There are many different leaves in nature, and some are more recognizable than others.
While that may be the case, not many leaves can claim to be featured on a country’s flag, but that is a distinction that the maple leaf holds!
Appearing on the flag for Canada, this leaf has become quite famous, and its unique shape can also make it fun to learn how to draw a maple leaf.
It can be trickier than expected, however, but with the right guide it can be made much easier.
This step-by-step guide on how to draw a maple leaf will help you to replicate this iconic leaf with ease.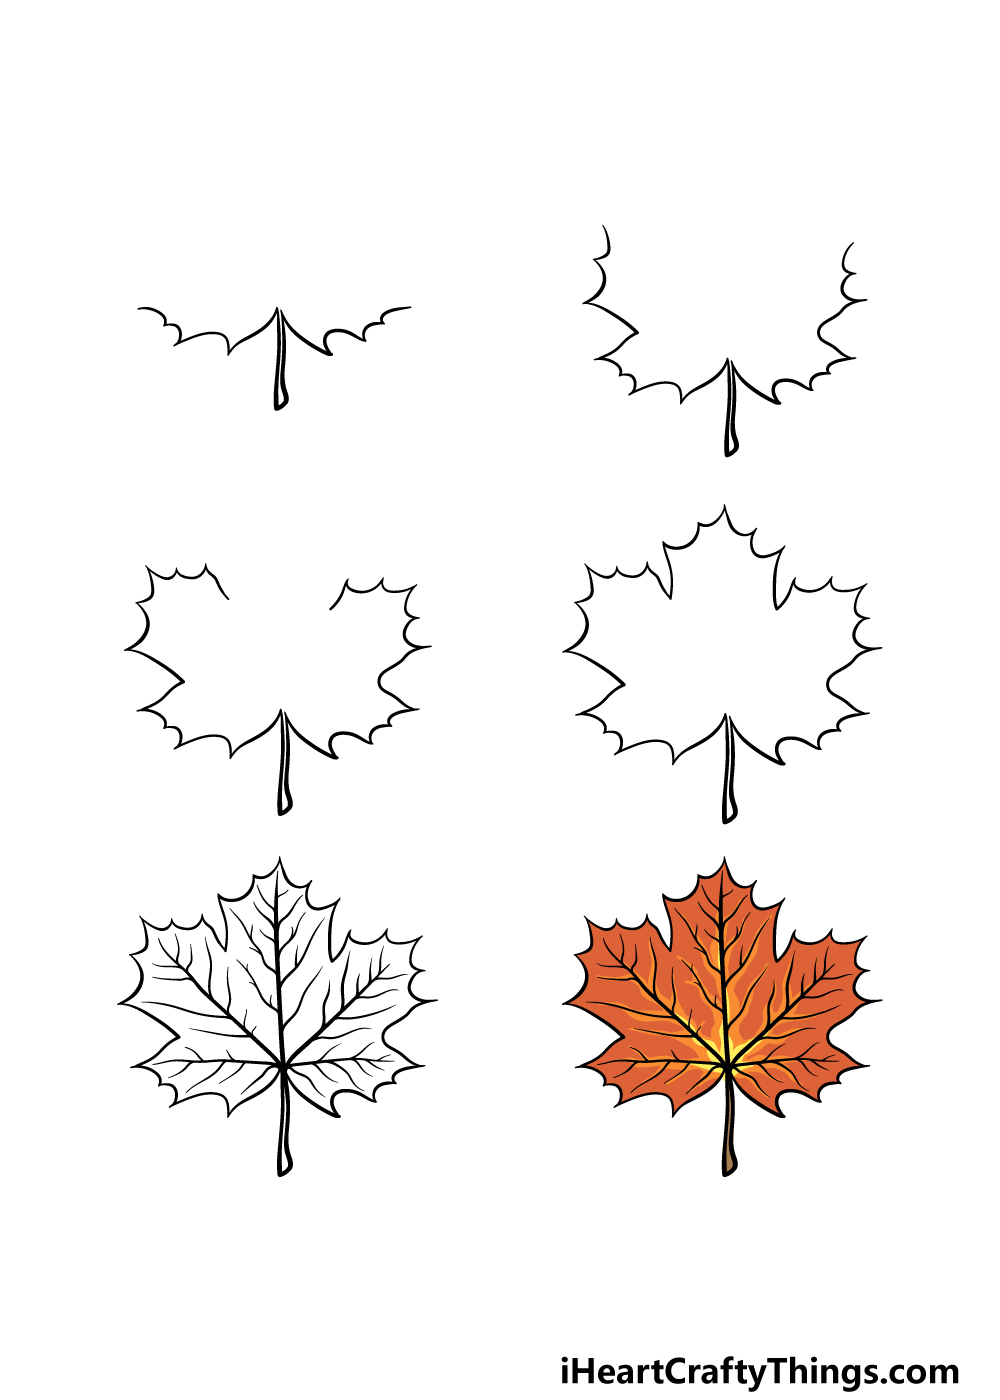
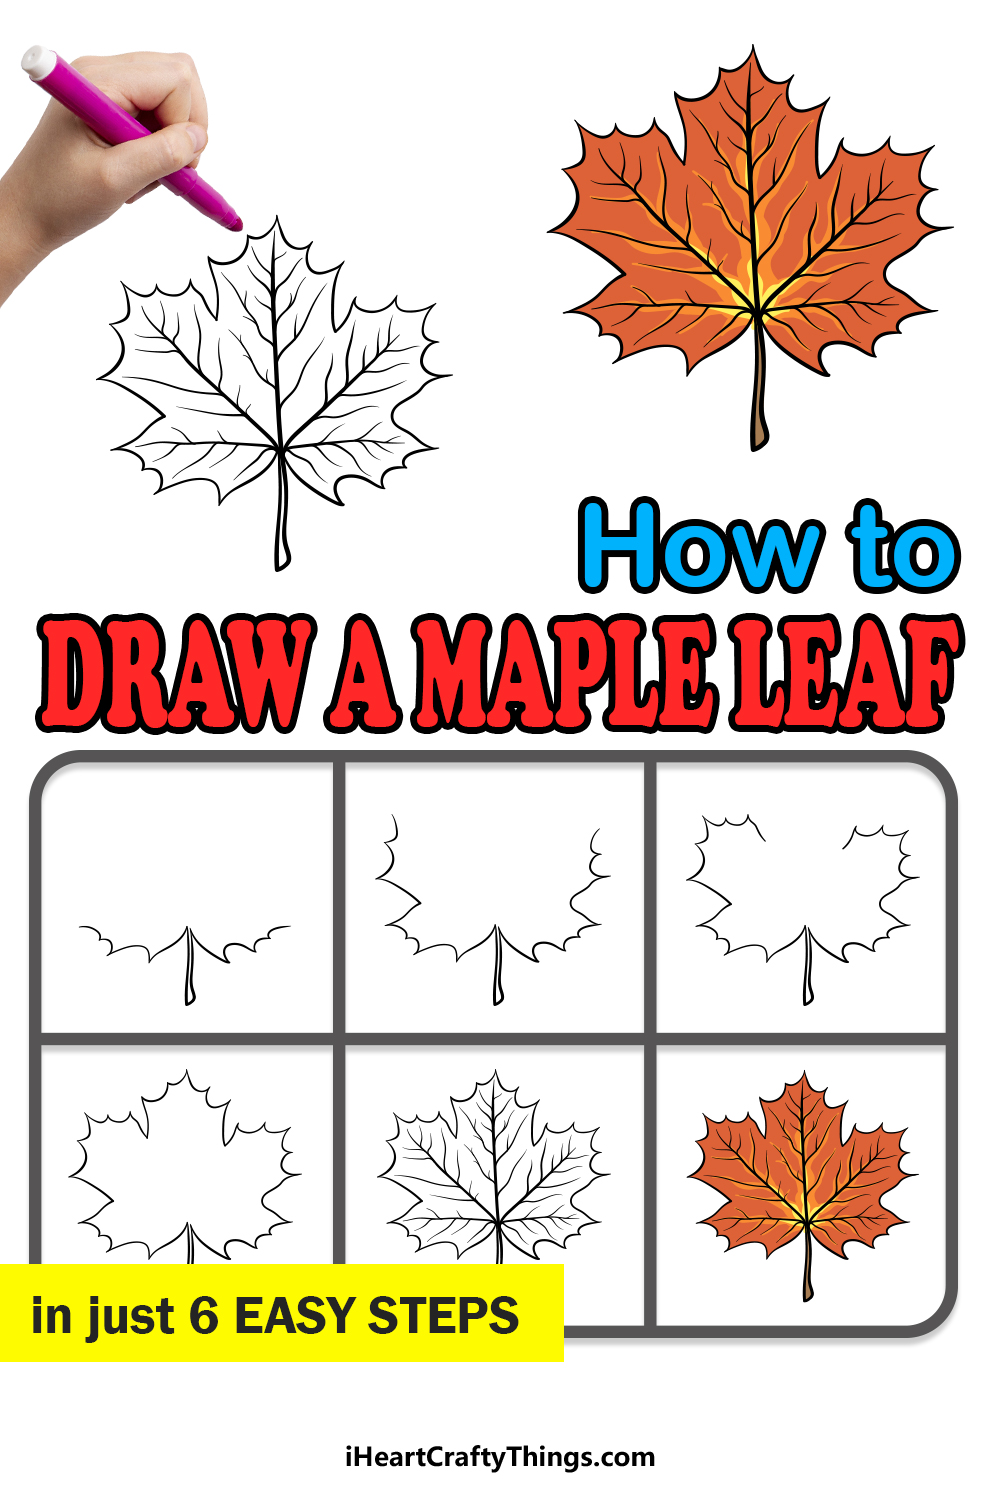
How to Draw A Maple Leaf – Let’s get Started!
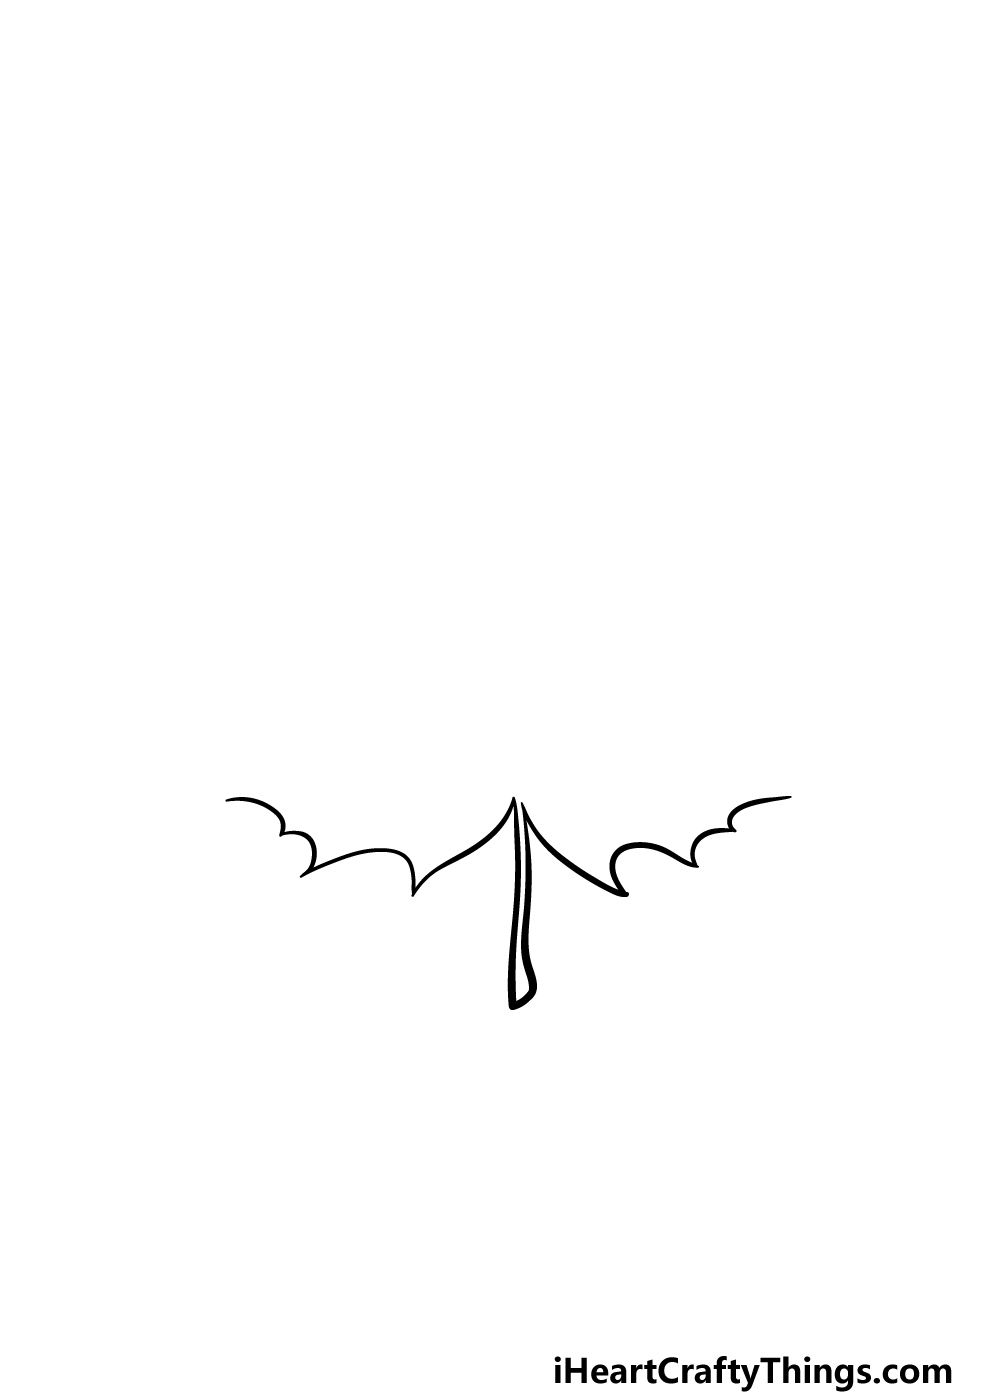
Step 1
When you see the leaf on the Canadian flag, it is actually a simplified version of how the real leaf looks.
In reality, it has more points and details on it, and we will focus on all these details in this guide.
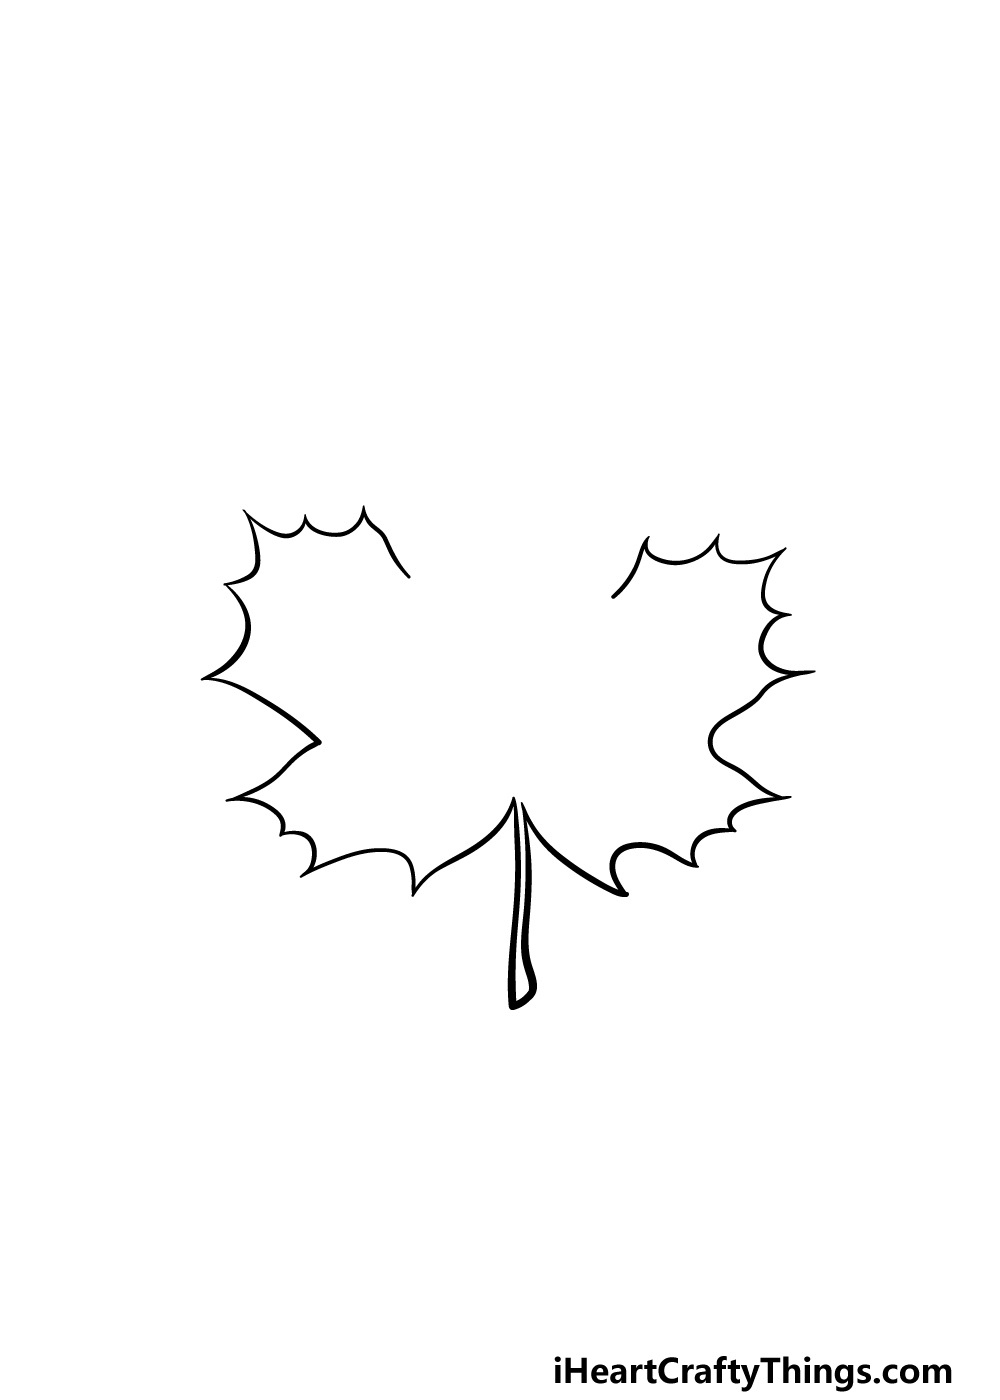
First, we will focus on the base of the leaf’s outline. You can use some smooth lines to create the thin stem coming down from the base of the leaf to start.
Then, we will be using some slightly curved and sharp lines extending out from the stem to the left and right, and this will begin the pointy outline of the leaf.
Once you have it looking as it did in our reference image, you’re ready to move on to step 2!
Step 2 – Next, draw the sides of the leaf
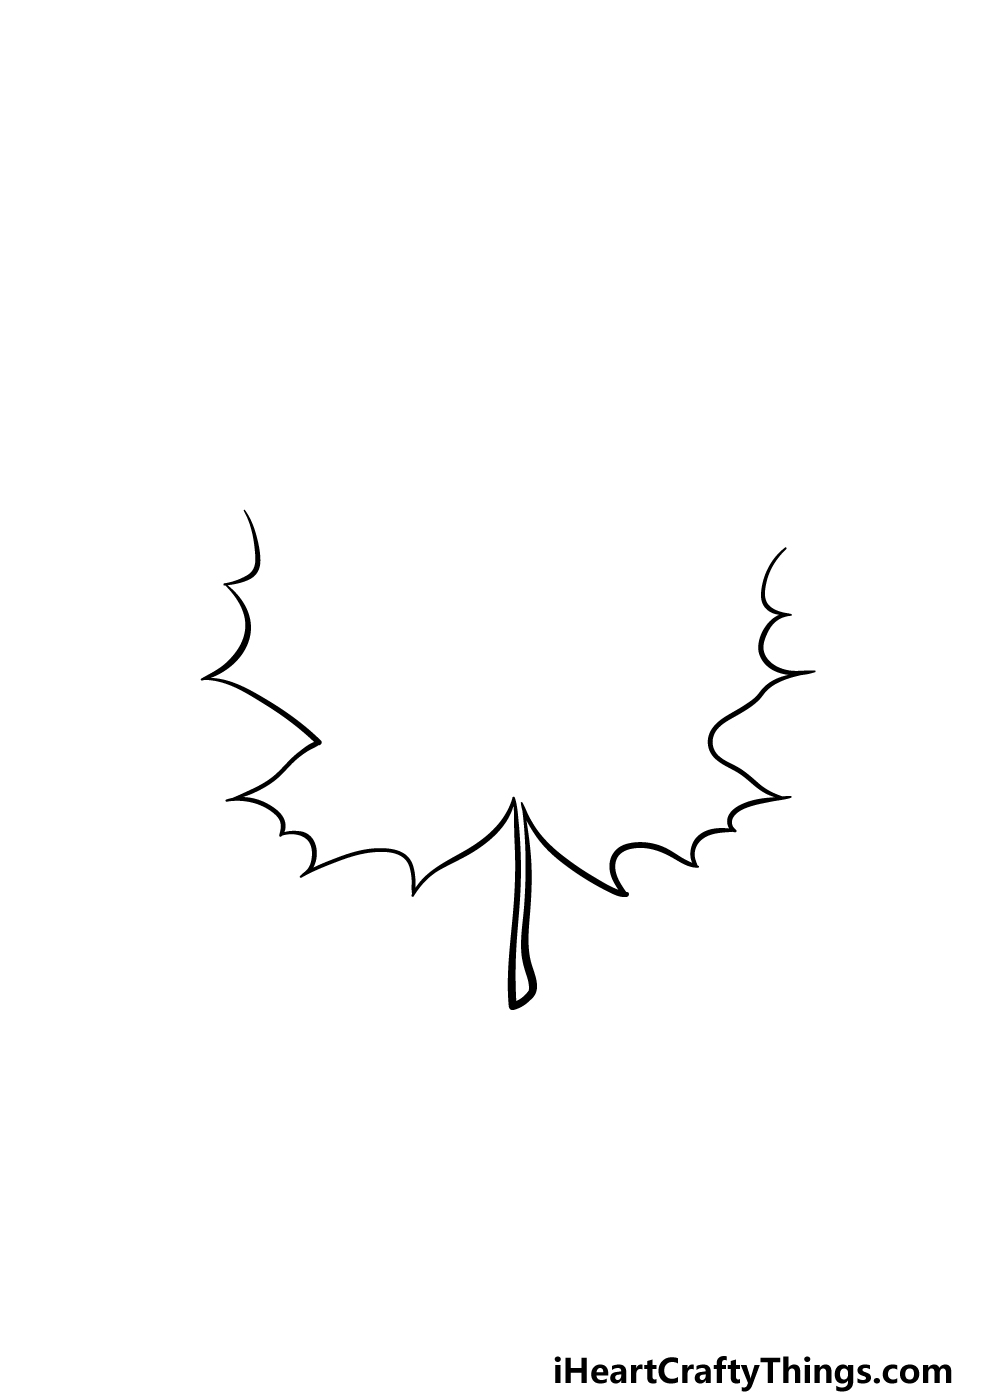
Now that you have the base of the leaf drawn, we can work on the sides of it in this second step.
The lines we will be using for the sides will look very similar to the ones that you used for the base of the leaf.
The gaps between the points will be a little bit longer though, and these sides will go straight up vertically, unlike the base which was at a bit of an angle.
We will continue to draw the outline in the following steps, so let’s proceed!
Step 3 – Now, continue drawing the outline of the leaf
In this third step of our guide on how to draw a maple leaf, we will be focusing on continuing the outline of the leaf that you’ve been working on so far.
Continuing from where your previous lines left off, you can continue drawing more of these curved and sharp lines inward on the leaf.
Once you have finished this step, we can complete the outline of the leaf in the next step before we focus on some final details.
Step 4 – Next, finish off the outline of the maple leaf
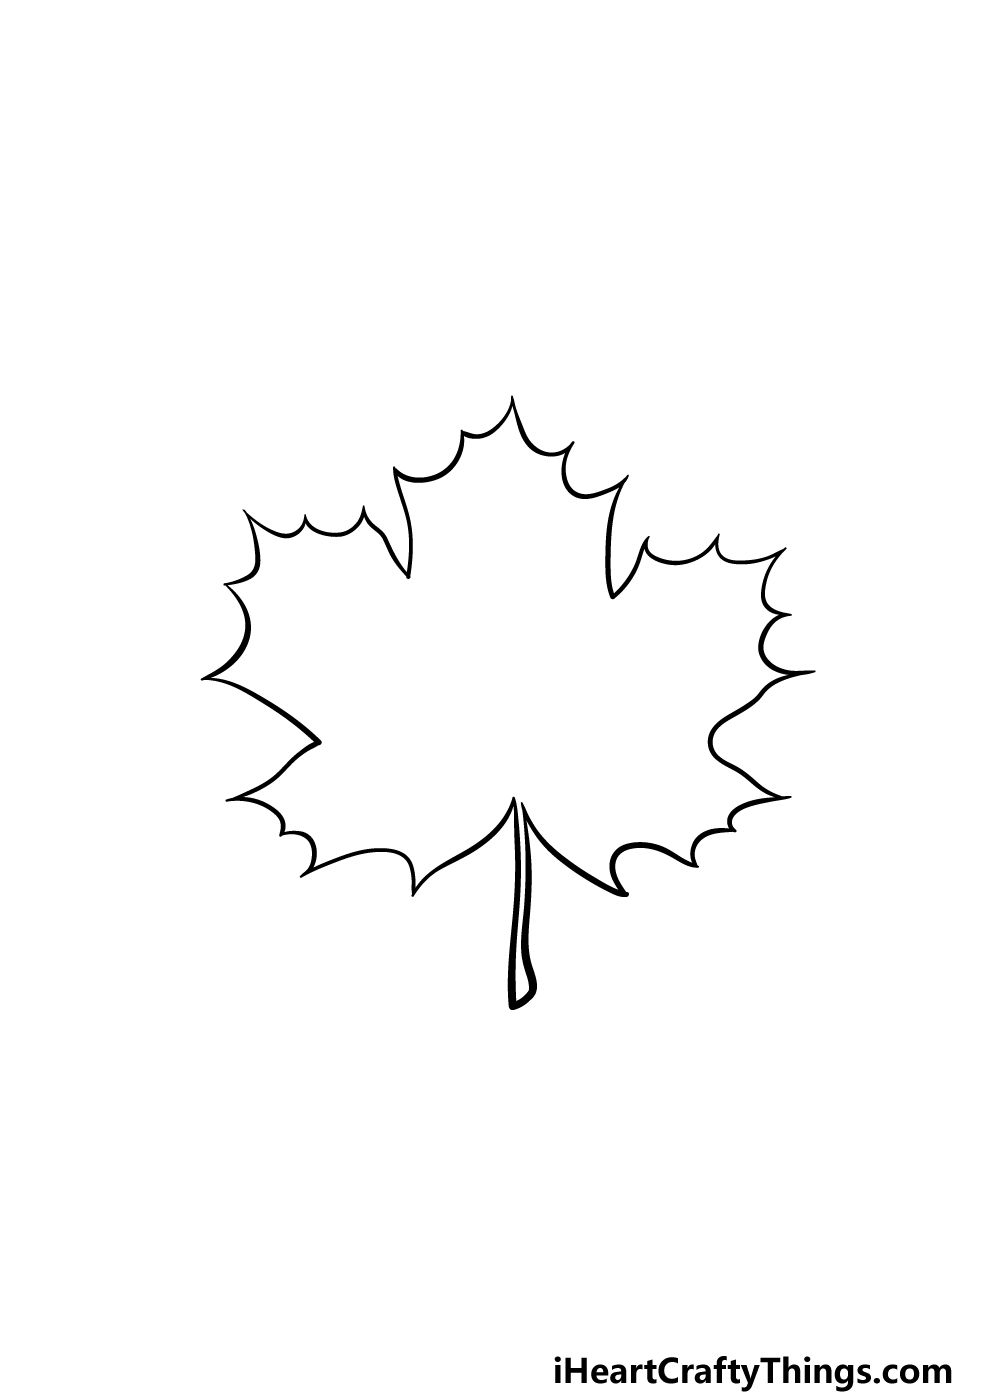
The maple leaf is famous for its distinctive shape, and we will finish off that shape for this step of your maple leaf drawing.
For this we will fill in the gap left in the outline by extending some lines straight up from where the previous ones ended.
Then, you can once again use some of those curved and sharp lines for the tip of the leaf on top.
With that, you have finished the outline of the leaf! Now all that remains is to finish off the final details and color it in, so we shall move on to that now.
Step 5 – Now, finish off your maple leaf drawing
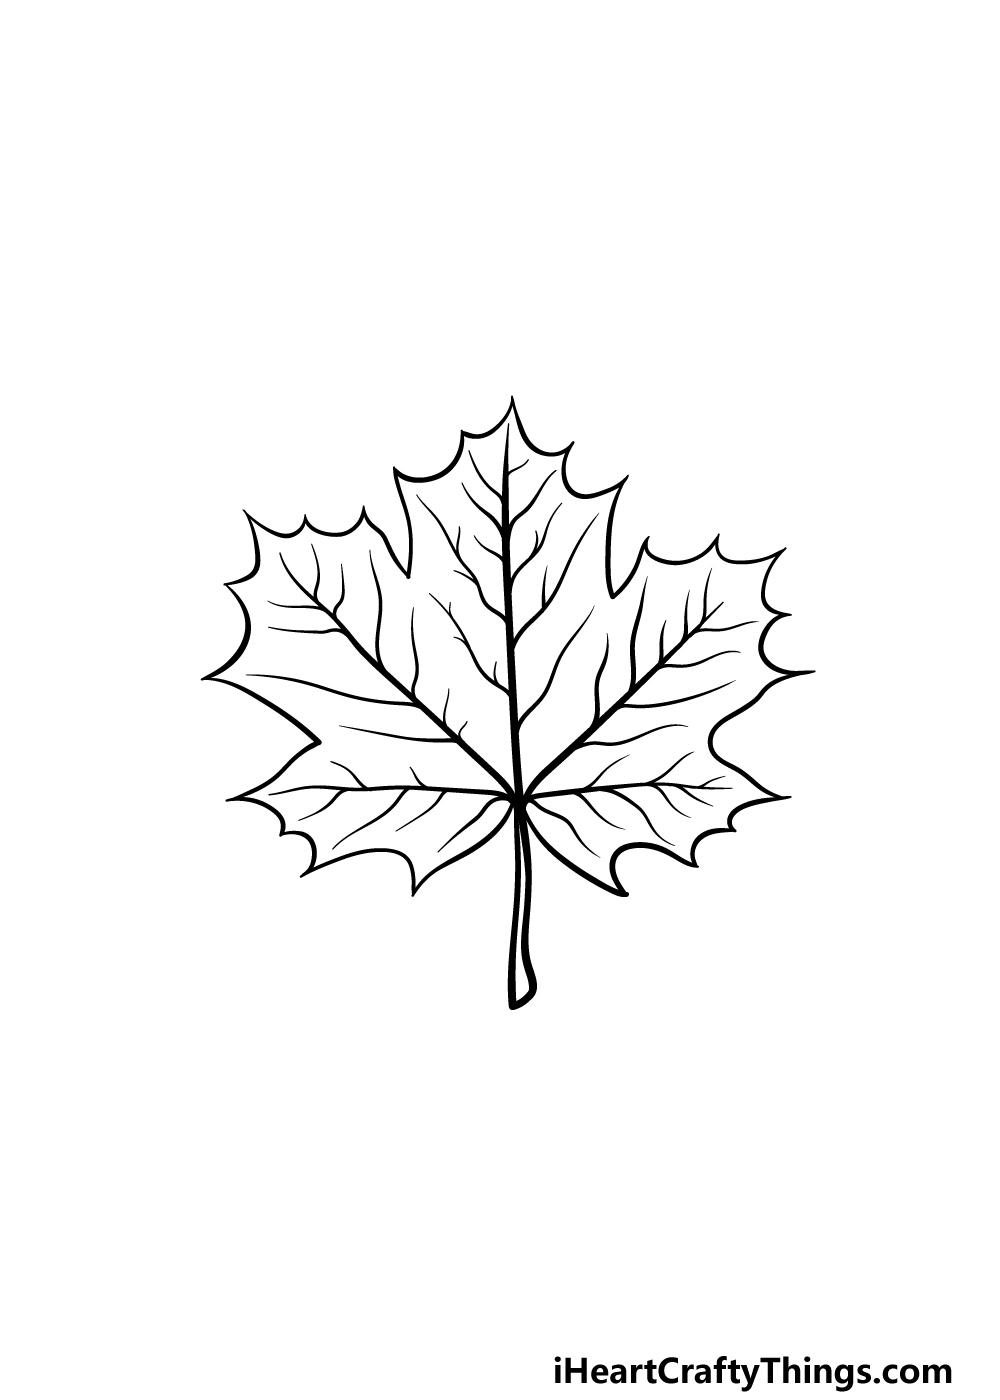
Perhaps the biggest difference between the maple leaf on the Canadian flag and a real one is that there is a lot of detail on a real leaf.
We will focus on adding those details in this step of our guide on how to draw a maple leaf.
This leaf is very veiny, and these are what we will be focusing on in this fifth step. You can start by drawing some thick lines extending into every tip of the leaf.
Then, each one of these thick lines will have several smaller, thin lines coming off of them in varying lengths to create that veiny effect.
You can also vary these lines as you wish in order to create a variation of your own. Then, you will have finished all of the details in this guide!
You don’t have to finish here, however. You can also add your own details and background elements to put your own spin on this image.
These could include drawing some holes or other details on the leaf, or you could also incorporate it into a flag design for a Canadian twist! How will you finish off this leaf before the final step?
Step 6 – Finish off your maple leaf drawing with some color
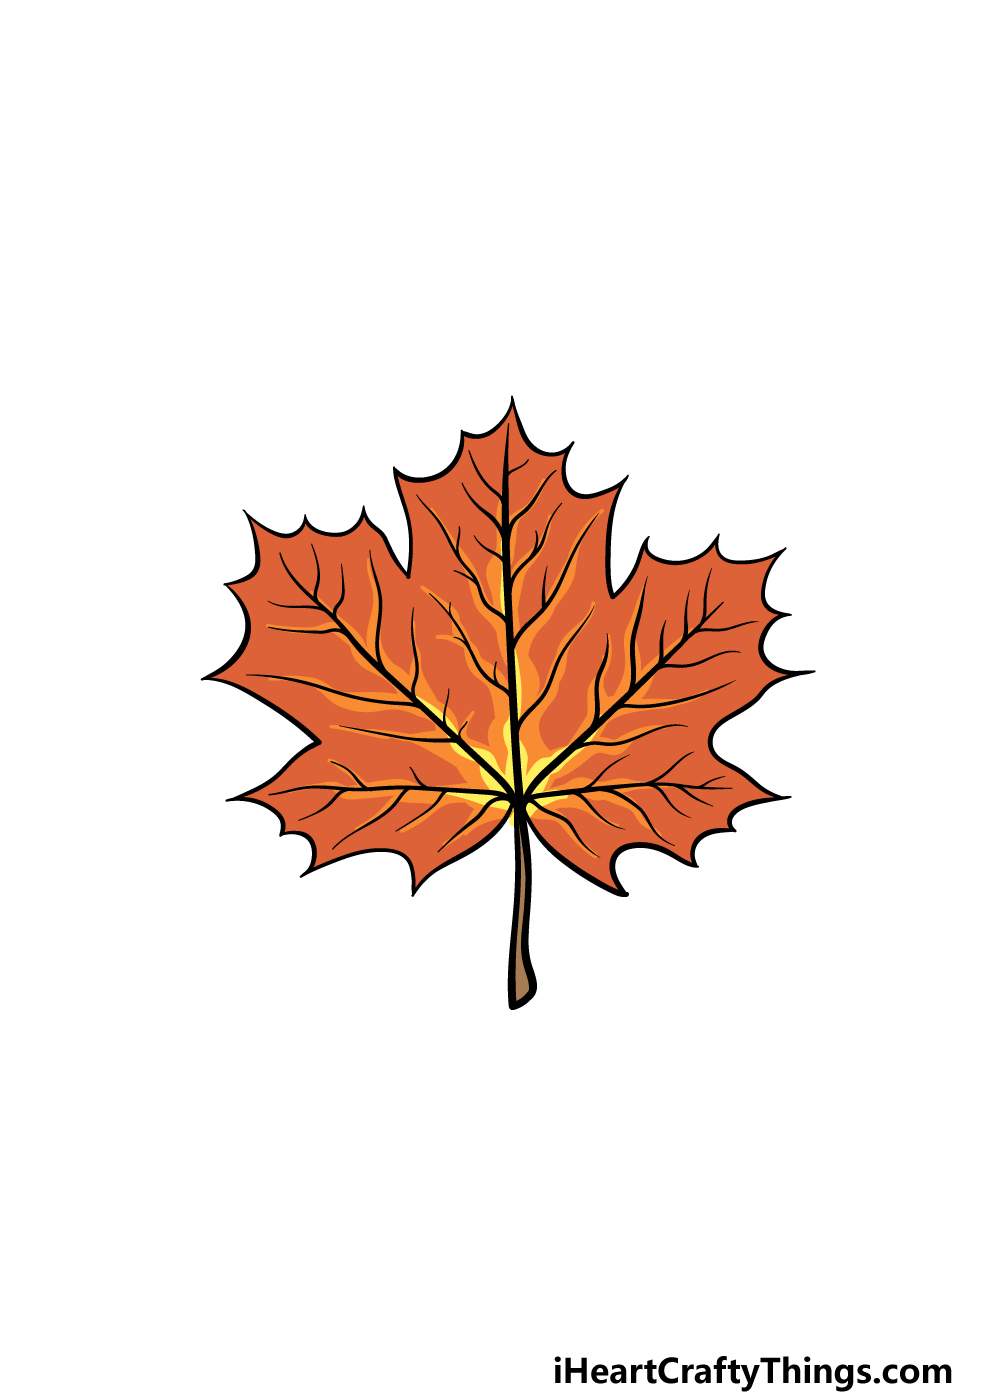
This is the final part of your maple leaf drawing, and for this one you get to have some fun bringing some amazing colors to your picture.
In our reference image, we went with some reds and oranges for that classic maple leaf look.
This is just one way that you could go about it, however. You could change up the colors to incorporate some green or other shades of red for a few suggestions.
Perhaps you could go for a brown color scheme to make it look like a Fall leaf. You could even crush up some real Fall leaves and glue them onto your picture for a textured effect.
There are so many colors and mediums to choose from, so how will you finish off this maple leaf drawing?
4 More Ways To Make Your Maple Leaf Drawing Unique
Make this iconic leaf look even better as we show some tips for your maple leaf sketch!
This drawing of a maple leaf shows it in some beautiful orange and yellow colors. This gives it an Autumn feeling, but there are some other colors that you could use instead.
For example, you could use some greens instead, as this would make it look healthier. Alternatively, using some browns would create more of a Winter feeling to the image.
If you can’t decide, maybe you could make 4 variations on the image to show how each season affects the leaf.
If you look closely at any leaf, you will often see small signs of life. These could be some details that you add to this particular maple leaf!
For instance, you could draw some small insects or even some holes that insects have chewed into the leaf.
Maybe it would be fun to add several different kinds of bugs and insects hanging out on this leaf!
What are some little creatures you would like to add?
One of the best ways you could make this maple leaf drawing even better would be by adding a background. One way of doing this would be to show the maple leaf lying on the ground.
That way, you could add some dirt textures beneath it and maybe have some other leaves.
Or, it could still be attached to the tree, in which case you could show a wonderful background setting behind the leaf.
You can actually use nature to make your maple leaf sketch even better! If you happen to have maple leaves in your yard or a local park, then try to find a nice one.
Then, you could stick it on the page next to the one that you drew to show the contrast. Or, start by laying a thin layer of glue over the maple leaf.
Then, try to find some dry, crunchy leaves and break them into small bits. Sprinkle them on the glue to create some real texture!
Your Maple Leaf Drawing is Complete!
You have completed this guide on how to draw a maple leaf, and you have an incredible drawing to show for it!
As mentioned a few times in this guide, the maple leaf can be a bit more detailed than it may first look. Our goal was to break it down into simpler steps to make it easy to draw despite this.
Now you can take over and show us how creative you can be with this picture. Whether you draw a background, add some details or get creative with your colors and art mediums, we can’t wait to see what you come up with!
Then, be sure to check out our website for more awesome drawing guides! We have many coming out soon, so you’ll want to visit often.
We would be very interested to see how you completed this maple leaf drawing, so we hope you will share it on our Facebook and Pinterest pages.