


A fence is usually a simple structure, but one that can serve many important functions. They can help keep livestock and wildlife safe and separated, keep homes a bit safer or simply serve as a nice decorative feature!
No matter the function, they can come in many different builds and designs, and it can be fun to create your own variation by learning how to draw a fence.
By the end of this guide, you will know just how to do that!
Our step-by-step guide on how to draw a fence in just 6 easy steps will show you how you can design your own fences and have fun doing so.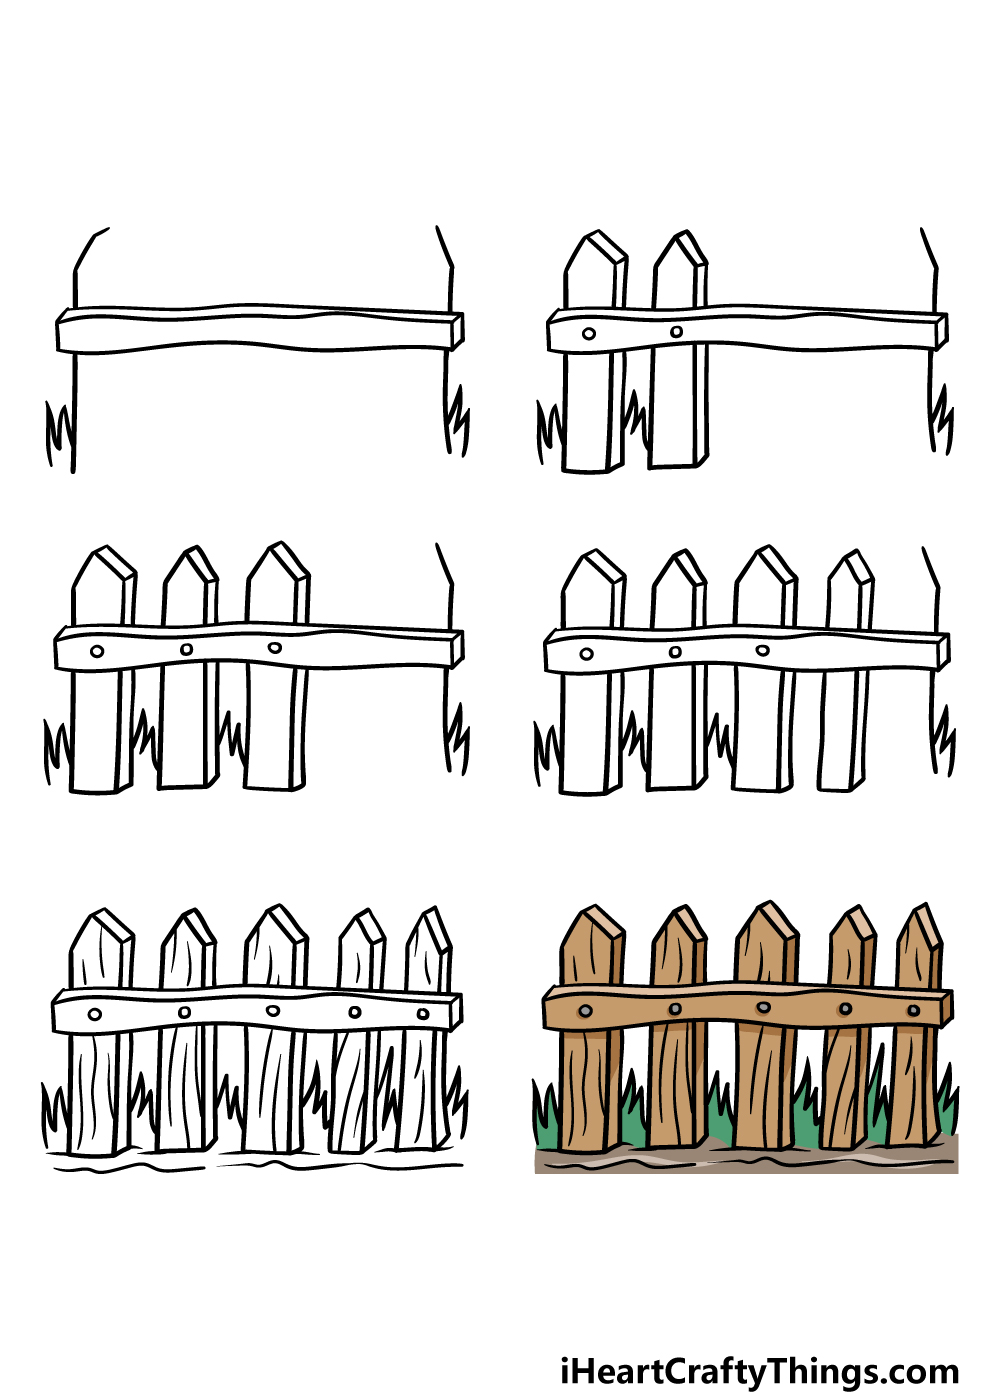
How to Draw A Fence – Let’s get Started!
Step 1
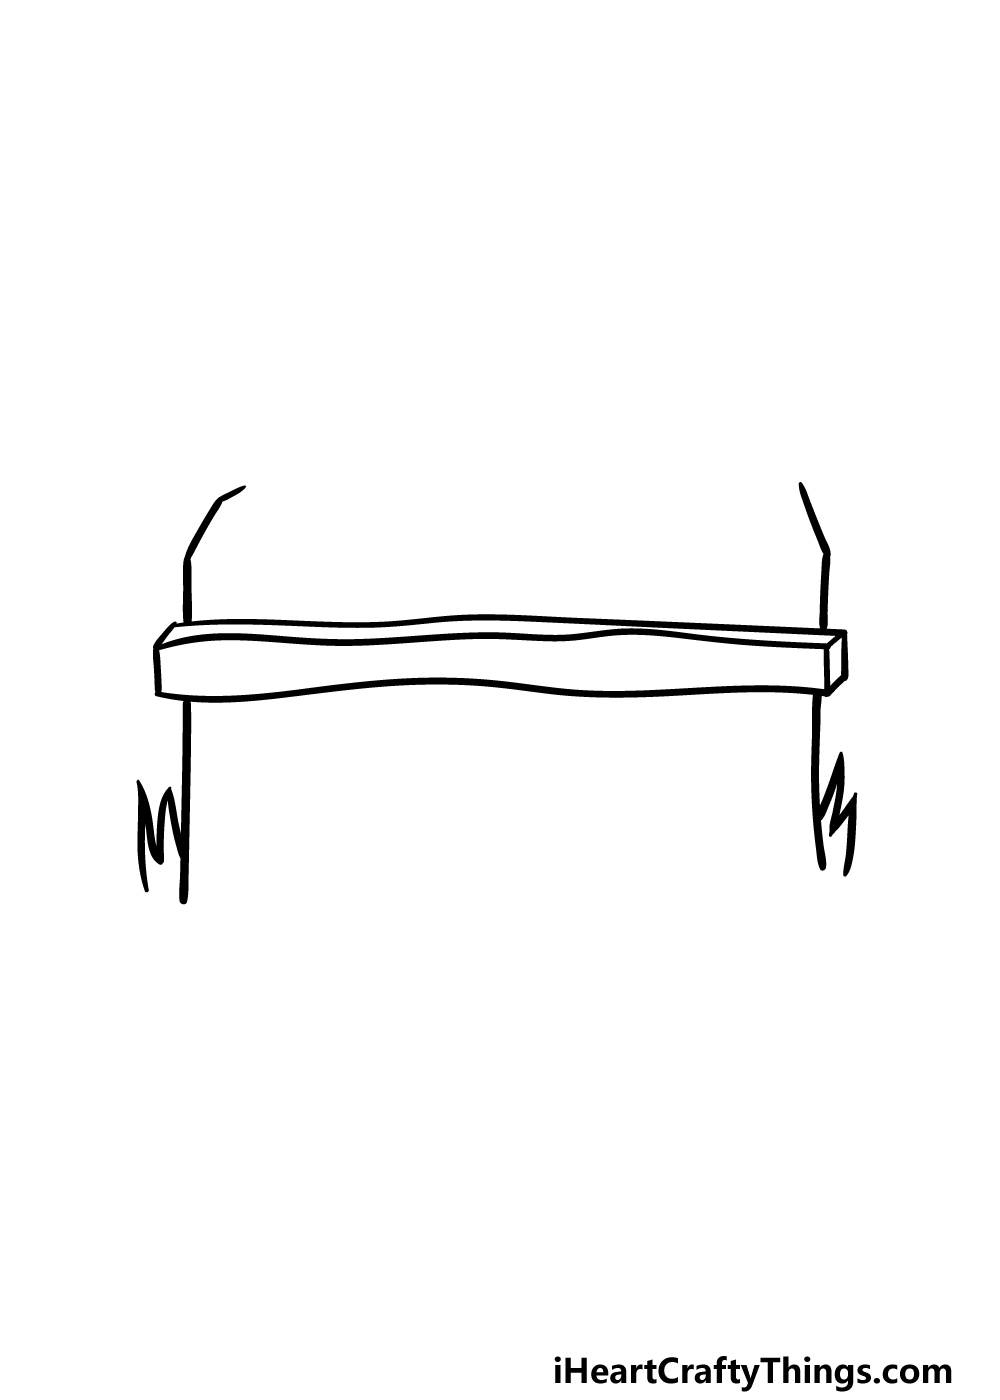
In this first step of our guide on how to draw a fence, we will be starting with the horizontal support beam of the fence while also starting on the outlines of the vertical slats.
We will start with that horizontal beam first. For this, we will be drawing a long, thin rectangle shape.
You may be tempted to use a ruler for this one, however you may want to draw this beam freehand as we want it to have the appearance of being made of rough wood.
Then, draw a line closely above it and then add a small square shape to the end of it to give it a bit of a 3D look.
Finally, you can use some fairly rough vertical lines for the slats at the ends of the fence. Then you can finish off by adding some sharp, jagged lines on the ground near the ends of the fence for some grass details.
Step 2 – Next, draw the first slats of the fence
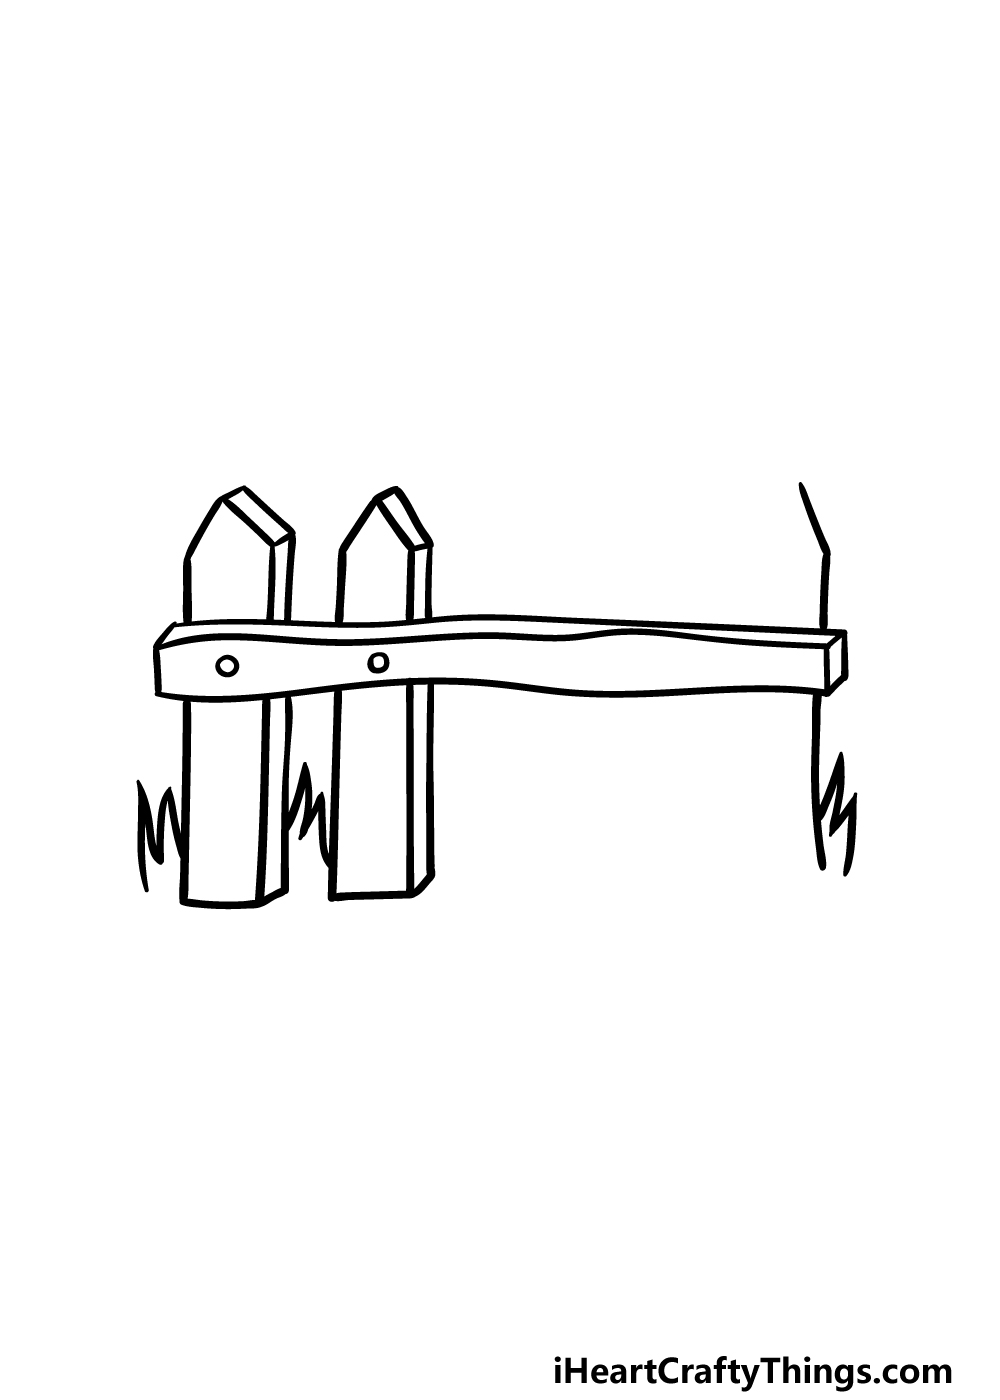
You began drawing the slats of the fence in the previous part of this guide, and now we will draw some more of them.
Using the first vertical line on the left, you can draw a long, pointy shape that we will be using for all the slats.
This shape will have another line coming down from the tip of it, and then we will be creating a similar 3D effect as we did for the horizontal beam by adding some lines down the side.
Then, you can draw another of these slats to the right of it. There will also be some more jagged lines between them for more grass in the image.
Finally, draw a small circle onto the horizontal beam where each slat is situated to make it look like it is nailed there.
Step 3 – Now, draw another slat for the fence
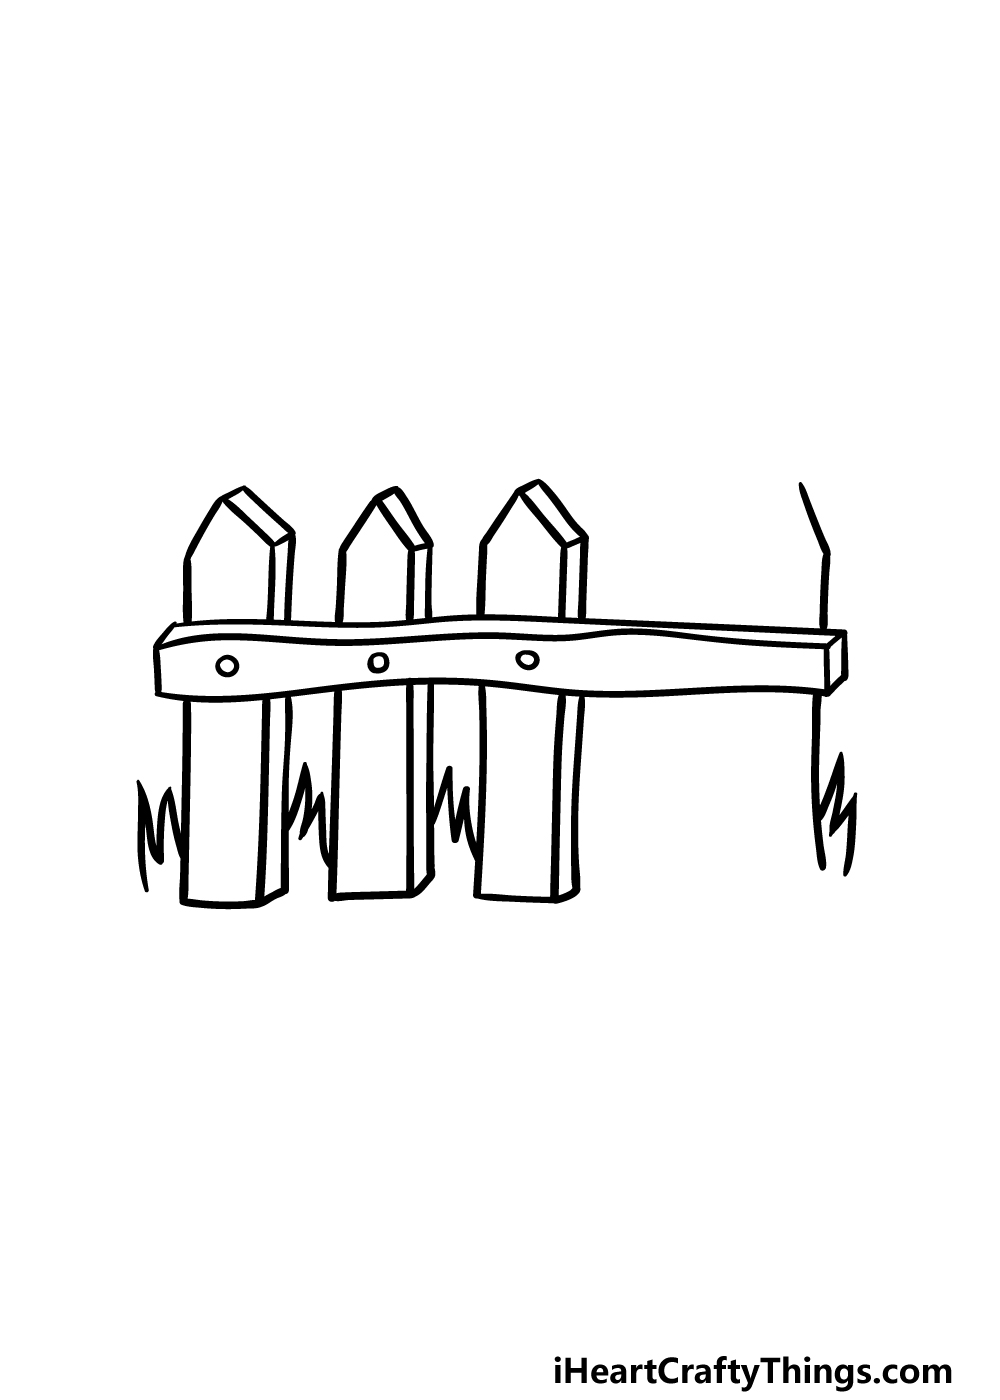
You’re really getting the hang of it now! For this step of our guide on how to draw a fence, you will be drawing another slat for your fence.
This one will look very similar to the previous ones, and will be drawn with the same freehand straight lines.
Don’t forget to also add some grass between them and draw a small circle for the nail securing it to the horizontal beam. That’s all there is to it for this step, so now you’re ready to proceed to step 4.
Step 4 – Next, draw another slat for the fence
This fourth step of your fence drawing will see you adding another slat before we start on the final details in the next step.
Simply use the steps you have been using thus far to draw the slats for this one, with the only difference being that it will be a bit thinner than the others.
Now that you have drawn this slat, there should be a space near the end of the fence for one more, and we will be filling that space soon in the next step.
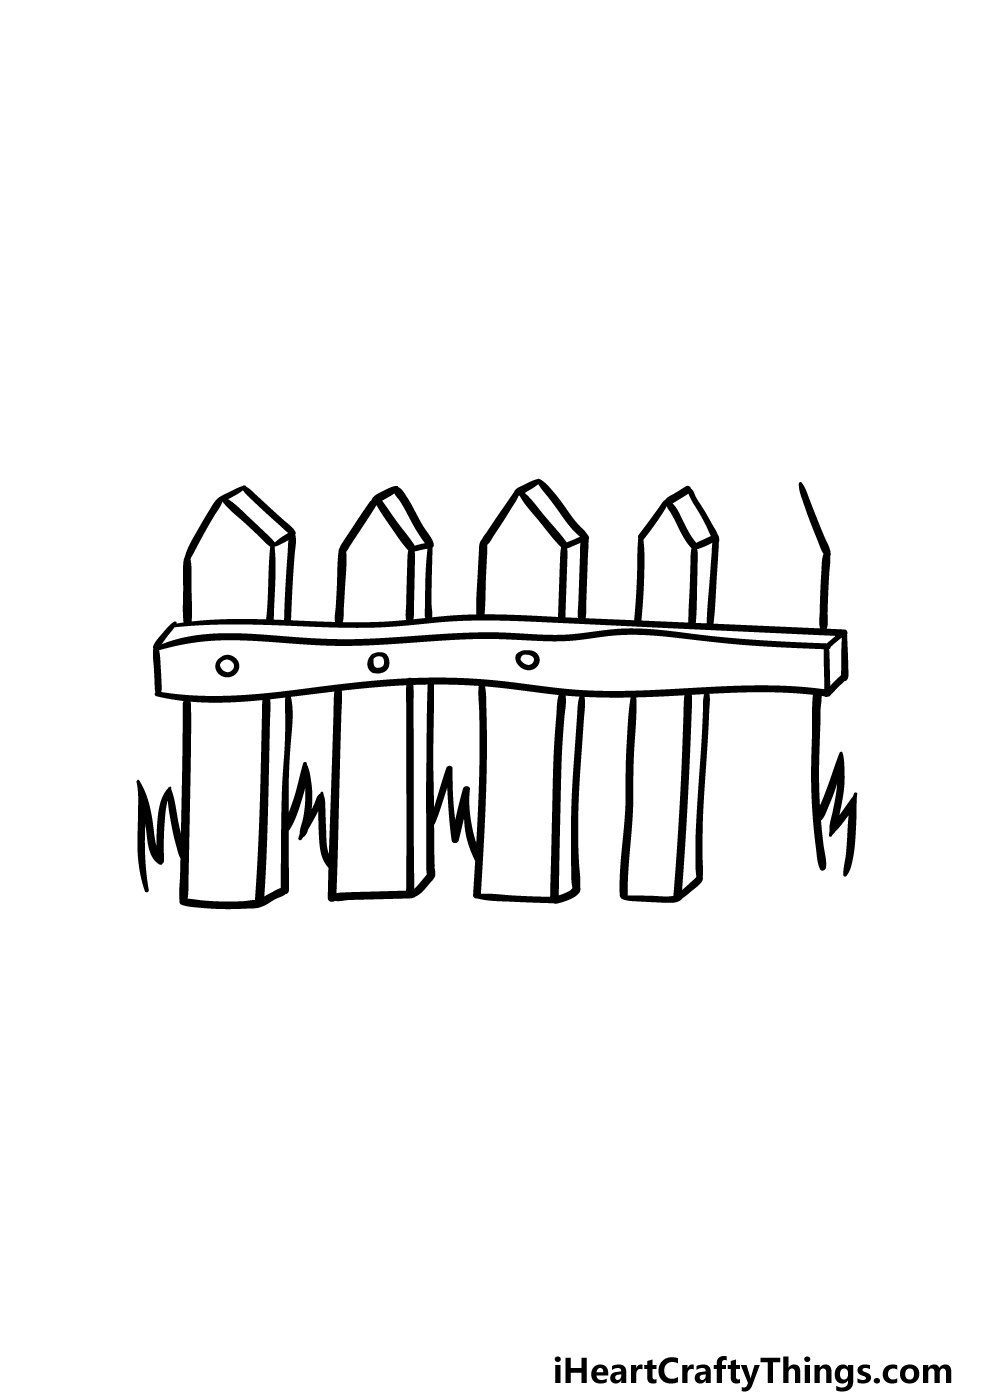
Step 5 – Now, you can finish off the final details of your fence drawing

For the fifth part of this guide on how to draw a fence, we will be finishing off the final details and elements of the fence so that you can color it in.
First, you can draw one more slat in the fence in that space that was left over earlier.
Then you can finish off with details such as nails for the slats and grass between them as you’ve been doing for all the other ones.
With all the slats drawn, we just have some final details to add! Mainly, we will be adding some slightly wavy lines to the wood making up the fence, and this will help to give it a more wooden look.
Then you’re ready to proceed on to the final step. Before you do, you could also add some background details or some other cool additions that you think would suit this picture. We can’t wait to see what you come up with!
Step 6 – Finish off your fence drawing with some color
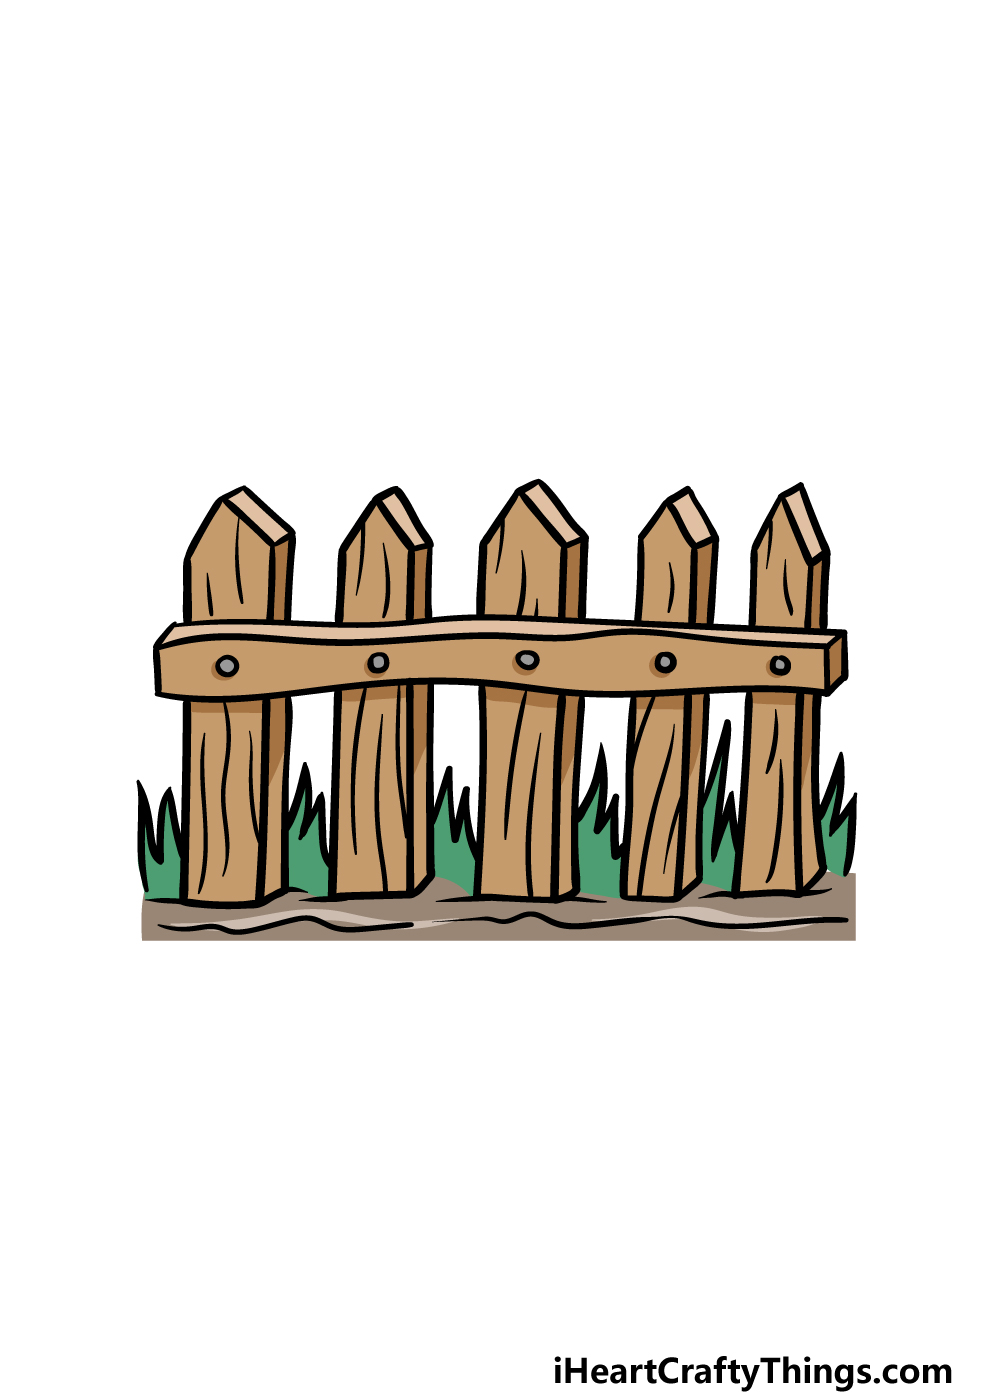
Now that you have finished all of the drawing steps of your fence drawing, you can now relax with some coloring fun!
In our image, we went with some brown shades for the fence and used green for the grass. Fences can also be painted many different colors, so you have lots of options for colors you could use!
Be sure to color in any background elements you added as well, and have fun trying out different art mediums!
3 More tips to make your fence drawing easy!
See how you can make this easy to draw fence even easier with these helpful tips!
For this fence drawing, we made the design quite detailed to give it a weathered, wooden look. This can make it harder to draw, so you could also go for a simpler design!
For example, we used a lot of lines that aren’t completely straight, which also helps make it look more weathered. If that’s an aspect that’s proving difficult, then you could use some straight lines drawn with a ruler.
That would make the fence look newer, but it would still have a realistic look to it! If there are any other details you’re struggling with, then you should definitely feel free to alter them to make it easier.
Another way to make this fence drawing easy to create is by incorporating it into a larger picture. This may seem like it would only make things harder, but that doesn’t have to be the case at all!
For instance, you could have this fence attached to a gate with a house in the background. These aspects could be drawn in a simple fashion, and they would take a lot of the focus off the fence exclusively.
The fence would also be smaller on the page, so you could get away with having it a bit less detailed.
The final tip we have for your fence sketch is to prepare as much as you need. Let’s cover a few ways you can do this.
First, you will definitely want a pencil to help you as you draw. Drawing with a pencil is great for planning as you can erase any mistakes.
Then, you can focus on drawing basic shapes for the slats of the fence. Once you have them spaced out, you can then start adding more and more details to the fence.
This way you can ensure you will be confident with your design before the final lines. When you’re happy, go over the lines with a pen and then erase your planning lines.
Your Fence Drawing is Complete!
You have reached the end of this guide on how to draw a fence!
We hope that this drawing guide was a fun and easy experience for you, and you should be very proud of the awesome drawing you have landed up with!
You can also take this drawing even further with your own details and background elements. Perhaps you could show us what the fence is used for or maybe draw some cool birds sitting on it.
There is a lot you could do, so be sure to have fun with it and see what happens!
Then, you can find your next drawing guide on our website! We have tons of guides with more coming soon, so be sure to visit often.
You can also upload your awesome fence drawing on our Facebook and Pinterest pages for us to see. We can’t wait to see the creative ways that you personalized this fence drawing of yours!