Alice In Wonderland is one of the most beloved literary creations of all time.
Starting with a series of books by Lewis Carrol, the series has since gone on to feature in countless movies, TV shows and video game adaptations.
It has also influenced countless creators to this day that love the quirky characters and whimsical feeling to the stories.
The Mad Hatter is one of the most famous characters from the story, and thanks to his unique appearance it has become popular to learn how to draw the Mad Hatter.
If you love this character and are wondering how it can be done, then look no further than this tutorial!
Our step-by-step guide on how to draw the Mad Hatter will show you how you can recreate this classic character.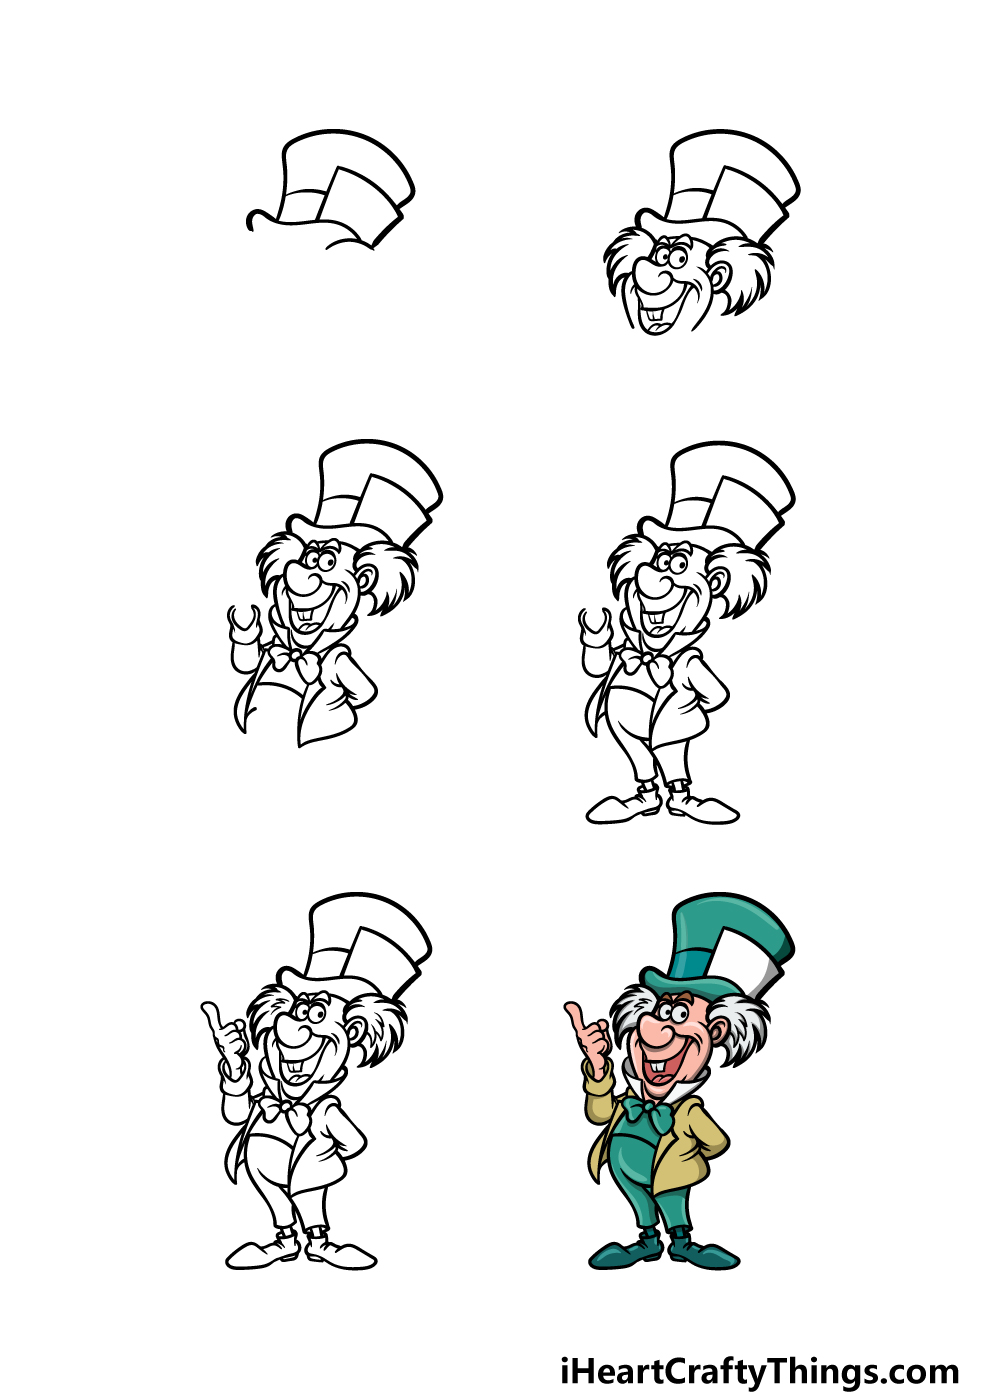
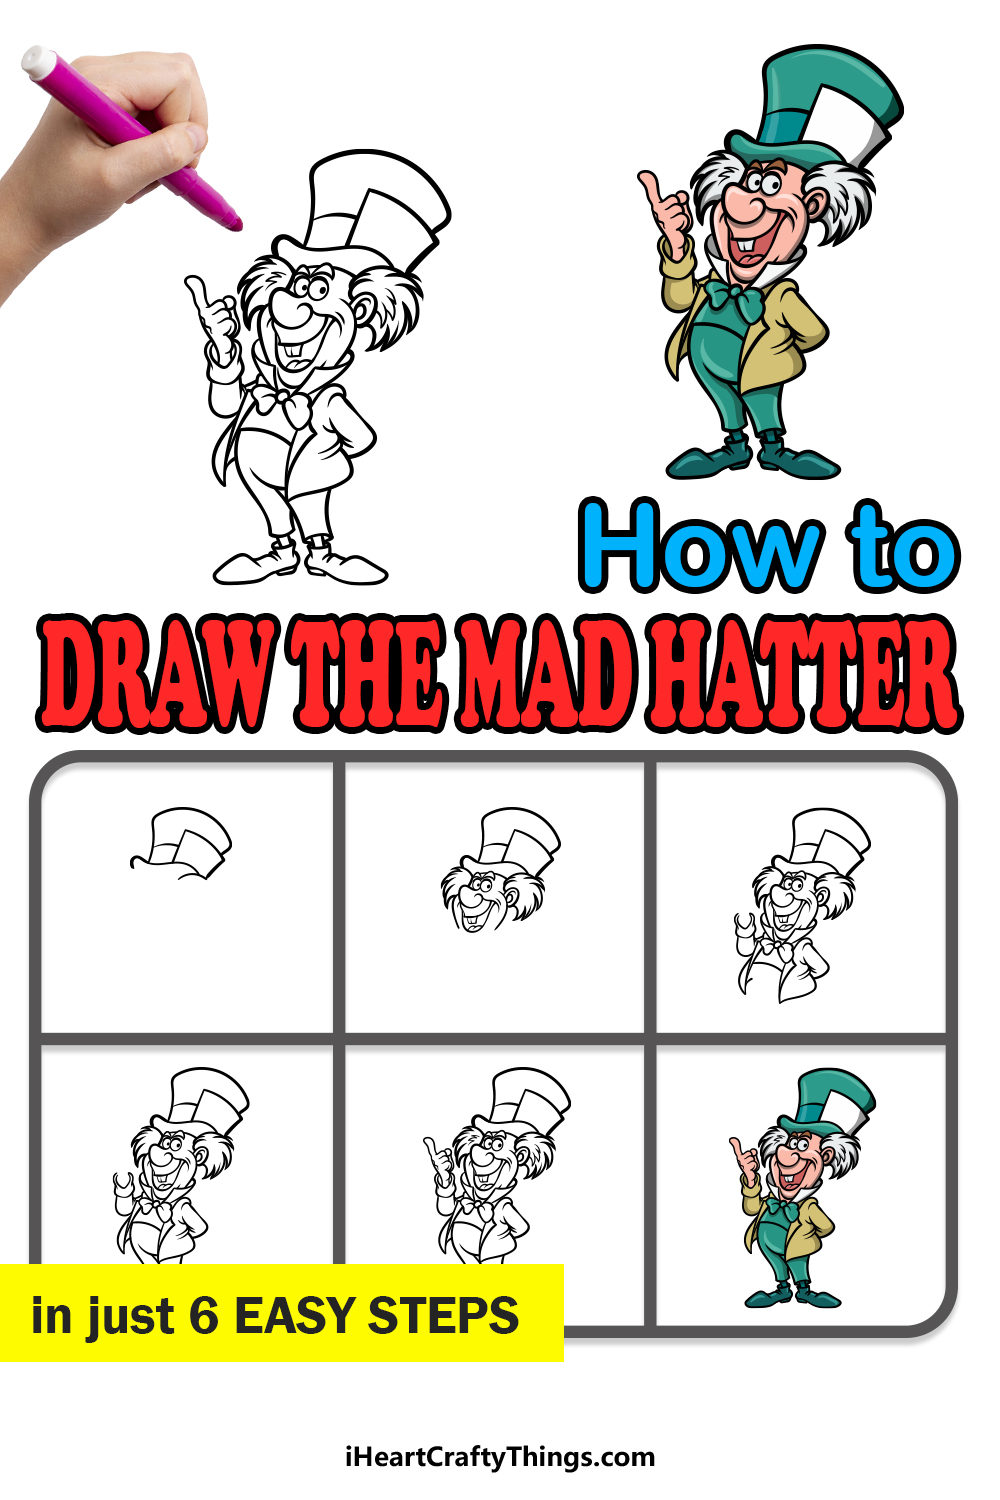
How to Draw The Mad Hatter – Let’s Get Started!
Step 1
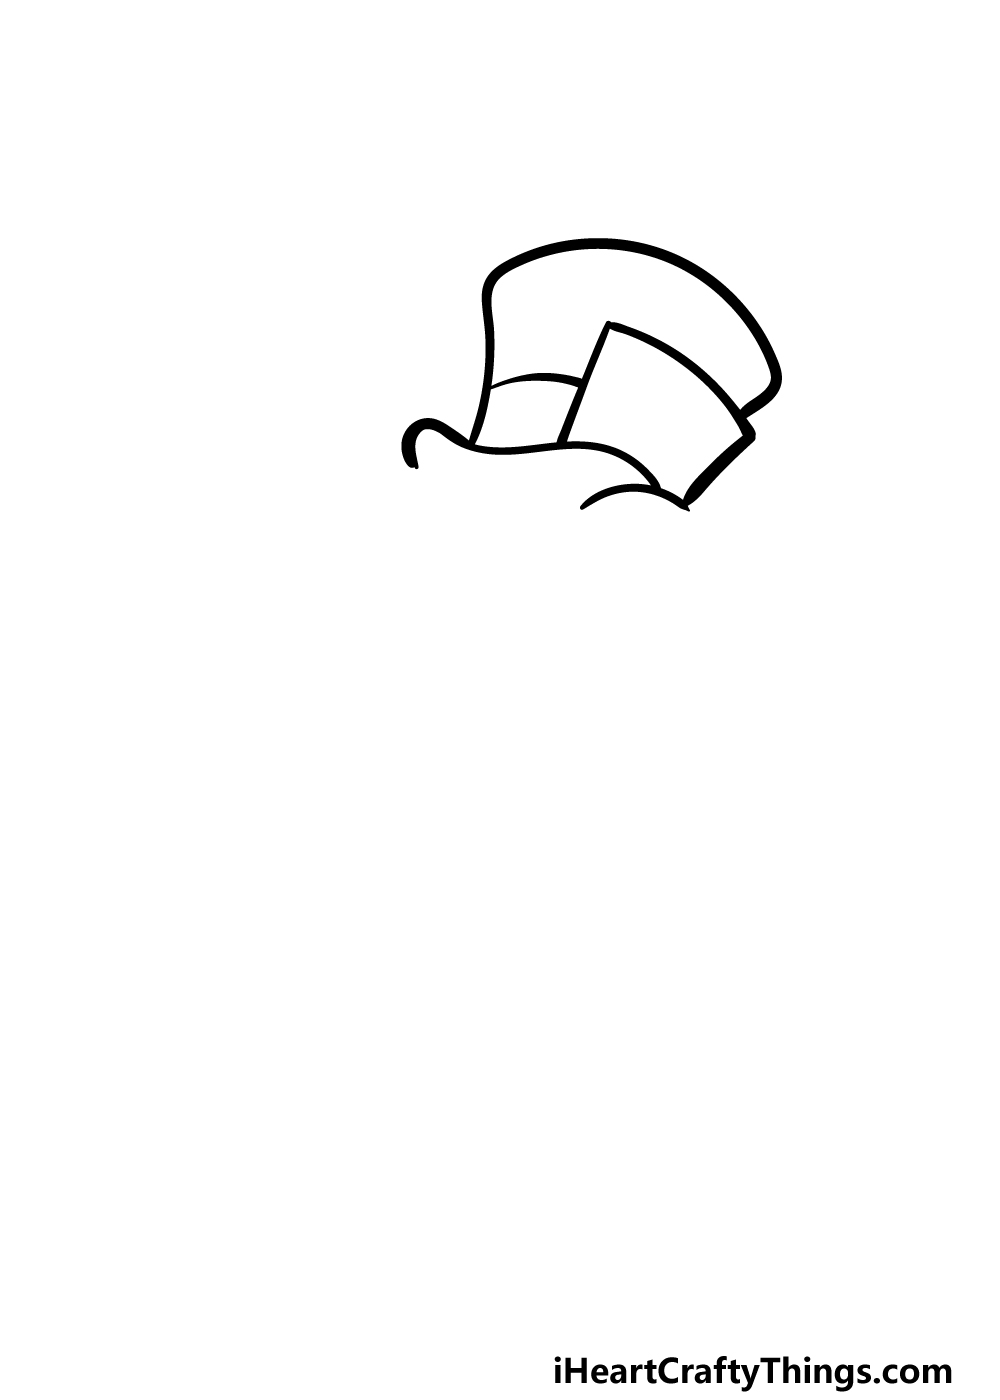
For this first step of our guide on how to draw the Mad Hatter, we will begin with the piece of clothing that he gets his name from: His signature top hat.
Also, the portrayal that we will be working on in this guide will be based on his appearance from the classic animated Disney film.
First, use a wavy line for the base of the rim of his hat. Try to replicate the line as close to the way it appears in the reference image as you can. Then, add a slightly curved rectangular shape onto the top of the rim.
Next, you can draw the top of his hat. This shape will be drawn with another curved line, and it will be a bit narrower near the base and get a bit wider the higher it gets.
Once you have drawn the hat, we can move on to step 2 of the guide.
Step 2 – Now, draw his face and hair
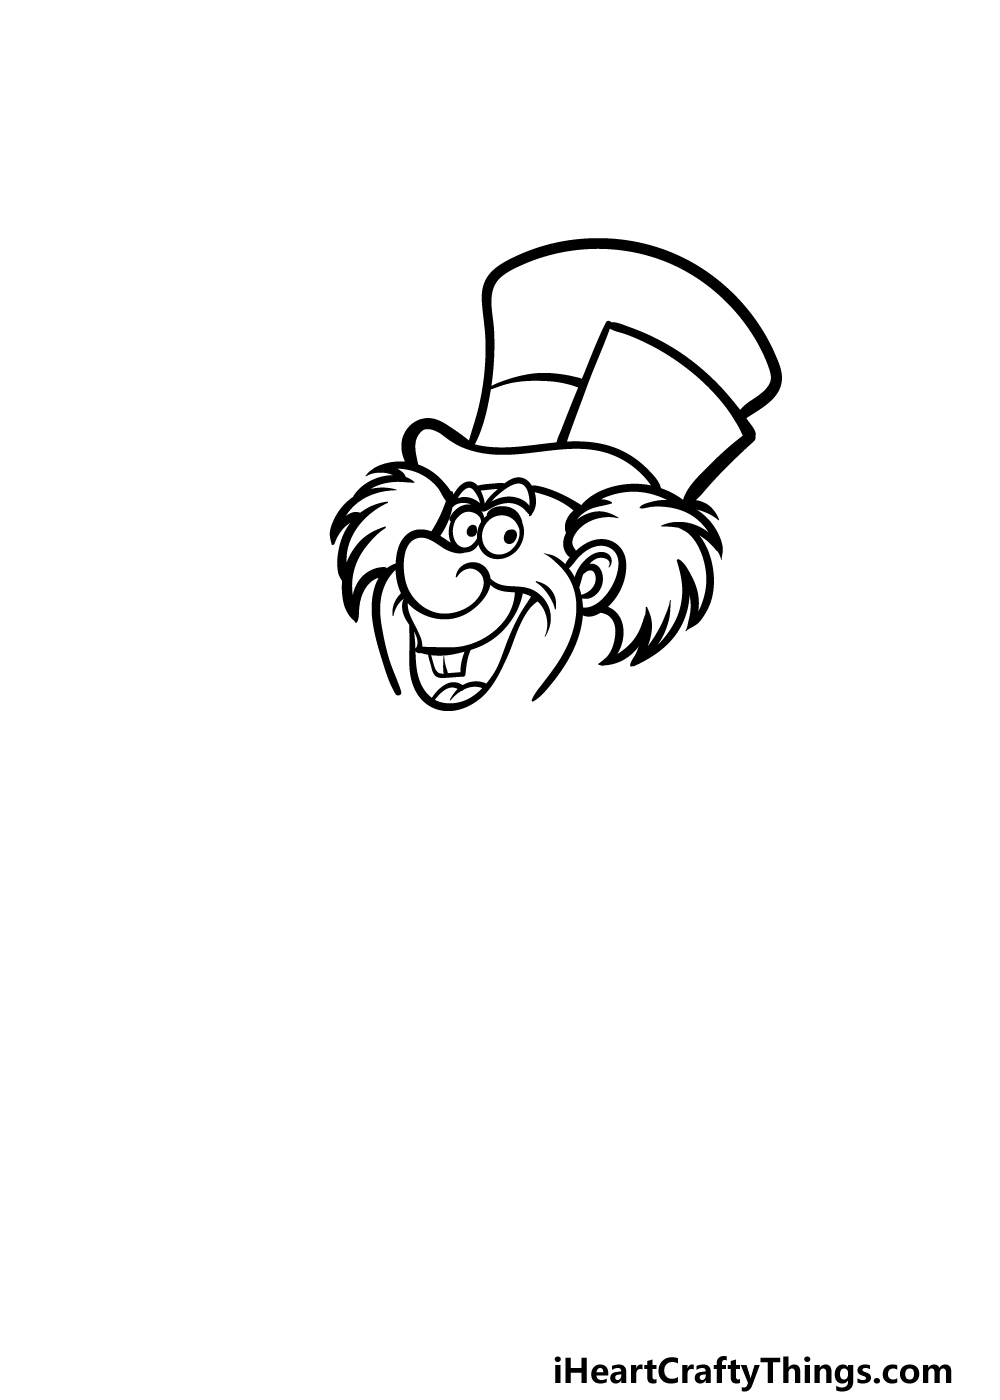
You’ve finished his hat, and now it’s time to start drawing the face and hair for your Mad Hatter drawing in this second step.
First, start by drawing two small circles close to one another. Add a dot to each one, and that will take care of his eyes.
You can then draw some eyebrow shapes above the eyes, and then use a large, rounded line for his bulbous nose.
Then, add his open grinning mouth beneath his nose and draw some square shapes for his buck teeth.
Next, draw the outline of his face and ears, and finish off by using some curved lines with sharp points for his hair poking out from beneath his hat. That will finish off his head so that we can take on step 3.
Step 3 – Draw his coat and bowtie

Next, we will be drawing his coat and tie in this third step of our guide on how to draw the Mad Hatter.
Start by drawing a circle beneath his head for the knot of his bowtie, and then draw the sides onto it. Then, we will be using some curved lines to draw the tall collar of his jacket beneath his head.
Then, his arm on the left will be extended up, whereas the other one will be crossed behind his back. Fining off by drawing the bottom of his jacket and shirt, and then it’s on to the next step.
Step 4 – Next, draw his legs and shoes
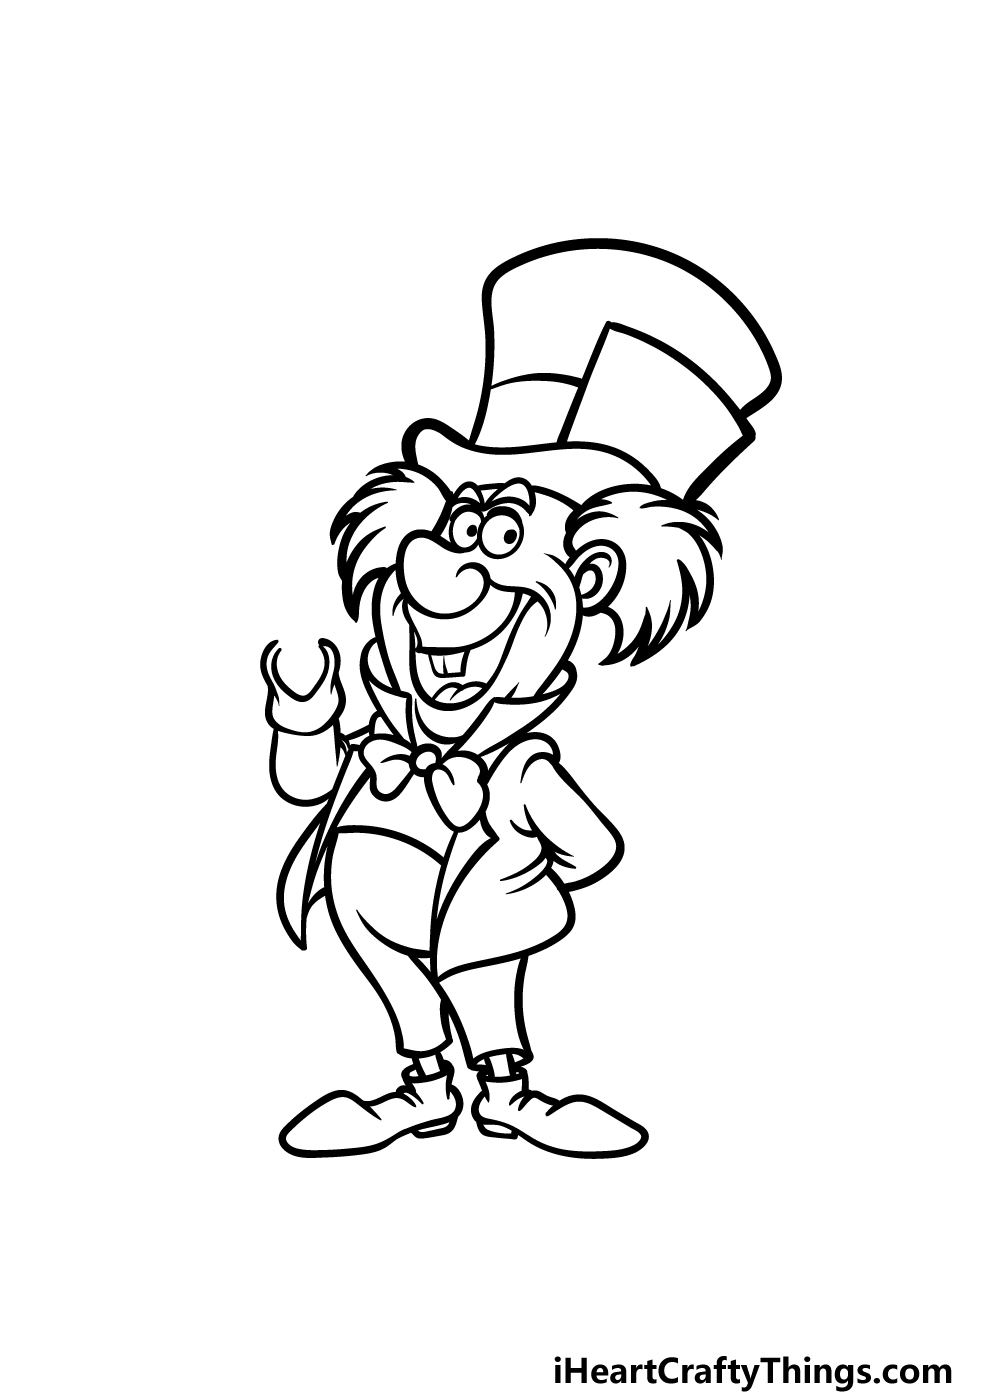
The next step of your Mad Hatter drawing will see you adding the legs and shoes for the character.
This character is quite short, so we will be making his legs quite short to add to that appearance. They will be drawn with some more curved lines to have them close to one another.
Then, you can finish off this step by drawing his shoes beneath his trousers. As shown in the reference image, they will be positioned so that they are pointing outwards.
Once these parts are drawn, we shall then finish off the final touches and details in the fifth step.
Step 5 – Add the final details to your Mad Hatter drawing
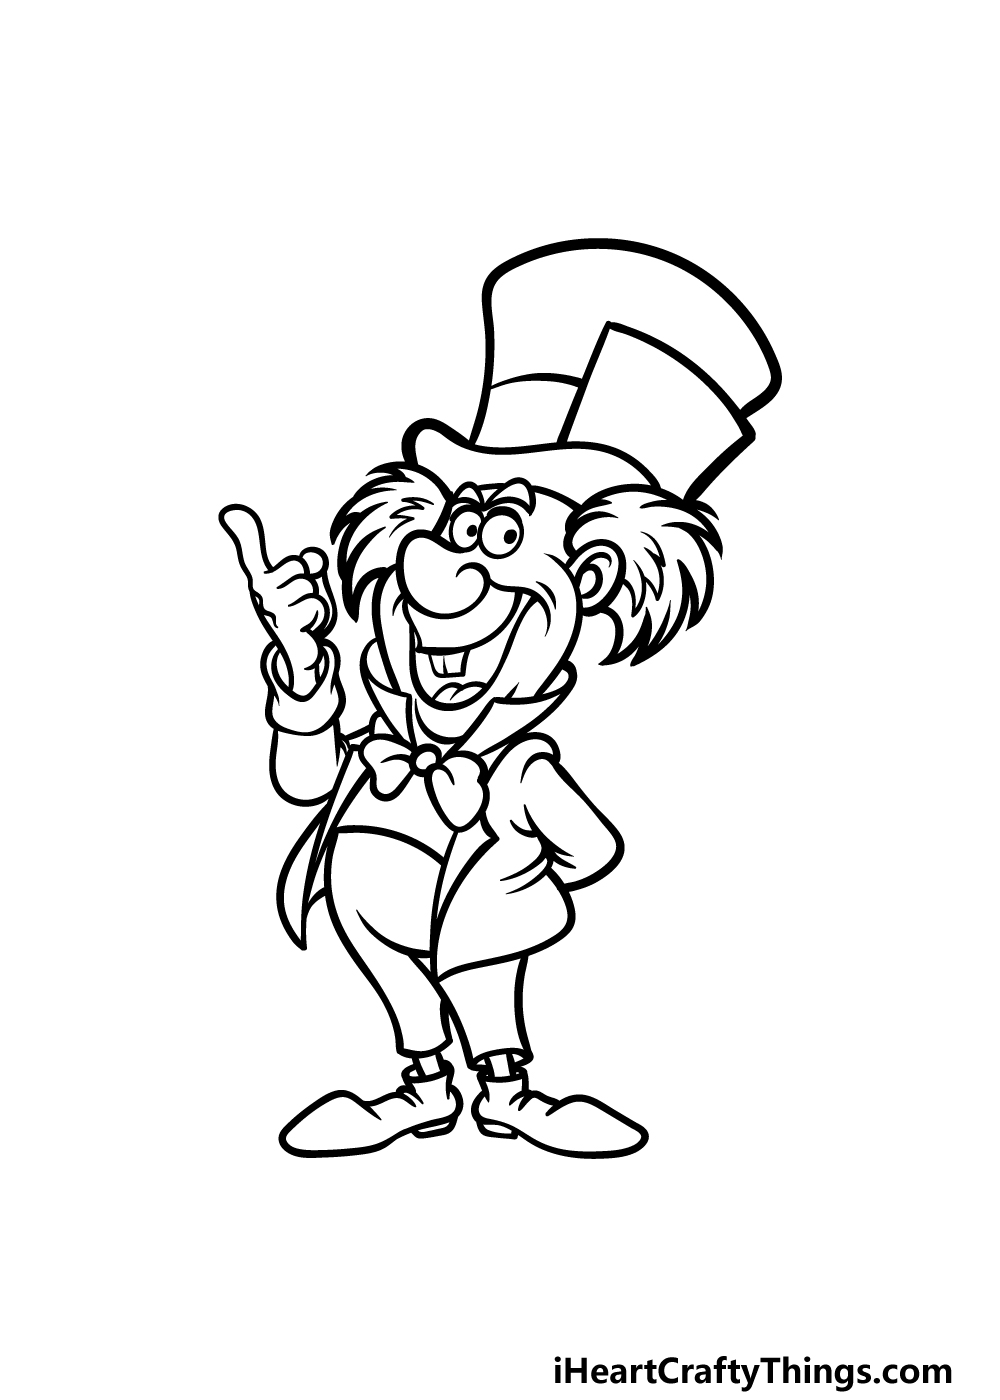
Now you’re ready to finish off this portrayal in this step of our guide on how to draw the Mad Hatter!
In this step, the final thing we will be adding will be his hand poking out of his extended jacket arm.
This hand will be pointing up, but you could also draw in a teacup or another prop for him to hold! You can then finish off with some pointy lines on his hair to make it look more textured.
Before you move on to the final step, be sure to also add any additional elements or ideas that you may like for it! Can you think of a fun background or characters that you could draw to go with him?
Step 6 – Finish off your Mad Hatter drawing with color
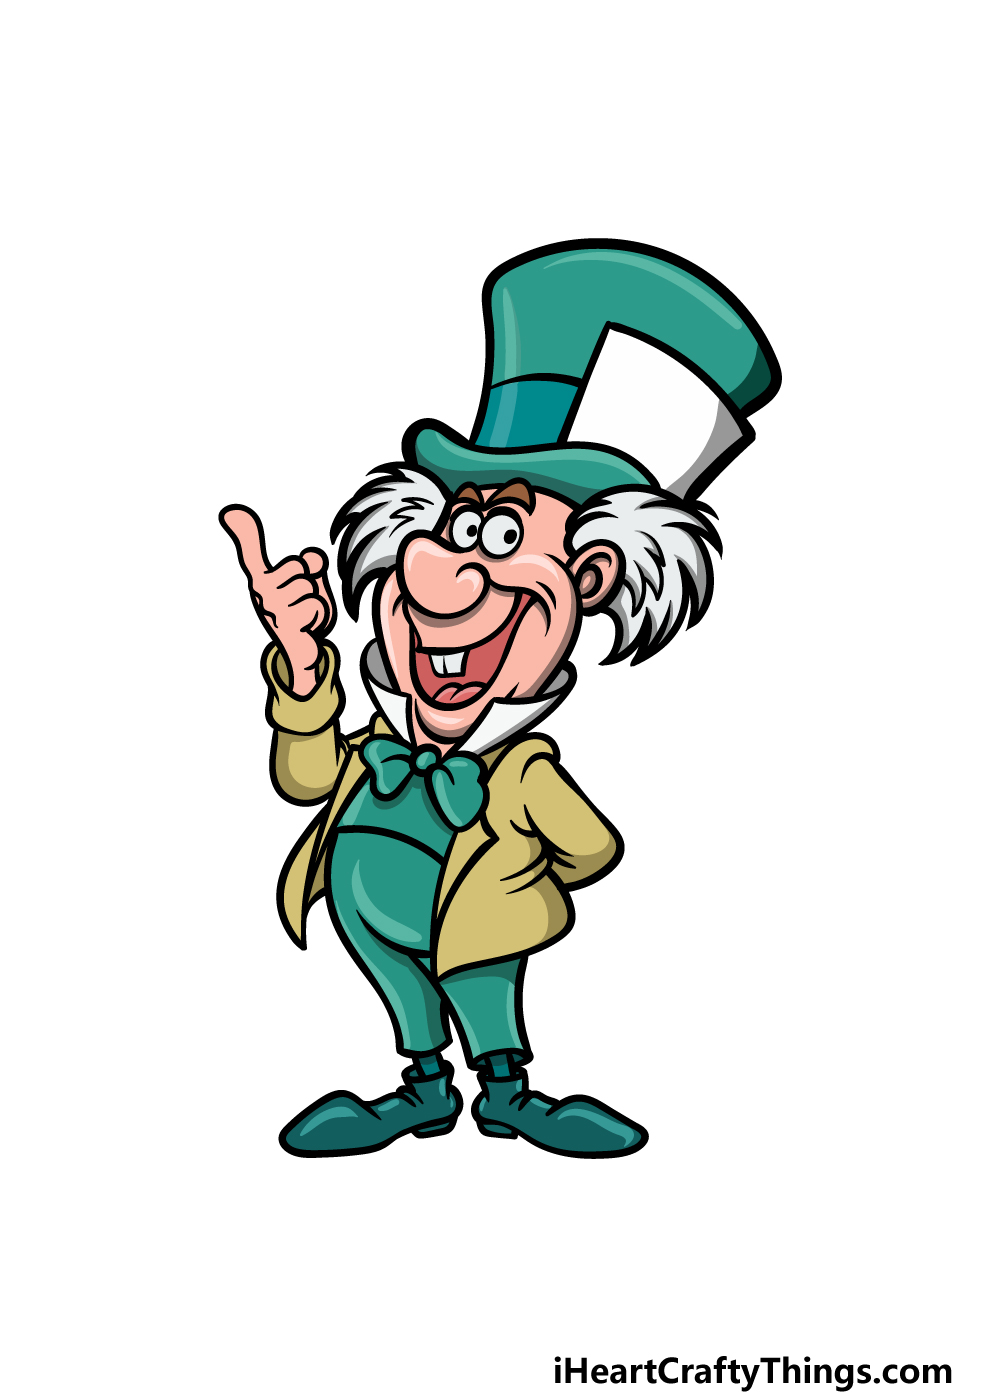
This final step of your Mad Hatter drawing will be all about finishing it off with some colors. In our reference image, we went with the colors the character appears in during his film appearance.
That means that we used some greens for his hat and clothes, and these are contrasted with a beige color for his coat.
This reference image can serve as a guide if you want to keep his colors screen accurate, but you could also use your own color choices for a unique variant!
You can also have some fun with the art mediums and tools that you use, so how will you finish off this awesome picture?
Do this to take your Mad Hatter drawing to the next level
Have some crazy fun as we make your Mad Hatter sketch look even better!
This drawing of the Mad Hatter that we created in this guide is styled on the classic Disney animated film. If you wanted to make a Mad Hatter party, you could draw some other interpretations!
For example, you could draw the live-action version played by Johnny Depp. Or, you could base additional portrayals on versions you’ve seen in books or other media.
It could also be fun to design your own portrayal! Whatever you decide on, they will serve as a great contrast to this version we created together.
Another way to populate this drawing would be to add different characters from the Alice in Wonderland story.
The first choice would be to add Alice herself, as she does interact with the Mad Hatter.
There are so many other characters you could add as well, though! For example, there is the Cheshire cat or maybe Tweedledee and Tweedledum.
These are just a handful of characters from the story, but you could add any of your favorites!
Once you are happy with the characters in this Mad Hatter drawing, you could add a background to create a more complete scene. There are so many classic locations you could portray!
One idea would be to recreate the classic tea party scene from the story. Or, you could show off your favorite Mad Hatter moments by showing a different setting you enjoyed.
What location would you like to have as the background?
Finally, this Mad Hatter sketch looks like he is in the middle of a sentence. One way you could add some more fun to the picture would be to draw a famous quote attributed to the Mad Hatter!
Or, you could go for a famous quote by one of the other characters. If it is a line that the Mad Hatter said, then you could write it inside a speech bubble.
If it is a more general quote, then you could draw it around the character.
Your Mad Hatter Drawing is Complete!
There’s no doubt that the Mad Hatter is one of the most iconic and recognizable characters ever created.
We hope that this guide on how to draw the Mad Hatter made it not only easier but also loads of fun for you to recreate him!
Now you can keep adding your own ideas and elements to the drawing to further make it your own. What creative touches can you think of that would finish it off nicely?
If you enjoyed this guide, you’ll be happy to know that many more guides await you on our website. We upload new ones often, so keep checking in to never miss out!
Please also consider sharing your finished Mad Hatter drawing on our Facebook and Pinterest pages so we can admire your hard work. We can’t wait to see how it turned out!