Angry Birds started out as a mobile game launched back in 2009, and since then it has become quite a media empire.
There have been many more games, toys, TV shows and even a movie launched since the game’s introduction, and it is still really popular today!
The series is known for its colorful and varied characters that are all full of personality and expression.
Many fans like creating fan art featuring these characters, and if you’re one of them then learning how to draw Angry Bird is a great way to do that!
This is the perfect tutorial for anyone who loves these colorful birds.
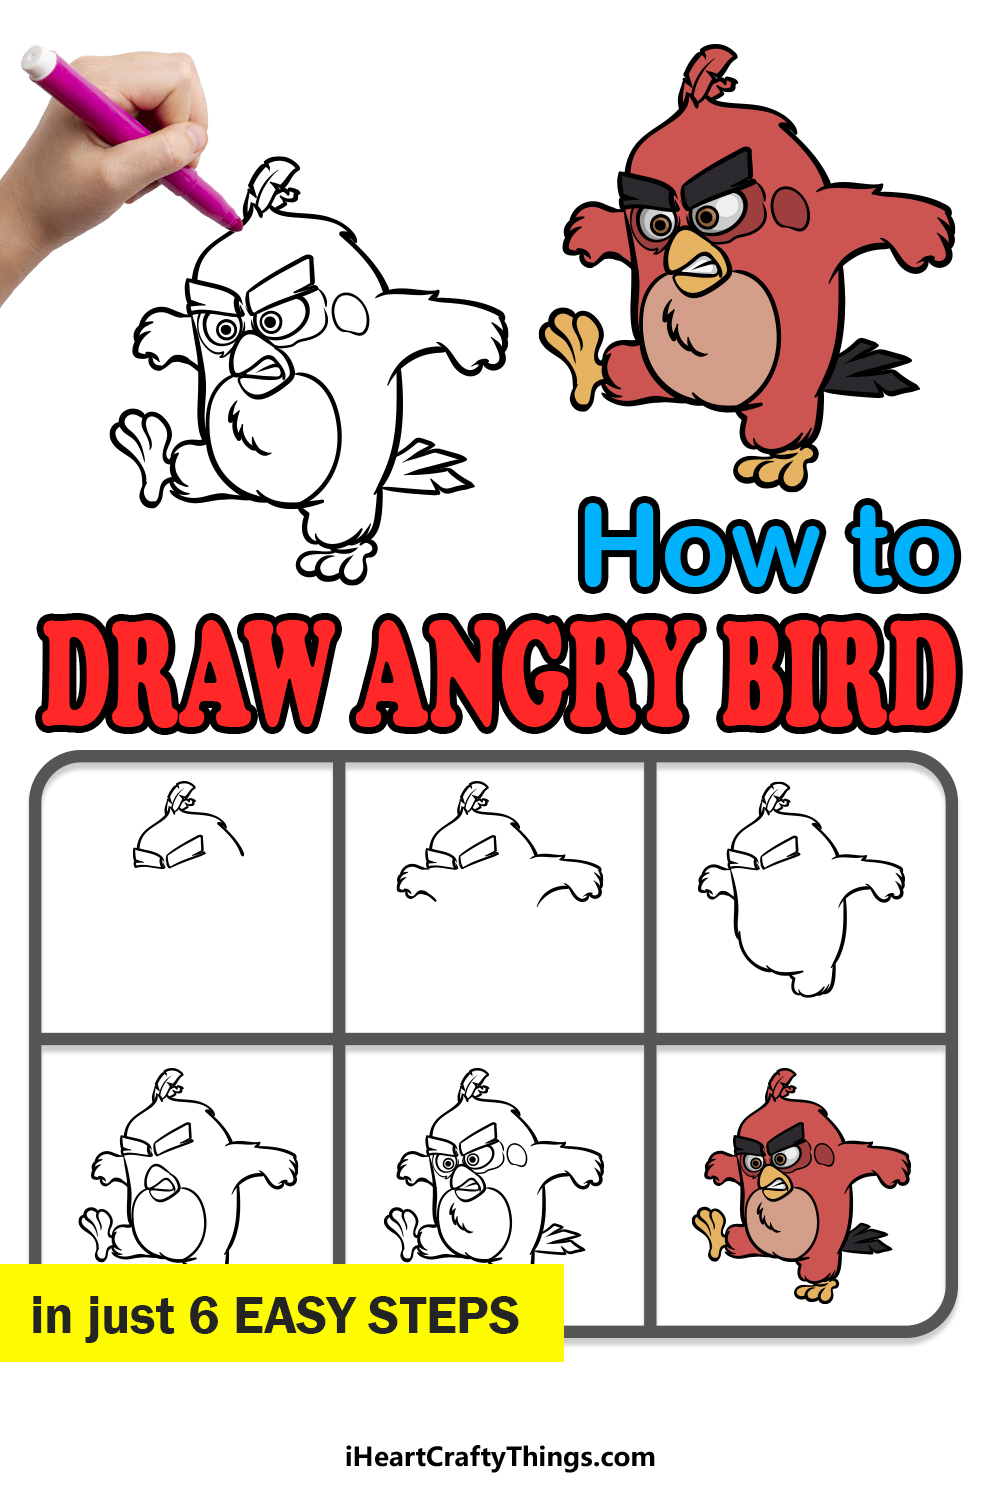
Our step-by-step guide on how to draw Angry Bird will show you everything you need to know about drawing this unique character!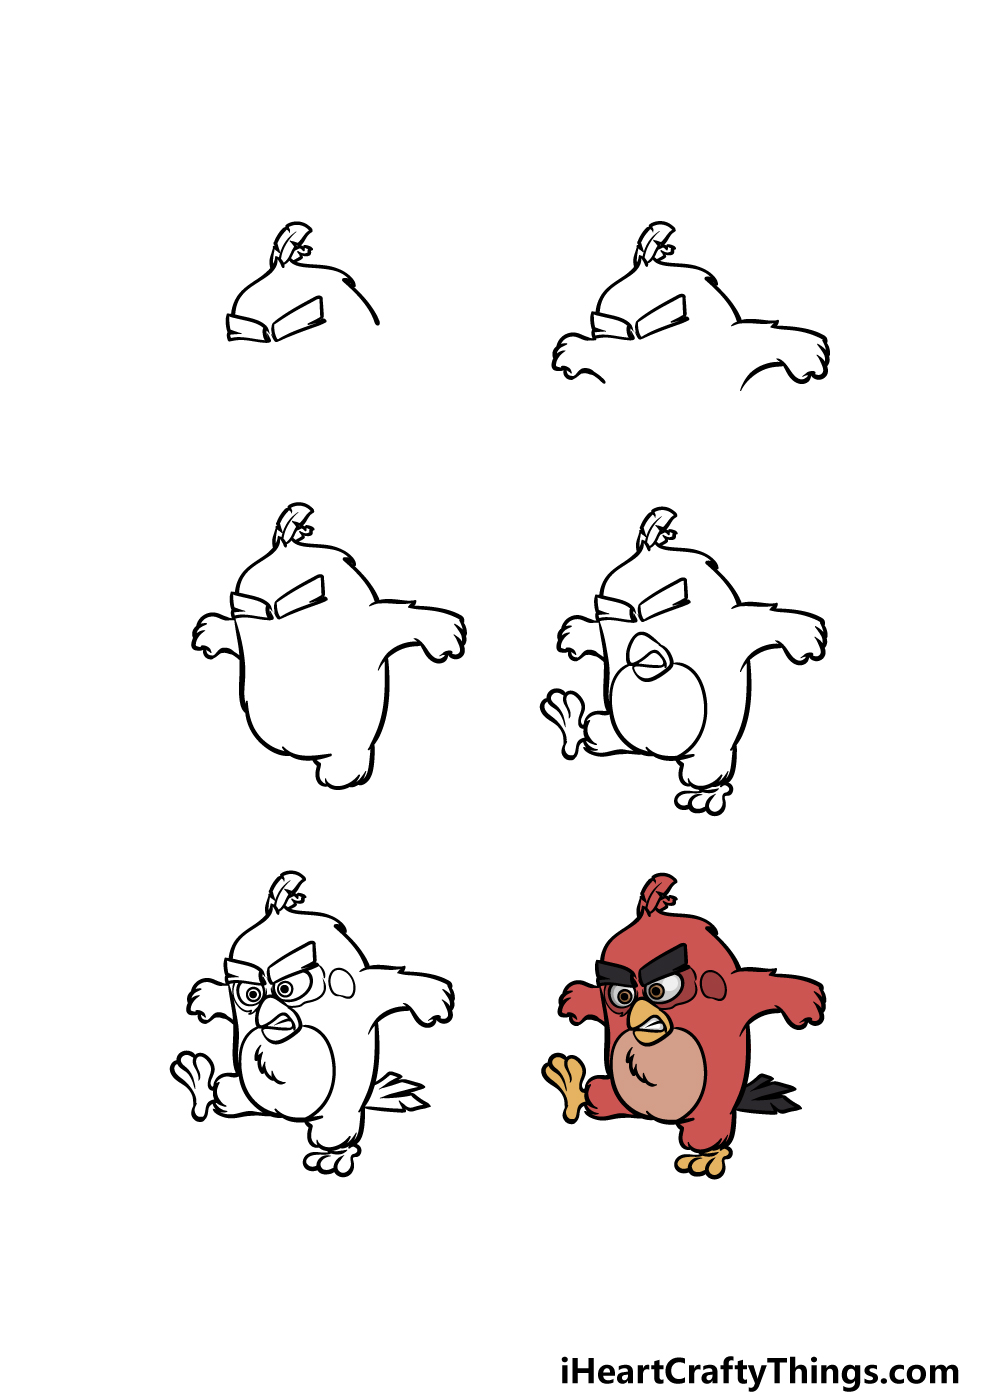
How to Draw Angry Bird – Let’s Get Started!
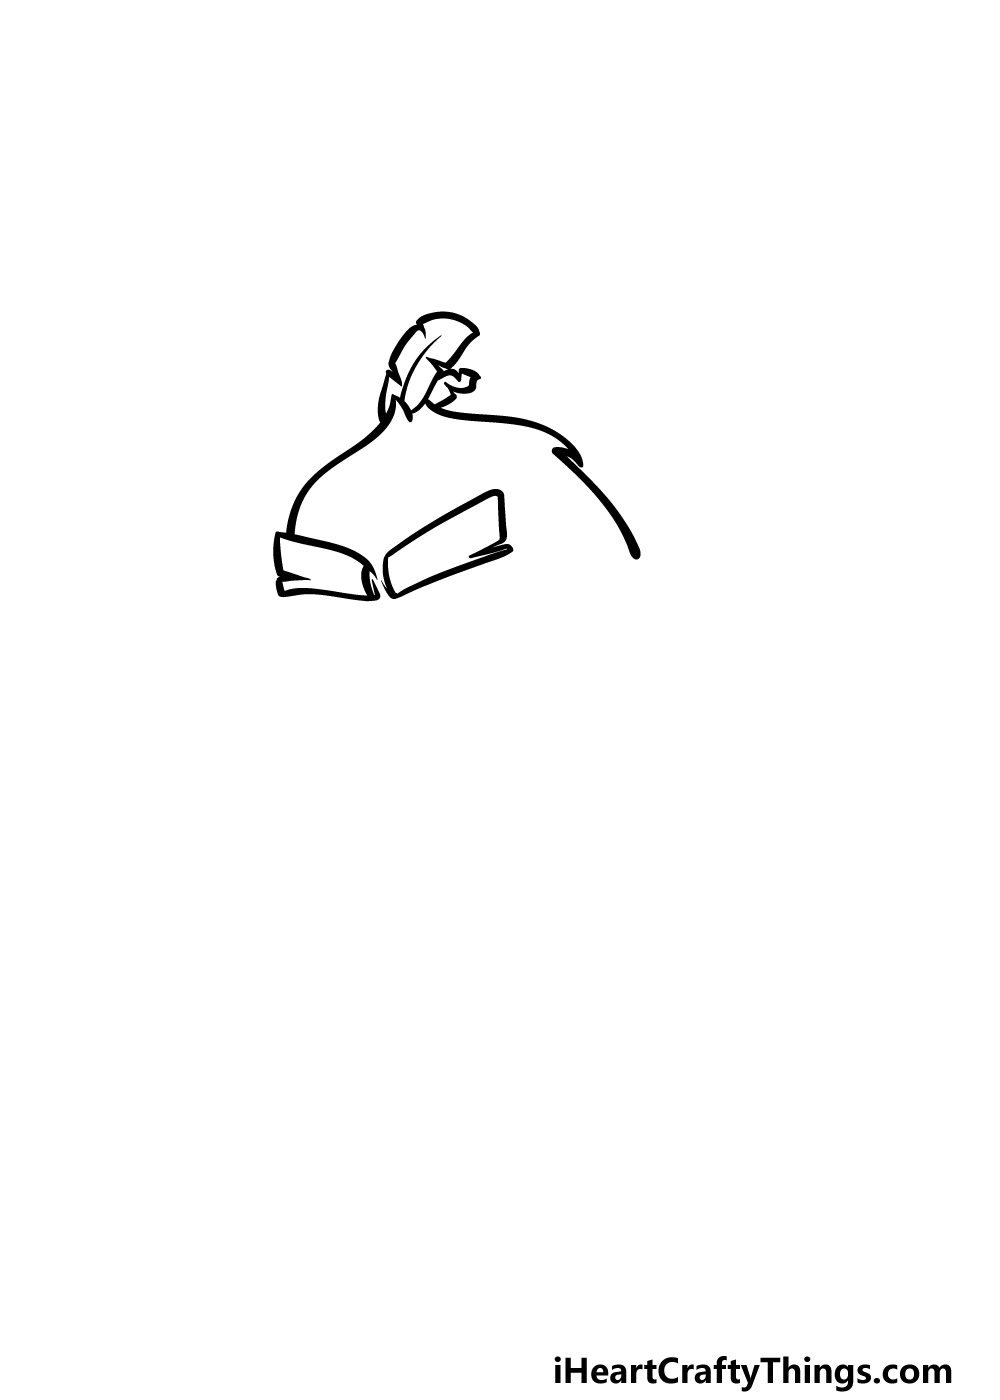
Step 1
In the mobile games, the Angry Bird characters are small and round with their faces being the only distinguishing feature they have.
The design we are doing in this guide on how to draw Angry Bird is based more on the movie appearance of this character, as he will have limbs and be posed.
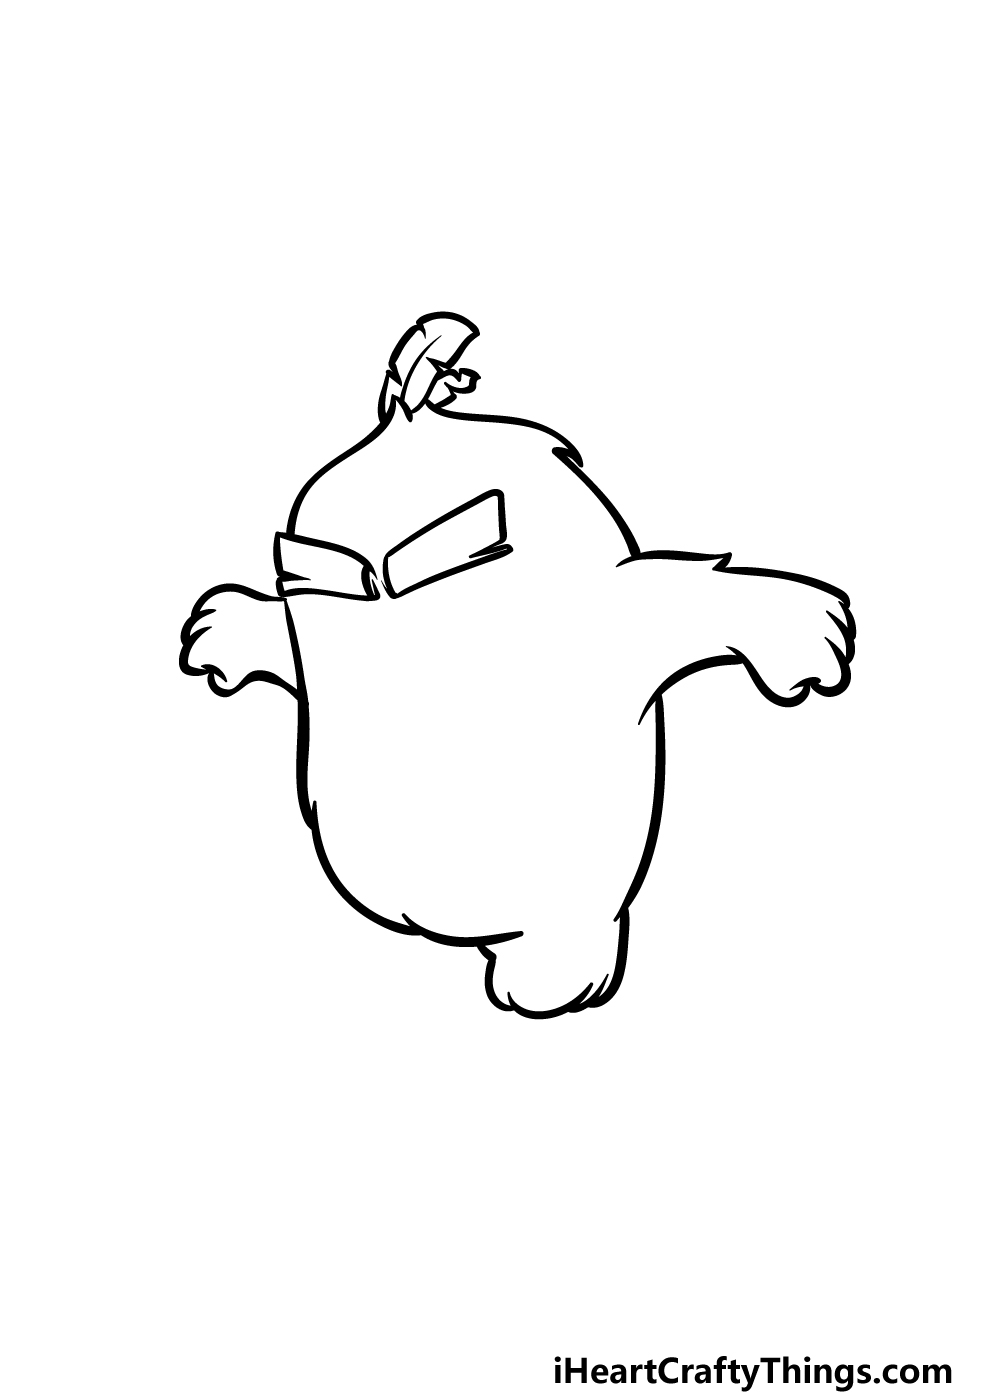
For this first step, we will be drawing the top of his head. You can start this by drawing some rounded lines with little sharp curves in them for the top of his head.
The little curves will be to make his outline look a bit more feathery.
There will also be a feather on top of his head, and then you can finish off this step by drawing his two large eyebrows. Remember to angle them downward, as we want him to look angry!
Step 2 – Draw his arms next
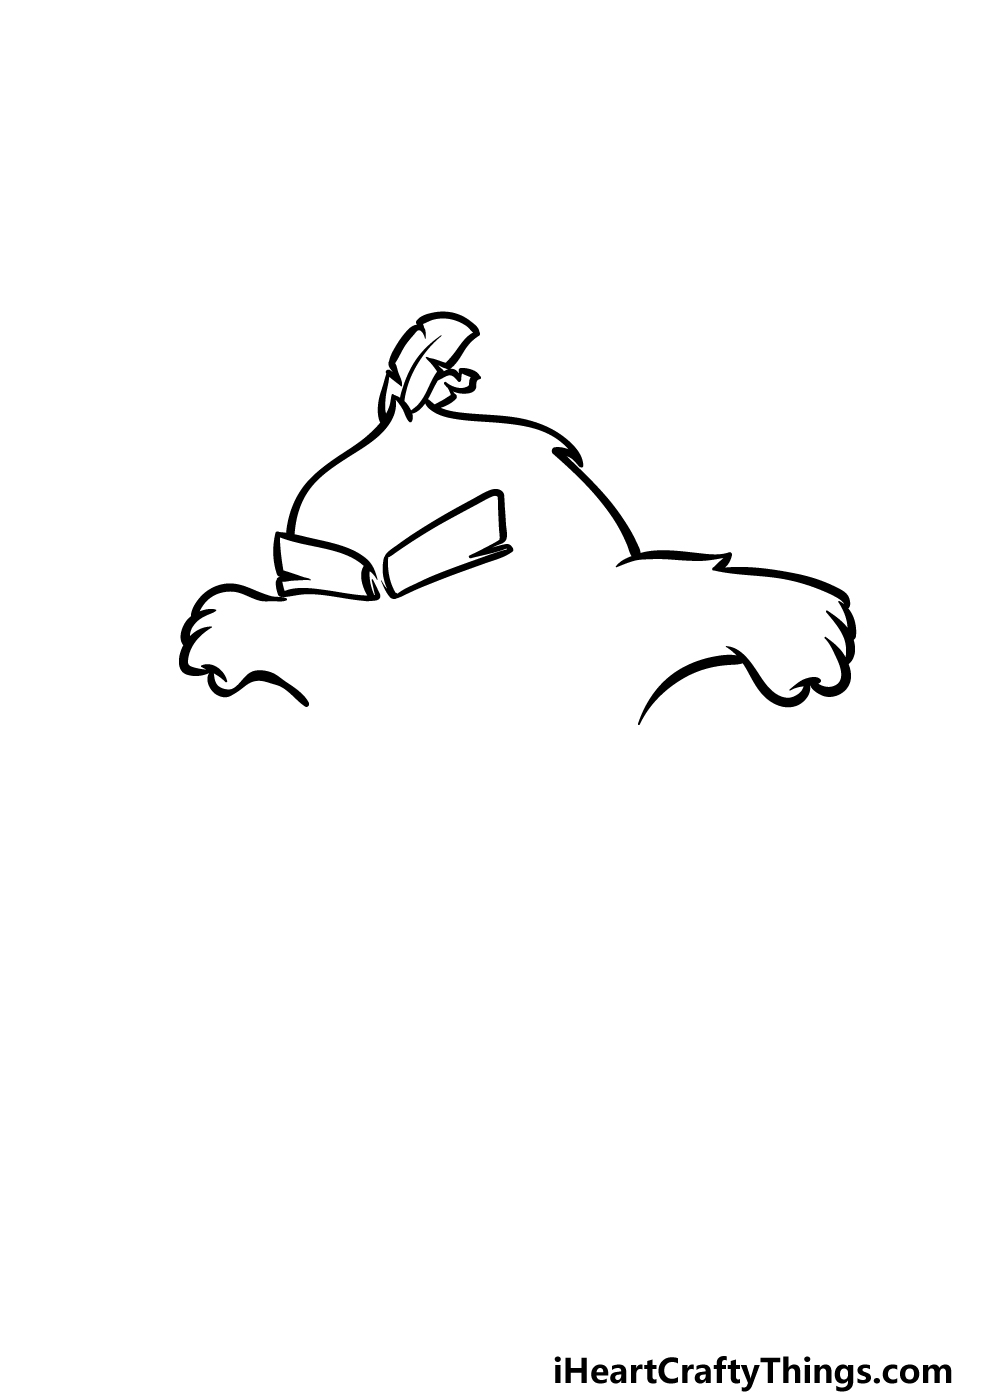
For this second step of your Angry Bird drawing, we will be drawing some arms for the character.
His arms will be extended outward with the ends balled into fists to further show that this little guy is feeling pretty angry!
His arms will be fairly short but also quite thick and stocky. To draw his arms, we will be using some lines that are similar to the ones that you used for the top of his head.
That means that we will be using some curved lines with some sharp bits sticking out to make them look like they have a feathery texture.
That’s all there is to it for this second step, and now you’re ready for part 3!
Step 3 – Now, draw his body outline
To continue this guide on how to draw Angry Bird, we will next be drawing the body outline for the bird before we start adding more inner details.
For his back, use a curved smooth line coming down. For his stomach, we will instead be using another line similar to the other ones you have used previously, and that means drawing a curved line with a few sharp bits.
Then, you can add a small stubby section near the bottom of his body. This will form the feathery top of his leg, and we will be drawing the rest of the leg in the next step.
Step 4 – Next, draw the rest of his legs and some body details
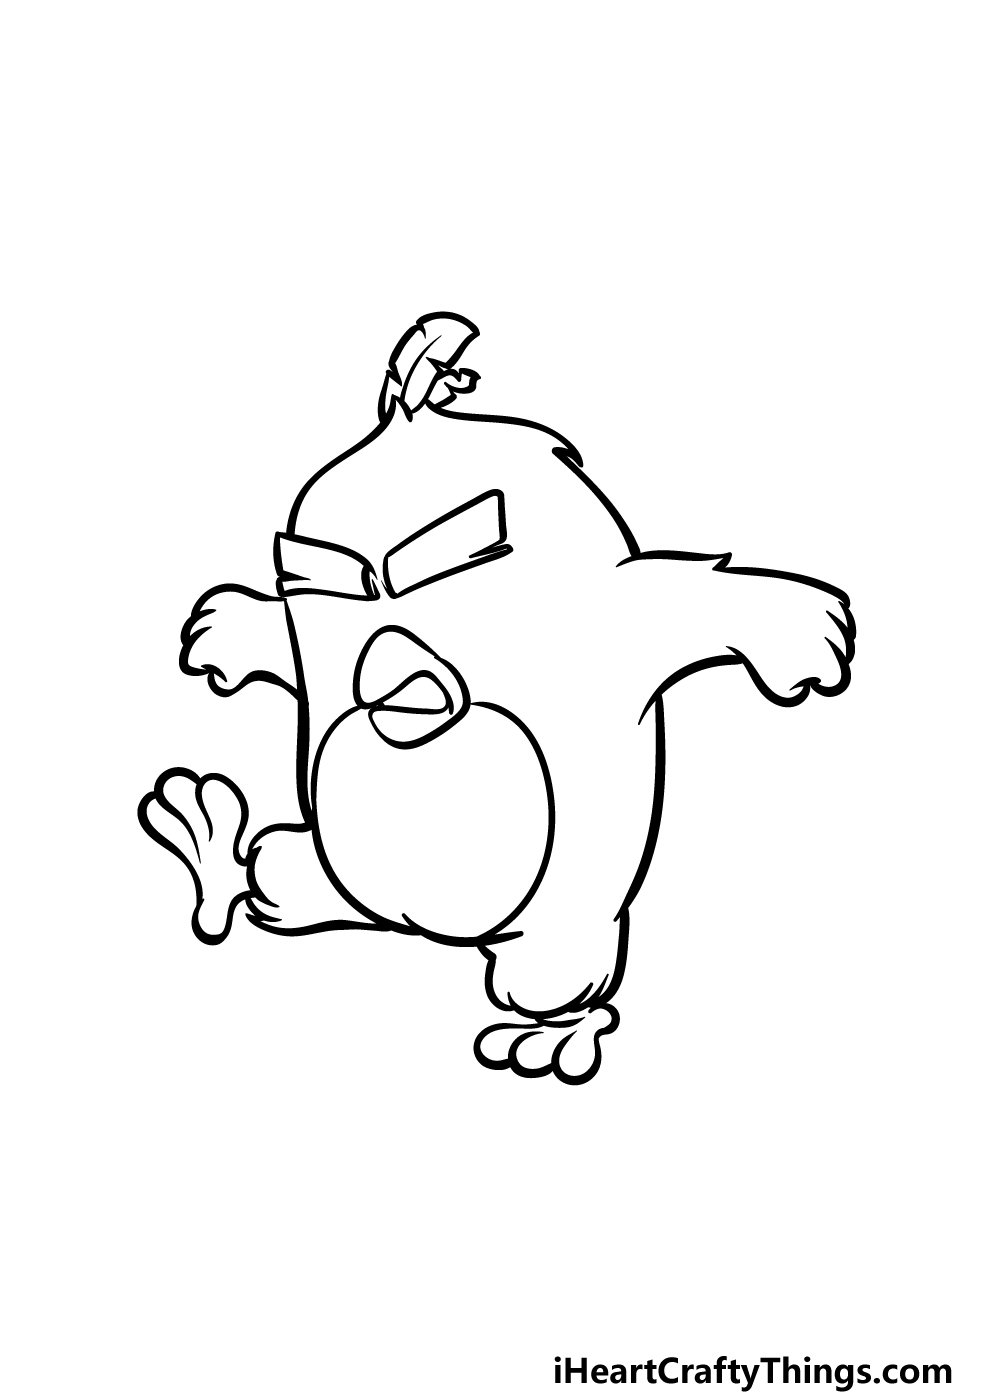
This next part of your Angry Bird drawing will see you adding the rest of his legs along with some other details.
First, use some small rounded lines to create his foot underneath the stubby feathery section that you drew in the previous step.
Then, draw another of these small feathery sections onto the side of his body, and then draw another foot poking off of it to make it look like he is kicking out.
Then, we will be drawing his beak. This will be drawn using some curved lines to create the beak that is twisted into an angry grimace.
The last thing to add before moving on to the next step will be a rounded line for the outline of his stomach.
Step 5 – Add the final details to your Angry Bird drawing
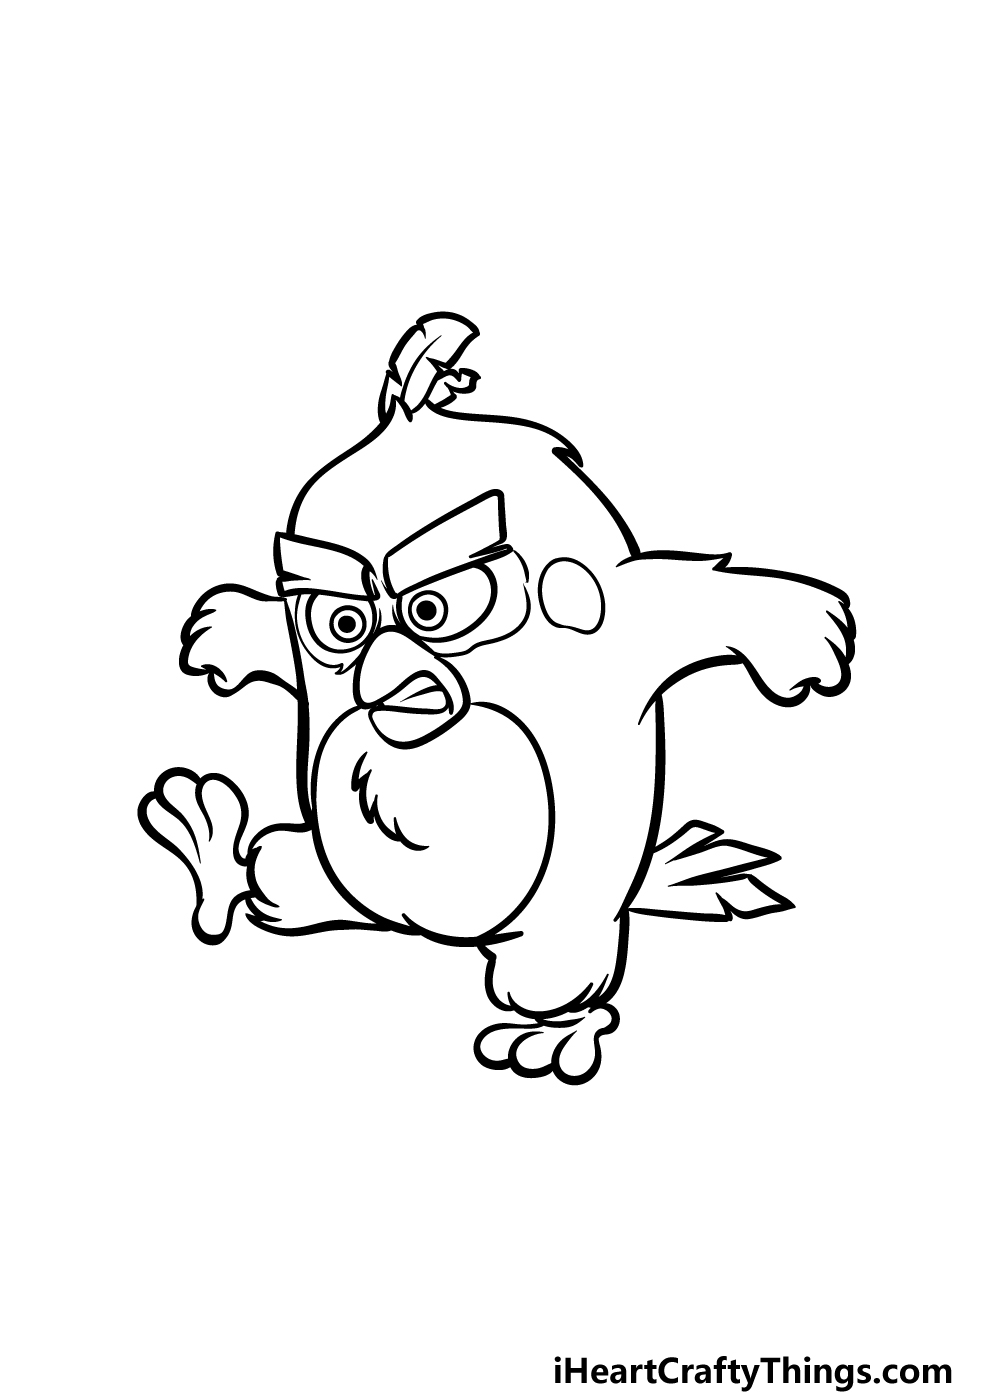
Now you’re ready to add the final touches and details before you move on to the final step of this guide on how to draw Angry Bird.
First, we will draw his eyes. These will be oval-shaped and go directly beneath his large eyebrows. Draw a circle inside of each one, and then add a dot inside of that for his pupils.
Then, draw some line details around his eyes and face, and then add a jagged line inside of his chest. Finish off by drawing some small rectangle shapes at his back for his tail sticking out.
Once these are all drawn, you can also add some details of your own! What kind of background would you create for this particular image?
Step 6 – Finish off your Angry Bird drawing with color
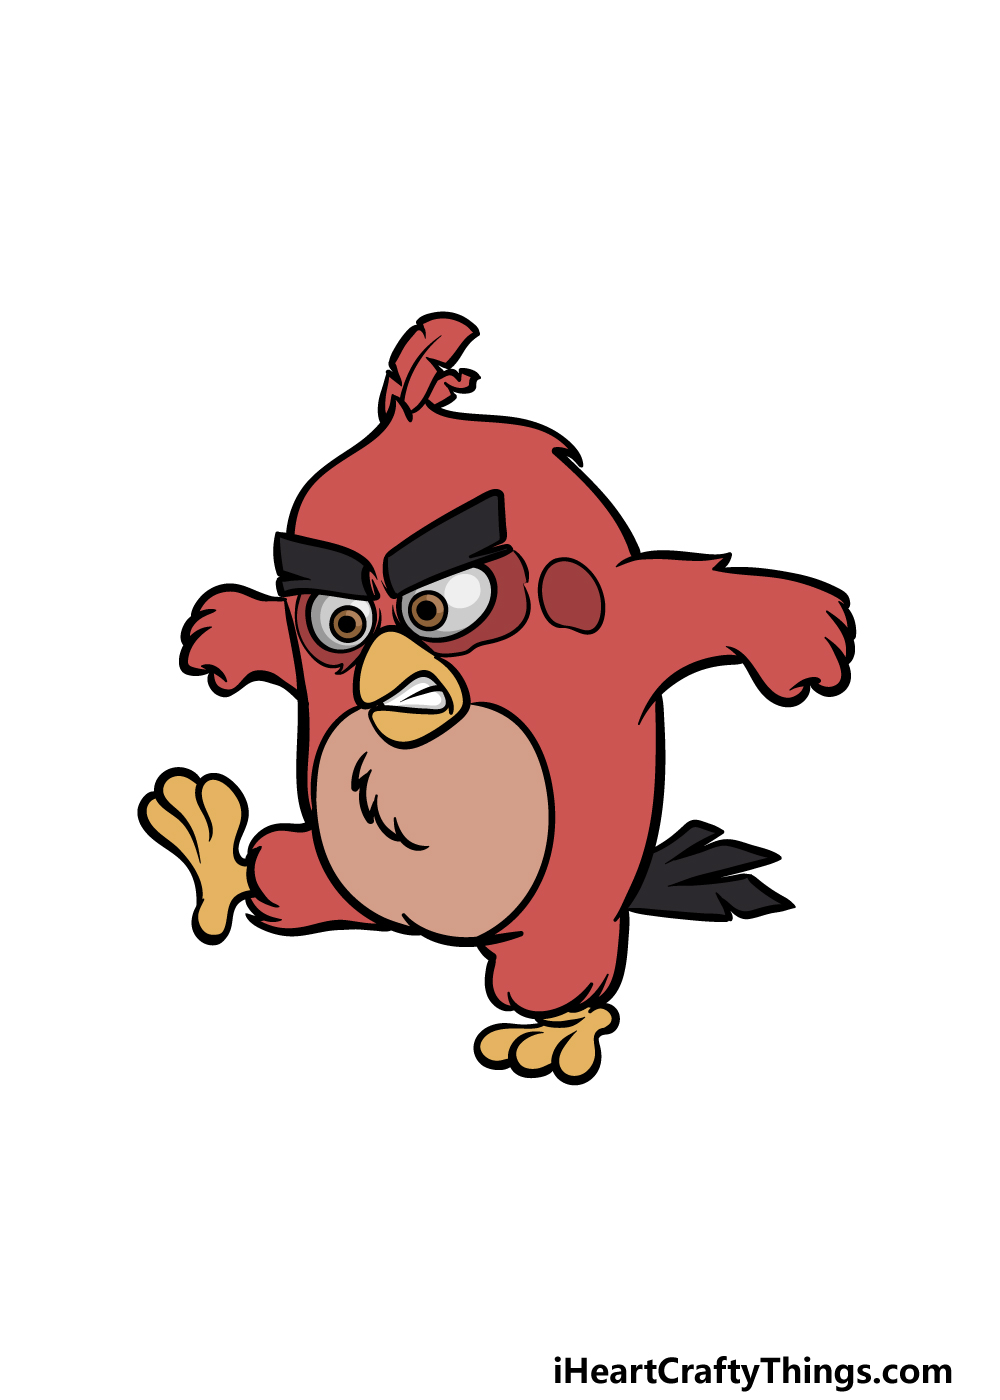
This is the final step of your Angry Bird drawing, and in it we shall be finishing it off with some color.
In our reference image, we went with this character’s usual color scheme of shades of red. You can use this to guide you if you would like to go with his typical color scheme.
You could also create your own Angry Bird character by changing some of the details and going with different colors instead! How will you finish off this awesome drawing of yours?
5 Tips To Make Your Angry Bird Drawing Even Better!
These tips for your Angry Bird sketch will definitely make you happy!
This drawing of an Angry Bird shows one of the many characters in this colorful series. There are so many more characters you could add to the image, though!
When choosing these characters, you could pick from the Angry Birds movies or the games and add them to the scene. With so many to choose from, which characters will you add?
The Angry Bird in this picture is based on a character from the Angry Birds movie. To give this picture a different feeling, you could change it to look like the same character from the games.
Luckily, the characters in the games are very simple in shape and details, so it would be easy to change this character to look like that.
Another way you could add to this Angry Bird drawing would be by adding some of the bad guys and other obstacles that can be encountered in the game.
The colorful pig characters that can be encountered in the game would be a good place to start. You could also build up some structures that this bird could fly into, as he would in the games.
This drawing shows that this Angry Bird is standing on the ground, but you could change it to look like he is flying through the air instead.
To do this, you would simply need to change the position of his limbs and maybe ruffle his feathers a bit. Then, you could add some curved lines behind him to show his trajectory.
Maybe you could also draw the sky with some clouds behind him.
In the games, you will play in a variety of colorful locations. You could use some of these locations as a background for your Angry Bird sketch!
This background could indeed be based on an existing location, or you could design your own Angry Birds level location.
What kind of background would best suit the kind of situation you wish to depict?
Your Angry Bird Drawing is Complete!
You have reached the end of this guide on how to draw Angry Bird, and we hope that working through it made you happy instead of angry!
As long as you follow all of the steps and take your time with it you will be able to draw this colorful character in no time.
Then, when you have finished with it you can change or add some details of your choosing to further personalize the picture.
This is your chance to have fun getting creative, so go for it and see what you can come up with!
If you had fun with this guide, you can head on to our website for many more guides like this one. We upload new ones often, so you’ll want to check in often to never miss out.
Please also remember to go ahead and share your Angry Bird drawing onto our Facebook and Pinterest pages. We can’t wait to see how this picture turned out!