It’s easier than you think to learn how to draw a starfish when you follow the guide I have for you! Find out how it’s done by joining me on this underwater journey.
Starfish are incredible little creatures that live in our oceans and come in many variations. So many people love these invertebrates, and they show up in many forms of art and media.
Drawing them isn’t always as easy as you may think, and that’s why I wanted to make it so much easier with this guide. Not only will you find out how to draw a basic starfish but one that’s also a cute cartoon character.
Once you have the hang of it, you could even give it your own facial expressions and add a background with some additional characters.
It’s up to you whether you want to draw a realistic one or keep the cartoony style intact, so let’s start the first step so you can see how it’s done!
Create Your Starfish Drawing By Watching These Steps
How to Draw A Starfish – Let’s Get Started!
Step 1
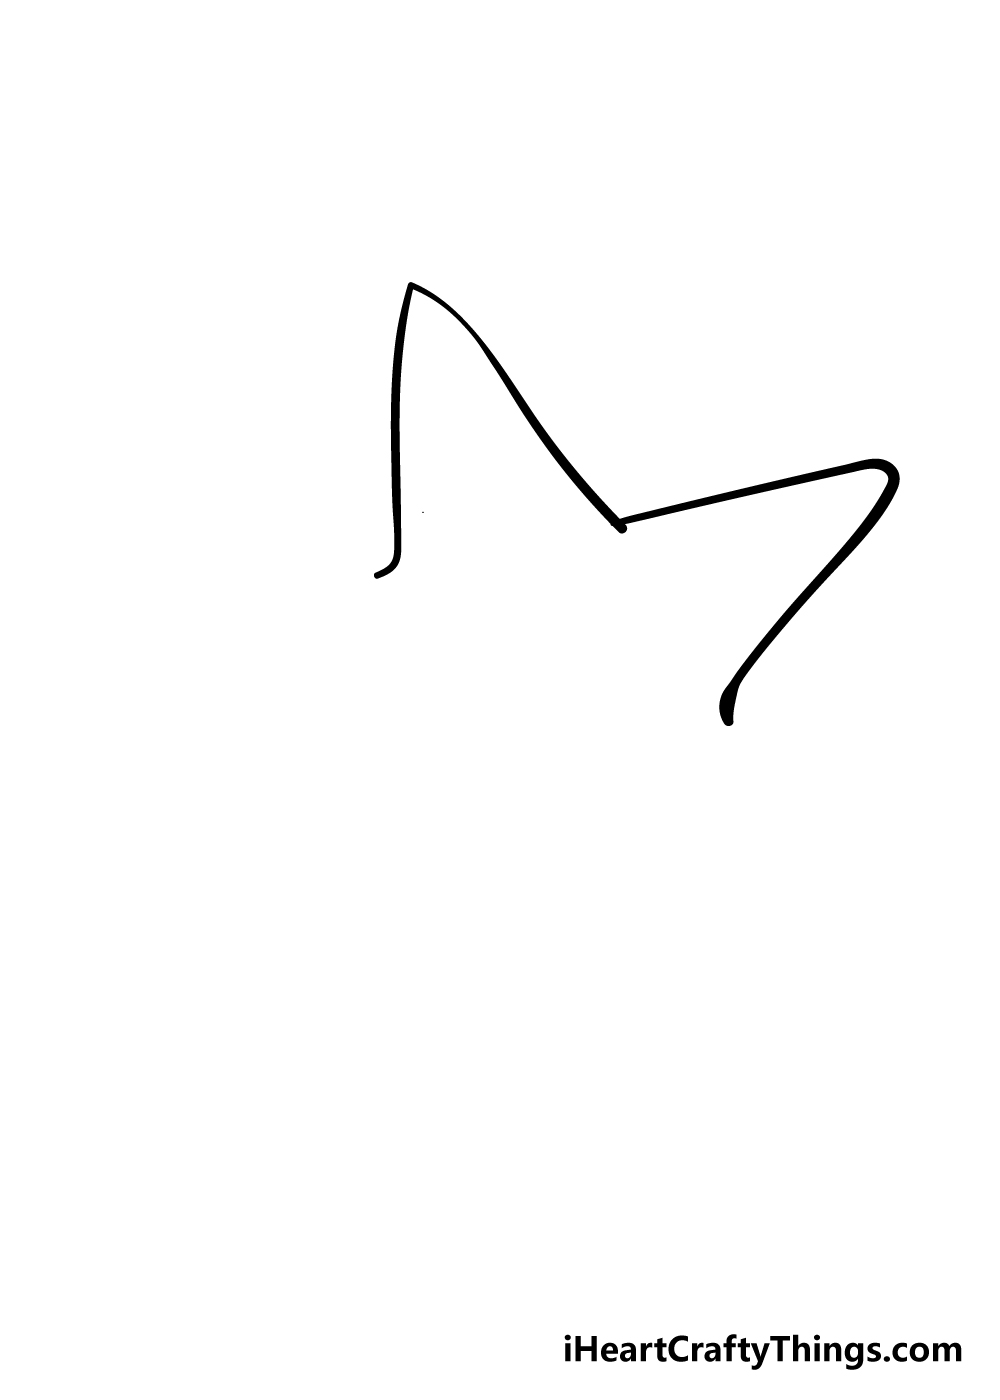
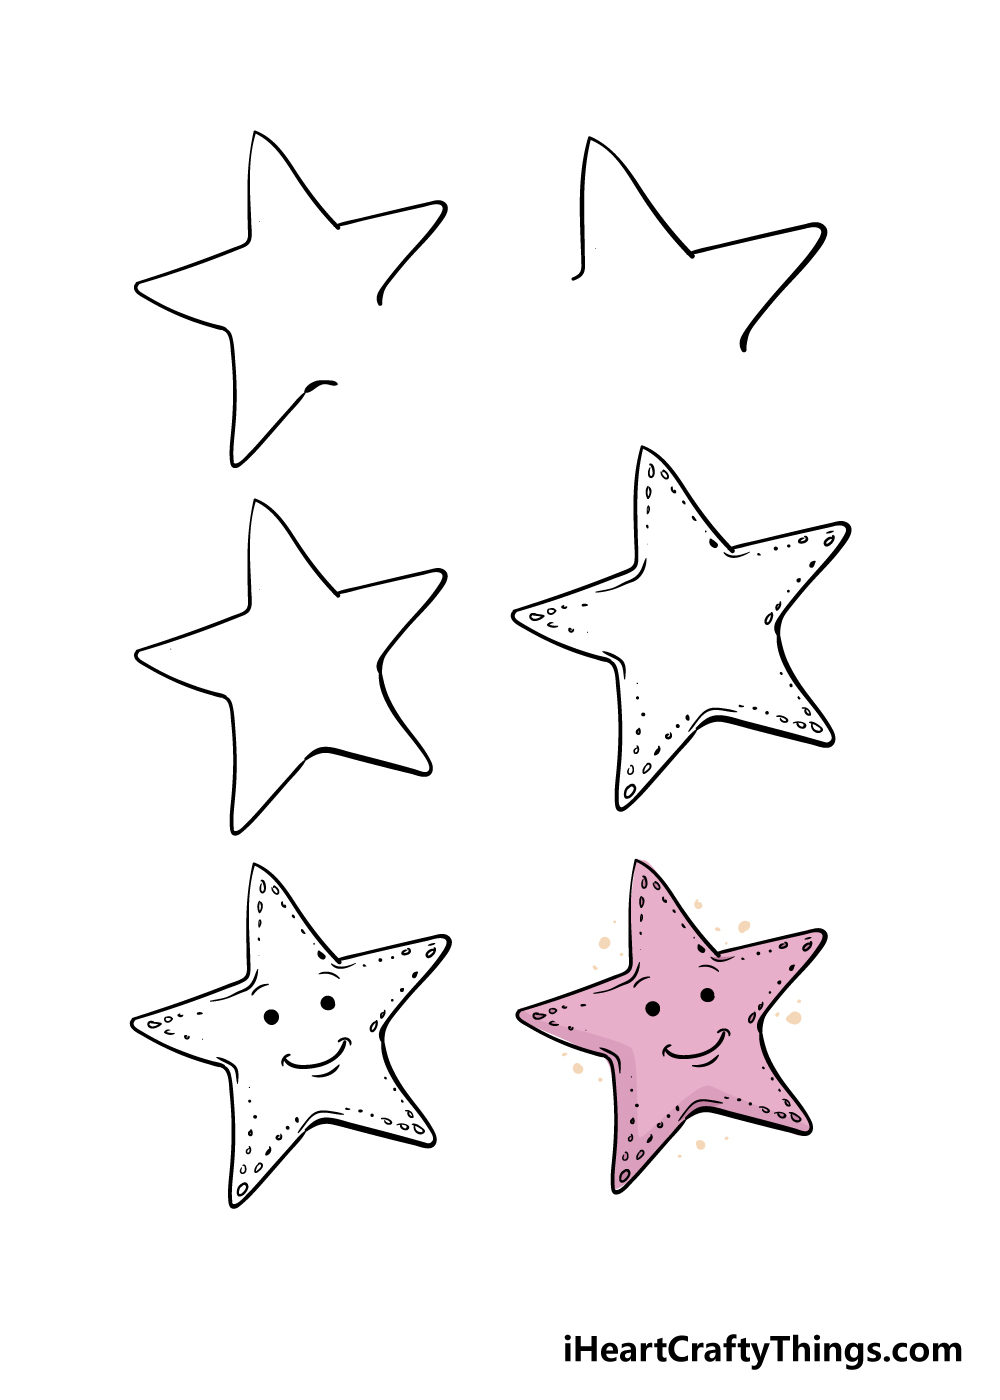
To get this guide on how to draw a starfish started, we will be beginning with the two arms of the starfish.
To draw each arm, you can use a line with a curved point, as if you were drawing a triangle without a base. Once you have drawn this line, you can then connect another to it as shown in our reference image.
Getting the angle right can be the trickiest part of this drawing, but if you take it slowly and follow the reference image then you’ll definitely be able to do it!
Once you have these arms drawn, then it’s on to step 2!
Step 2 – Add two more arms to the starfish in this next step

For this part of your starfish drawing, we will be adding two more arms.
You will be drawing these so that they will look similar to the first two that you drew, however they will be in a different position than the first were.
These new ones will go at the bottom left of the starfish drawing. Once you have these two then there’s only one more arm to add!
Step 3 – Now, draw the final arm of your starfish

You’ve been doing a great job drawing these arms for this guide on how to draw a starfish! For that reason, you should have no problems adding the final arm in this third step.
Simply use the process that you’ve been using for the previous few steps to add this final arm. Then, you’re ready to add some final details and touches!
Step 4 – Add some details to your starfish in this step

Now that you have the outline for your starfish completed, you can start adding some finer details for the final few steps of your starfish drawing.
To start, you can draw some dots and small oval shapes along the perimeter of the starfish outline. You can also add some lines and other details to give it even more definition.
Step 5 – Now, you can add some final details and touches

This fifth step of our guide on how to draw a starfish will see you adding some final fun touches.
You’ll also be able to add some of your own details and elements. In our reference image, we added a simple yet cute little smiley face onto the starfish to give it some character.
You could add a little face like this for a cute little starfish, but you could also leave it off if you prefer a more realistic image.
Before you move on to the final step, you could also add some details and elements of your own as well. You could draw a fun background for your starfish as well!
There are many incredible ocean creatures that you could add to the background to create a beautiful ocean scene! Or maybe this starfish could be in a tank with some pretty props and features around it.
There are many fun and creative things you can do to personalize this drawing, so how do you think you’ll finish it off before you color it in?
Step 6 – Finish off your starfish drawing with some color
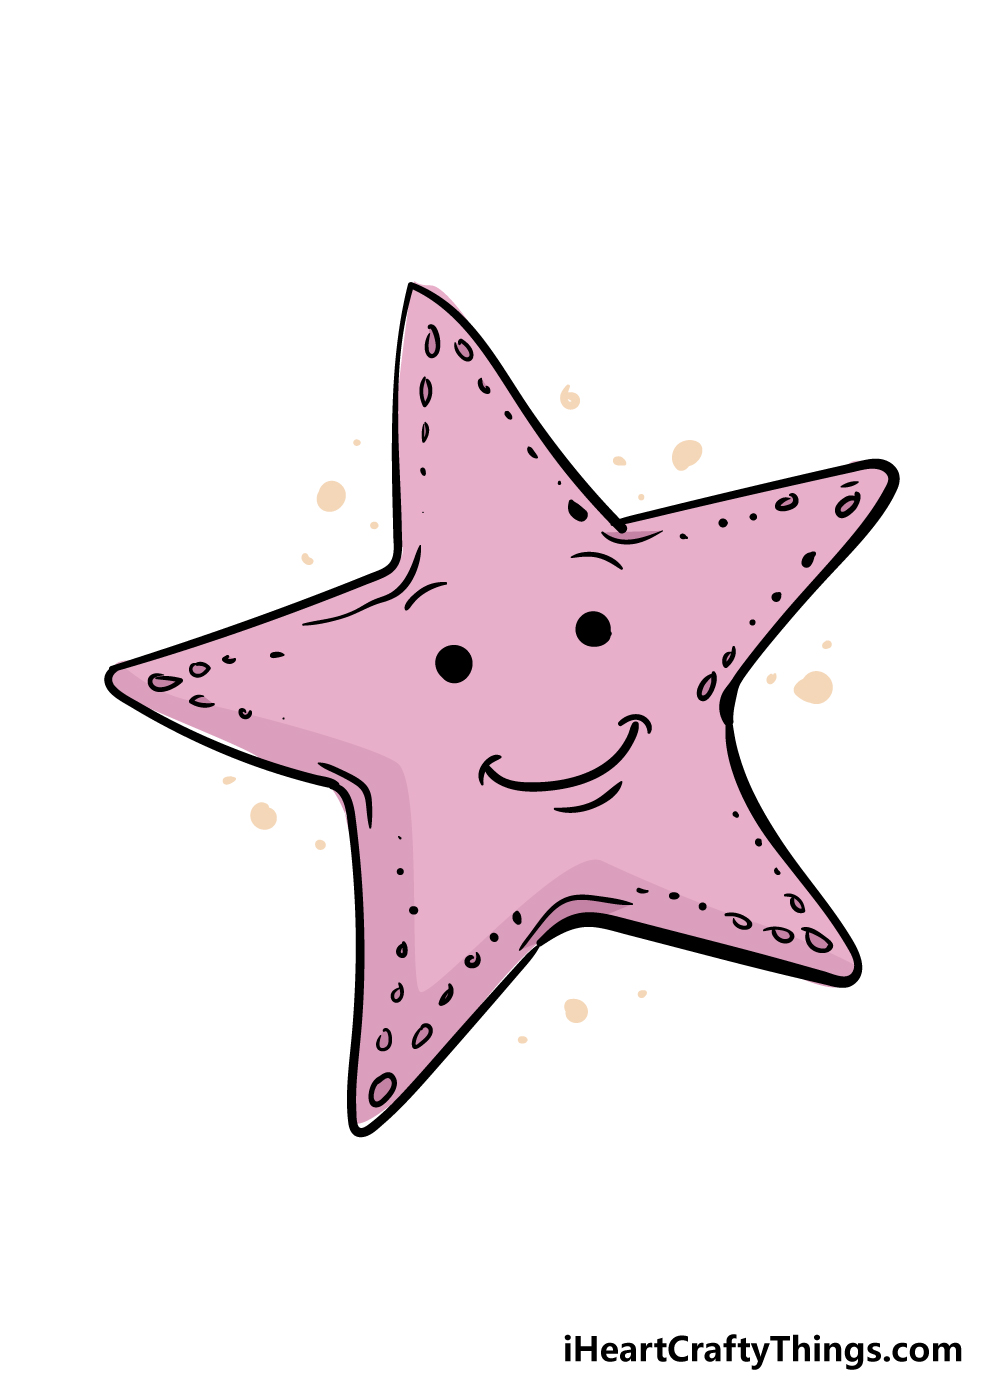
You will be adding some color to your amazing starfish drawing in this final step.
In our reference image, we used a lovely soft pink to color in the starfish, but this is a step where you can take over and really let your creativity flow!
A starfish can come in many incredible colors, so this is an image where you could incorporate any of your favorite colors for an image that pops off the page.
When you know what color scheme you would like to use, you can also experiment with bringing these colors to life by the art mediums that you use.
Brighter colors can be achieved by using mediums such as acrylic paint, colored pens and markers. These are great for a more vibrant, striking image.
More muted colors can be achieved by using mediums like watercolors, colored pencils and crayons. These are great for a more classic, subdued look.
There is no wrong way to go about it, and whatever you choose will look amazing! We can’t wait to see what you choose for your starfish drawing!
Do this to take your starfish drawing to the next level
Become a drawing star as we show you how to make your starfish sketch even better!
We created a cute and cartoony starfish drawing in this guide, but if you wanted to, you could make it more realistic. The first step to doing this would be to remove the face we added.
If you like the face, don’t worry, as we will be covering ways to make the face even more visible later!
For now, you may want to remove it and then add a few more texture details to make it look more realistic.
Maybe consult some photos of starfish online if you want to see some details you could add here.
For those of you who like the cartoony look of this drawing of a starfish, then you could make it even more exaggerated! For example, instead of removing the face you could make it look even more excited.
Changing the style of the face would also allow you to make it more expressive and unique to you. Would you like to make this starfish look even more cartoony?
A starfish can come in many amazing colors, and that means you can use any colors you like for this starfish sketch. Whether they are bright and vibrant or more muted, you will have a wonderful look for your picture.
You may also want to shake up the art tools and mediums you use depending on the kinds of colors you would like. What colors would suit your interpretation of this starfish best?
When you’re ready to truly finish off this starfish drawing, you could draw an awesome background. There are so many fun and creative backgrounds you could use!
Two obvious settings would be an ocean floor or maybe a fish tank. Either of these would also allow you to add other fish and sea creatures along with details like coral.
Those are just two of many ideas, and we’re sure you can think of many cool background settings and details to add!
Your starfish Drawing is Complete!
That brings us to the end of this step-by-step guide on how to draw a starfish! We hope that you had an amazing time working alongside us to create this wonderful little sea creature.
This guide was created to make this drawing not only much easier but also a lot of fun as well!
The best part of this guide is that once you’ve mastered it then you can take charge and add your own details and touches to it! You could create some fun new details or change up some of the ones that you drew in this guide.
You can even take it further by creating a cool background for it as well. Adding a background is a great way to add some context and personality to your image, and there are so many creative ones you could go for.
You can also put your own spin on this image with the colors and art mediums you use, so be sure to let your creativity flow!
We have plenty of awesome drawing guides on our website for you to enjoy! We upload new ones often, so be sure to check in often so you never miss out.
Once your starfish drawing is finished, we hope that you will share it on our Facebook and Pinterest pages for us to admire!