Humans have been divided by many things over the centuries. Wars, ideologies and cultures have clashed and caused division, but one thing unites all of mankind: the fact that flies are quite annoying.
While they may be irritating, when you zoom in on them they actually look really cool. This redeeming feature makes it equally fun and challenging to learn how to draw a fly.
Luckily, when you have a guide like the one in front of you it can be made much less annoying than the subject matter itself!
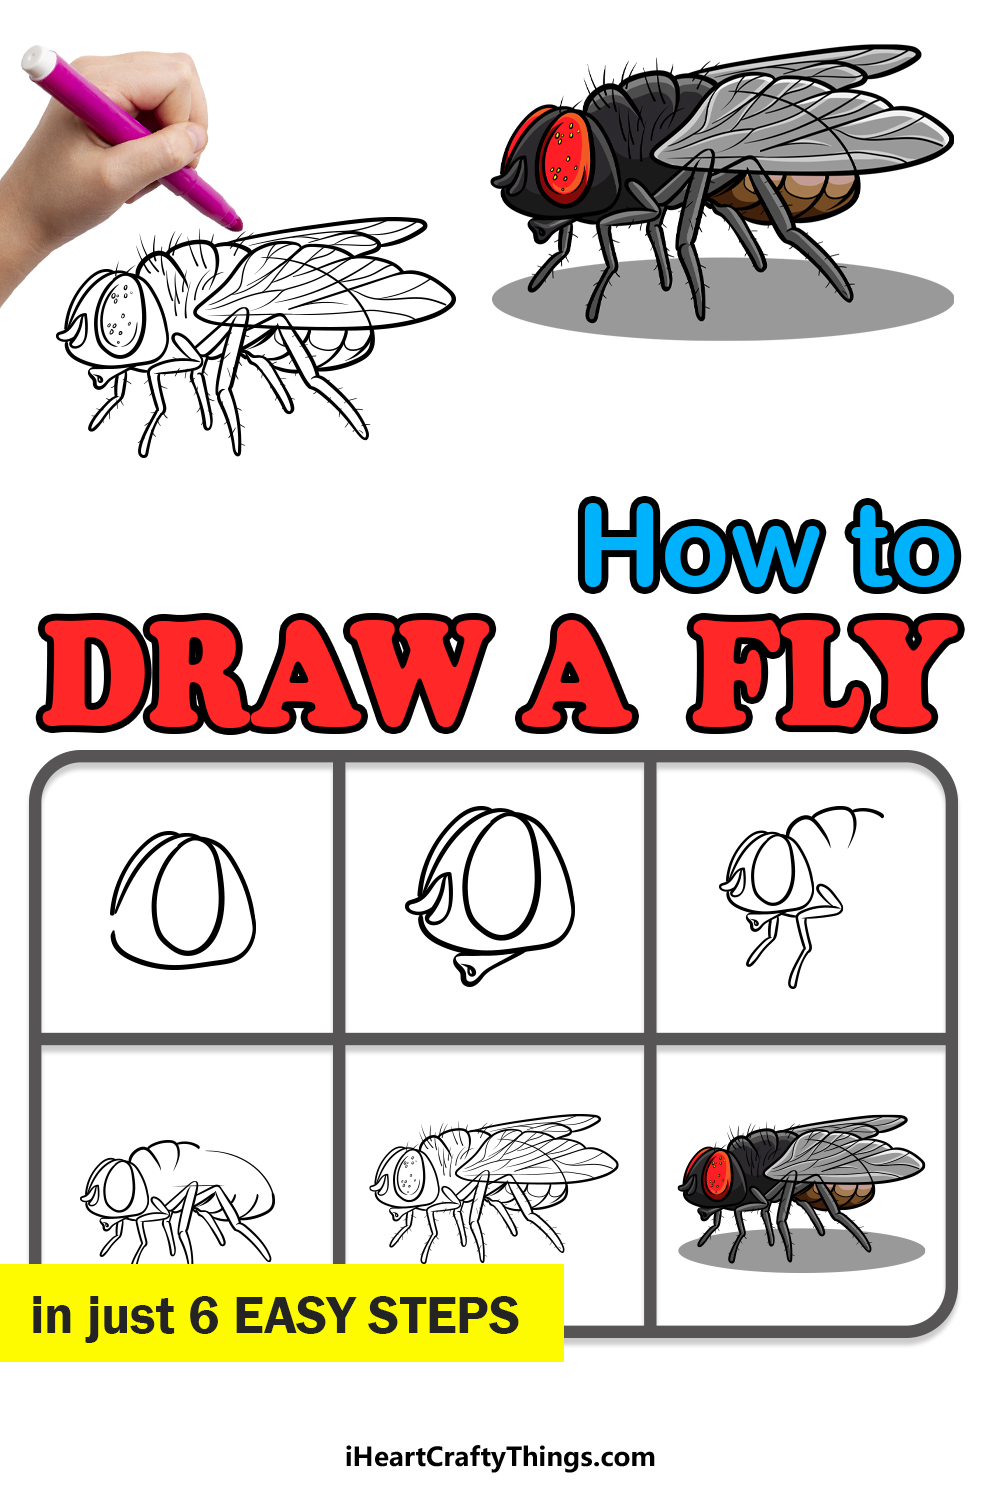
This step-by-step guide on how to draw a fly will show you how easy and fun it can be to draw one!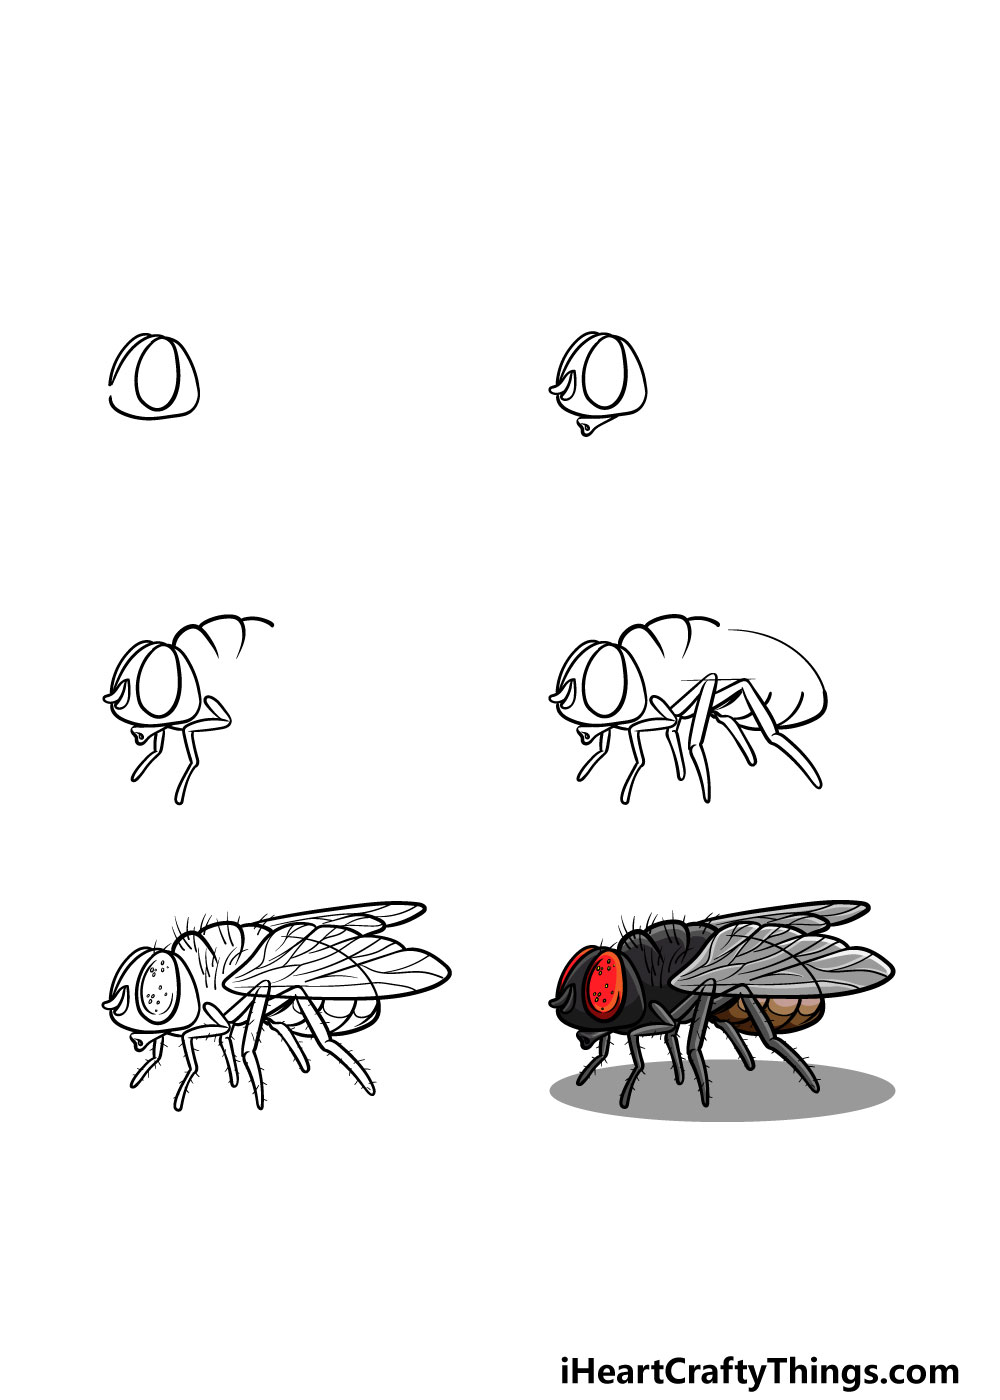
How to Draw A Fly – Let’s Get Started!
Step 1
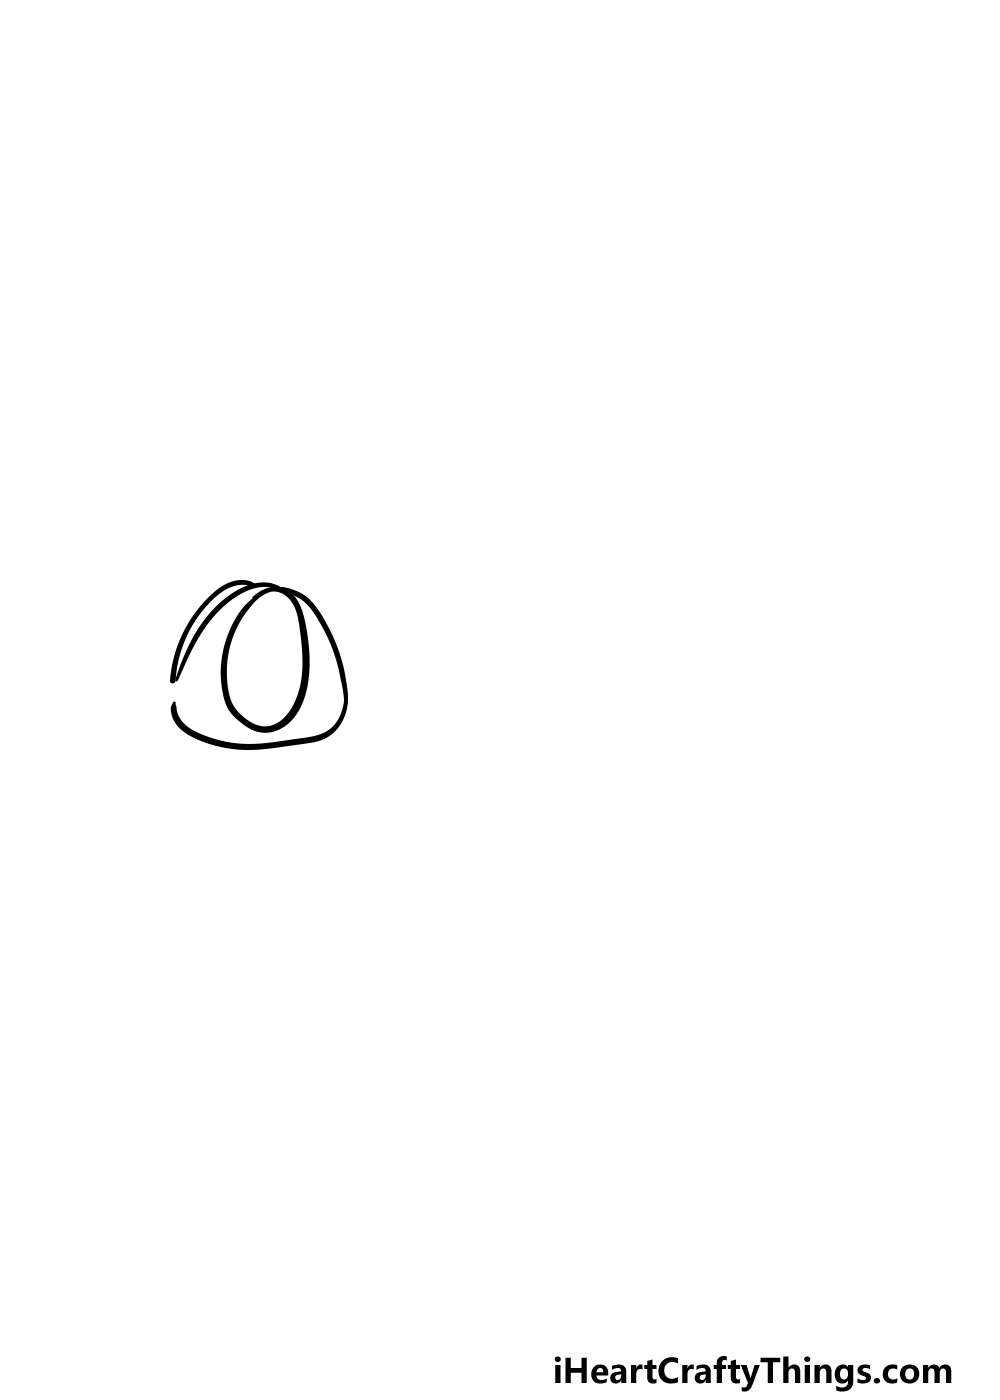
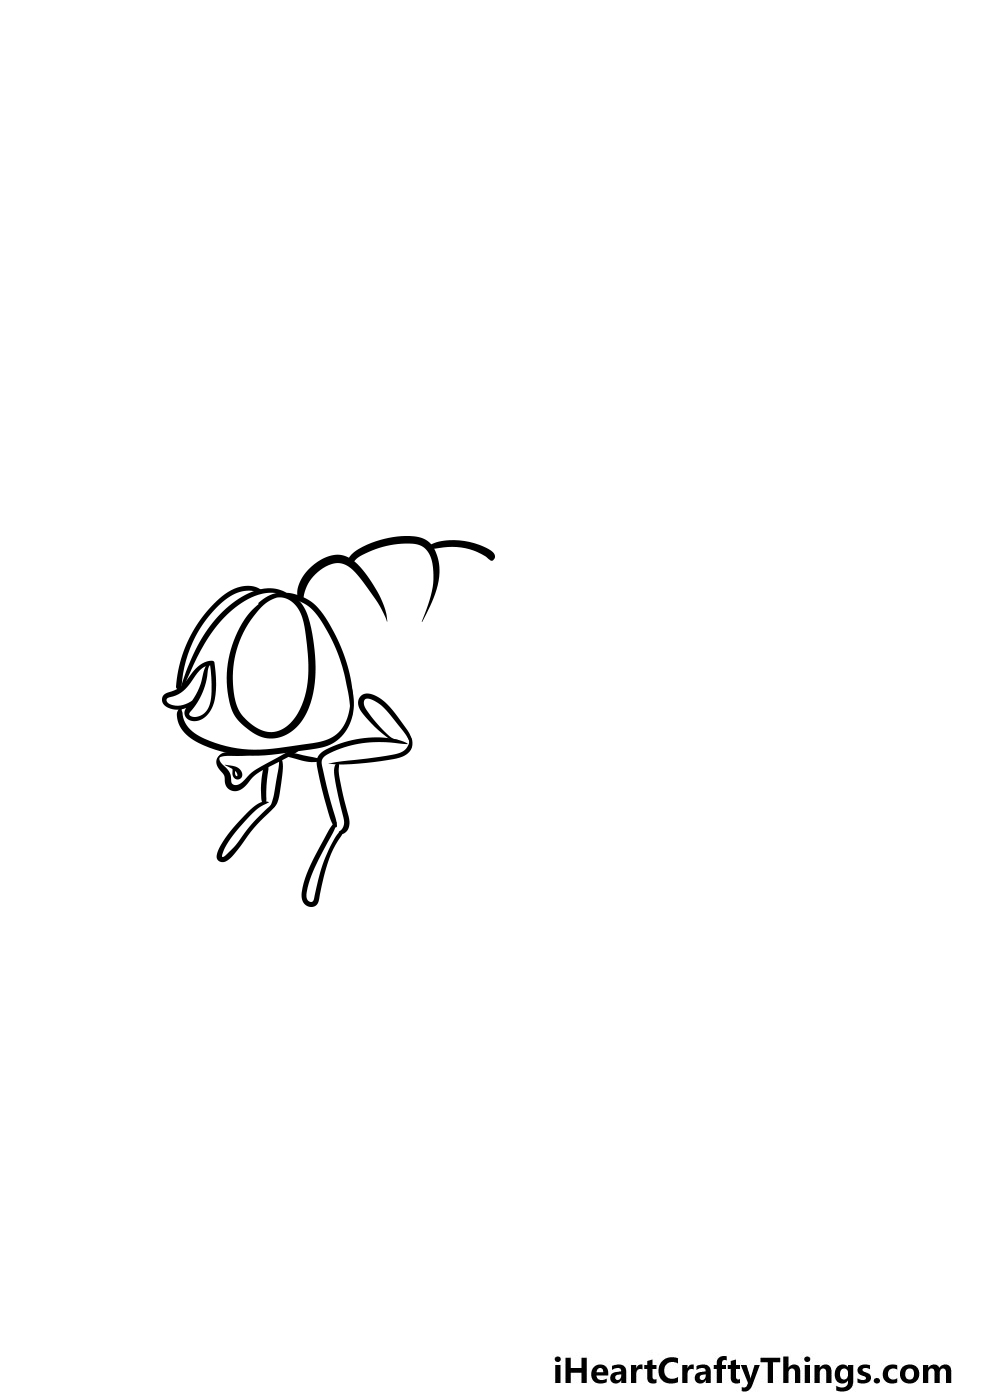
Flies may be pretty small, but there is a lot of detail packed into their little bodies. To help with that detail, we will be drawing some rough outlines with a pencil in this first step of our guide on how to draw a fly.
Using a pencil will make it much easier to plan out the basic details and structure of the fly. With that in mind, simply use your pencil to replicate the lines that we have in our reference image.
They will look fairly basic for now, but we will be adding a lot more detail soon. Once you have the pencil outlines done, you can then use your pen to go over the head of the fly.
Its eye will also be drawn with a large oval shape, as shown in our reference image.
Step 2 – Start drawing some detail for the face
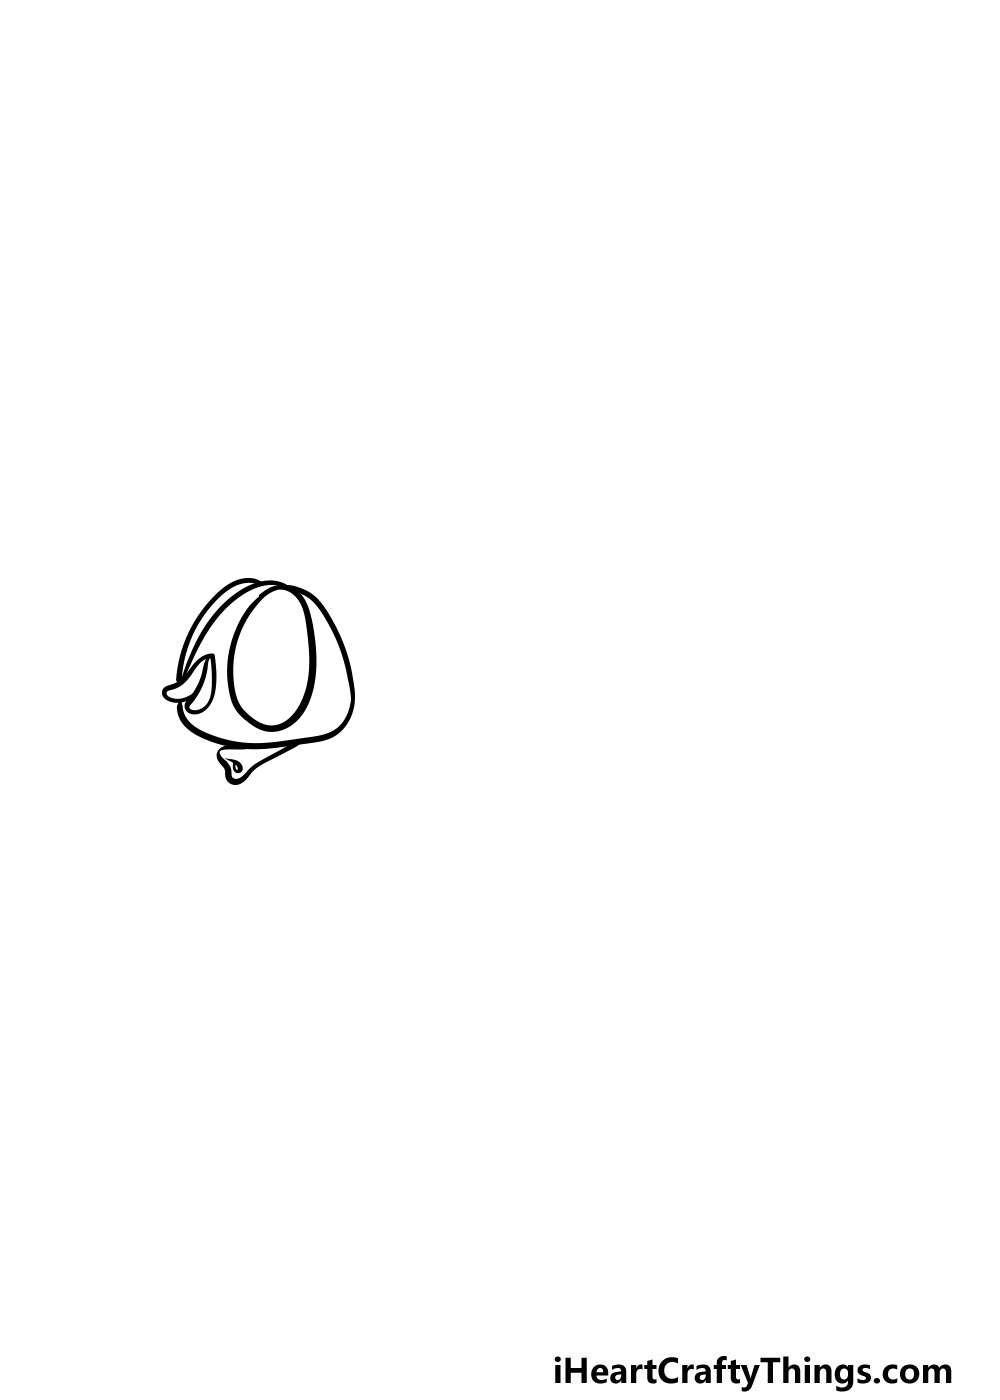
For this second part of your fly drawing you will be adding some elements and details to the head of the fly.
These will include some small shapes for the feelers on the face and a longer shape at the bottom.
This longer piece is called the proboscis. With these drawn, you can then move on to the next step!
Step 3 – Continue adding pen lines to your fly drawing
We will continue adding pen details and lines in this step of our guide on how to draw a fly. For this part, you can draw over the two front legs of the fly to start off.
Then, you can use three curved lines for the back of the fly as it appears in the reference picture.
Step 4 – Draw the remaining legs and abdomen
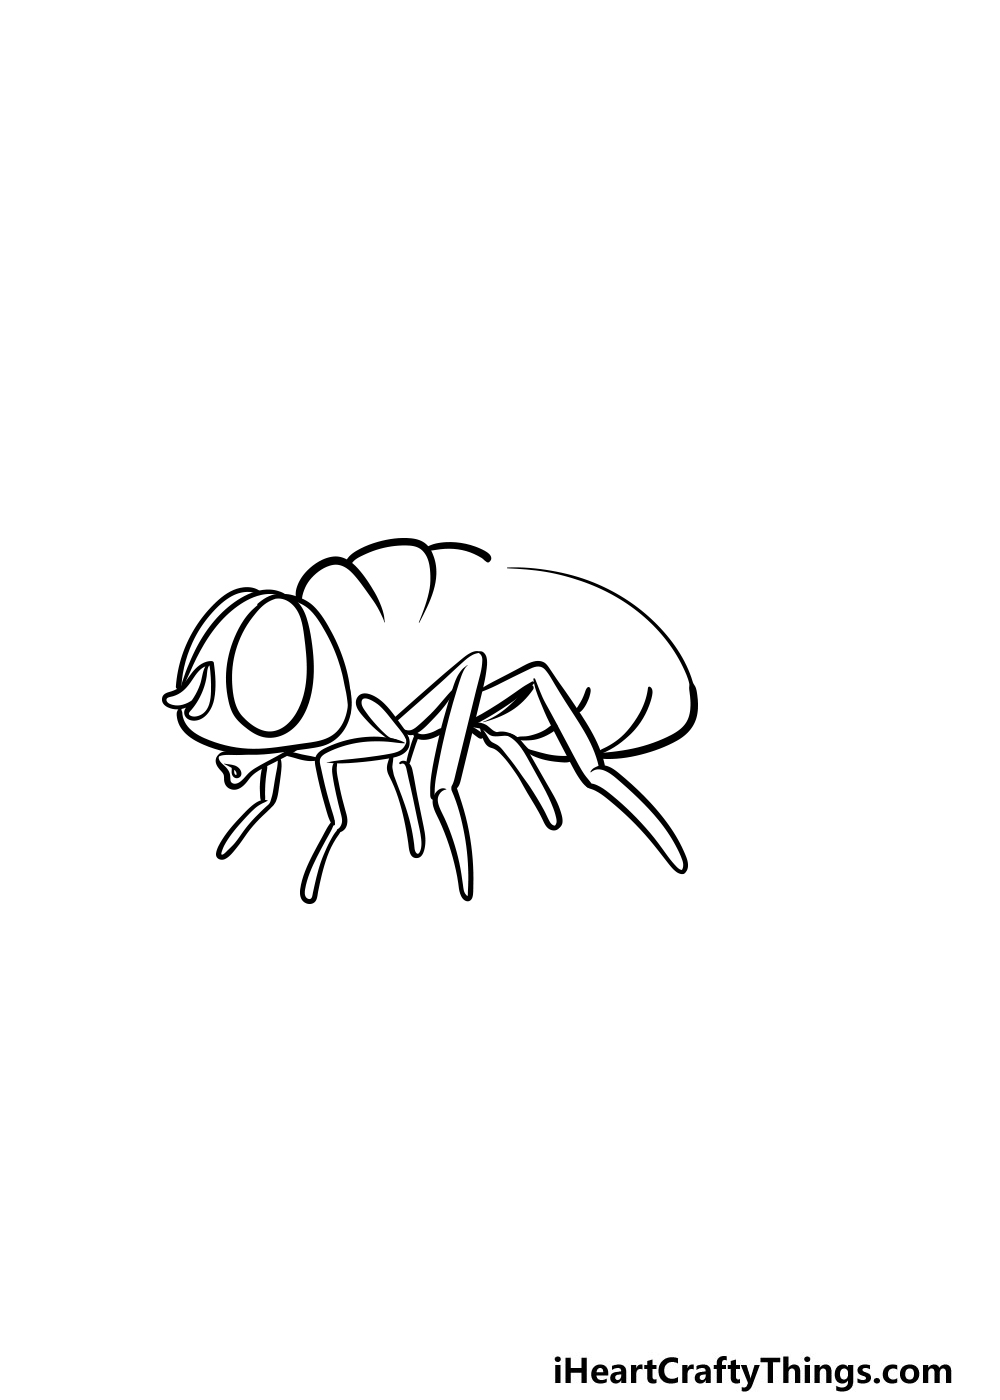
Continuing on, you can draw the remaining legs of your fly drawing. Simply go over them in the same way that you did the other ones in the previous step.
Then, once you have all the legs drawn you can draw the back section of the fly.
This area is called the abdomen of the fly, and it can be drawn with a few simple curved lines.
Step 5 – Finish off the final details of your fly drawing
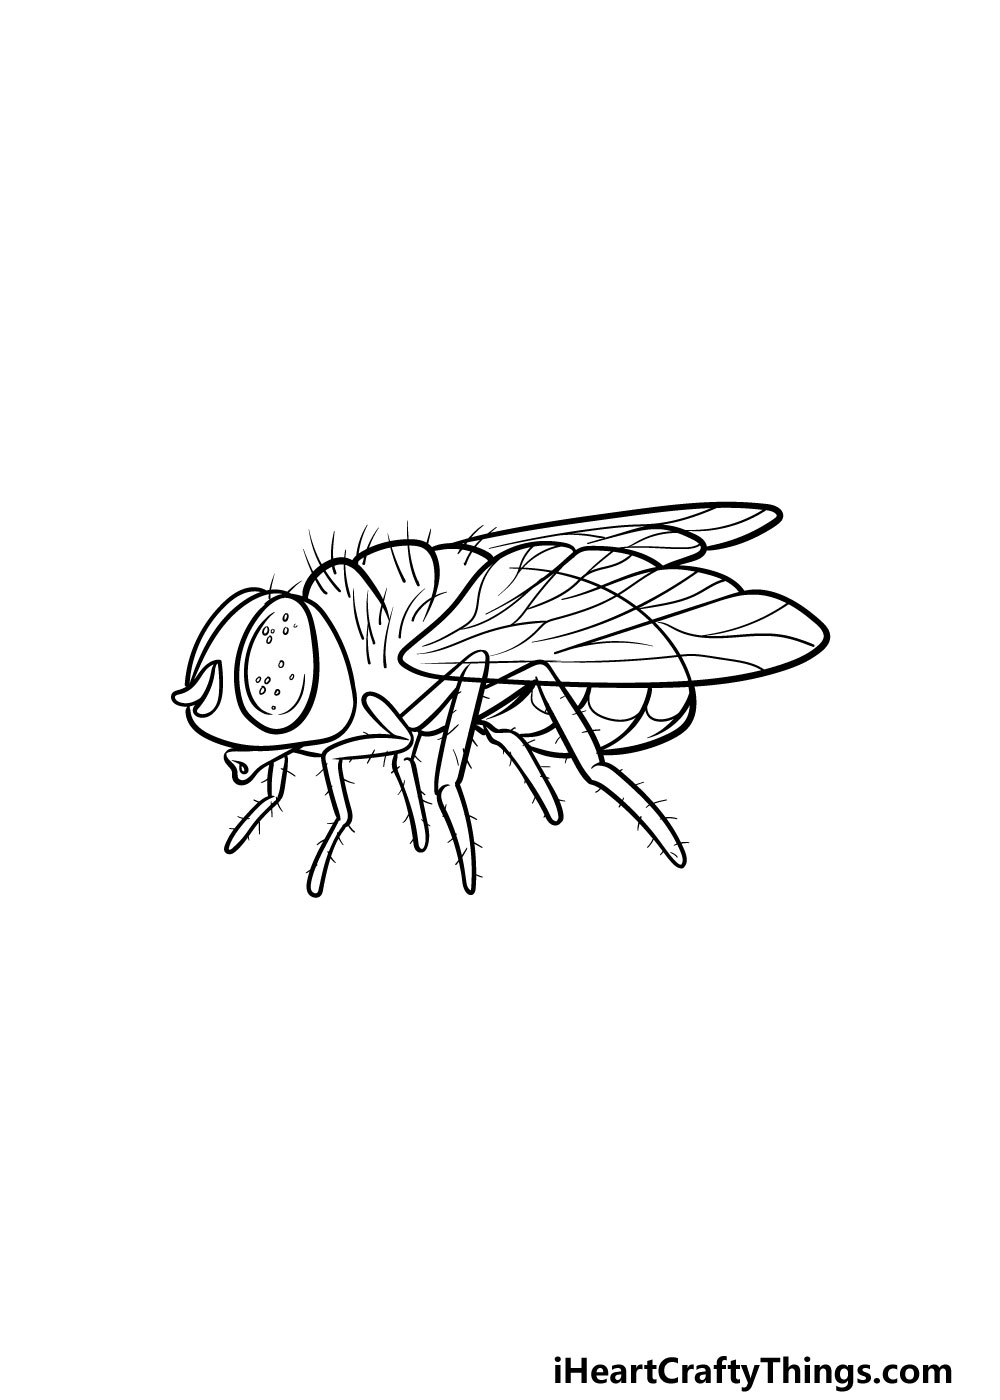
There are a lot of details to add in this step of our guide on how to draw a fly, so let’s take it slow and finish it up to have you ready to color in! Before you start adding details, you can finish off the wings of the fly as shown.
Then, once those are done you can erase all remaining pencil lines to clear up the image as you start adding detail.
As you can see in our reference image, we will be adding lines and dots all throughout the fly.
Areas such as the wings, the eyes and the limbs will get a lot of detail added, but you can add detail to every part of the fly. This will make the fly look more hairy like a real fly.
These are the details that we would add, but you should also add some of your own that you may like! One fun idea would be to draw a nice background.
Because flies are so small, that means that you could draw some giant versions of everyday objects in the background! Maybe the fly could also be sitting on some food for another idea.
What fun ways can you think of to finish off this image?
Step 6 – Finish off your fly drawing with some color
You’ve worked hard on this fly drawing of yours, and now you can relax with some coloring fun to bring it to life!
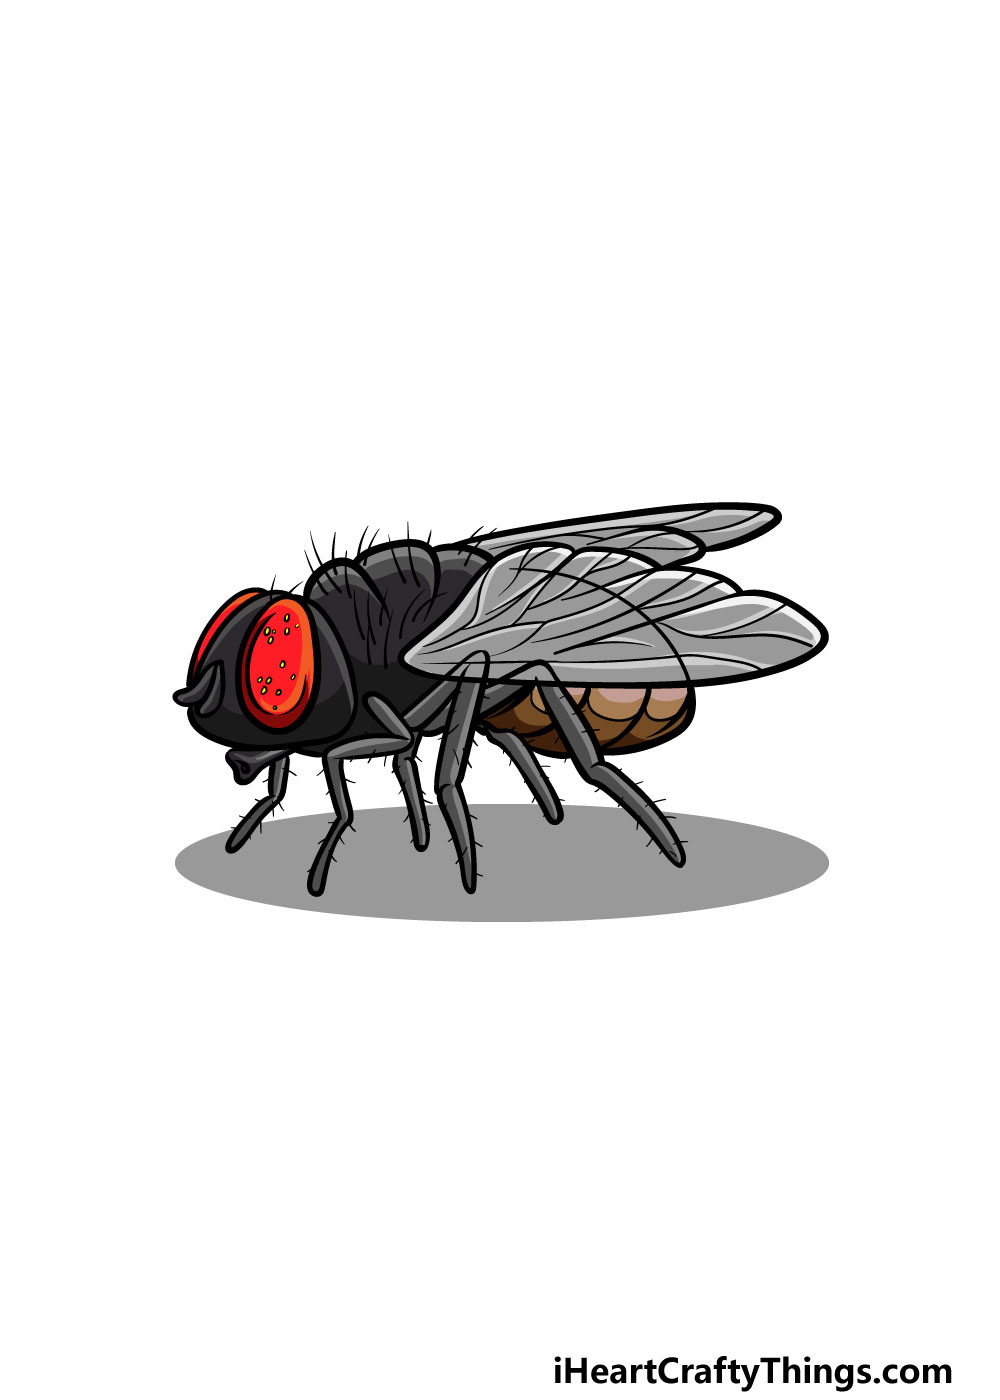
For our reference image, we used greys, blacks and browns for the fly, and we finished it off with a splash of red for the eyes.
This is just one way that you could color in your fly drawing, so be sure to get creative with it!
If you keep the colors for the fly darker and more muted, you could contrast it by adding some lovely bright colors to the background or any extra details you may have drawn.
You could also go for a more stylistic image by using your favorite bright colors on this fly! Whatever you go for, you can also get some color variation by utilizing your favorite art mediums and tools to color.
Whether you use some paints and watercolors or go for some colored pens and pencils we know it will look incredible!
Do this to take your fly drawing to the next level
Create some artistic buzz as we show you some tips to make your fly sketch even better!
The worst thing about flies is that when you see one, there are probably more around as well. For that reason, you may want to add some more to this drawing of a fly.
Luckily, flies usually look very similar, so all you would have to do is follow the guide and add as many more to the image as you like.
You could change small details such as the position of the wings and legs to differentiate them.
How many flies would you like to add to the picture?
The fly that we created for this picture is sitting pretty still, but you could make it more animated to make the picture even more interesting. This could be done in a few simple ways!
For example, you could make it look like the fly is flying around by changing the wings and adding some motion lines around it. What are some other poses you could use for this fly?
If you leave food out, chances are you will find some flies buzzing around it before you know it. You could show off this aspect of these bugs by adding some food for the fly to sit on.
To do this, you could add some of your favorite food to this fly drawing. Remember that the food will look big compared to the fly, so remember to work in that perspective!
Once you have added all of your own ideas to this fly sketch, you could then finish it off with a background. This is something you could do whether you went with one, two, all or none of our previous suggestions!
Flies can be found in all manner of places, so you would have many possibilities available to you. It could be a simple house setting, or you could show the fly somewhere more exotic like a desert.
Where are some cool places you could put this fly?
Your Fly Drawing is Complete!
With the colors and final details added, that means that you have reached the end of our guide on how to draw a fly!
With this guide, we aimed to show you how even a more complicated drawing can be made so much easier when you have some steps to follow.
We also hope that this guide made it not only easier for you but that it was also lots of fun to work through!
Now that you have finished our guide, you can keep the drawing fun going by adding your own elements, details or background.
This is where you can really show off your creativity, so we can’t wait to see what you come up with!
Please be sure to visit us on our website when you’re ready for more drawing fun! We have many guides for you to enjoy and we upload new ones often as well!
Be sure to check in frequently to never miss out.
We would also love to see your amazing fly drawing, so we hope that you will share it on our Facebook and Pinterest pages when it’s finished!