Of all the animals in the animal kingdom, lobsters have to be some of the strangest when it comes to appearance!
These curious crustaceans almost look like they could be from another planet with their big pincers and red exoskeleton.
Their unusual appearance can make them fun to replicate in art, and that means that learning how to draw a lobster can be quite useful if you want to do that!
Once you have reached the end of this guide, you will know exactly how it’s done.
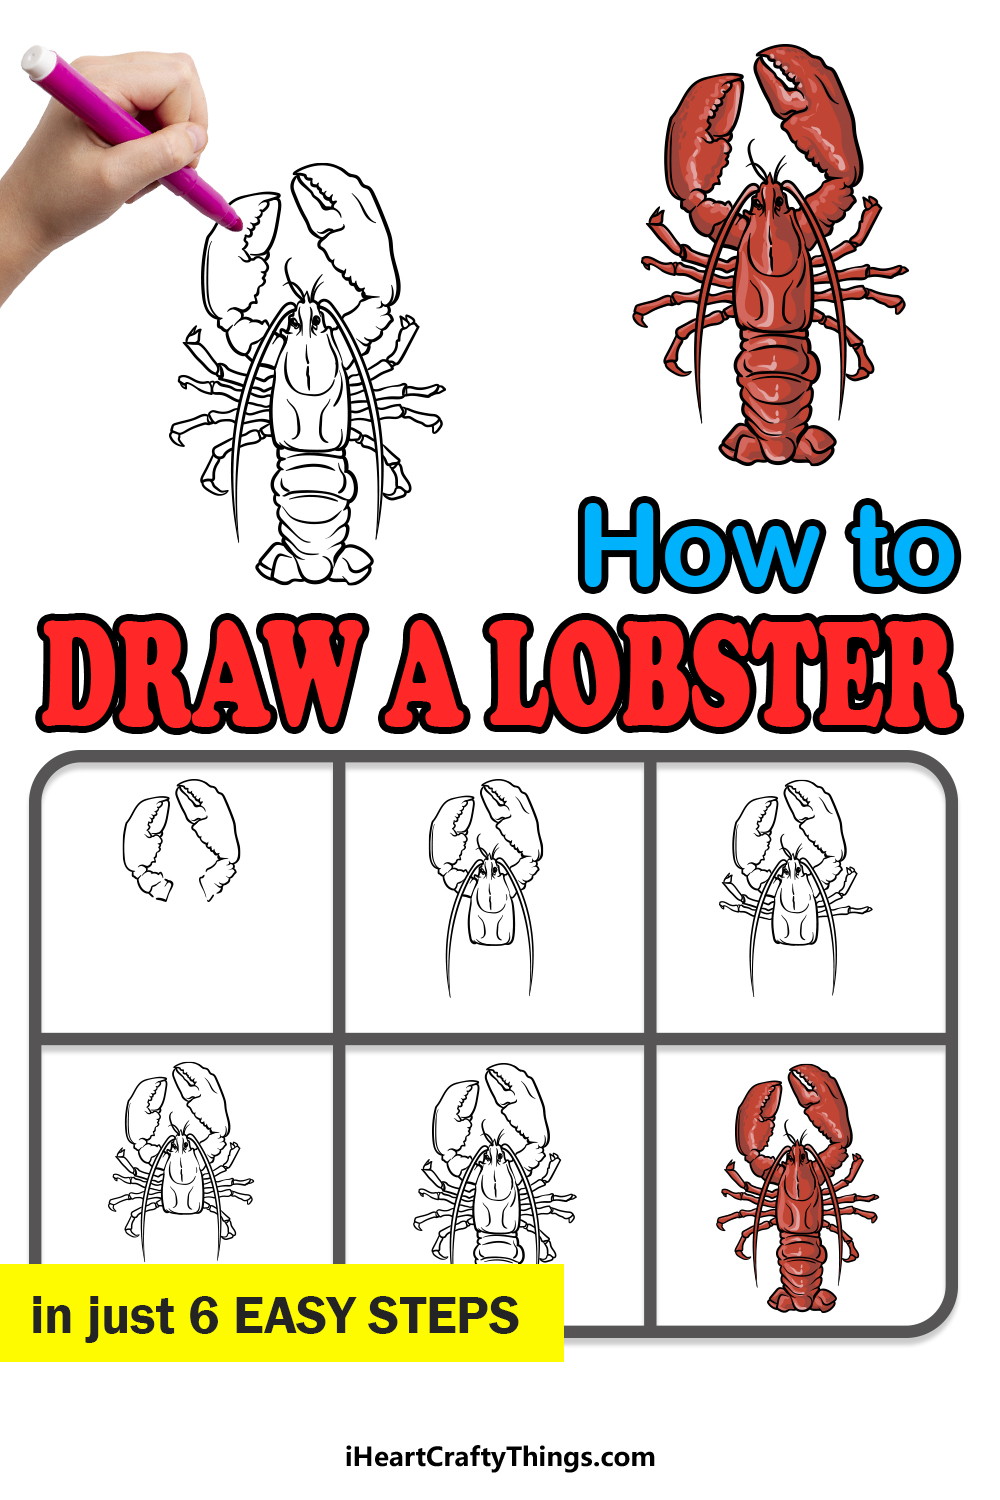
We hope you enjoy this step-by-step guide on how to draw a lobster in just 6 easy steps.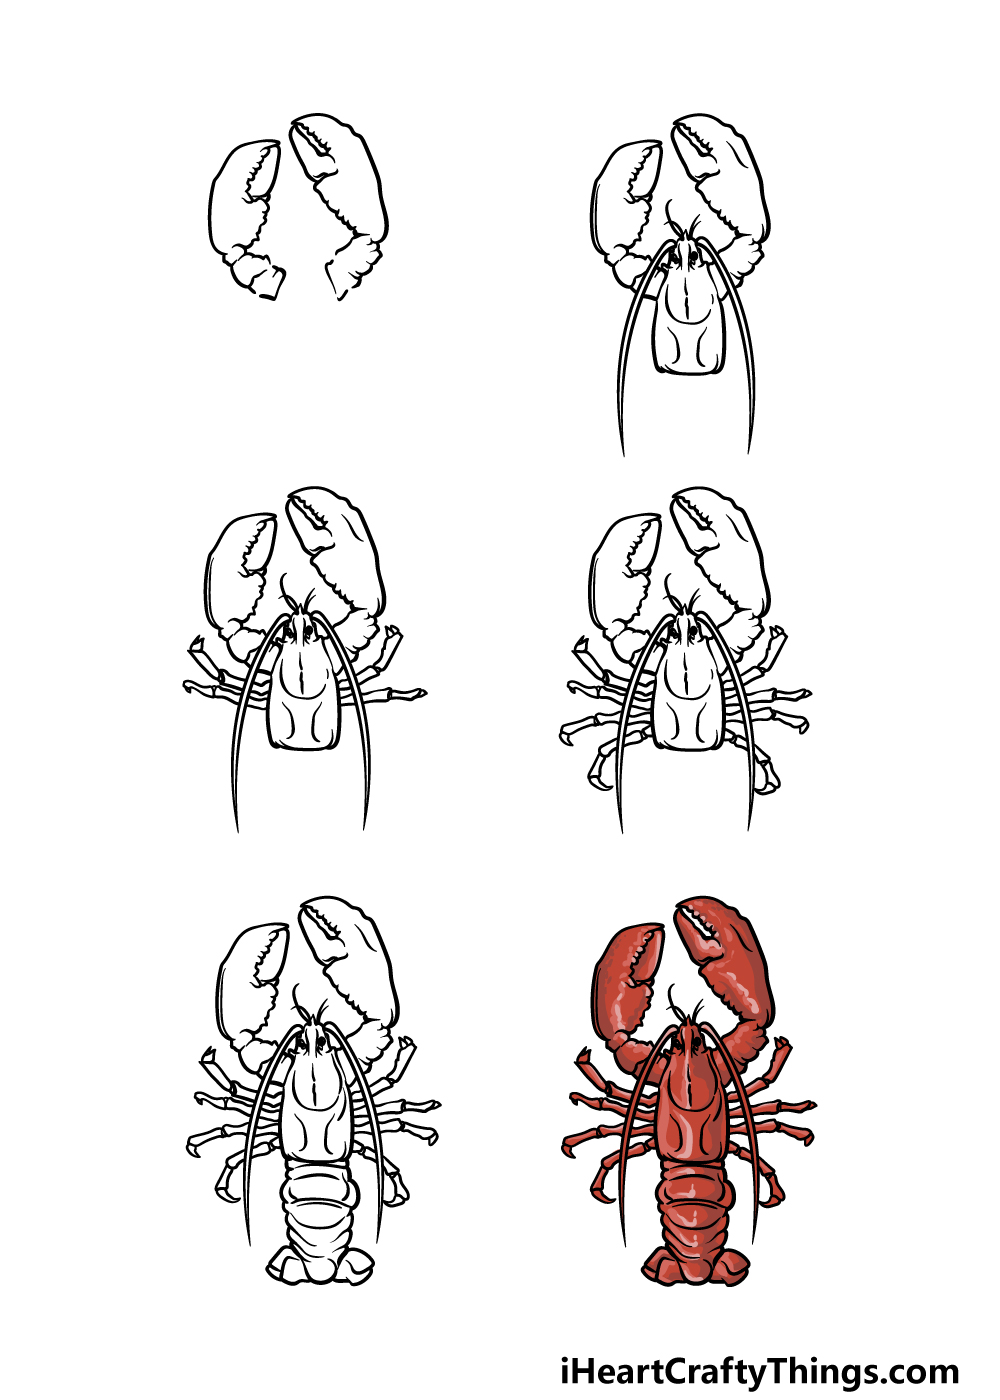
How to Draw A Lobster – Let’s get Started!
Step 1
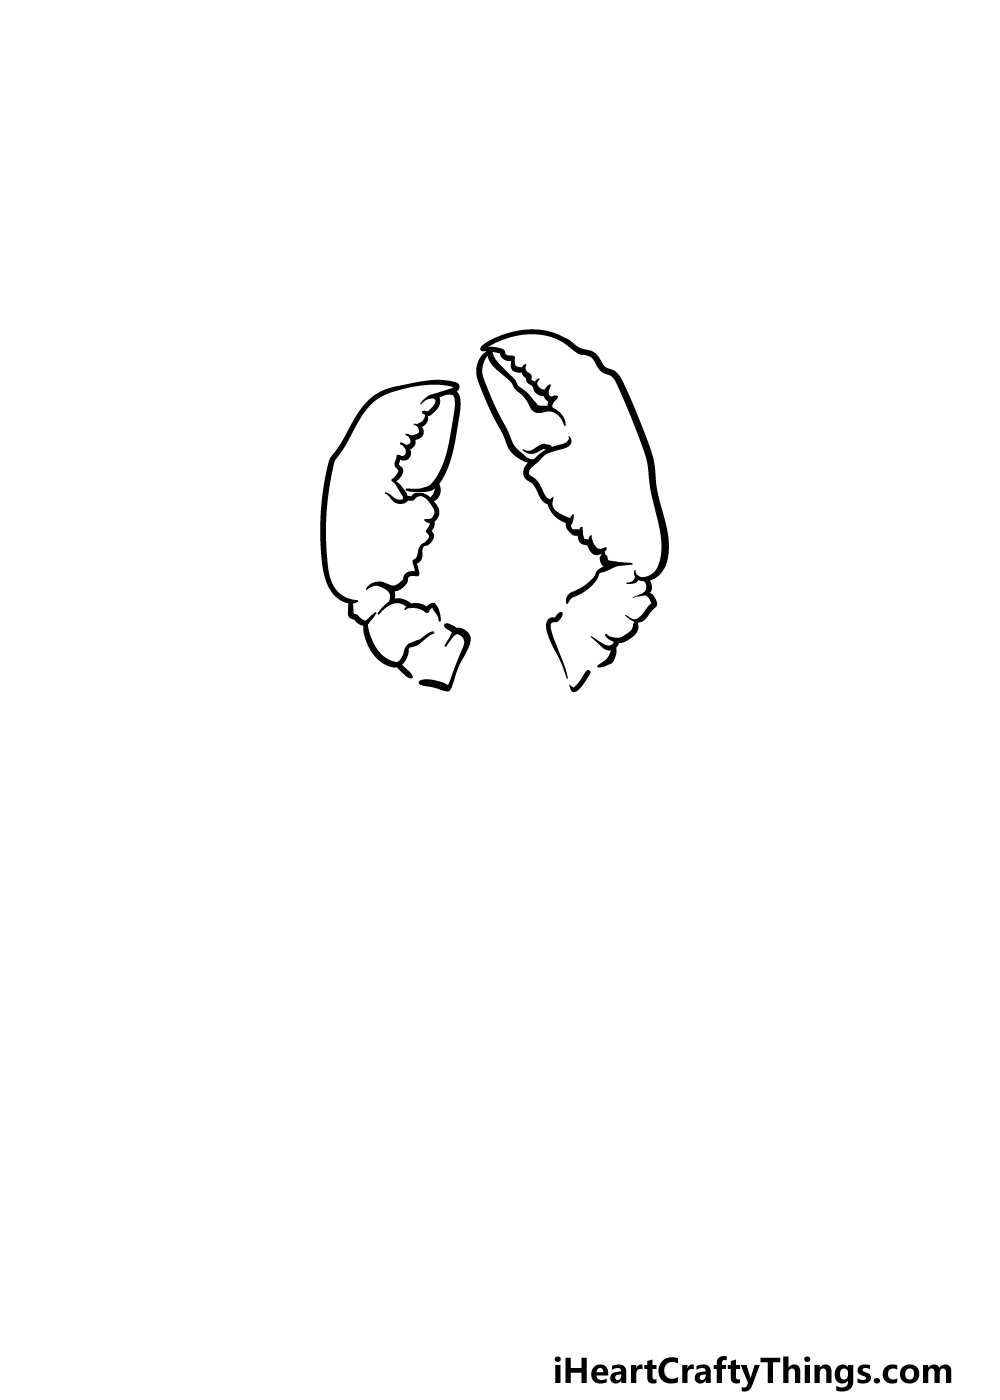
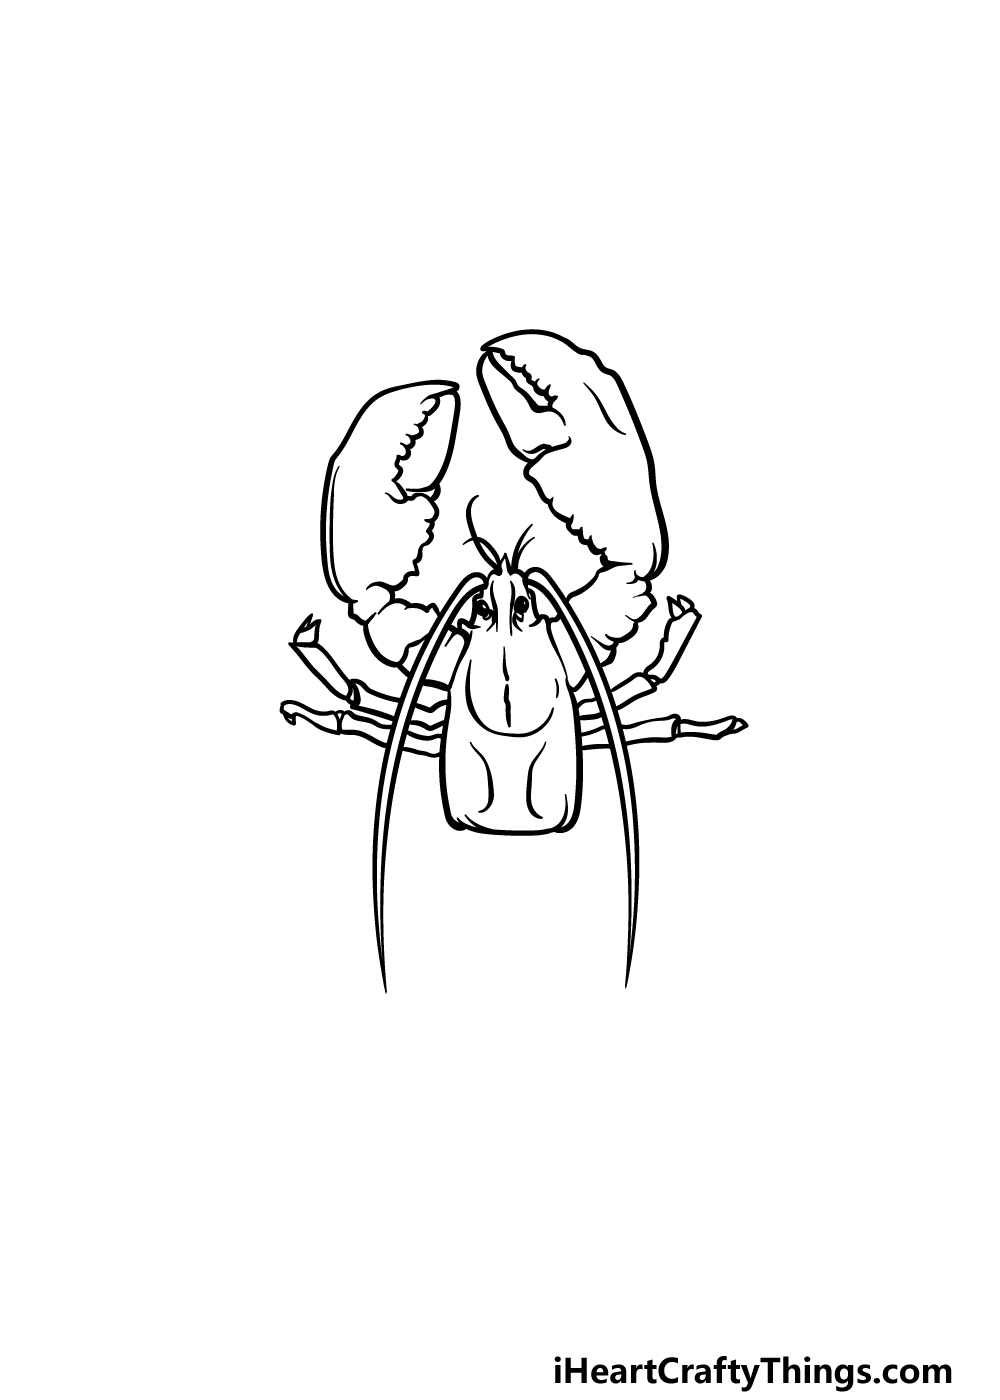
In this first step of our guide on how to draw a lobster, we will start with probably its most recognizable features: the pincers on its arms!
The pincers will be quite large and thick, and the lines we will be using will help to make them look a bit more realistic.
The outer edge of the pincers will be drawn with a smooth yet slightly rounded line.
Then you can draw the actual claws of the pincers, and finally the inner edge of the pincers will be created with some small bumpy lines.
Once you have drawn the pincers, you can finish off by drawing the arms that they are attached to.
When drawing the arms, be sure to leave a tiny gap in them where they appear in the reference picture. This will be for the antenna of the lobster which you will be drawing later.
Step 2 – Next, start drawing the head and body of the lobster
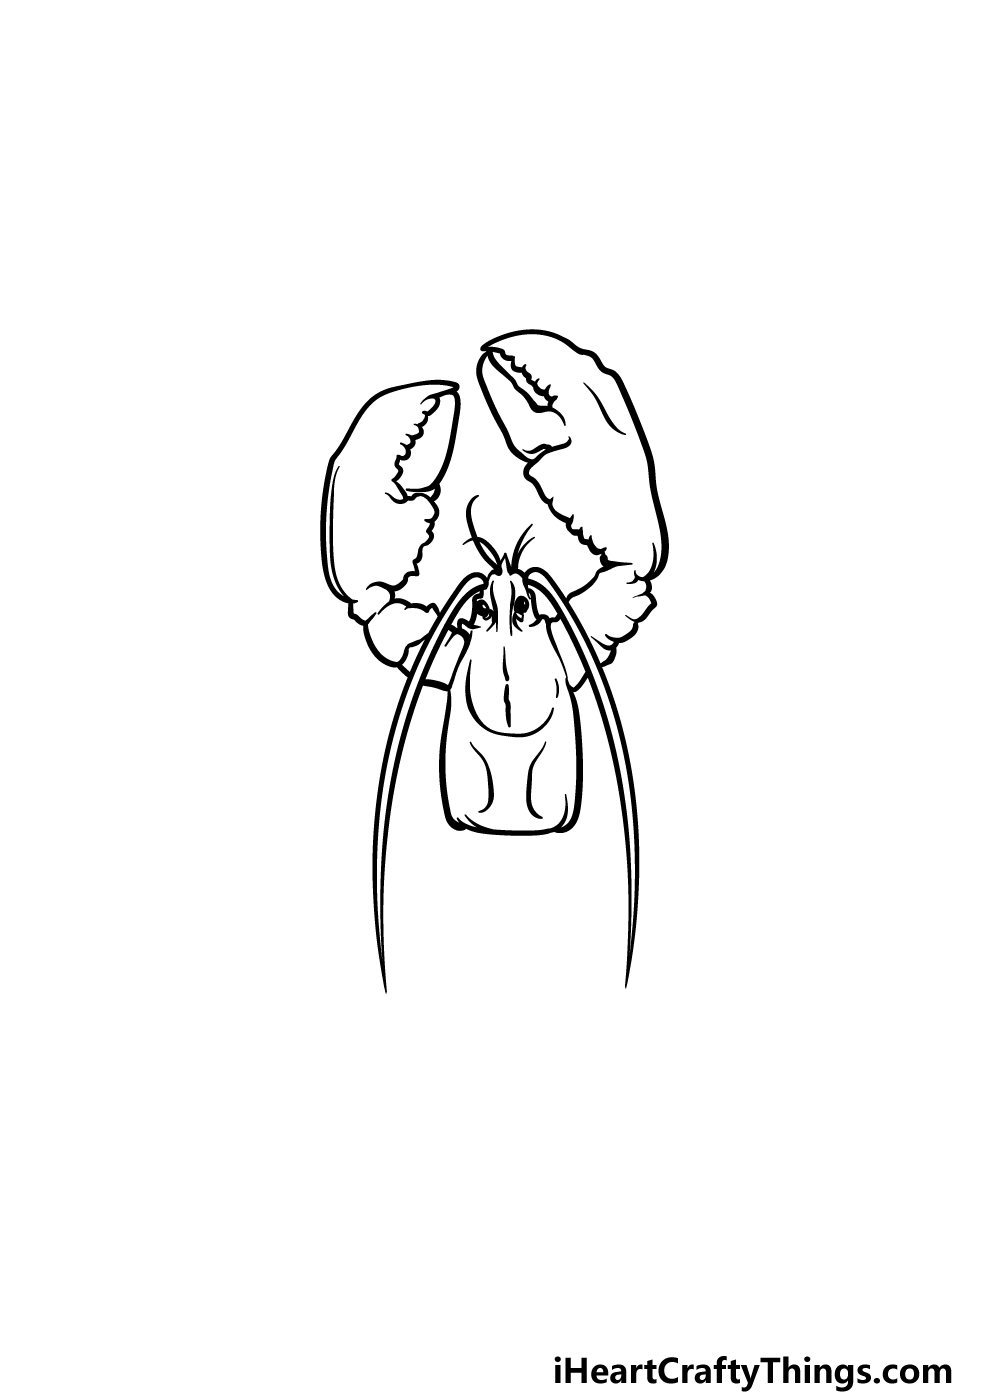
Now that the arms and pincers are complete, we can move on to the head and body of the lobster drawing. The face will be thin and pointed with two black dots for the eyes on it.
Then, you can draw some small lines coming out from the front of the face. The body will be drawn with a curved yet smooth line, and will have some lines inside of it for more structural detail.
Finally, you can finish off this step by drawing the long and tin antennae coming down from the head.
These will fill in the gap in the arms that you left previously.
Step 3 – Now, draw the first four legs of the lobster
It’s time to start drawing some legs in this step of our guide on how to draw a lobster. These will start right underneath where the base of the arms starts.
Each leg will be drawn in two sections using some smooth lines with a slight curve to them.
That will do it for this step, and you’re ready to proceed!
Step 4 – Next, draw four more legs
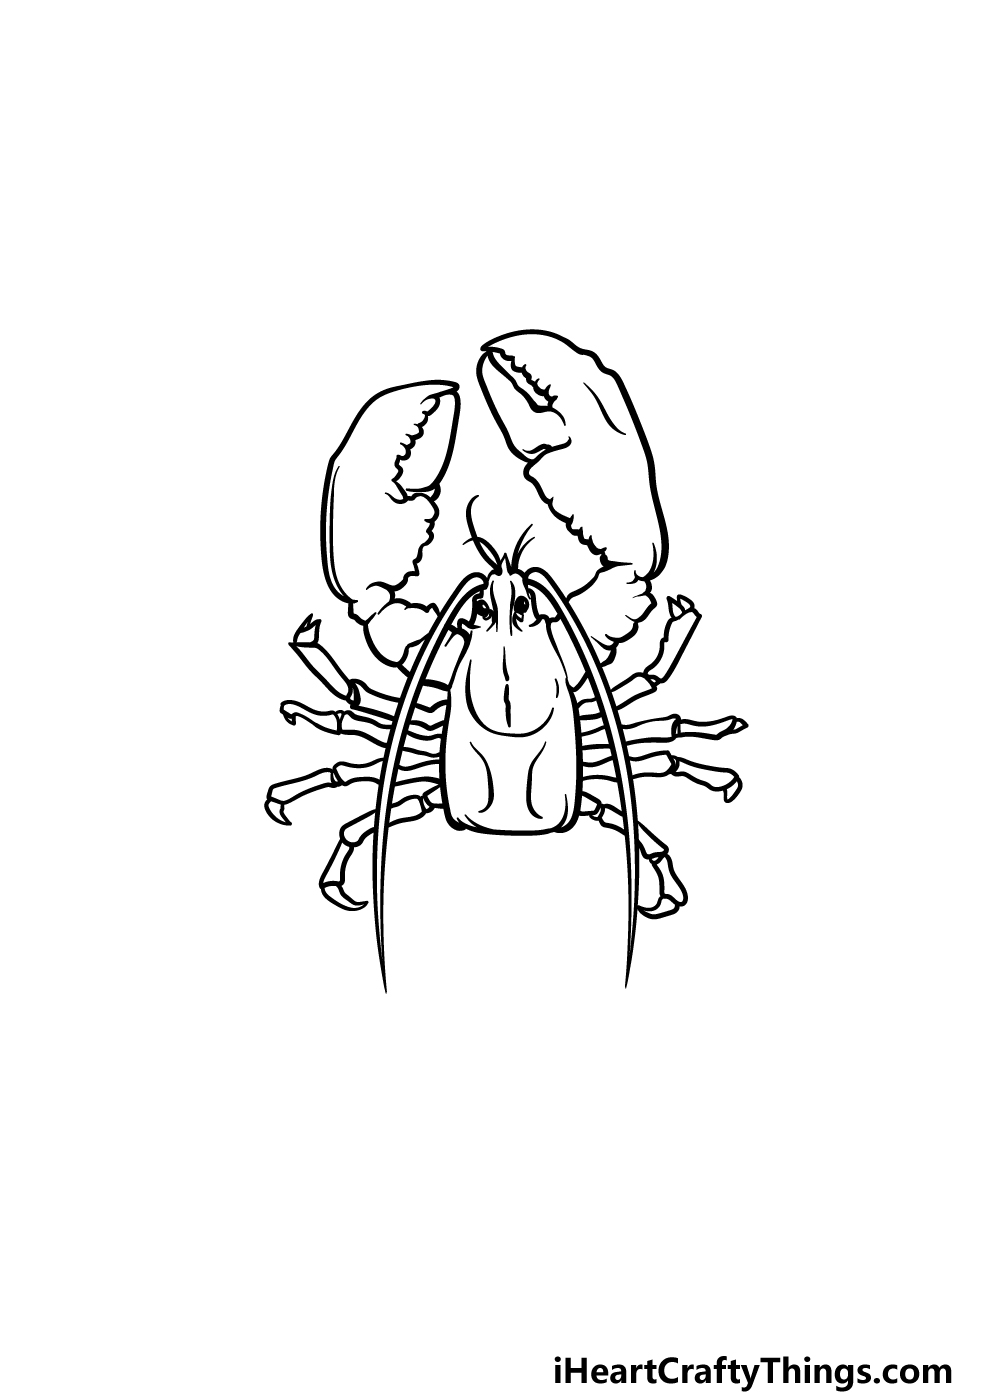
Now that you have drawn some legs, you should have no problems adding some more to your lobster drawing!
The first two will look quite similar, if maybe slightly straighter, than the first four that you drew. The remaining two legs will look a bit different, however.
These legs will be drawn in three segments instead of two, yet the first one will be very short. Then, the final segment of the leg will curve quite sharply backward.
Once you have drawn these legs and are happy with how they look, you’re ready for the final elements in the next step!
Step 5 – Now, finish off your lobster drawing
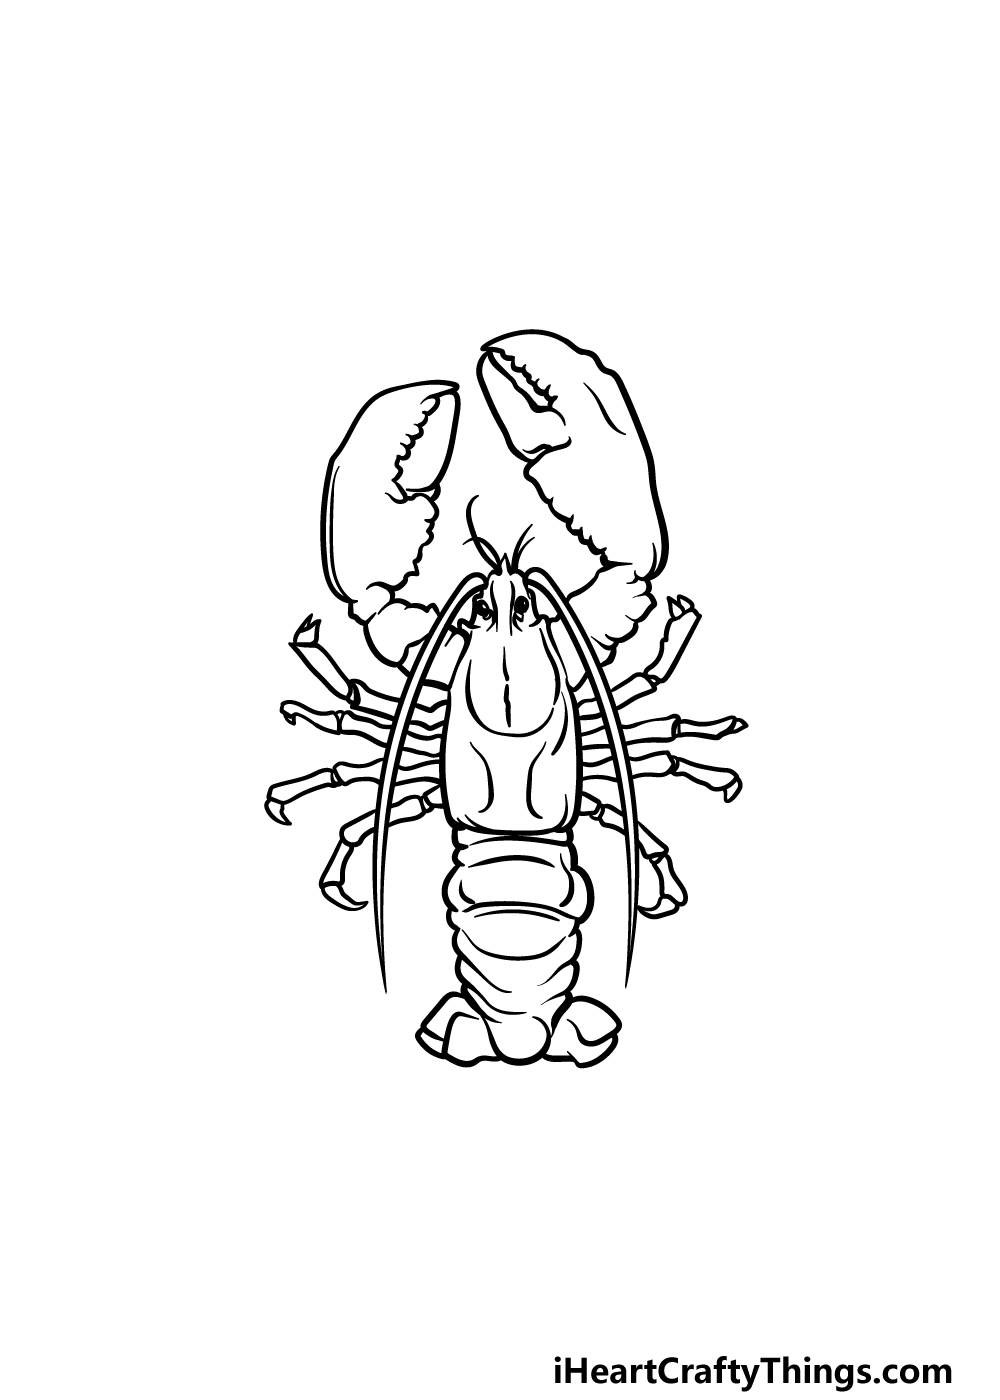
This step of our guide on how to draw a lobster will be all about finishing off the body of the lobster. This will be focused mainly on the tail of the lobster.
The outline of the tail will be drawn with some bumpy lines going downward. There will also be some slightly curved lines going horizontally down the tail, as shown in the reference picture.
You can then finish off by adding the rounded end of the tail that’s separated into two parts. That will do it for all of our details in this guide, but you don’t have to move on to the final step just yet!
You could also add some extra details of your own to really finish it off.
Some ideas could include drawing a background to show the kind of environment this lobster is in or you could draw some more lobsters for it to hang out with!
If you did draw a background, then you could also add more fish and other sea life for an extra fun detail.
How will you finish off this lobster for the final step?
Step 6 – Finish off your lobster drawing with some color
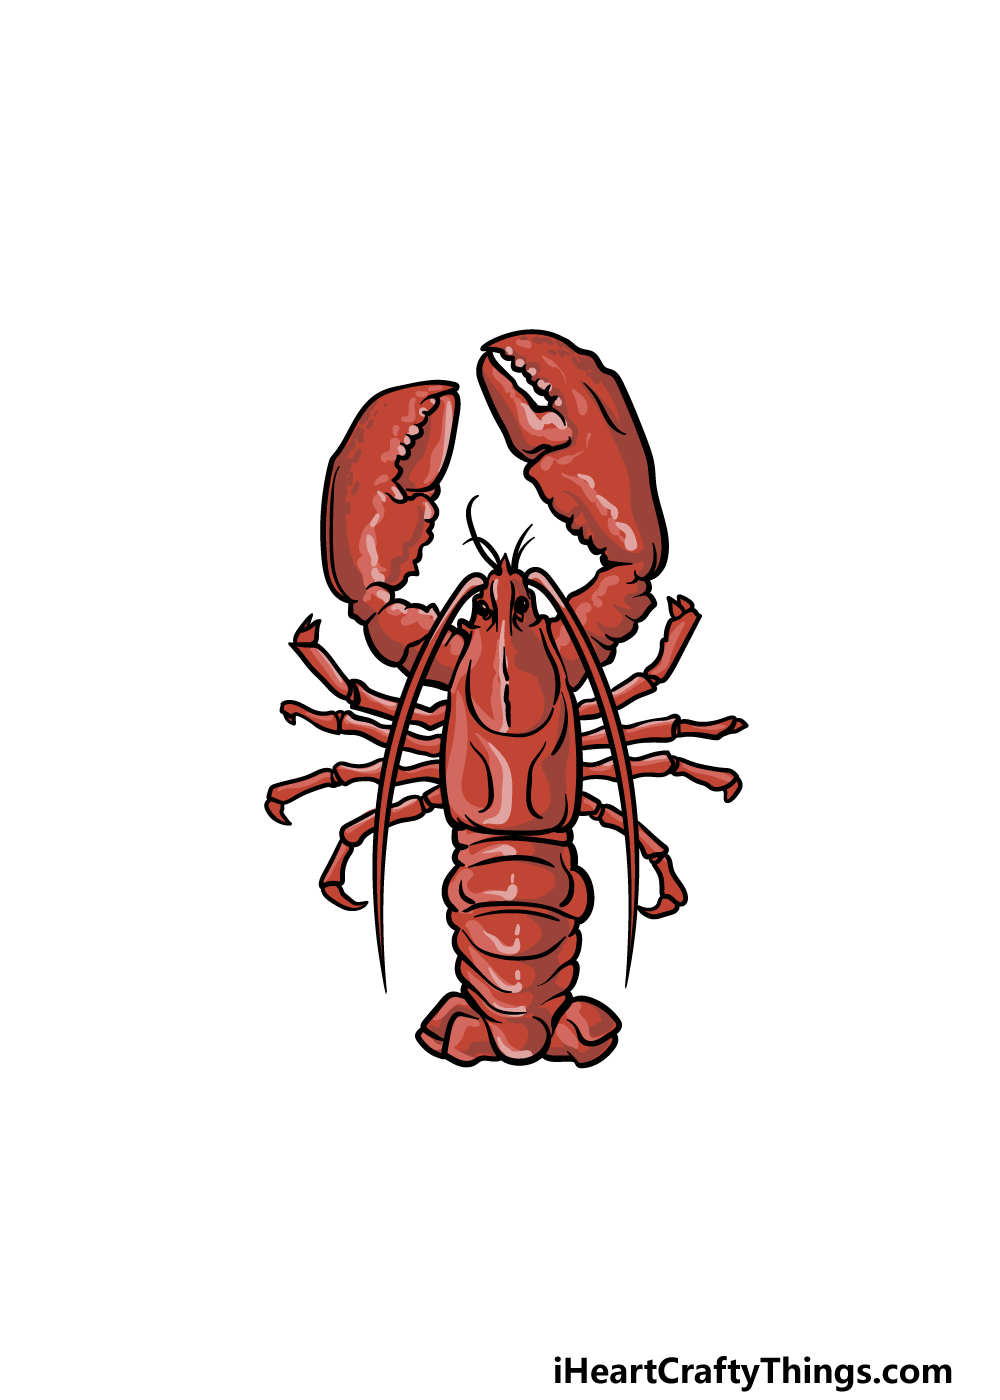
Now that you have finished off your lobster drawing, there’s just one thing left to do! Now you can relax with some coloring fun as you bring this drawing to life.
In our reference image, we went with some shades of red to create a classic lobster look, but you don’t have to use the same colors we did!
You could go for different shades of red or use some more of your favorite colors to create your own lobster variation.
Then you can decide on how you will bring these colors to life with your art mediums.
These could include painterly mediums such as acrylics and watercolors or more precise ones like colored pens and pencils. We can’t wait to see what you decide on!
5 Tips To Make Your Lobster Drawing Even Better!
These tips will have you swimming in ideas for your lobster sketch!
In this guide, we created a highly detailed version of this creature for your lobster drawing. This is a great look for this creature, but there are many different drawing styles you could use as well!
You may want to make the lobster look more cartoony, for instance. If you want to try out a few different styles, maybe you could show them near to one another so that you can compare them.
No matter what styles you try to draw in, it would be fun to draw a few lobsters together. That would be a great way to make your drawing of a lobster even more interesting!
You could simply follow the guide again and then change a few details to make each one unique. That would make for a real lobster party!
When you need a break from drawing lobsters, you could also add some different ocean creatures around them. There are so many different animals in our oceans and it can be hard to narrow it down!
If you have some favorite fish, crustaceans or any other creatures then you should certainly add them here.
Next, you could really take this lobster drawing to new heights (or depths) by adding a background. The background could be as complex or as simple as you want, and you could create all kinds of fun scenes.
You could keep it simple by using some coral, rocks and sand to create an ocean backdrop. There are lots of other environments you could create, so let your creativity flow and see what happens!
We tend to picture lobsters as red, and that is how we colored the one in this picture. This is just one of a few colors that lobsters can come in, however.
If you wanted to make your version more unique, you could try out a new color scheme! You could keep the colors a bit more realistic, but don’t be shy about using colors that are more stylistic.
Your Lobster Drawing is Complete!
As we mentioned at the start of this guide on how to draw a lobster, these are some of the strangest looking creatures under the sea, and that’s saying something!
We hope that our guide made it fun and easy for you as you replicated this incredible animal in your own artwork.
Don’t forget that you can also create your own variations by changing up the details, adding a background or getting creative with your favorite colors and art mediums. Be sure to let your creativity flow and have fun as you finish off your artwork!
This guide you have completed is one of many amazing guides we have for you on our website. Be sure to visit us there often to never miss out on the new guides we will be uploading soon.
We would love to see the creative ways that you finished off your lobster drawing, so once it’s done please be sure to share it on our Facebook and Pinterest pages!