


Get some directions on how to draw a compass by following this guide for kids! This tutorial will get you ready to make all sorts of adventurous art.
Compasses have been serving adventurous people in one form or another for hundreds of years as a tool of navigation. With modern technology, they aren’t used as prominently but some people still prefer their reliability.
They are also often used as a symbol of adventure and discovery, so there are many reasons as to why you may want to draw one. This guide will take you through the process of learning to do that, as I will walk you through each and every step.
Let’s get our drawing tools ready and begin this creative adventure by learning this design together!
Find Out How To Draw A Compass By Watching This
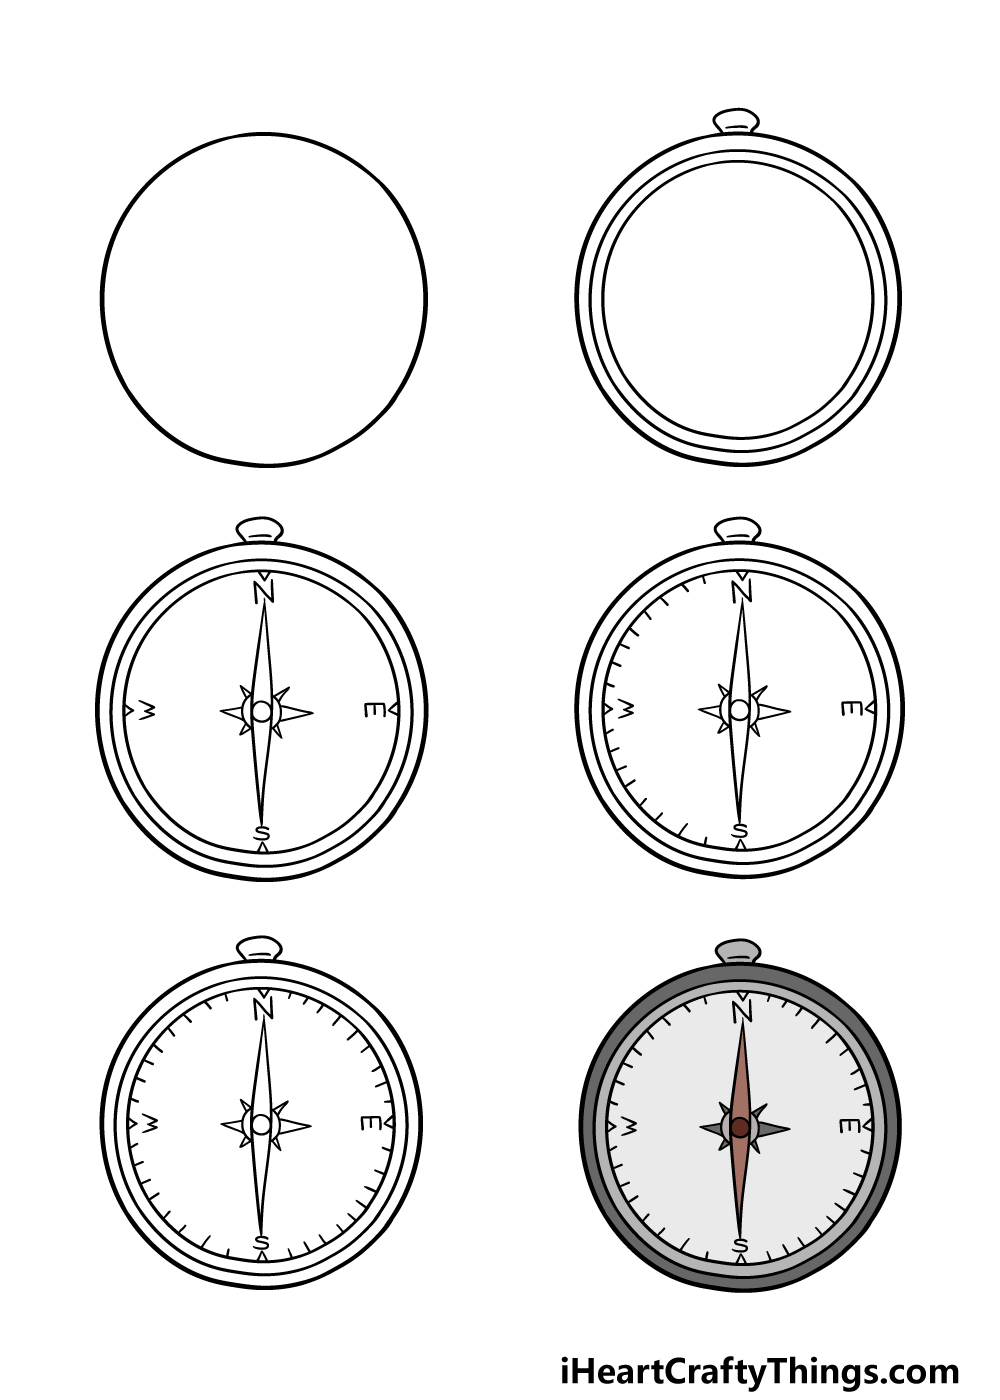
How to Draw A Compass – Let’s get Started!
Step 1

For this first step of our guide on how to draw a compass, we will be keeping it simple. All we will be doing for now will be drawing a perfect circle, and this will serve as the outline of the compass.
There are a few ways that you can go about drawing a perfect circle. The easiest way is to use a drawing compass (which looks very different from the compass you’re drawing now!)
These simple drawing tools make it so much easier to draw a circle using your pen or pencil. You can also trace around something round and flat if you don’t have a compass handy.
However you choose to draw it, you are ready to proceed!
Step 2 – Next, draw some inner details of the compass
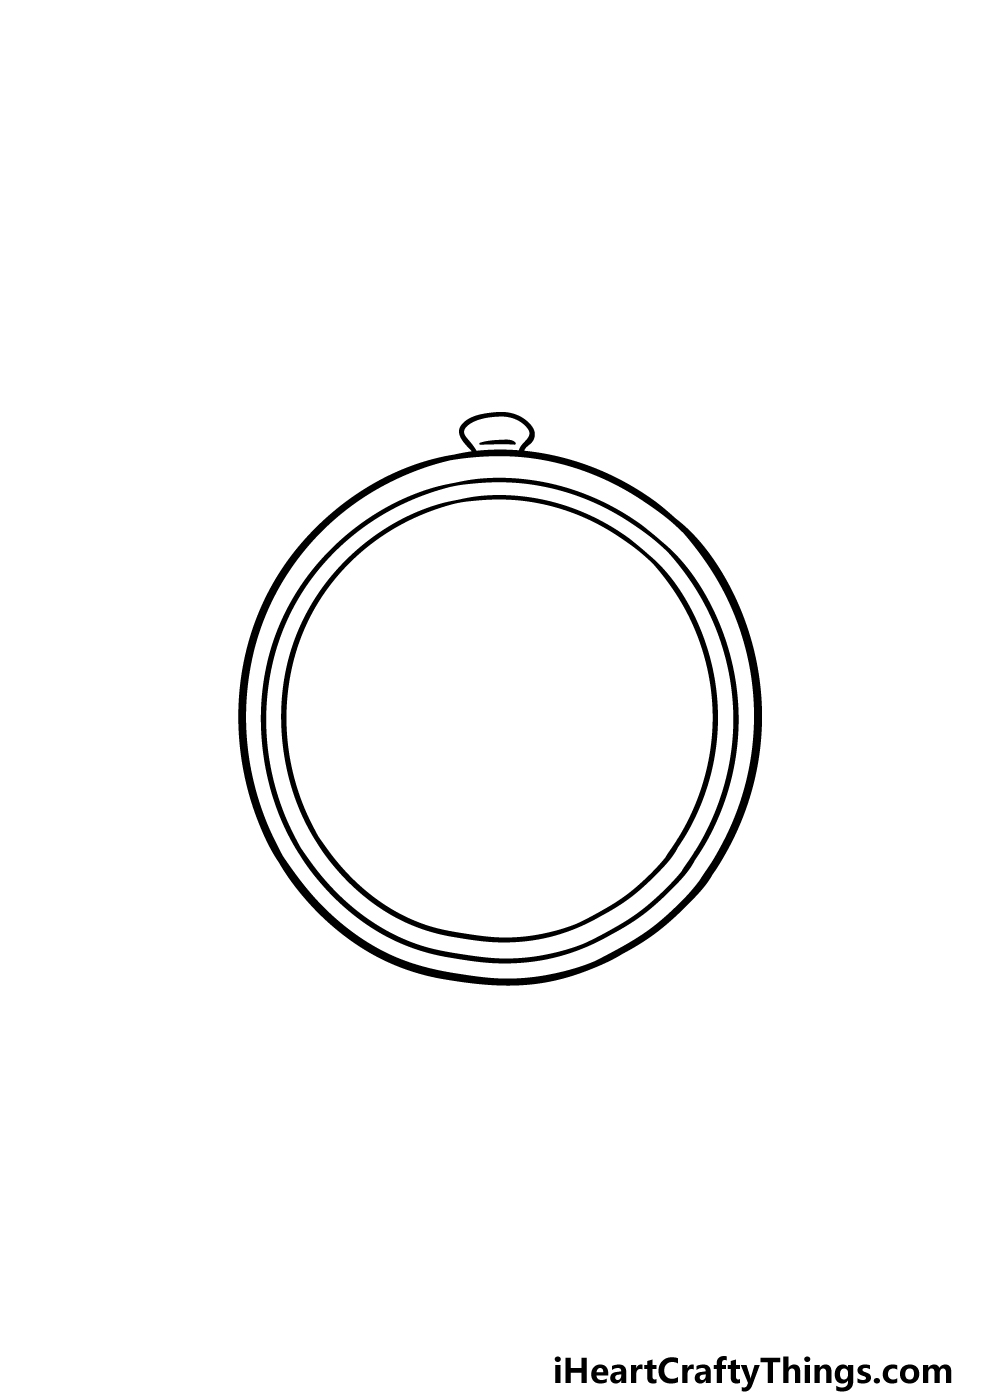
For this second step of your compass drawing, we will be adding some more details to the inner portions of the compass.
For this step, you will want to use whichever method you employed to draw the outer circle of the compass, as we will be drawing some more circles inside of it.
To do this, simply draw another circle inside the first one and close to the outline. Then, draw another one inside that one, even closer than before.
Finally, we will be adding a small, rounded shape on top of the compass.
Step 3 – Now, start the face of the compass
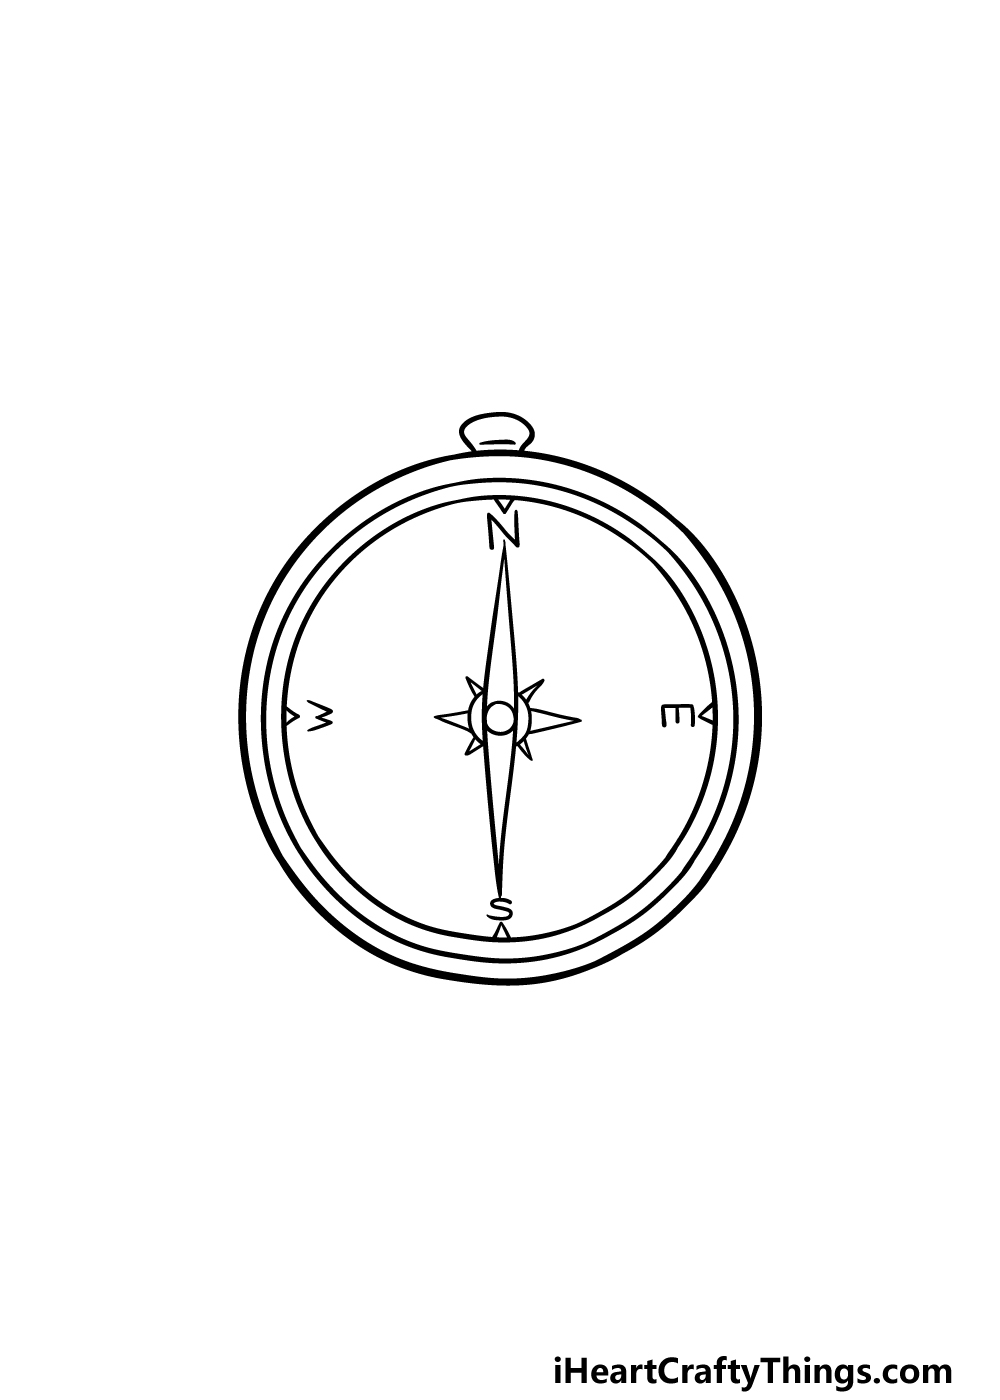
A compass wouldn’t be very helpful without directions on the face, so we shall draw some of those details in this step of our guide on how to draw a compass.
First, draw an N at the top of the compass face with a tiny triangle above it. Then, draw a sideways W on the left with a sideways E on the right.
Finally, finish off with the S at the bottom. Each of these letters will also have a tiny triangle between them and the outline of the face.
Then, using some rounded lines you can draw the sharp shapes that will form the hands of the compass, as shown in the reference image.
Some smaller details can then be added around these hands before you move on to step 4.
Step 4 – Next, draw some more details for the face
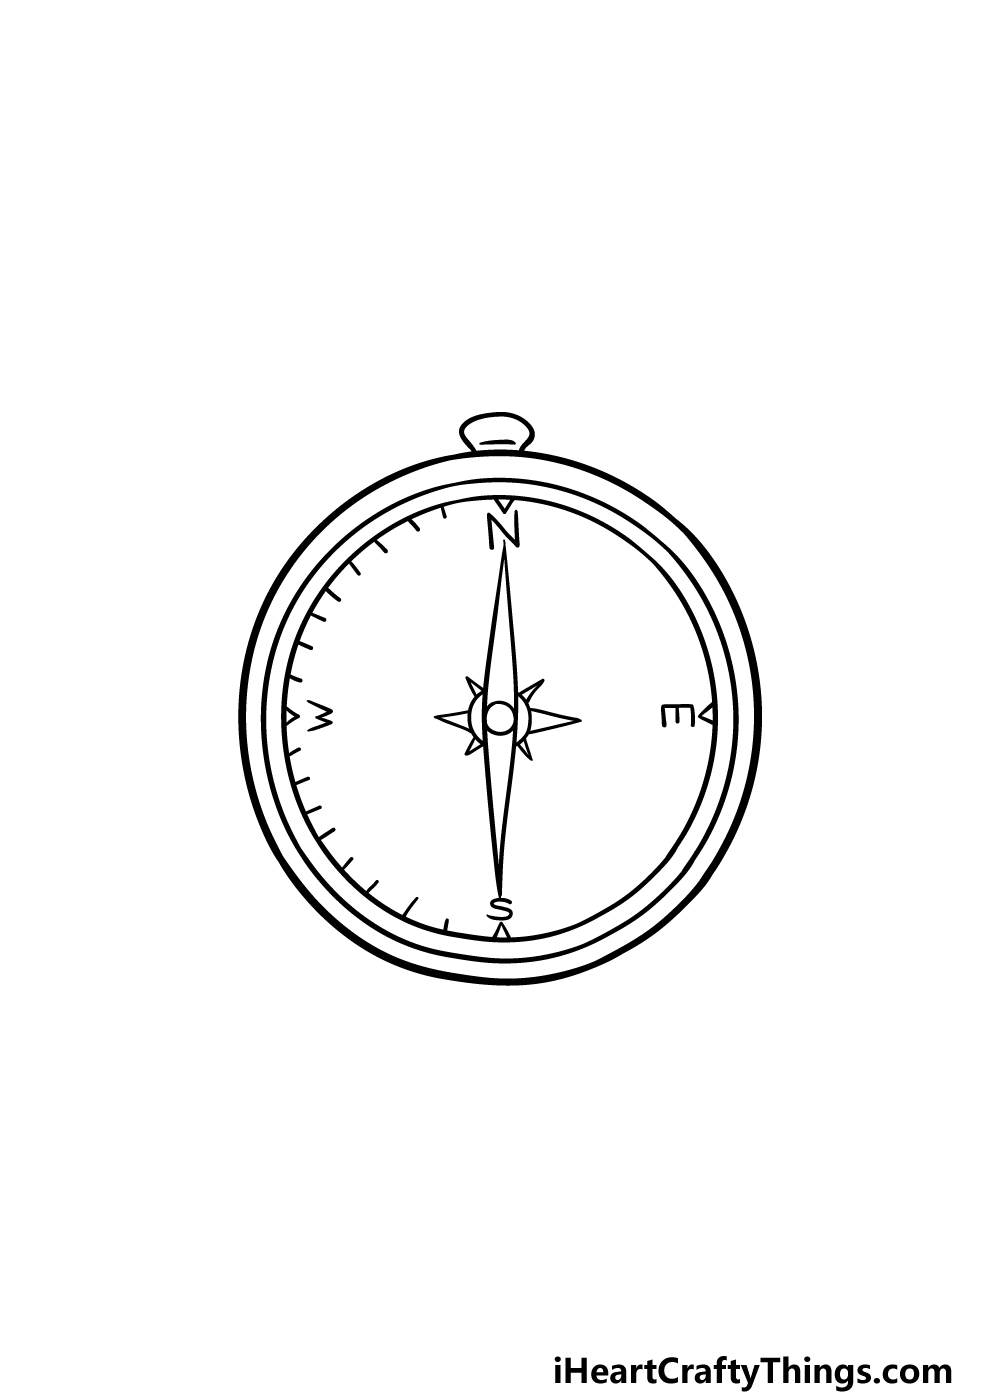
You have the main parts of your compass drawing completed now, so for the next few steps we will add some smaller details.
For this part, we will be adding lots of small, straight lines to the inner perimeter of the compass face.
These will be going on the left-hand side only for now, and these lines help with more precise navigation on a real compass.
If you want it to be precise, you can count how many are in our reference image and try to replicate it for your own picture.
Step 5 – Now, you can finish off the final details of your compass drawing

We will be finishing off the final details in this step of our guide on how to draw a compass.
This part should be quite easy, as all you need to do is replicate what you did in the prior step, just on the other side.
Once you have finished these small lines, you’re ready for the final step! Before you move on, however, you can also add some touches of your own.
Perhaps you could draw a fancy chain for the compass to be hanging from, or you could have it sitting on top of a map to really finish off the navigational theme.
You could also draw some engravings onto the compass or change up some of the details.
These are just a few details that you could go for, so be sure to have fun and experiment as you finish off this picture for the final step!
Step 6 – Finish off your compass drawing with some color
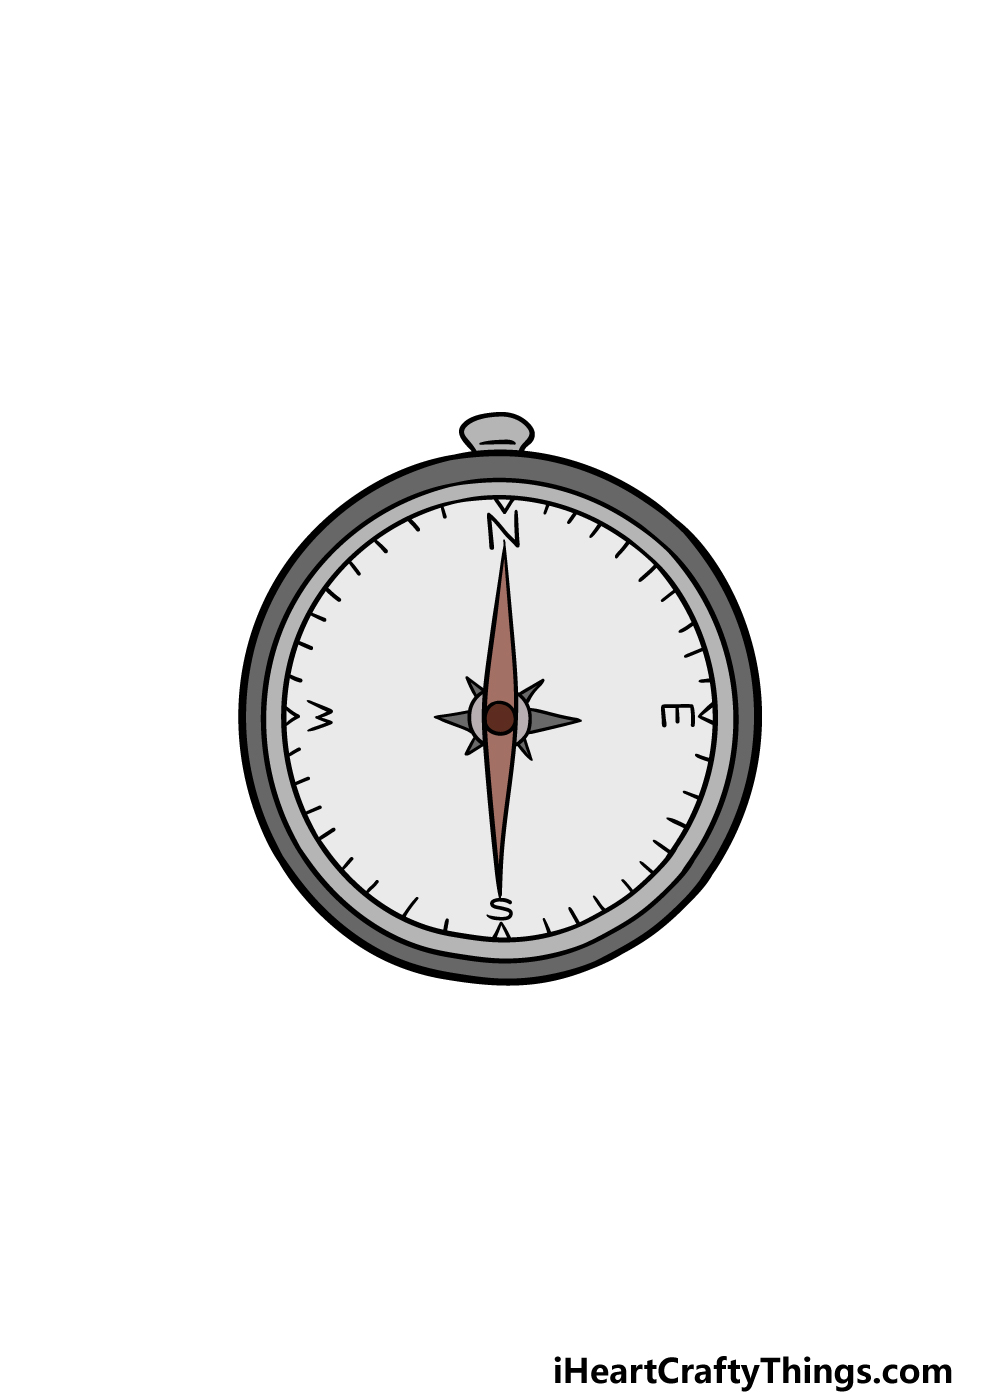
This sixth and final step of your compass drawing is the one where you can have some fun adding some colors to it!
In our example, we used some more muted greys and reds for the compass, but these colors are just a suggestion.
You could use some golden yellows to make it look like bronze or use a variety of different colors to make it look like it’s made of different materials.
You could also change up the mediums and art tools that you use for the compass, as using different mediums can be a great way to achieve whatever tone you want for the drawing.
This is your chance to show off how creative you can be, so we can’t wait to see what colors and mediums you use to finish off your amazing drawing!
3 More tips to make your compass drawing easy!
Make sure you don’t lose your way with the help of these tips for your compass sketch.
The design of this drawing of a compass may look simple, but it can be surprisingly tricky. That’s why you will want to use any and all tools at your disposal to make it easier to complete.
If you want this compass to look as close to perfect as possible, you will definitely need a ruler, a drawing compass or something to trace around.
If you try to draw the circular outlines of the compass freehand, then you will not be able to make it perfect. By using the compass or the object to trace, you can easily make it round.
The ruler will then come in handy for drawing the small lines on the face of the compass.
If you find yourself having a hard time creating this compass drawing, you could try to draw it at a different angle. This could be to hide some of the areas of the drawing you’re struggling with.
For instance, if you are struggling to draw the face of the compass, then you could draw it tilted at an angle so that area of the compass is mostly obscured.
This is one example, but drawing from a different angle could also result in a more unique drawing!
Finally, you could also make your compass sketch easier by using pictures of real compasses. Or, if you happen to have access to a real compass then that would be even better.
However you end up doing it, these real compasses will help you with drawing the form and details of the one in our guide. Even if these real ones don’t match up perfectly, you can still use these references.
Another benefit of using real ones to help with this drawing is you could create new versions and add some visual flourishes to the compass that you’re drawing.
Do you have a real compass that you could use to help you as you draw?
Your Compass Drawing is Complete!
You have reached the end of this guide on how to draw a compass, and you should be very proud of your incredible artwork!
We hope that this guide showed you that drawing one of these helpful tools can be much easier and more fun than you may have thought it could be.
Now you can show us how you think this drawing should be finished off, and there are so many details and colors you can use to do this. Be sure to have fun with it and see what you can come up with!
This guide you just completed is one of many that we have on our website for you! Be sure to visit us often to enjoy the many guides we upload often.
When your compass drawing is complete, we would love to see it! Please be sure to share it on our Facebook and Pinterest pages for us to admire.