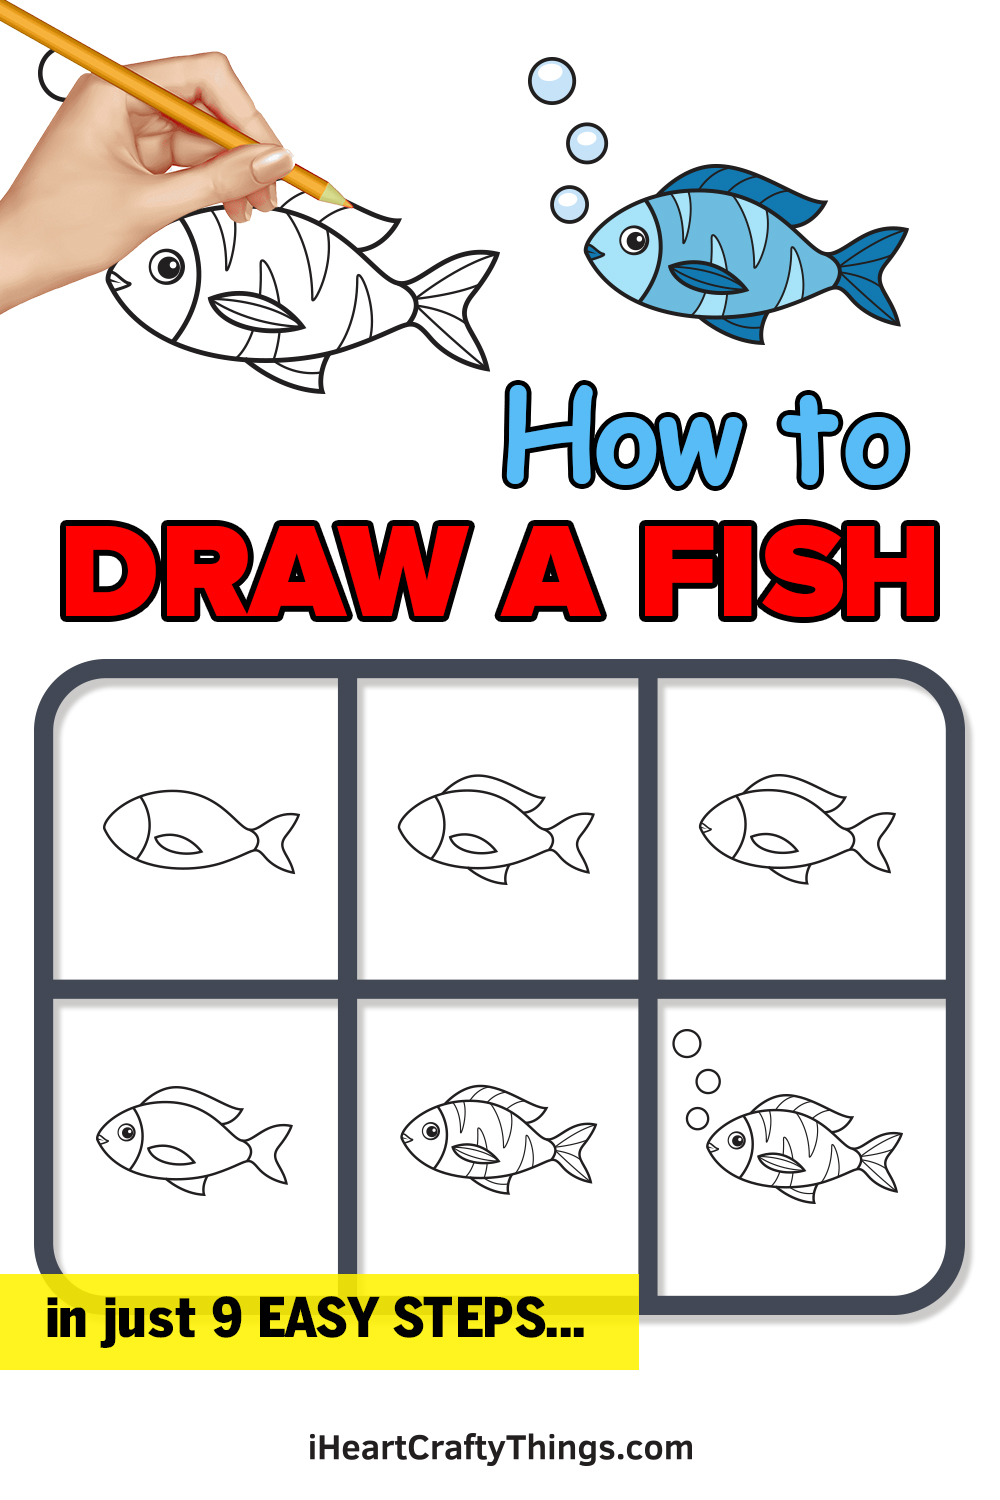
Anyone can learn how to draw a fish with this intuitive step by step guide. No matter your skill level, you can follow along with this tutorial and discover just how simple it can be.
When drawing a fish, you need to get the shape and the smaller details right if you want it to look like the real thing. This is true even when it’s done in a more cartoony style.
With this guide for kids, you can see how the most basic shapes of the drawing come together to form the fish as well as how you you can add the fins, skin patterns and other details.
There are some bubbles coming from the fish you will soon draw, but you could also add even more background details as well once you have the hang of it. If you’ve ever struggled to draw a fish, this guide will take you through the whole process and help you to see how easy it really is!
Watch And Learn How To Create A Cartoon Fish
How to Draw a Fish – Let’s get started!
Step 1
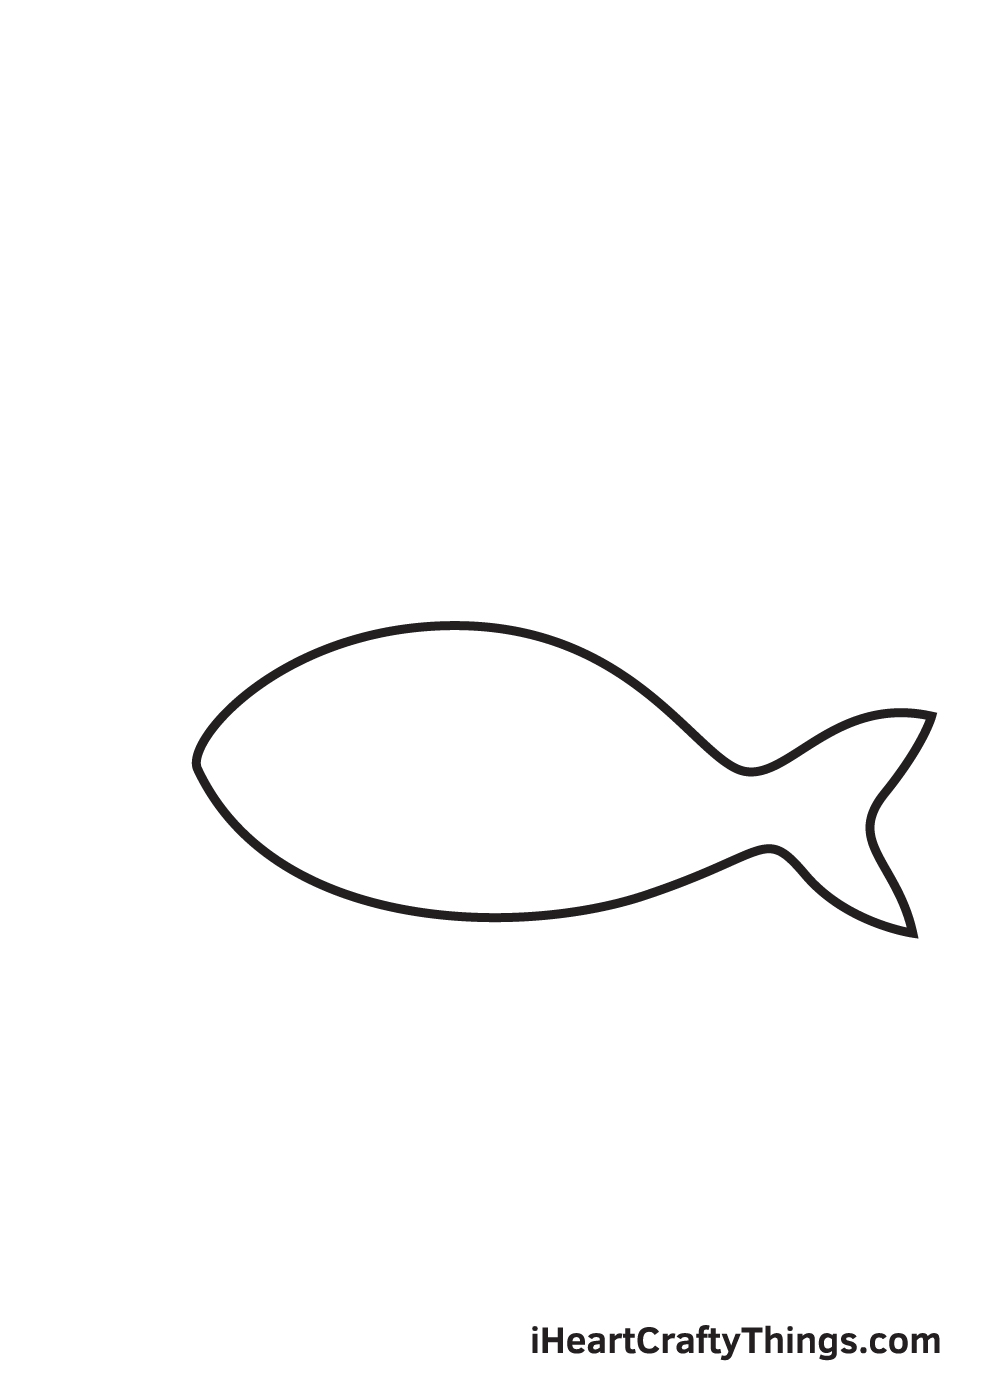
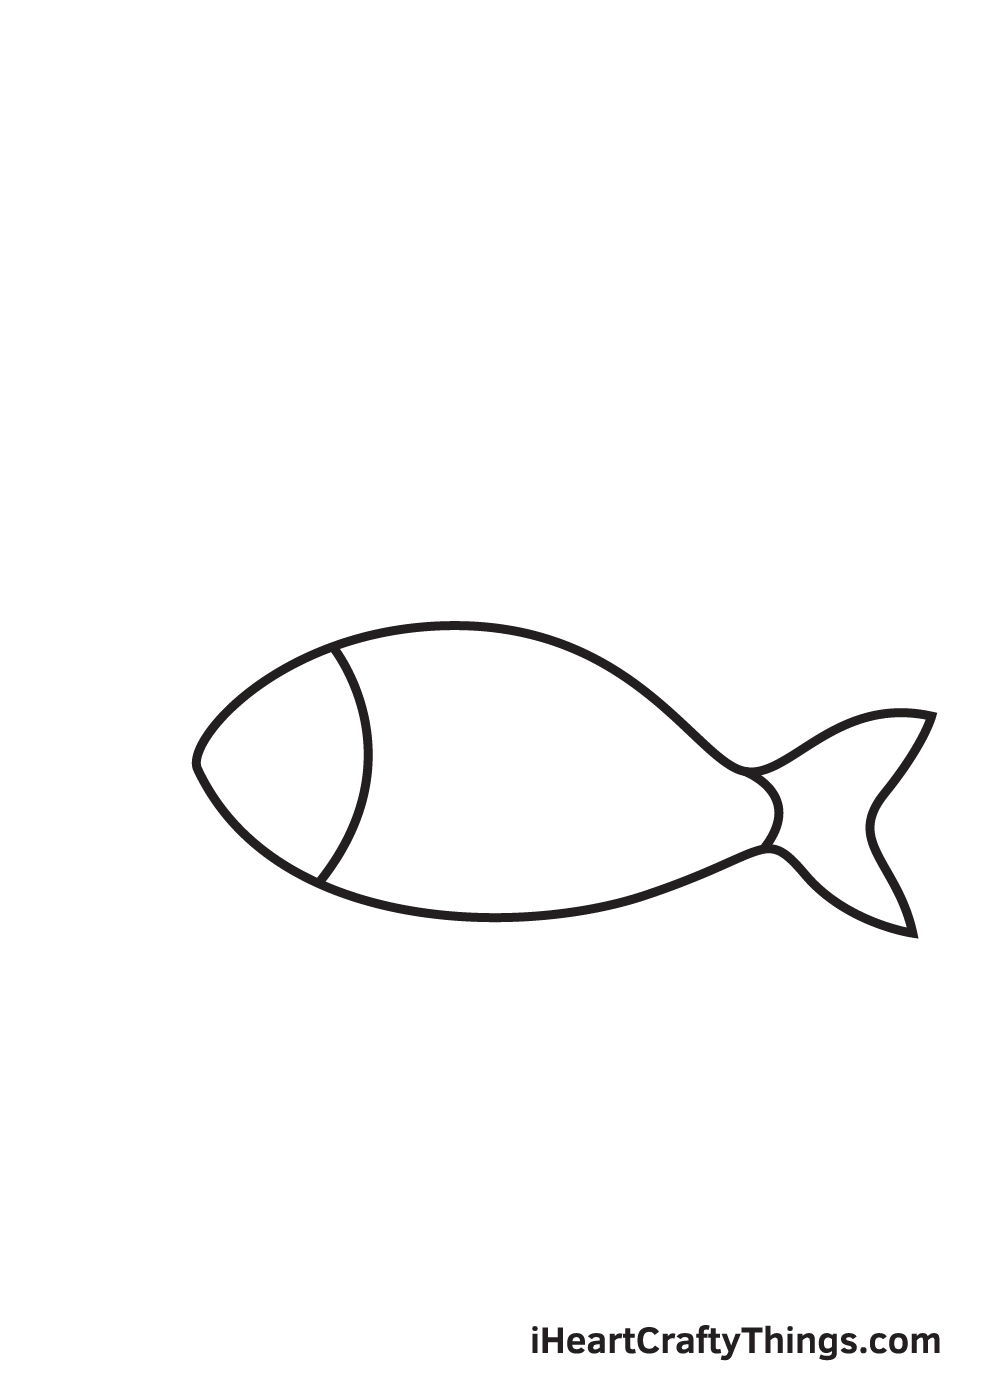
Create an outline of the shape of the fish in the center of your paper.
In order to make sure that the fish will be drawn in the middle of your paper, create reference lines by drawing an intersecting horizontal and vertical line across your paper.
The point where the two lines meet marks the center and it’s where you should draw the outline.
Step 2 – Draw the Gill Cover of the Fish
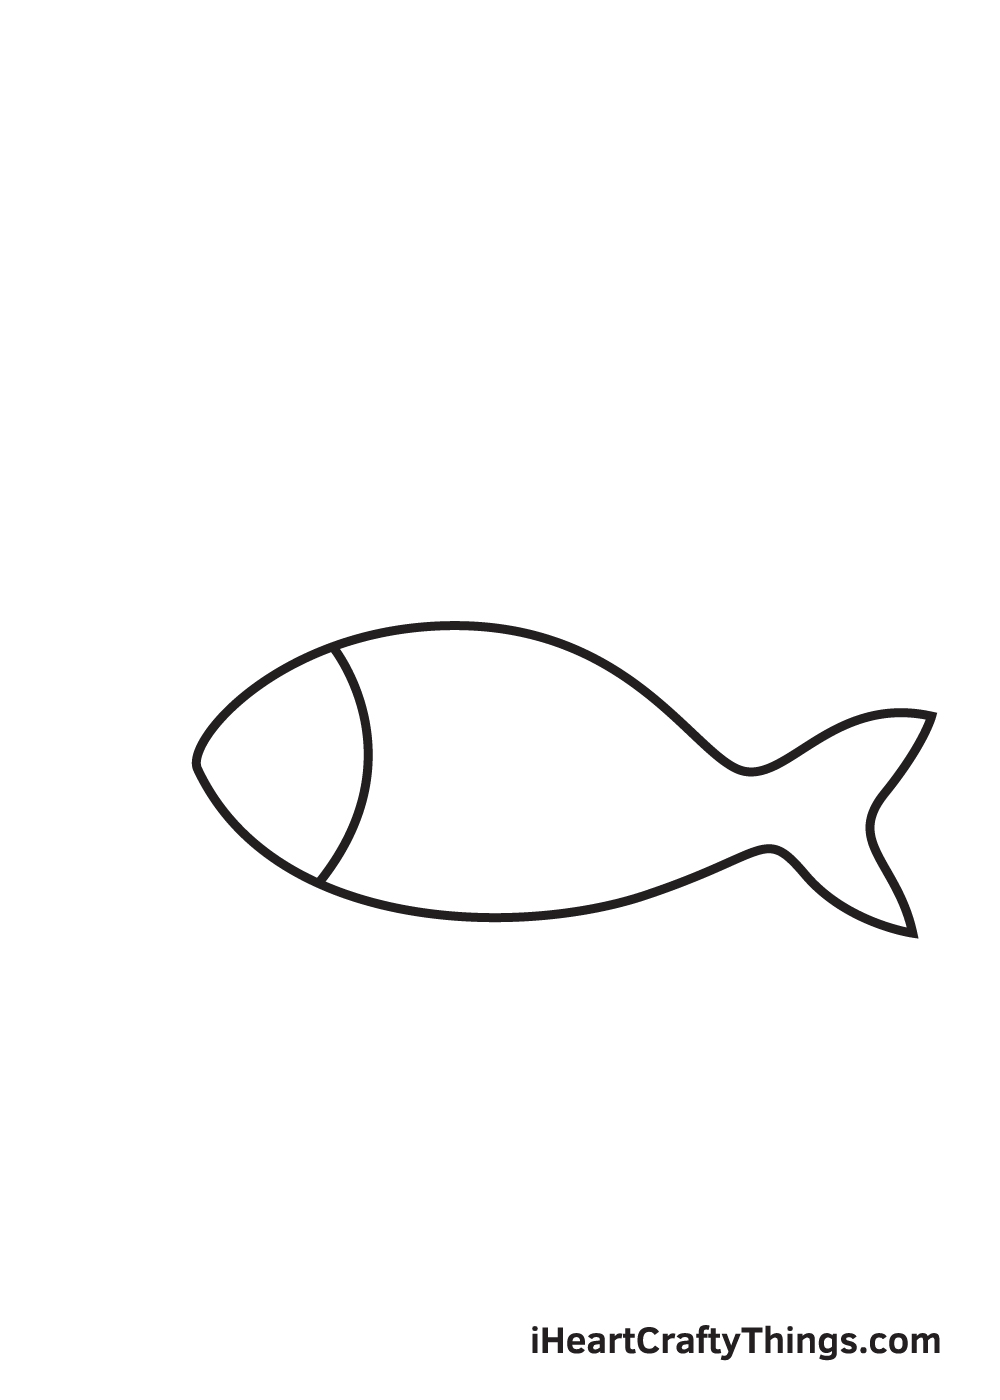
Draw a curved line within the outline to form the gills of the fish, creating a division between its head and its body.
Step 3 – Next, Draw the Fish’s Caudal Peduncle
Draw another curved line on the tapered part of the body of the fish right before its tail.
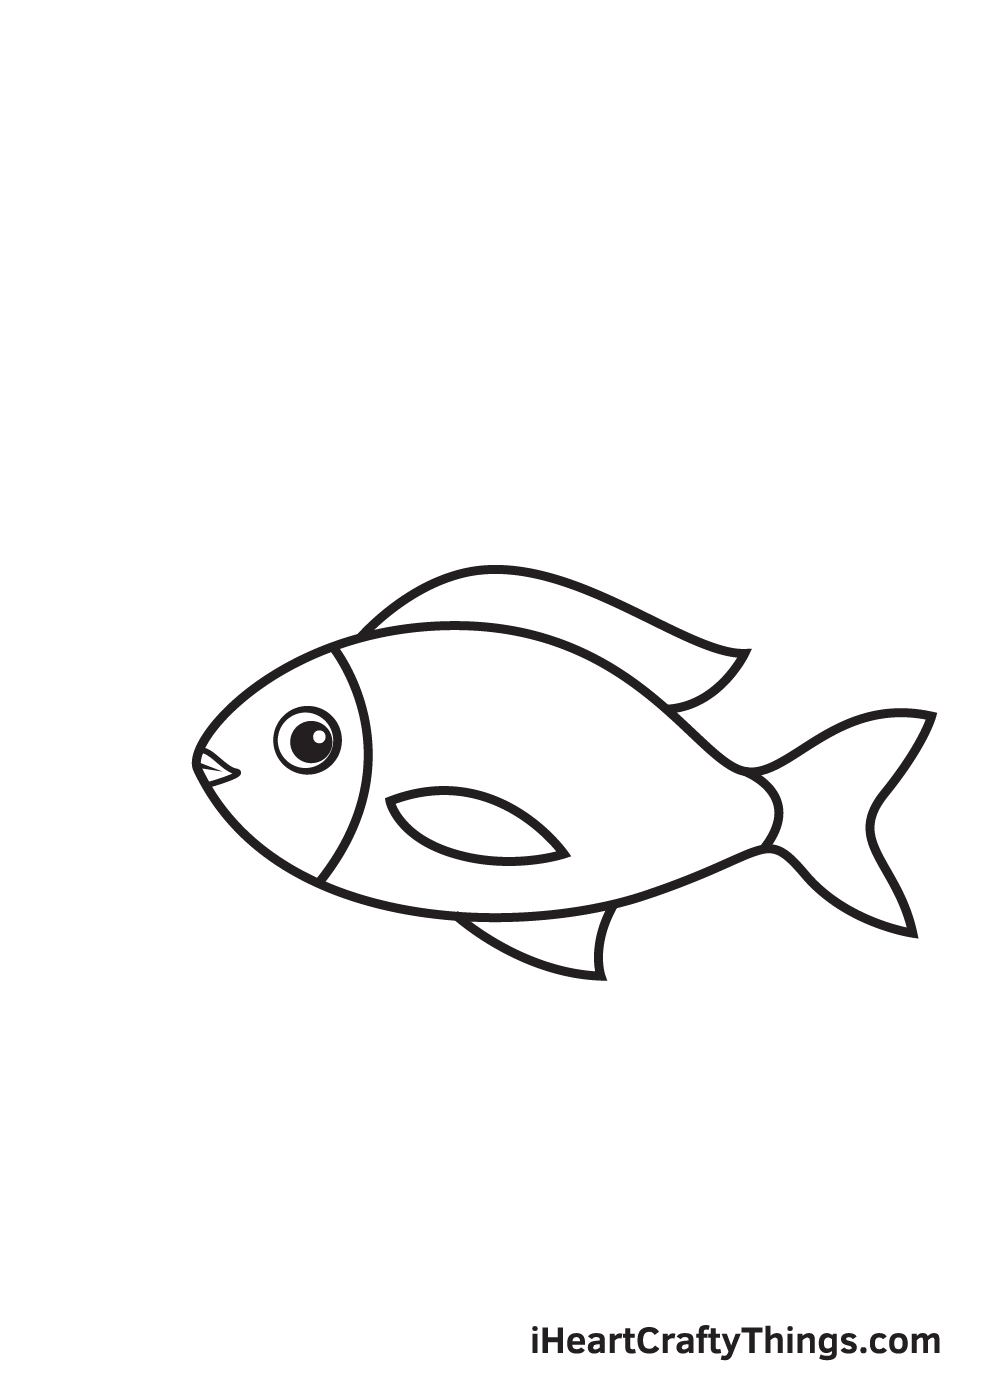
Step 4 – Afterwards, Draw the Pectoral Fin
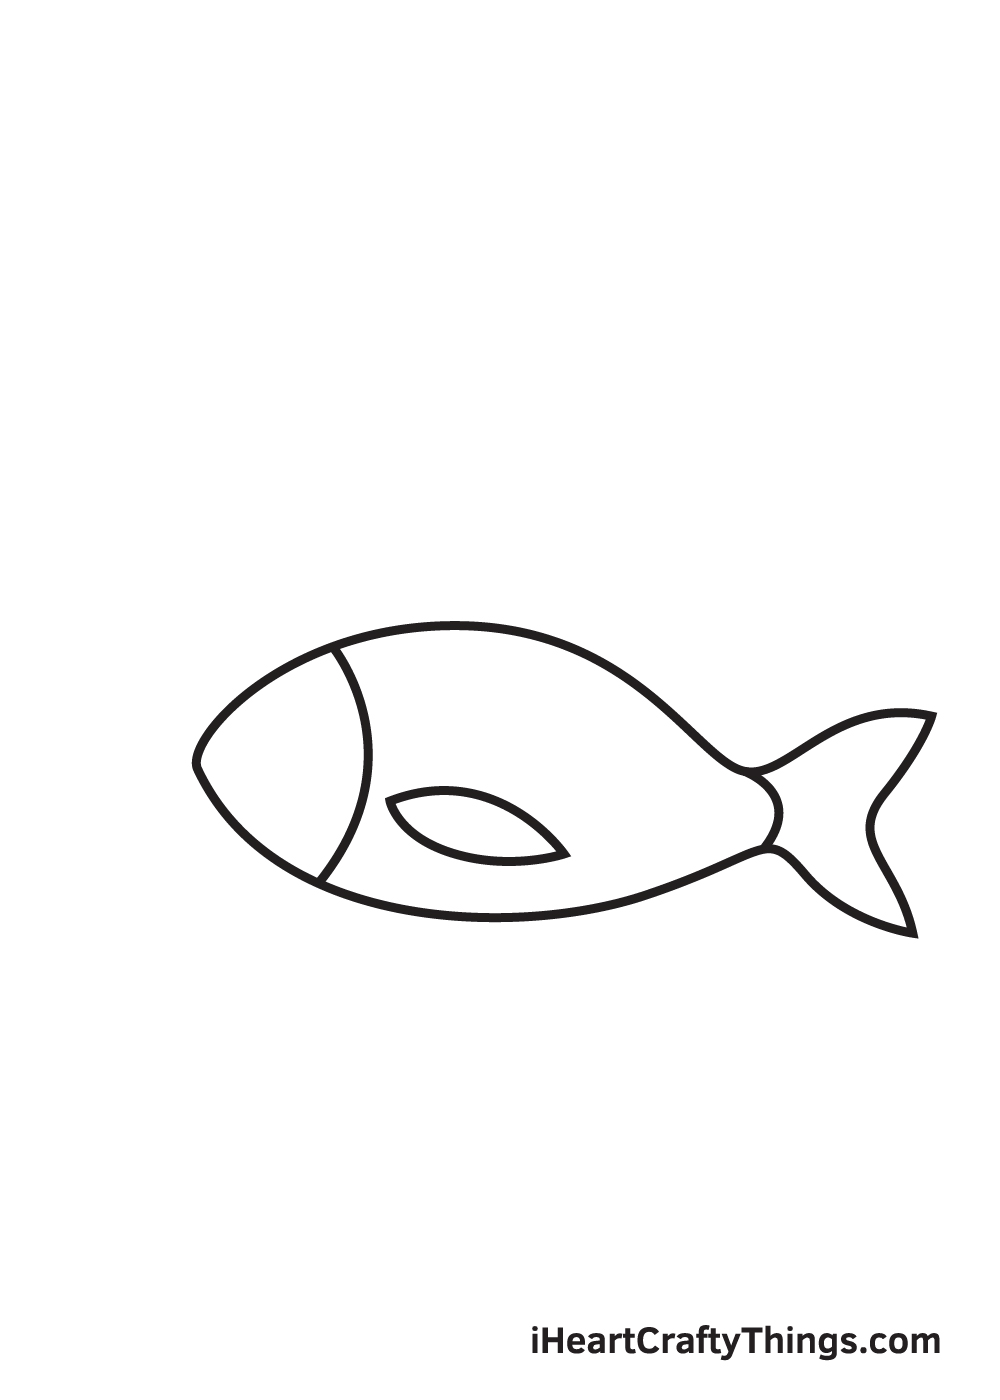
In this step, we will be working on the fin on both sides of the fish, which is called the pectoral fin. Since the fish is positioned sideways, as seen in the illustration, only one fin is visible.
Structure the shape of the fin by drawing two connected curved lines. Both end points of each of the curved lines should be connected to create the pectoral fin.
When drawn correctly, its shape should look like a sideways oval with pointed sides.
Step 5 – Complete All the Fins of the Fish
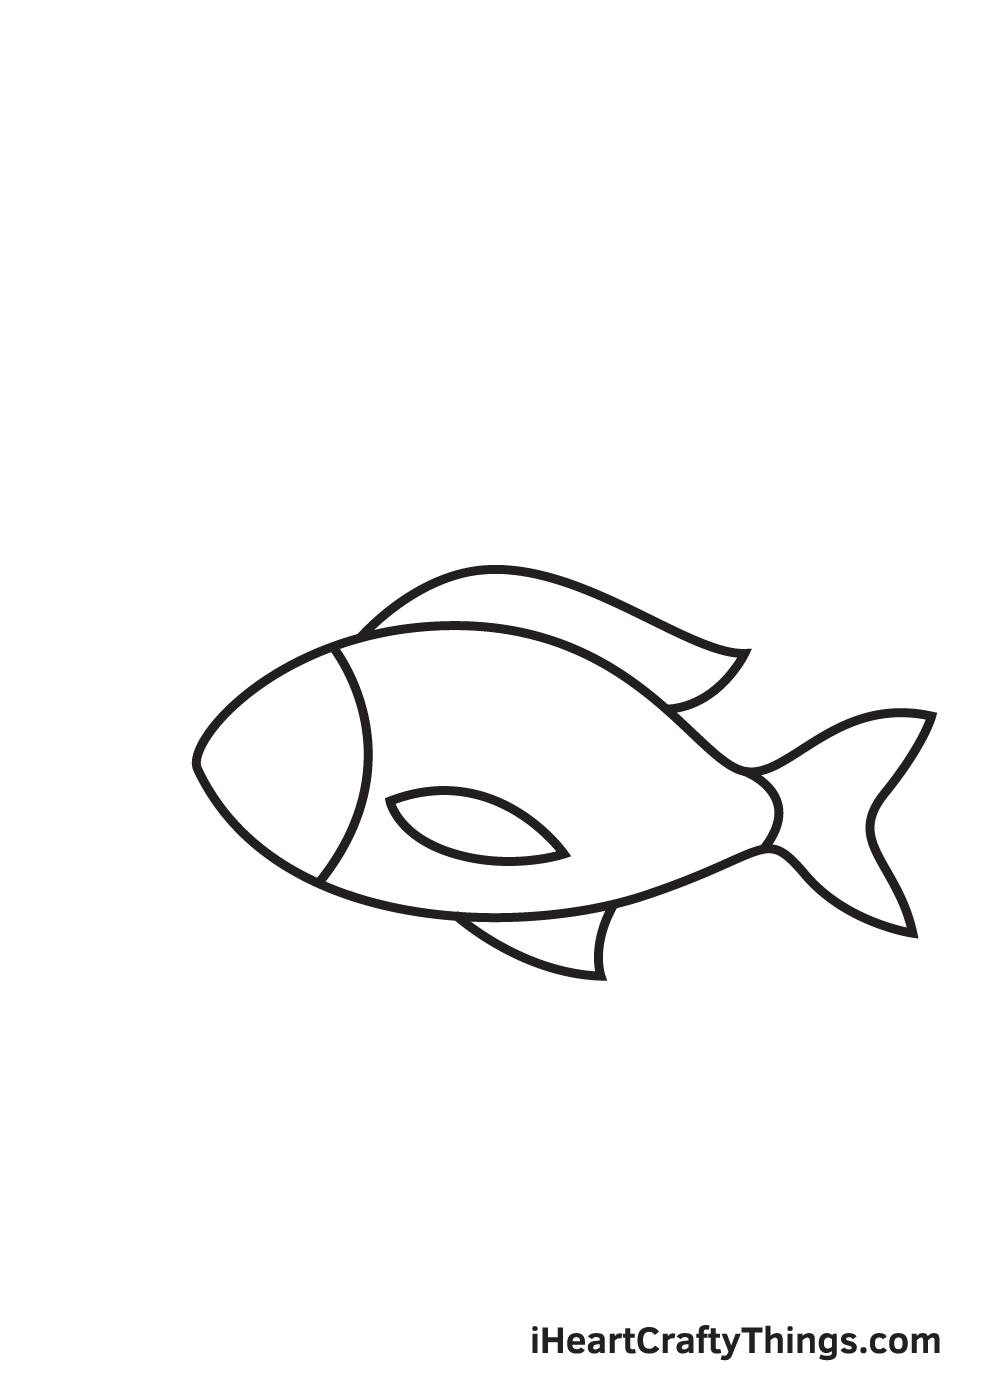
Now, we will be drawing the fins affixed at the top and at the bottom of the fish, which is called the dorsal fins and pelvic fin respectively.
Starting from the dorsal fins, draw an elongated curved shape directly connected at the top of the fish’s body.
Then, draw an upside down triangular shape at the bottom to create the pelvic fin. See, it’s as simple as that!
Step 6 – Then, Draw the Mouth of the Fish
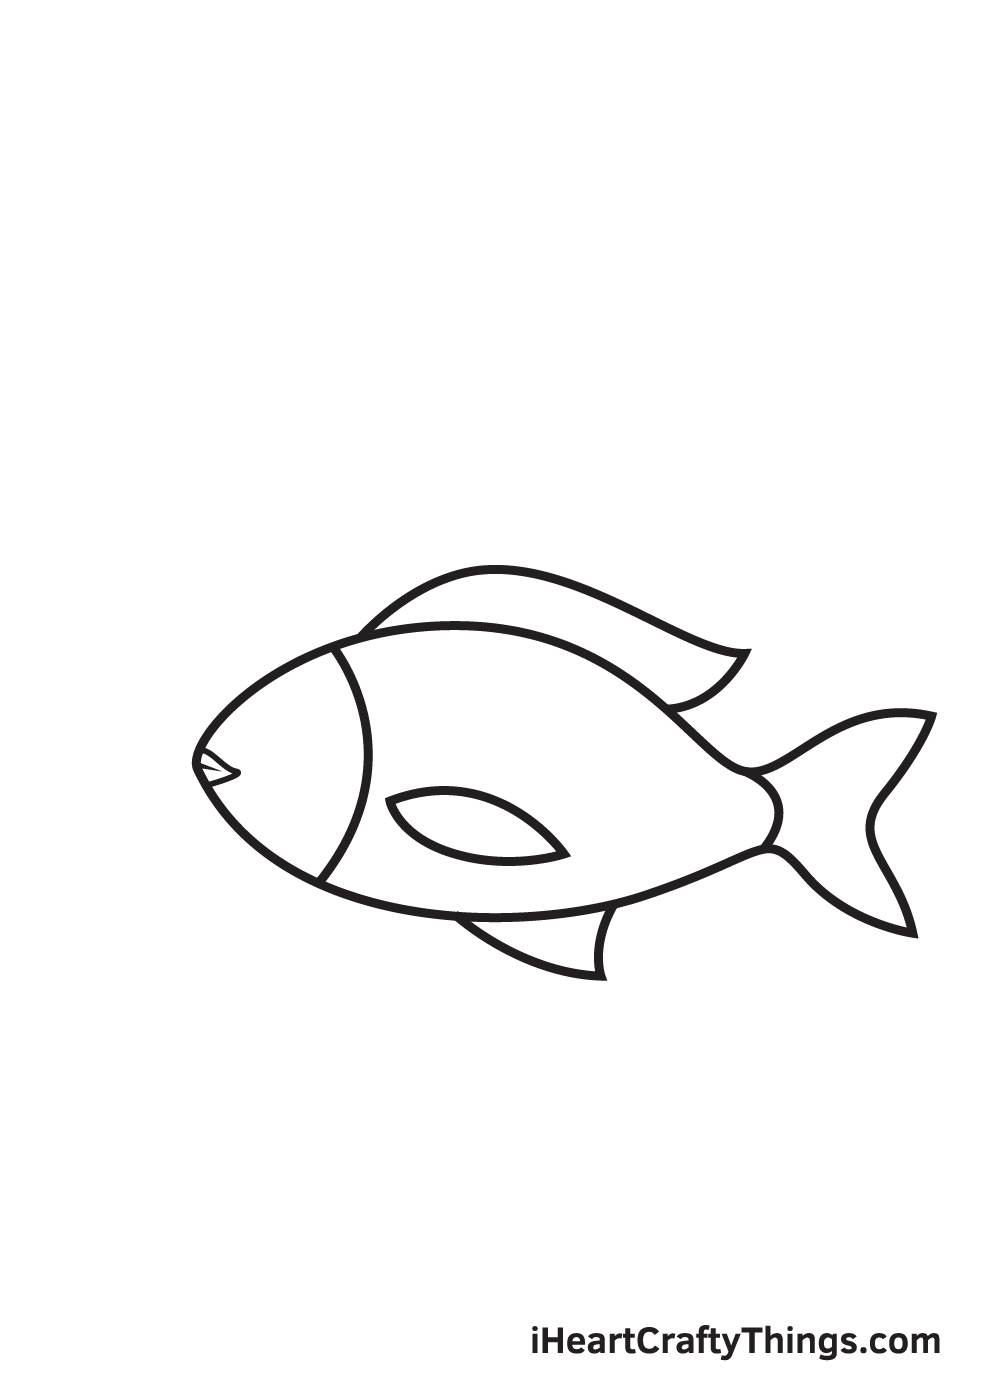
On the corner of the face of your fish, draw a connected downward and upward diagonal line, forming an outline similar to the shape of a half rhombus.
Step 7 – Draw the Fish’s Large Circular Eyes
Draw a circle on its face to create the eye. Then, inside the eye, draw another circle to outline the pupil. Now, draw a tiny circle inside the pupil to highlight the iris.
When shading the eyes, shade the entire pupil while leaving out the iris unshaded, creating a dramatic “sparkling eyes” effect.
Step 8 – Now, Add Patterns All Over its Body
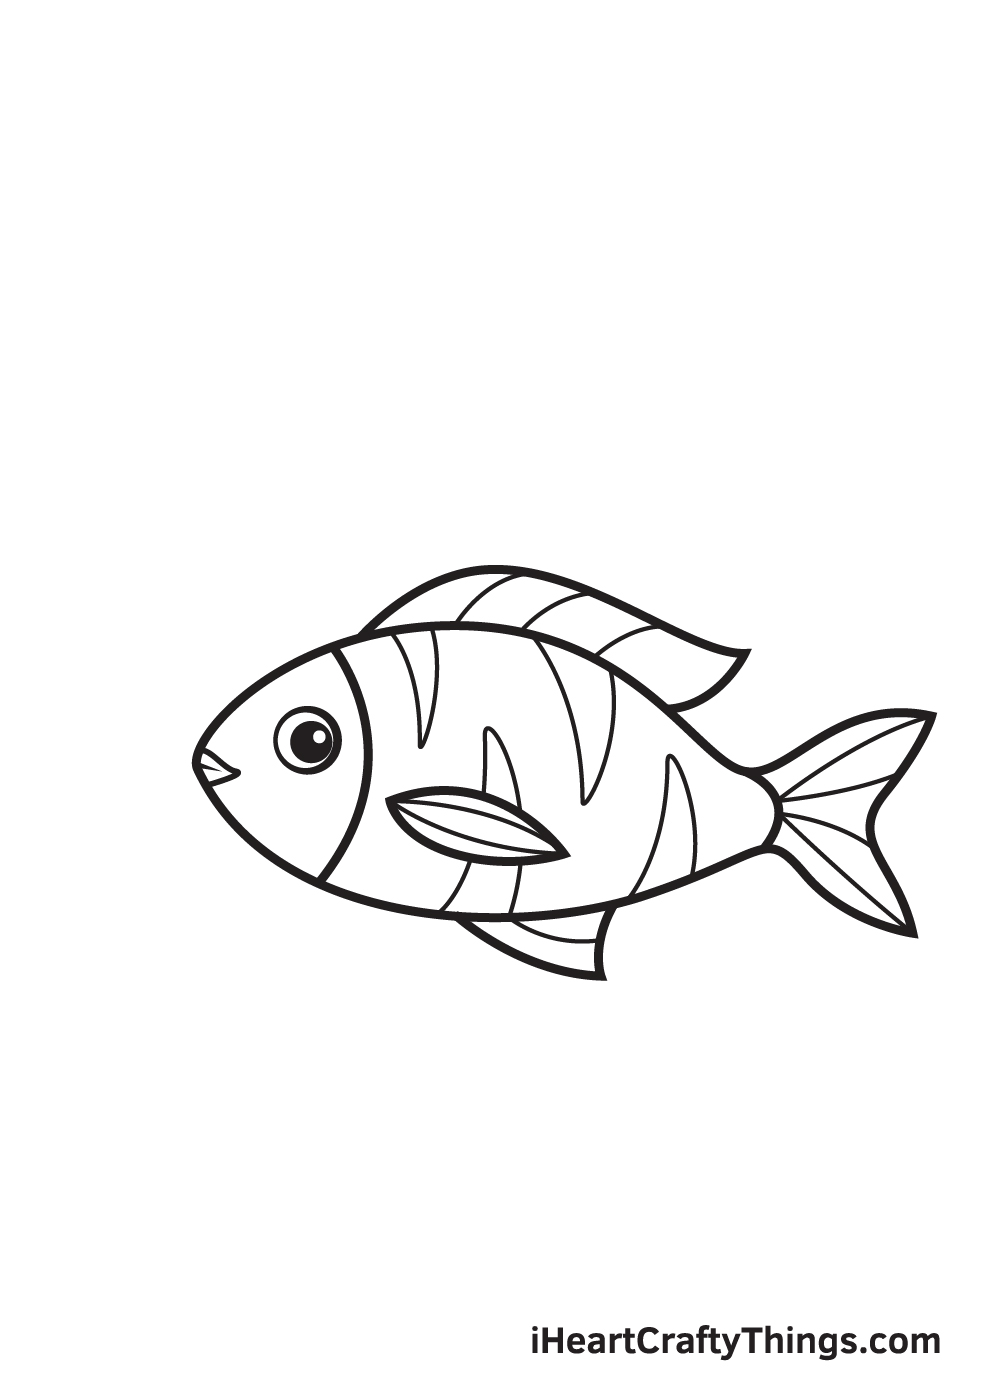
Draw elongated triangular patterns across the body of your fish, as shown in the illustration.
The position of the shapes should be alternate, meaning you must draw the first triangle shape at the top edge of the fish’s body, then draw the second at the bottom edge, and so on.
Feel free to customize the patterns imprinted on the fish. For instance, the angelfish has distinct diagonal lines across its body while common carps only have scales.
Determine which species of fish you want to draw first, and go from there. You can also create a unique pattern of your own, resulting in a one-of-a-kind fish!
Don’t forget to draw parallel lines on the fins to add texture!
Step 9 – Draw Bubbles Coming Out of its Mouth

Draw multiple circle shapes above the head of the fish to create bubbles. This will create an illusion that the fish is breathing underwater, making it appear more realistic.
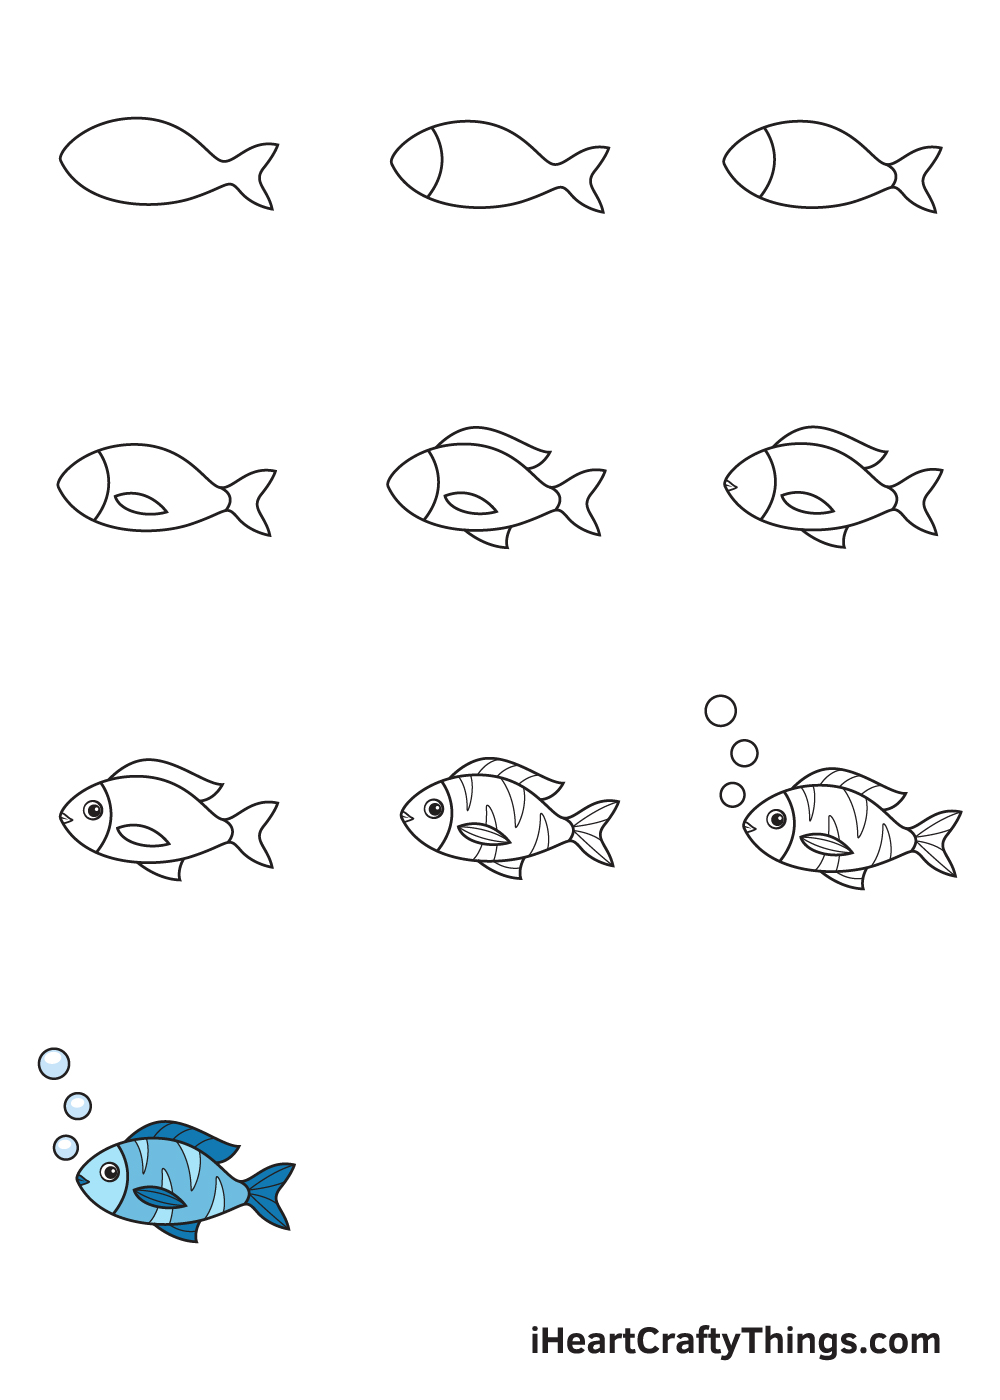
As you can see, the fish drawing is complete. All it’s missing is a dash of colors to make the fish vibrant and colorful!
Now that we have successfully drawn a fish, it’s finally time for the most exciting part, which is picking the colors and coloring your drawing!
This is the part where you can showcase your artistic skills and your ability to mix and match various colors.
Depending on the species, fishes come in a wide range of colors. So, you’ll definitely have a lot of color options to choose from when coloring your fish. Have fun playing with colors and watch as the fish ultimately comes to life!
Make Your Fish Drawing Even Better With These Tips!
You did an amazing job working on this guide on how to draw a fish, and the finished drawing certainly shows it!
Before you finish off this guide, we have a few more tips that you can use to make your drawing even better.
Firstly, in real life fish will often travel in packs (or schools, if you want to use the right term.) Because of this, we would recommend drawing more fish into the scene.
Now that you know how it’s done, this should be easy! All you need to do is follow the steps again and add more fish to the scene.
They could look very similar to the first one, just with some different poses or facial expressions. If you’re feeling extra creative, then you could try to draw different kinds of fish to be friends with this one.
You could also add other ocean creatures, such as an octopus or a dolphin. Drawing a background can also help to take your drawing to the next level.
That might sound hard, but you can make the background simple and cartoony to match the style of this fish. Even if you draw the floor of the ocean beneath it and a few plants, it will make it look even better.
If you want to go even further with it, then you could add bigger details like a sunken ship or a treasure chest. There are so many ways to make your drawing more special!
A light sprinkling of glitter would also make it look like the water is sparkling. You have some ideas to work with, so it’s up to you now!
What are some details you would like to add to this underwater image?
Your Fish Drawing is Complete!
We hope you enjoy this step-by-step fish drawing tutorial. This guide is designed for beginners and experts alike who want to learn how to draw a fish along with its intricate features.
If you love the sea and the majestic creatures that live underwater, we’re sure you’ll have fun!
We are always updating our catalog of “how-to-draw” series, so make sure you keep re-visiting our website to continuously enjoy brand-new drawing tutorials.
What kind of sea creature would you like to draw next? Let us know and we’ll do our best to deliver your requests.
Once you’ve successfully drawn a fish and colored it, don’t forget to exhibit your work of art by sharing it on our Facebook page and on Pinterest.
Don’t be afraid to show off your masterpiece! You’ve worked hard for it, so it is definitely worth sharing!
We are excited to see your colorful fish drawing!
Here Is A Fish Drawing For Kids To Inspire You!
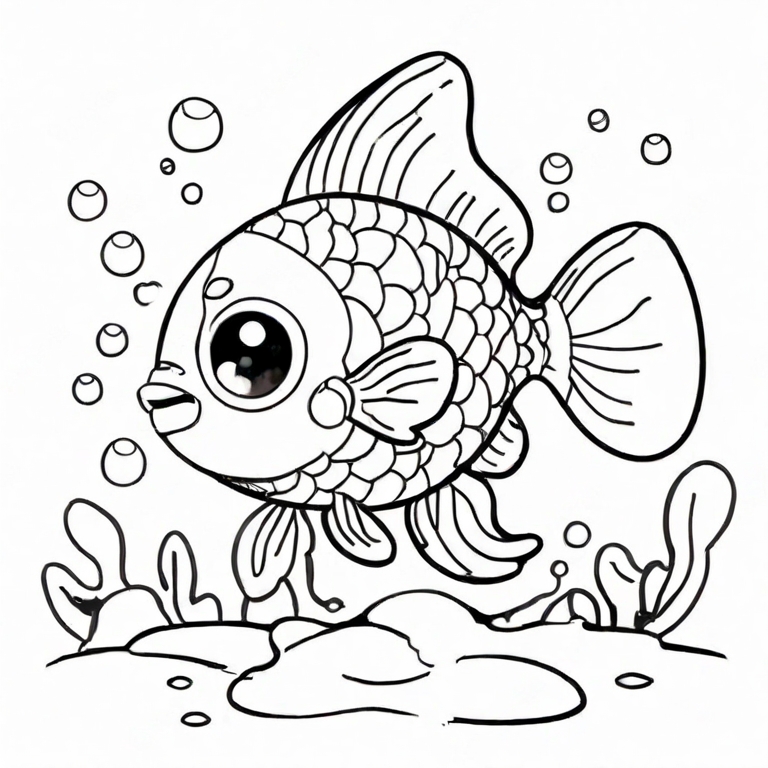
Fish come in so many varieties and kinds in our oceans and lakes, and there is such a lot of beauty to admire. Our artist Freddy has captured this beauty with this fish drawing for kids.
He has made this fish so detailed with the scales and the fins showing off a lot of texture. Drawing these kinds of details can take patience, so make sure you don’t rush it.
If you draw these aspects too quickly, then it can start to look messy. However, if you take your time with it and have fun as you draw, then it doesn’t need to be hard.
When making this fish sketch, be sure to add any additional details you would like in the background or even on the fish itself. That would be a great way for you to make this drawing even more unique!