Our oceans are filled with many different varieties of creatures both large and small.
These creatures usually fall into the categories of predator and prey, and sometimes there can be a bit of a grey area between these categories.
Things are pretty black and white when it comes to the killer whale, as they are known as one of the most efficient apex predators in the animal kingdom.
They’re also one of the most impressive-looking ocean creatures, and this can make it fun to learn how to draw a killer whale!
If you’re interested in learning how to do this, then you’ll want to read all the way through this tutorial.
Our step-by-step guide on how to draw a killer whale will show you how to recreate this incredible animal.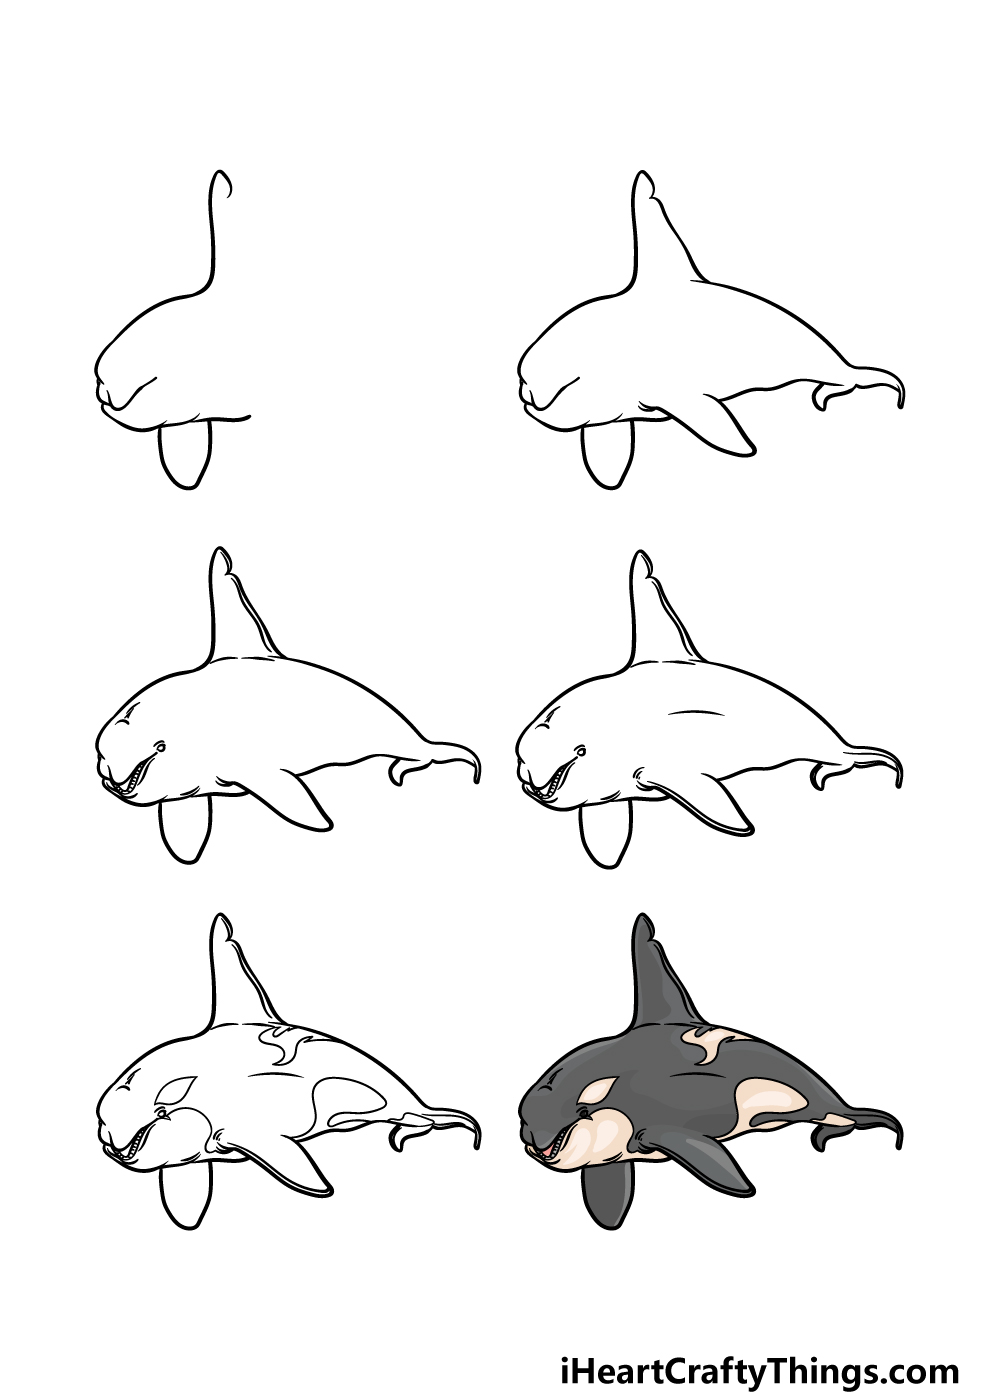
How to Draw A Killer Whale – Let’s Get Started!
Step 1

We shall start this guide on how to draw a killer whale by drawing the face and dorsal fin of the creature.
The killer whale has a rather rounded body in general, so we will be using a lot of curved lines throughout this picture.
For now, use some of these rounded lines to create the head of the killer whale. The top of the head will extend inward to create a rather pointy mouth for it, as shown in the reference image.
Then, use some more rounded lines to create the underside of the killer whale’s head. The next thing to draw will be a large, rounded pectoral fin extending down beneath the body.
Finally, draw the first lines for the large dorsal fin on top of the body, and then we can move on to the next step.
Step 2 – Now, draw the rest of the body outline
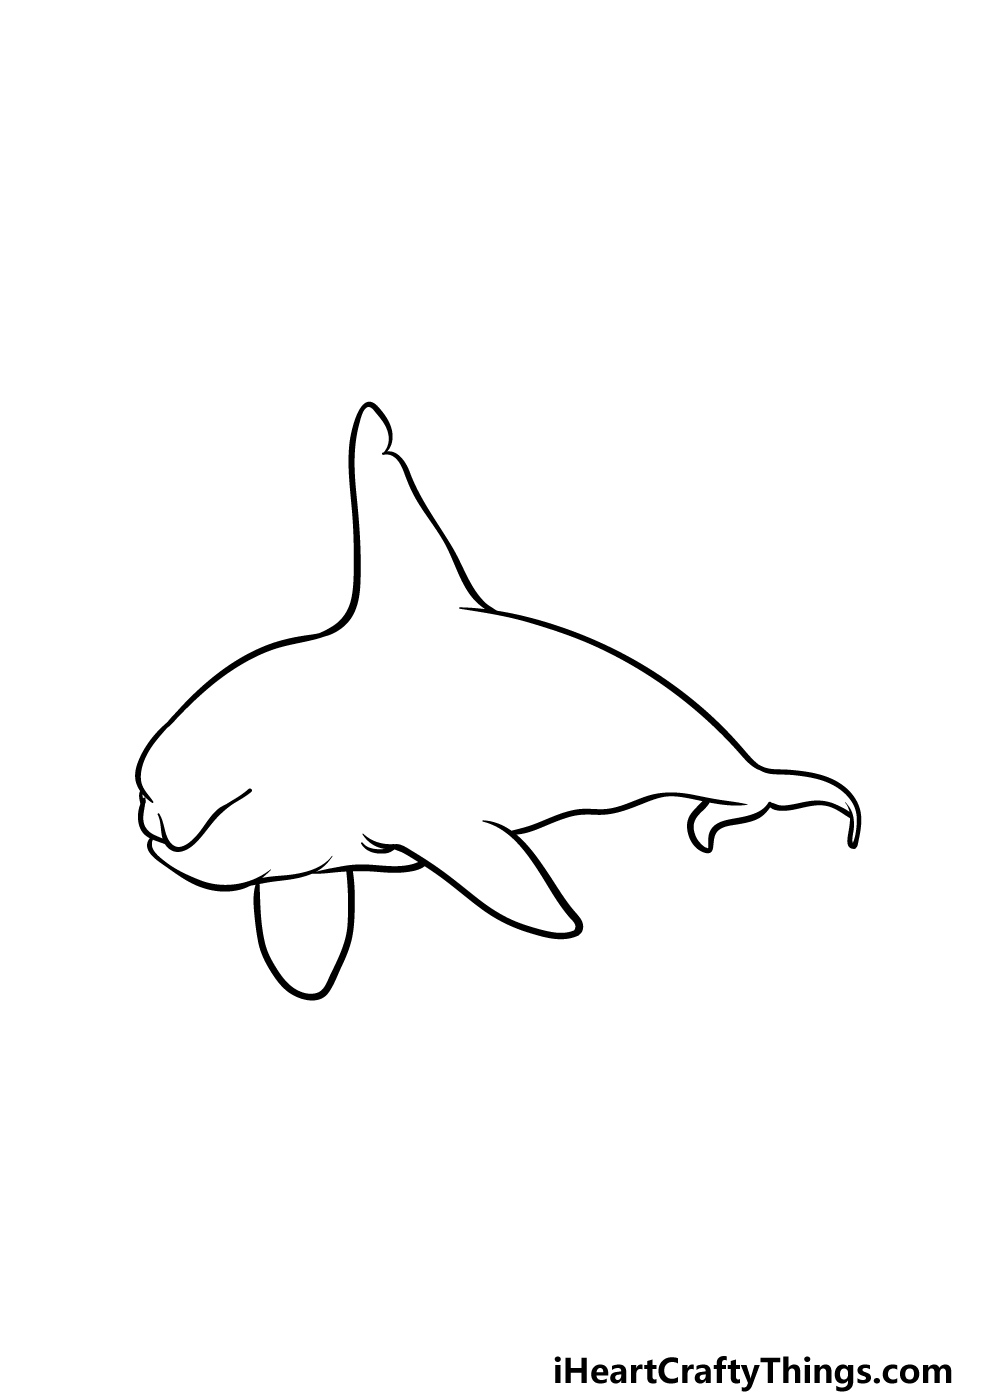
This second step of your killer whale drawing will see you finishing the outline for the rest of the body.
First, start by drawing another pectoral fin at the base of the body to match the other one.
Then, extend a fairly wavy line back from this fin for the belly of the killer whale, and then you can draw another long, rounded line for the back after finishing off the dorsal fin.
Finally, finish off this step by drawing the tailfin at the end of the killer whale, and then it’s on to step 3.
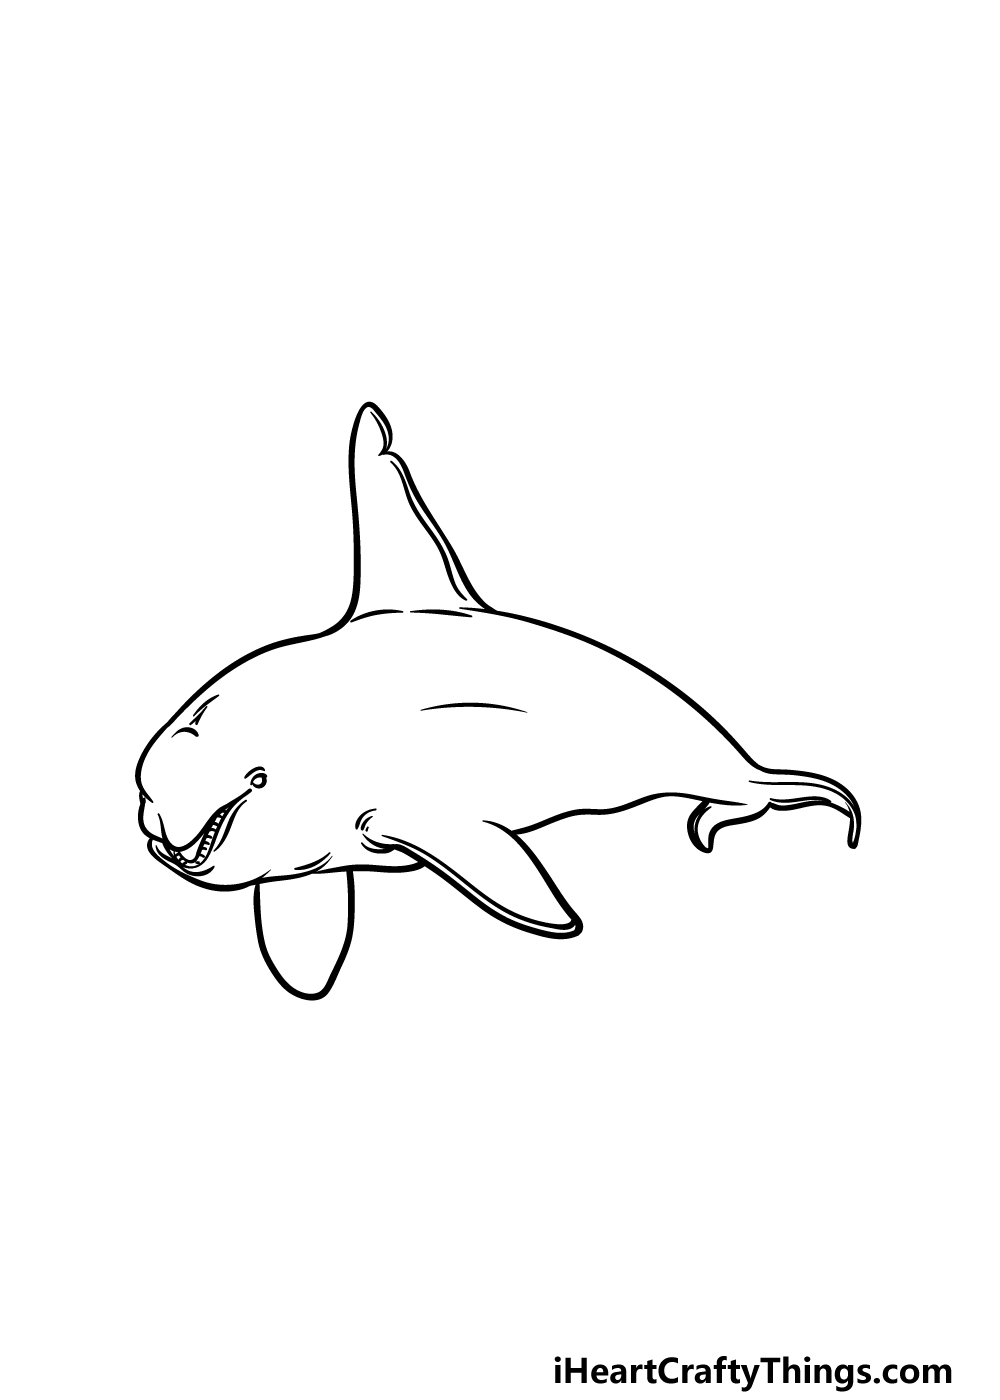
Step 3 – Next, draw some details for the killer whale

You’ve finished the outline of the drawing, and now we can start adding some inner details for the killer whale.
First, draw the bottom of the mouth and add a row of teeth to this bottom row. Once that is drawn, add a small shape into the face outline for the eye of the killer whale.
To finish off this third step, we shall then start adding some smaller line details to the face and body of the whale to give it a bit more dimension to its body shape.
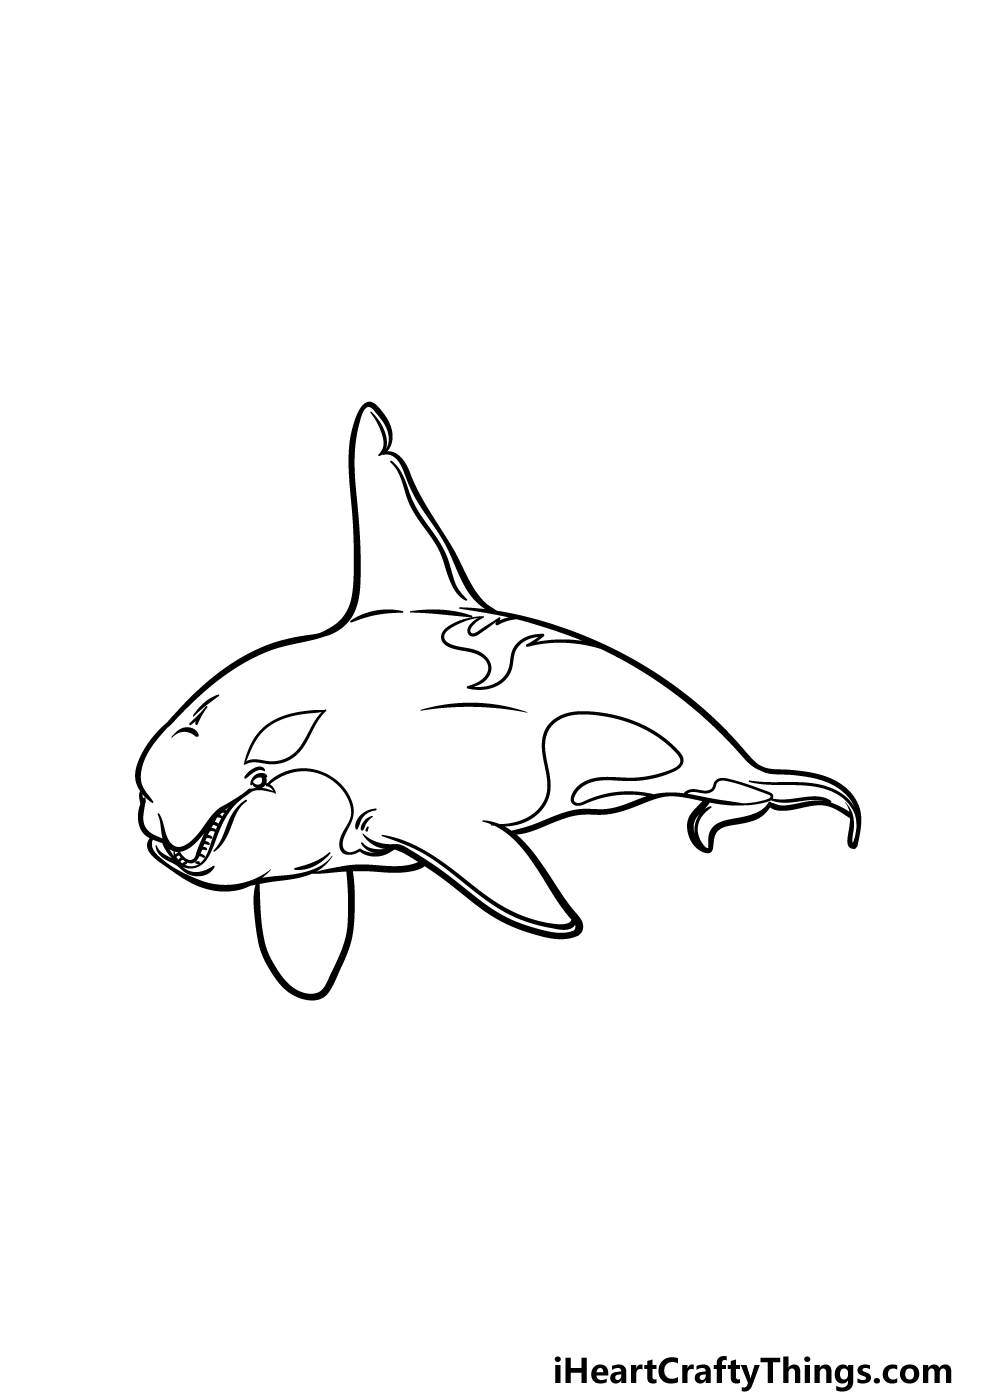
Step 4 – Now, draw some more inner details for the killer whale
Continuing on from the previous step of this killer whale drawing, we shall be adding some more details to the body and fins.
These details will be subtle, but they will be very useful in adding even more dimension to the creature. Add some lines along the outlines of the pectoral fins as well as the tailfin.
Then, you can add some curved line details to the middle of the killer whale’s body as well. Once you have drawn all of these details, we will be ready for some final touches in the next step.
Step 5 – Add the final details to your killer whale drawing
Killer whales are well known not only for their skills as hunters and their intelligence, but also for their distinctive markings.
We shall be adding these body markings in this step of our guide on how to draw a killer whale, and this will have you ready for the final step where you shall color your creation in!
First, add a rounded shape with some sharp corners on it near the eye of the killer whale. Then, we will be drawing some rounded and twisty lines near the face, back and belly of the animal.
This will help to create the kinds of shapes that are common on a killer whale.
Once these details are drawn, you can also add some elements of your own!
It could be fun to draw an ocean background, and then you could add some more killer whales or some other ocean creatures you may like.
Step 6 – Finish off your killer whale drawing with color
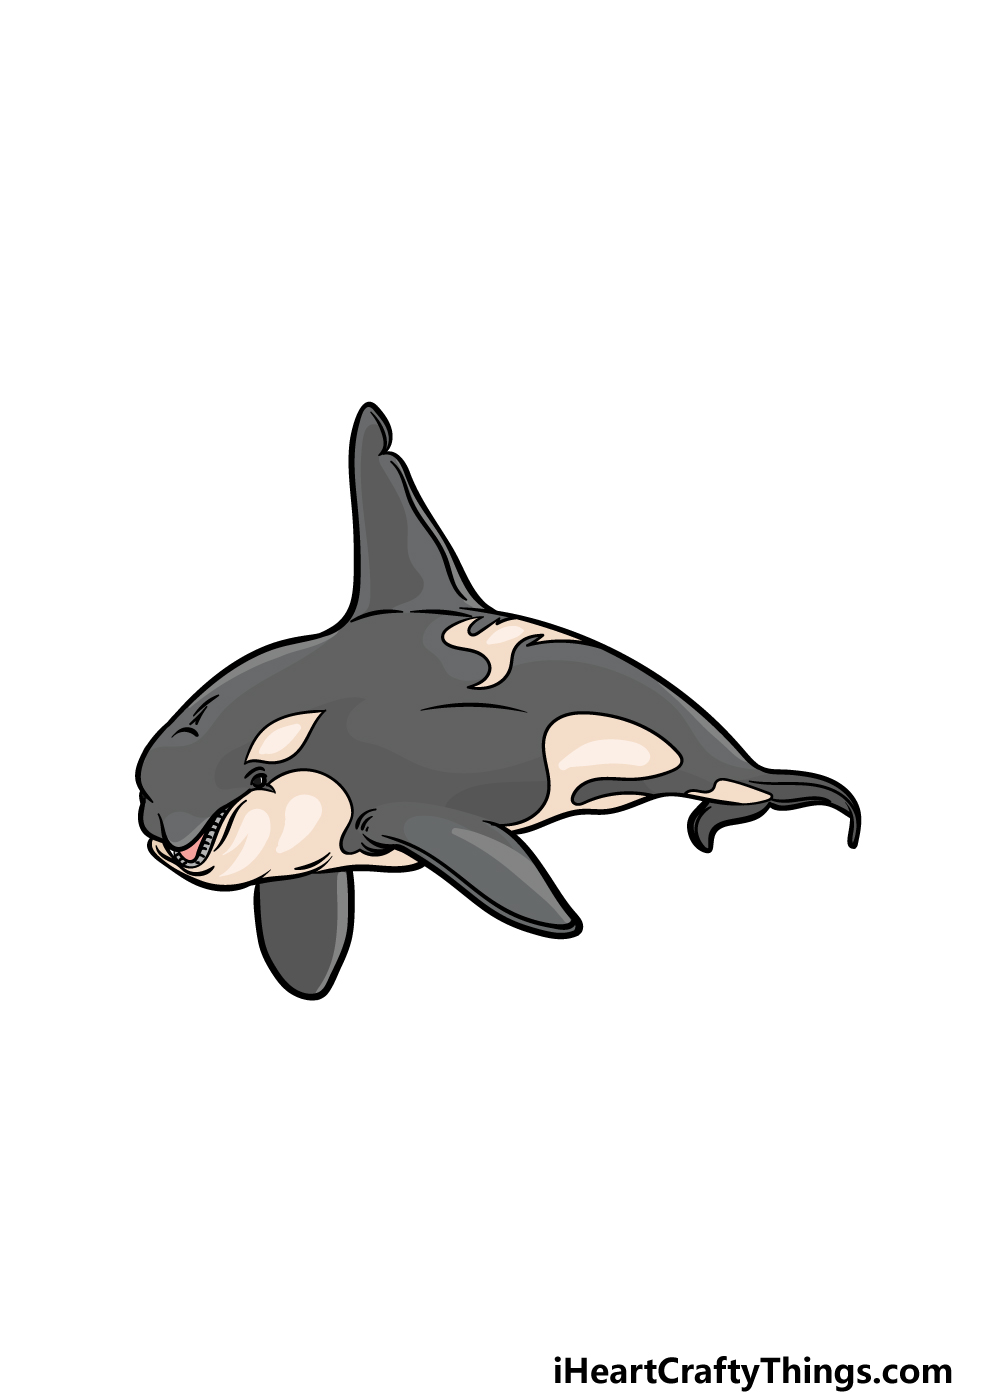
You’re ready to finish off this killer whale drawing in this final step of the guide. As we mentioned before, this step will see you coloring your creation in to finish it off.
Killer whales have a rather binary color scheme of simple black and white, and while they may not be super colorful they still have a really distinctive look!
Even though they have two main colors, you can still incorporate different shades of black for some more body definition. For the white portions, we actually used light beige shades to make it look a little more dynamic.
Will you use similar colors to the ones that we used, or do you think that you will use some brighter colors for a more stylistic look to the killer whale?
3 More tips to make your killer whale drawing easy!
Dive into these 3 tips for making your killer whale sketch so much easier!
With the design of this drawing of a killer whale, we tried to make it quite detailed and realistic. This makes the drawing even more impressive, but it can also make it much harder to draw.
What can you do if the details are proving too frustrating? The simple answer would be to simplify our outright remove some of the details.
For example, the killer whale could have a smoother outline to give it a cartoonier look. This also means you wouldn’t need to include as many details and it would still look great in its own way!
This could not only make it easier but may also result in a style you prefer.
You may wish to stick to the detailed style of this killer whale drawing, in which case you may want to use some additional references to help you as you draw.
The best way to start would be by looking up some photos of real killer whales online. Then, use these photos along with our guide to make it so much easier.
The guide was designed to show you how it’s done, but seeing the real thing could help you to realize the smaller details and proportions of this killer whale.
Finally, you could add a background and additional elements to your killer whale sketch. That may not seem like it would make the drawing much easier, but you may be surprised.
If you were to stick to just the killer whale, you would find that it is the center of the page and that means that any parts that may not have come out as you wanted them will be on full display.
However, you could incorporate the killer whale into an underwater ocean scene.
By adding some lines to represent the water currents and maybe an ocean floor, you could make the killer whale a smaller part of the image.
Not only will it allow you to use fewer details, it will also look more complete!
Your Killer Whale Drawing is Complete!
This is the end of this guide on how to draw a killer whale, and now you have an incredible depiction of this amazing predator!
Hopefully this guide showed you how it can be made much easier and even more fun to recreate this amazing creature.
Now that you have drawn it, be sure to add your own details, ideas and color choices to make it even more personalized.
We can’t wait to see what you can come up with, so let your creativity run wild and see what happens!
This drawing guide is one of many more that we have for you on our website! You can visit us there for more, and be sure to keep visiting as more are on the way soon.
Please also remember to share your finished killer whale drawing on our Facebook and Pinterest pages for us to see!