There are many different characters that have become well-loved around the world. Some are on a whole other level though, and Kermit The Frog is part of that elite group.
Kermit is a beloved icon worldwide, and that means that many would like to learn how to draw Kermit The Frog.
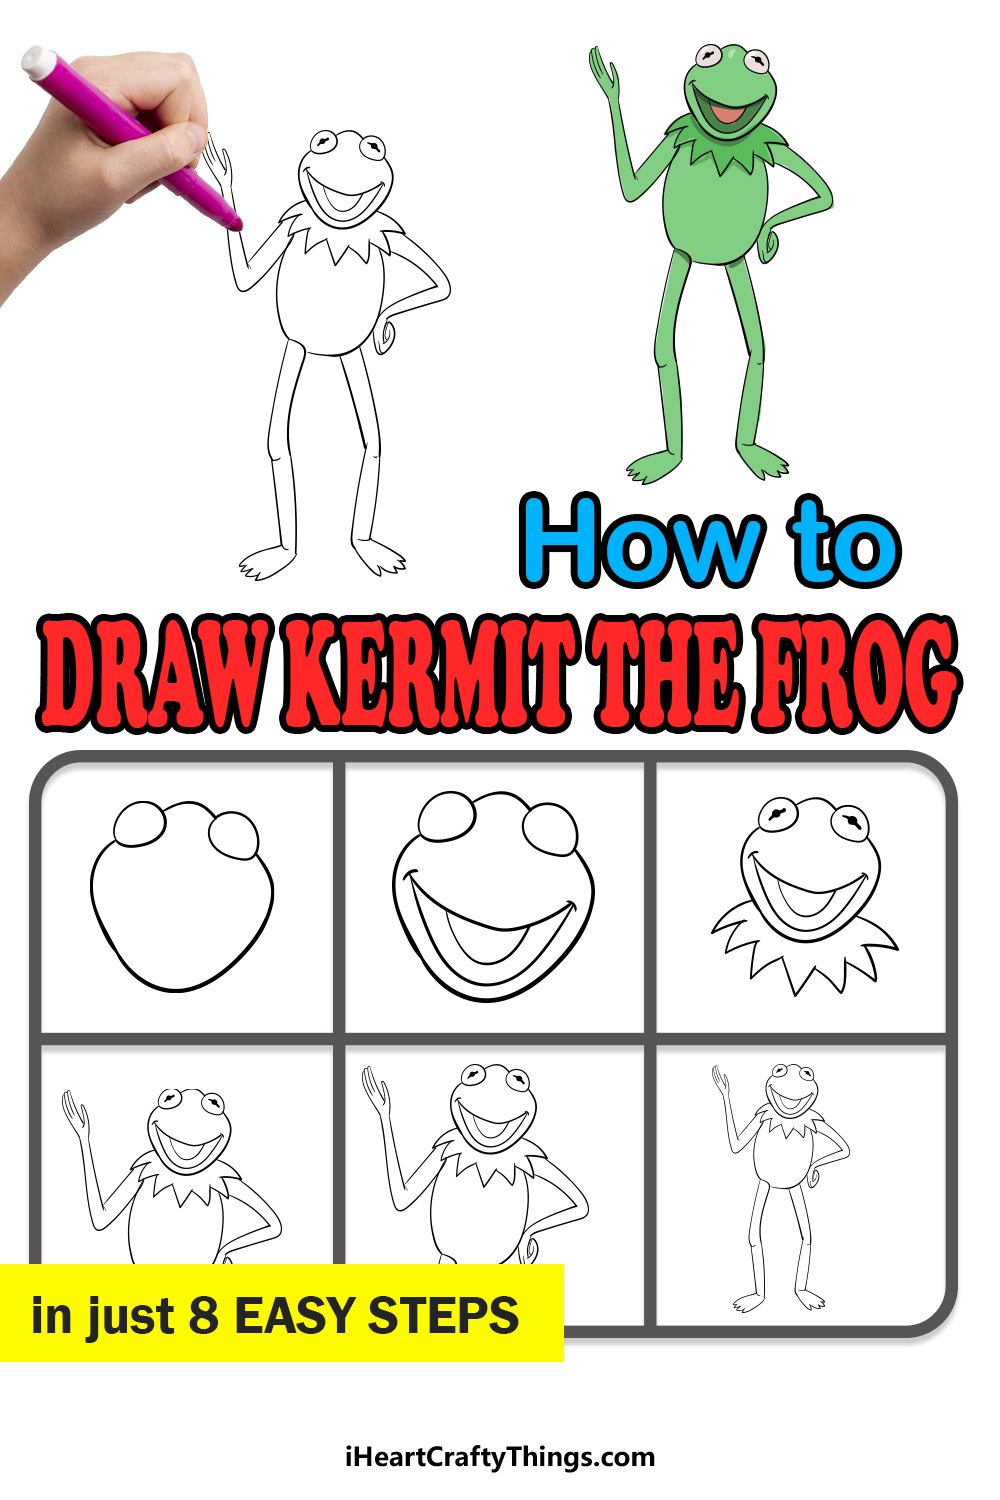
It may not be easy being green, but it can be easy to draw Kermit The Frog when you have the right guide to follow!
This step-by-step guide on how to draw Kermit The Frog in just 8 steps will show you how fun and easy it can be!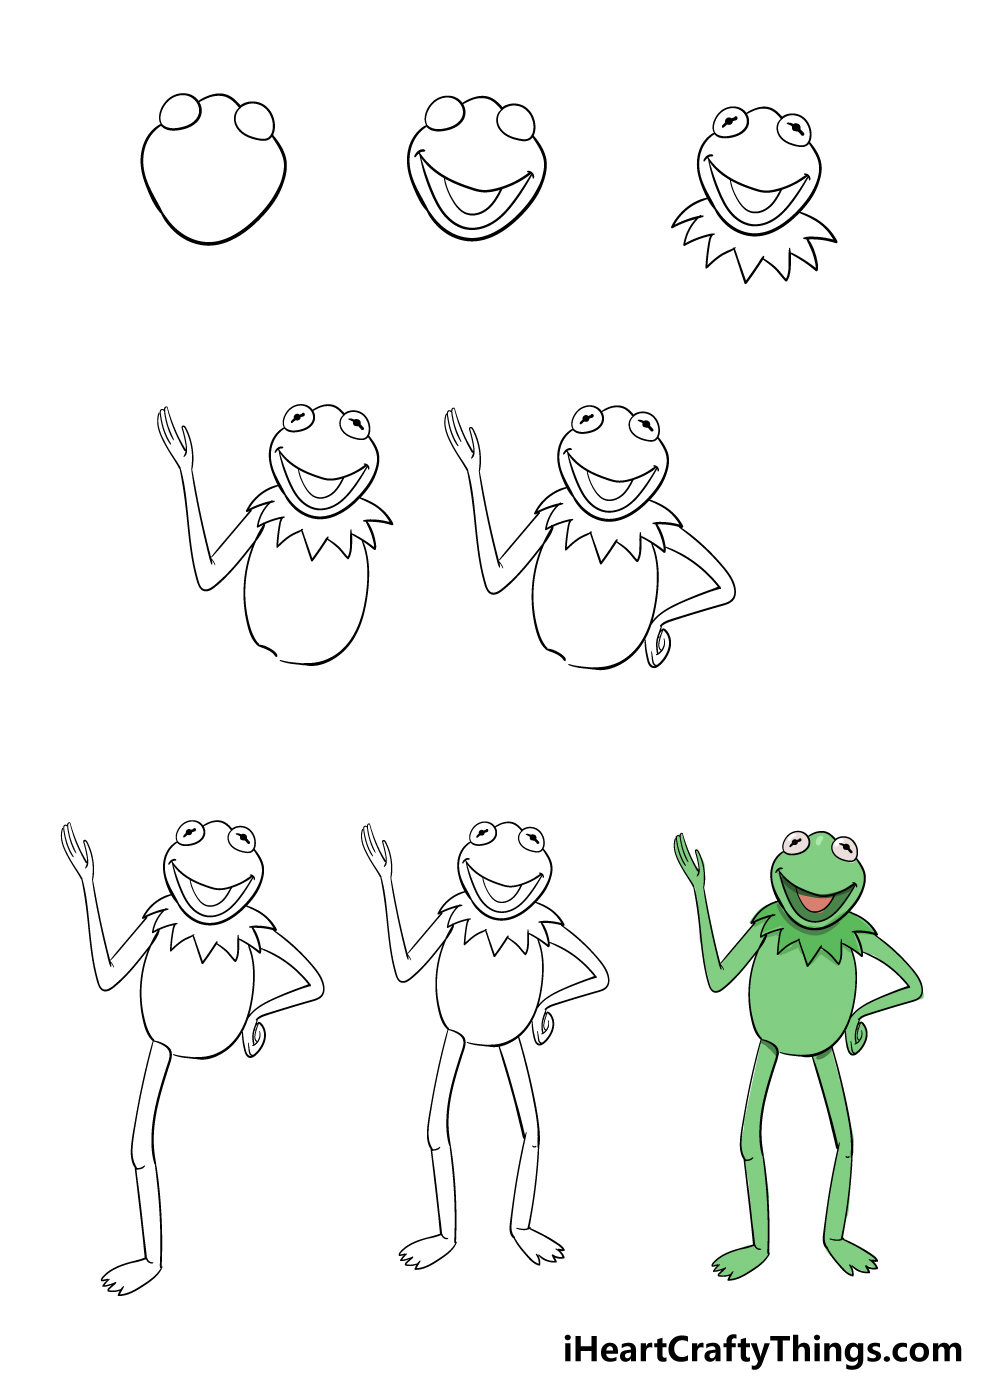
How to Draw Kermit The Frog – Let’s get Started!
Step 1

To start this guide on how to draw Kermit The Frog, we will be starting with his head. His head is quite rounded and long, as shown in the reference image.
His eyes stick out from the top sides of his face as well, and they are drawn with two round shapes.
Once you have it looking like our reference image, you’re ready for step 2!
Step 2 – Next, draw a mouth for Kermit The Frog

Kermit and many of the other Muppets have a distinctive mouth design, so e shall be adding it to your Kermit The Frog drawing now.
You can use a curved line for the top of his smiling mouth, and then have a more sharply curved line beneath it.
Finally, you can draw a rounded shape coming down from the inner roof of the top of his mouth.
Step 3 – Now, draw his pupils and collar
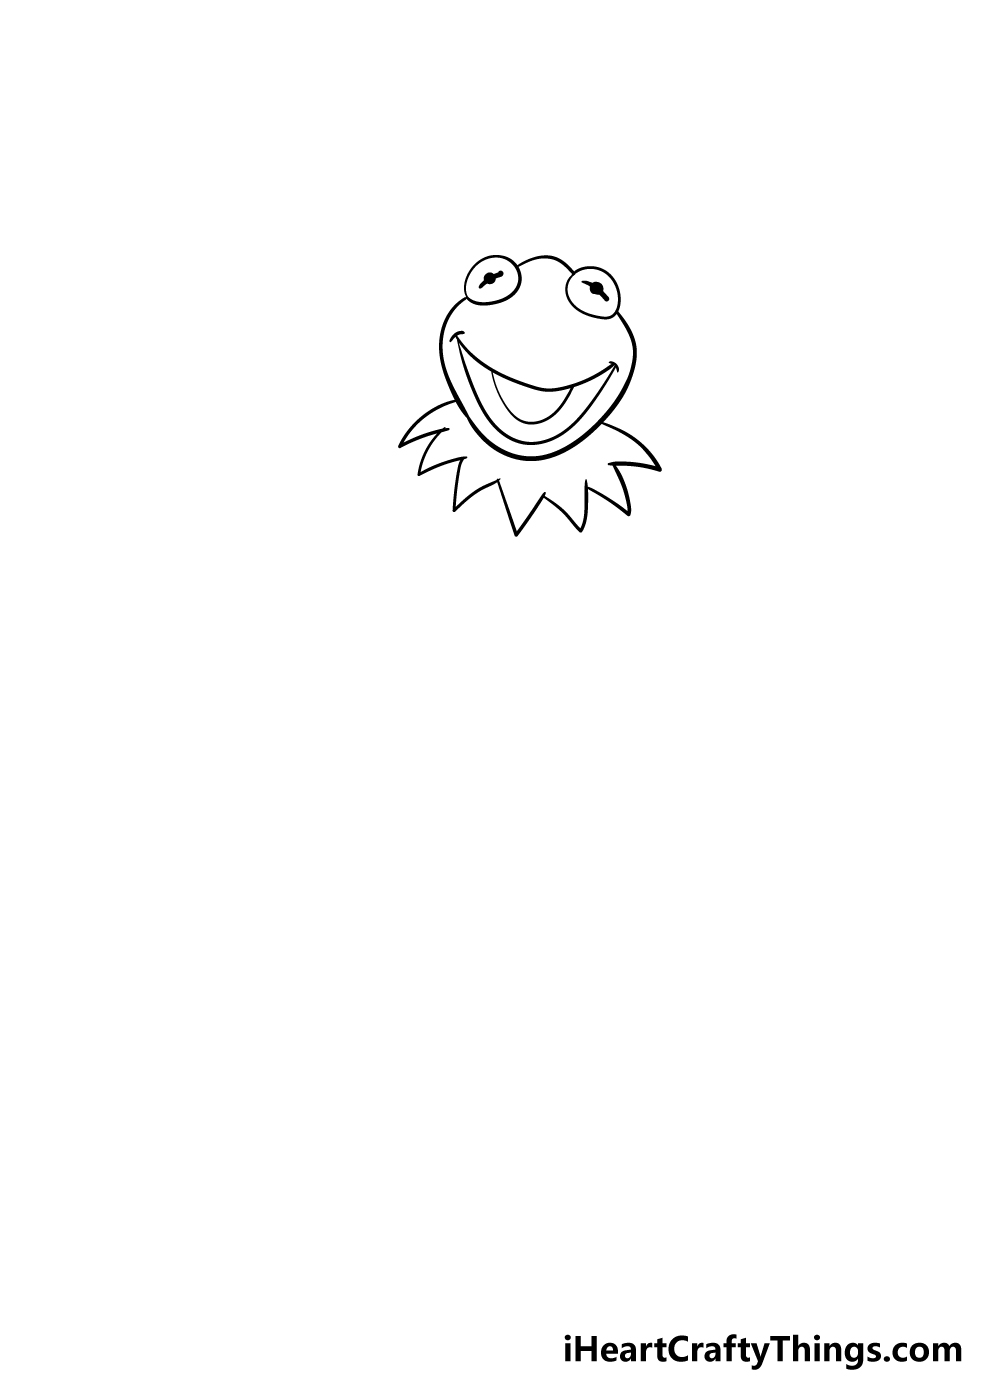
In this part of our guide on how to draw Kermit The Frog, we will be drawing his iconic pupils and spiky neck collar.
To draw his pupils, simply put a dot in each eye and then draw a line through each dot to make his distinctive pupils.
Then, using some sharp and jagged lines around his face you can easily draw the spiky collar that he has.
Step 4 – Next, draw his body and first arm
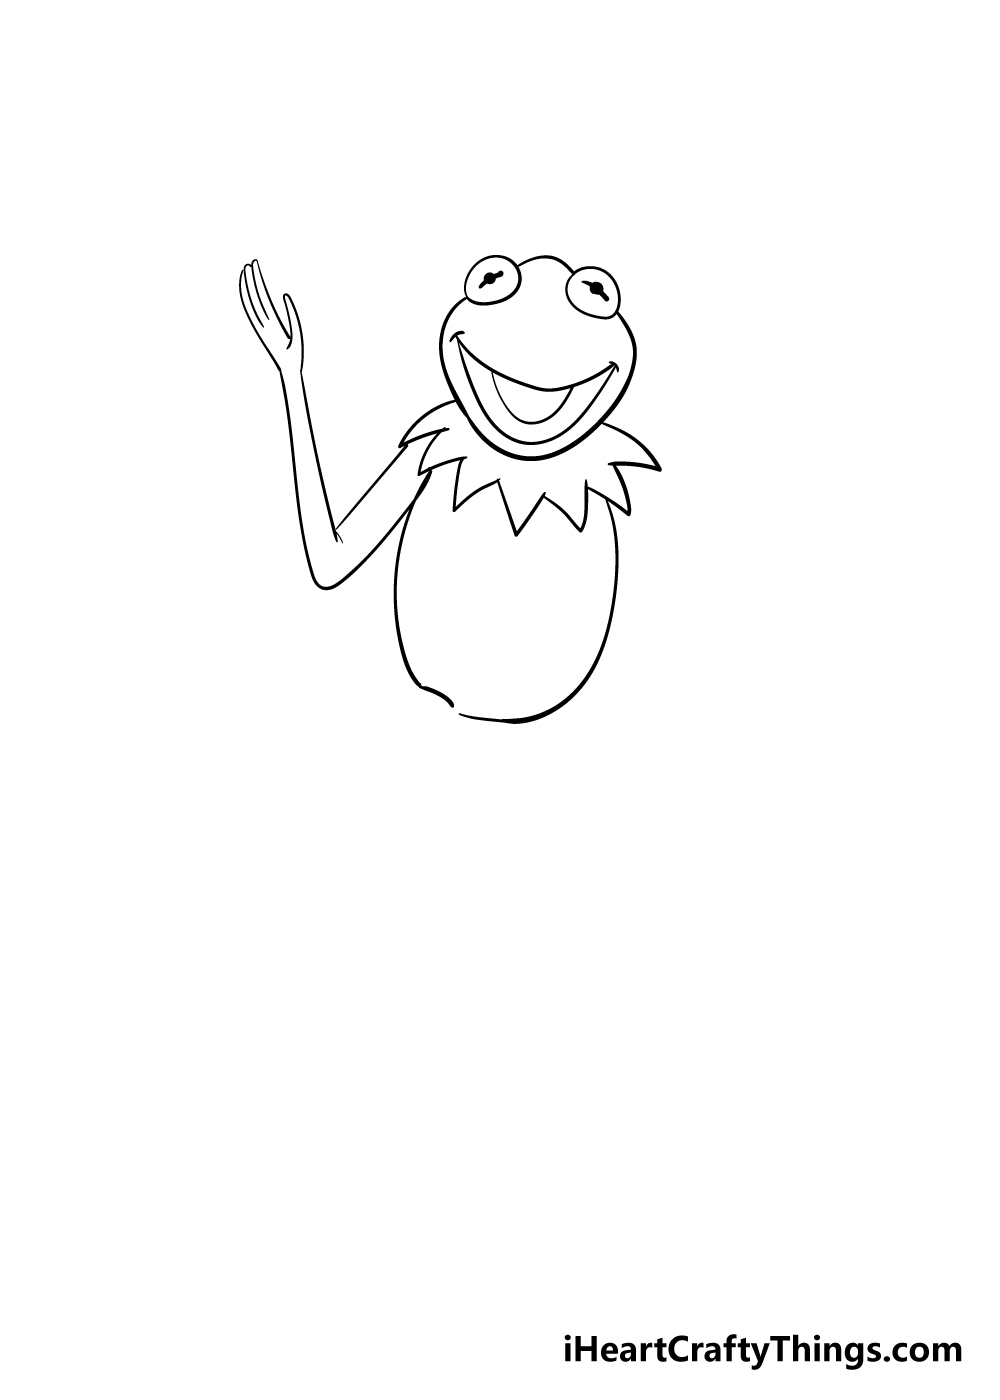
We will be adding the belly and first arm for your Kermit The Frog drawing in this next step. For his belly, you can draw two rounded lines with a small gap at the bottom right of his belly.
Then, you can draw an arm on the left that is angled upward for a wave. His arms are long, thin and lanky as shown in the reference image.
You can then add his thin, long fingers to his hands to finish off this step.
Step 5 – Now, add his other arm
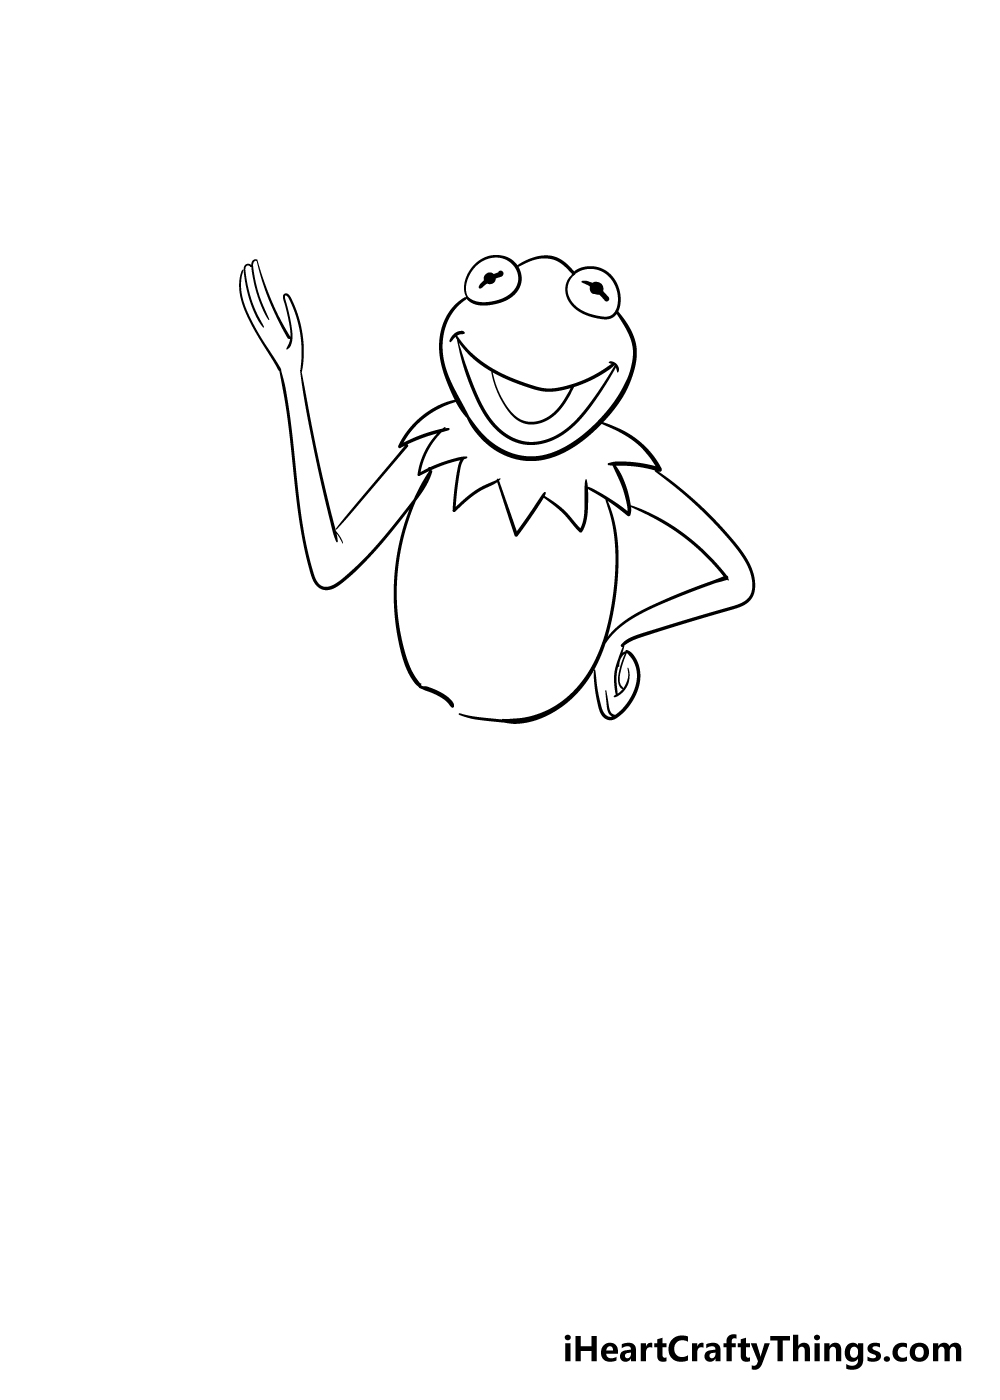
You’ve drawn one arm so far in this guide on how to draw Kermit The Frog, and in this next step we will be adding his other one.
This one will look similar to the other one, except it will be bent and have his hand on his side. The hand will also be curled over itself against him.
Step 6 – Next, draw Kermit’s first leg
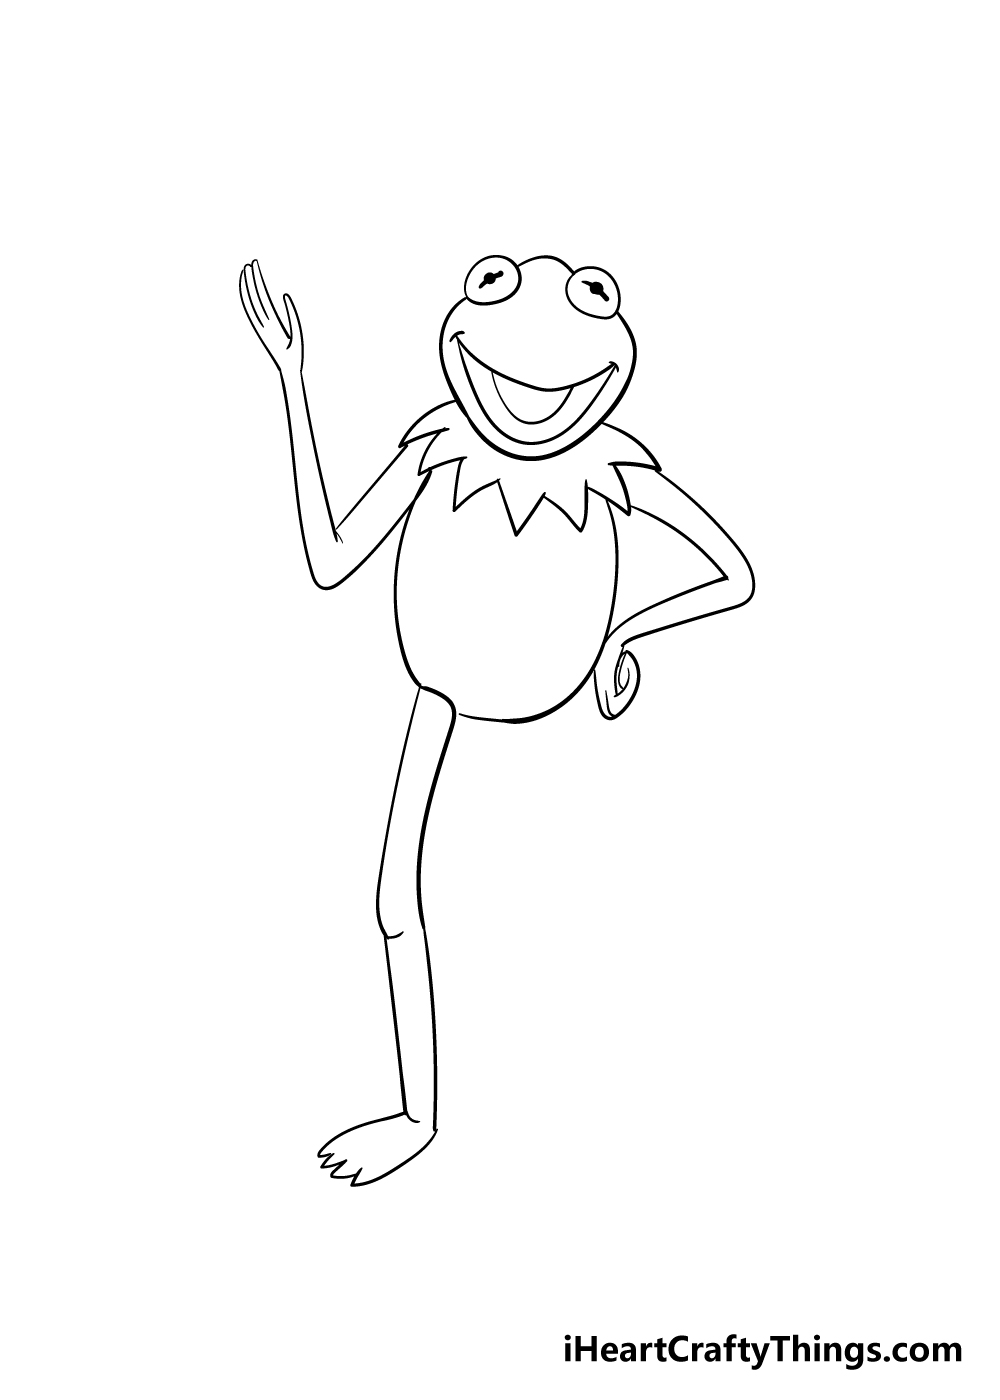
We will be drawing the first leg for your Kermit The Frog drawing in this next step. Much like his arms, his legs are long, thin and lanky.
The leg can be drawn with two slightly curved lines, and you can add a bump on the left-hand side for his knee.
His foot will be small and flat with a jagged line for his toes. Once you’re happy with it you’re ready to move on!
Step 7 – Now, draw the other leg
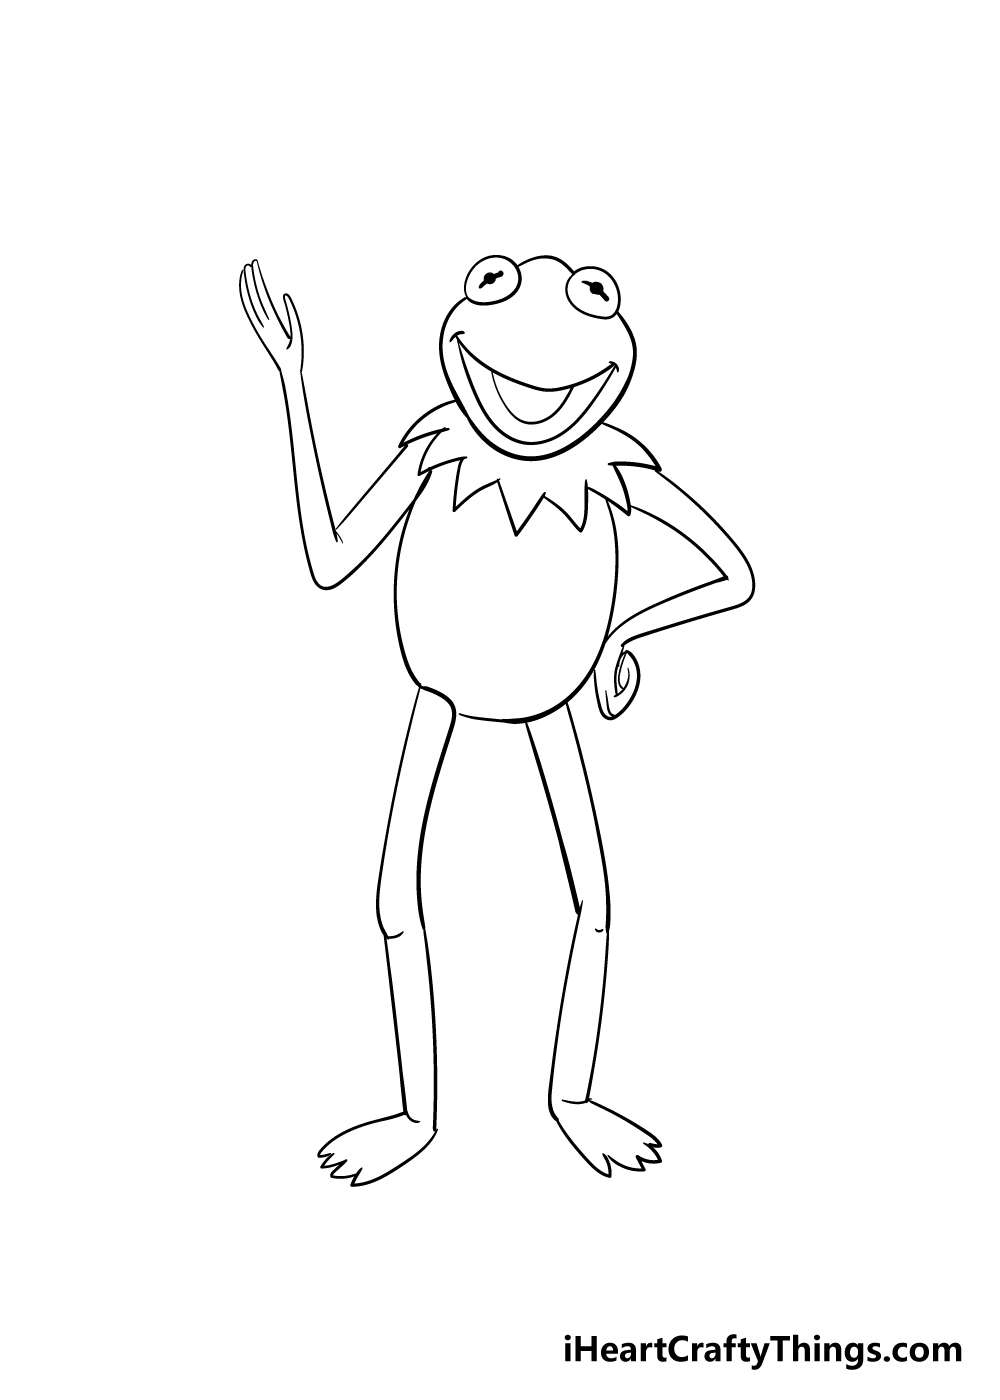
This guide on how to draw Kermit The Frog would be incomplete without his second leg, so we will add it in this next step!
Simply draw his other leg to make it look similar to the other one that you just drew.
With that, you’re ready for the final step! Before you move on, be sure to add any extra touches you may want for your picture.
You could draw a fun background for one idea! This way you could show what kind of environment Kermit is in and you can create a fun scene.
What else can you think of to add for your Kermit The Frog drawing?
Step 8 – Finish it off with some color
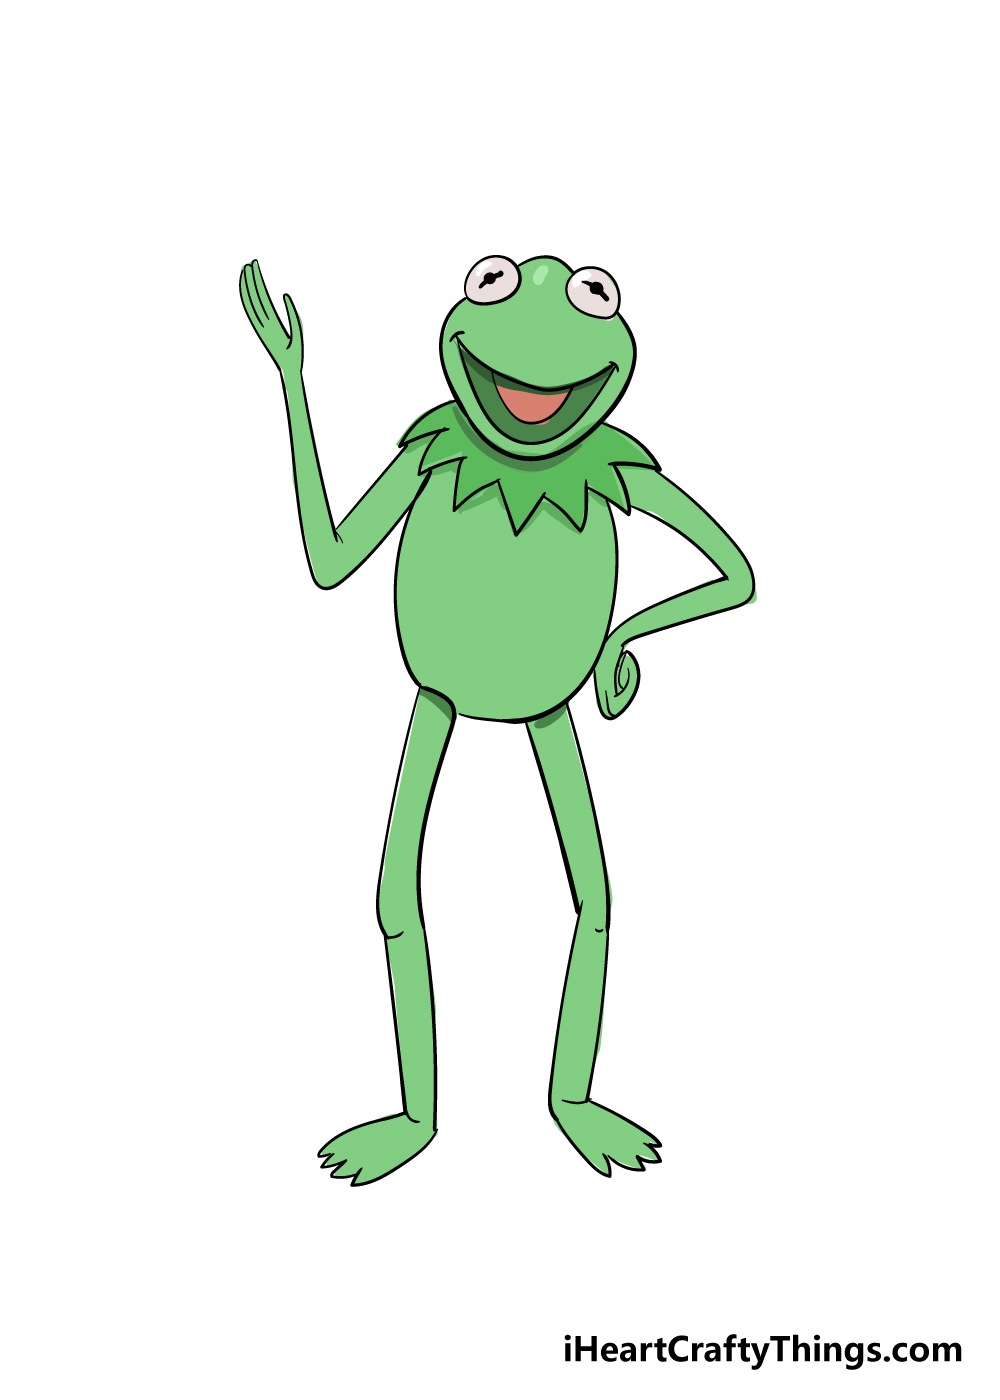
You’ve done a great job working through this guide to land up with a great Kermit The Frog drawing!
Now you get to have a fun time with your favorite colors and art mediums to really finish off this picture.
Kermit is famously quite green, so as you might imagine that is the color we chose for him in our reference image.
Even if you stick with his green color scheme, there are ways that you can vary things up. A great way to do this is by coloring in any background elements that you may have drawn.
You could also use a variety of different awesome art mediums! Maybe you could use a combination of watercolors and colored pens for a multimedia look to the image.
That’s just one of many ideas and approaches you can take, so have some fun being creative with it.
It’s all up to you now and we can’t wait to see what you do!
Do this to take your Kermit the Frog drawing to the next level
Make this Kermit the Frog sketch look the best it can be with these tips!
Now that you have mastered this Kermit the Frog drawing, you could make it look even better by giving him some accessories. For one example, you could have him strumming his famous banjo.
This would be easy enough to adapt to this drawing, and you could look to the various Muppet shows and movies to help you out. There are so many other objects he has interacted with in the past, and you could use any favorites you have for this picture!
Another aspect of this character is that he will often be dressed up in themed outfits. You could use some of these outfits for your drawing of Kermit the Frog!
For example, you could make him look fancy in a tuxedo, or maybe he could be casual in a leather jacket. If you added any themed accessories, then that would go well with a themed outfit.
Maybe he could be in a baseball uniform while holding a baseball bat!
Kermit is one of many iconic characters in the Muppets franchise, and there are so many more you could add to this Kermit the Frog sketch! For example, you could add the lovely Miss Piggy, as she is often associated with Kermit.
She is just one of many examples, and you could pick any of your favorite Muppet characters. By looking up pictures of these characters or using their appearances in movies and shows, you can learn how to draw them as you learned to draw Kermit!
Finally, you could finish it all off with some background details. Once again, the background setting could depend on the other elements you added to your Kermit the Frog drawing.
Using our baseball example again, you could draw a baseball field behind him if you went for this look.
That’s just one possibility, and you could create all sorts of fun scenes for Kermit to be a part of!
Your Kermit The Frog Drawing is Complete!
That brings you to the end of this step-by-step guide on how to draw Kermit The Frog! We hope that you had a lot of fun working with us to celebrate this iconic and beloved character.
This drawing may have looked a bit tricky at first, but when you have steps to follow then a new drawing challenge can be made easier!
Now you can take over and really make this drawing your own!
Whether you draw a fun background, add some props for Kermit or use some creative art mediums we know you’ll do an incredible job!
The drawing fun doesn’t have to end with this guide! When you’re ready for more, be sure to visit us on our website.
We have tons of awesome drawing guides for you to enjoy over there, and we upload new ones all the time! Be sure to check in often so that you never miss out on any new guides!
We would love to see your finished Kermit The Frog drawing, so please do share it on our Facebook and Pinterest pages for us to enjoy!