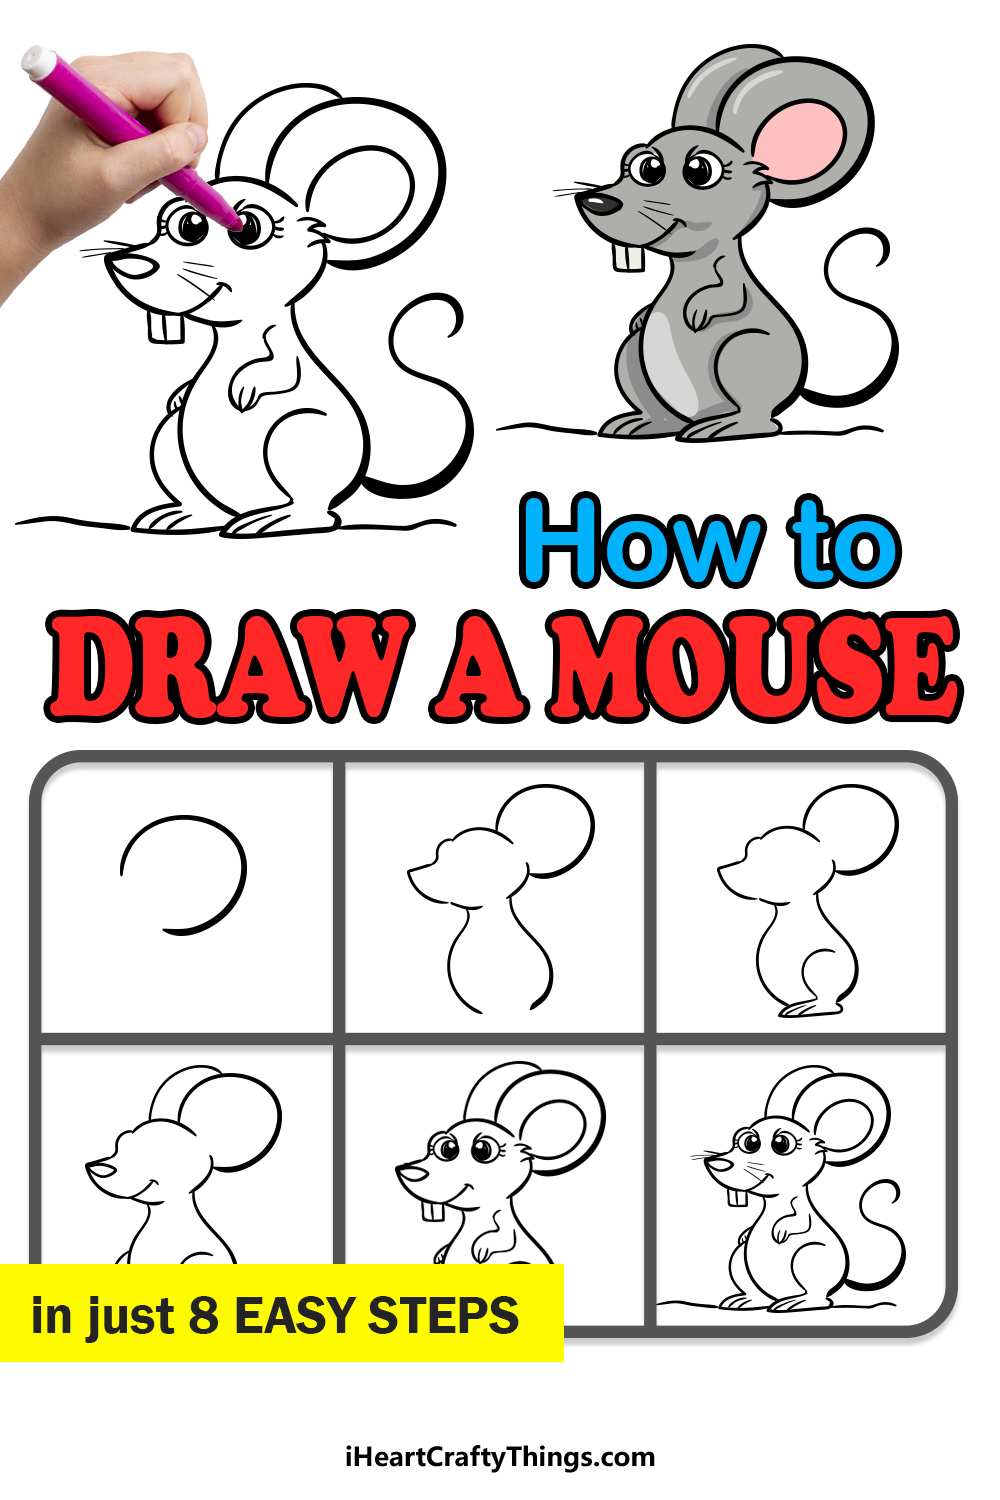
Find out just how easy it is to learn how to draw a mouse with this fun guide for kids! You’ll be able to create your own cartoon mouse in just a few steps.
Mice are so cute, and I love to incorporate them into drawings and designs. I especially like cartoon mice, and there are so many famous ones in classic cartoons.
If you want to make a cartoon mouse of your own though, then it can present some challenges. This guide aims to eliminate those challenges as you see how it’s done.
I will show you how to draw details like its big round ears, teeth and twisty tail. This is just the beginning, too! Once you have finished it, you can take it even further with a background and some additional details.
I’m sure the mouse would appreciate it if you were to draw a nice block of cheese, just saying!
Watch These Steps To Create A Cute Mouse Drawing
How to Draw A Mouse – Let’s get Started!
Step 1

Mice are known for their big, round ears, so it seems fitting that we shall start with the ear for this first step of our guide on how to draw a mouse.
To draw this first ear, simply draw a large and rounded curved line as it appears in our reference image. We will be adding to it in the following steps!
Step 2 – Next, draw the head and body
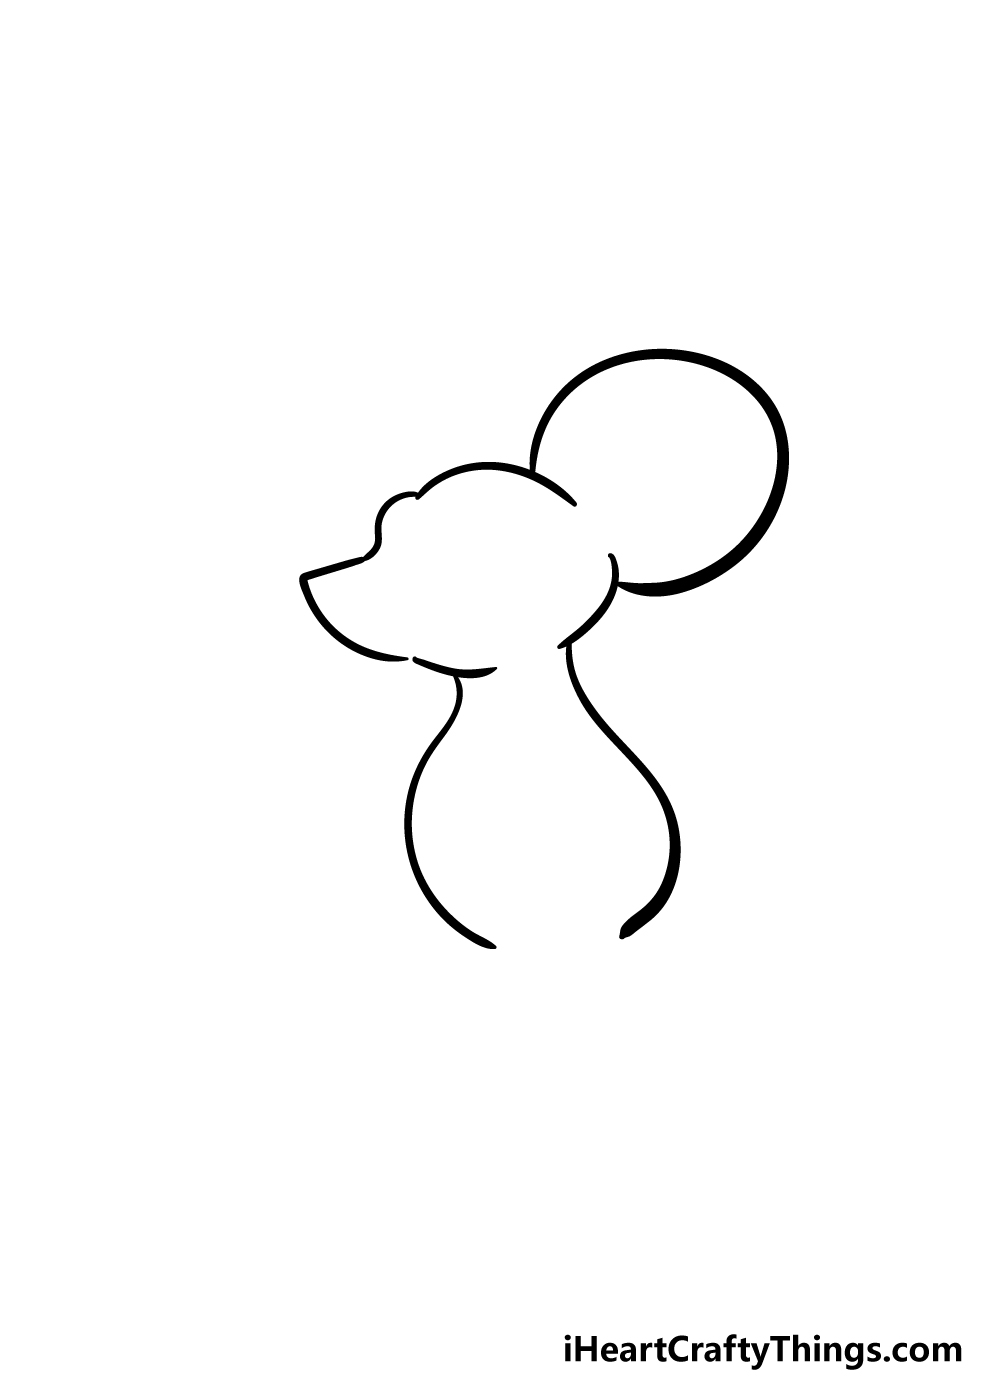
Using the ear that you drew in the previous step, we shall draw the start of a head and body for your mouse drawing.
Focusing on the head first, it will be connected to the ear and have a rounded head with a pointed snout.
The rest of the head will be rounded as well. The body will come downwards from the head, and it will be quite thin at the top and get thinner as it goes down.
Don’t forget to leave a gap at the bottom of the body, as the leg will slot into that space.
Step 3 – Now, draw the first leg of your mouse
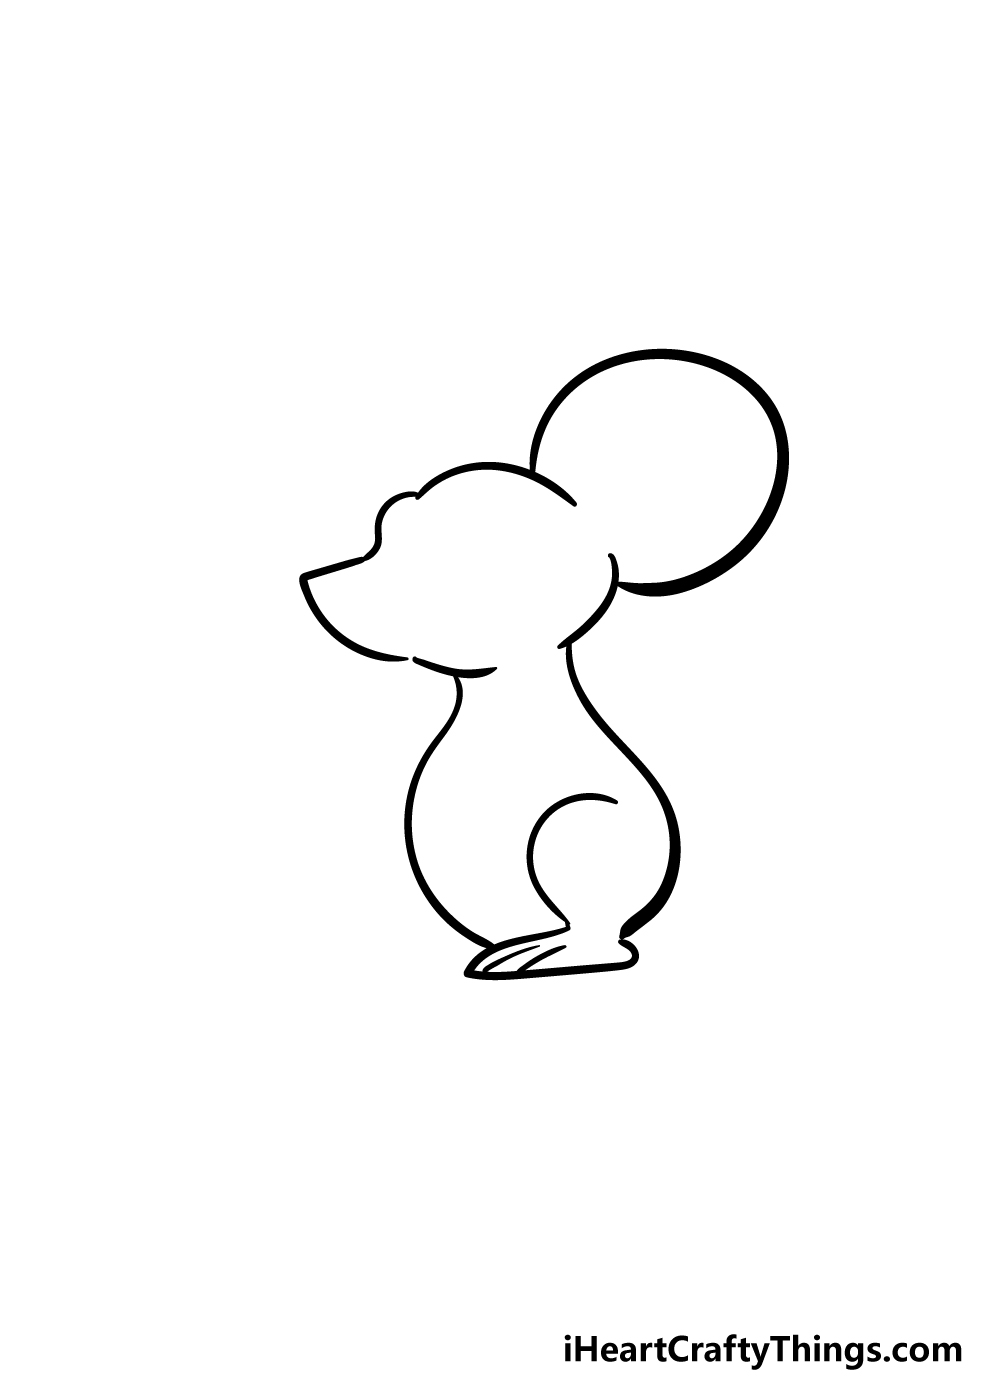
We will add the first leg in this next part of our guide on how to draw a mouse. The leg will be quite squat and rounded, and you can use a curved line to make it.
Then, you can draw the foot at the bottom of it. As you can see in the reference picture, the leg portion is within the body outline and the foot will be flat on the ground.
Step 4 – Next, draw the other foot and other details
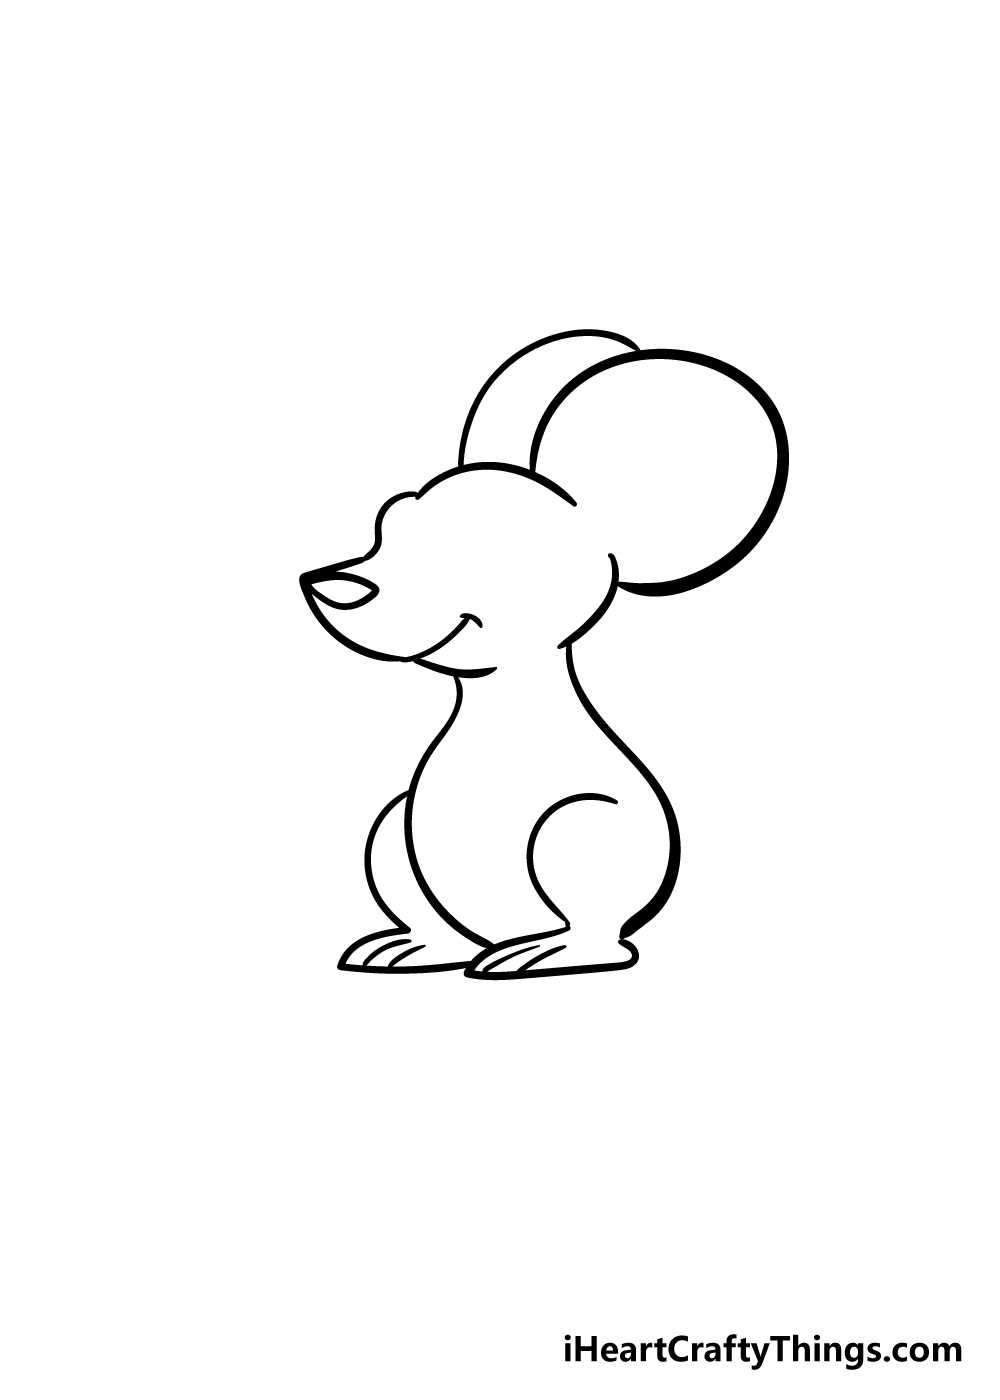
This step will be all about building some more details on your mouse drawing. First of all, draw the other foot coming out from the other side of the body as you can see it in the reference image.
Then, use a curved line coming off from the ear that you have drawn already to create the second ear.
Finally, draw a flat, triangular shape for the nose, and then finish off this step with a curved line that will make the smiling mouth of your mouse.
Step 5 – Draw some eyes and facial details in this step
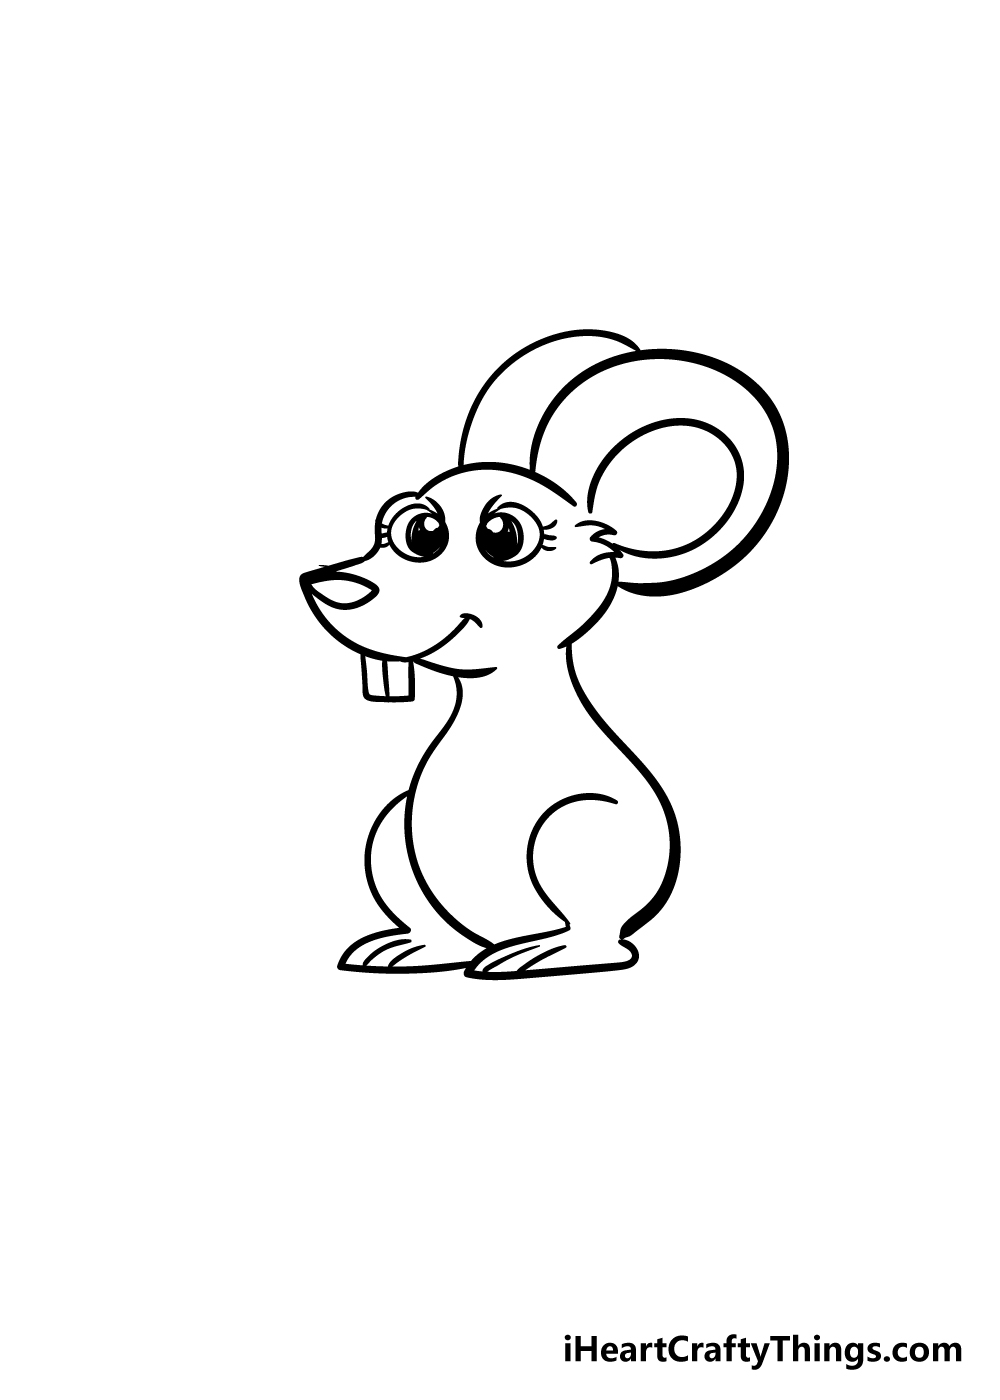
To create a cute face for your mouse drawing, we will start with some eyes. We’ve kept them big and round with black circles within them to make some large irises for extra cuteness.
Then, you can draw a square with a vertical line going down it for the buckteeth of your mouse, and then use a circular shape to create the inner portion of the ear.
Step 6 – Now, draw some arms for your mouse
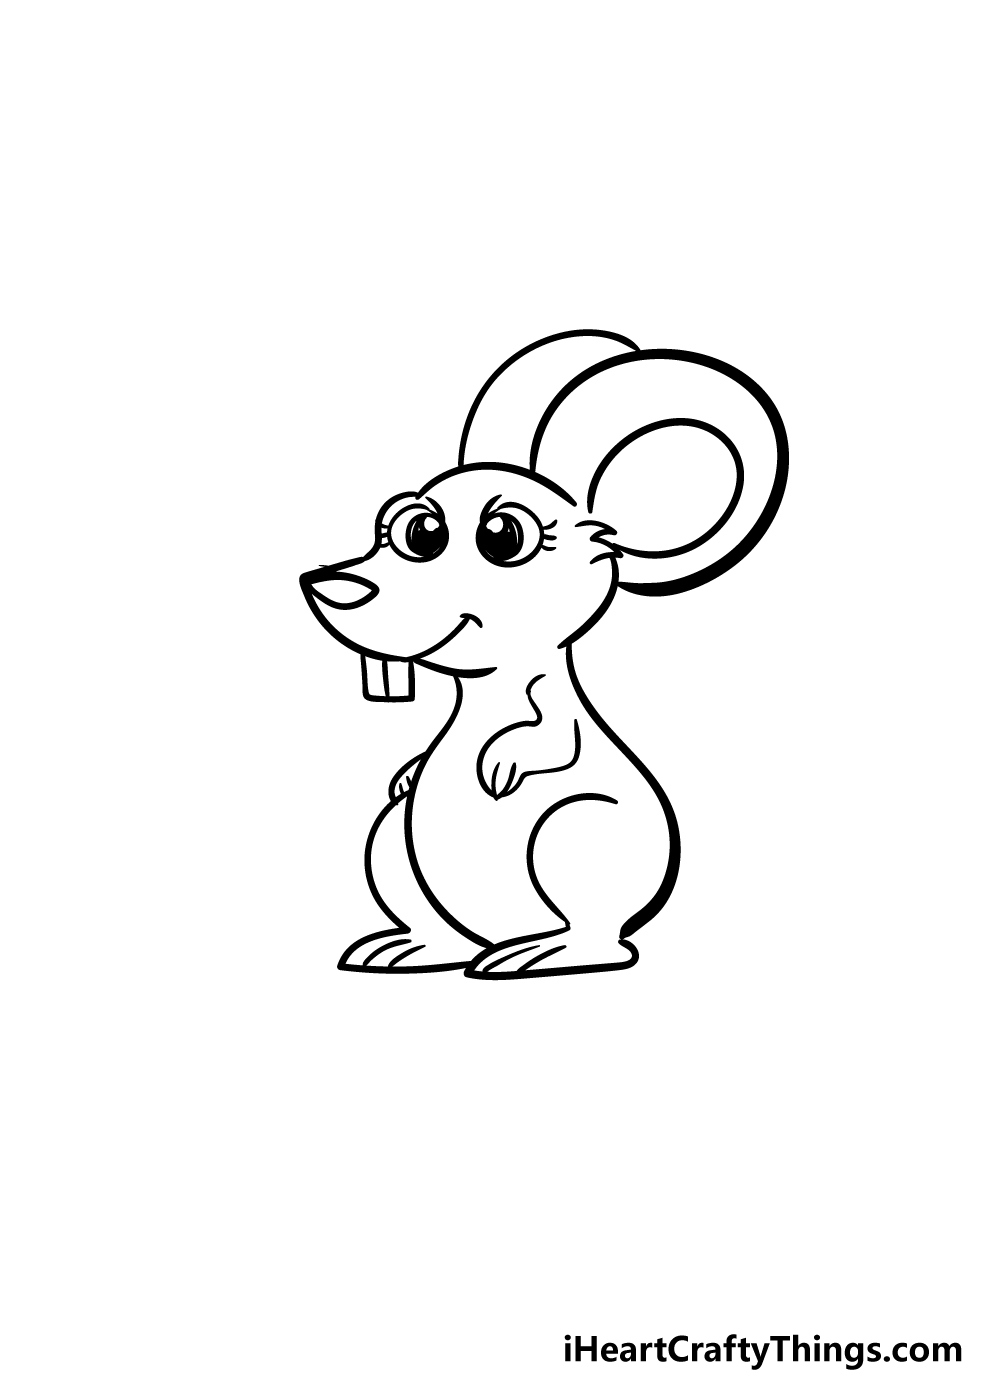
We’re nearing the end of this guide on how to draw a mouse, but before we get to the end we will need some more details. For this step, we shall draw some little arms for your mouse.
These will be much smaller than the back legs of your mouse and will be bent a bit for a cute look.
Step 7 – Draw the final details of your mouse
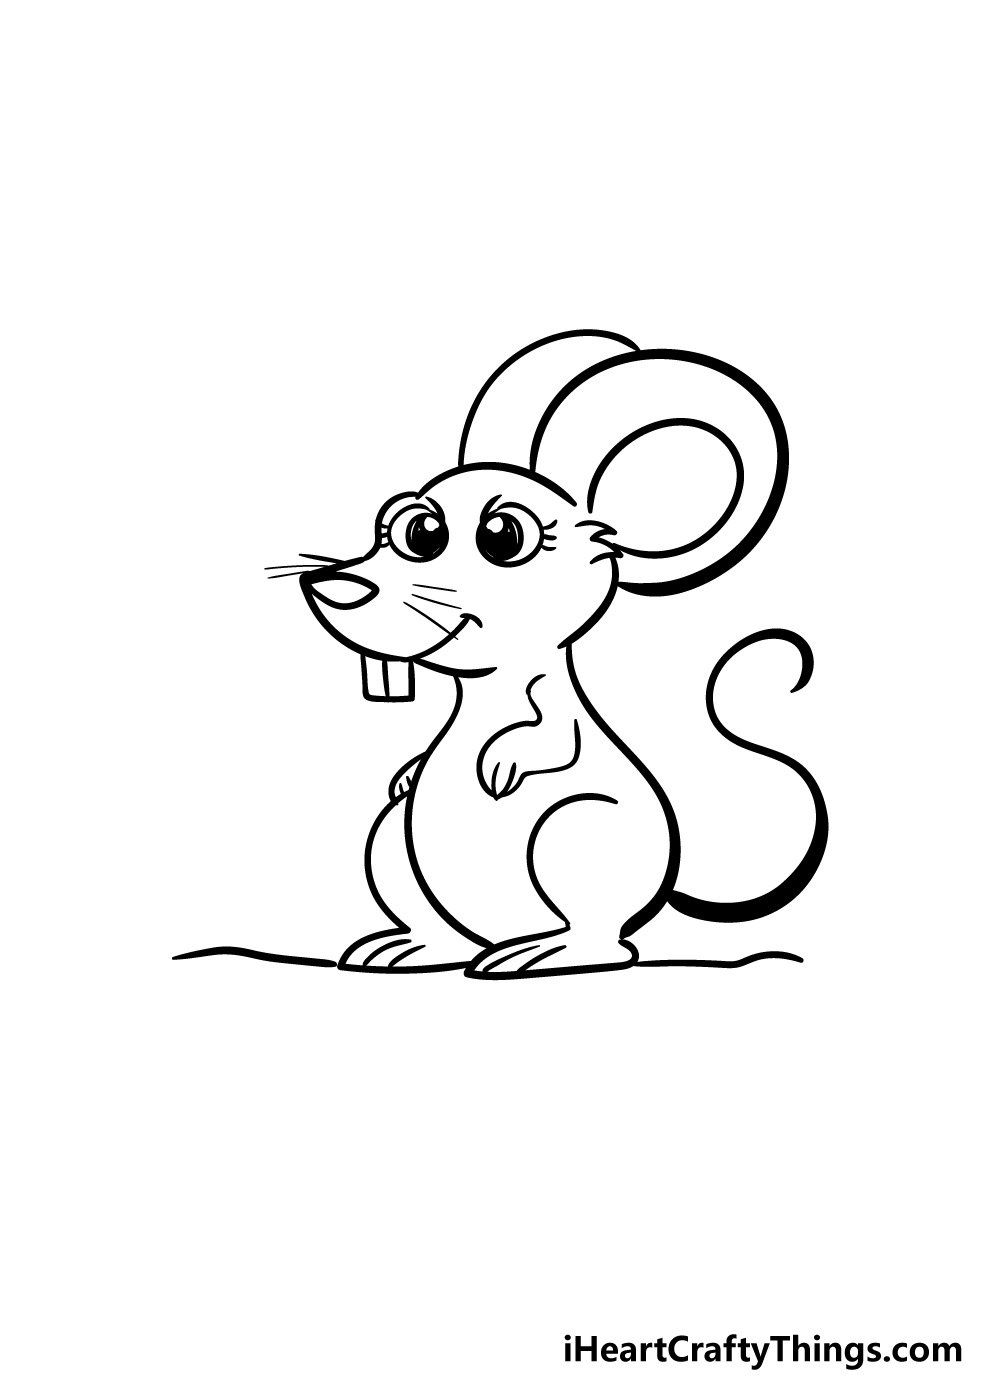
You’re almost ready for the coloring in stage of your mouse drawing, but first we will draw some final details.
The most important of these is a long tail, as what would a mouse be without its tail?
You can draw this with a long, curvy black line. Then, draw some thin lines coming from the snout for some whiskers and draw a line underneath your mouse for the ground.
These are the details that we used for this drawing, but you could also add any details that you would like too!
Perhaps your mouse could be holding a tasty piece of cheese, or maybe there could be a fun background behind it? How will you finish your mouse drawing off?
Bonus: Add Some Clothes Or Accessories For This Mouse!
We’re about ready to take on the final step of this guide on how to draw a mouse. That final step will be aimed at adding some colors to the drawing, but we thought it would be fun to examine a few more ideas.
Mice are used commonly in cartoons, with perhaps the most iconic cartoon character being a mouse. For this reason, we think it’s good to have some fun with it and be a bit imaginative without worrying about realism.
One way you could do this would be to create some clothing for this mouse drawing to wear! If you’ve already made the final drawing, then this could be an alternative drawing to show what it would look like.
When doing this, you could pick a theme. It could be as simple as creating a casual look, which you could do with a cap, t-shirt and shorts.
Or, you could also use a profession as a theme. This mouse could be a doctor with a stethoscope or maybe an engineer holding a wrench.
These are just two ideas, but you can see how you can get creative with it! If you get a bit lost, then you could always look up clothing online and then adapt it to this drawing.
You don’t need to stop with the clothing, however. You could also add some accessories that correspond with the theme.
We already gave you some ideas with the two examples we used, but you could add accessories that correspond with any themes you can think of!
Now it’s up to you to decide how you would like to dress this mouse. What clothing styles can you think of?
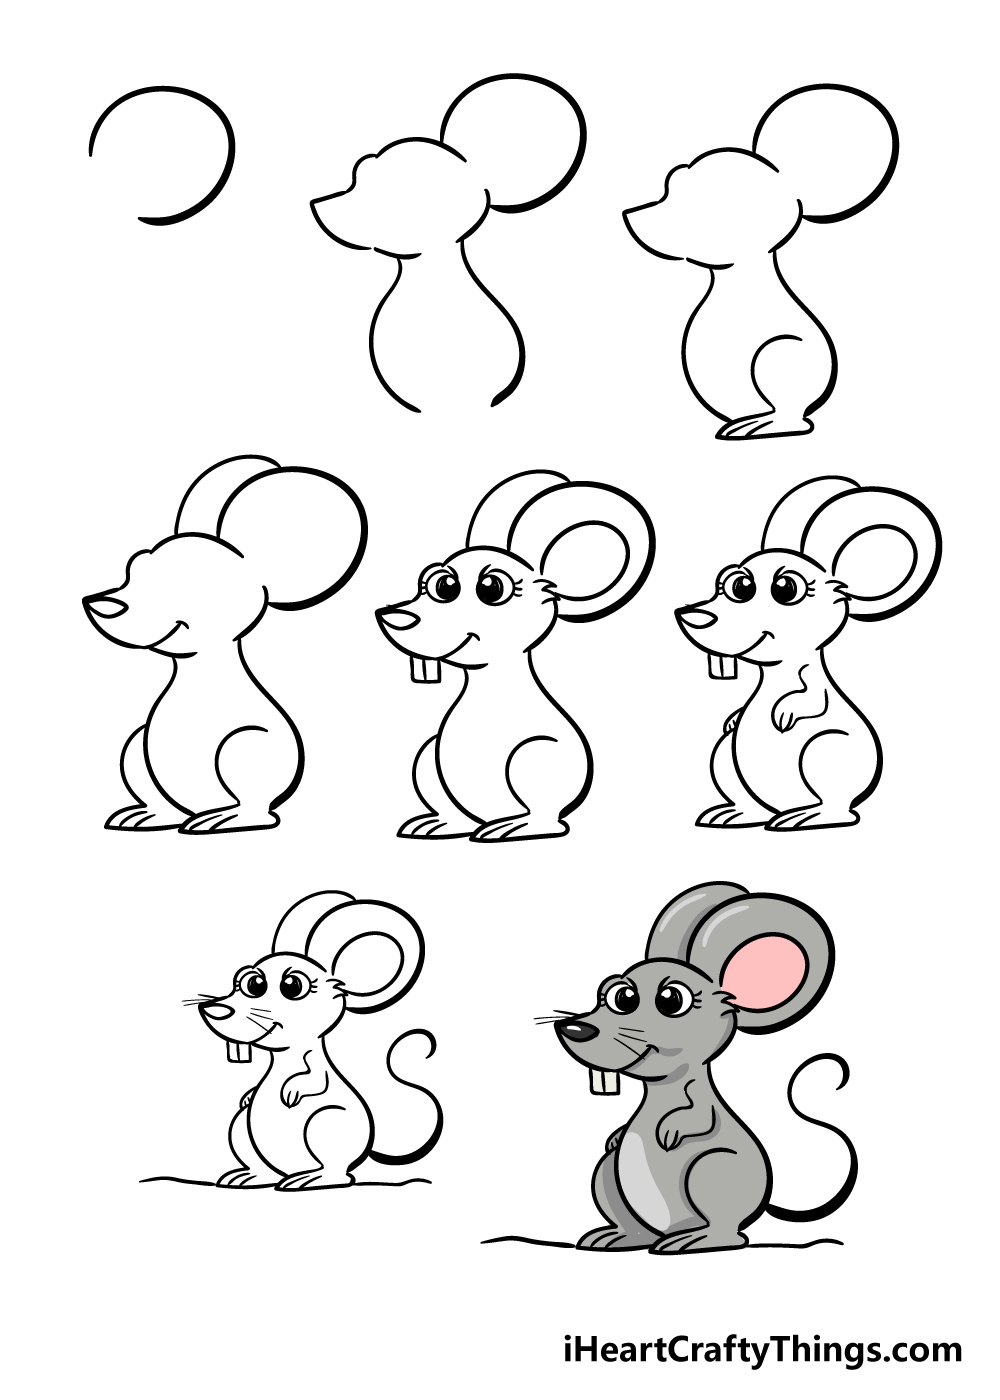
Step 8 – Now finish off your mouse with some color
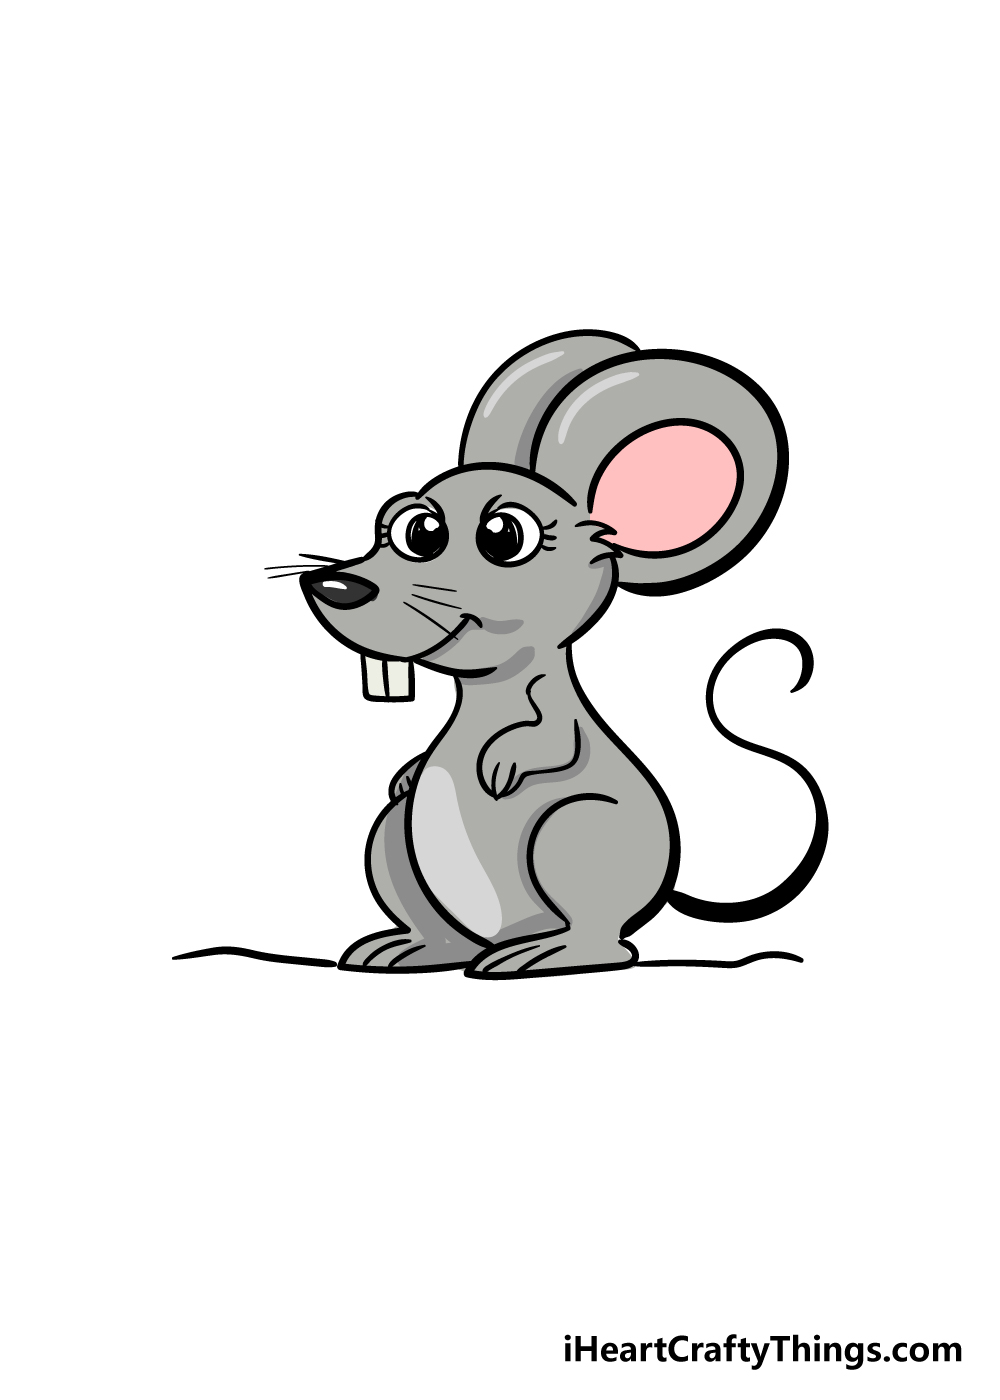
Now that you’ve completed your drawing, it’s time to have some fun coloring in your amazing mouse!
We used a grey color scheme for our mouse, but that’s just one of many options you could choose.
Mice come in all manner of different colors, and you could also use some of your favorite bright colors for a more stylistic look.
Will you use brighter mediums such as paints or colored markers or keep it more muted with something like watercolors or colored pencils?
Perhaps you have even more favorite mediums that you love to use, and we can’t wait to see what you decide on!
Do this to take your mouse drawing to the next level
Have some big fun drawing this tiny creature as we make your mouse sketch even better!
Now that you have completed this drawing of a mouse, you could add some more little mouse pals to the image! If you were to do this, you could go through the steps of the guide again.
For example, by reversing the direction of each image in our guide, you could have a mouse that has the same design but is facing the opposite direction.
Even so, you could still change up some details to make the mouse look unique as well. You also don’t need to stop at one, as you could also add multiple mice!
When it comes to adding friends for this mouse, you could also add other kinds of characters. These could be similarly small creatures such as insects, rats or even birds.
If you wanted to show the arch nemesis of the mouse, then you could even have a cartoon cat in the scene! These are just a few examples of animals that you could add.
What are some other characters that you think belong in this picture?
Another way that you could make this mouse drawing even more dynamic would be by adding some objects for it to interact with. For instance, mice are famous for pilfering food.
You could add some yummy treats for this mouse to enjoy! We’re sure it would appreciate a big block of cheese, for instance.
This would also be a great way to show off any of your favorite food as you add it for this mouse!
Once you’ve added all of the food and characters you want for this mouse sketch, you could then finish off with a background setting.
Mice can turn up in the strangest places, so you have many options!
One fun idea would be to show what it looks like in the mousehole this mouse lives in. You could even have little pieces of furniture to make it seem like a real home!
Your Mouse Drawing is Complete!
That brings us to the end of this guide on how to draw a mouse. We hope that you had a lot of fun creating an adorable new rodent friend alongside us!
Our goal with all of our step-by-step drawing tutorials is to make them easy and fun to use, so we hope that you had a great time with it!
This may be a guide that you can follow, but we hope that you will feel free to put your own creative spin on it as well.
You could do this by drawing some extra props for your mouse, by creating an incredible background or by getting creative with your colors.
There is no limit to your creativity, and you should let your imagination run wild!
If you enjoyed this step-by-step drawing guide then we have good news for you, as we have many more like this one on our website, and we upload more very often!
Be sure to check in frequently to never miss out on the fun.
We also would love to see your mouse drawing when it’s done, so we hope that you will share it on our Facebook and Pinterest pages so we can admire it!