There are so many different kinds of flowers around the world, so you’re spoiled for choice when trying to decide on a favorite kind of flower.
Some flowers are closely associated with certain countries or regions, and they become symbolic of whichever place they’re linked to.
For example, you may think of tulips when thinking of the Netherlands, and similarly you will probably link the cherry blossom to Japan.
While this flower is well known for its beauty, learning how to draw a Japanese flower isn’t always that easy.
It can be made much easier when you know what to do, and that’s what this tutorial is here for!
Our step-by-step guide on how to draw a Japanese flower will show you how it’s done so that you can focus on the fun of drawing instead of the frustration.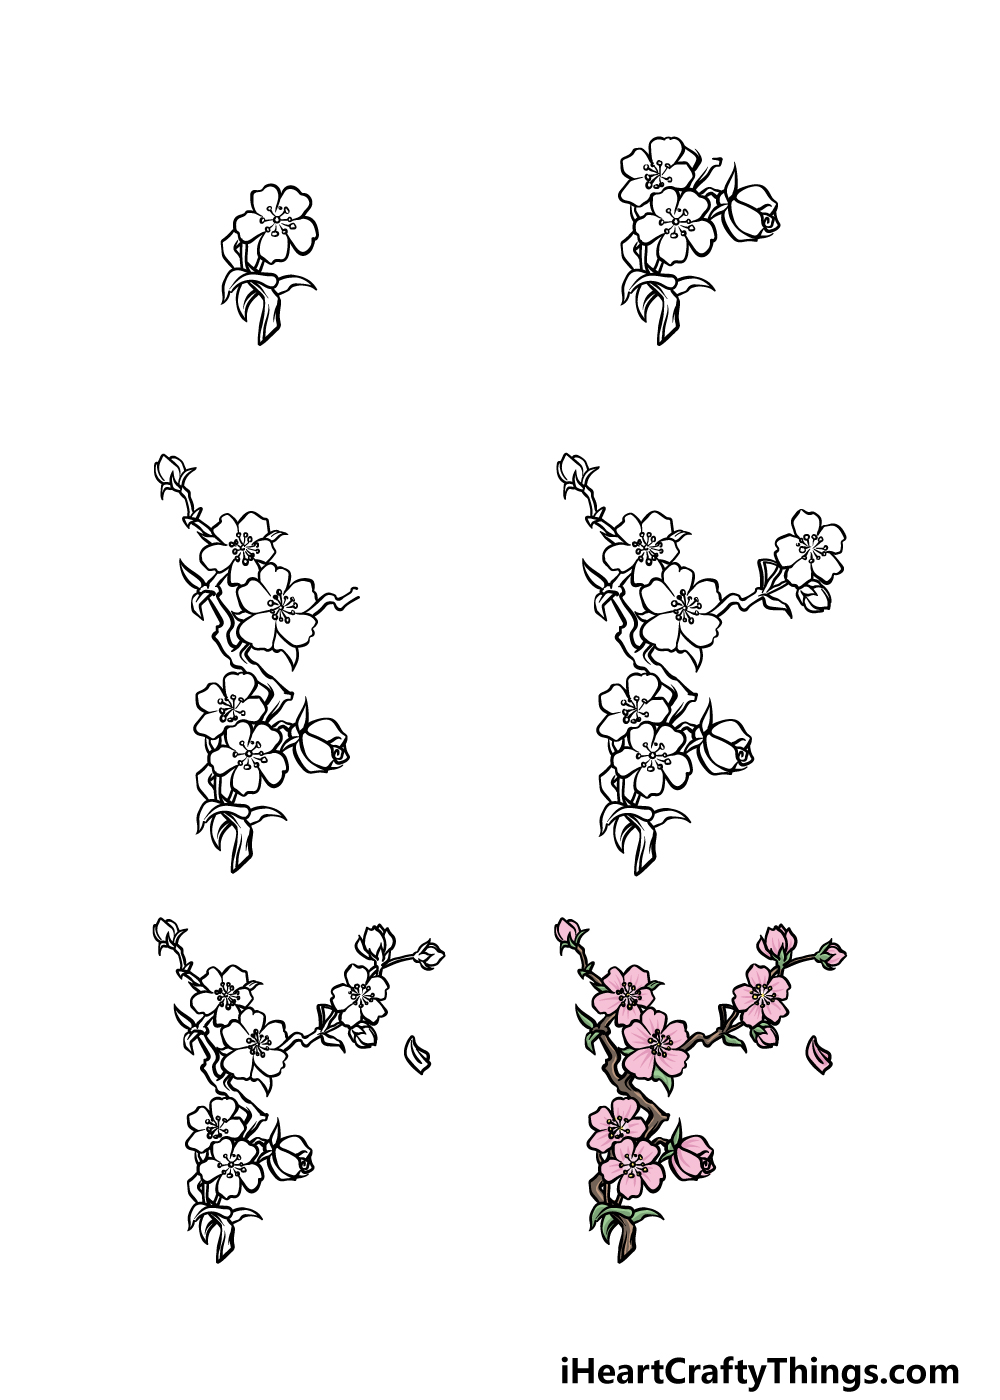
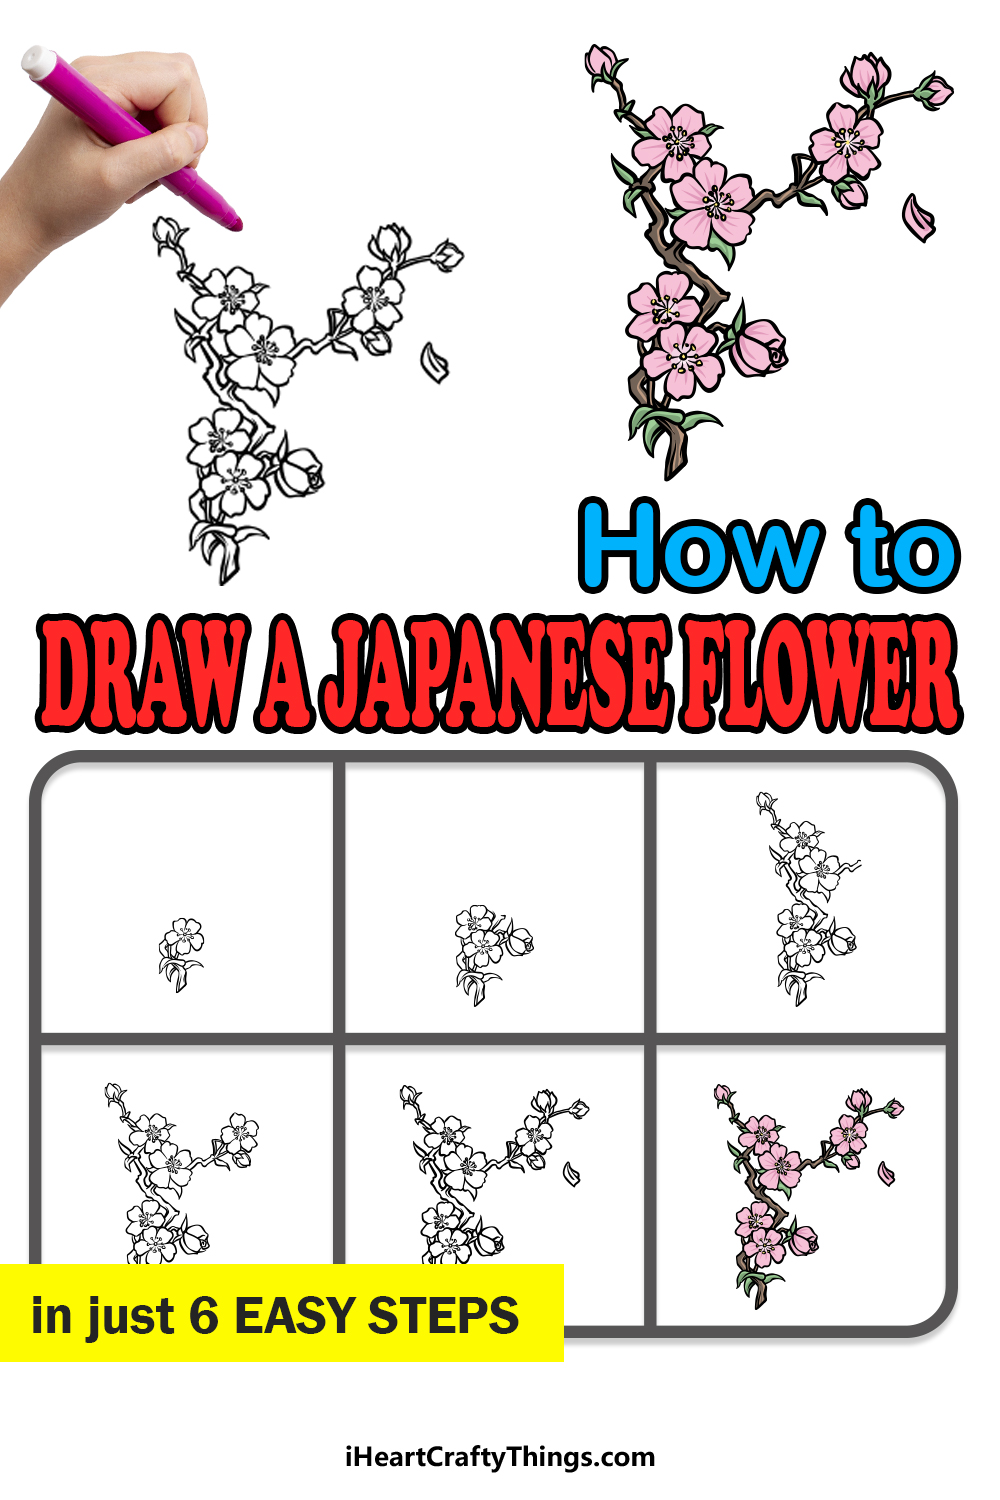
How to Draw A Japanese Flower – Let’s Get Started!
Step 1
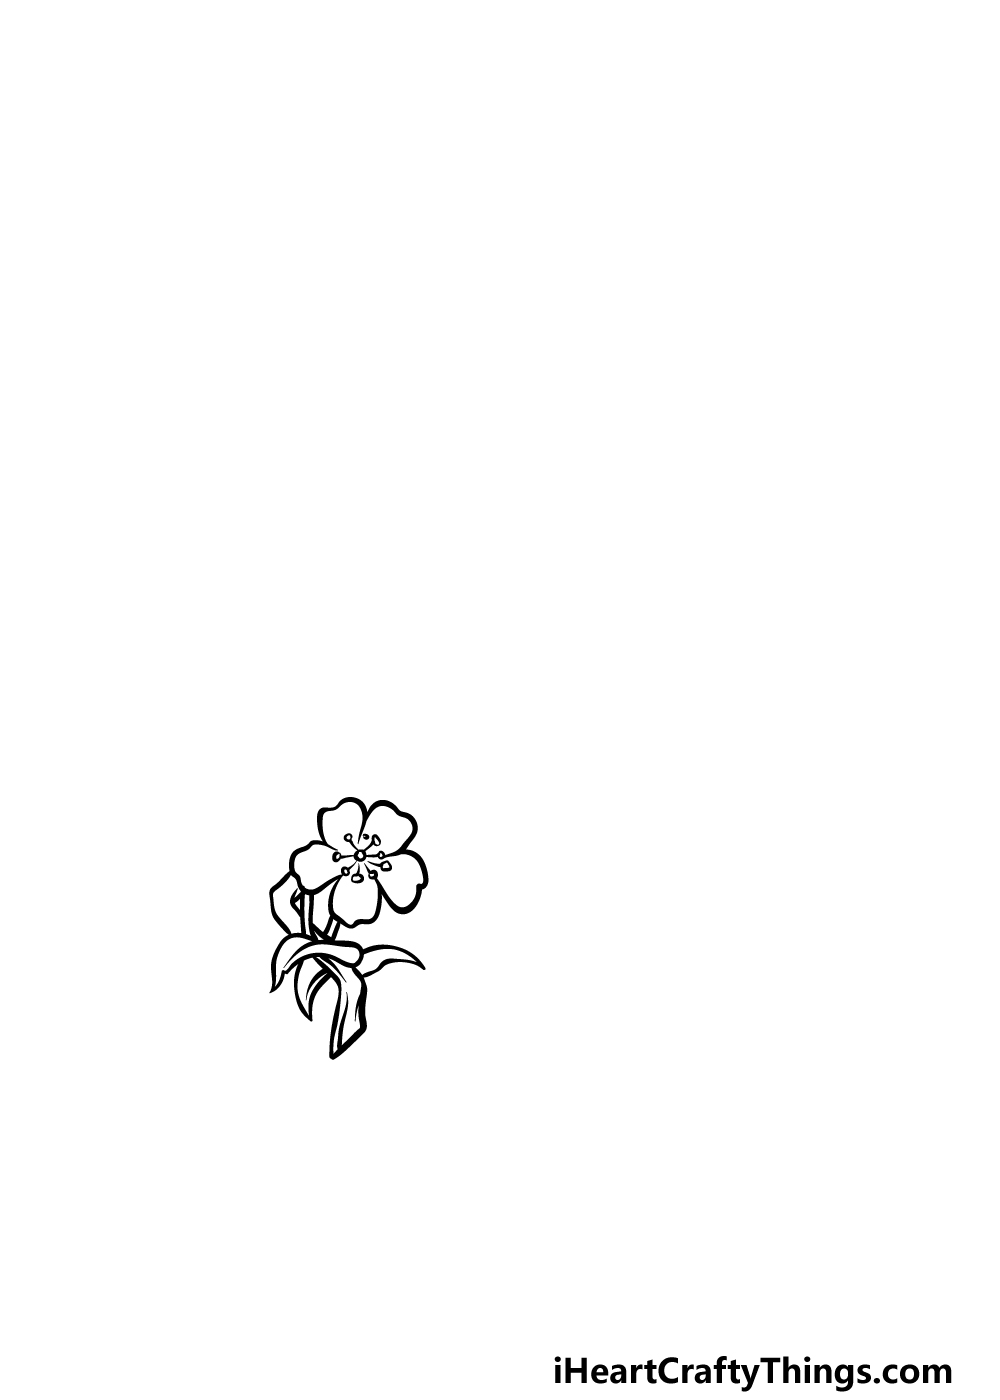
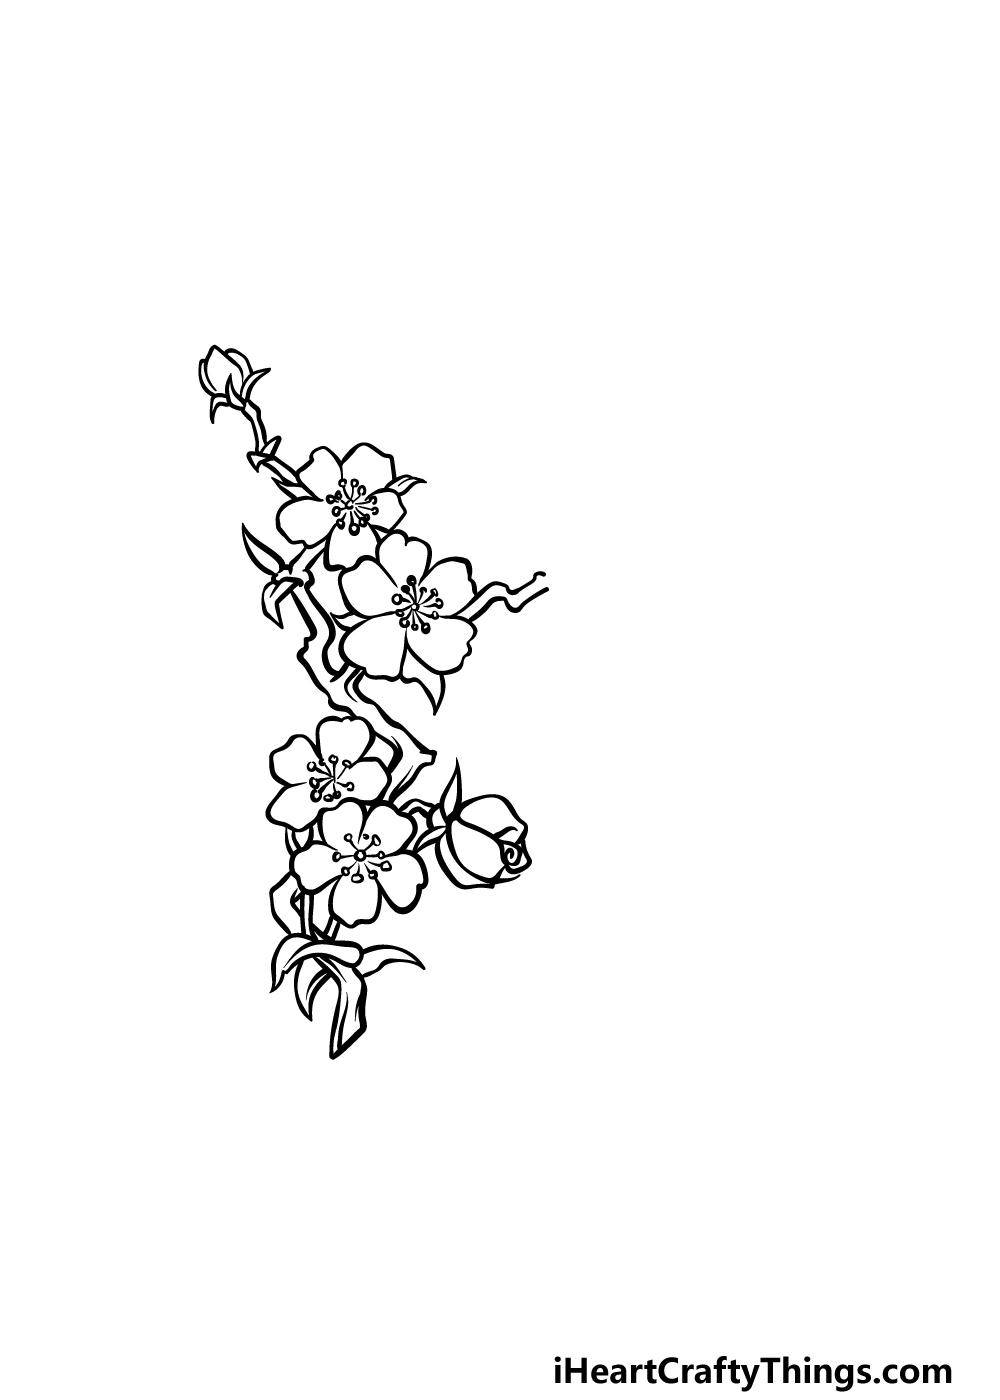
To get this guide on how to draw a Japanese flower started, we will begin with the first flower that will be attached to the branch that the next ones will also be on.
To draw this flower, we will be drawing five petals, and each one will have a rounded square shape to it.
At the center of the flower, there will be a small circle that will have lines extending from it. Each of these lines will have an even smaller circle at the end.
Now that you have drawn this part of the flower, we will then draw some thin, angular shapes for the branch it is attached to.
Then, draw some curved leaves at the base, and then it will be time to move on to step 2!
Step 2 – Now, draw some more flowers
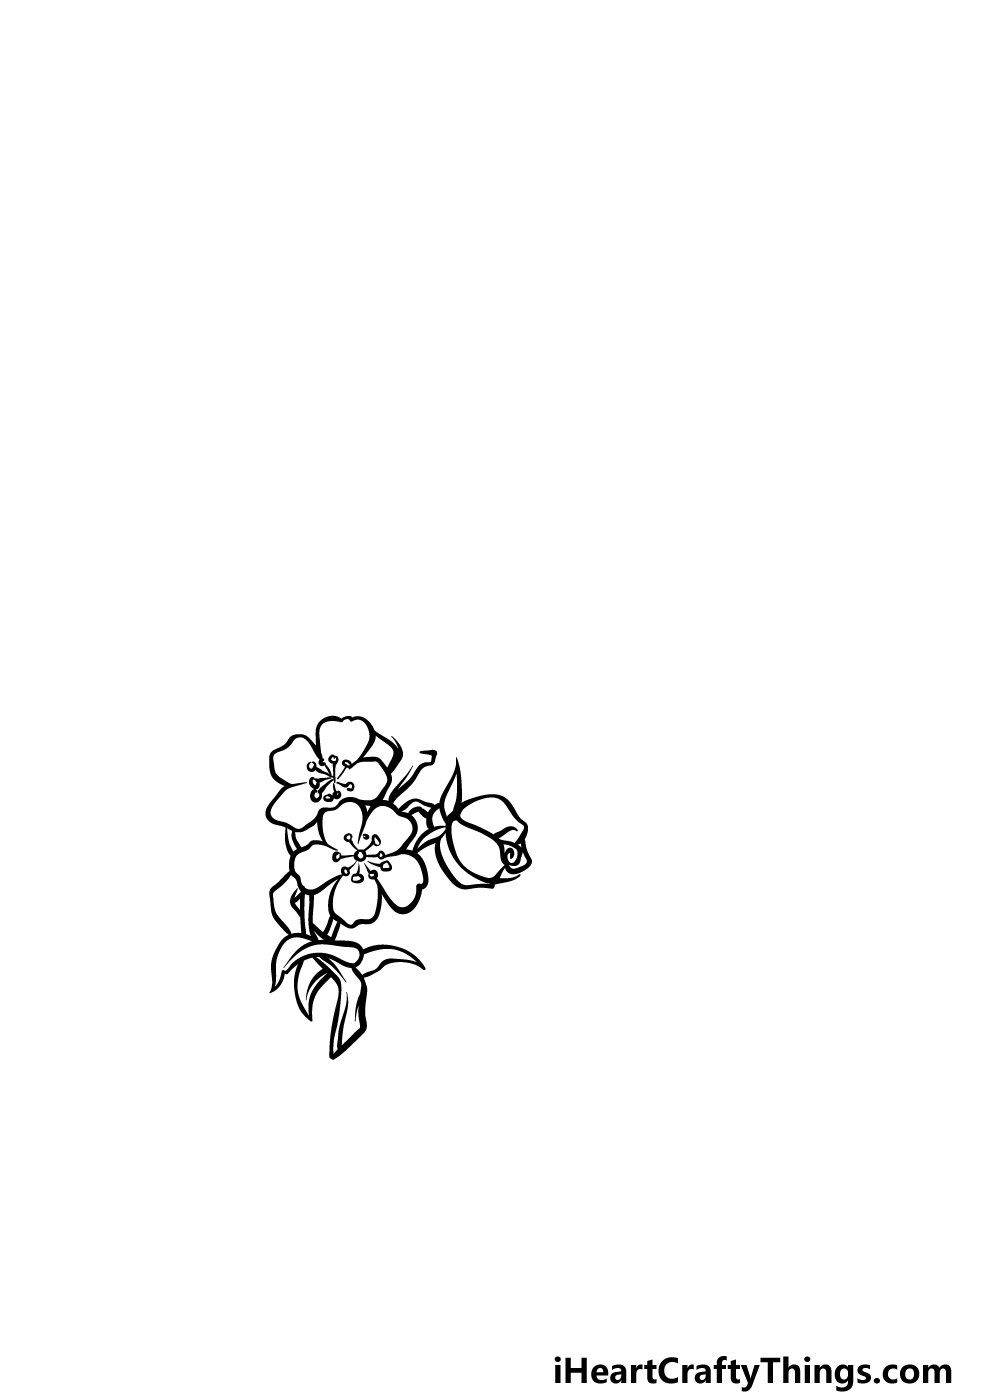
Continuing with this Japanese flower drawing, we will next be adding some more flowers to the branch.
The first of these flowers will go on the left, and this one will be drawn practically identically to the first flower that you drew.
Once that one is drawn, we will then add another flower, but this one will look a bit different. While the previous flowers were opened up, this one will be closed and pointing to the right.
Draw this one in several sections using some curved lines, and then attach it to another thin stalk. You can then proceed to step 3 of the guide so we can keep adding to the picture.
Step 3 – Draw some more flowers for the image
Now we will be adding some more flowers in this step of our guide on how to draw a Japanese flower.
First, use some more angular lines to create a slightly thicker branch section moving upwards. Then, you can draw some more flowers, and these ones will be open like the first one was.
These will also have some small branches extending off of them, and another branch will extend even higher. This branch will culminate in one more closed bud like the other one that you drew.
Step 4 – Next, draw another open flower
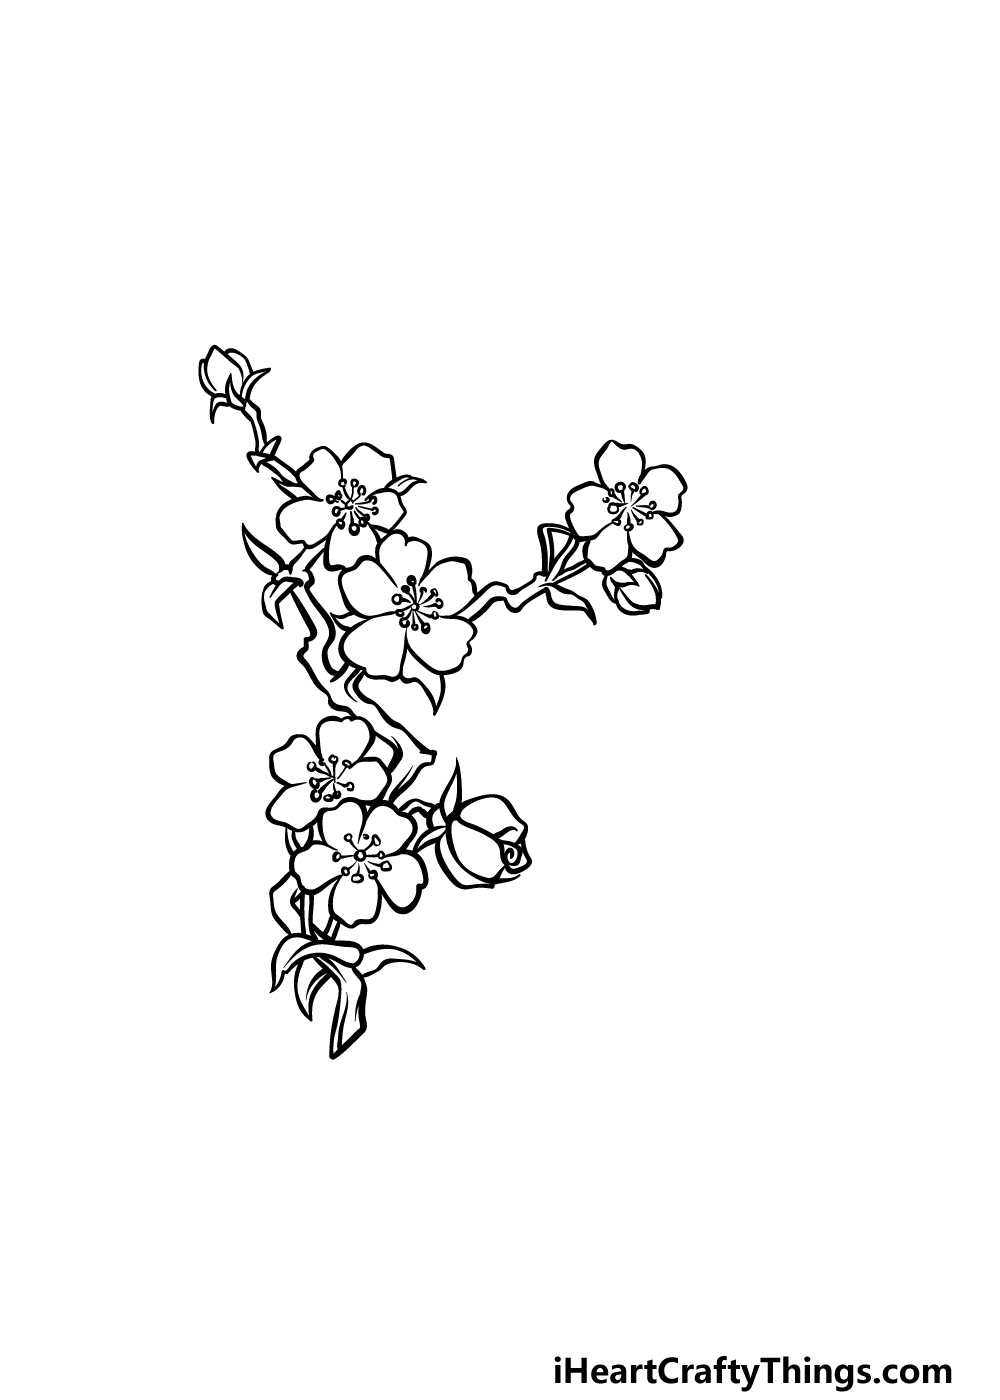
You can never have too many flowers, and that’s why we shall add another to your Japanese flower drawing in this step!
Using the small branch that you drew earlier that ended in a blank space, draw another open flower connected to a thin stem.
This flower will also then have a small closed bud attached to it to finish off that section.
Once you have drawn these new flowers, we will then be ready to draw some final elements and details in the next step of the guide.
Step 5 – Add the final details to your Japanese flower drawing
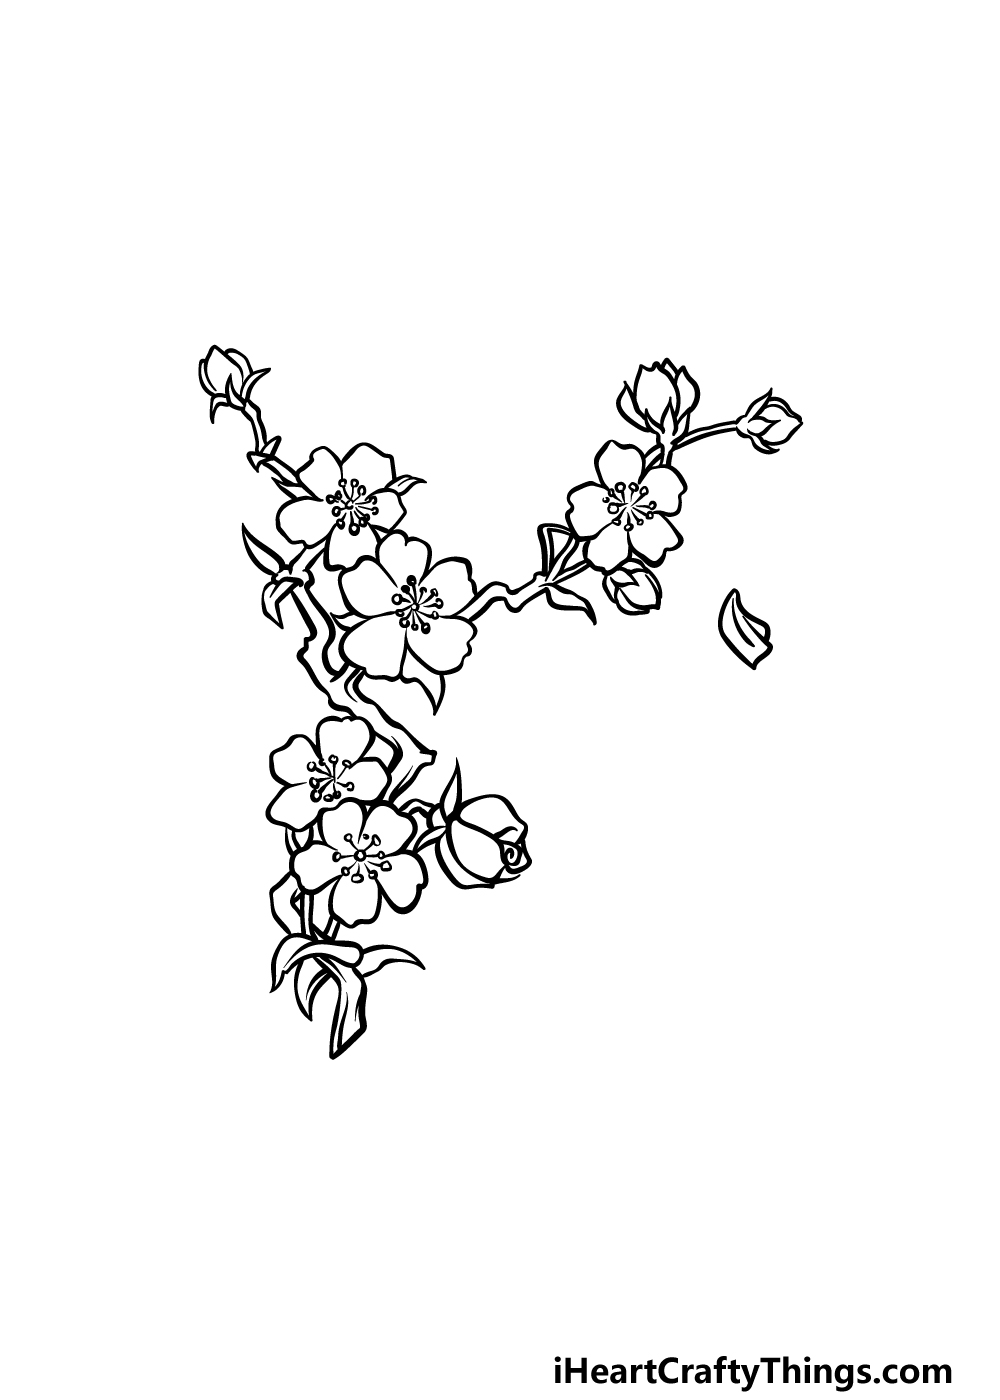
Now you’re ready to finish off the drawing with some final details in this fifth step of our guide on how to draw a Japanese flower!
To do this, we will be adding another couple of flowers onto the one that you drew in the previous step.
These ones will also be attached to some small stems, and they will be closed buds like some of the others.
For a final touch, you can draw a small petal floating away from the flowers. This will finish off the picture, but before you move on you can also add some details of your own!
One idea would be to draw even more petals floating away from the tree to make it look like a breeze is blowing through.
You could also draw a background for another idea. What kind of setting would you draw for the background of this image?
Step 6 – Finish off your Japanese flower drawing with color
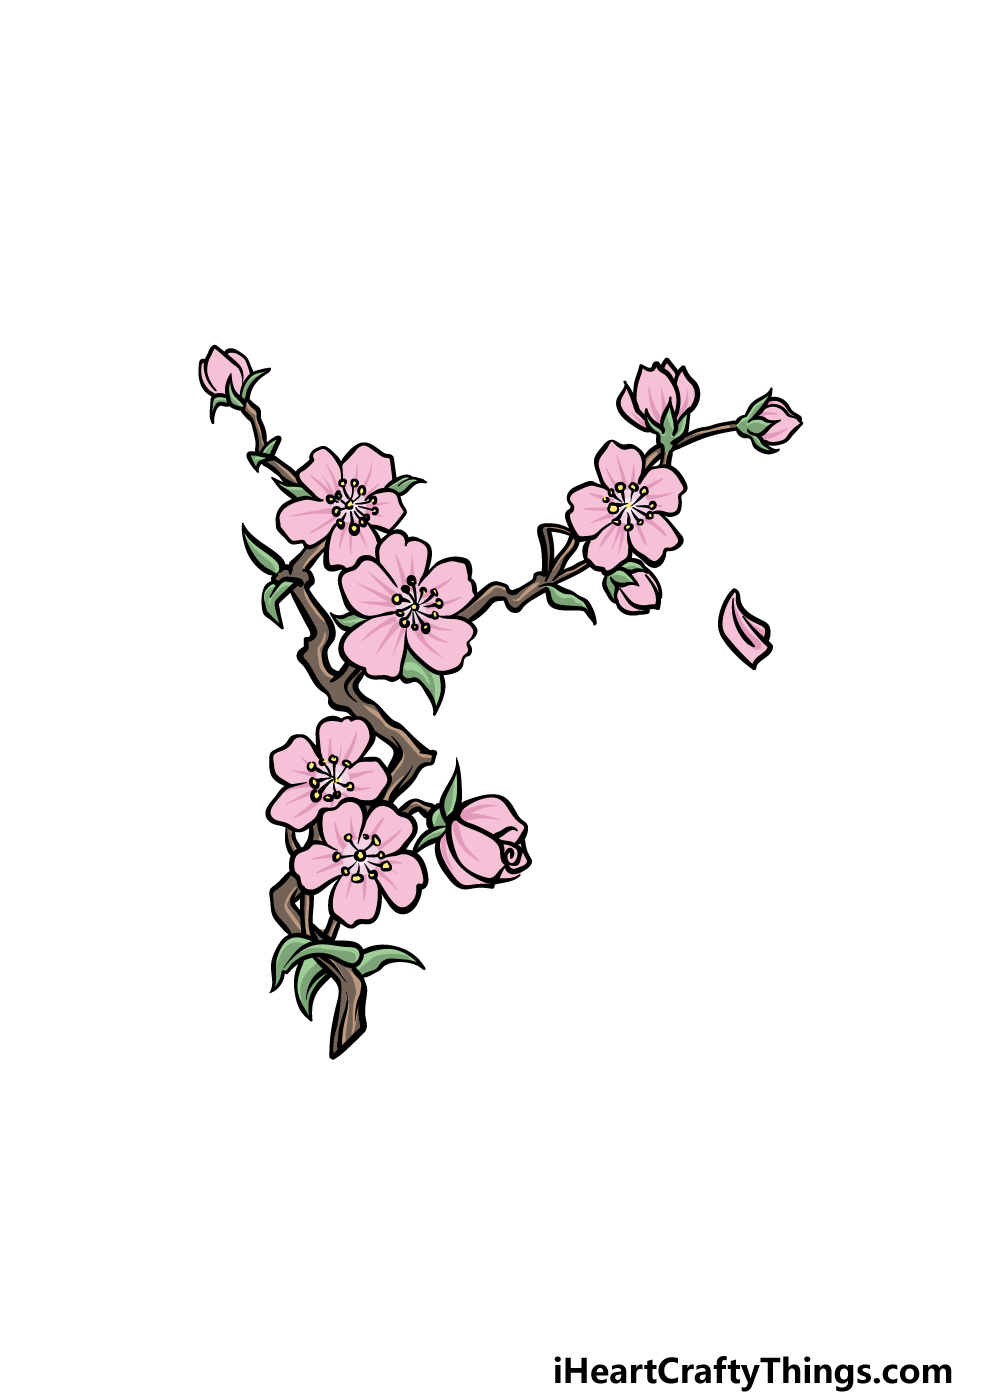
You have arrived at the final step of your Japanese flower drawing, and in this one you can finish off with some amazing colors.
In our reference image, we went with a beautiful, classic color scheme for these flowers.
That means we used a pretty pink for the petals while using some browns for the branches and greens for the leaves.
You can go for similar colors to these for a classic look, but you could also change up the colors if you prefer!
Using watercolors would be great for a more muted tone to the colors, but acrylic paints would be great for brighter colors. Will you go for mediums like that or experiment with some others?
Do this to take your Japanese flower drawing to the next level
Make your beautiful Japanese flower sketch even more stunning with these tips!
We portrayed just a branch of this amazing plant for this Japanese flower drawing. This looks really pretty and makes it easier to draw, but you could always add more to it!
How much more you add is up to you, but now that you know how to draw a Japanese flower it should be easier.
You could add to the bench these flowers are on, or you could draw the whole tree if you’re feeling ambitious.
How much more would you potentially like to add to this Japanese flower?
We added a petal or two to this drawing of a Japanese flower, but you could make it look even more stunning with more petals! You could fill a lot of the empty space around it with floating petals.
This would require a bit of patience, but the end result would certainly be worth it. How many petals do you think you could incorporate into this beautiful picture you have created?
Once you have added as much to this Japanese flower sketch as you like, you may want to consider a background. There are so many wonderful background settings you could use!
For instance, you could recreate a beautiful Japanese botanical garden with a little pond and some statues. That’s just one idea, but you could incorporate it into any settings you like.
Can you think of any other places that would look amazing with some Japanese flowers?
Finally, this Japanese flower drawing will truly be complete with some colors. We showed you a few colors you could use for the drawing, but this is your chance to really have some fun experimenting.
This flower is known for its beautiful soft colors. For this sort of color scheme, we think colored pencils or watercolor paints would be perfect.
That isn’t the only way to do it, though. If you prefer brighter colors, then there are mediums you can use to achieve such colors.
Your Japanese Flower Drawing is Complete!
That brings you to the end of this guide on how to draw a Japanese flower! We hope that working on this guide to recreate this beautiful flower was a fun and easy experience for you.
Whenever taking on a new drawing challenge, the best way to go about it is by breaking it down into smaller steps, and that’s what we aimed to do for you.
We mentioned a few ideas for how you can add your own touches to this drawing, but this is your chance to really get creative with it! What details, additions and colors will you choose?
Remember that when you’re ready for more drawing fun, you can check out our website for more amazing drawing guides. We bring new ones out often, so keep checking in for those!
We hope that you will also share your finished Japanese flower drawing on our Facebook and Pinterest pages so we can see how it turned out!