We use many different types of clothing for different situations in life. You may wear a shirt when it’s hot or a swimsuit to the beach, and if it’s cold then you can wear a nice warm jacket.
We all have that special jacket that we favor to guard us against Winter’s chill, but can you draw a jacket off the top of your head?
It can be harder than expected to learn how to draw a jacket if you don’t know the right steps!
Luckily, this very guide will give you all the steps you need!
Our step-by-step guide on how to draw a jacket will show you how to create your own special jacket in no time.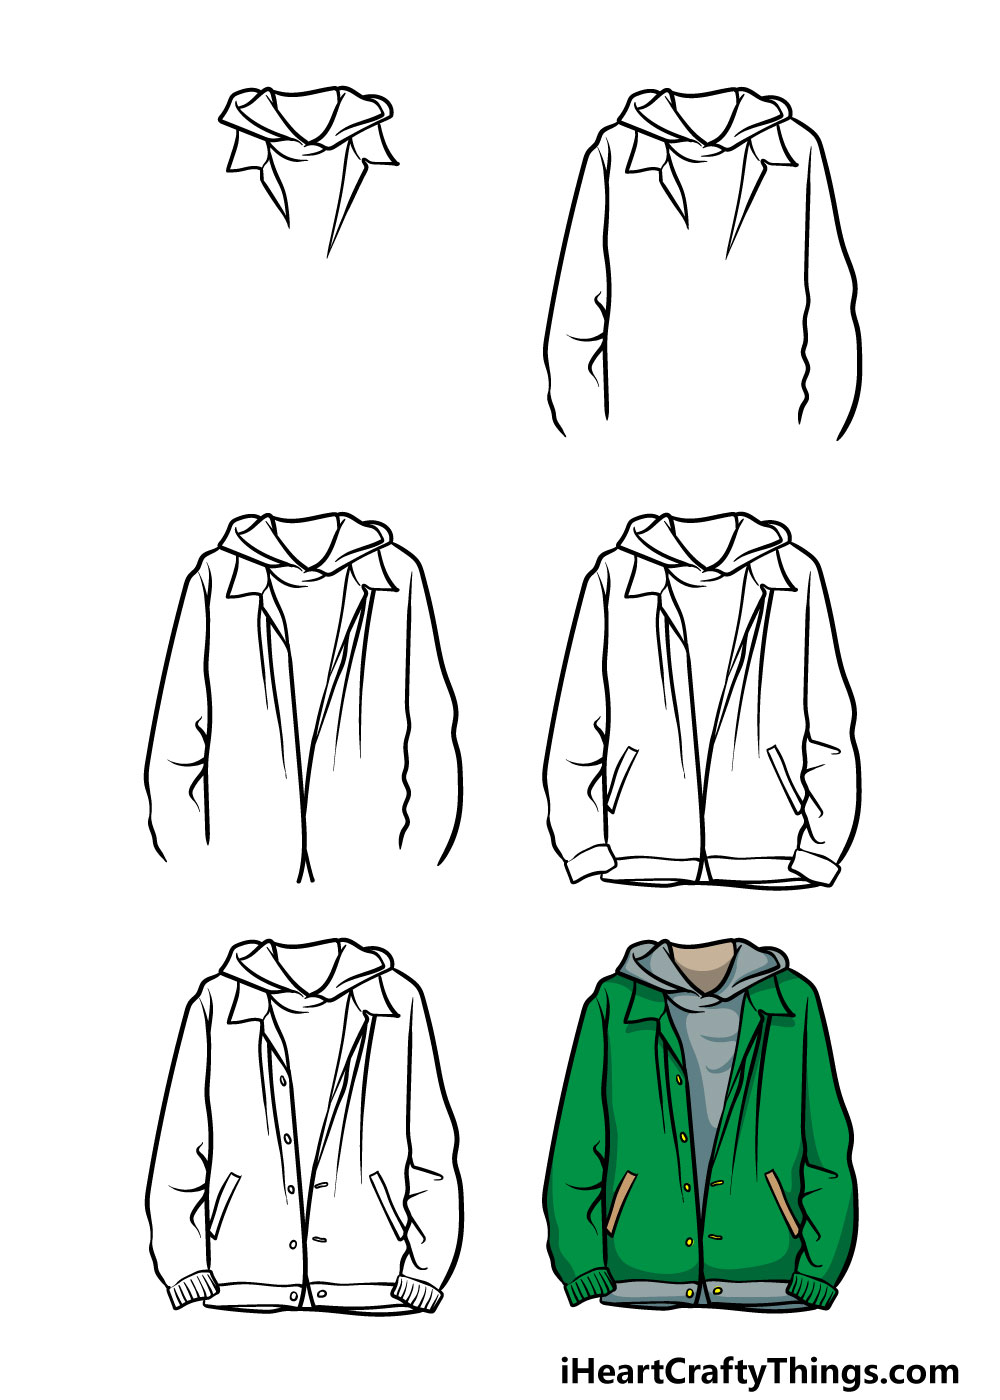
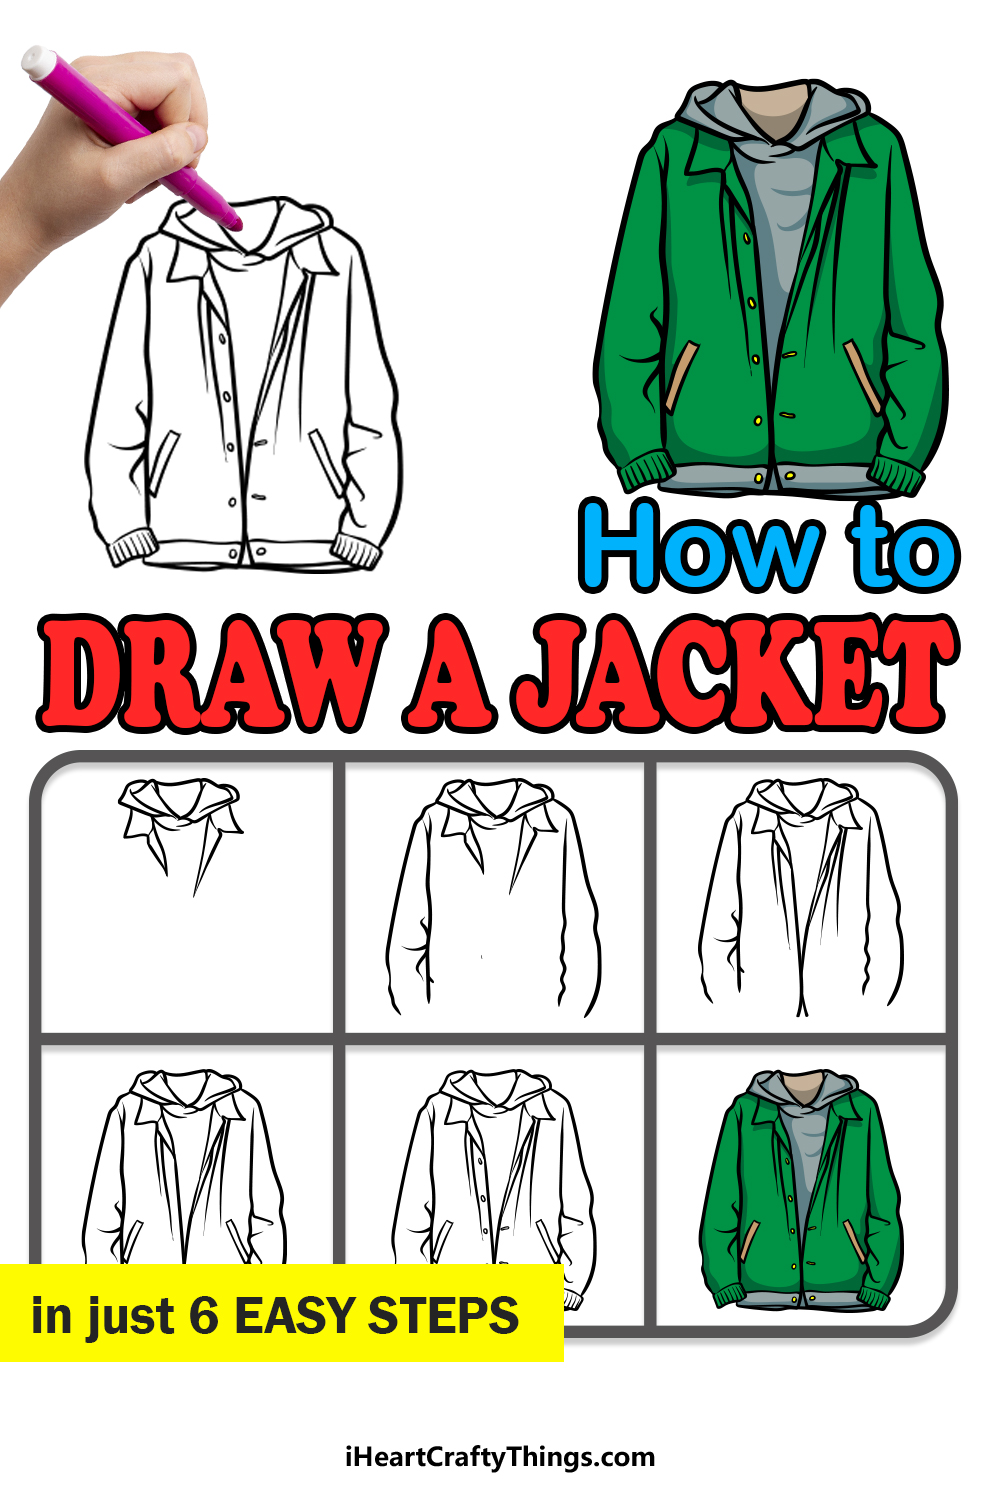
How to Draw A Jacket – Let’s get Started!
Step 1
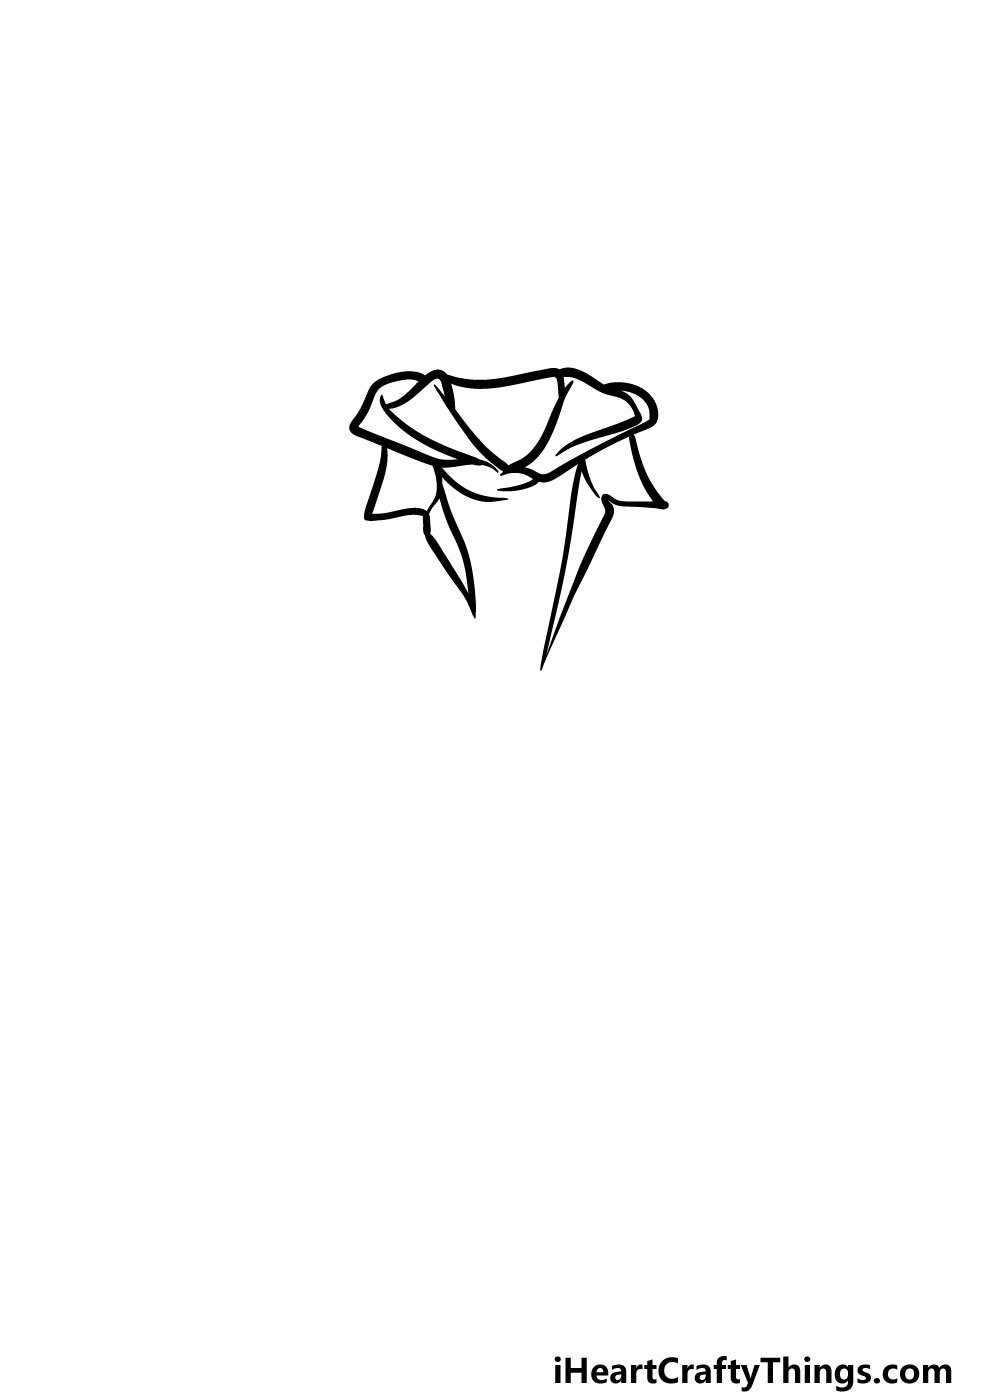
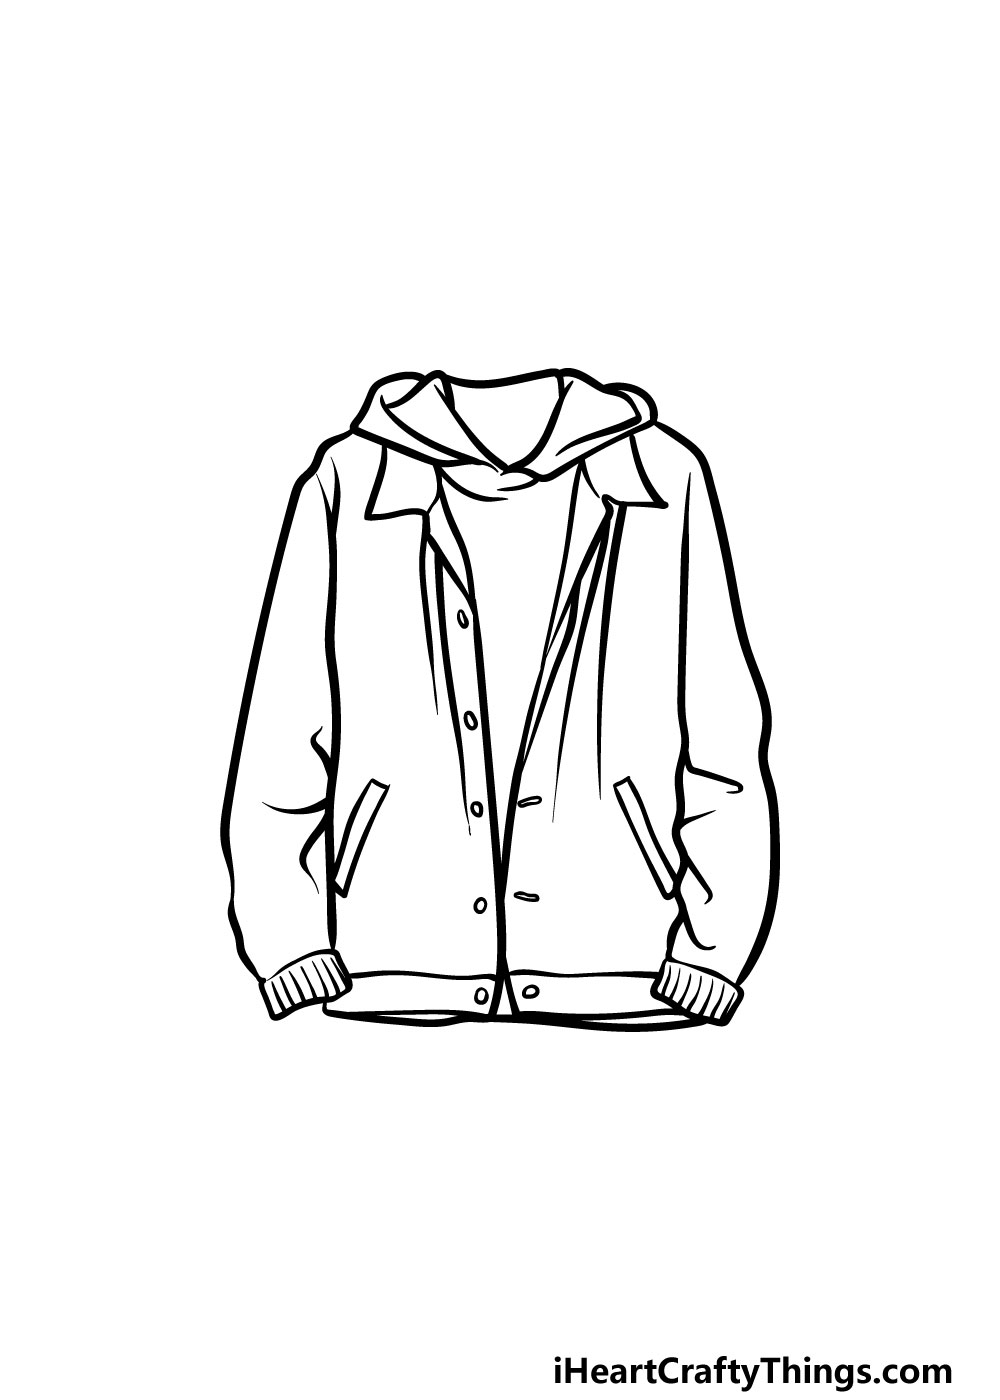
To get this guide on how to draw a jacket started, we will begin with the collar of the jacket.
There are quite a lot of small lines and details on this image, so don’t be afraid to carefully copy the reference image we’ve provided as you go!
Once you have this collar drawn you’re ready for the next step.
Step 2 – Draw the sleeves of the jacket
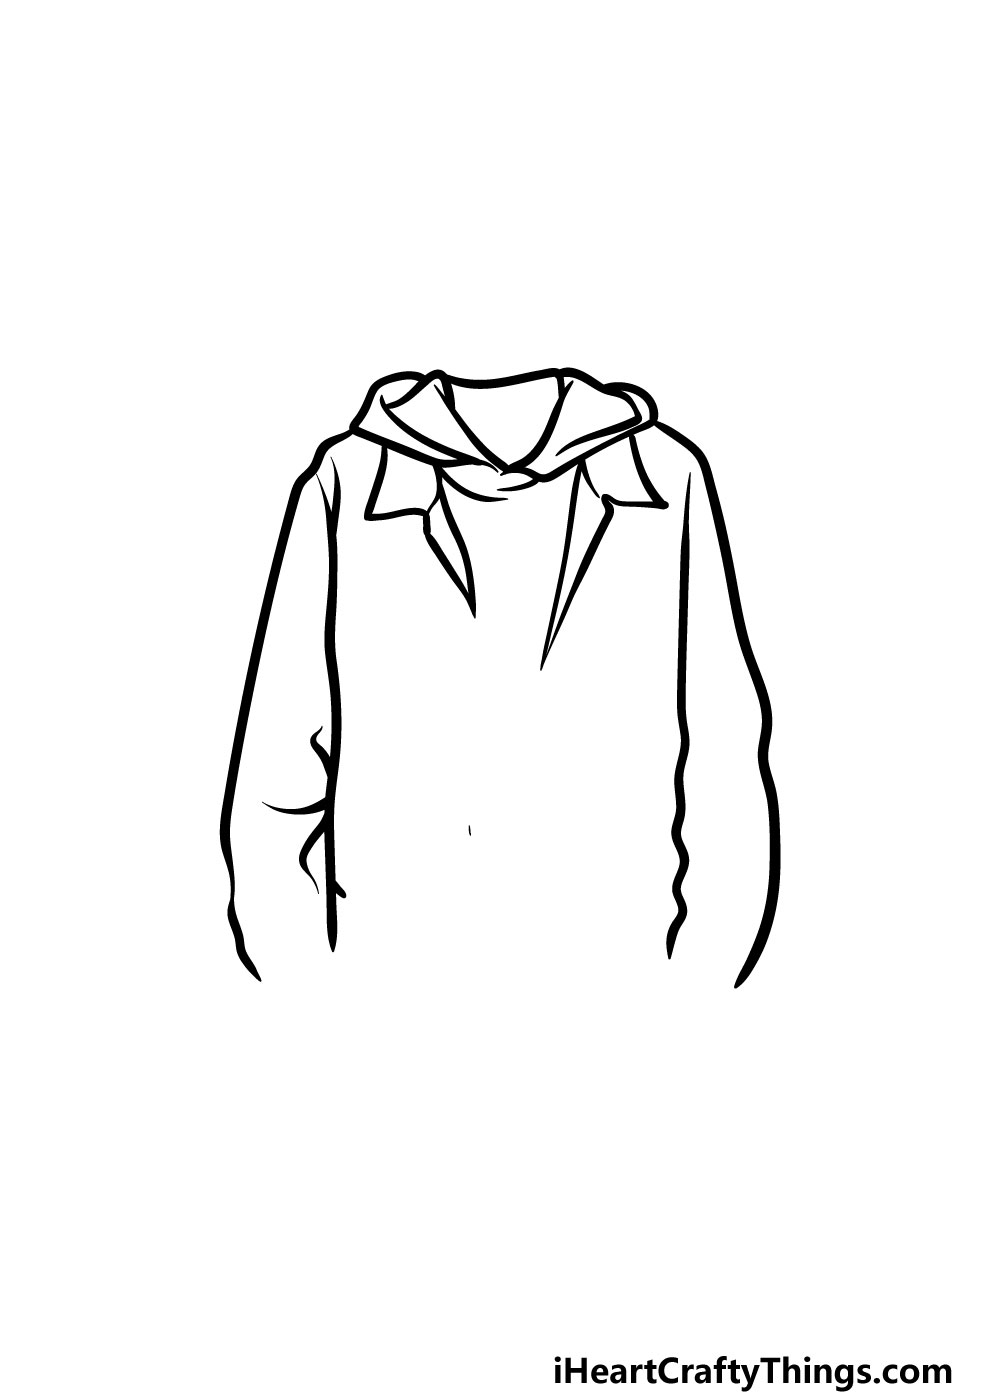
For this step of your jacket drawing, you will be working on the sleeves of the jacket. To do this, you can extend the shoulders and sleeves don from the sides of the collar as shown in the reference image.
These will curve outward on the jacket, and then you can draw two straighter lines coming down the sides of the inner jacket.
Step 3 – Now, you can add the opening of the jacket

Now that you have the collar and arms of the jacket, you can draw the opening for it in this step of our guide on how to draw a jacket.
To do this, simply draw a series of straight lines that show the opening at the top of the jacket and meet about halfway down the jacket where it’s zipped up.
That’s all there is to it for this step and you’re ready to move on!
Step 4 – Draw the bottom of the jacket and some pockets

For this part of your jacket drawing, you can draw the rims of both the ends of the sleeves and also the bottom of the jacket.
Then, once you have these rims drawn you can add some long thin rectangles for the pockets of the jacket. The reference image will show you how these should be positioned and angled as well.
Then, it’s on to some final details in the next step.
Step 5 – Now, you can add some buttons and final details
As we mentioned in the previous part of our guide on how to draw a jacket, in this step we will be focusing on some final details and elements before you move on to coloring in your image.
First, you can add some small lines to the rims that you drew at the end of the sleeves. This will give them a look of elasticity.
Then, once you have added these details you can then draw some buttons onto the jacket using some small shapes and lines.
That will finish off all of the details we have in this guide, but you can also take this drawing even further by adding your own details and elements!
One idea you could do would be to draw a fun design onto the jacket or change up some of the details.
If you’re feeling extra creative you can also draw a head and hands coming out of the holes of the jacket. Perhaps you could even draw yourself wearing this jacket!
There are so many creative ways that you can put your own spin on this image and we can’t wait to see what you do!
Step 6 – Finish off your jacket drawing with some color
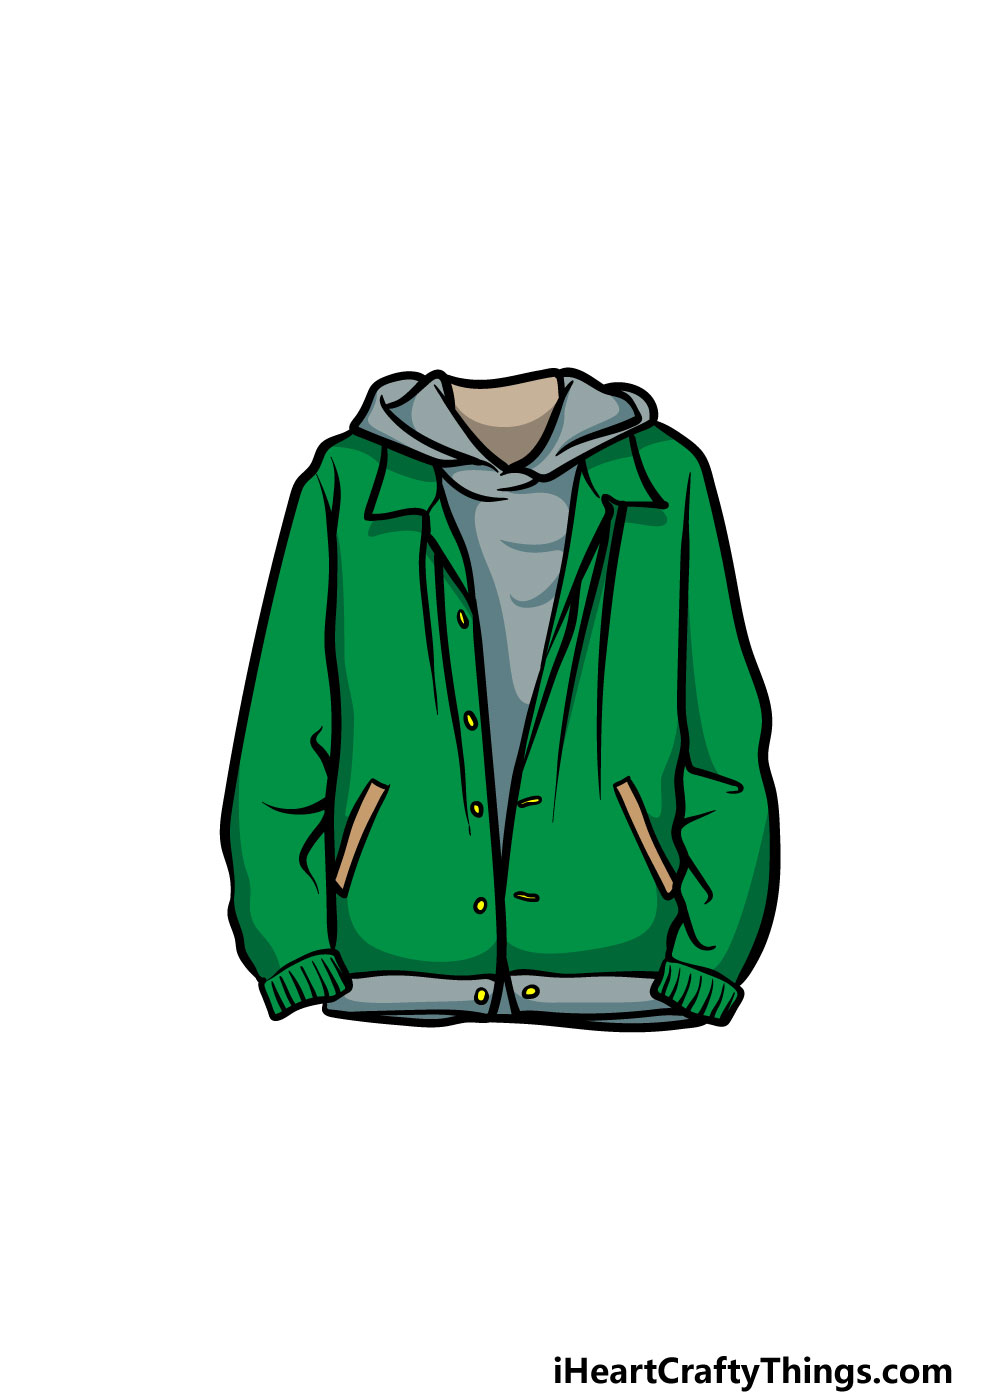
With the final details drawn, it’s now time for the final step of your jacket drawing. This is also a really fun step, as now you get to express yourself with some amazing colors!
In our example image, we used some green and grey to color in the image, but this is a step where you can let your creativity run free and use any colors that you love!
Jackets can come in all manner of different styles and colors, so you should feel free to use any colors or designs that you want!
This is where you can let your inner fashion designer run wild and come up with an incredible design.
Once you know how you would like to color it in, you can also have some fun choosing which art mediums and tools you’ll use to finish it up.
You could use some acrylic paints and colored pens if you would like a bright, vibrant look to the picture.
If you would like a more muted subdued look then you could also use some watercolor paints or colored pencils. The choice is up to you and anything you pick will look amazing!
3 More tips to make your jacket drawing easy!
Make this jacket sketch easier to draw with the help of these 3 fun tips!
In order to make this drawing of a jacket more realistic, we added a lot of details such as creases and a shirt.
If you are feeling overwhelmed by the drawing, then some of these extra details could be removed.
One way you could do this would be to have the sleeves extended out. That would mean that you wouldn’t have to draw the bunched-up creased fabric at the ends.
You could also have the jacket buttoned up so that the shirt could be more hidden. Or, the shirt could be removed entirely!
These are a few examples of how some simple changes or omissions can make the drawing simpler, so don’t be afraid to make any similar changes of your own!
One way that you could also make this jacket drawing easier would be to draw someone actually wearing it.
Adding even more to the drawing may seem like it would make it harder, but it can make it easier to visualize.
The person could just be a simple outline, and you could even use a pencil if you don’t want them as a part of the image.
By adding pants, shoes and other clothing it could also help you to visualize the way the jacket should look, too.
Finally, you can use your own clothing to make this jacket sketch easier. If you have some jackets in your closet, then they could be used along with the images in our guide.
Even if they are not identical to the jacket in our guide, the real ones could help you with the proportions and details of the one you’re drawing.
Using real ones could also help if you want to create different jacket variations. If you don’t have any suitable jackets in your home, then there are other options.
For example, you could look up some jackets online to get some ideas and inspiration for the artwork that you’re creating!
Your Jacket Drawing is Complete!
We really hope that you had a wonderfully fun time working alongside us on this guide on how to draw a jacket!
This guide was designed to make taking on this drawing challenge not only much easier but also really enjoyable as well.
It was also made to give you the freedom to change up some aspects to your liking and create your own designs and patterns.
There are so many fun ways that you can put your own spin on this drawing! We discussed a few ideas you could try, such as drawing your own face and hands onto the jacket.
You could also change up some elements to make a fashionable jacket you may see on a runway. You could also create a cool background or experiment with some new art mediums and color combinations.
When you’re ready for your next drawing challenge, we hope to see you on our Facebook and Pinterest pages!
We have so many great guides there for you, and we have many more coming your way all the time.
We would also love to see your amazing jacket drawing when it’s done, so we hope that you will share it on our Facebook and Pinterest pages when it’s done!