There are many fun activities that you can enjoy outside, but few are as high octane and exciting as riding a dirt bike!
There are few activities that can bring about an adrenaline rush quite like riding a dirt bike, and they come in many different variations and designs.
As much fun as it is to ride them, it can also be lots of fun to learn how to draw a dirt bike!
By the end of this guide, you will know how to draw one of these incredible vehicles.
We hope that this step-by-step guide on how to draw a dirt bike will make learning this a smooth ride.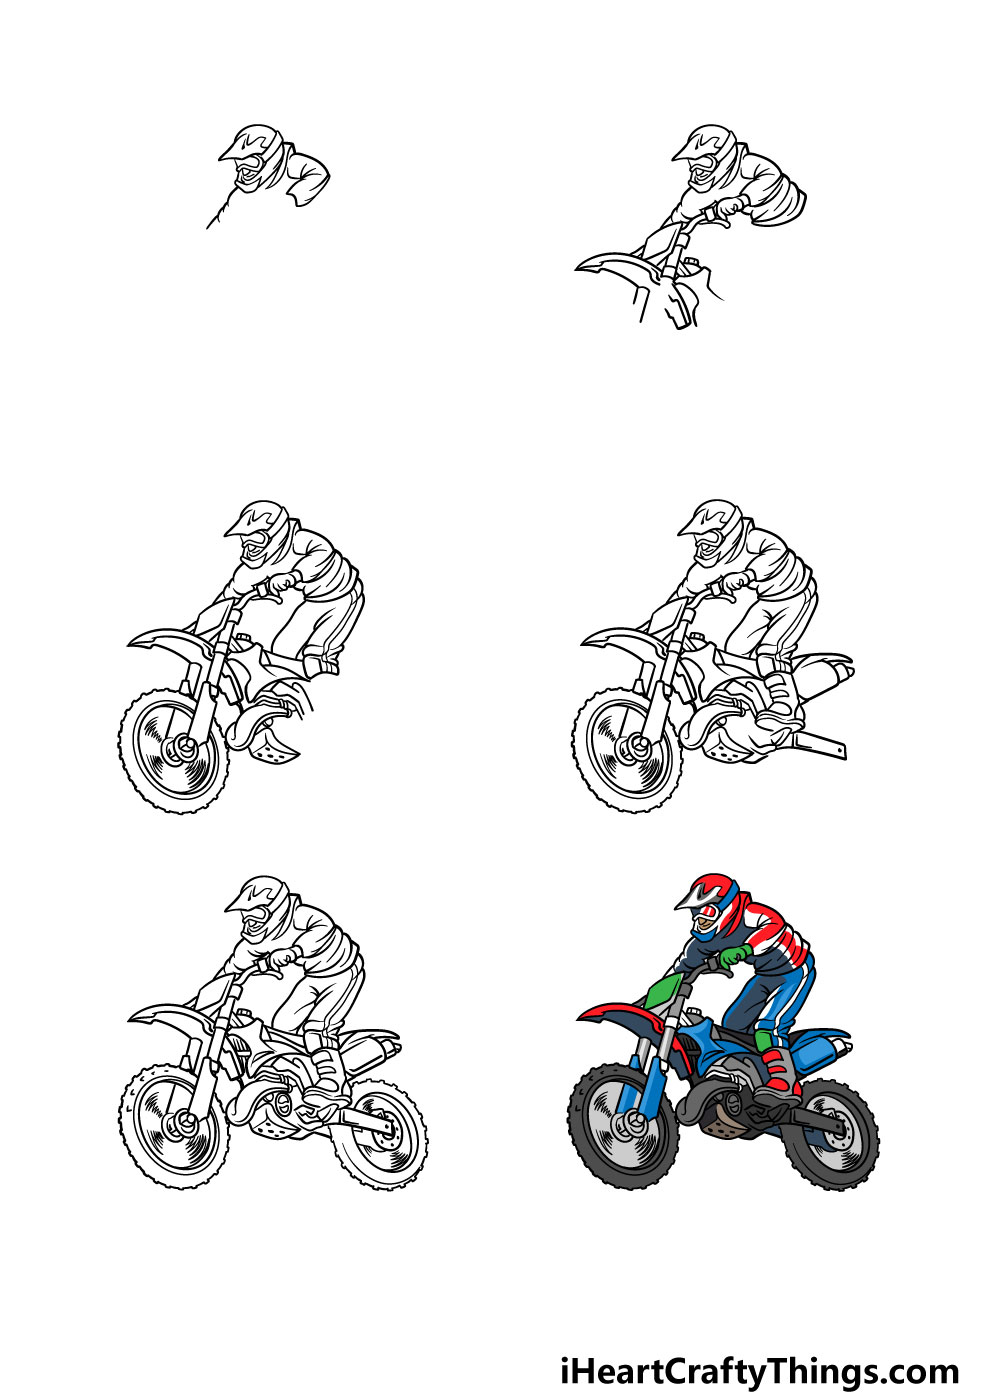
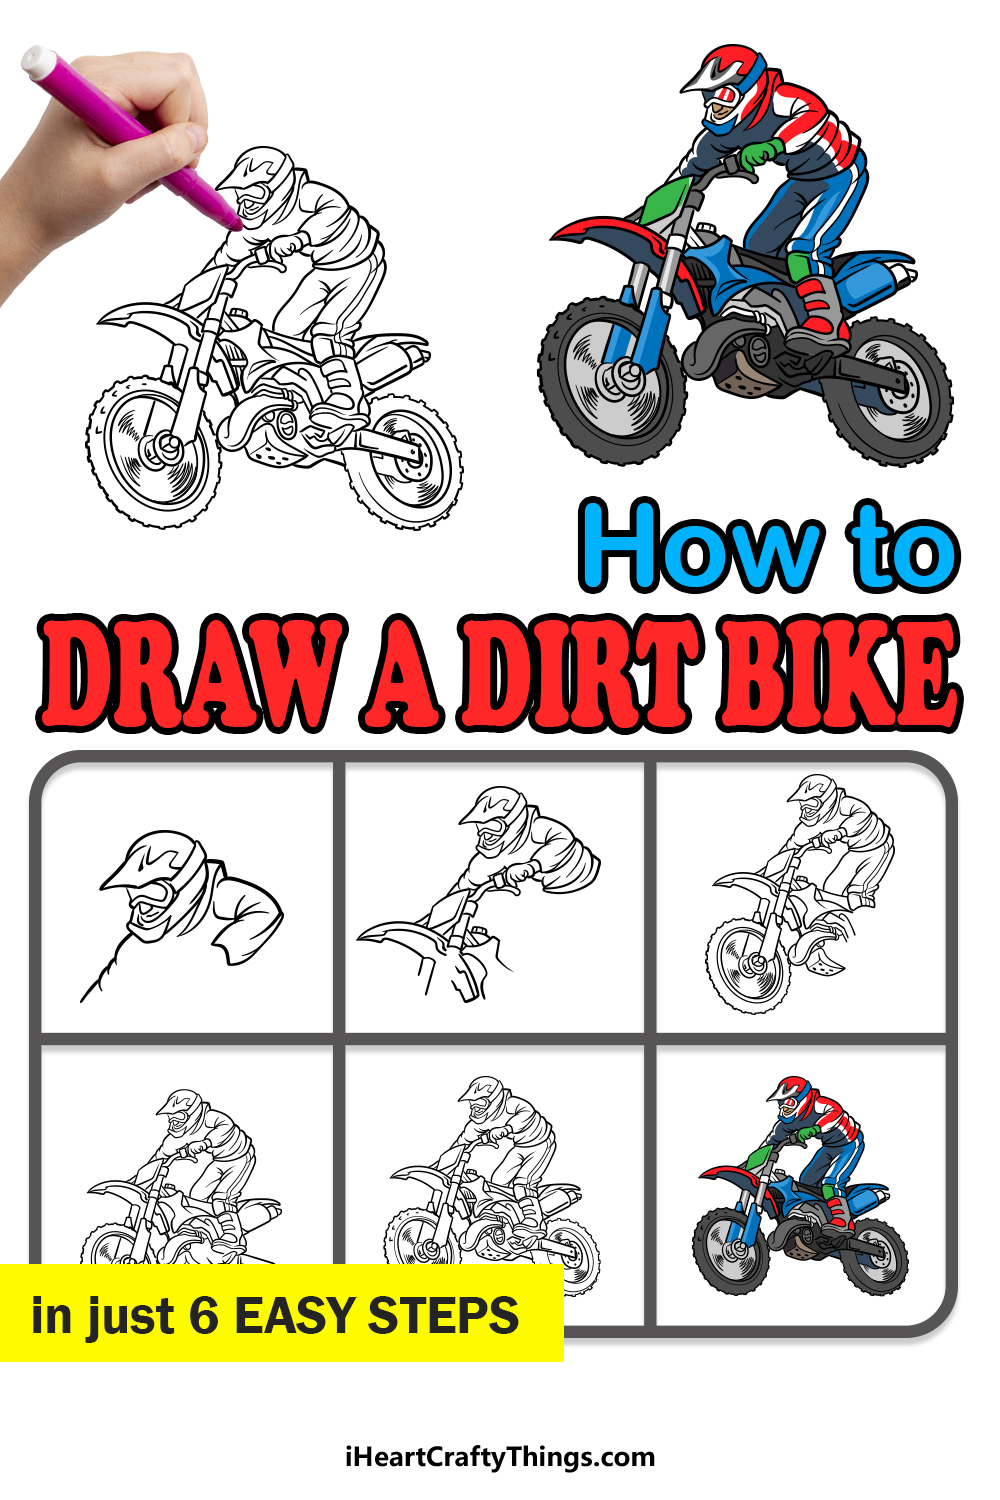
How to Draw A Dirt Bike – Let’s Get Started!
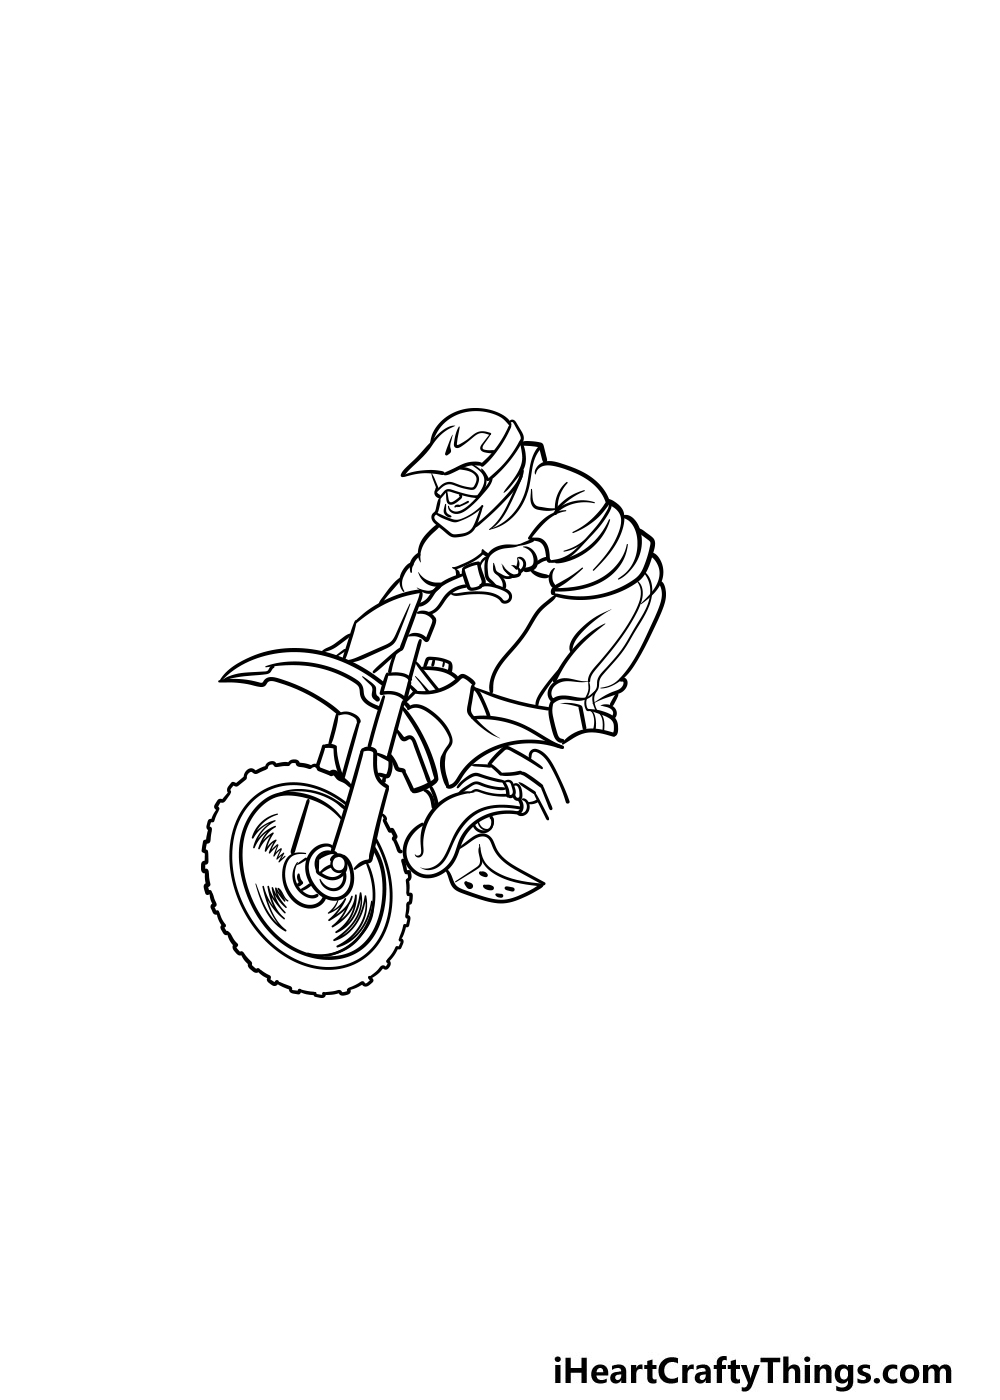
Step 1
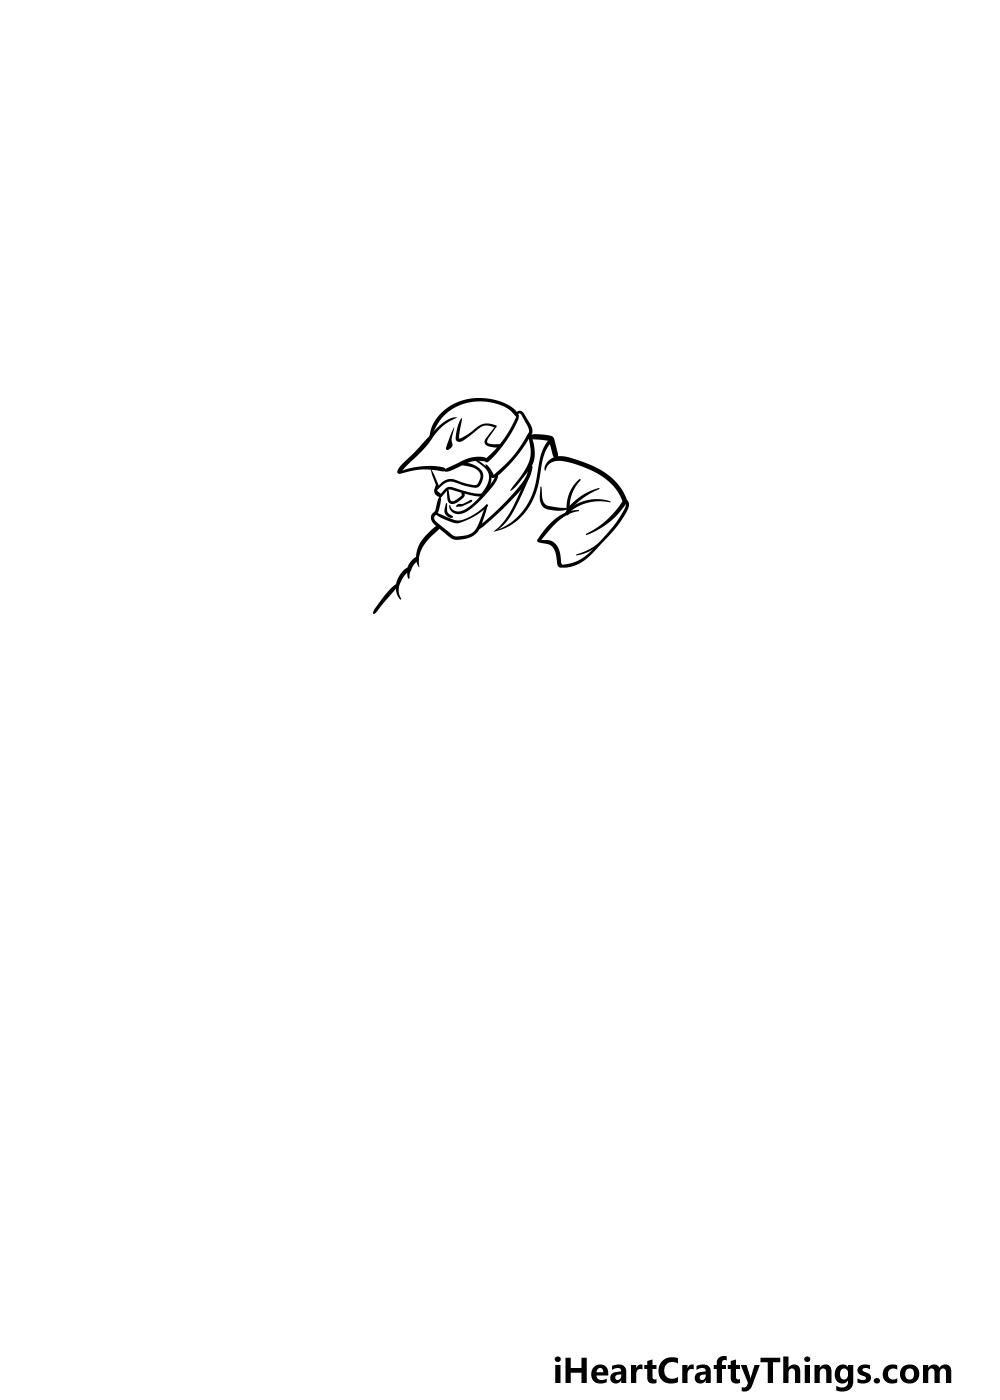
This first step of our guide on how to draw a dirt bike may look complicated, but once it’s done it will make the following steps much easier.
Using your pencil and the reference image, you can draw a rough outline for the bike and the rider.
This is a step that you will want to take slowly and try to get it looking as close to the reference image as you can.
Once you have the rough outlines drawn, you can then use your pen to start adding some detail to the helmet and the arms of his outfit. Once you’re happy with how it looks, you’re ready to move on!
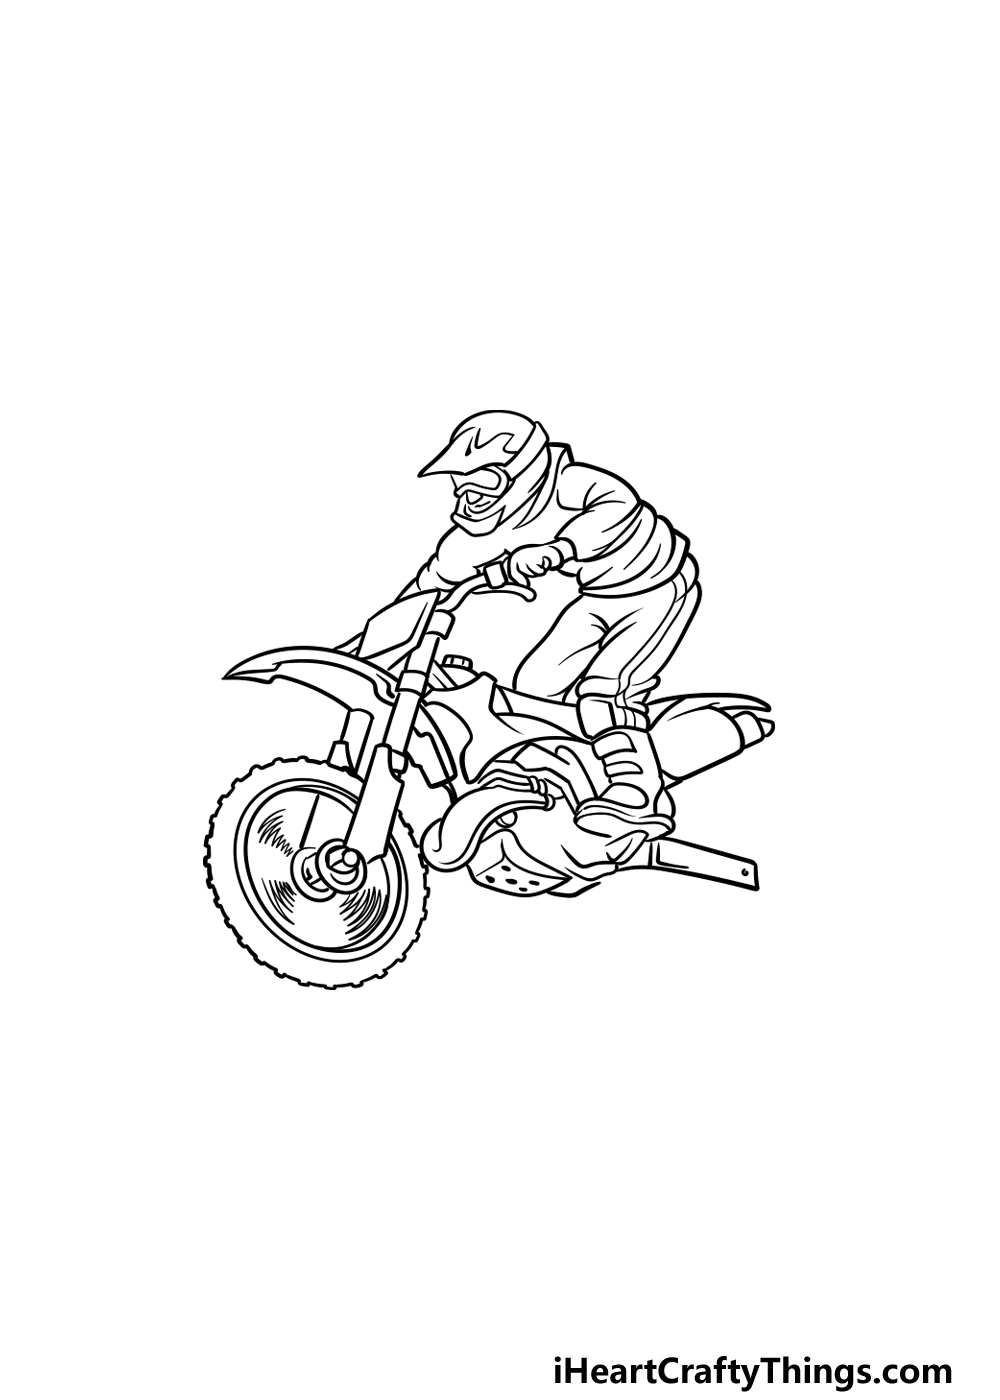
Step 2 – Extend the pen lines of the drawing in this step
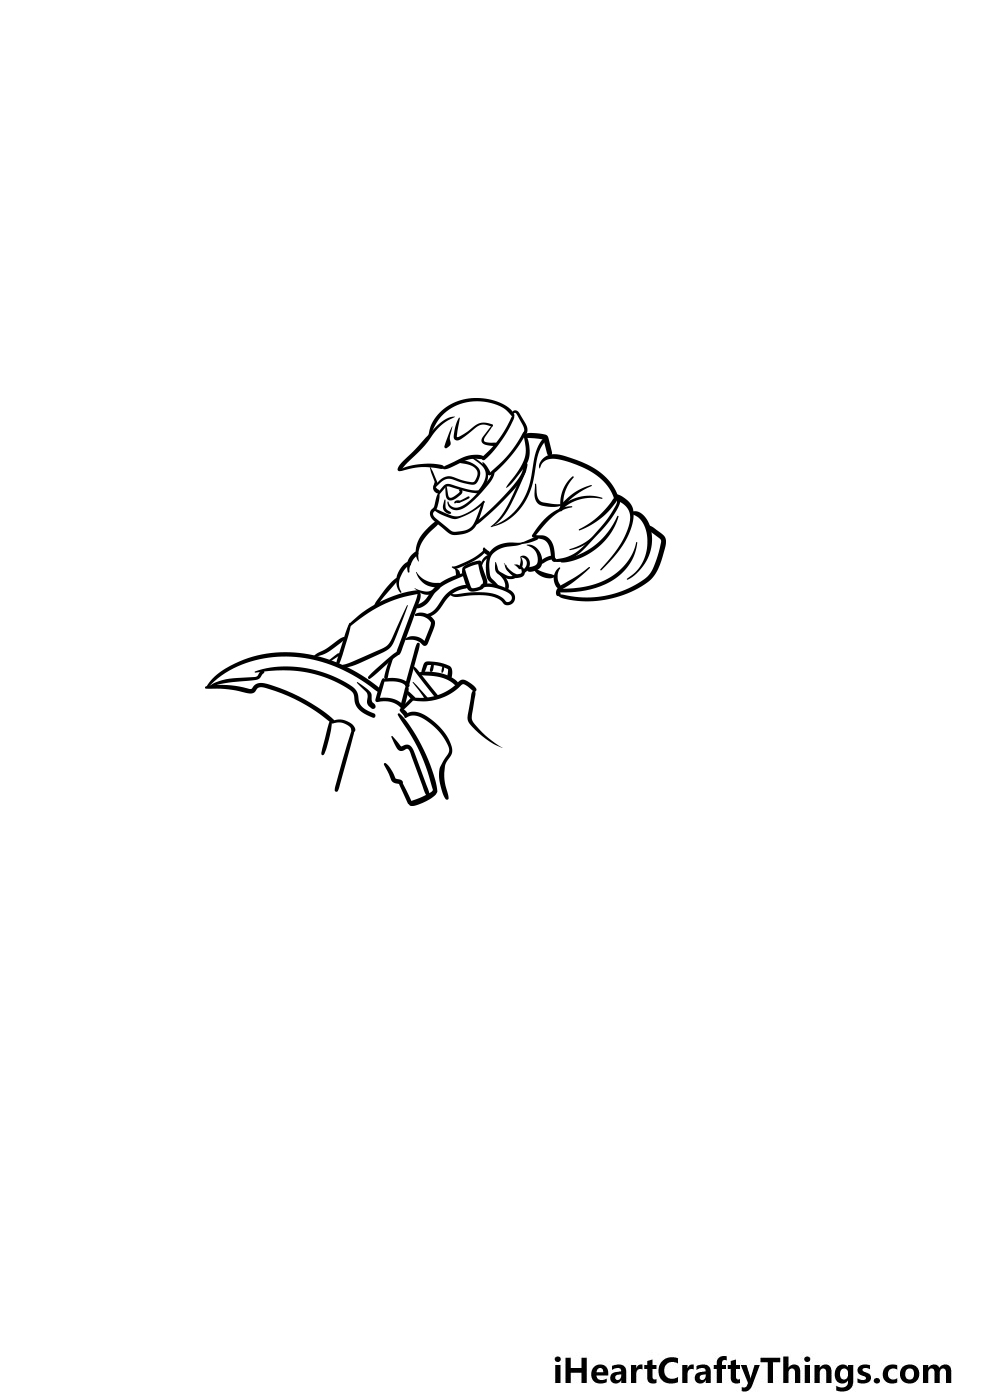
In this part of your dirt bike drawing, you will be adding more pen lines and fine details to the image. For this part, you can add some details to his top, and then begin on the handlebars of the bike.
If you go slowly, follow the reference image and use your pencil lines then you should have no problem with it!
Step 3 – Now, keep extending the pen details
This third step of our guide on how to draw a dirt bike will see you extending the pen lines even further on the bike.
In this step, there are a few sections we will be focusing on. These will include the pants of the bike rider, as shown in the reference image.
Then, we will work on extending the front sections of the dirt bike, and this will also include the front tire of the bike. There are lots of small details, but the reference image will definitely help a lot as you draw!
Step 4 – Draw the boots and back of the bike
Next for your dirt bike drawing, you can finish off the rider by drawing his boots. Once you’ve finished off the rider, you can also keep drawing some details for the back section of the dirt bike.
That will leave only a few final details that we will be adding in the next step.
Step 5 – Now, finish off the final details
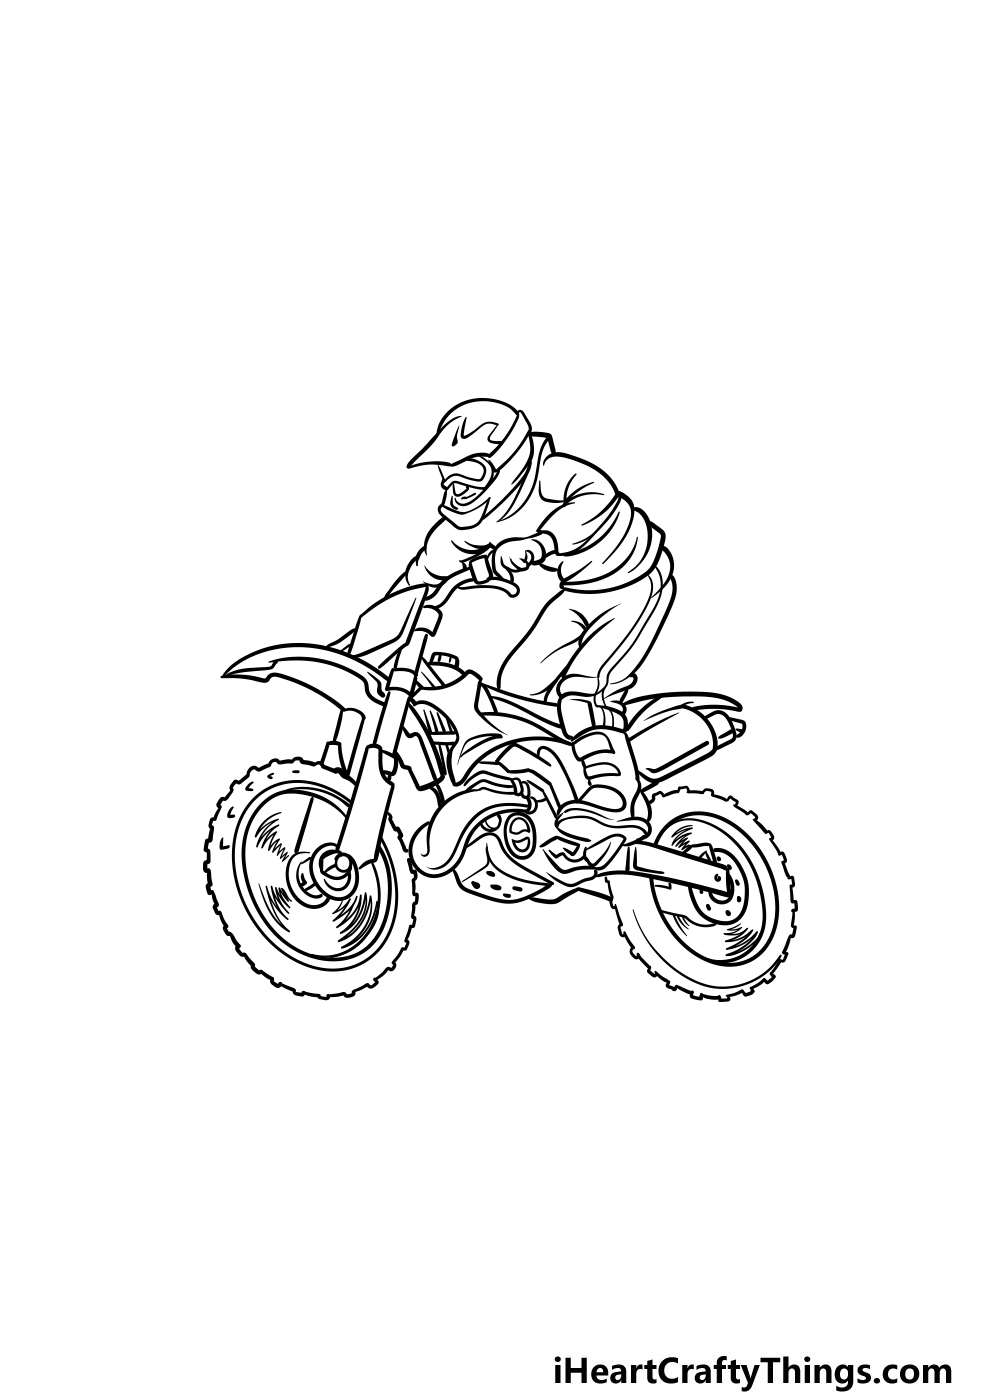
It will soon be time to draw the final details, but before we get to that part there are just a few final details to add in this step of our guide on how to draw a dirt bike.
First, you can draw the back tire of the bike to finish off the main structure of it. Once you have this tire drawn, you can then erase the pencil lines from the first step.
You should be cautious when you start erasing the pencil lines, as if the pen ink is still wet at all you could smudge it.
Once the pencil is all erased, you can then draw some final details onto the drawing. These will go all throughout the bike and the rider, and you can use as many or as few of the details in our example as you want!
Before the final step, you can also add any extra details and elements of your own that you would like!
If you’re feeling extra creative then you could draw a background for this image. That would be a great way to show where you would like to be riding this dirt bike if you were this rider.
Which final details will you use to complete this drawing before the final part?
Step 6 – Finish off your dirt bike drawing with some color
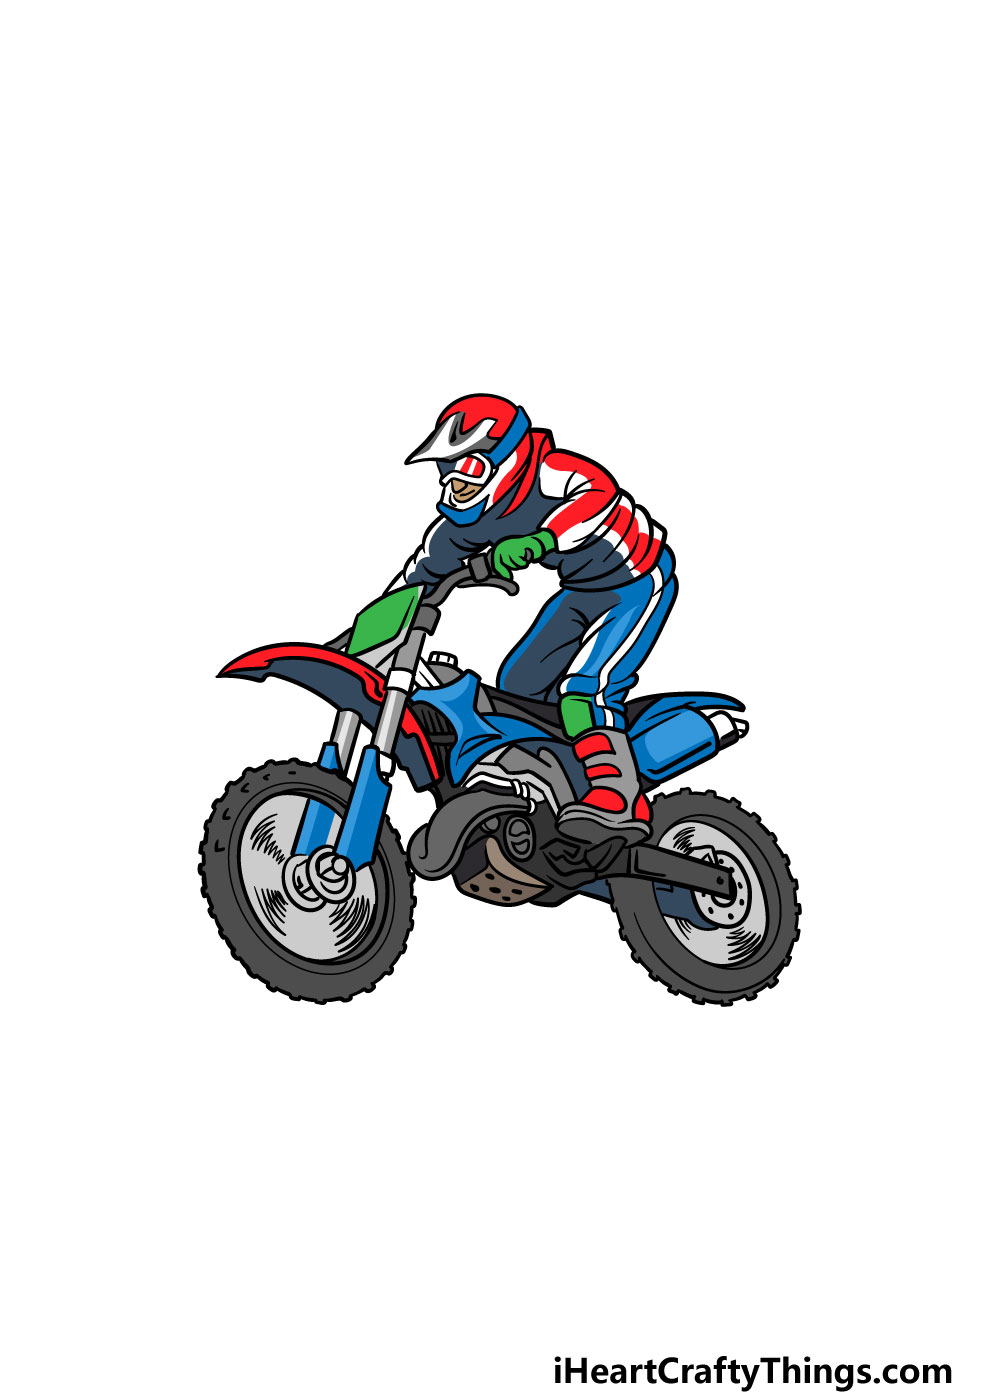
This part of your dirt bike drawing is where you get to take over and use your favorite colors to finish off your drawing!
We used some blues, reds and greens along with darker greys for our reference image, but this is just one way that you could tackle this image.
Dirt bikes can come in all manner of different color schemes and designs, so that gives you a lot of freedom for how you can color it in.
Whether you use some bright and vibrant colors or more muted tones, it will look incredible!
There are lots of intricate parts to this image, so when you’re coloring in you will find it much easier to color in if you use mediums that allow for accuracy.
These could include colored pens, markers or paintbrushes with thin tips.
With all of these options at your disposal, how will you finish off this drawing with your favorite colors?
3 More tips to make your dirt bike drawing easy!
Take a ride through these tips we have to make your dirt bike sketch even easier!
This drawing of a dirt bike that we created in this guide has a rider pulling off a cool move.
There are so many details to portray with this pose, so you may want to change the design a bit to make it easier.
For example, you may find drawing the human character to be too challenging. If that is the case, then you could remove the human character entirely.
Not only would this make the drawing easier for you, but it would also bring the focus back on the bike. If there are any other troublesome details then you should definitely alter them as well!
As we mentioned in the first tip, this dirt bike drawing has a lot of detail packed into it. This can make it a lot more difficult, but there are different styles you could use to make it easier.
This is something that would depend entirely on you and your strengths. You may like drawing in a simple cartoon style.
If that is the case, then you could adapt this dirt bike design to that style. If there is a different style of art that you like to work in, then that could be used as well.
You can definitely play to your strengths when it comes to making this drawing easier!
Finally, using a real dirt bike as a reference would be a great way to make this dirt bike sketch easier. There are a few options for how you could do this.
For example, if you happen to own a dirt bike or know someone that does, then you could use that to help you as you draw.
If you don’t have access to a real dirt bike, then you could look up some pictures.
However you go about it, using these additional references along with our images will make drawing the finer details much easier for you to get through!
Your Dirt Bike Drawing is Complete!
We hope that you have had a great time with this guide on how to draw a dirt bike!
This was a complicated drawing with a lot of small and intricate parts, so it may have seemed like it would be too intimidating to take on.
When you break a drawing down into smaller steps, however, it can be made so much easier to do!
Now you get to take over and put your own spin on this drawing with some final details.
You could draw a cool background to give this drawing some context, add some detailing to the bike or use some creative mediums and colors to bring it to life. No matter what you do, we know it will look great!
When you’re ready for more drawing fun, we hope that you will visit us on our website! We have plenty of drawing guides for you to enjoy, and we upload new ones all the time.
We would also love to see your finished dirt bike drawing, so please be sure to share it on our Facebook and Pinterest pages when it’s done!