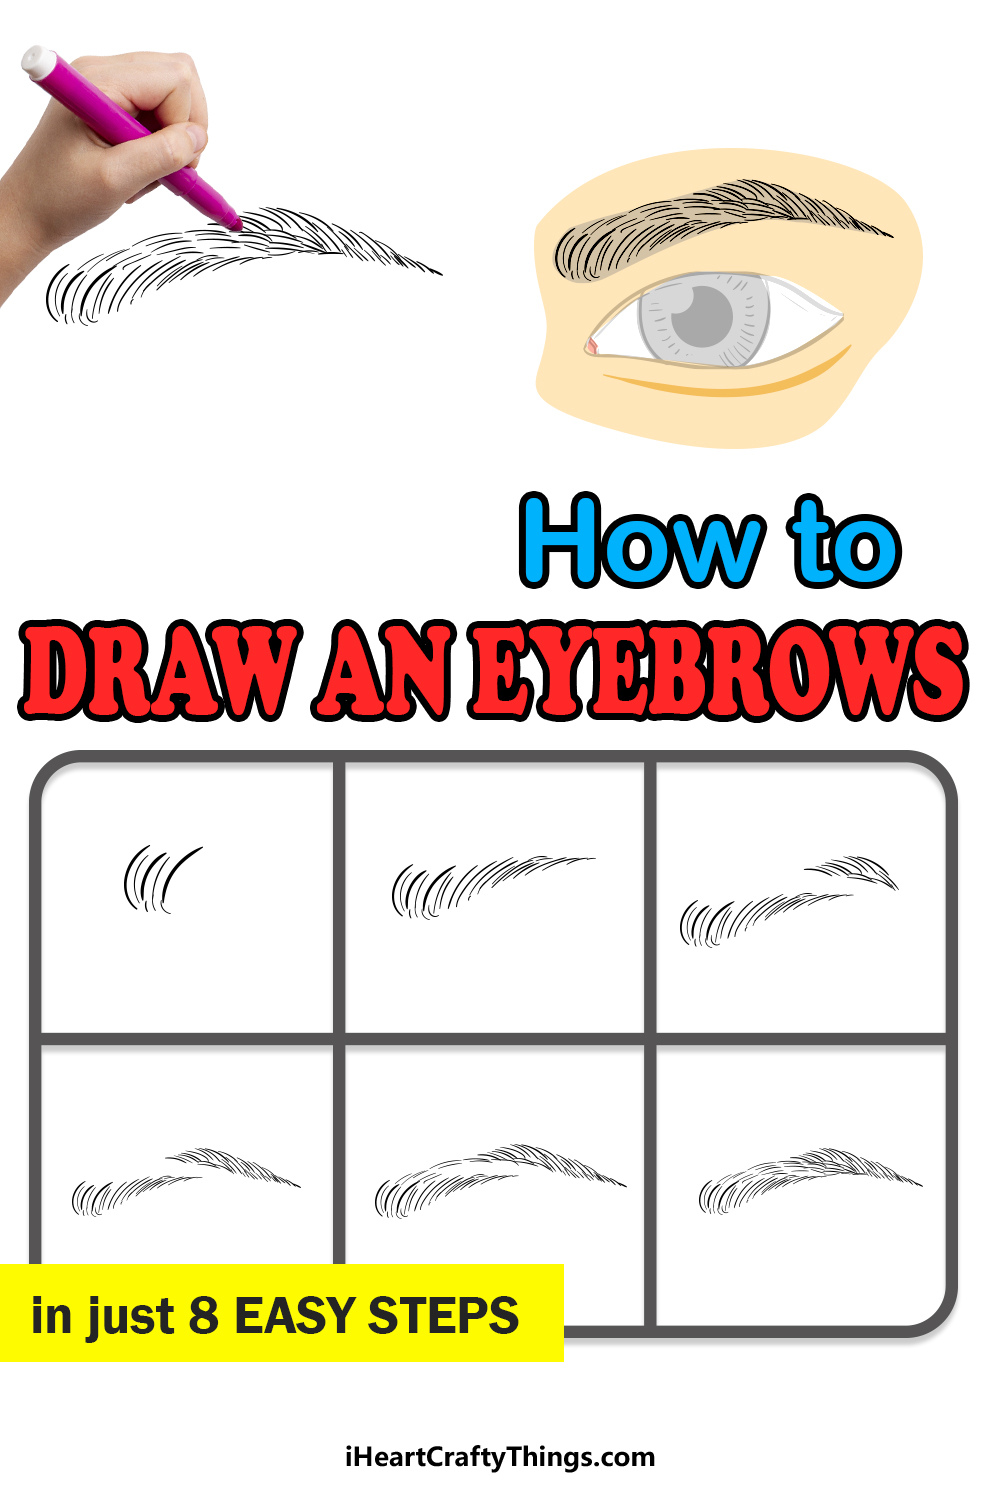
Eyebrows are a big part of how we show expressions. They can indicate whether someone is feeling sad, happy or surprised!
We see many thousands of eyebrows in our lives, and they’re such a common sight that you can start to take them for granted.
You’d think that because we see them so often on our own faces and the faces of others every day that they would be easy to draw!
This isn’t necessarily the case, as it can be difficult to make them look right.
With this step-by-step guide on how to draw an eyebrow, we will show you that it can be very easy when you know what to do!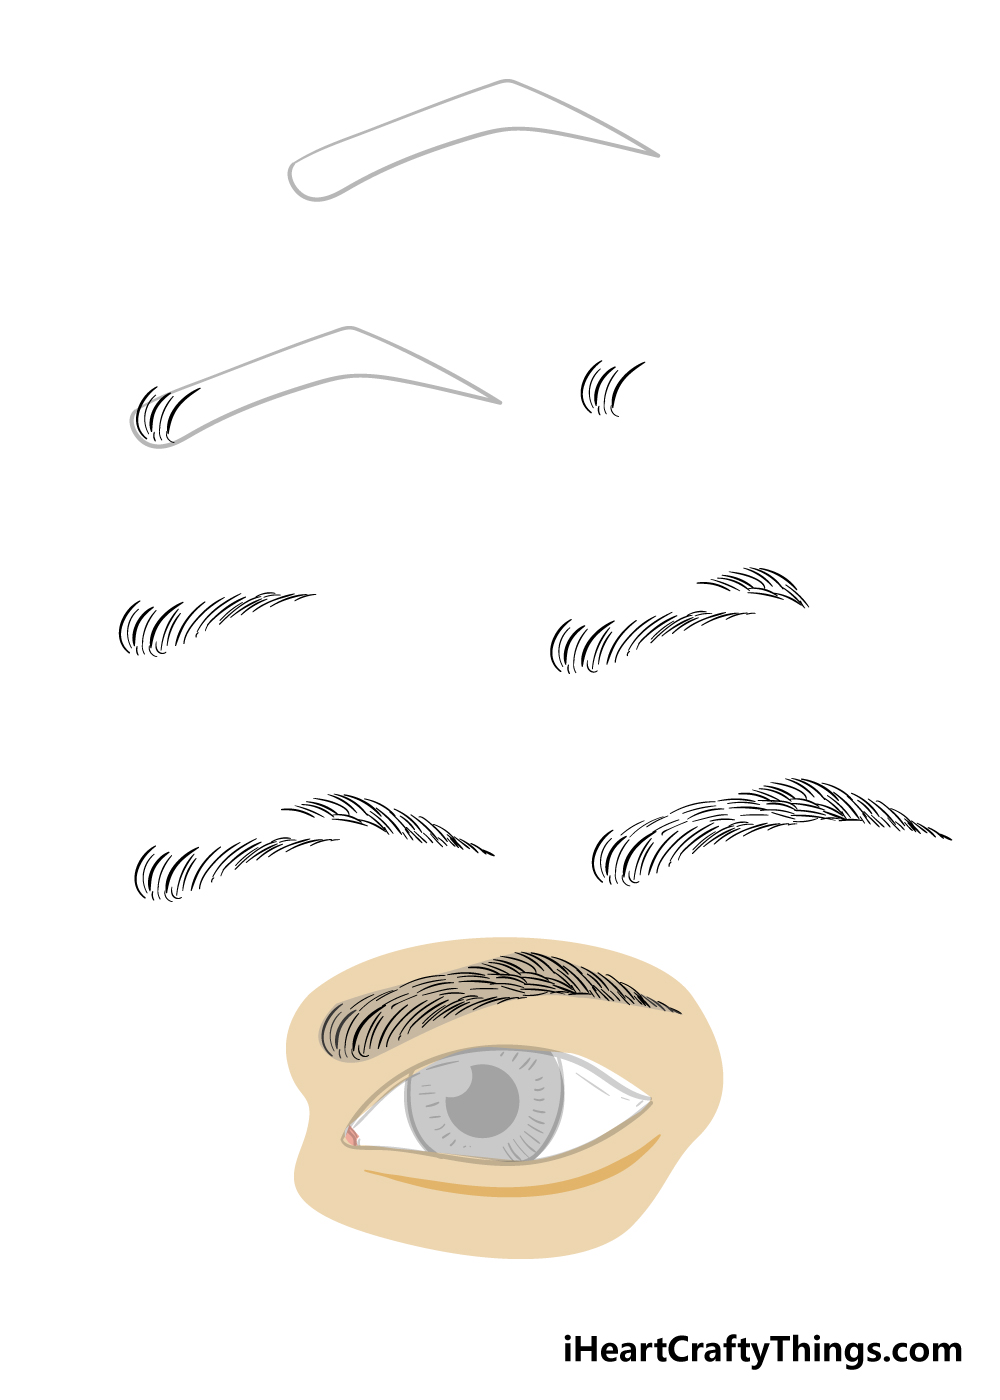
How to Draw An Eyebrow – Let’s get Started!
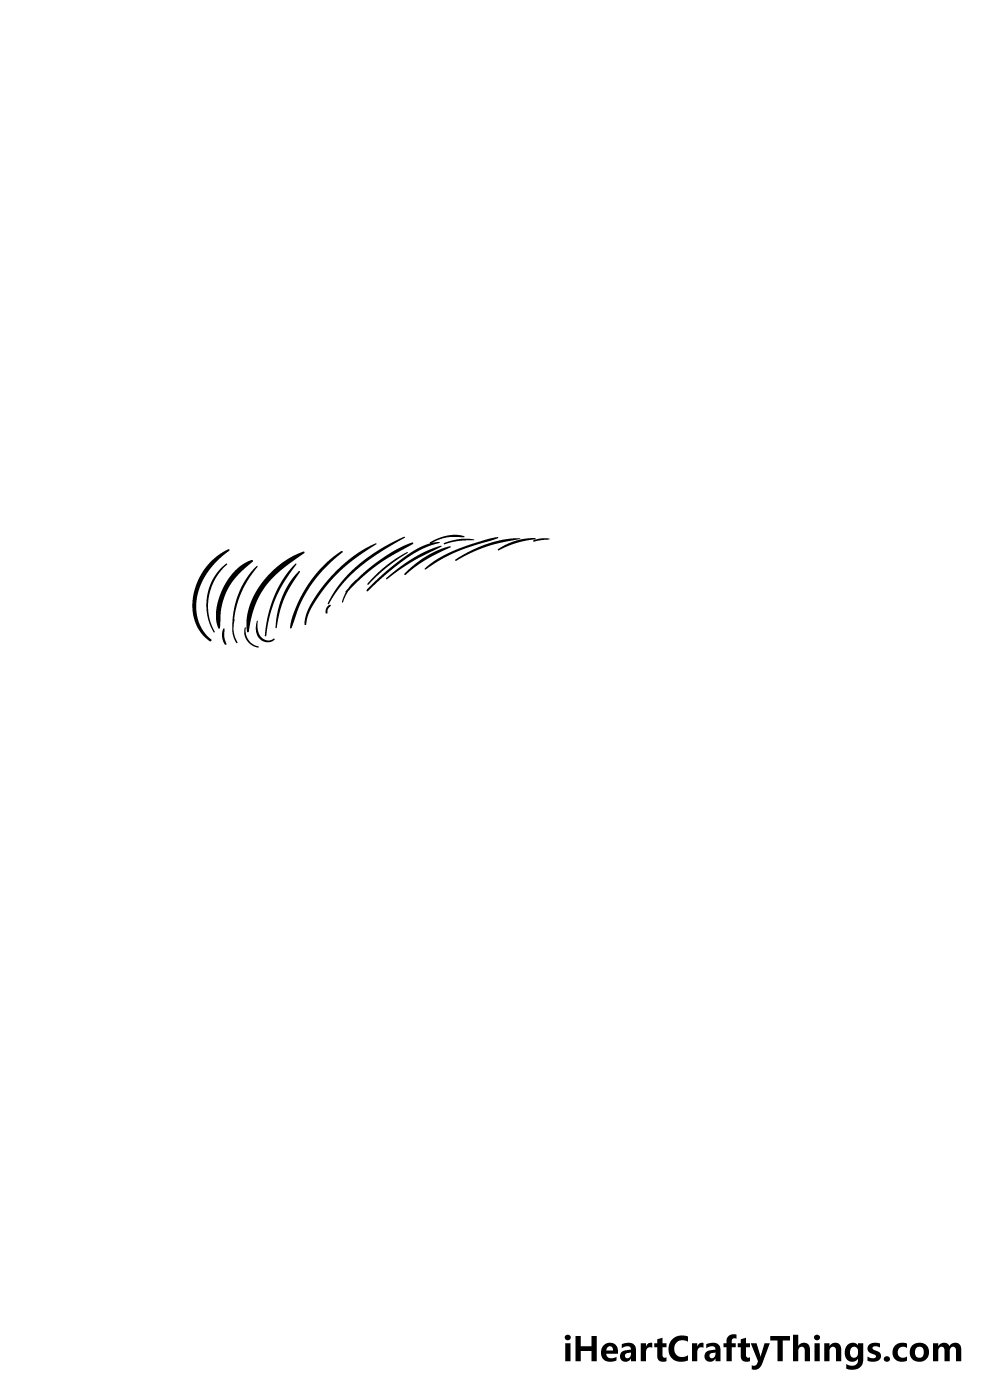
Step 1
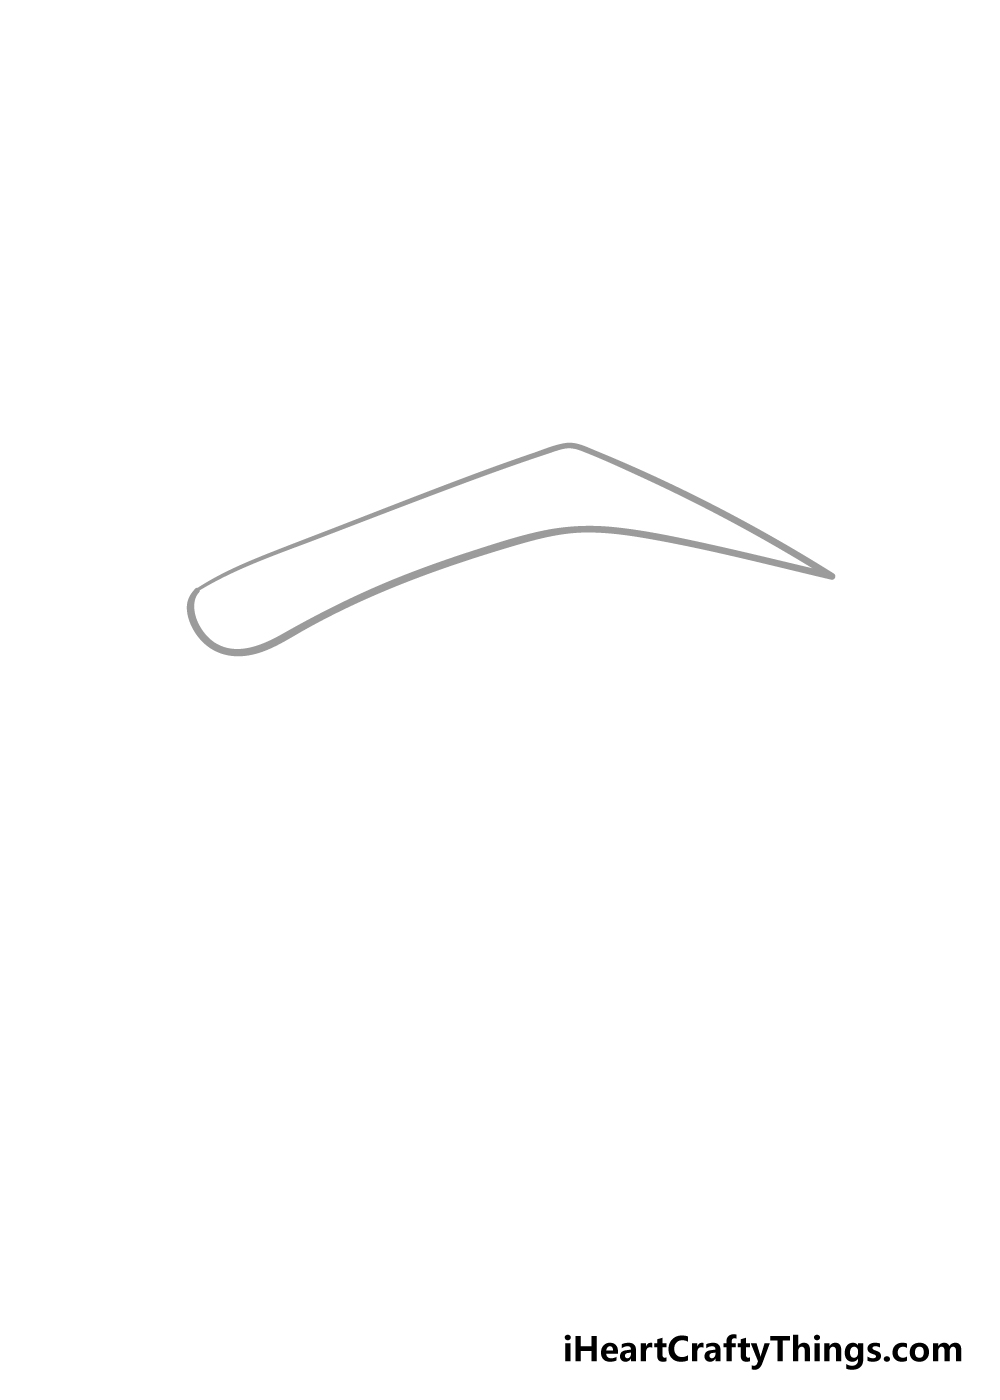
To begin our guide on how to draw an eyebrow, we shall be drawing in a guiding shape to help as we draw in the eyebrow properly later.
To start with, you should use a lighter pencil to draw in the shape that you see in the reference image.
This shape is made up of curved and straight lines, and we are using a pencil for now because you will be able to erase it later. The reference picture will show you how it should look before moving on.
Step 2 – Now you can start to draw in some ears
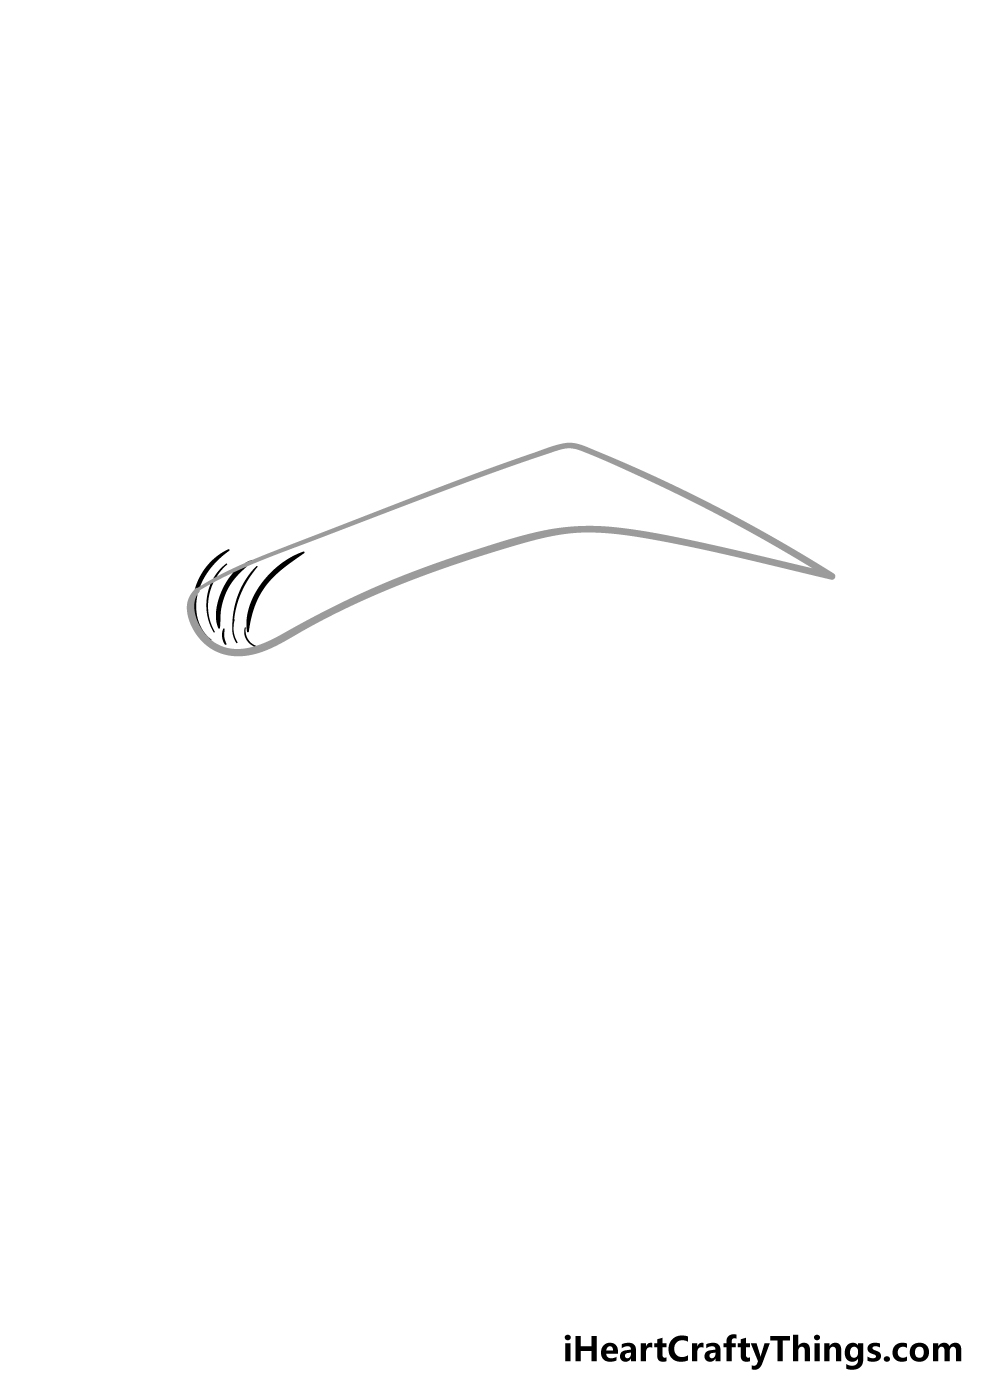
Eyebrows are not made up of a solid shape, but rather are made up of many smaller hairs. For this step of your eyebrow drawing, you can start to add in some of these hairs.
Using the outline you drew in the previous step, carefully start to add in some small, straight lines from the left corner of the eyebrow.
They shouldn’t be too close together, and the reference image will give you an idea of the amount of space there should be between them.
Step 3 – Next, you can add in more hairs
In this next step of our guide on how to draw an eyebrow, we have taken away the pencil eyebrow outline to show you how it will look at the end, but I would recommend keeping the outline there until the end of your drawing.
For now, carefully keep on adding more lines like the ones you have already drawn extending further along the eyebrow.
Step 4 – Keep on adding more hairs to the eyebrow
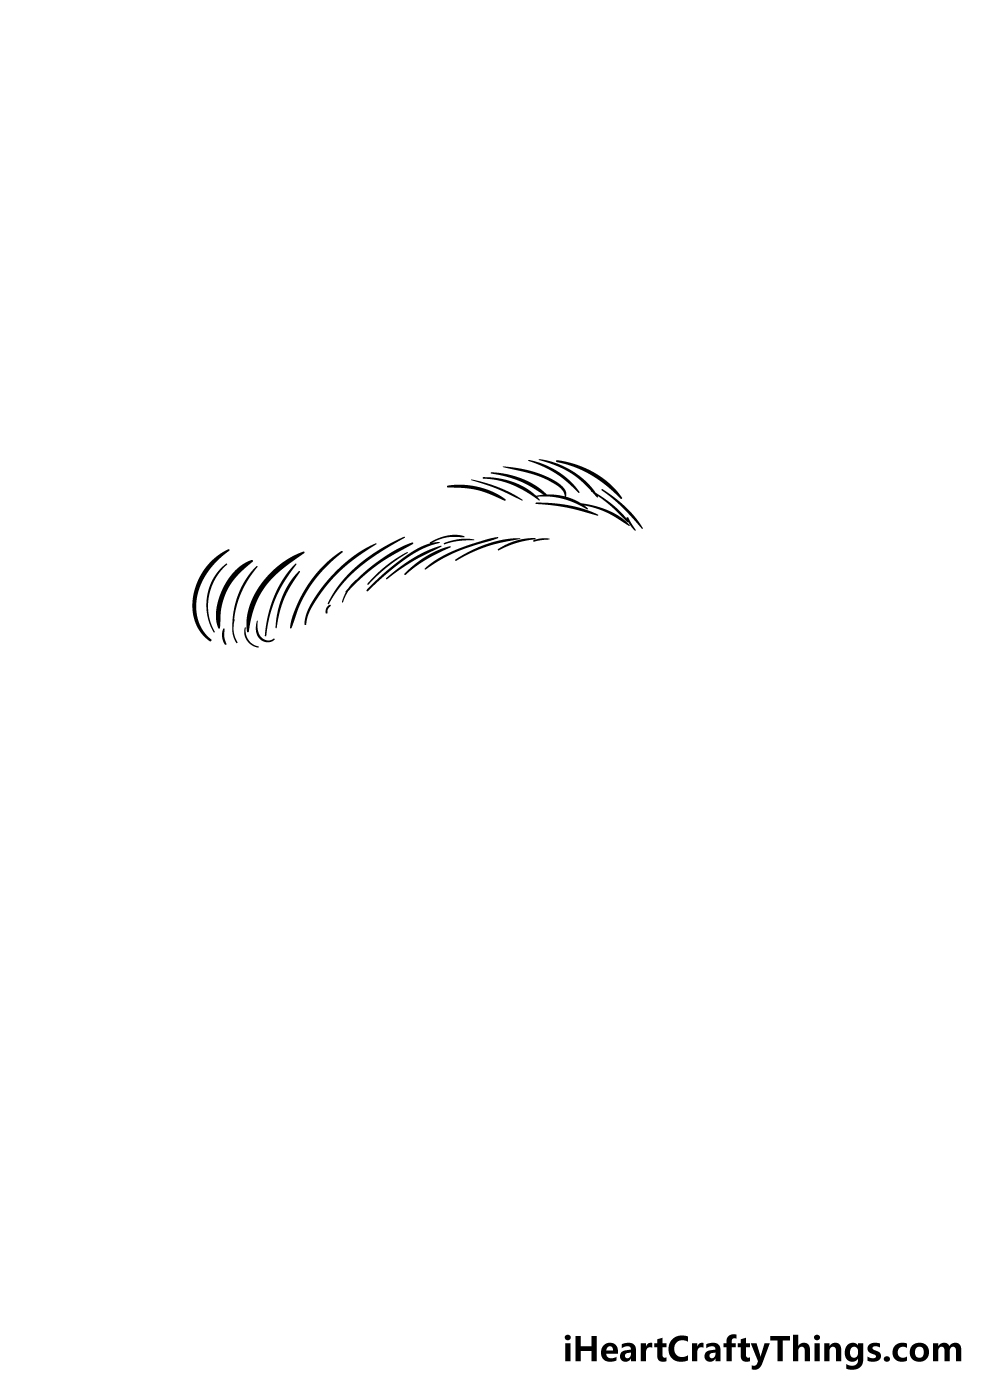
We won’t keep extending right with hairs for this step of your eyebrow drawing.
Instead, simply start adding more hairs like the ones you’ve been drawing at the top corner of your eyebrow planning image.
This will help you keep the shape of the eyebrow as well as the flow of the hairs consistent as you proceed.
Step 5 – Next, let’s draw in more of the hairs
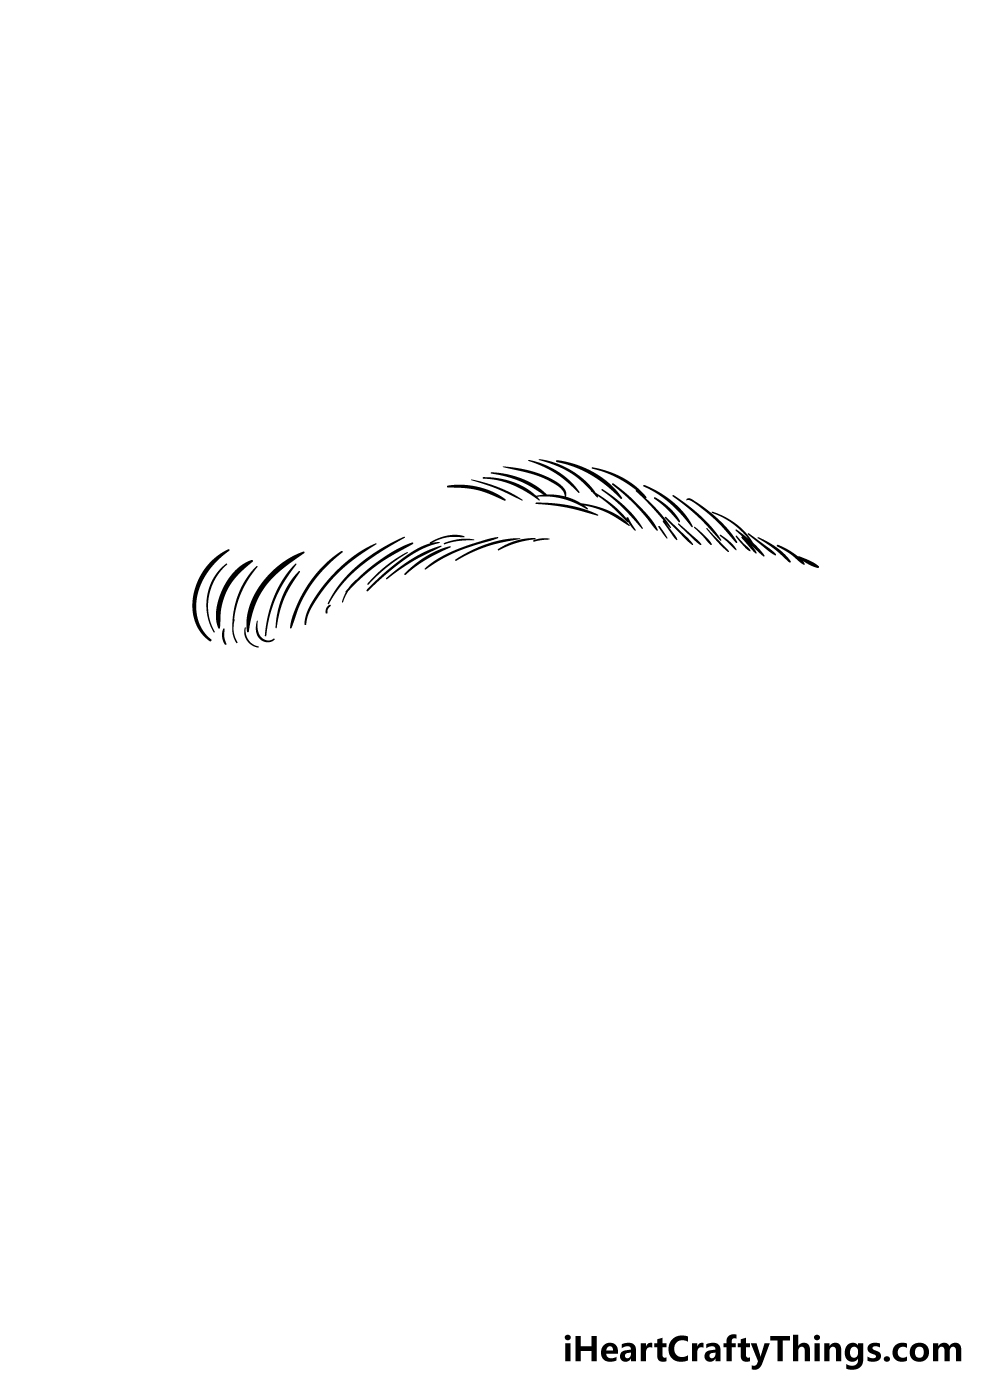
Your eyebrow drawing is starting to come together nicely, so let’s keep that momentum going! For this step, start drawing in more hair lines extending from the portion that you drew in previously and extend it all the way right along the eyebrow.
As you can see from the reference image and the guide lines you drew in step 1, the width of the eyebrow will get much thinner as you go along.
Step 6 – Now you can draw in the top hairs of the eyebrow

We have the far left and right sides of your eyebrow drawn in, so for the next few steps of our guide on how to draw an eyebrow, we shall start to join them with a middle section.
For this step, simply add in some finer hair lines extending from the top of the left portion of the eyebrow and extend along the top of your guide line to the right top side.
Step 7 – Next, draw in the final details
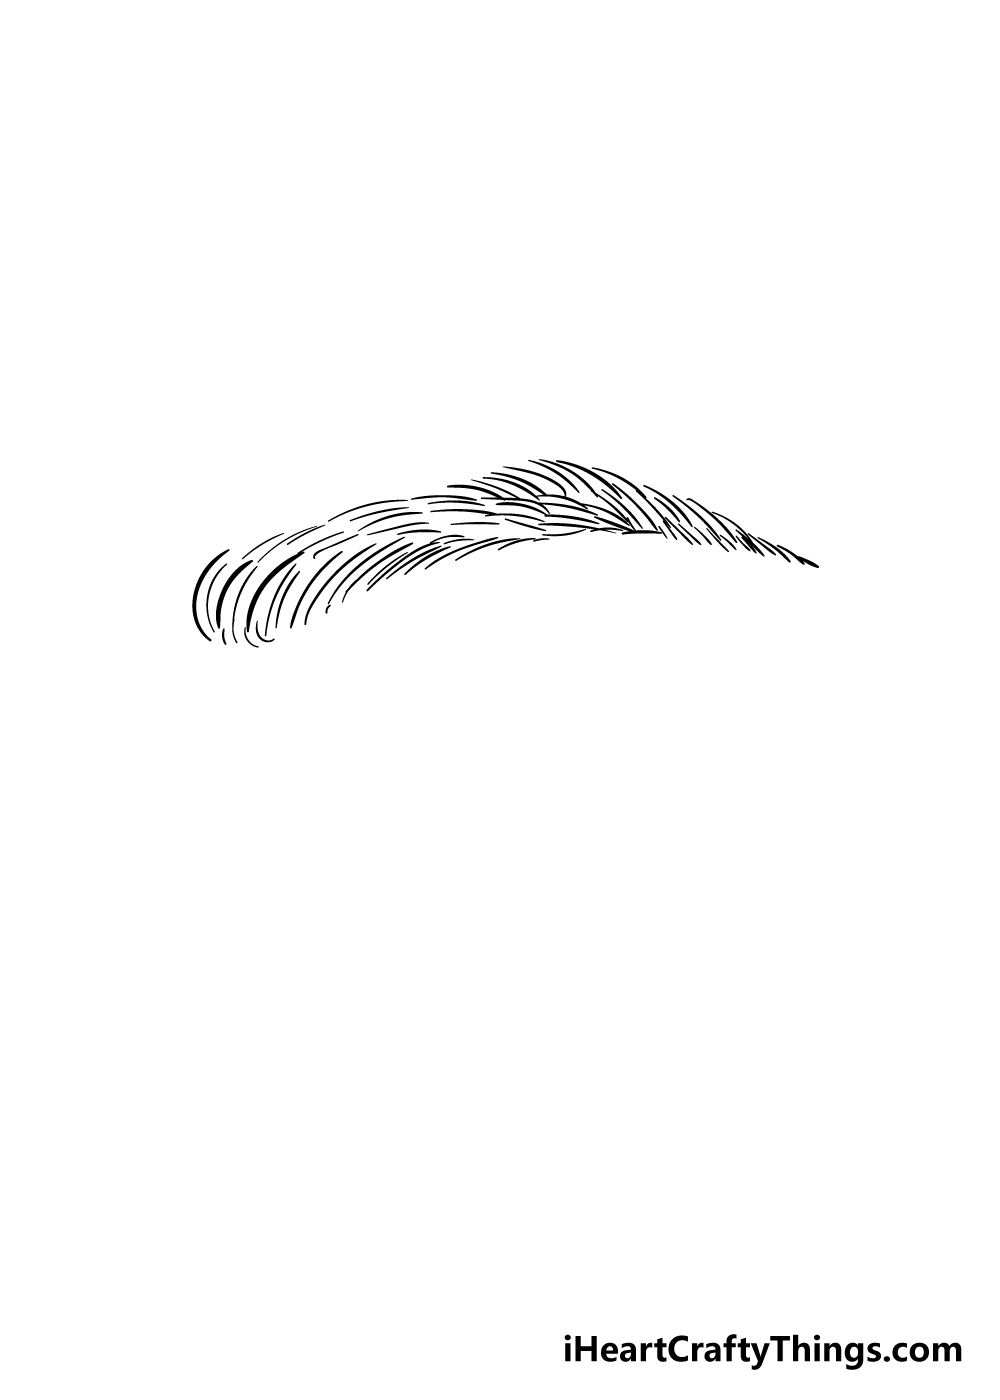
Your eyebrow drawing is so close to being complete! As you can see in your own drawing, there’s one empty space left, and I’m sure you can guess what we’ll be doing in that space!
Simply add in one more section of hairs to this space as seen in the reference image to finish off the eyebrow.
Once you’re happy with how it looks, all that remains is to erase the pencil guide shape you drew in step one.
If you used a pen for the hairs of the eyebrow, be sure to let the ink dry before you start erasing the pencil lines!
Step 8 – Now finish off your eyebrow with some color
With the final hairs added and the pencil erased, your eyebrow drawing is almost completely done! All that remains is to add some lovely color to it.
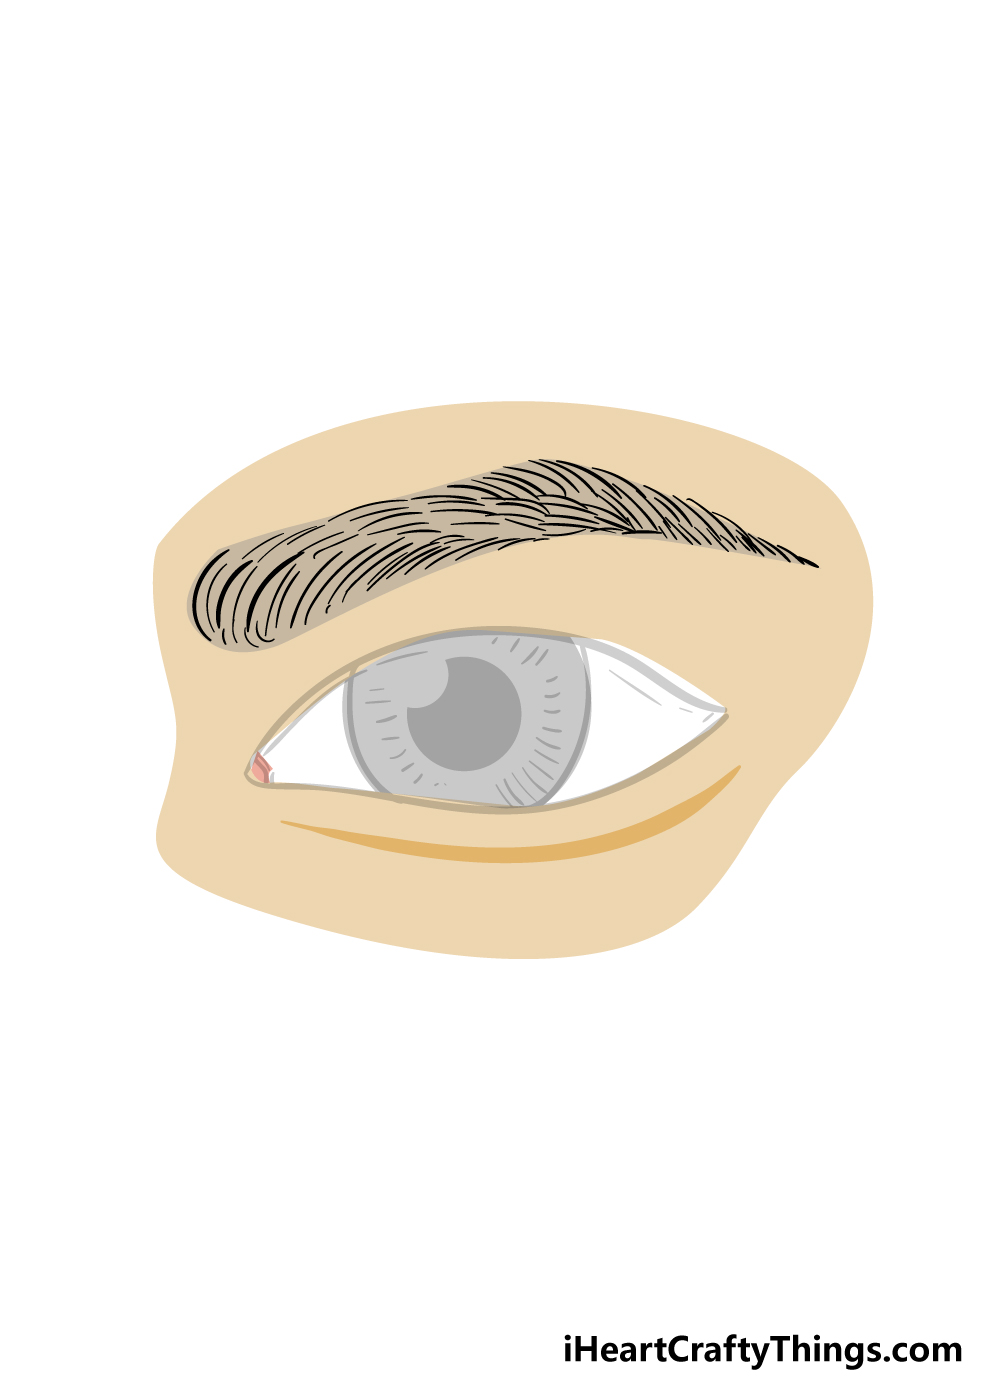
In our reference image, we have also shown where the eye would sit beneath the eyebrow. If you’re feeling extra creative, you could use this image to draw in an eye beneath your eyebrow!
Once you’ve decided on some colors and extra details for the eyebrow, the last thing to decide is what art mediums you will use to finish it off!
Whether you choose a painterly approach with acrylics or watercolors or prefer the strong color details of colored pens and pencils we know it will look great! We can’t wait to see what colors you decide.
3 More tips to make your eyebrow drawing easy!
You won’t raise any eyebrows when you check out these tips for your eyebrow sketch!
Whenever you draw anything realistic, you will find it much easier when you use the real thing to help you.
Luckily, you have the perfect model for your drawing of an eyebrow readily available!
One option would be to use your own eyebrows. You could take a photo of them or use a mirror as you draw.
Another option would be to get someone to pose for you.
This could be a friend or a family member, but you could find a photo online instead if that isn’t an option.
Whatever you use as a model, you will find it so much easier when you use it along with our guide!
The eyebrow drawing we created in this guide is fairly realistic with lots of little lines showing the individual hairs. There are other styles you could use if this style is proving too difficult.
For example, in cartoons and comic books the eyebrows will be drawn as a solid shape. If this is not enough detail for you, you could still draw the solid shape and add some small line details.
That is one example, but there are plenty of art styles you could use instead if you find it easier. What are some other styles you like that you could use?
In this eyebrow sketch, the focus is purely on the eyebrow itself. This can make it much harder, as there is more pressure to have it looking perfect.
If you were to draw more of the face this eyebrow is on, you could make it easier on yourself. Once again, you could use your own face or the face of someone you know to help you out.
The face doesn’t have to be super realistic, and you could work in an art style that you are comfortable with.
That will mean the eyebrow is much smaller on the drawing, and so it would not need to be as detailed!
Your Eyebrow Drawing is Complete!
Your eyebrow is drawn and you’ve colored it in, so you can now say that you have learned how to draw an eyebrow!
We hope that by using this guide that has broken it down into several steps that you found it to be easier than you expected.
Our goal with this guide was to help not only make it easier for you but also to make it fun for you to learn!
Now that you can draw an eyebrow, you can have fun putting your own spin on it. You can do this with your color choices and even with some extra details.
For example, you could draw in an eye underneath it and color it to look like your own!
It can be great fun to get creative with color choices and art mediums, so we can’t wait to see what you come up with!
This step-by-step guide is one of many we will be bringing out, so be sure to check our site frequently as we will be uploading more constantly.
We would also love to see your finished eyebrow drawing, so please go ahead and share it on our Facebook and Pinterest pages for us to admire and enjoy!
We can’t wait to see your amazing eyebrow drawing.