Is there anything that epitomizes the idea of a tropical vacation better than relaxing on an island? If there is, we would like to hear it! Islands can also capture the imagination in other ways.
They can be pockets of land untouched by man or the hiding place for pirate treasure. It’s fun to imagine what an island would mean to you, and you can visualize it by learning how to draw an island.
If you’ve ever dreamed of owning your very own island, then this is the guide for you!
So sit back, relax and enjoy this step-by-step guide on how to draw an island that we have prepared for you.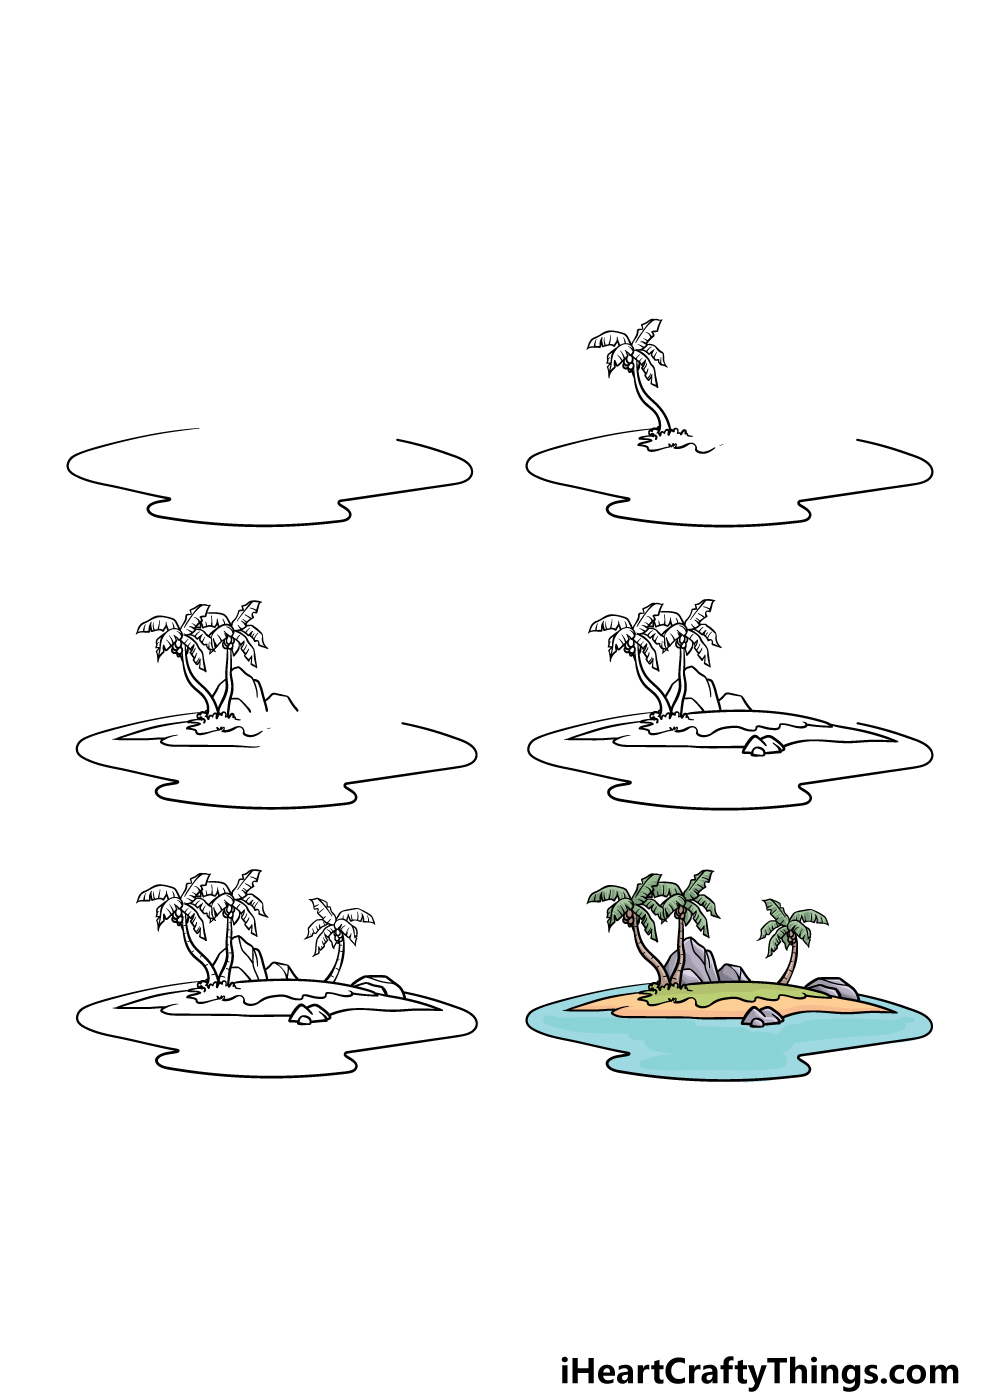
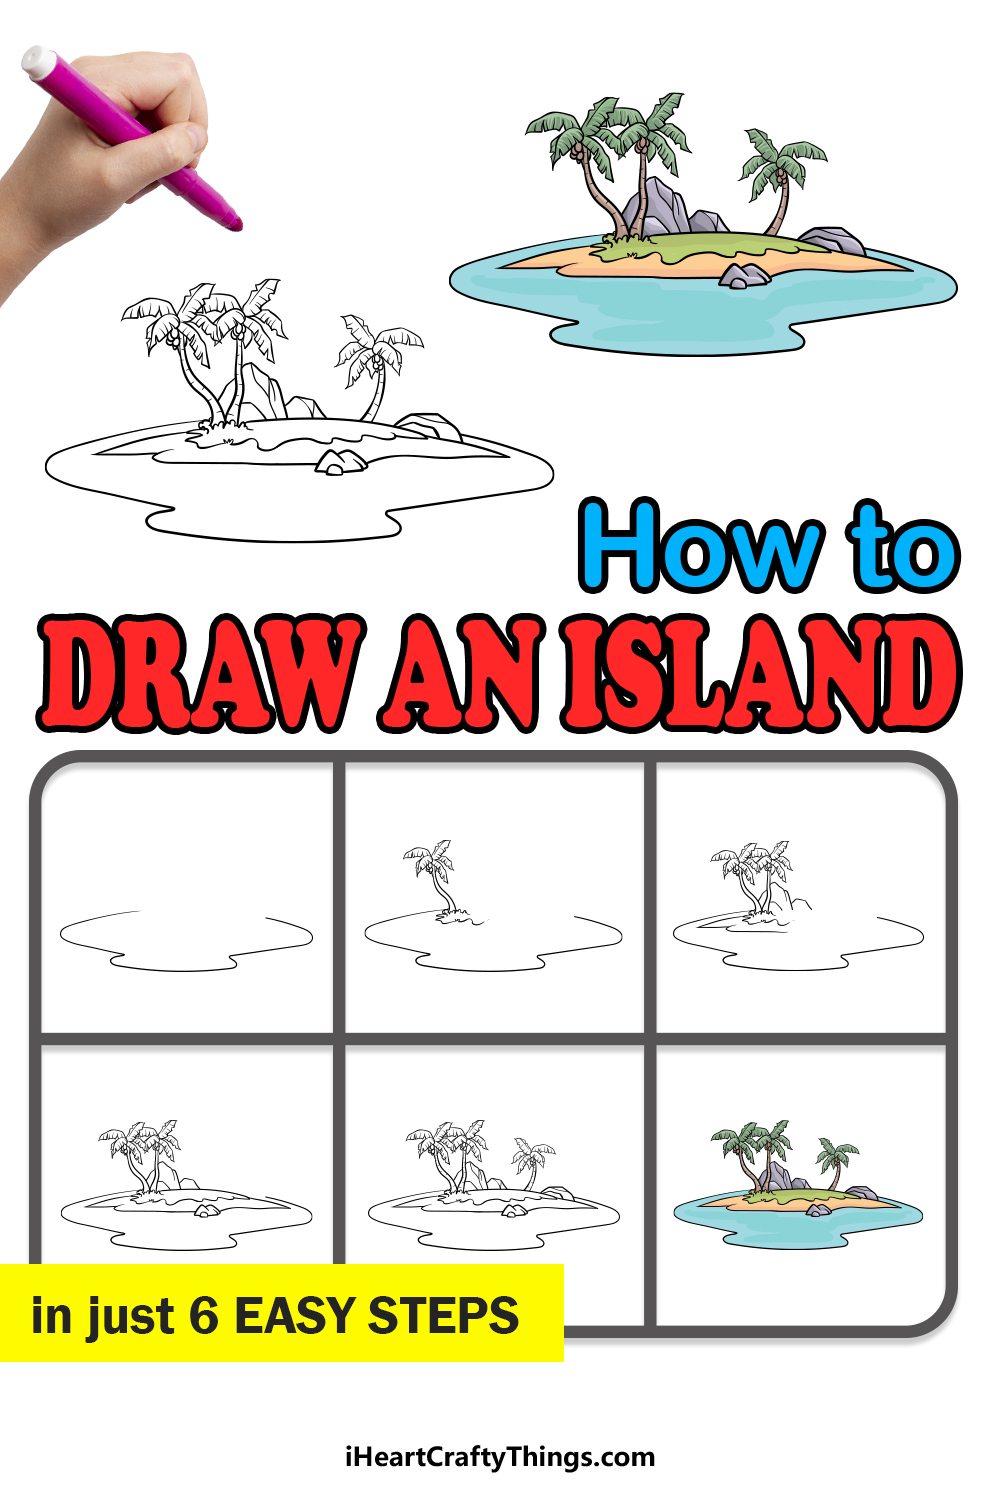
How to Draw An Island – Let’s Get Started!
Step 1
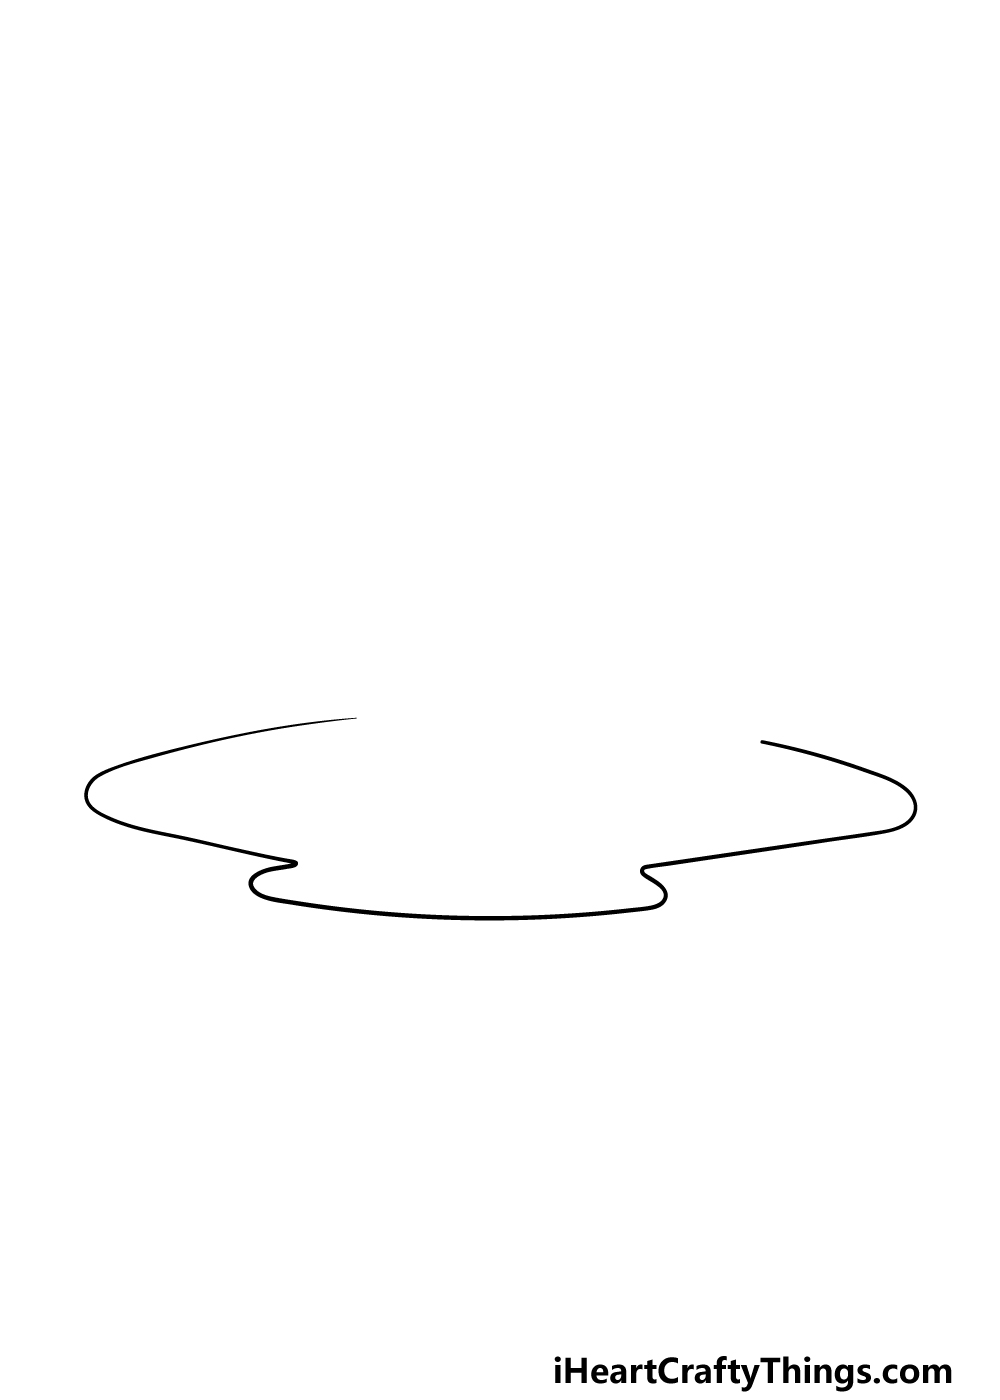
We will begin this guide on how to draw an island not with the island itself, but actually the water surrounding it.
This is a step where you could change it up a bit if you wish, as we will only be drawing a small section of the vast ocean that this island is situated in.
You could make this stretch of ocean bigger or smaller depending on your own preference. To draw it, we will then be using some curved and rounded lines for the stretch of the ocean, and it will have two curves to it.
Be sure to also leave a space at the top of it, as this is where we will be drawing the island later.
Once you’re happy with how it looks, you’re ready to proceed!
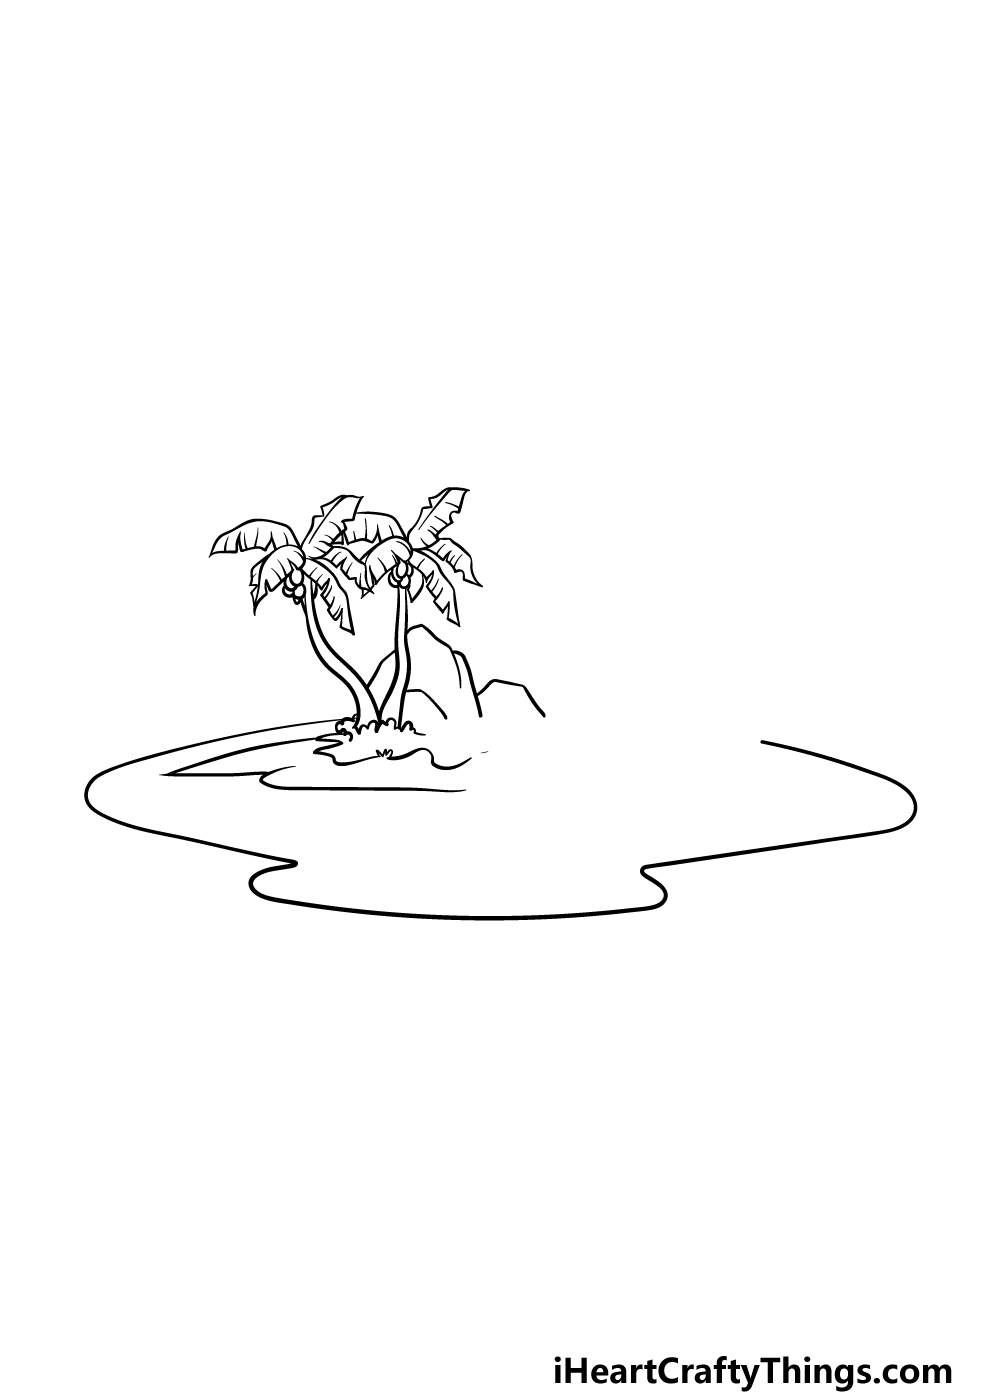
Step 2 – Next, start drawing some features for the island
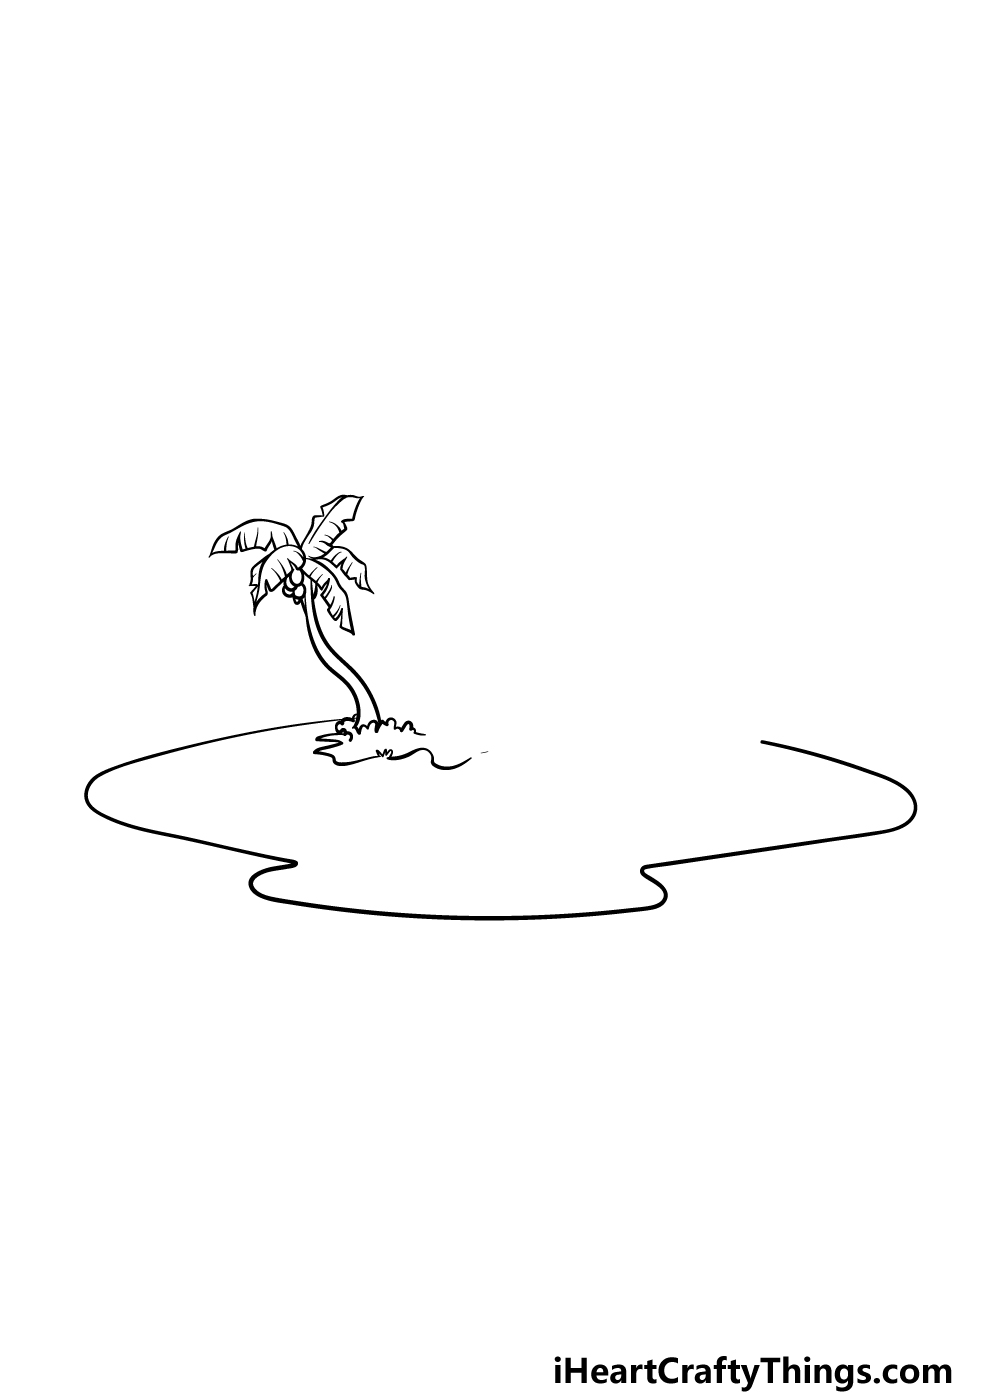
You have the lines for the ocean drawn, and in this next step of your island drawing you can start drawing some features for it.
When thinking of this kind of island, you probably have visions of palm trees and beaches in mind, so it seems fitting that we will draw a palm tree as the first feature!
To do this, use two curvy lines close to one another for the twisty trunk of the tree. Then we will be drawing several large palm leaves onto it, and these will have smooth lines for the tops and more jagged lines for the bottom.
There will also be some circular shapes for some coconuts under the leaves.
Finally, use some bumpy lines to create a grassy base for the tree, and then it’s on to step 3!
Step 3 – Draw some more features for the island
Now that you have drawn one tree for the island, you should find it much easier to draw some more in this step of our guide on how to draw an island!
Simply add another of these palm trees, and it will look very similar to the first one that you drew.
To finish off this step, we will then add a rock feature behind the trees, which will be drawn with some more rounded, slightly jagged lines.
There will be some spaces left over, as we will be adding even more features in the next few steps.
Step 4 – Now, draw some more land for the island
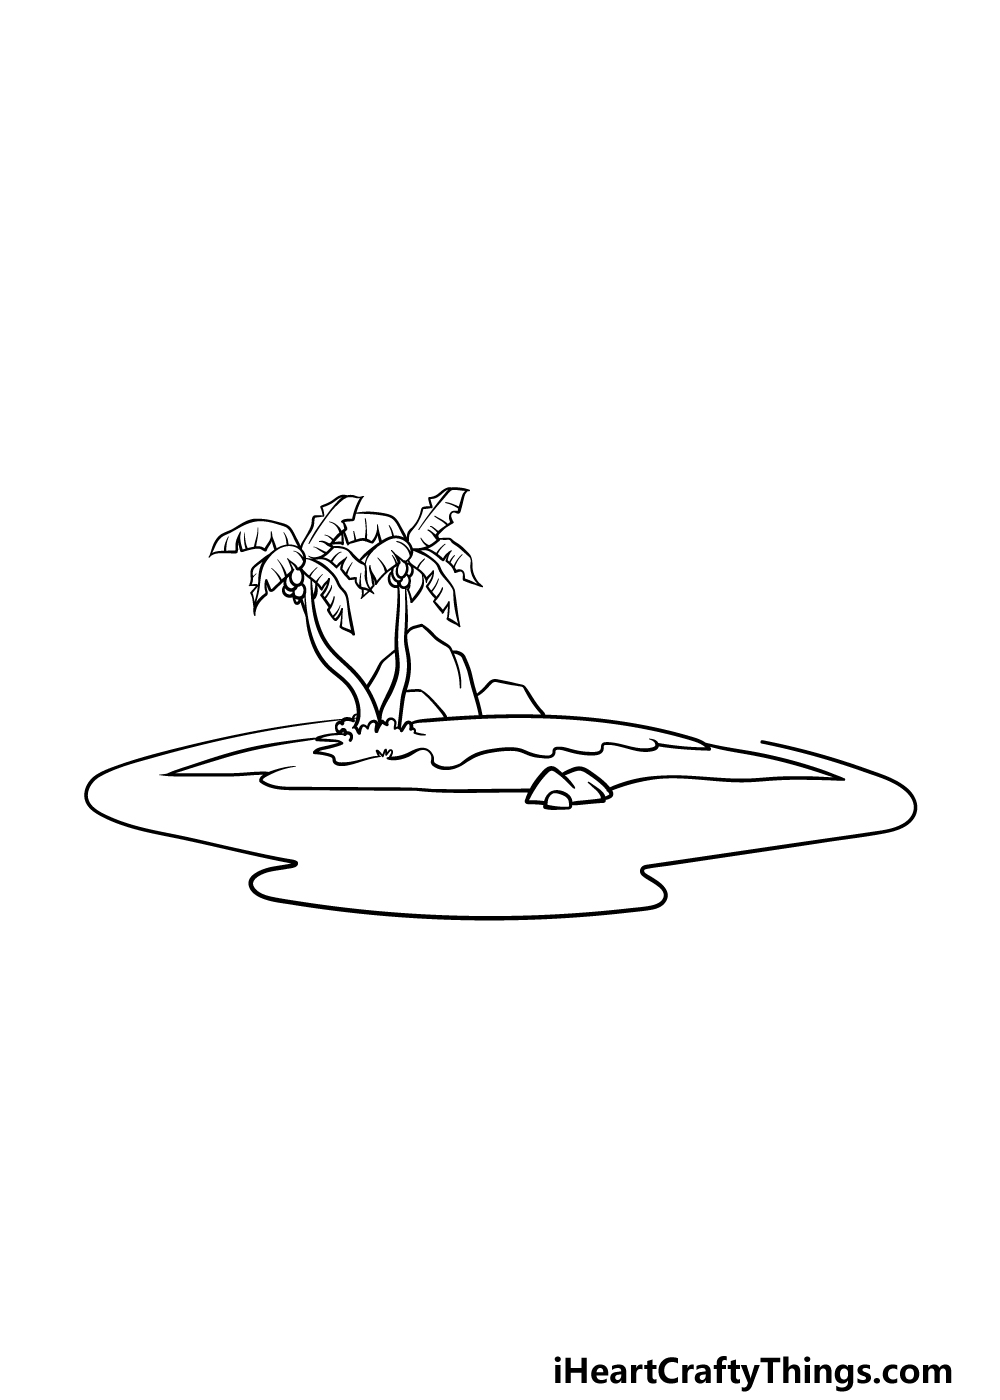
As we start to finish up the details for your island drawing, we will now add some more of the land for the island. For this land, we will be drawing a sandy beach base with a grassy top.
To do this, use a curved line for the top of this island, and then use some wavy lines for the bottom of the grassy portion. Then, use some more slightly curvy, smooth lines for the bottom of the grassy portion.
You can also add smaller details such as some rocks at the base of the sandy portion. Once these aspects are drawn, we can move on to some final details in the next step.
Step 5 – Finish off your island drawing
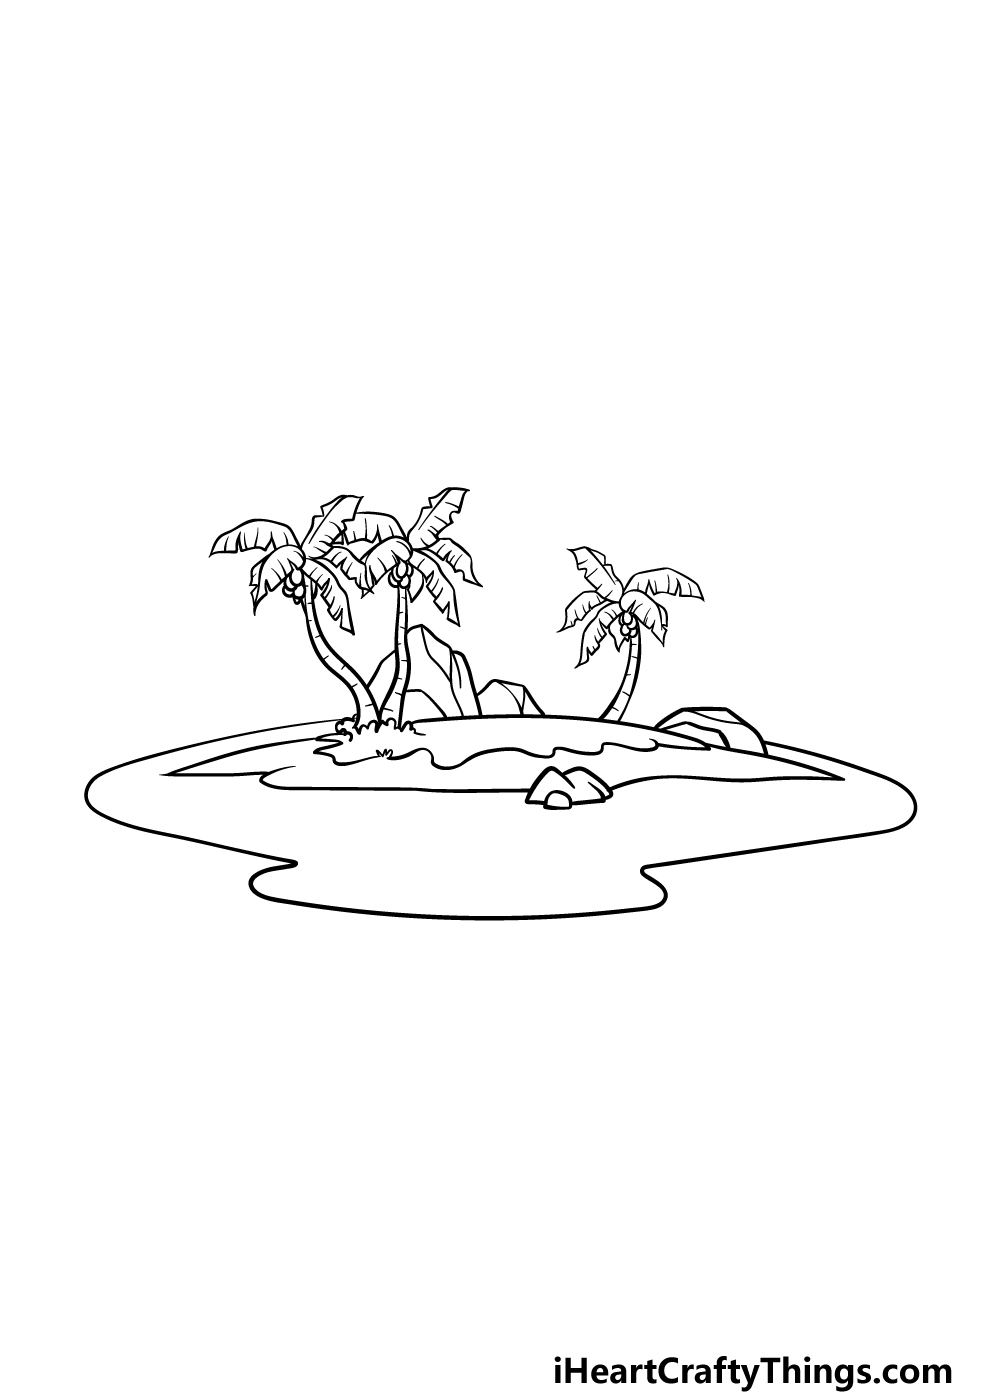
Soon, you will be able to bring some tropical vibrance to your picture, but first we have some final details to add in this step of our guide on how to draw an island!
To do this, first draw another palm tree on the right-hand side of the island. Once again, this tree will look very similar to the others, so it shouldn’t prove much of a challenge!
Finally, you can add another rock to the scene, and then finish off with some minor details for all of the parts that you have drawn.
Before you go to the final step, you could also add some touches of your own. Maybe there is a volcano on the island, or you could draw some huts and cottages.
These are just a few suggestions, but this guide is all about creating your perfect island, so be sure to let your imagination run wild!
Step 6 – Finish off your island drawing with some color

Now, you have arrived at the final step of your island drawing. We used a lovely cool color palette for our example image, with lots of pleasant blues, greens and browns for a relaxing feel.
You could go for a similar look to your picture, but you could also make it much brighter and more vibrant if you prefer! The mediums you pick can have a big impact on how it looks.
Acrylic paints and colored pens would be ideal for a brighter look, while watercolors and colored pencils would do great for a look similar to our image.
Which colors and mediums are you thinking would suit this picture best?
5 Tips To Make Your Island Drawing Even Better!
Have some tropical fun as we show you how to make this island sketch even better!
With this island drawing we have created, we left the sky above it blank. This means you could create your own sky above it, and you would have many ways to do that!
The obvious choice would be to add a beautiful sunny sky above it. That would look great, but you may want the skies to be cloudy and rainy for a different vibe entirely.
Once you have decided how to finish off the sky, you could then add some details to the island itself. For a few ideas, you could populate your drawing of an island with some people or maybe some wildlife.
There are all sorts of fun details you could add to your island, so what are some ideas you may have?
Next, you could even increase the size of the island itself once you have the hang of this island sketch. You have the hang of it now, so you could create a really cool island!
Don’t be shy about changing any details you like as you change the design of the island. What features would you like to add to this island?
Moving away from the island a bit, you can also turn your focus to the water surrounding it. We kept the details of the ocean pretty scarce, but you could also make it a bit more interesting!
For some easy ideas, you could add some sharks or other creatures. It could be as simple as adding some waves or even more islands in the distance.
How else could you make the water more interesting?
You can also enhance your island drawing with the colors and art tools you choose! For example, you could give this picture a nice mild look with some watercolors or colored pencils.
That is one way you could choose to color this drawing, but you should go with your instincts to create your own perfect picture! What will you choose?
Your Island Drawing is Complete!
We hope that you had a great time creating some vacation vibes as you worked with us on this guide on how to draw an island!
Even though there were some smaller details in this picture, we aimed to make it fun and easy for you by breaking it down into smaller steps.
Now you can also take it even further, and this is where you can get really creative by adding your own details, elements and color choices.
We know you will create an incredible island paradise, and we can’t wait to see what you do!
Then, when your island drawing is ready to go, you can visit our website for more awesome guides. Be sure to keep checking in, as we have some more great drawing guides coming soon!
We would love to visit your island paradise, so please be sure to share your finished artwork on our Facebook and Pinterest pages!