There are so many different iconic comic characters in comic book history.
These characters have transcended the pages of comic books to star in films, TV shows and video games, and they’re beloved the world over.
The Incredible Hulk is one of the most unique superheroes ever created, and he first appeared in 1962.
Unlike many costumed heroes, Hulk is instead a monstrous transformation that Dr. Bruce Banner undergoes when he gets angry.
He’s also a striking and unique looking character, and fans of this character often try to learn how to draw Hulk’s face.
Seeing as emotion is a big part of this character, this can make things tricky as these emotions need to be portrayed in the picture.
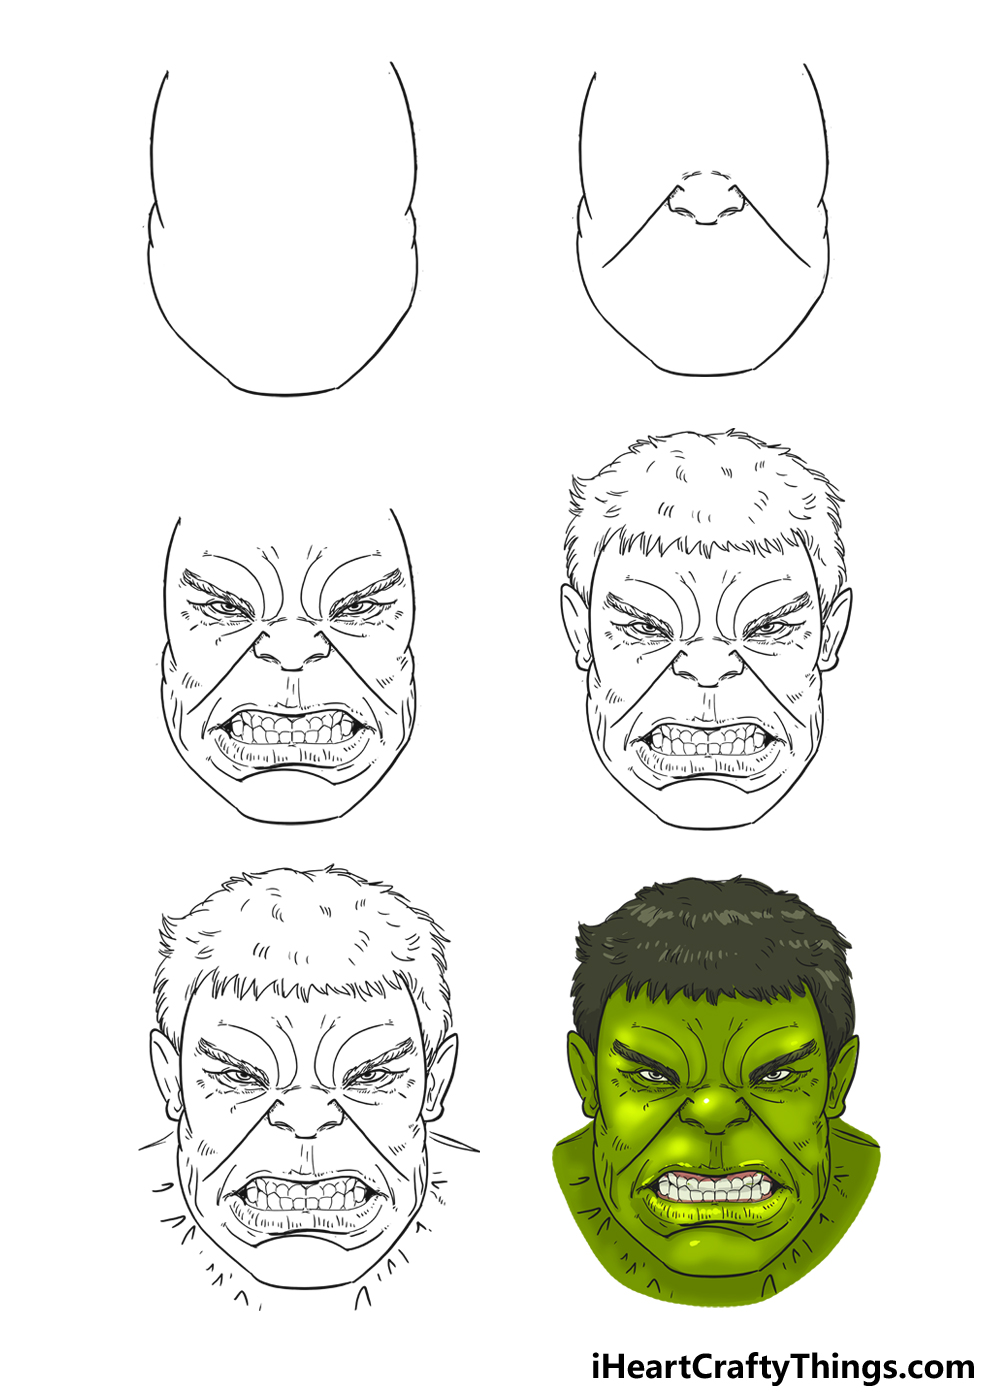
In this guide, we have 6 steps that will take you through the process of drawing this iconic character.
We will also show you how you can color in your creation and make some variations.
Additionally, we will give you some ideas you can consider to add your own unique details and ideas to the picture.
With all that said, get ready to portray this famous character as we begin the first step of the guide!
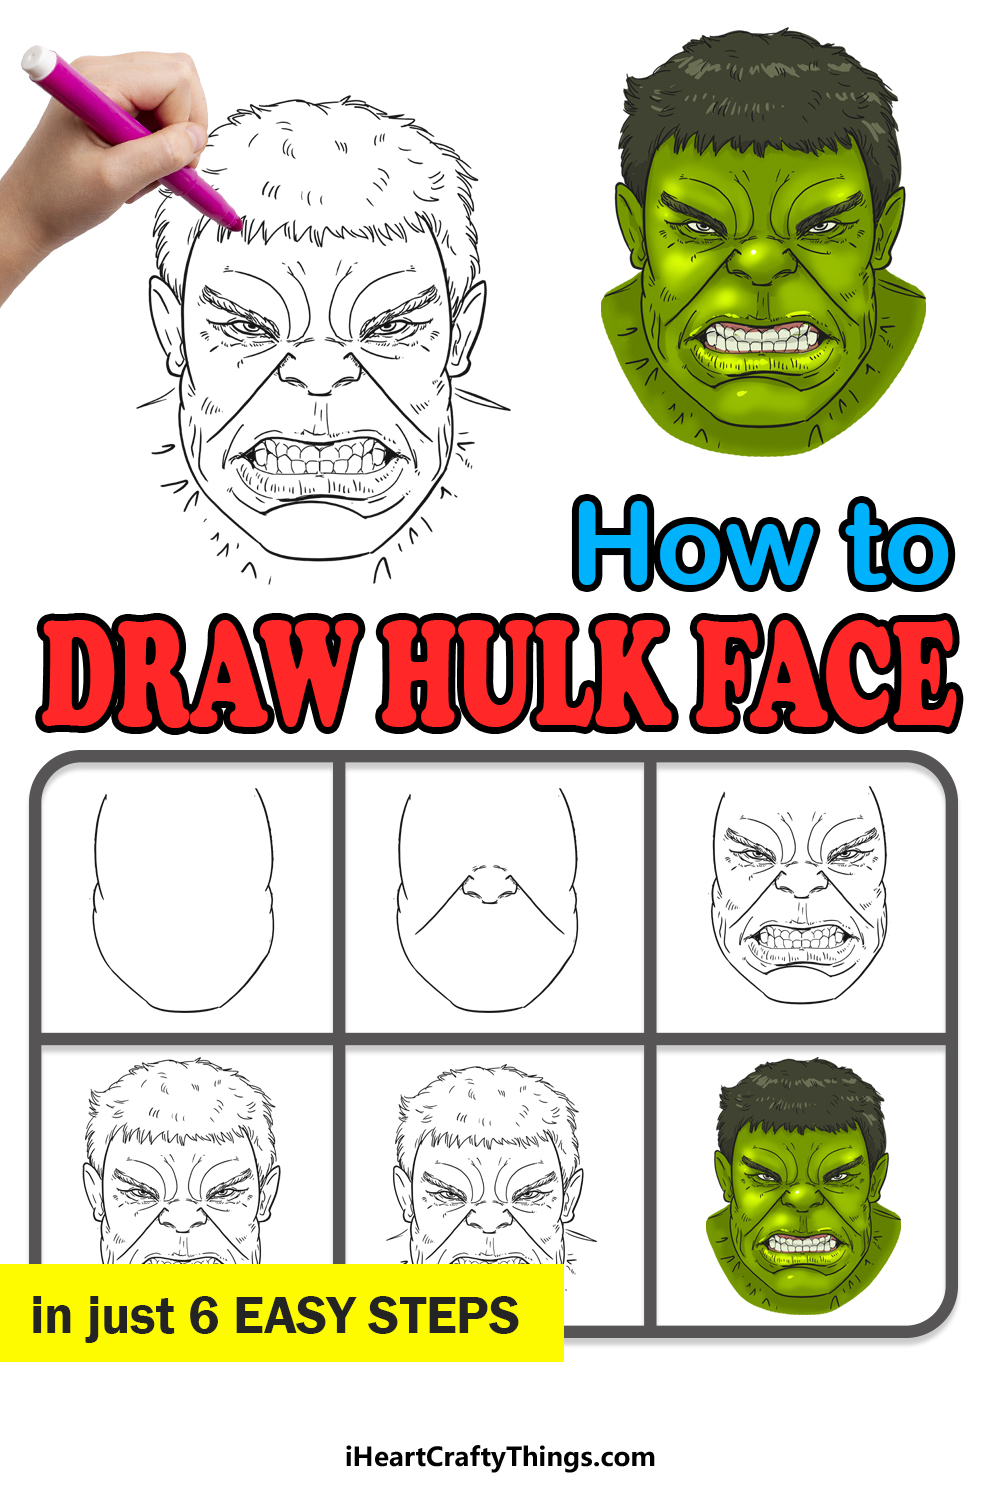
How to Draw Hulk’s Face – Let’s Get Started!
Step 1
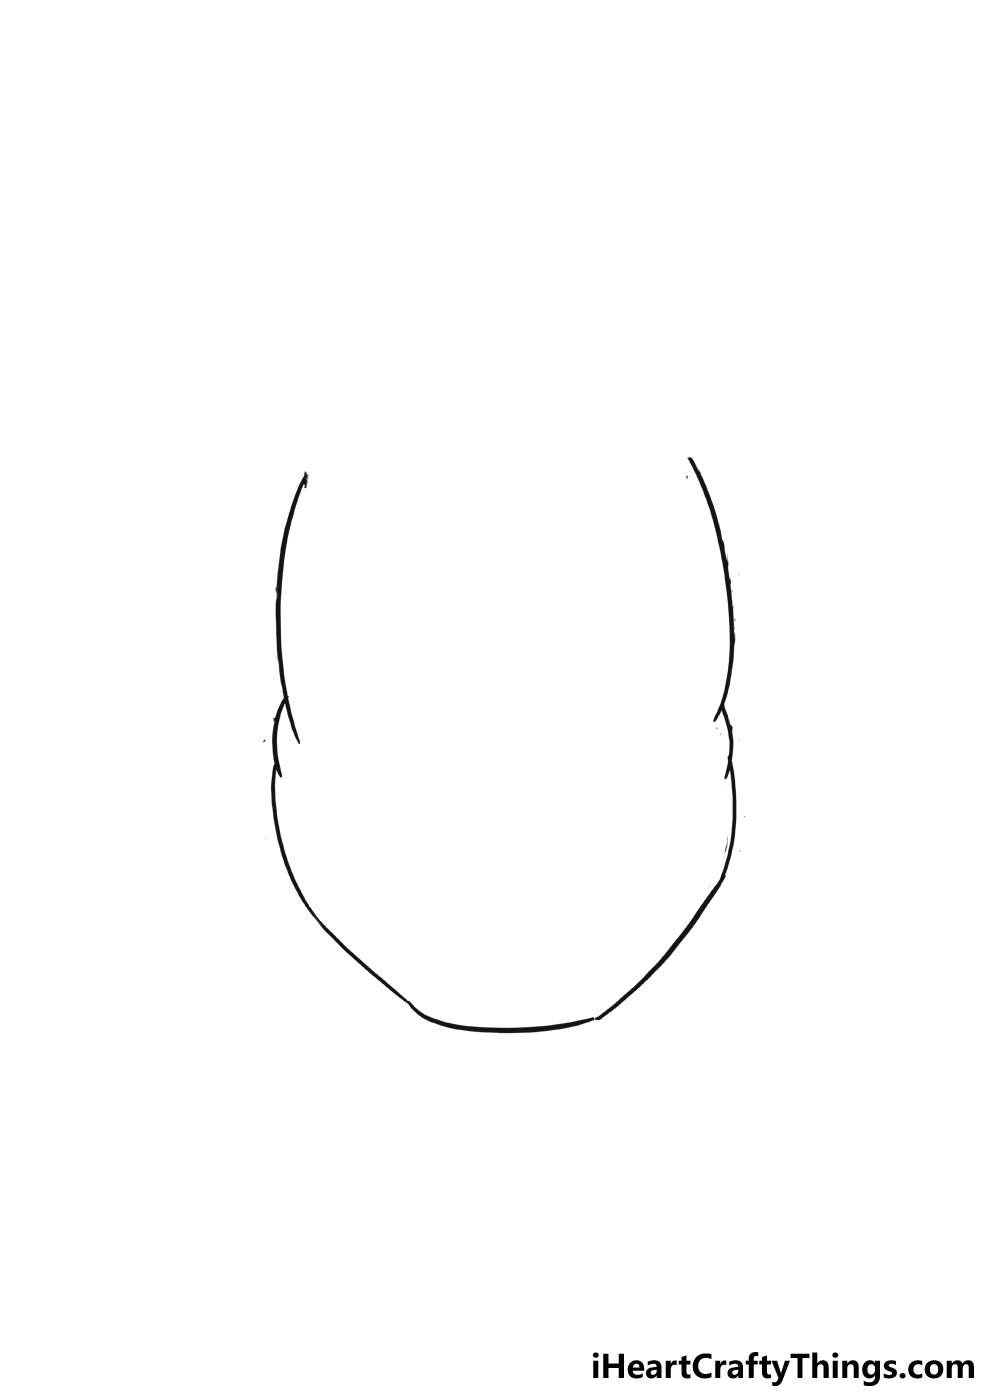
The Hulk has a very unique and exaggerated appearance, but despite this we can still use some of the tricks we would use to draw a regular face.
When doing these preparations, it’s best to use a light pencil and not press too hard. We would recommend starting with a rough outline for the head.
Normally, we would use more of an oval shape for a head outline, but instead we will use a more squared shape for this particular head shape. This is because the Hulk’s head is quite square and angular.
When you have drawn this shape, we will then draw some curved lines on the face. You can draw a straight vertical line and then a horizontal curved line that will line up where his eyes will go.
These preparations may seem unnecessary, but you will see how they come into play and help with the design later. With that done, we can start drawing the actual outline for Hulk’s face.
First, we will use two curved lines for the upper portions of the sides of his face. Then, have these overlap with two smaller curved lines beneath them.
We will use some sharper curved lines connected to these for his jaw line, and the angles of these lines will help to make his face look squared.
Finally, connect it all at the base with a fairly flat yet still slightly curved chin. Then, we will be ready for step 2!
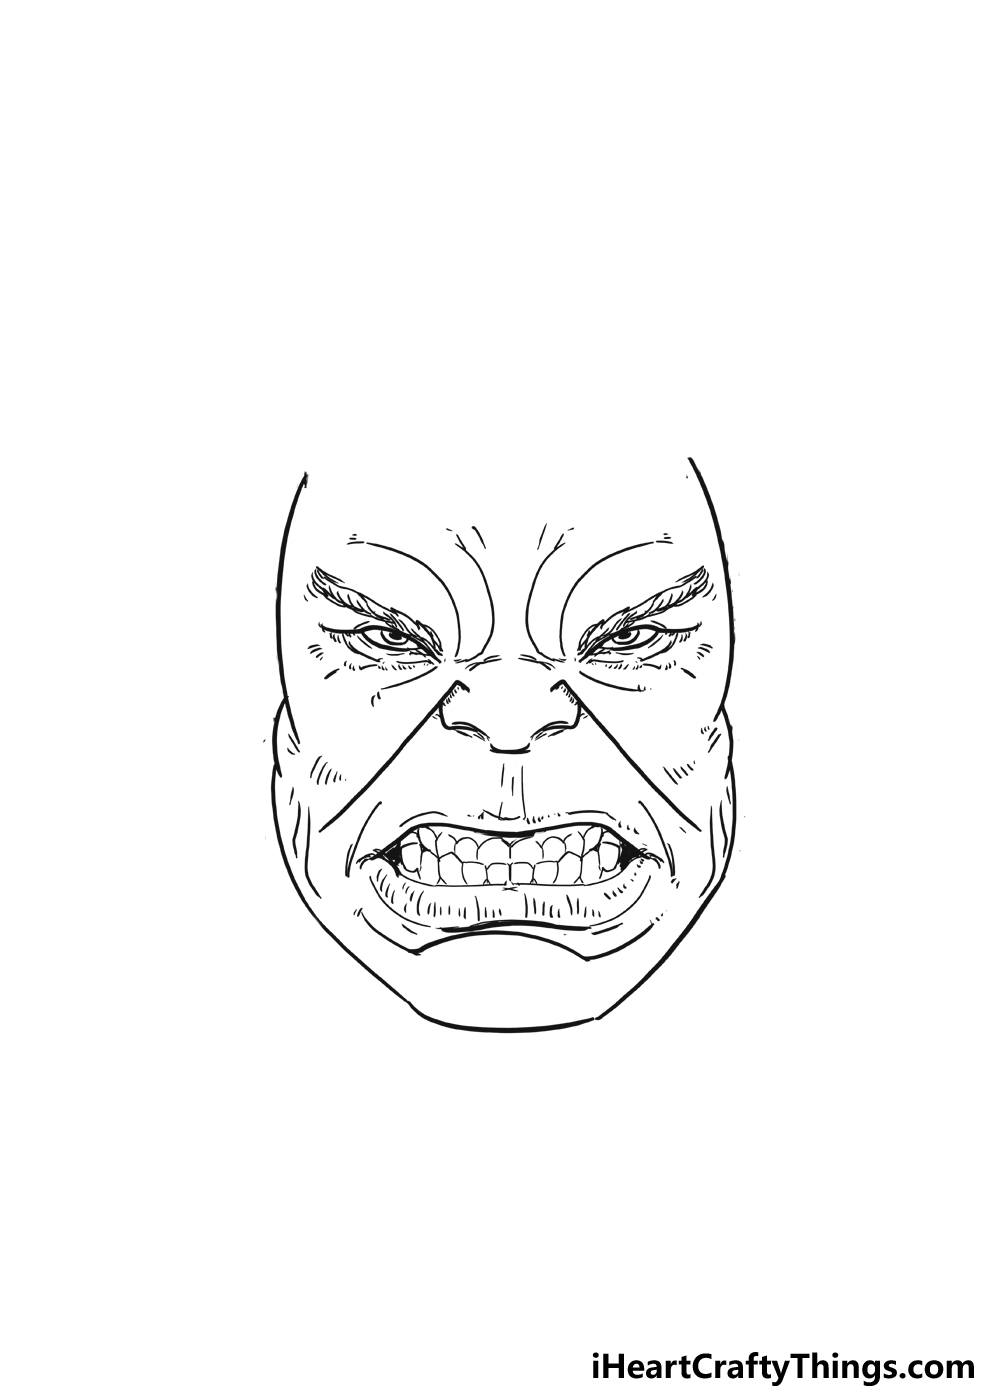
Step 2: Draw the nose and some facial details
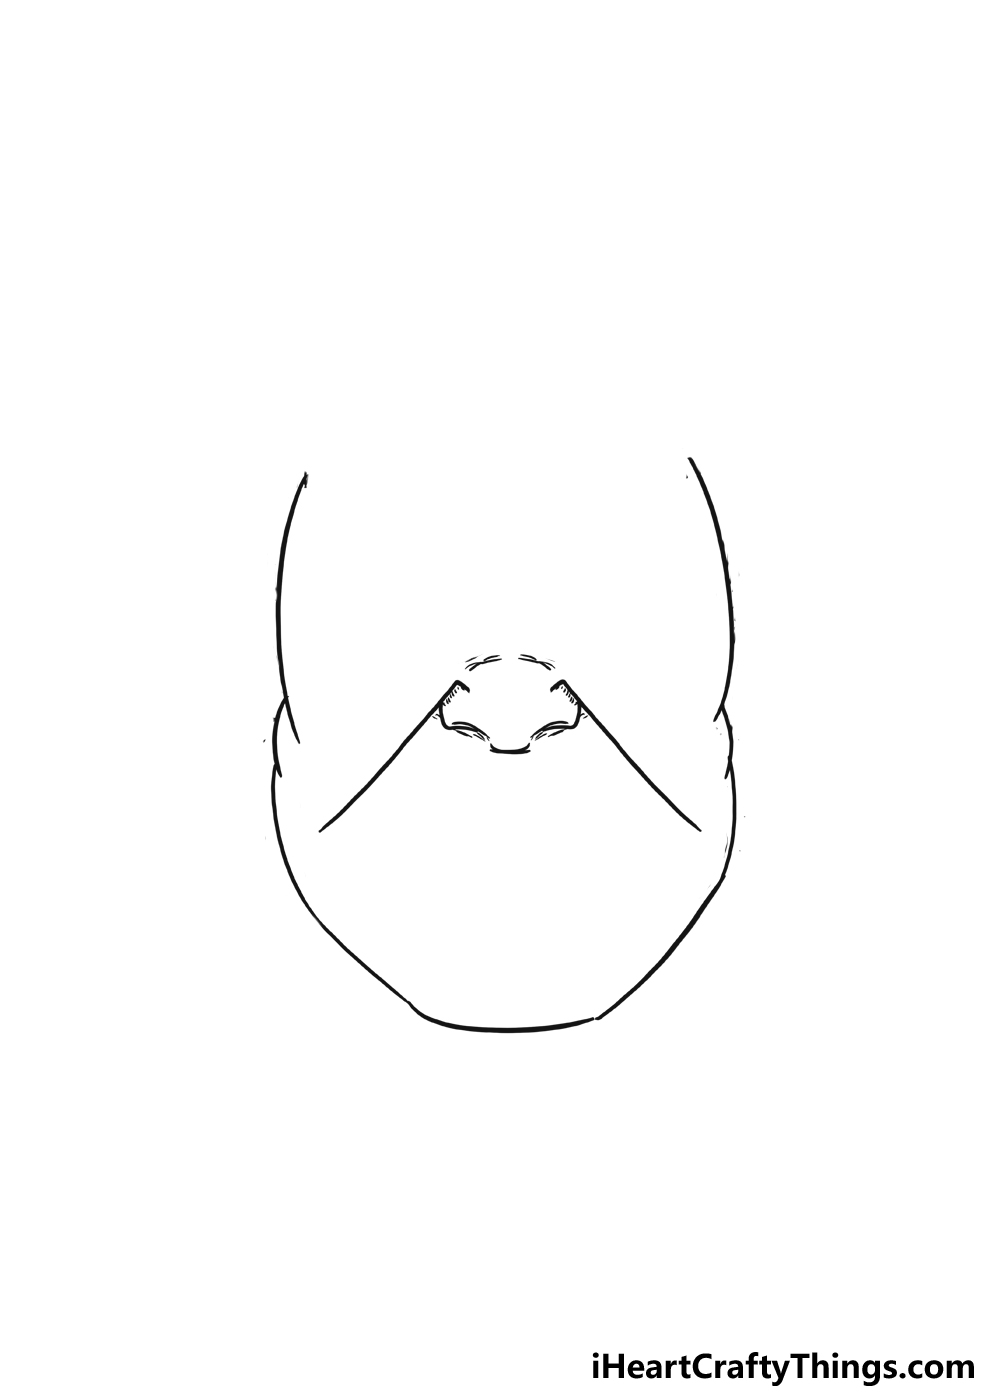
Drawing noses can be tricky pretty much any time you need to do it, but it is especially true here. This is because the nose we will be drawing here is quite detailed.
Don’t worry though, as you can take it as slowly as you need to, and we will walk you through what needs to be done.
The Hulk has a rather thick, rounded nose, and that’s what we will go for in this portrayal.
Before we begin, you can once again prepare for the drawing by using some basic shapes with your pencil. You could use a horizontal oval shape for the nose in this case.
The center of this oval would be cut through at the center if you added that vertical line we suggested adding earlier. It will also be just about at the exact center of the face.
First, draw the nostrils using some curved yet slightly angular lines. At the top of the nose, you can add some small curved lines to show the skin wrinkling up.
Add another small horizontal line at the base of the nose to create the tip. There are a few small shading details that can also be added on the nostrils.
Then, we will add the lines of his cheeks. These will be connected to the nostrils, and each one will extend at a diagonal angle in some fairly straight lines.
Once you have added these, you can erase any pencil lines you used to plan out the nose, as we will not be needing them anymore.
Step 3: Add more facial elements
When you first look at this third step of our guide on how to draw Hulk’s face, you may initially be intimidated by how much there is to add.
There is a lot to add in this third step, but try to not let it get to you! As always, you can take it as slowly as you need to, and we will also prepare for the many elements we will be adding.
As you will see in the reference image, we will be adding most of his facial features in this step. First, we would suggest getting that pencil out again and drawing some basic shapes.
Using the nose as a point of reference, start by drawing some small oval shapes for his eyes. Then, draw some simple rectangular diagonal shapes over the eyes in order to prepare for his eyebrows.
The next part will be his mouth, and you can try to draw a rough version of what that will look like. It looks a bit like a number 8 that was laid on its side and flattened a bit.
Once you have all of these guiding shapes, we can then start adding some details.
Following the reference image closely, start by drawing the outlines of his eyes, and then add the iris and pupil for each eye.
We will then draw the wavier outlines for the eyebrows and add the wrinkles around the eyes. The mouth will be quite tricky, as we have lots of details in the bottom lip.
You can also draw the gums and then each tooth individually. There will also be some wrinkle lines around the lips.
It is a lot to do, but just make sure you follow the reference image closely and take your time with it. Then you can erase the pencil lines once more, and we can head to step 4.
Step 4: Now draw his hair and ears
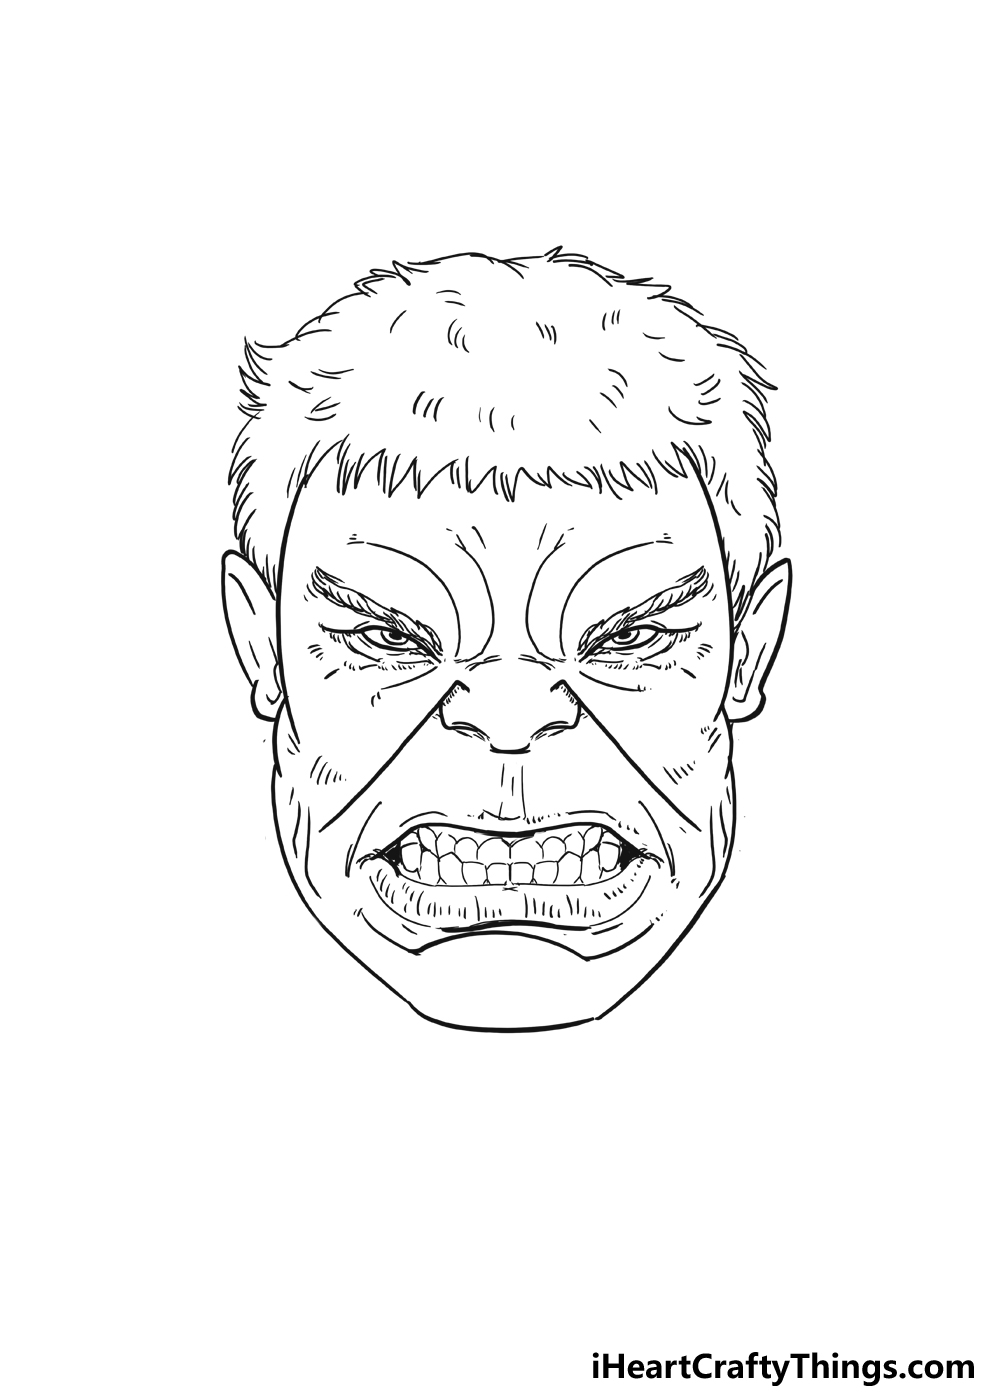
This fourth step of your drawing is comparatively easier to the previous one, as we will be focusing on his hair and ears. While this step should certainly be easier, it will still have some challenges.
We know you can overcome all of these challenges, however! The Hulk has a fairly distinctive hairstyle, and we will portray it in this image.
He has a short, spiky fringe over his forehead that you can add with some simple jagged lines. We will also be aiming to make his hair look messy and unkempt.
The rest of his hair outline will be drawn with lots of small curved and pointy lines that will form the outline.
You will notice that the two sides of his hair are not symmetrical, and each side has its own little unique details.
When you have the outline of his hair, you can add some small line details inside the outline in order to add some texture to his hair. Then, all that remains is to draw his ears.
The ears are fairly small and a bit pointy at the tops, and then you can add some simple line details inside each one. Then we’re ready for the final details of the drawing!
Before moving on, you can erase the pencil lines that we suggested drawing in step one if you used them, as we have most of the face drawn now.
Step 5: Draw his shoulders and any extra details
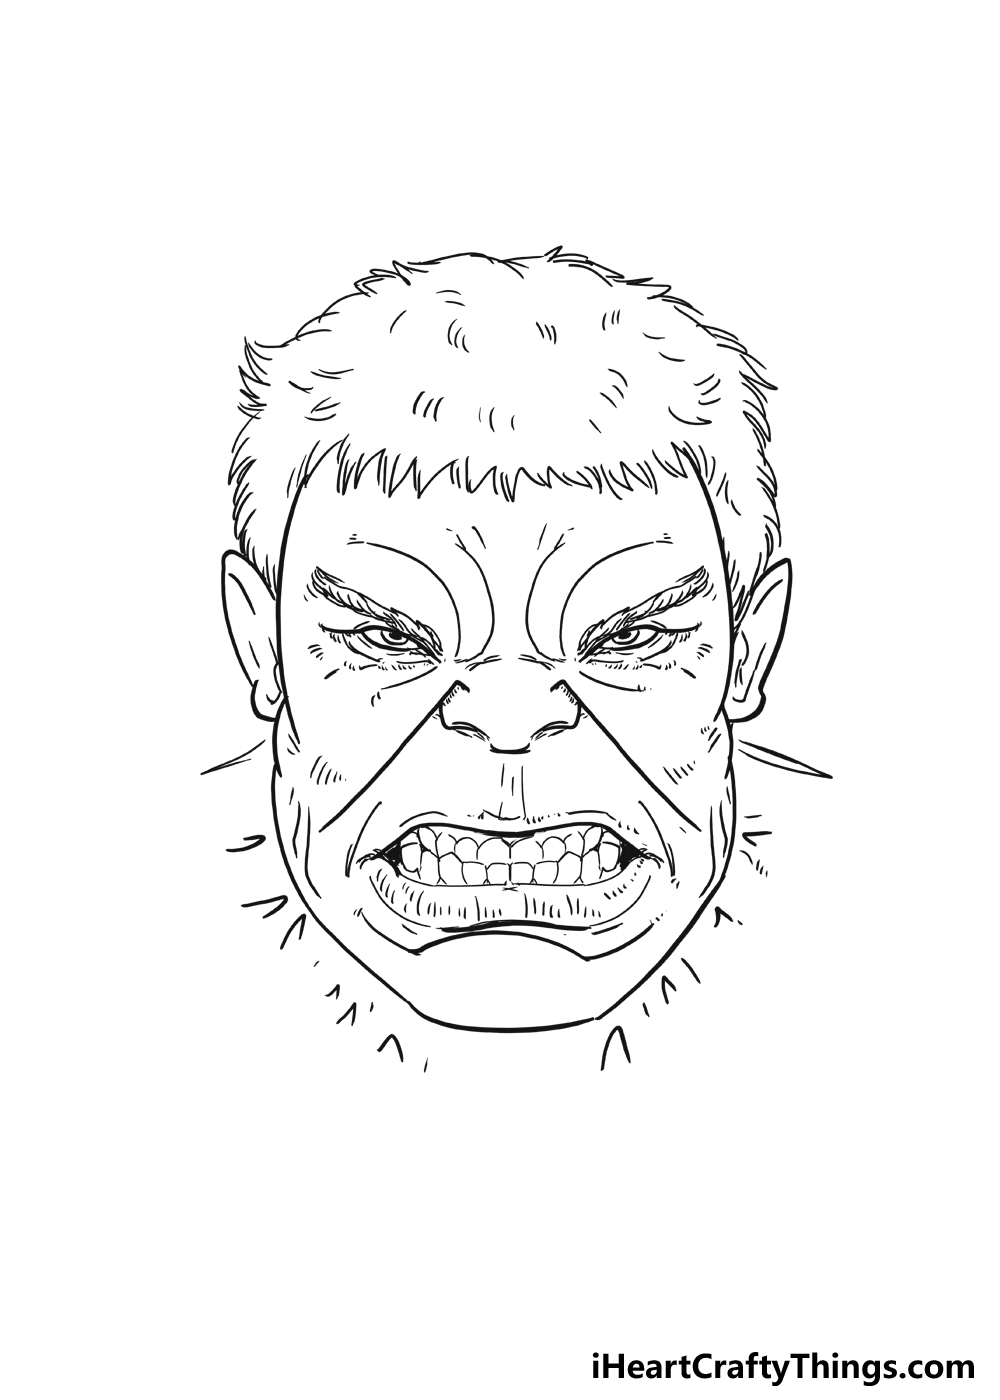
We’re ready to finish off this Hulk’s face drawing with some final touches. In this step, you will also be able to add some of your own ideas, so we will have some fun here!
You will notice in our reference image that the details are rather minimal in this step.
The focus of this guide was his face, but we did add a few details for his neck muscles, which you can add as well.
Once these have been added, you will be ready to add some color in the final step! You don’t have to move on just yet, however, as you can also add some of your own ideas.
Perhaps the most obvious way to add to this drawing would be to add more of Hulk’s body. This would depend on how much space you have left on your paper.
If you draw his face small enough on the page, you could potentially draw the entirety of his design! If you have some comics featuring Hulk on hand, you could use them as a reference.
If not, looking up pictures of Hulk online would bring up some pictures that you can use to help. You could really create some cool poses, even if you just draw a portion of his body.
If you have space in the background, then you could add a background setting as well.
This could be based on a favorite scene from the comics or maybe one of the many films that Hulk has appeared in.
Can you think of a famous scene featuring the Hulk that you could represent with a background?
Step 6: Now, finish off with some color for Hulk’s face
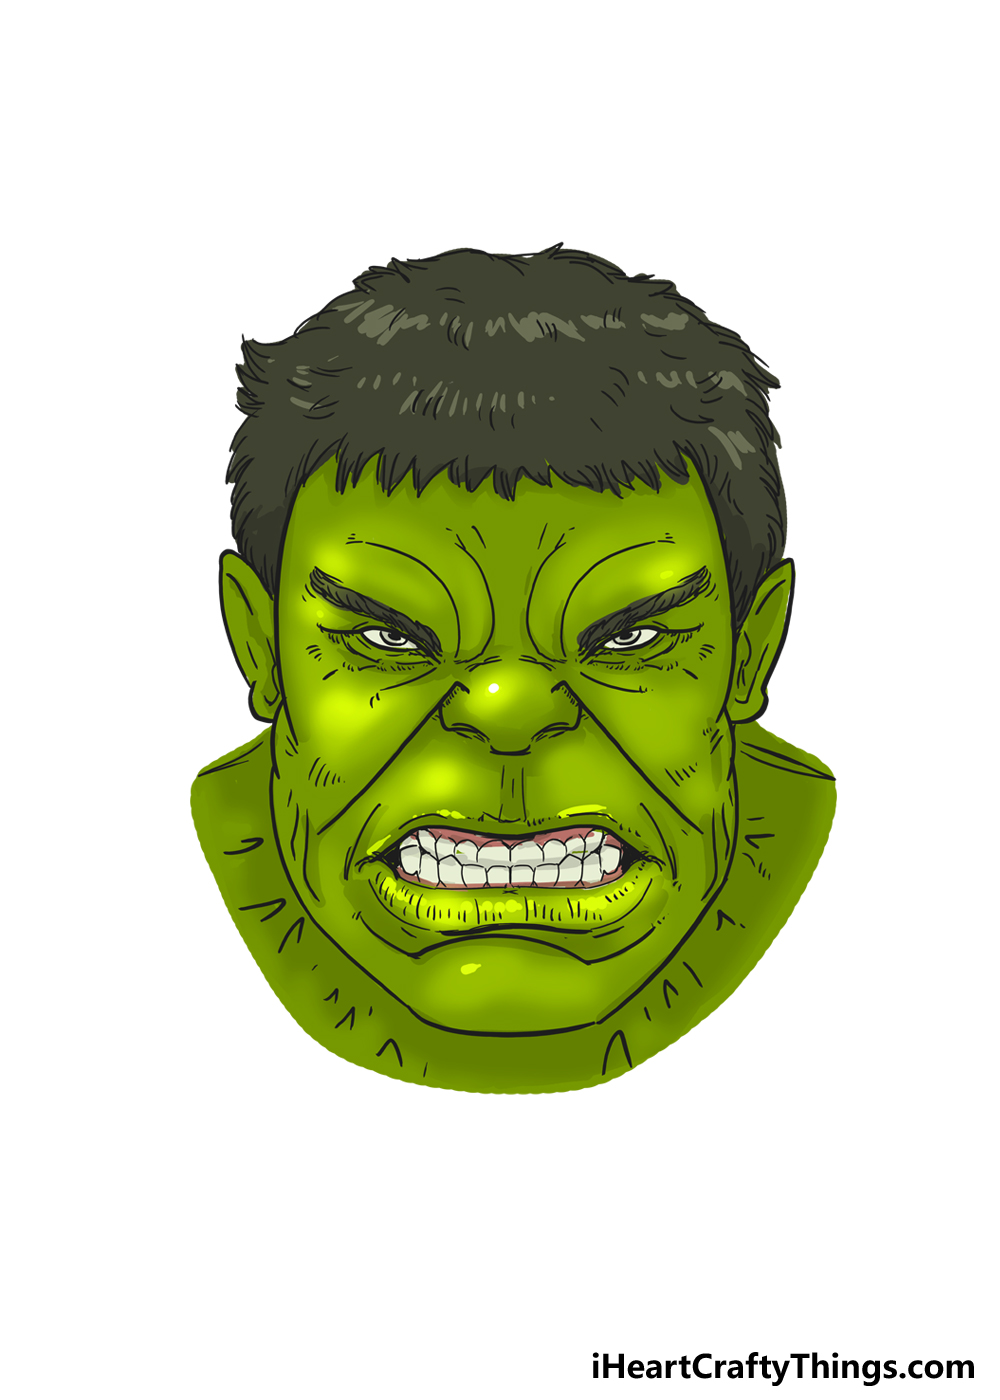
Now we’re ready to finish off this drawing of Hulk’s face with some colors to bring it to life! Did you know that when the Hulk first appeared, he was actually grey?
He would get his signature green color scheme as time went on, but he’s still occasionally portrayed with his original grey color scheme.
For this guide, we will stick to the more recognizable green color scheme he is well known for. Even so, we won’t just be using one shade of green for his face.
Instead, we will incorporate tones of dark and light greens to create some tone and texture for his face. You can see on the reference image how we use different tones to create these textures.
Even with his hair, you may think that we would just use solid black to color it. You could do that, but incorporating shades of greys helps to make it look more textured.
If you want to replicate the look of classic comics coloring, you can use colored pens and markers to keep the colors nice and vibrant.
For something more subtle, you could use some paints such as watercolors or acrylics.
It can also help to mix different art tools and mediums. For example, maybe you would like to use watercolors for the face and then use colored pens for some of the smaller details.
Which colors and mediums will you use?
Your Hulk’s Face Drawing is Complete!
That does it for all the steps of this guide on how to draw Hulk’s face! Now that you have finished the six steps, you have an awesome portrayal of this famous character.
We hope that you had a fun time working through this guide, and that it helped to make the process even more fun and easy.
You can also go ahead and add your own ideas, details and flourishes to the image.
We know that whatever you choose to do will look amazing! One thing is for sure, we would love to see how it turns out.
When you have finished your drawing, you can go ahead and share it on our Facebook and Pinterest pages for us to see! We would love to see how you represented this famous character.