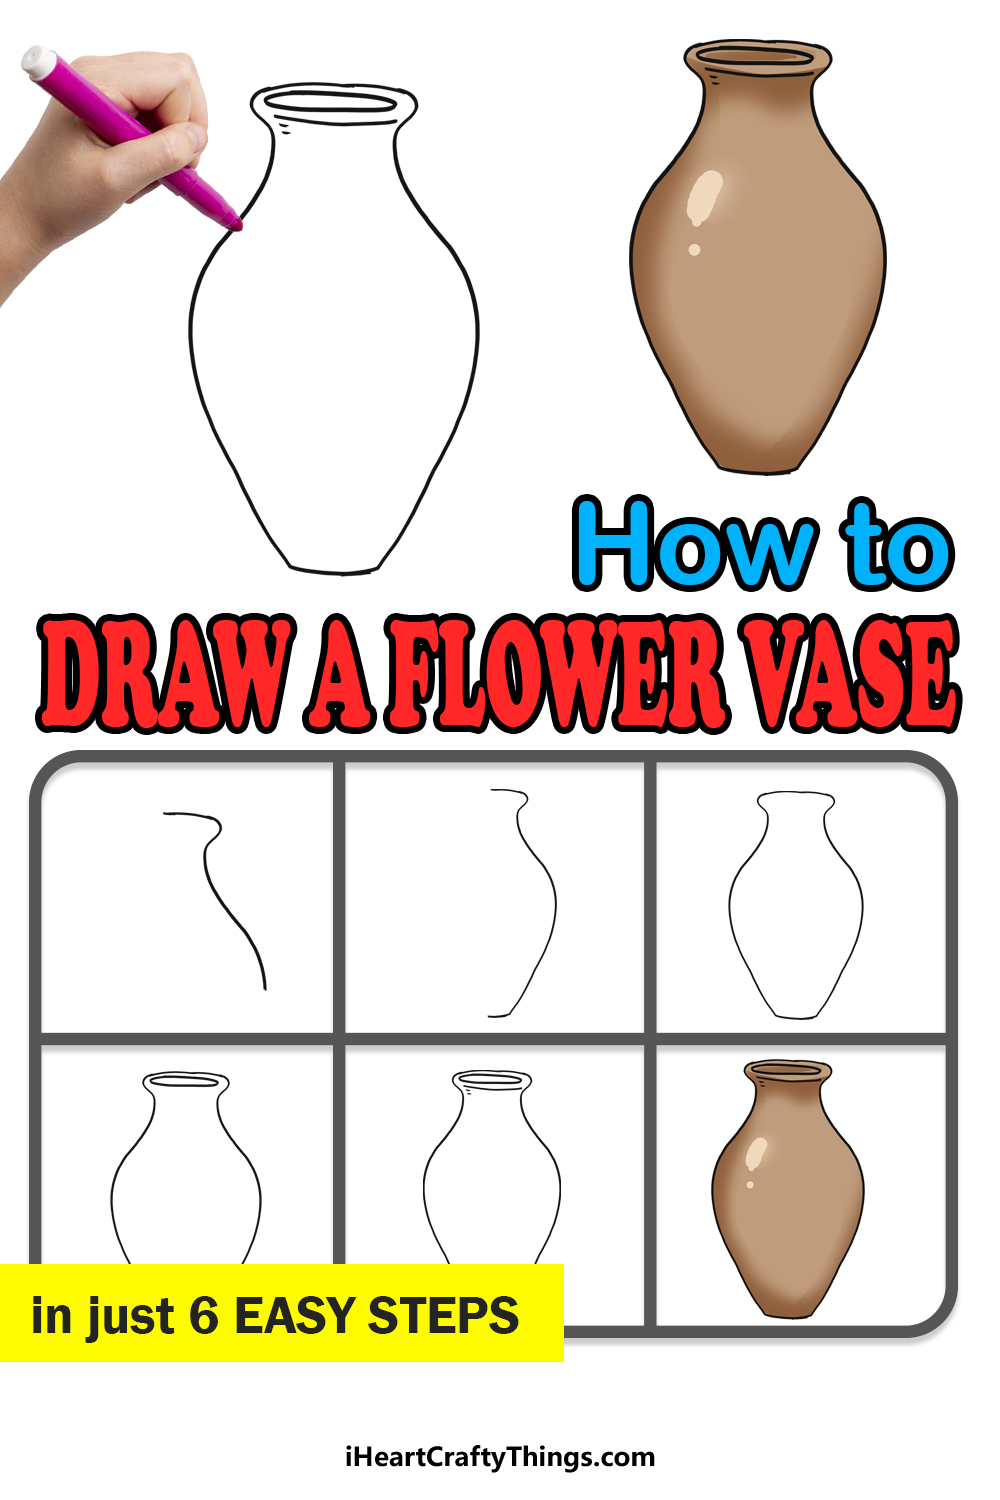
This fun and easy guide for kids will make it possible for anyone to learn how to draw a flower vase. It’s a guide that kids and adults of all ages can enjoy!
Flowers are always a beautiful addition to any room, but you need something to hold them in. Sometimes, the vase that you use to display flowers can be just as beautiful as the flowers themselves.
If you want to draw a bunch of flowers, then you should also know how to draw a vase. That’s what the goal of this guide is, as I will show you exactly how it’s done!
When we have finished the guide, you will know not only how it’s done but also have the freedom to add your own details, design ideas and even flowers within the vase.
Discover How To Make Your Flower Vase Drawing
How to Draw A Flower Vase – Let’s Get Started!
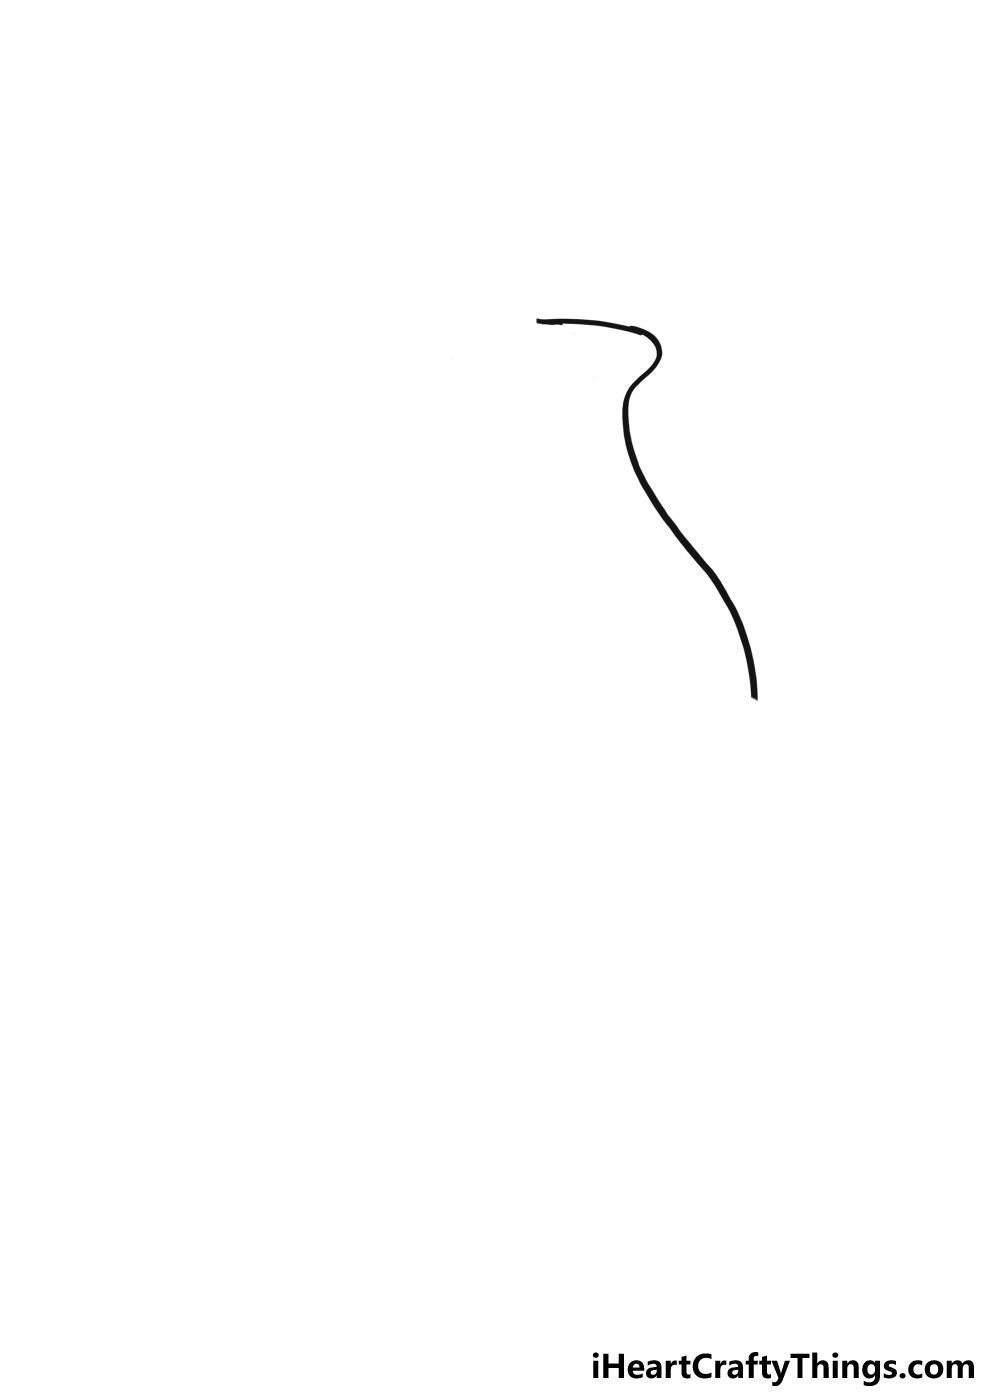
Step 1
We may have a general idea of what a flower vase should look like, but the truth is that they can come in pretty much any shape or design you can imagine.
As long as they can hold water and flowers, then a flower vase can take on any kind of shape imaginable! For this guide, we will be creating a fairly standard flower vase.
You can change the shape and details of this flower vase later on, but for now, we will keep things simple. The standard flower vase has a thin base, a wide central portion and then a thin top.
This is worth keeping in mind as we start this drawing, as we will break it down into smaller portions. For now, we will just be drawing the top right-hand portion of the flower vase.
The top of the flower vase has a rounded ridge that we will draw properly later, but for now we will start drawing the outline of this ridge.
Draw a curved line that moves inward and then curves out again.
If you want to prepare for the drawing as a whole, you could draw a very rough version of the shape as a whole using a light pencil.
This will help to guide you as you draw, even if it’s very rough and vague. Whether you do that or not, we can continue to step 2 when you’re ready!
Step 2: Draw the rest of the right-hand side of the flower vase
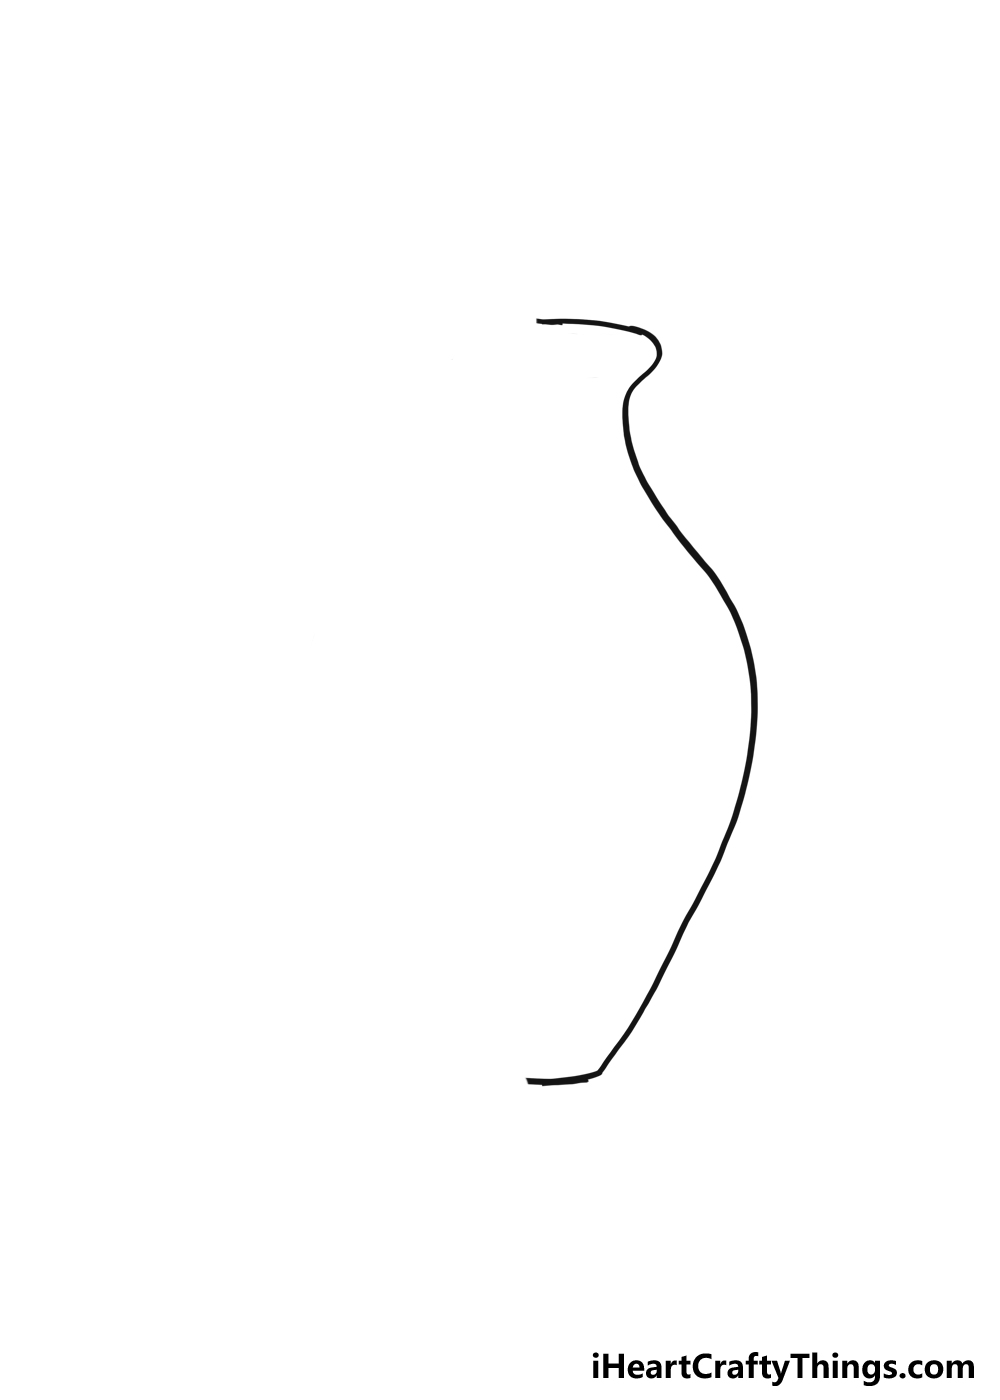
We will keep things very simple for this second step of the guide. In the first step, we started drawing the right-hand side of this flower vase and kept it limited to the upper section.
In this second part, we will draw the rest of the right-hand side of the flower vase. When we left off last time, the line was fanning out a bit in a curved line.
Now, we will keep drawing this line curving down and inward, continuing from where we left off last time. As you will see in the next step of this guide, the base of the flower vase is very slightly curved.
At a glance, it may appear like a straight line but there is a slight curve. We will start drawing this curve in this step, admittedly only a portion.
For now, we will just be drawing half of this base, as shown in our example. Now you will see that we have one half of this flower vase done.
In the next step, we will essentially be creating a mirror image of what we have done so far to complete the outline and prepare us for some final details. When you’re ready, let’s proceed to step 3.
Step 3: Add the rest of the outline for this flower vase
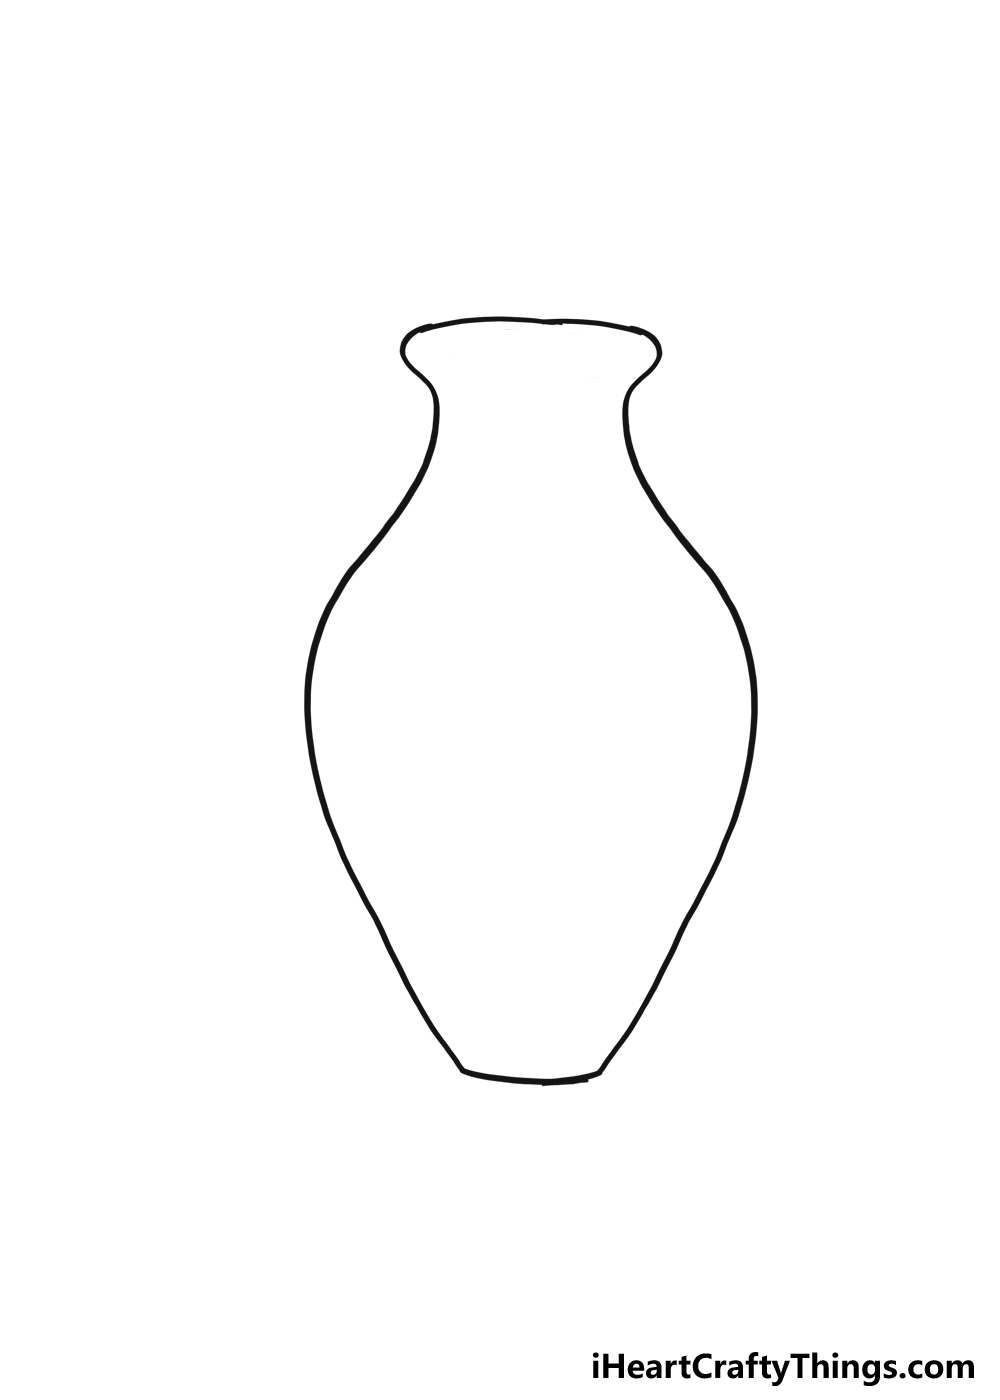
In this third step of our guide on how to draw a flower vase, we will be replicating what you have done in the first two steps, just in reverse. This may sound simple, but we still need to be careful.
Symmetry is the key here, because if the sides don’t match then it will look a bit weird.
Some vases aren’t symmetrical, and if that’s the kind of flower vase you want to create then it won’t be a big deal if it doesn’t match.
The flower vase design we’re creating in this guide does call for symmetry, however, so we will try out best to make this left side match. The key to getting this right is to take it slowly.
Drawing is never a race (unless you’re taking part in a drawing race) so you can take as much time as you need. Start by drawing the top ridge of the flower vase.
This line will be slightly curved and extend to the left a fair distance. Then, it will curve inwards slightly, just as it did on the other side.
Once again, it will curve outward for the body of this flower vase. Finally, we will cure in again for the lower portion.
This will end on the other side of the base that you started previously. Then, we will have a complete flower vase outline.
If you used a pencil to map out your drawing as we suggested, then you can erase these pencil lines now. We won’t be needing them anymore from this point.
Try to be careful if you’re erasing pencil lines, as you wouldn’t want to smudge or erase any of your hard work!
Step 4: Now draw the hole of the flower vase

Those last few steps of this drawing of a flower vase were quite tricky and required a bit of precision and patience. Luckily, the last few parts are nice and easy!
We have the outline of the flower vase, and it’s looking great already. A flower vase wouldn’t be much use if there wasn’t an opening for the flowers, however!
That’s why we will add that detail in this step. If you were to look at this flower vase from the top, this hole would likely be round.
Because of the angle, it will be flat and oval in this picture. If you want to have flowers poking out later, then you should leave out the uppermost lines of the outline.
This would be the case for the vase itself but also the hole of the vase. You could also make the hole a bit smaller or make it a different shape if you wanted to.
If you’re planning on leaving the flower vase empty, then you could color in this hole to make it look like there is a shadow inside of the vase. Or, you could leave that for when we color in this vase in step 6.
Before we get to that coloring step, we have a few more details to add in the next step. You will also be able to add some ideas and extra details of your own in that step, so let’s head there now.
Step 5: Draw the final details for your flower vase drawing
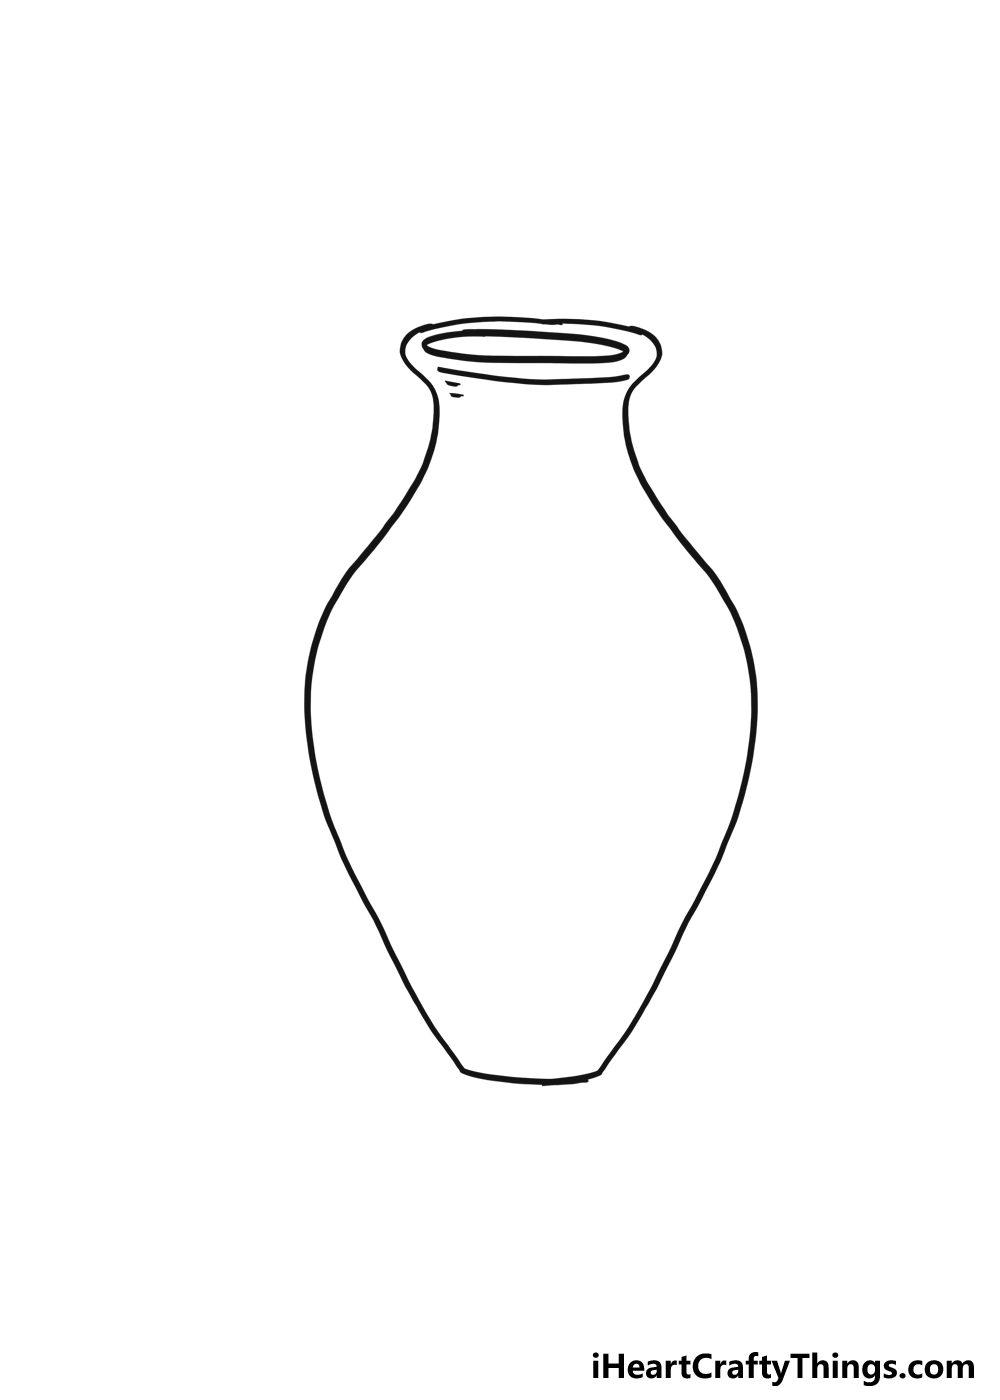
In this fifth step of our guide on how to draw a flower vase, you will notice we kept things very simple in our example. In order to create the appearance of a ridge at the top of the vase, we added another curved line beneath it.
Then, we added a few small line details to add some more texture. It’s pretty simple, yet effective.
Once you have added these details, you may think we’re all done with this drawing. You can move on to the final step if you wish, but there is so much more that can be done!
For example, you could decorate the flower vase itself. Vases can have patterns, pictures and even words on them in real life, so you could go for anything you like.
Choosing a theme could be a great way to decorate it, for example. You could add some waves and fish for a water theme or maybe go for some flame details.
These are just two examples, but there are so many other ideas to try. You can also add to the background by adding other details and objects.
One great way to do this is by drawing a background. This would be the perfect way to show where this flower vase is being kept.
And of course, adding your favorite flowers to the picture would be a perfect way to make it even more beautiful.
These are just a few ways to make this flower vase even more special, but now you can show off all of your ideas!
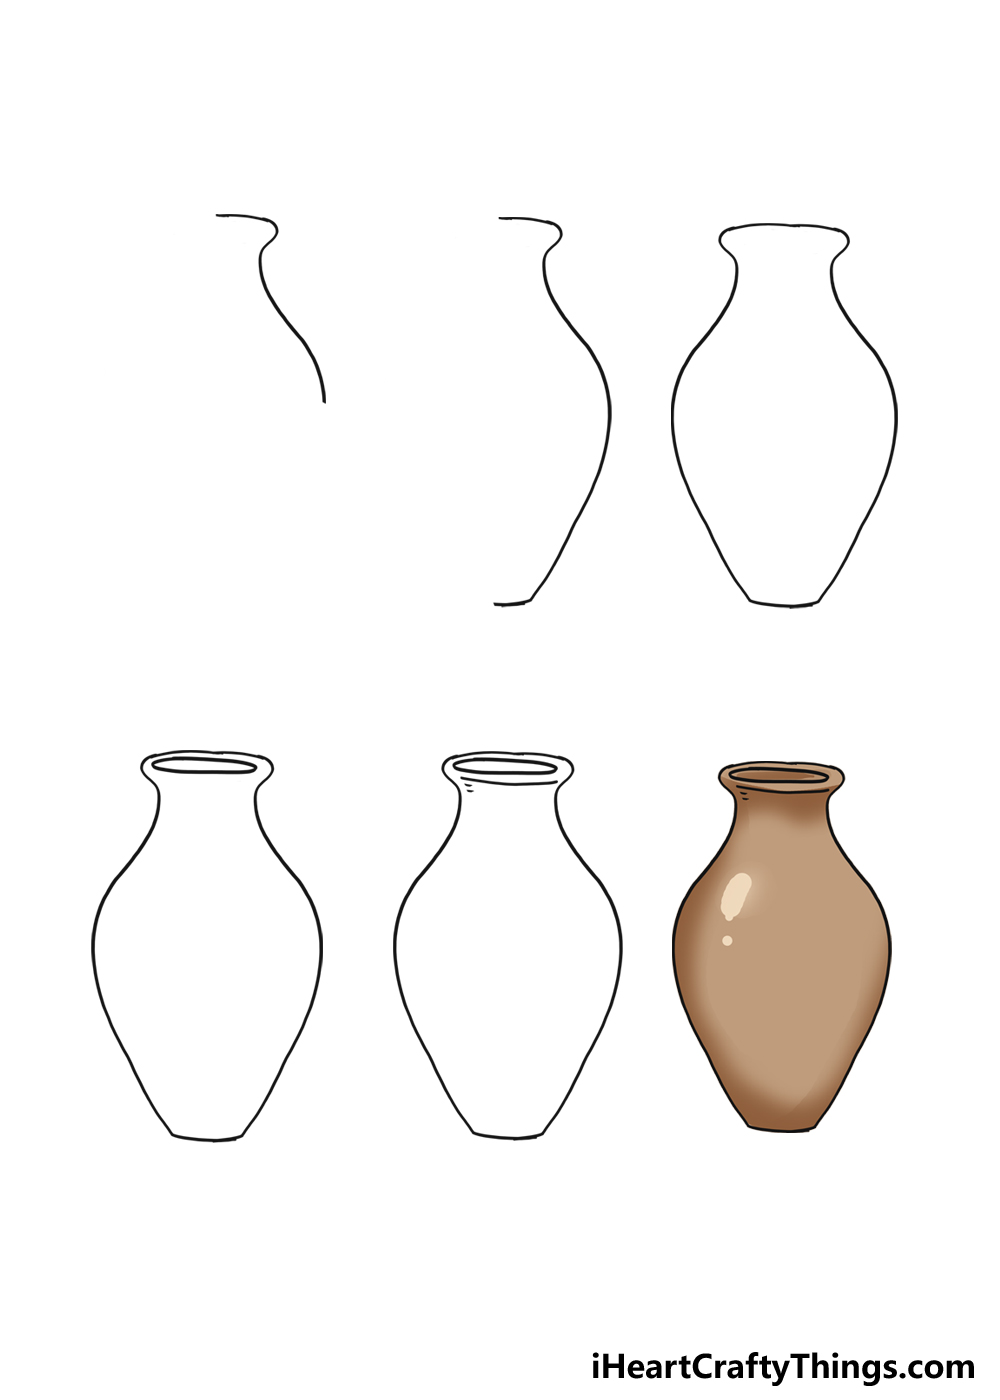
Step 6: Now, finish off with some color to this flower vase
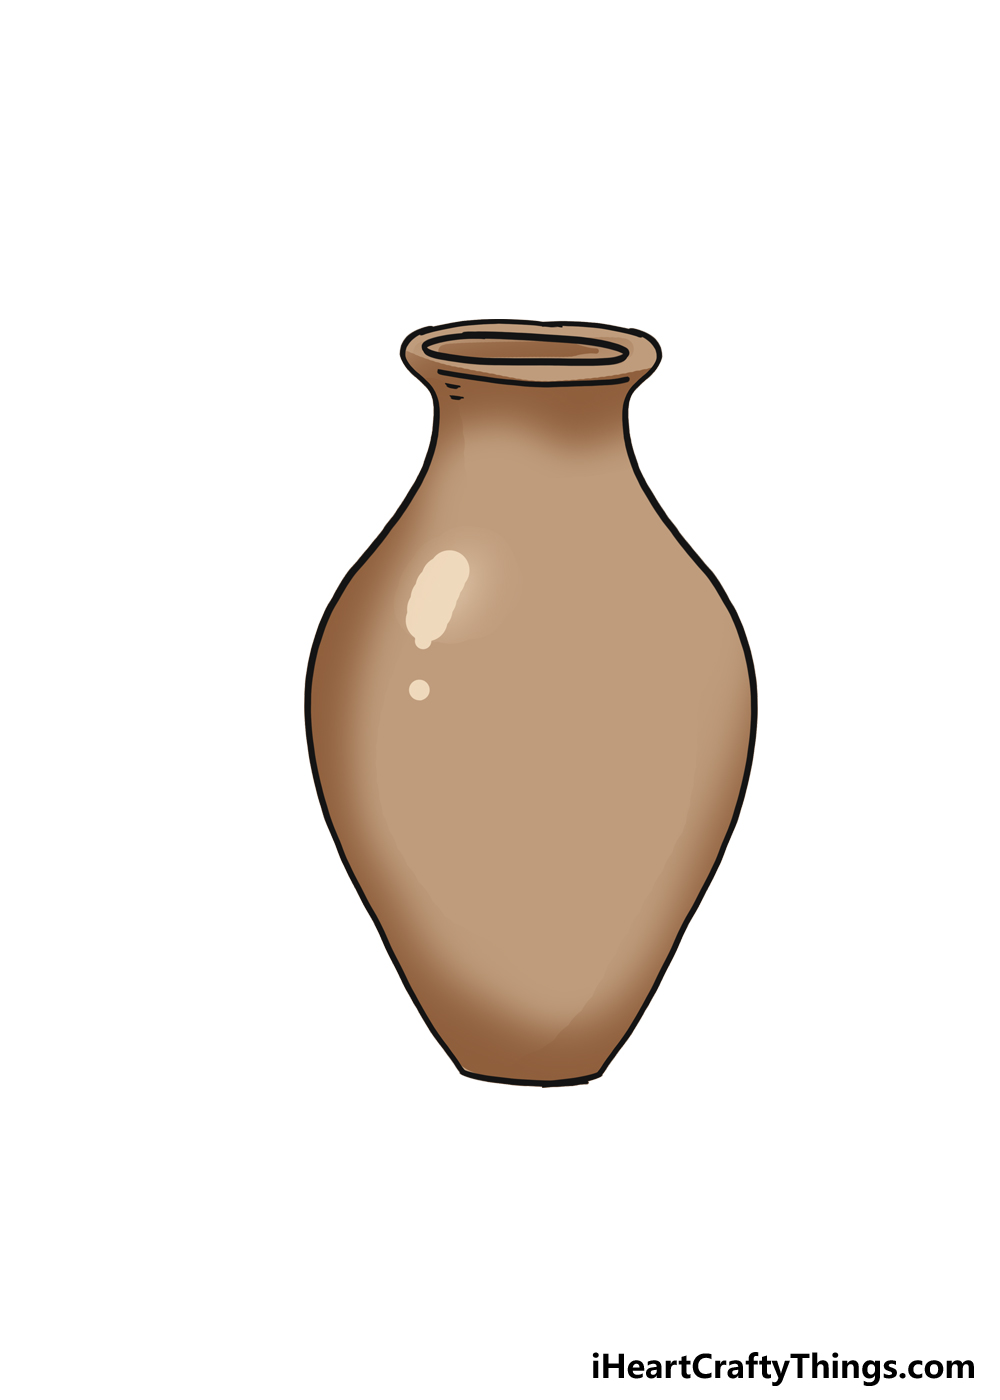
Experimenting and playing with color is always fun, and you have so many possibilities open to you here. In our example, we kept things very simple to show you how you can color this flower vase.
We kept it to a simple brown color scheme, but even so we used various tones to create different effects. For example, we used darker tones on the outer edges for some shading and form.
Then, we added some very light brown tones to the upper sections to show where light is reflecting on the flower vase. You could achieve similar results no matter which color scheme you choose.
If you added other patterns and pictures to the flower vase then you can color in all of these details. The same goes for any background details and additional details you drew.
When coloring, it can also be fun to try out different art tools and mediums. If you like coloring, you likely have some mediums you love to use the most.
Sometimes it can be nice to stick to what we know, but don’t be scared to try something new! For example, maybe you don’t use watercolor paints that much.
It could be fun to try that for this picture to create some new tones to the colors. This is just one example of mediums you could use, but it’s up to you now!
How will you finish off your artwork with your own awesome color and art medium choices?
Your Flower Vase Drawing is Complete!
This guide on how to draw a flower vase was lots of fun to work through, and we hope that you enjoyed it! In the guide, we kept the design simple and easy to do, and that opens things up.
While it may be simple, it will allow you to master the process of creating this flower vase, and from there you can try out all sorts of fun things.
You could go for some different flower vase shapes, try out some unique patterns and colors or try some different background settings.
These are just a few ways that you can customize your artwork as well!
The colors and art tools you use to depict them can also help you to make this artwork unique to you. There are no wrong or bad ways to go about it, so let your creative side take over.
One thing is for sure, when your flower vase drawing is done we would love to see it! You can share your drawing on our Facebook and Pinterest pages when it’s done.
We know it will look incredible no matter what approach you went with!