When it comes to shapes, there are many that we will learn about in our earliest years of school.
You may learn how to draw a square, triangle or circle, but there are some more complicated shapes than these.
One of these shapes is the hexagon; a six-sided shape that can be quite tricky to draw. One thing that sets the hexagon apart from some other shapes is that we see them in nature in a honeycomb.
Honeycomb is made up of many hexagon holes in a wax nest, and these structures are used by bees to create natural honey. It’s an incredible natural phenomenon, and many people like to learn how to draw a honeycomb.
This is because it’s a beautiful sight in its own right, but it can also be great for patterns and other designs. It can be a bit tricky and require a bit of patience, so that can be off-putting to some.
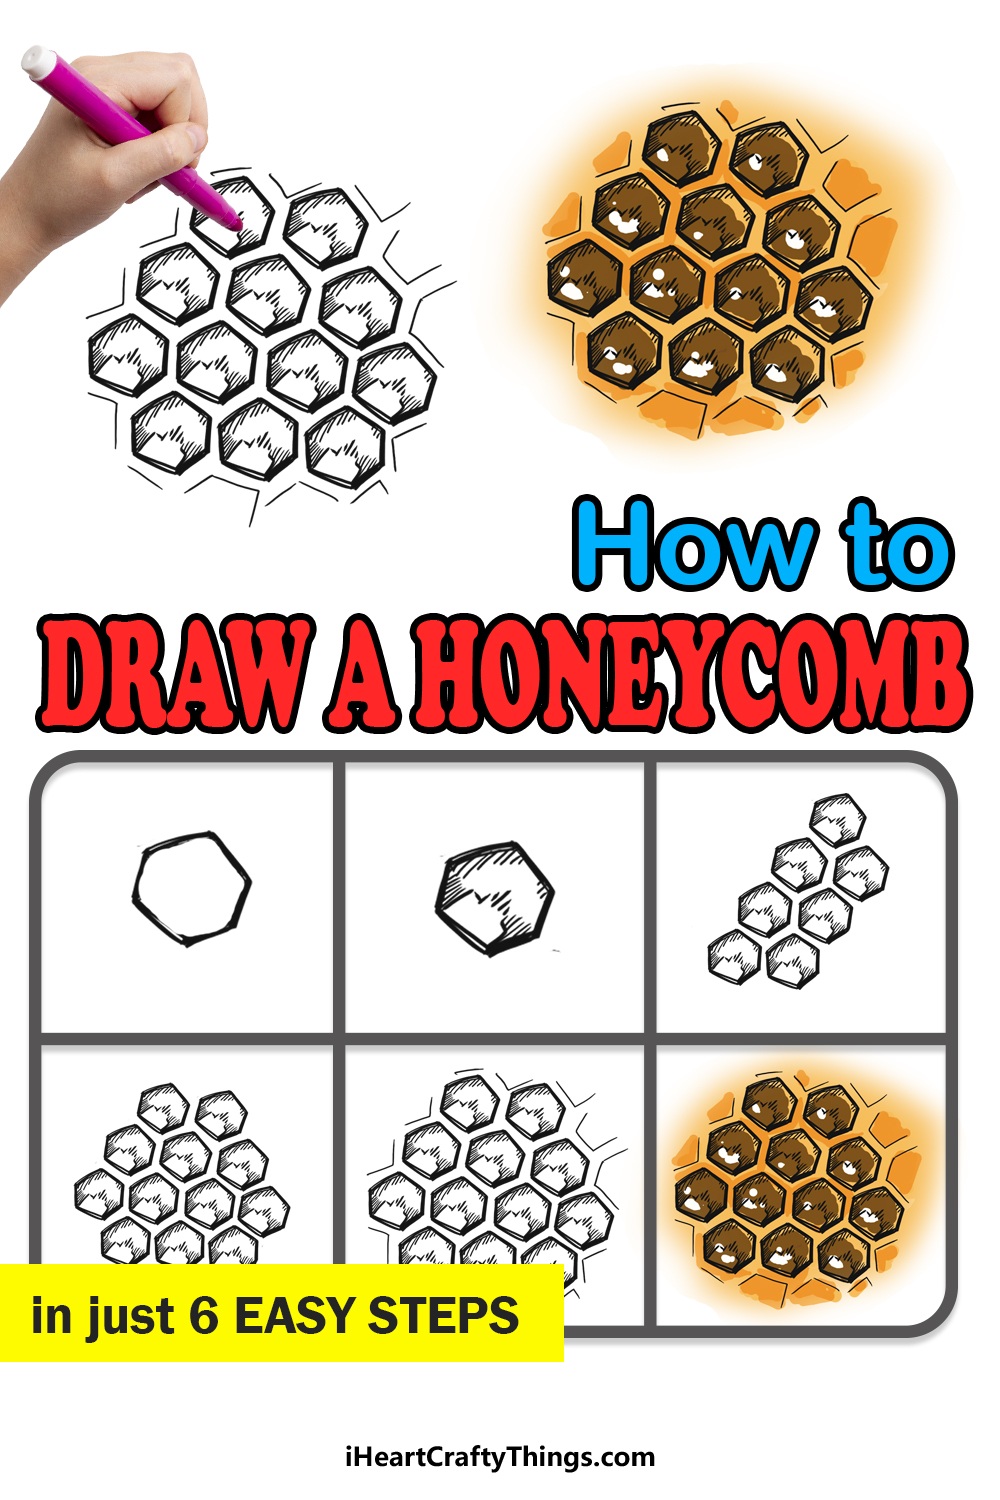
There’s no need to worry, as this guide has six steps that will show you how it’s done and how you can add some of your own ideas and touches to the design.
How to Draw A Honeycomb – Let’s Get Started!
Step 1
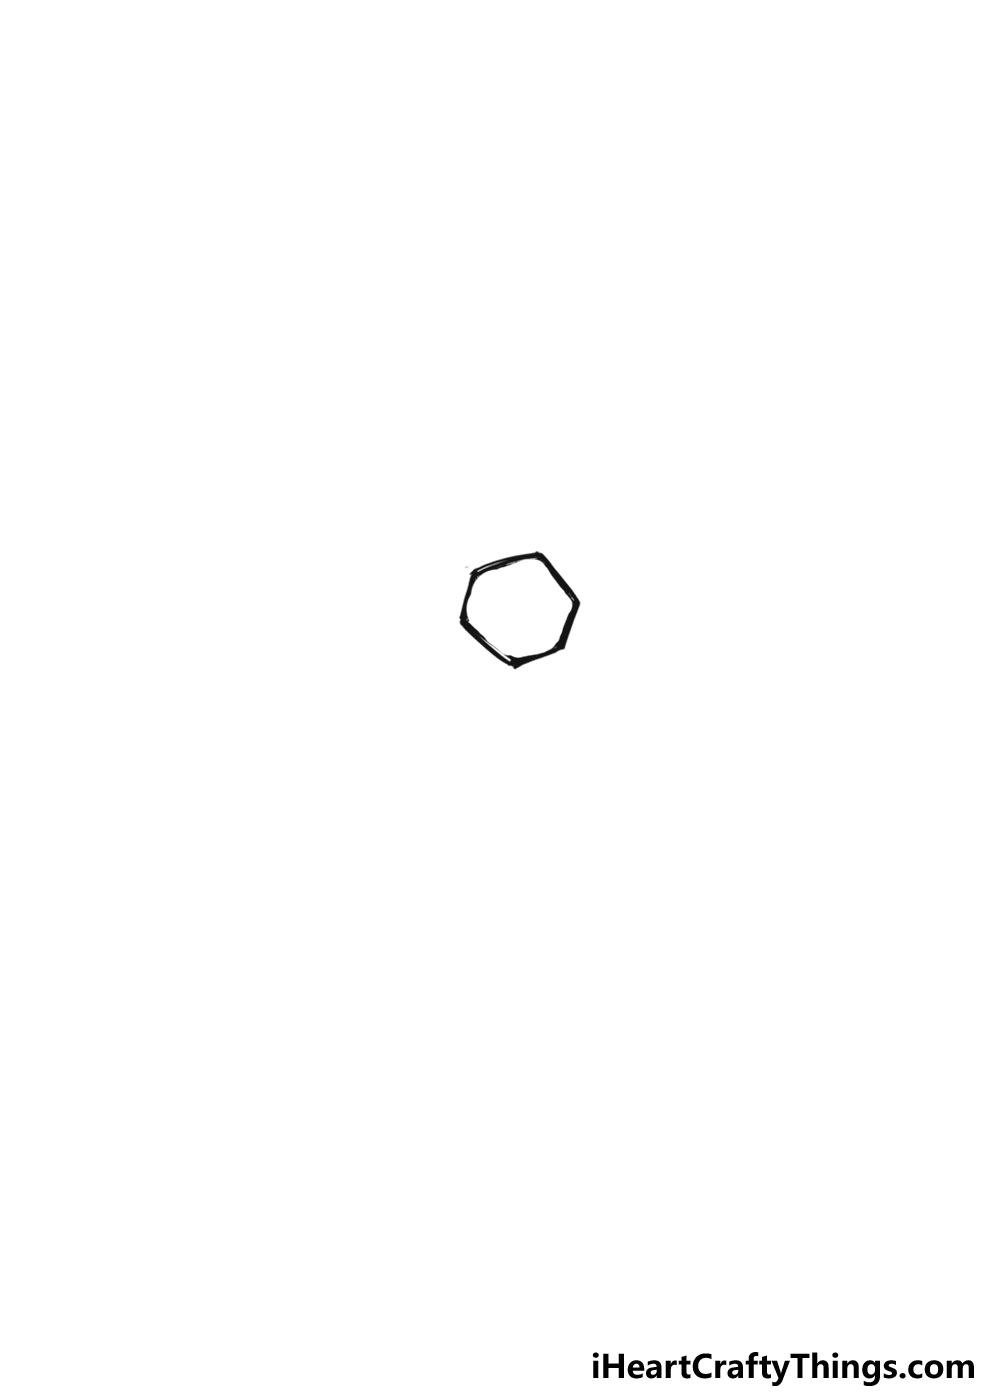
When drawing a honeycomb, the main thing you will have to master is drawing a hexagon. As we mentioned before, this is a shape that has six sides.
Normally when a design involves shapes that have straight edges, we will recommend using a ruler for those edges. However, in this case we would recommend drawing these shapes free-hand.
That’s because while the shapes in real-life honeycombs are pretty neat, the edges aren’t exactly straight in nature.
Drawing them free-hand will allow the shapes in the honeycomb to have a more natural look.
With that said, we can draw the first of these shapes now. It is definitely a good idea to practice drawing these hexagon shapes on a spare piece of paper.
We will be drawing many hexagons for this design, and while they don’t have to be perfect, they should at least be consistent.
Using the reference image as an example, try drawing the hexagon at whatever angle you feel comfortable.
Then, when you get the hang of it, try to draw it at the angle that we drew it in our reference.
Don’t worry about details, as those will come later on in this guide. For now we will focus just on the shape, so once you have a feel for that we can move on to step 2 where we will add some of those details we mentioned.
Step 2: Draw some detailing for the first hexagon
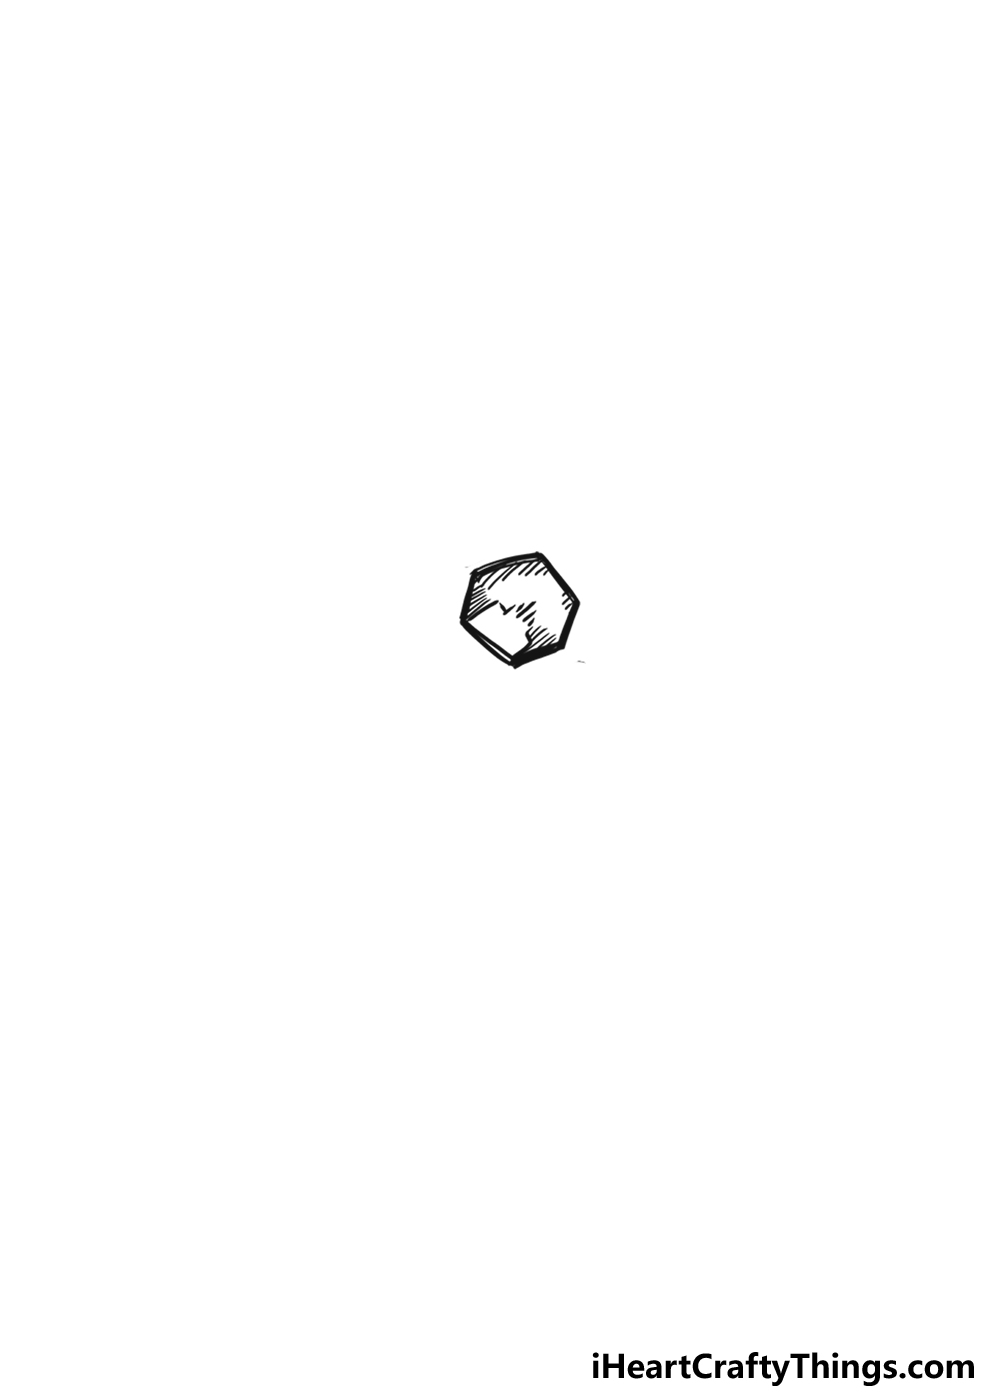
We have the first hexagon for this honeycomb drawing, but the shape alone is just the start! If you look at some real honeycomb, you will see that each hexagon is a hole.
We are creating this hole design using a 2D flat surface, so we will create the illusion of an actual hole using some simple details.
Colors will also play a large role in creating this illusion, but that’s coming later on in the guide.
For now, let’s focus on the smaller line details. As you can see in our example image, these line details will be drawn using lots of small lines close to one another in order to create some depth.
When drawing these line details, we would suggest closely following the reference image to try and get them looking as similar to our example as you can.
The reason for this is that the line details are not random, and have been arranged to create that illusion of depth we spoke of earlier.
Also, we will be drawing quite a few more hexagon shapes for this design as we go, so if you can get the hang of it now then you will find it easier to draw them going forward.
If you took our suggestion of drawing some practice shapes earlier, then you could practice drawing these details on some of those before you take a crack at drawing the final details of this hexagon.
When you feel confident with it, we can move on to step 3 where we will draw some more shapes and details.
Step 3: Add 5 more hexagons for this honeycomb

Now you have the hang of the basics of everything we will need for this design. These would include drawing the basic hexagon shape free-hand, and then adding the inner detailing.
Once you have the hang of it, we can start adding more. The placement of these hexagons to form the honeycomb as a whole are not random.
In fact, our design will be composed of a larger hexagon design made up of the smaller shapes.
That may not be apparent in this particular step, but it will start coming together in the next few steps.
In this third one, we will be adding six more hexagons to the design. These hexagons will be close to one another, with straight lines running parallel to one another.
You can map out the general pattern that these hexagon shapes will take using a light pencil if you want to make the pattern consistent.
For now, you can also carefully follow the design and place the new hexagon shapes as they appear in the design. When doing this, starting with the very first hexagon you drew is the best thing to do.
It’s a bit like assembling a puzzle where each piece needs to fit in its proper place. When you have drawn these shapes, you can then add some interior details to each one.
Ideally, the details should match the details of the first one and be close to identical. Don’t worry if there is a bit of variation, however!
Once you’re happy with how these first 7 hexagons look, we can move on to step 4 and draw the rest that will make up this honeycomb.
Step 4: Now draw the rest of the hexagons
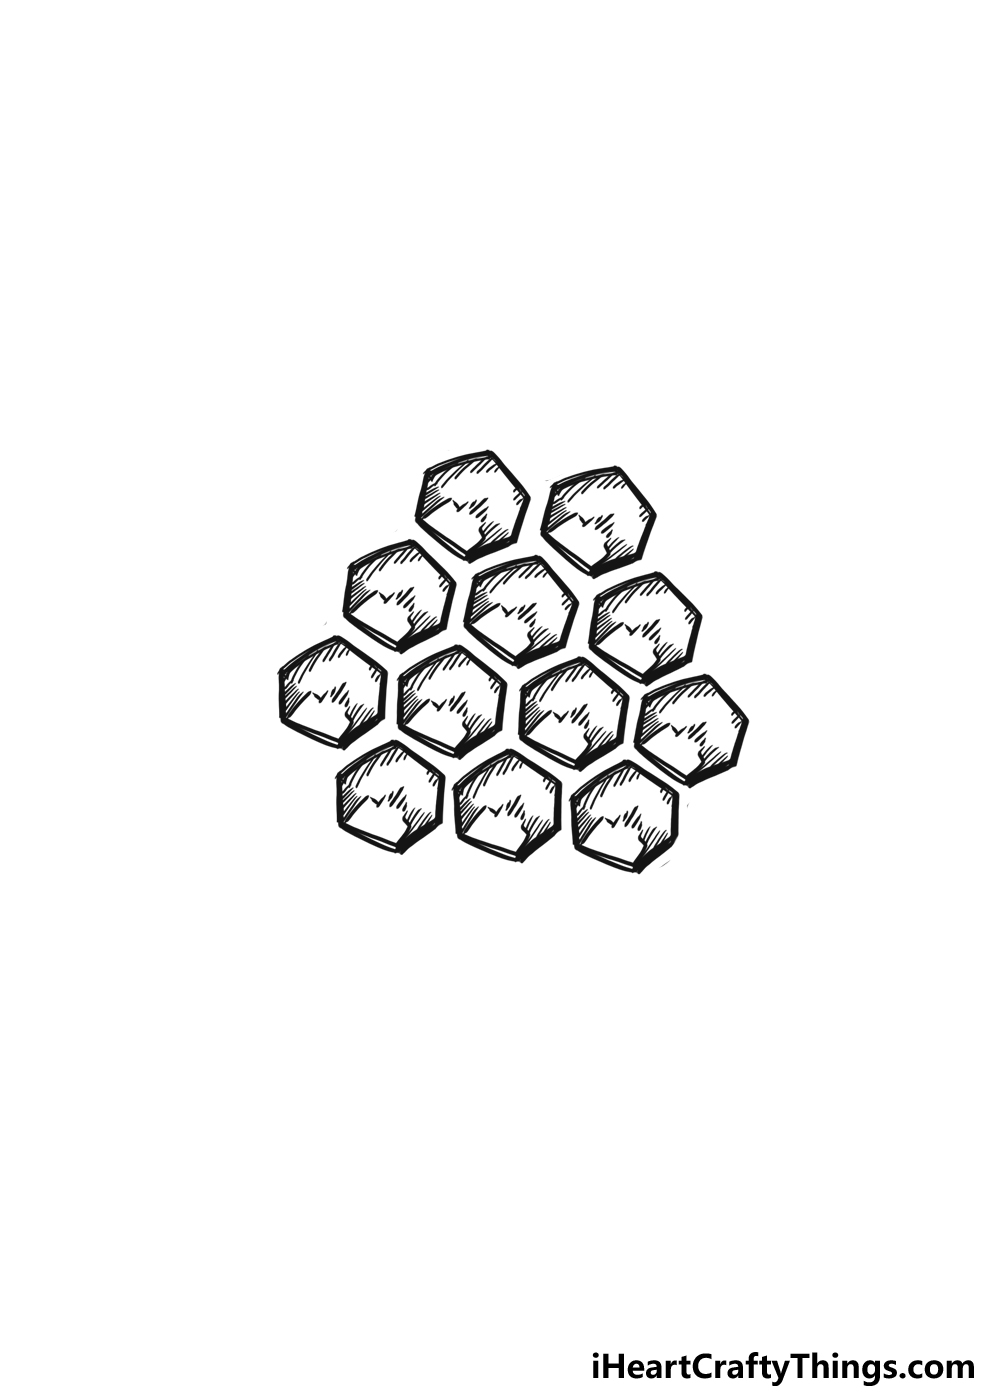
Earlier, we mentioned that we will be drawing a larger hexagon shape made up of the smaller ones.
In this fourth step, we will draw the rest of the hexagons that will make up the design.
To do this, we will be adding 5 more hexagons to the image to make that larger shape we are aiming for.
You will notice that unlike a standard hexagon, this larger one will not have equal sides on all sides.
With that being said, we can draw the final small hexagons. First, draw two more on the lower right to create a smaller side to the larger hexagon.
We will then be drawing three more, this time on the upper left side of the shape. Once drawn, simply add those same details inside each one that we have been drawing so far.
And then, this honeycomb puzzle has been assembled! You don’t have to arrange them in this shape, but it does create a classic appearance for this honeycomb design.
If you used a pencil to map out this design or plan any of the hexagons, you can go ahead and erase them now, as we will not need them going forward.
Then, we can move on to step 5 where we will add some final touches and any additional details and ideas you have for this design.
Step 5: Draw some final details and any other final touches
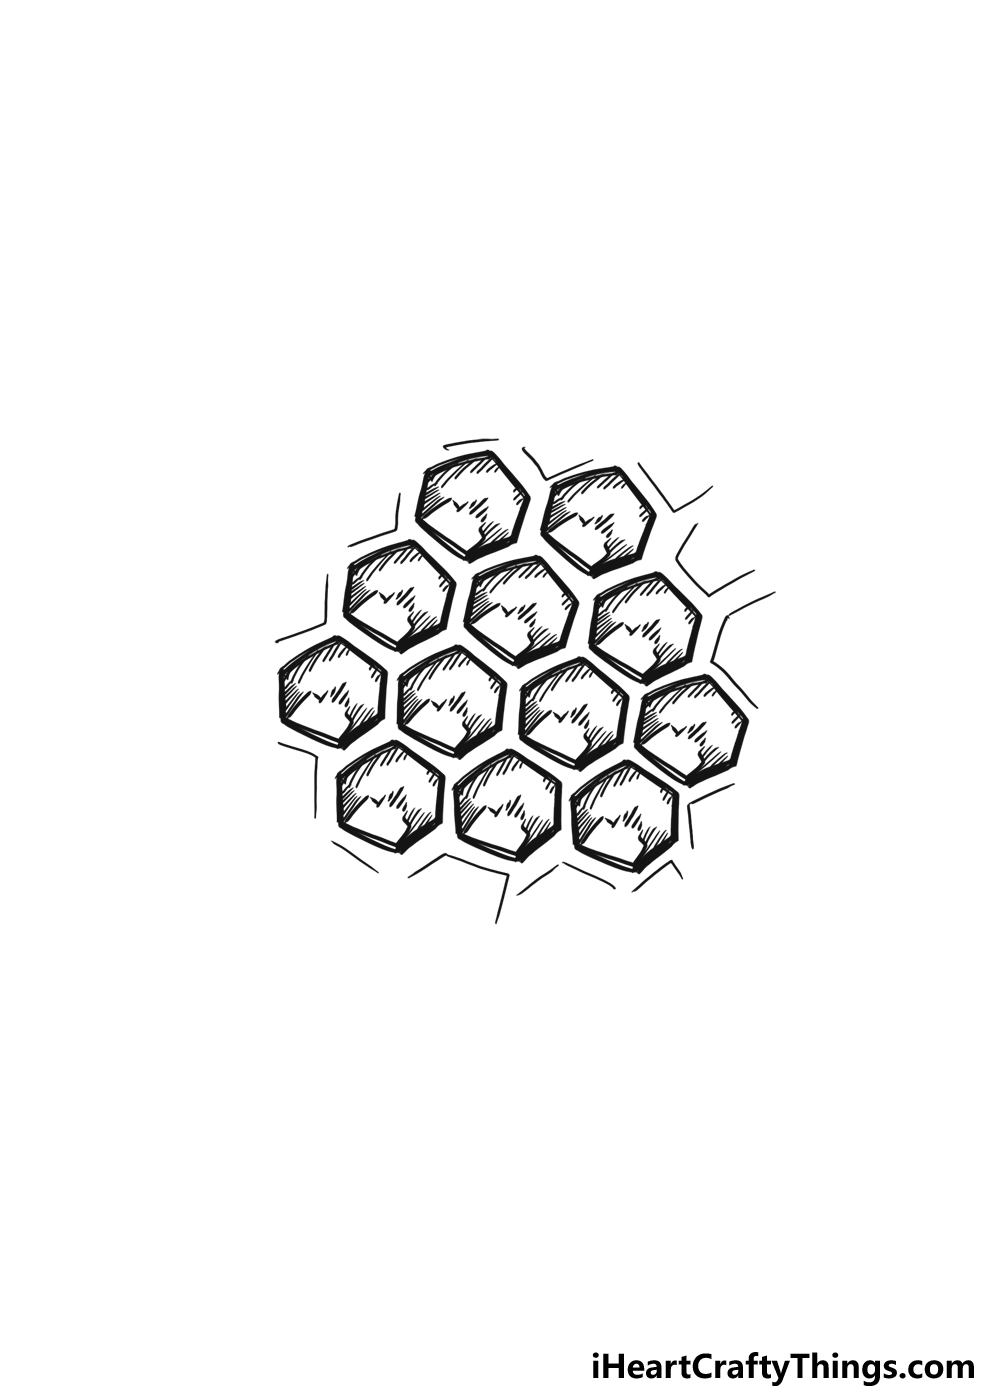
Now we’re ready to add the final touches before we get to the last step of this guide on how to draw a honeycomb.
The details we have to add in thie fifth step are simple, but we will also go over some extras you can add.
For now, we will focus on the details that are already in the example image. You will notice that we added some curved line details around the hexagons.
These lines are simple but they will create the impression that this is just one section of honeycomb among many. Once you have added these details, you will be ready for the final step!
You don’t have to stop here though, there are so many other fun details that you could add to really finish off this design.
Of course, we tend to associate honeycomb with bees, so adding a bee or two would be a great idea.
You could make these bees realistic, or they could be simpler and more cartoony. It’s up to you!
Adding some honey dripping from the honeycomb would be another way to make this image even sweeter. These are just a few ideas, but you should go for any others that you can think of.
You could also add text to the image or maybe some objects you would associate with bees and honey. You have some ideas to get started, but now it’s all up to you!
Do you have some ideas on how you could make this drawing even more unique and fun? When you’re happy with how it looks, we can proceed to the final step.
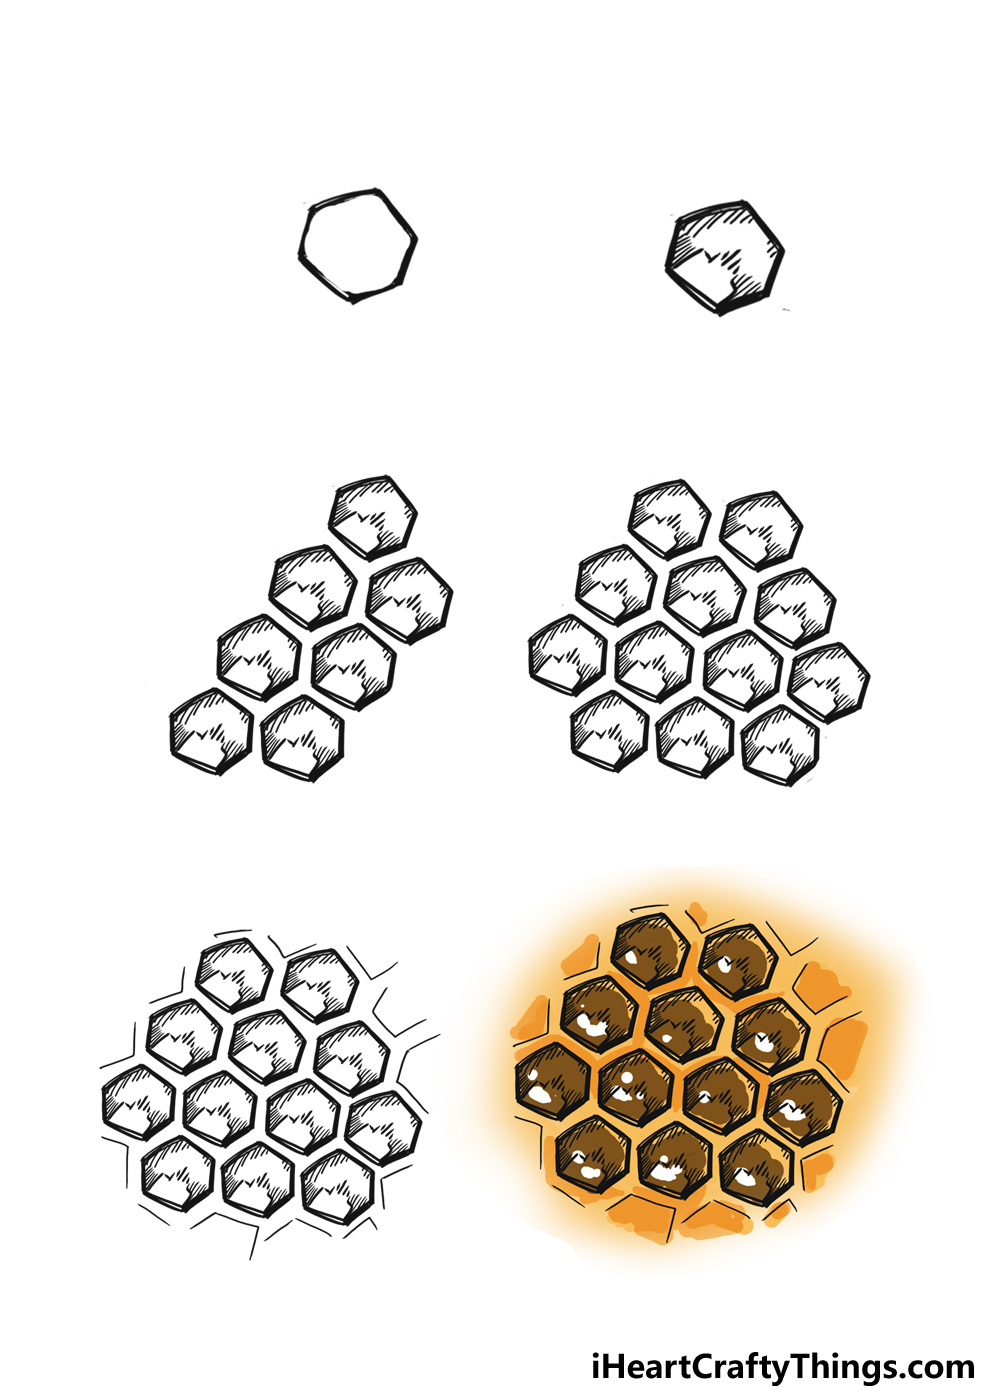
Step 6: Now, finish off with some color for this honeycomb
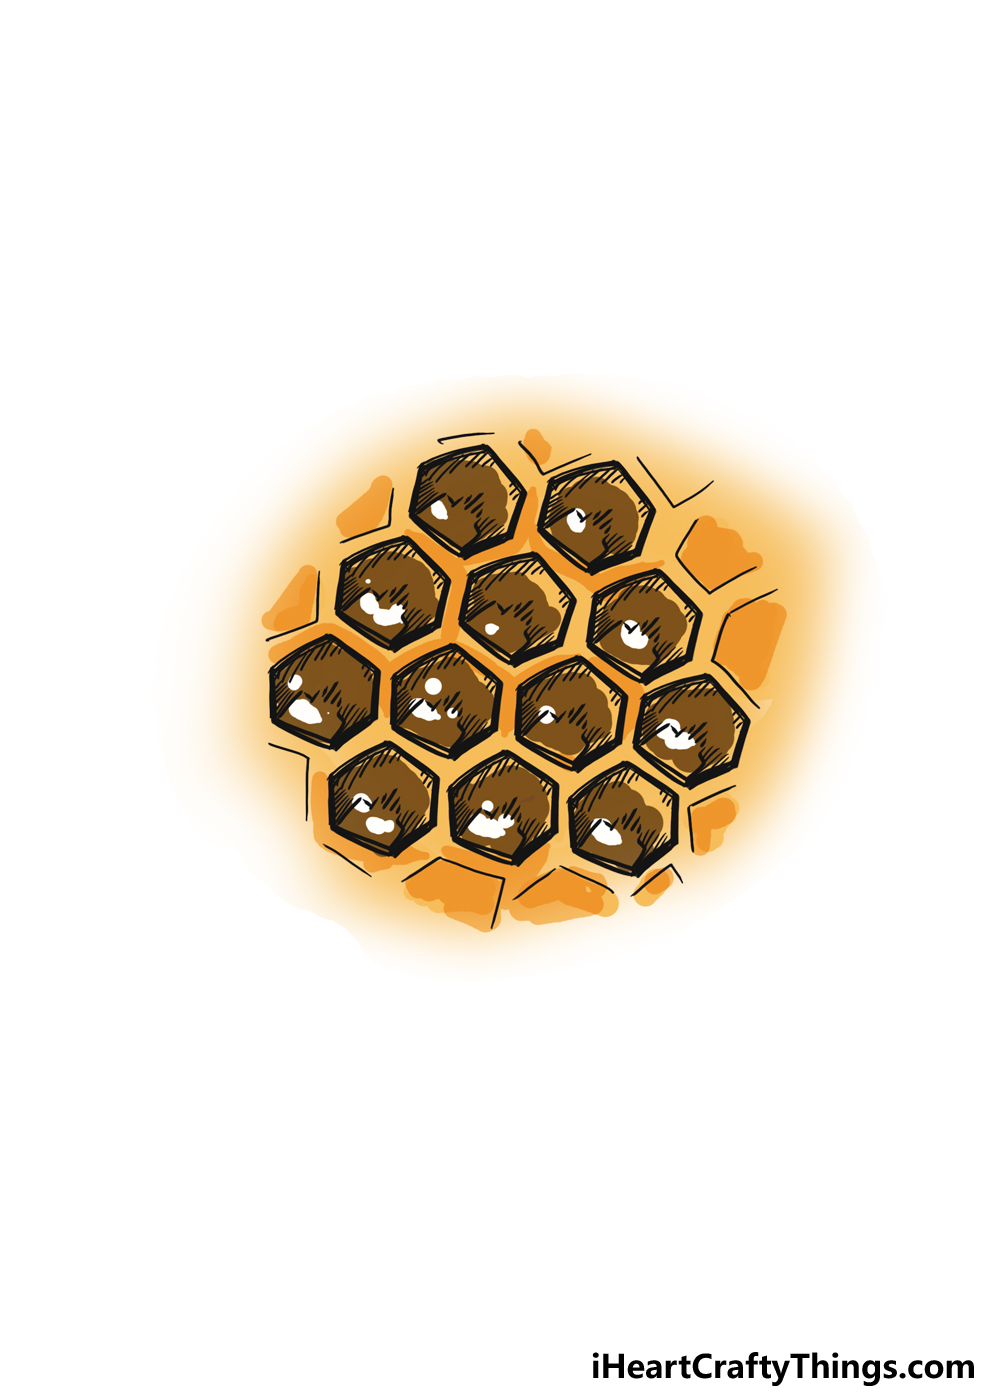
It’s all led to this, and now we are ready to finish off this drawing of honeycomb with some colors! As you would imagine, we will be using a lot of golden yellows for this drawing.
That takes care of the honey aspect, but there are other colors that we will incorporate as well. Earlier, we spoke about creating some depth for the hexagon holes in the image using some colors.
To do that, we added different shades of browns inside the hexagon holes. However, you will see that we left some small touches of yellow in the upper sections of the hexagons.
This helps to contribute to the depth of the holes and makes it look like there is some shading.
Of course, these colors are a suggestion, and you don’t have to go for the same ones if you don’t want to!
You could go for different shades or different colors entirely. They don’t even really have to be realistic if you would prefer a more stylized image.
When adding your colors, you can also think about the various art tools and mediums you use to achieve your colors.
For example, if you wanted to show honey dripping down you could use some thick paint.
You could also mix lighter mediums like watercolor paints and acrylics with highlights from a colored pen for one example.
There are so many other ways to color this drawing, so how will you finish off your own?
Your Honeycomb Drawing is Complete!
You have completed all 6 steps of this guide on how to draw a honeycomb, and it’s one sweet drawing at the end of it!
Honeycomb is an incredible thing to view in nature, and this drawing captures it nicely.
In this guide, we wanted to show you how to make this design while leaving it open for you to add your own touches and ideas. Even though it is a fairly simple design, you can add a lot to it!
We spoke about adding bees, honey and text, but these are just a few of the extras you could add. We’ve given you the starting point, and now it’s up to you to take it further!
Don’t forget to play around with colors and art tools so that you can achieve the colors you want. When you have completed your honeycomb artwork, it would be great to see how it looks!
When it’s done, you can share your finished artwork on our Facebook and Pinterest pages. This is the best way to show off your artwork for us to see!