Angels are common in many cultures and religions around the world, and they are known to be perfect beings that watch over, protect and guide people.
One of the most common symbols of an angel is the bright halo that sits above their head.
The halo has also become a symbol of purity and virtue, and seeing as it’s just a ring you may assume it would be easy to learn how to draw a halo.
It can be trickier than expected, however, but this guide will make sure you can master it regardless!
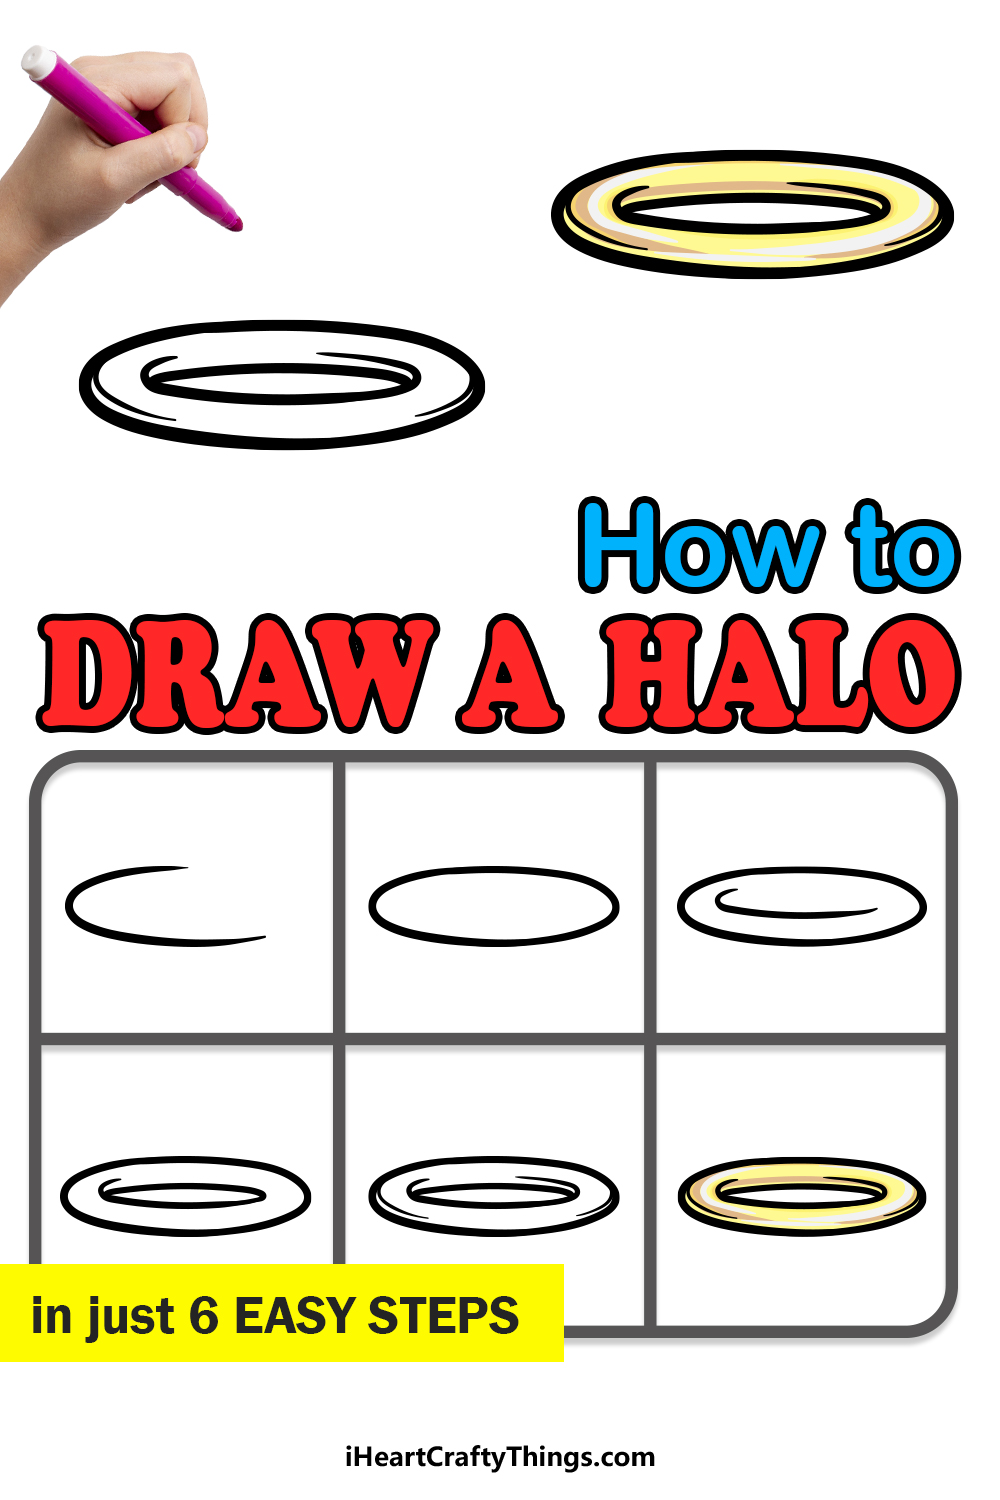
This step-by-step guide on how to draw a halo in just 6 easy steps will guide you as you draw this angelic symbol.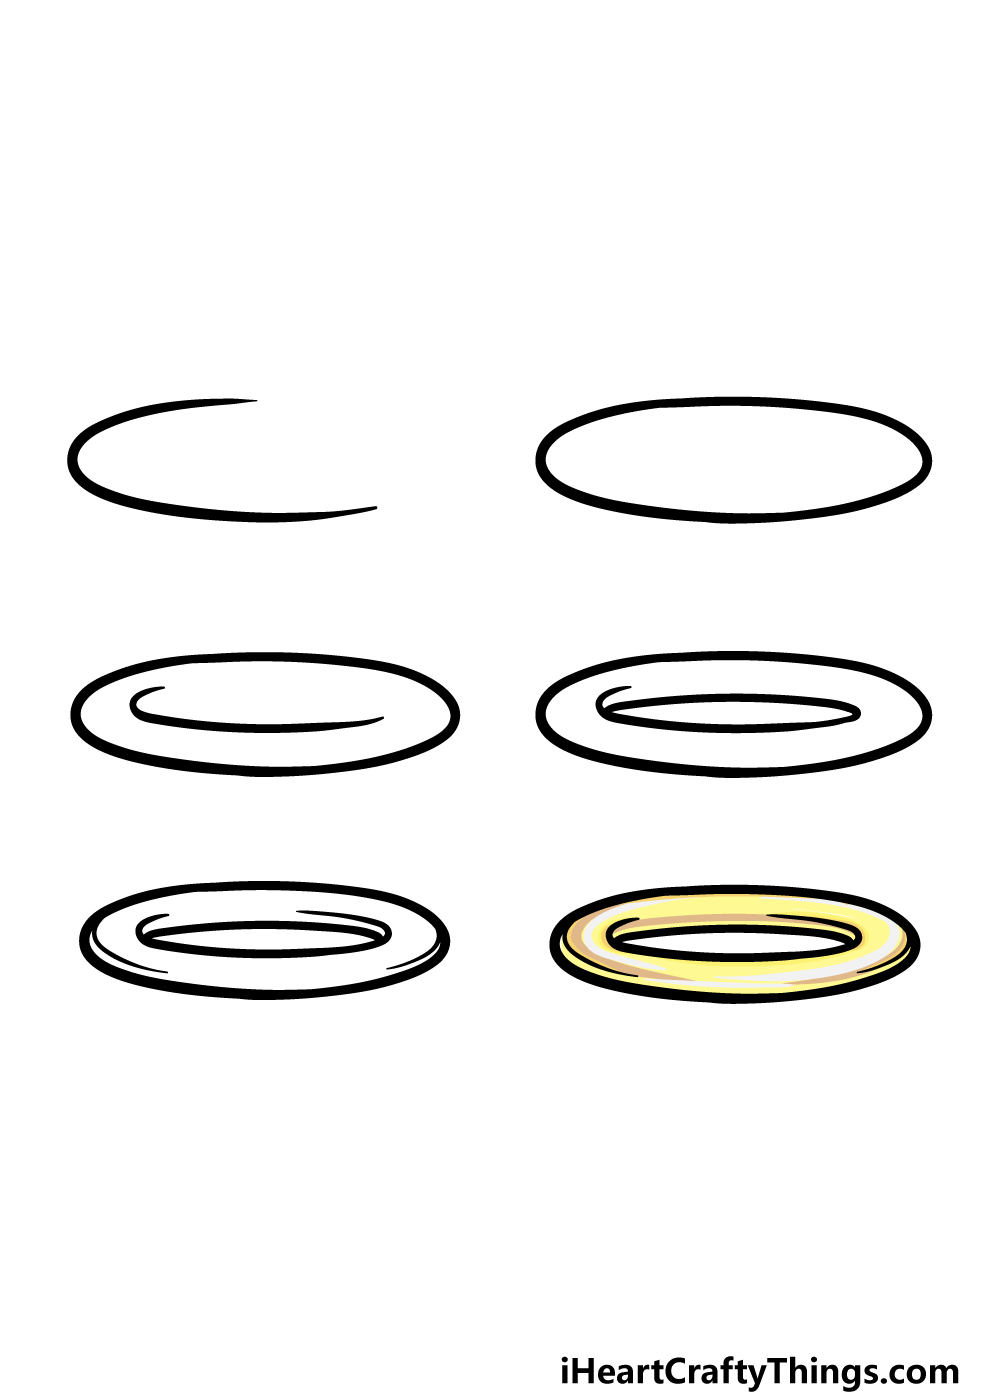
How to Draw A Halo – Let’s get Started!
Step 1

When you decided to learn how to draw a halo, you may have thought it would be as easy as drawing a thin donut shape.
While technically the halo does have a rather simple structure, it may not be as easy as you think! While it may be harder than expected, the steps in this guide will make sure it never gets too difficult for you.
To that end, we will start slowly with the first step in this guide. We will be starting with the outline of the halo, and all you need to do for now is draw a sharply curved line, almost as if you were drawing half of a flat oval.
That is all for now, and you can move on to step 2!
Step 2 – Next, finish the outline of the halo
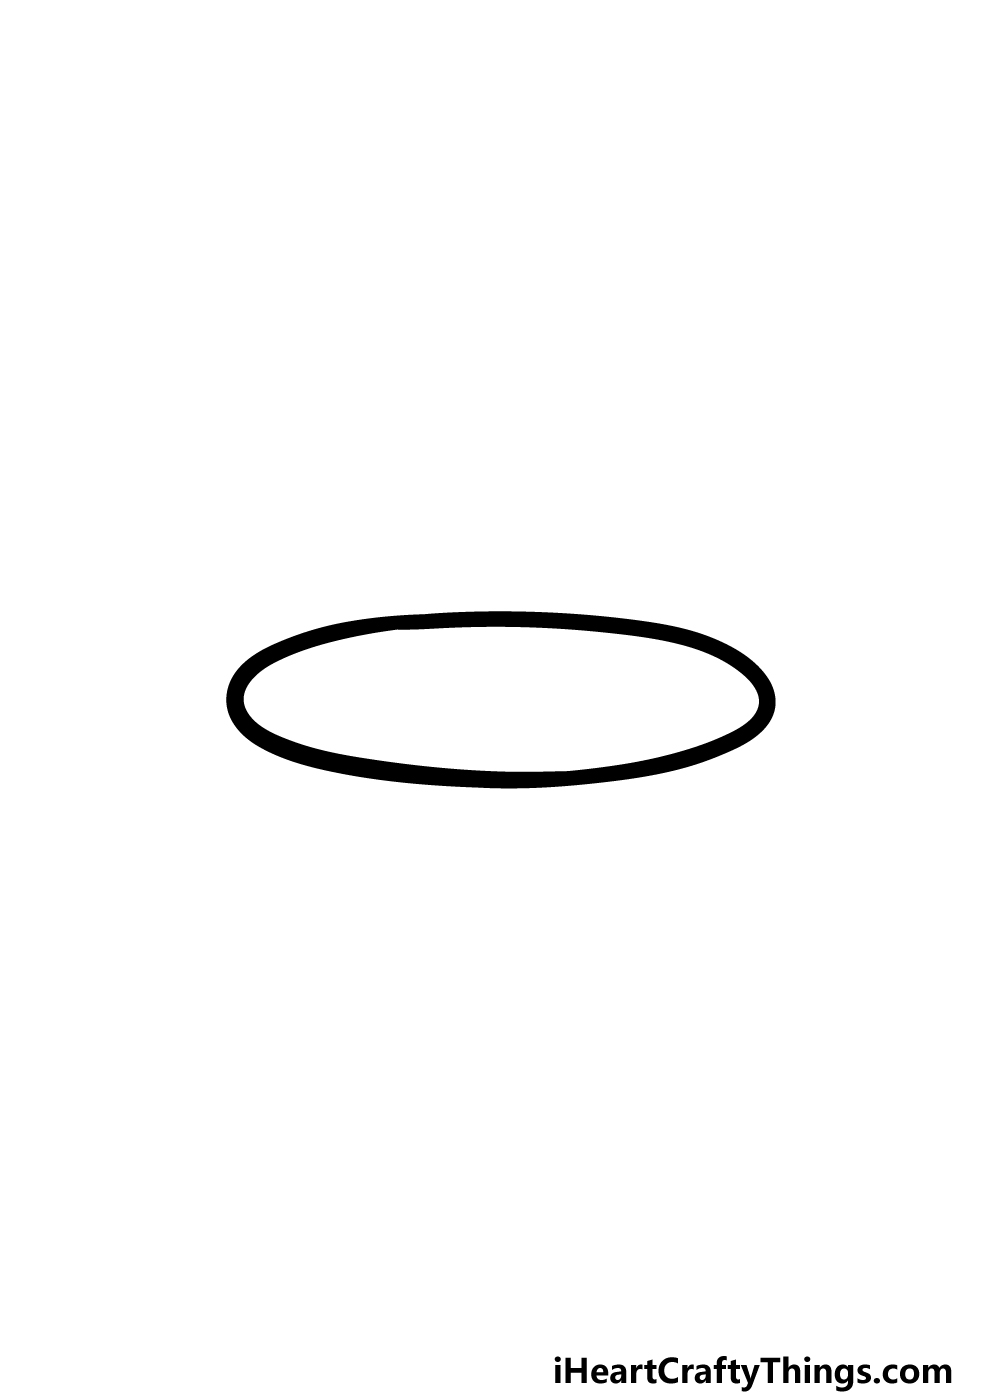
We mentioned that the first step was like drawing half of a flat oval, and in this step of your halo drawing we will complete that analogy by actually drawing a flat oval.
To do this, simply draw another line that is a mirror image of the first one that you drew. With that outline complete, we can start on the inner curves of the halo.
This will be where things can start to get tricky, but don’t worry! We will take it slowly as we continue to make sure you end up with an amazing halo.
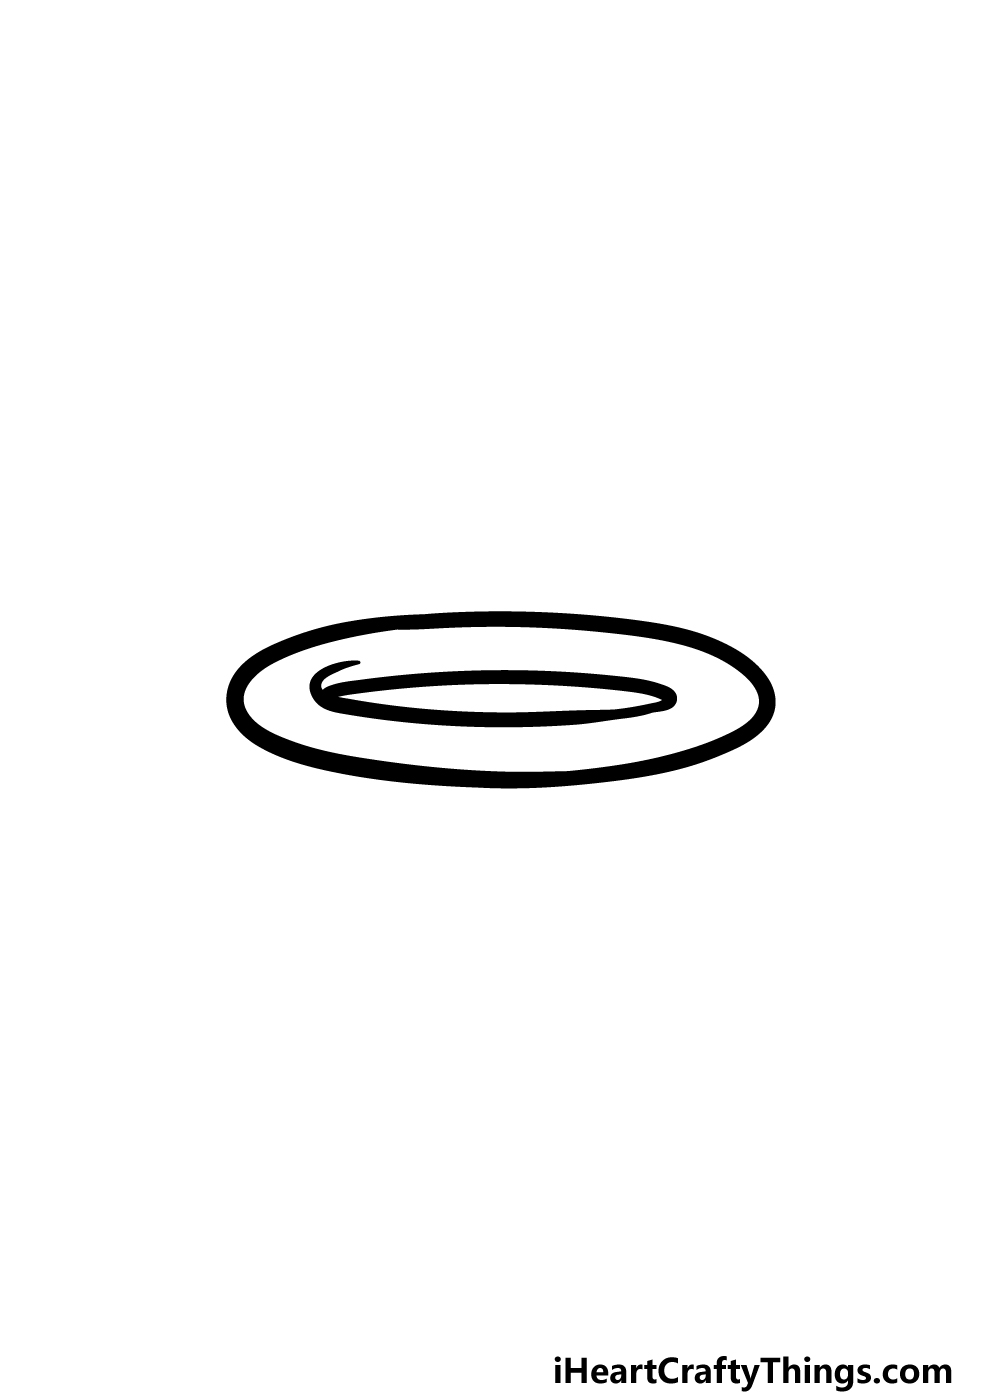
Step 3 – Now, draw the curves on the inner edge of the halo

You may think it would be easier to just draw another oval within the first one, but while that would work we will take it a step further in this guide on how to draw a halo.
The way we will be drawing the lines will better represent the curves of the structure of the halo much better.
To do this, we will start with one line inside the outline of the halo. This line will be rather curved, running along the inner perimeter of the halo outline.
The reference image will also show you how this line should be curved, and then we can finish it off in the next few steps.
Step 4 – Next, finish off the inner curve of the halo
In this fourth part of your halo drawing, we will finish off the inner outline of the halo.
This line that we will be drawing will also be curved like the previous one you did, however it won’t connect perfectly to the other one.
They will connect perfectly on the right, but on the left the line you drew in step 3 will go slightly above the start of the one in this step.
That may sound complicated here, but once you see the reference image it will become very clear! Then we just have a few final details to add, so let’s move on!
Step 5 – Now, you can finish off the details of your halo drawing
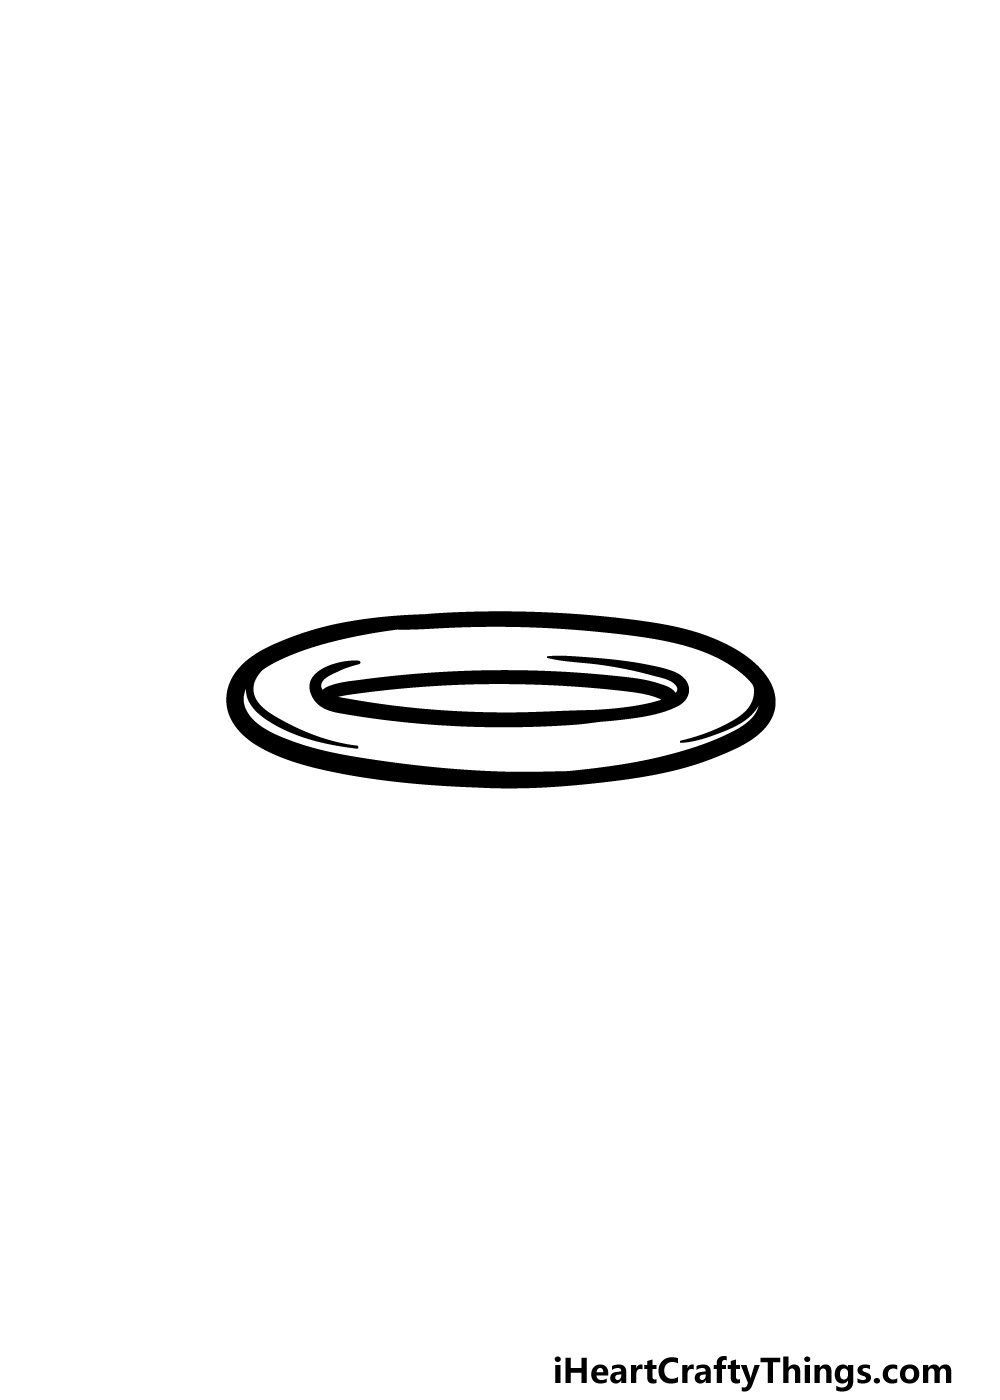
Your drawing is almost complete now, but we will first add a few more lines before you have finished this step of our guide on how to draw a halo.
First, extend the line of the inner curve of the halo on the right. Then, you can add some more line detail along the inner edge of the halo on both sides.
Once you have it looking as it does in our reference image, you have technically finished the drawing!
You don’t have to stop here though, and there are many more awesome details that you can add. You could draw some lines around the halo to make it look like it’s glowing or even draw an angel’s head beneath it!
These are just two out of many ways that you could add your own spin to this drawing, so be sure to get creative and have fun with it before you move on to the final step!
Step 6 – Finish off your halo drawing with some color
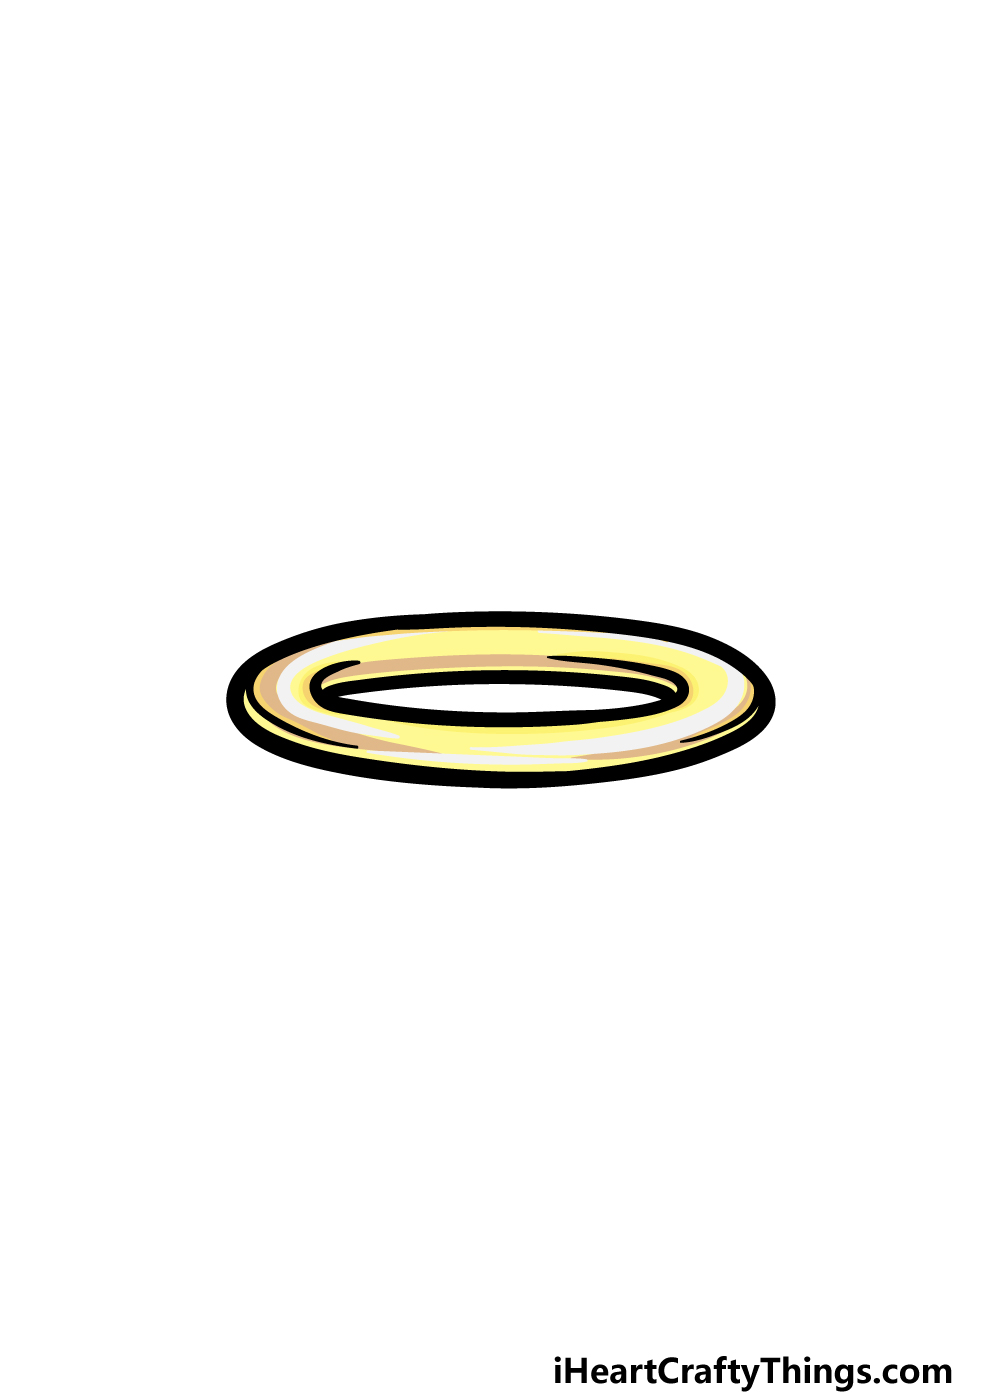
Now that you have finished creating your halo drawing, you can now relax with some coloring fun to finish it off!
We used some shades of yellow to give this halo a golden look, but you could also use any other colors you love for it!
Using mediums like paint or watercolors, you could make the colors brighter near the halo and make them lighter the further you move away from it. This would help to create a look of radiance emanating from the halo.
There are many other colors and art mediums you could use to finish off this picture, so what will you choose to finish off this amazing halo?
Here’s how you can make your halo drawing even better…
Create a heavenly artwork with these tips for your amazing halo sketch!
Halos are most often depicted as floating above the head of an angel, and that is one option for this halo drawing! You could draw an angelic head beneath the halo to give this picture even more to admire.
This face could be drawn in any style you like, whether it’s realistic or cartoony. If you need some inspiration, why not use someone you know that would make a good angel as inspiration?
Whether you add an angel face to this drawing of a halo or not, you can also make it prettier with some background details. One idea would be to add a heavenly setting behind it!
You could create this with lots of puffy clouds and rays of light and sunshine. That would be a typical setting, but it’s far from the only one you could go for.
Do you have any other settings in mind for this picture? Adding a setting would also go brilliantly with the previously suggested tip!
Once you have added your chosen additions to this drawing of a halo, you can also add some effects around it to make it even more eye-catching.
This could be done by drawing some small, simple lines around the halo to make it look as if it is glowing. That would be one simple way to make the halo look even lovelier, but there are tons of simple yet effective things you could add around the halo.
Colors and art tools are your best weapons for making a picture even more amazing. The same is certainly true for this halo sketch!
We showed you a couple of ways to color this picture in the guide, but you can get really experimental with it. If you added any extra elements or details, then they can have color added to them as well.
Using traditional art tools and mediums is one way of doing it, but you can also incorporate crafts! For instance, glitter would make this angelic artwork really sparkle.
Your Halo Drawing is Complete!
We hope that you had a marvelous time working with us on this guide on how to draw a halo! This halo may have been a bit more complex than it first appeared, especially at the curves in the center, but hopefully this guide made it fun and easy for you regardless!
Don’t forget that you can also draw your own extra details and elements to really finish it off. We mentioned a few ideas you could try, but this is your chance to show us how creative you can be with your own ideas!
Then, when you’re ready for a new drawing to take on, be sure to visit our website! We have tons of amazing guides for you to enjoy there and have many more on the way, so be sure to check in frequently!
We know your halo drawing will have turned out amazingly, so please be sure to share it on our Facebook and Pinterest pages for us to admire!