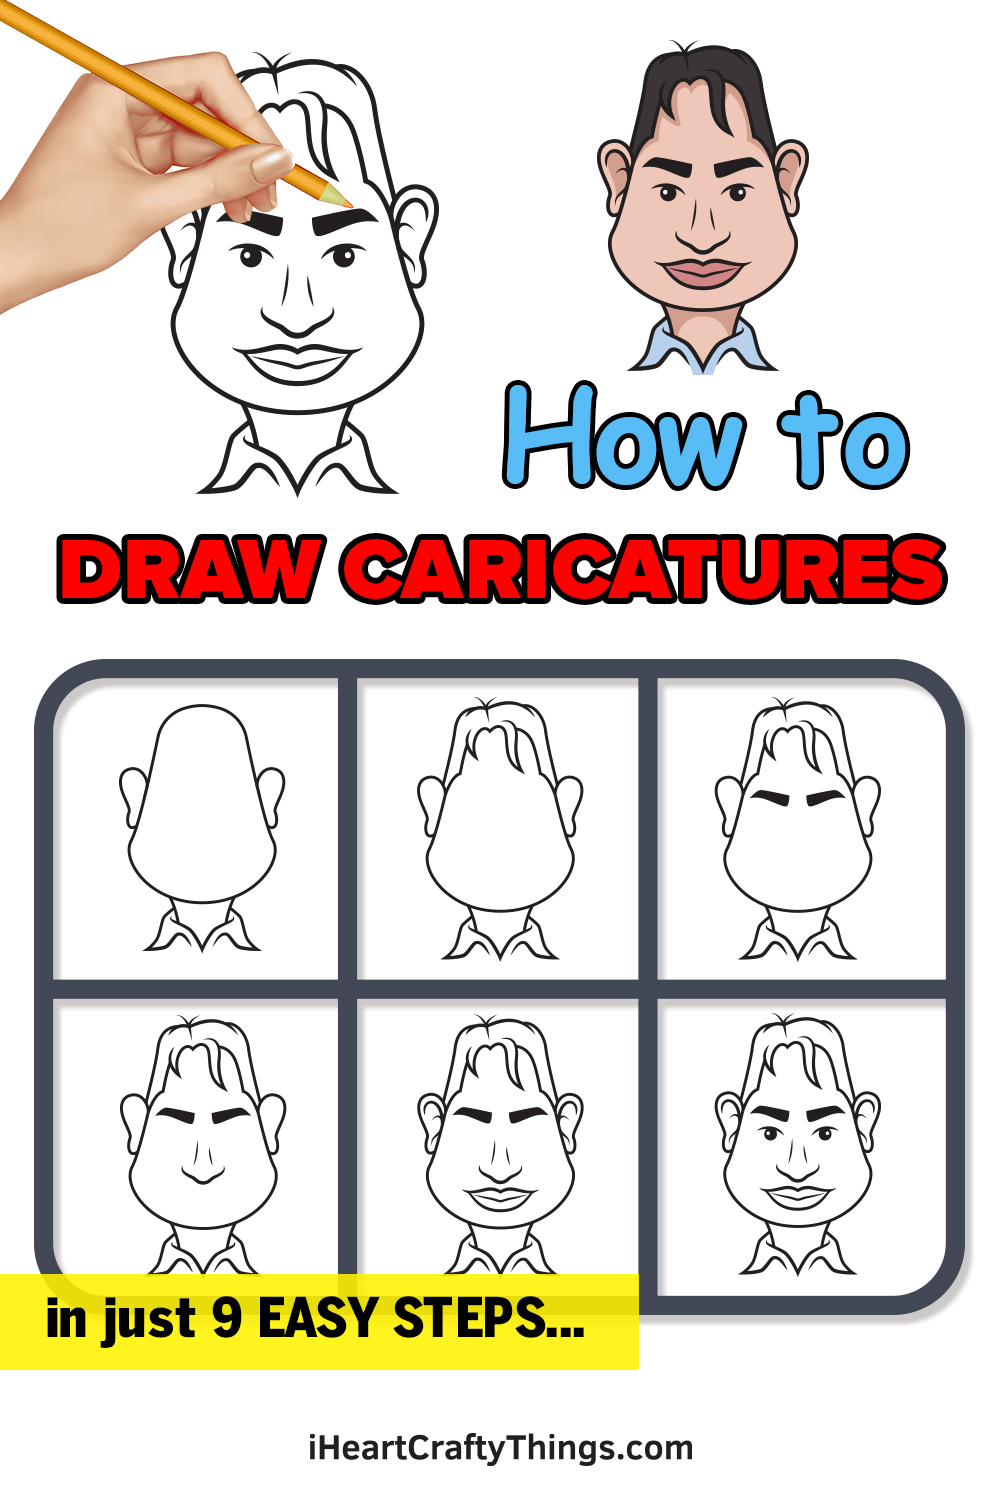
If you’ve ever wondered how to draw a caricature, then you’ve come to the right place! This guide will make it so much easier for you to make your own caricature designs.
Caricatures have been around for many, many years. There is something amusing about seeing people we know or recognize drawn in an exaggerated style, and many people wish that they could make them.
With this guide, you can easily make your own caricatures! We will be working on a standard design, but you can take the basics you will learn and apply them to your own designs.
Once you have the hang of it, you can use photos of people and adapt the steps to match the person you want to draw. It all starts with this first step, so let’s begin!
Find Out How To Make Your Caricature Drawing
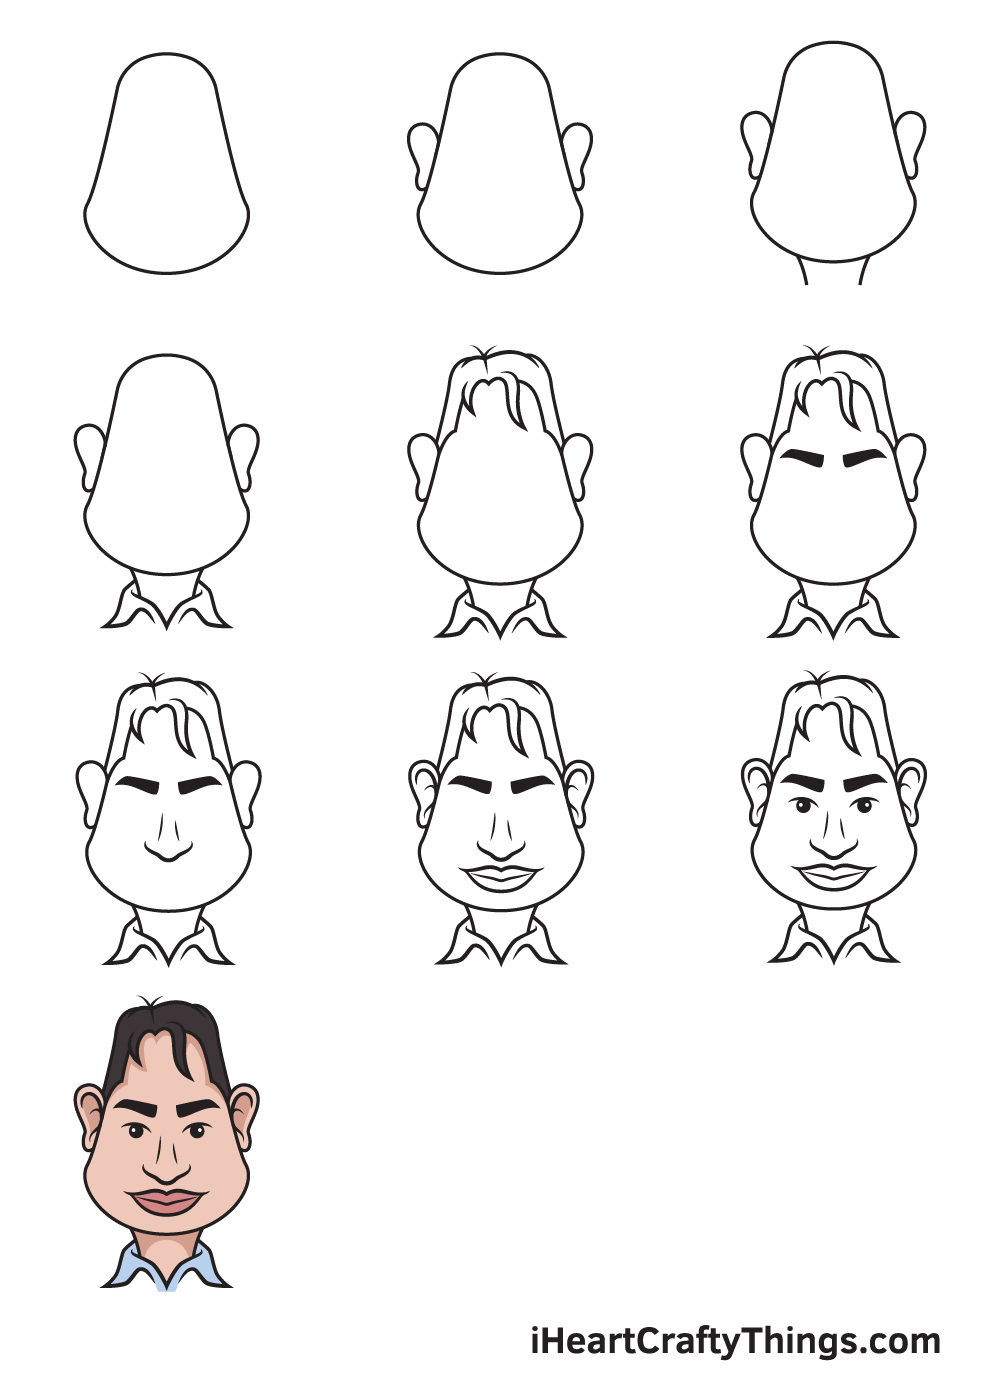
How to Draw a Caricature – Let’s get started!
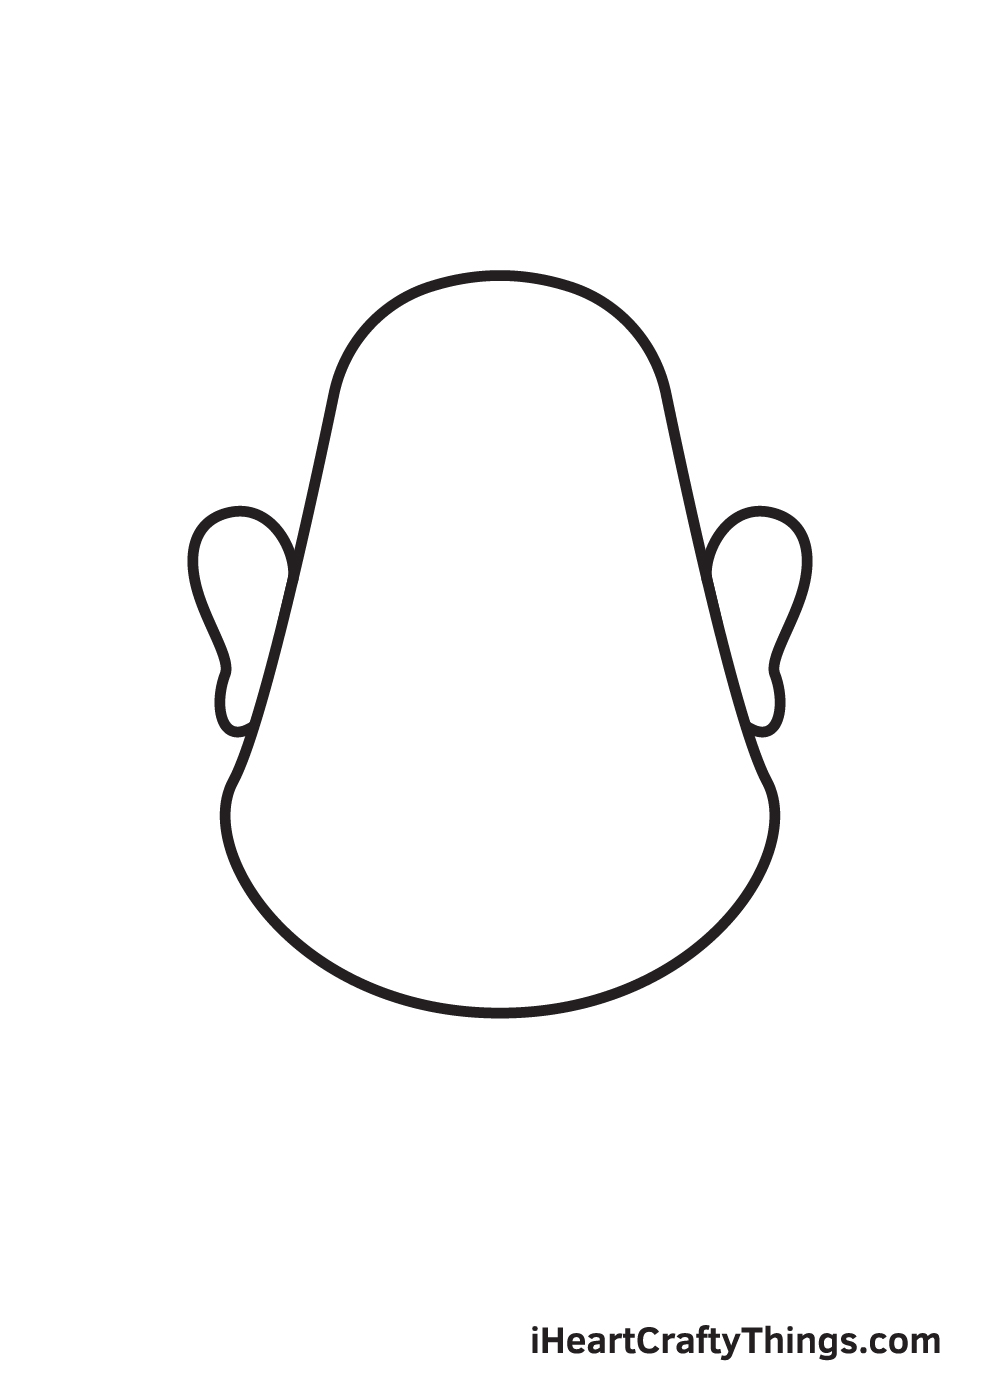
Step 1

Starting in the very middle of your paper, draw an irregular upright oval shape with a wider bottom.
To ensure that the caricature will be drawn in the center, you can create reference lines by drawing an intersecting horizontal and vertical line.
The point where the two lines meet should be right in the middle of your caricature’s face. Use the lines as a guide.
Step 2 – Create an Outline of the Caricature’s Head
Draw an ear on each side of the head of your caricature. As seen in the illustration, the upper part of the ears we drew is relatively bigger than the bottom part.
Make sure that the ears on both sides of the caricature’s face is drawn evenly and within the same level. This will help make your drawing look proportioned.
Step 3 – Afterwards, Draw the Neck of the Caricature
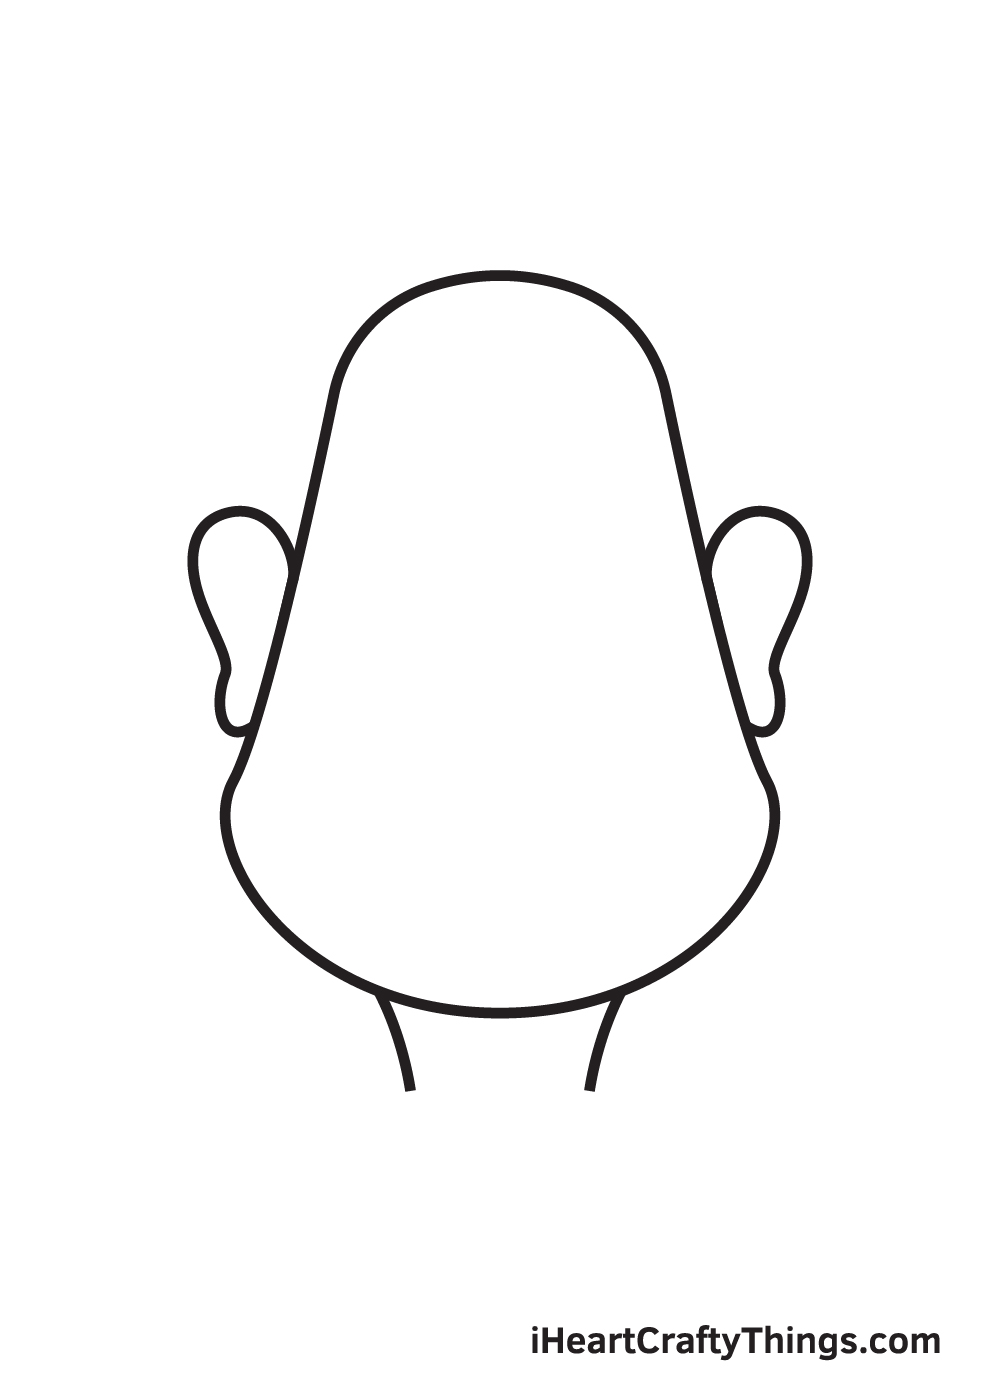
Draw two downward diagonal lines headed towards each other beneath the head of the caricature. This creates the head of your caricature drawing.
The gap in between the diagonal lines depends on how thick or thin you want the neck to appear to be. As a general rule of thumb, an inch gap should be sufficient.
Step 4 – Draw the Collar of the Caricature’s Shirt
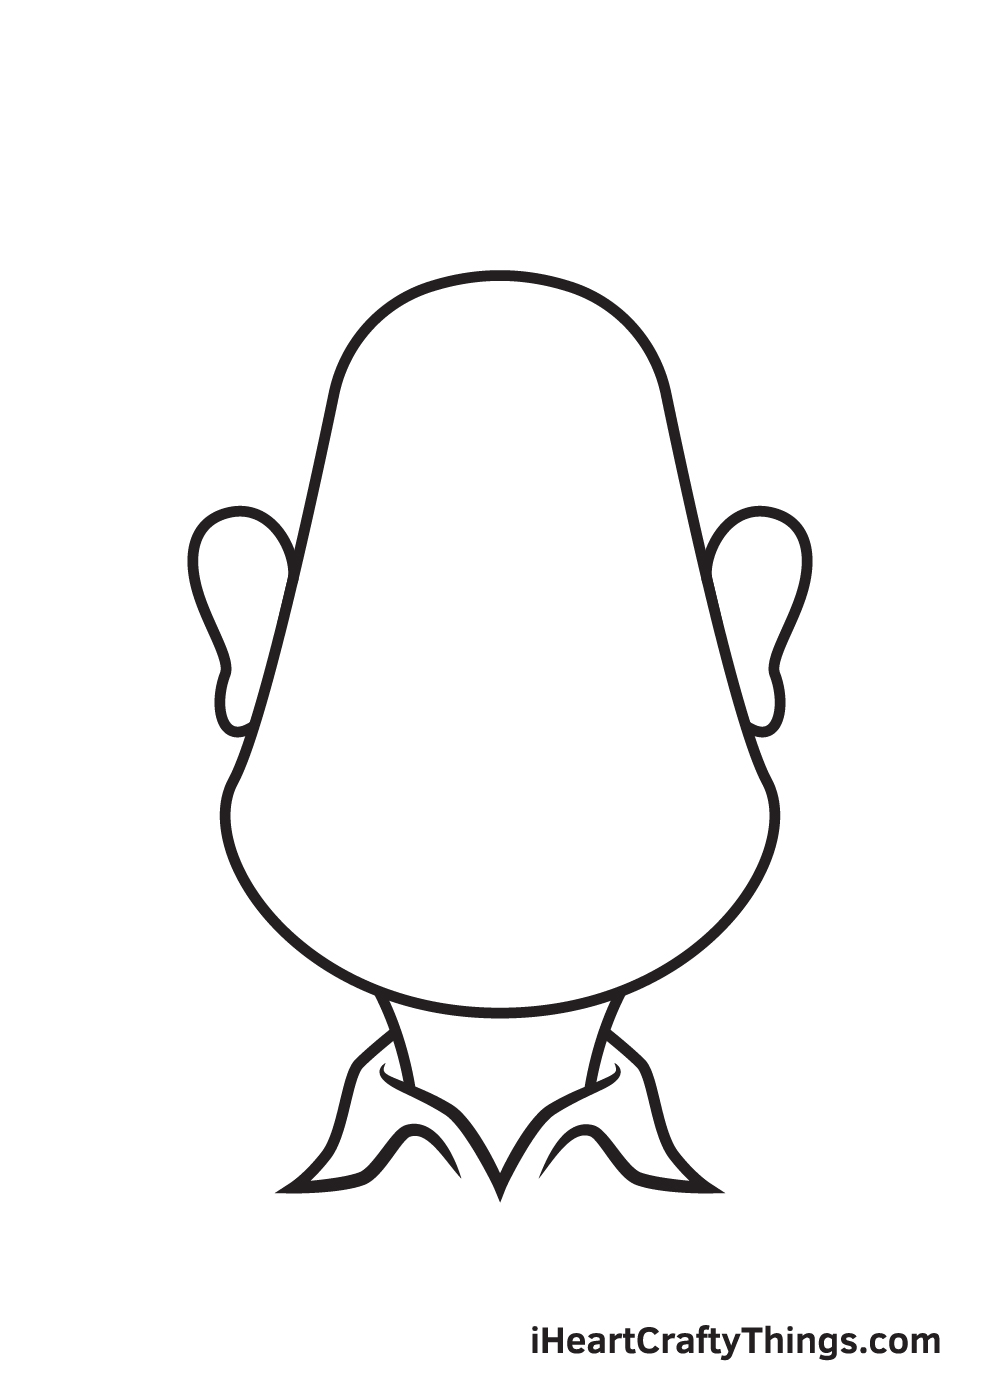
In this step, we will be creating the collar of the shirt your caricature is wearing. Start by drawing an uneven V-shaped line at the bottom of the neck, with both endpoints going past through the neck.
Afterwards, draw two sideways V-shaped lines on each side of the line we drew just now. At this point, the entire collar should be completed.
Keep in mind that the lines should be slightly curved instead of straight to make the collar appear soft like a real fabric.
Step 5 – Next, Draw the Hair of the Caricature
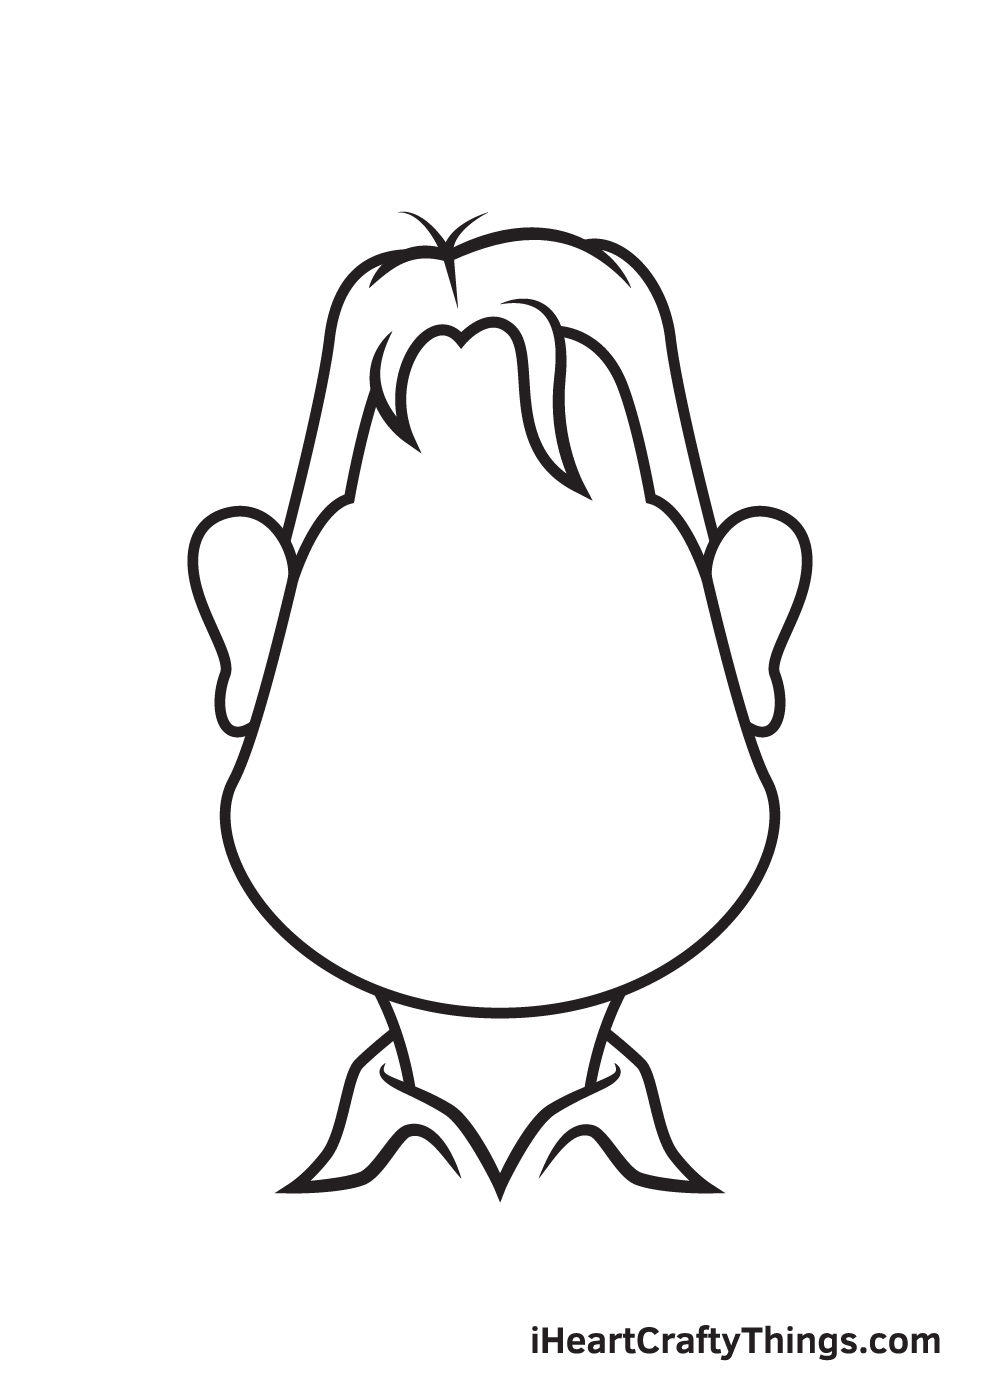
Continue by drawing the hairline of your caricature as well as the top of its hair. Don’t forget to add clumps of hair to add texture on the appearance of the hair!
As you can see in the illustration, we kept the hair of our caricature pretty basic. We simply drew an outline for the hairline and added some hair sticking up here and there.
You can draw the hair of your caricature similar to how we’ve done ours or create a different style! It’s all up to you!
Step 6 – Then, Draw a Pair of Thick Eyebrows

Draw the eyebrows right below the forehead. Make sure to shade the entire shape of the eyebrows!
Remember, males typically have thicker eyebrows than females, so keep that in mind when drawing the eyebrows.
And since we’re creating a male character, we drew a thick, arched, and well-defined pair of eyebrows.
Step 7 – Next, Draw the Nose of Your Caricature

To create the nose, draw an upward curved line with a bump in the middle to form the nostrils or the tip of the nose.
Then, draw two diagonal lines above the nostrils, completing the appearance of the nose.
Step 8 – Afterwards, Draw the Caricature’s Lips

Draw two connected curved lines forming the upper lip. Then, connect both endpoints of each line with another curved line below it, creating the bottom lip.
Now, you’ll want to add a line within the outline of the lips to create the division between the upper lip and the bottom lip.
In this step, we will also be adding the details inside both ears. Draw a curved line at the top of the ear, following the outline of the ears.
Then, draw another two short curved lines to create the inner part of the ears.
Step 9 – Now, Draw the Eyes of Your Caricature

Finalize the look of your caricature by adding the eyes. Draw downward curved lines underneath each eyebrow, forming the lid of the eyes.
Then, beneath each of the curved lines, draw a circle shape to outline the iris. Afterwards, draw a small circle within each iris on both eyes.
Now, shade the entire iris while leaving out the tiny circle unshaded to create a dramatic “sparkling eyes” effect.
Remember, a caricature is typically exaggerated so feel free to emphasize whichever facial feature you want to highlight.
Now that we have successfully drawn a caricature, it’s time for the most enjoyable part, which is choosing the colors and coloring your drawing!
As you can see in the illustration, we used a customized skin tone color for the skin of our caricature drawing.
To create a skin tone color, simply mix the colors white, brown, red, and yellow. You may add more of any color depending on the complexion you’re trying to achieve.
Please be advised that this color is best achieved using a watercolor or any coloring materials that are fairly easy to blend and mix.
Have fun playing with colors and watch as your caricature ultimately comes to life!
4 More Ways To Make Your Caricature Drawing Unique
Draw your favorite people with these 4 tips on making your caricature sketch more unique
In this guide, we showed you how to create a standard caricature character. But you can make your own unique character really easily!
First, pick the person you would like to create a caricature drawing of. This could be a friend, family member or even a celebrity!
Then, go back to step 3 of the guide, and then use your reference person to start adding more personalized details.
This can take some practice, but you’ll soon get the hang of it!
Whether you stick to our design or create your own, you can add some clothing and accessories to make your drawing of a caricature more unique.
For some simple examples, you could have the character wearing a hat or a beanie. Or maybe you could give them some glasses or have them wearing a sweater.
If you need some clothing ideas, you could look to the clothes you or your family own as inspiration!
When you really have the hang of this caricature sketch, you can start drawing more of the body. With caricatures, the classic style is to have the head be much larger than the body.
This isn’t always the case, however, and you could go for any style you want. This could be really simple and cartoony or quite detailed.
It’s up to you, so what kind of style do you think would best suit this drawing? Also, you could put them in all sorts of fun poses!
Lastly, we would recommend drawing a background for your caricature drawing. This is another great way to add a unique spin to the scene!
Adding a background would also be a perfect addition if you went with our previous tip and added a body. That way, you can match the background setting to the pose and clothing you added in that step.
For instance, maybe you created a police officer character, in which case you could have them out on the streets or driving a police car.
Your Caricature Drawing is Complete!
We hope you enjoy this step-by-step caricature drawing tutorial.
If you’ve finished this guide up to this point, we’re sure you’re now capable of drawing a caricature version of any character you want to draw!
Once you finish drawing and coloring a caricature, don’t forget to show off your masterpiece! Take a photo of your artwork and share it on our Facebook page and on Pinterest.
We’re excited to see your incredible caricature drawing!