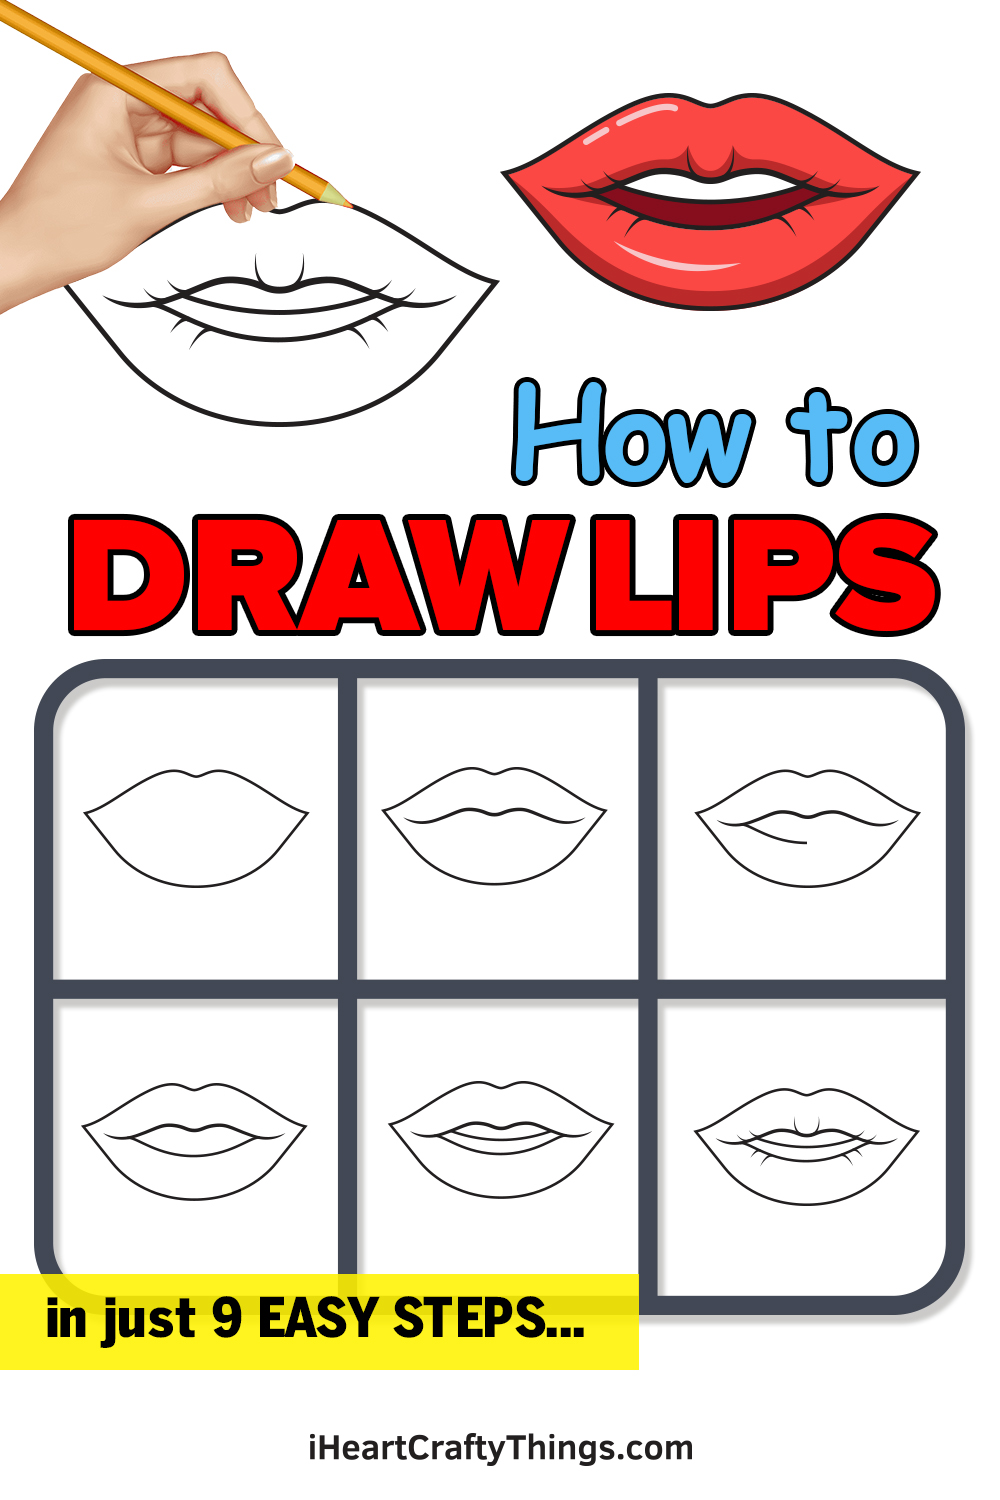
Anyone wanting to learn how to draw lips is in the right place. This guide for kids will show you how easy it can be when you know what to do.
We see lips every day, and yet drawing them isn’t a simple task. Lips have to have the right shapes and details in order to look realistic and natural, and therein lies the challenge.
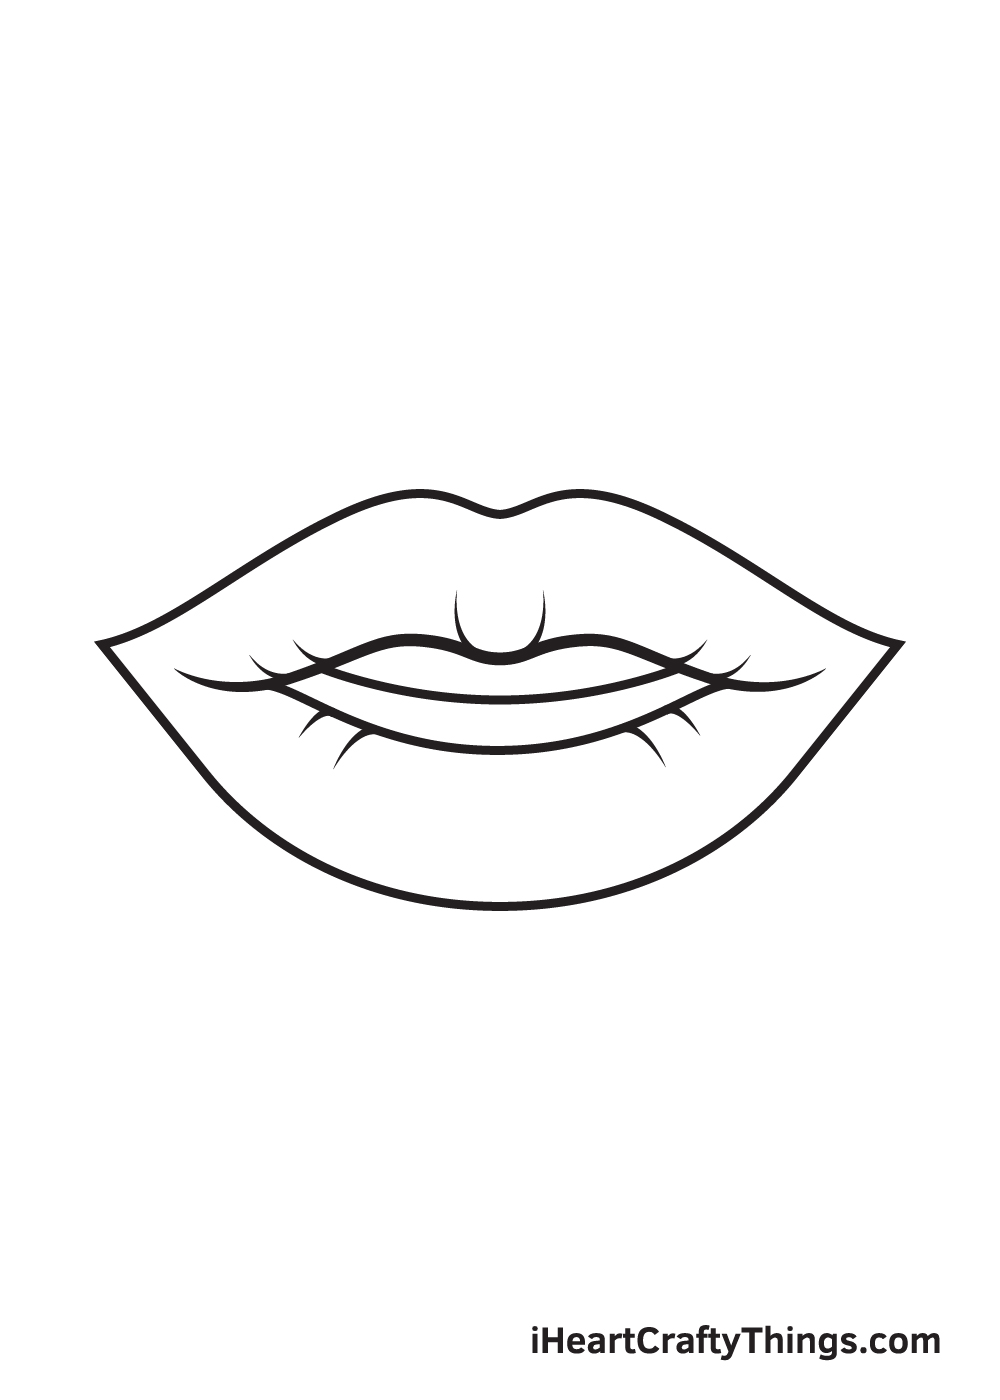
In this guide, I will show you the simplest shapes and lines you need to start building up the drawing. This will also include details such as creases on the lips and a row of teeth.
Everything has been done in a cartoony way, as that’s the easiest way to make it accessible for everyone. When you have the hang of it, you could make it more distinct and complex.
You could even draw the rest of the face around these lips! It’s up to you, so let’s see how it’s done.
Watch This Guide To See How To Create A Lips Drawing
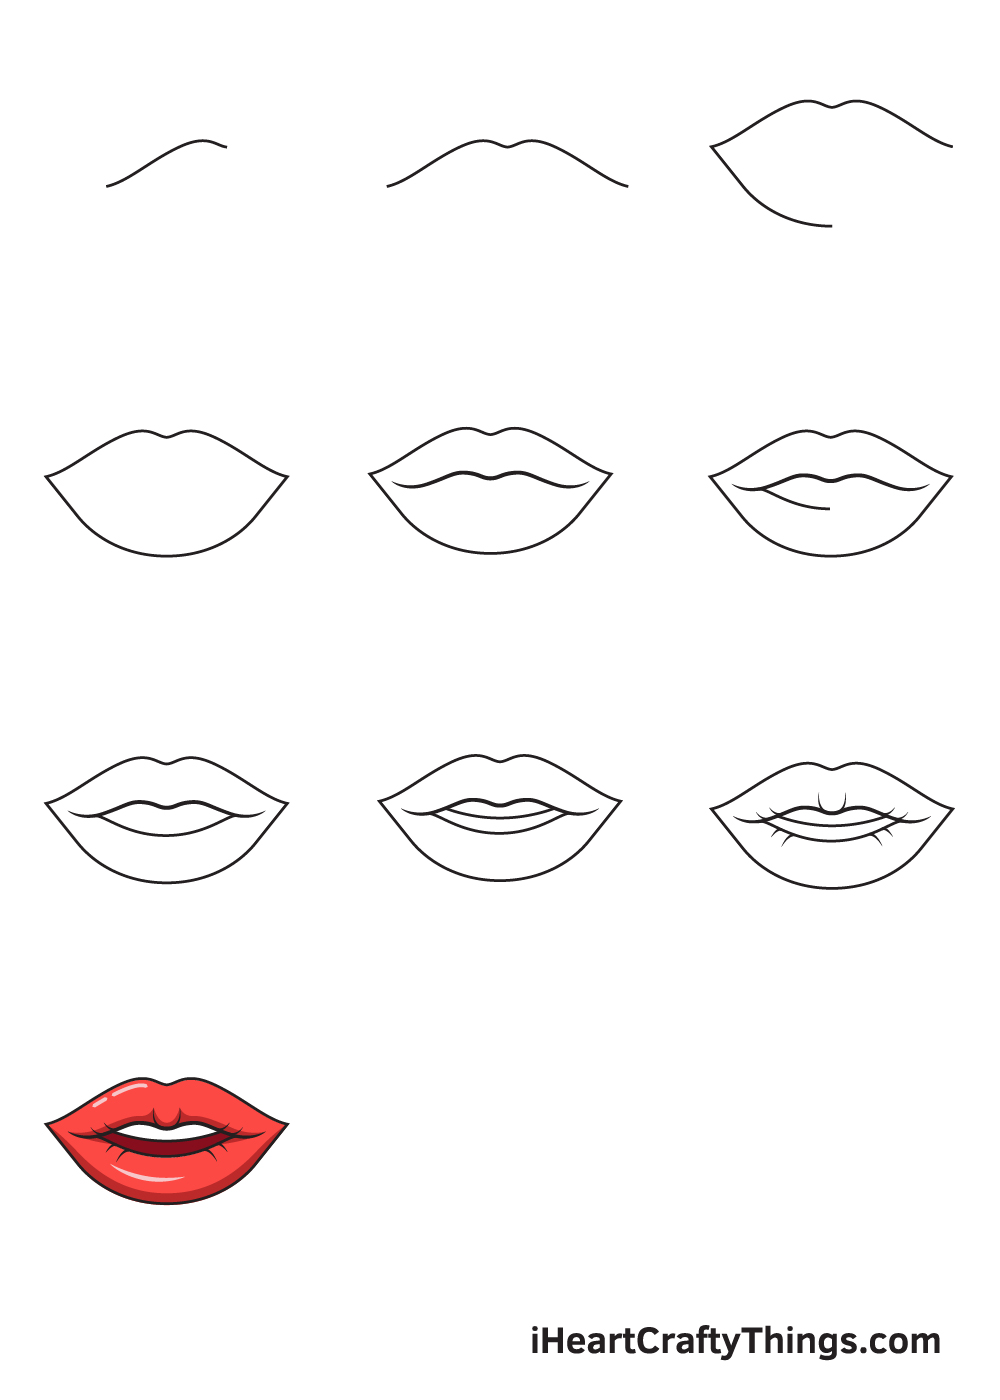
How to Draw Lips – Let’s get started!
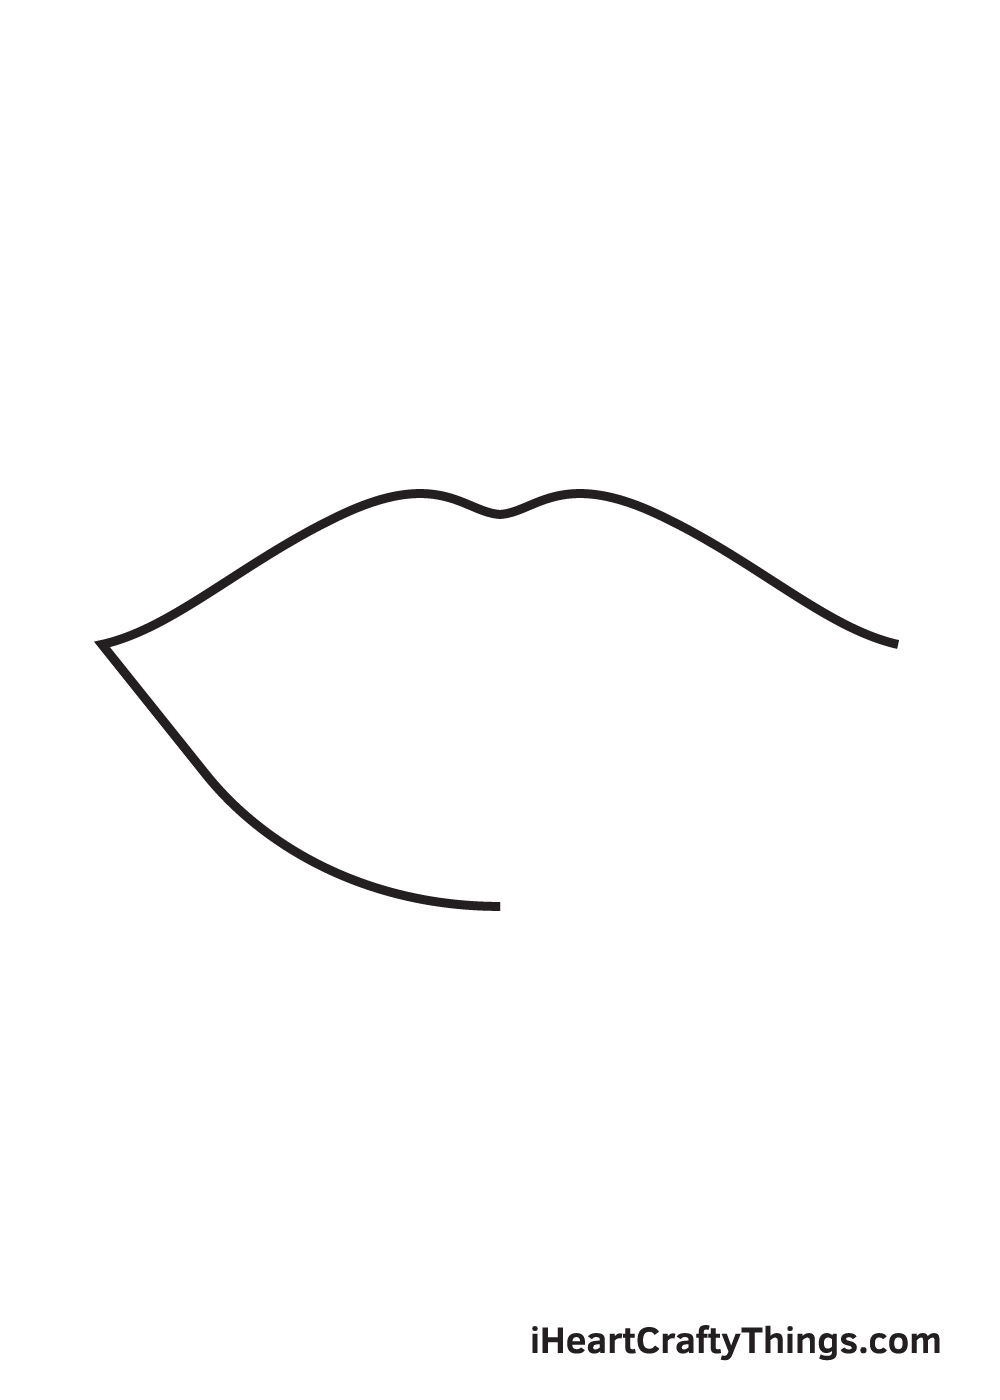
Step 1

Starting from the left side of the middle of your paper, draw a line going upwards. Once the line is about an inch long, gradually extend a short line downwards.
This creates the left side of the upper lip. When drawn correctly, the form of the line should look like a slope.
Keep in mind that the line should be drawn with a light stroke to avoid creating a harsh or thick line. This helps make the lips appear more natural.
Step 2 – Draw a Line Forming the Upper Lip

Repeat the previous step on the opposite side to create the right side of the upper lip. At this point, the outline of the upper lip should now be complete.
Bear in mind that the two lines we drew previously and the one we drew in this step should be connected, forming the upper lip.
In scientific terms, we’re drawing the vermillion border of the upper lips on each side of the cupid’s bow.
Step 3 – Draw the Left Side of the Bottom Lip
After completing the outline of the upper lip, we will now be moving on to the bottom lip.
Beginning from the left endpoint of the upper lip, draw a downward curved line until you’re aligned with the cupid’s bow on the upper lip.
Remember, the further you go down when drawing the bottom lip, the more plump your lips will look. If you want to draw thin lips, the line should only be slightly curved.
But if you want a fuller lips like the one shown in the illustration, draw a downward sloping curved line.
Step 4 – Complete the Outline of the Lips
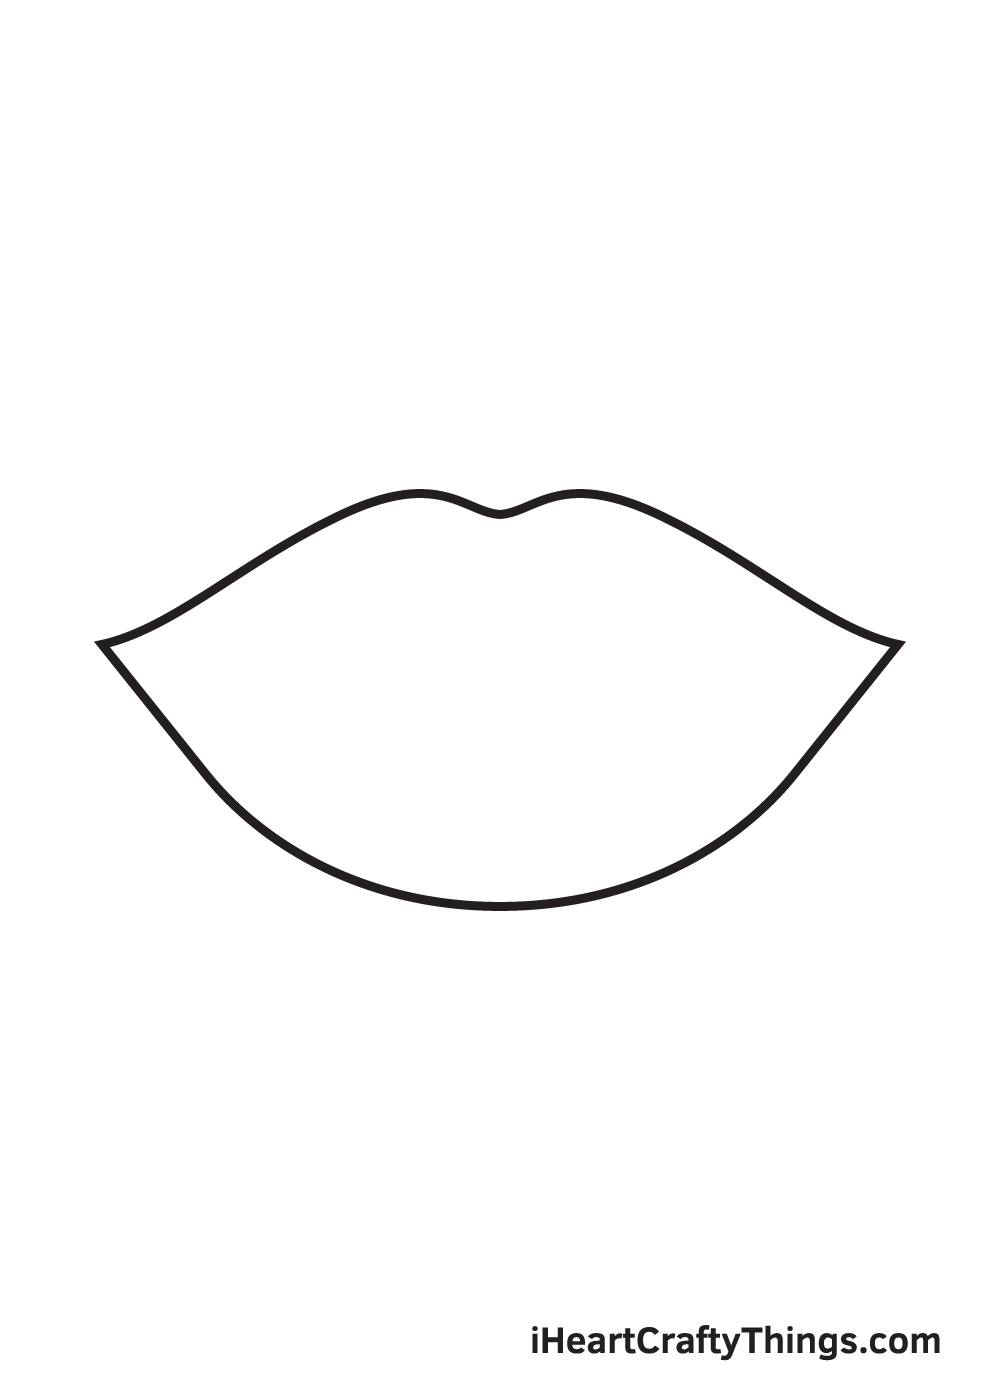
Once you’re satisfied with the shape of the lips, extend the line we drew previously until you reach the right endpoint of the upper lip.
After finishing this step, the outline of the entire lips should now be complete.
Step 5 – Finalize the Form of the Upper Lip
Draw a line inside the lips following the outline of the upper lip. This forms the tubercles of the upper lip.
Step 6 – Wrap Up the Form of the Bottom Lip
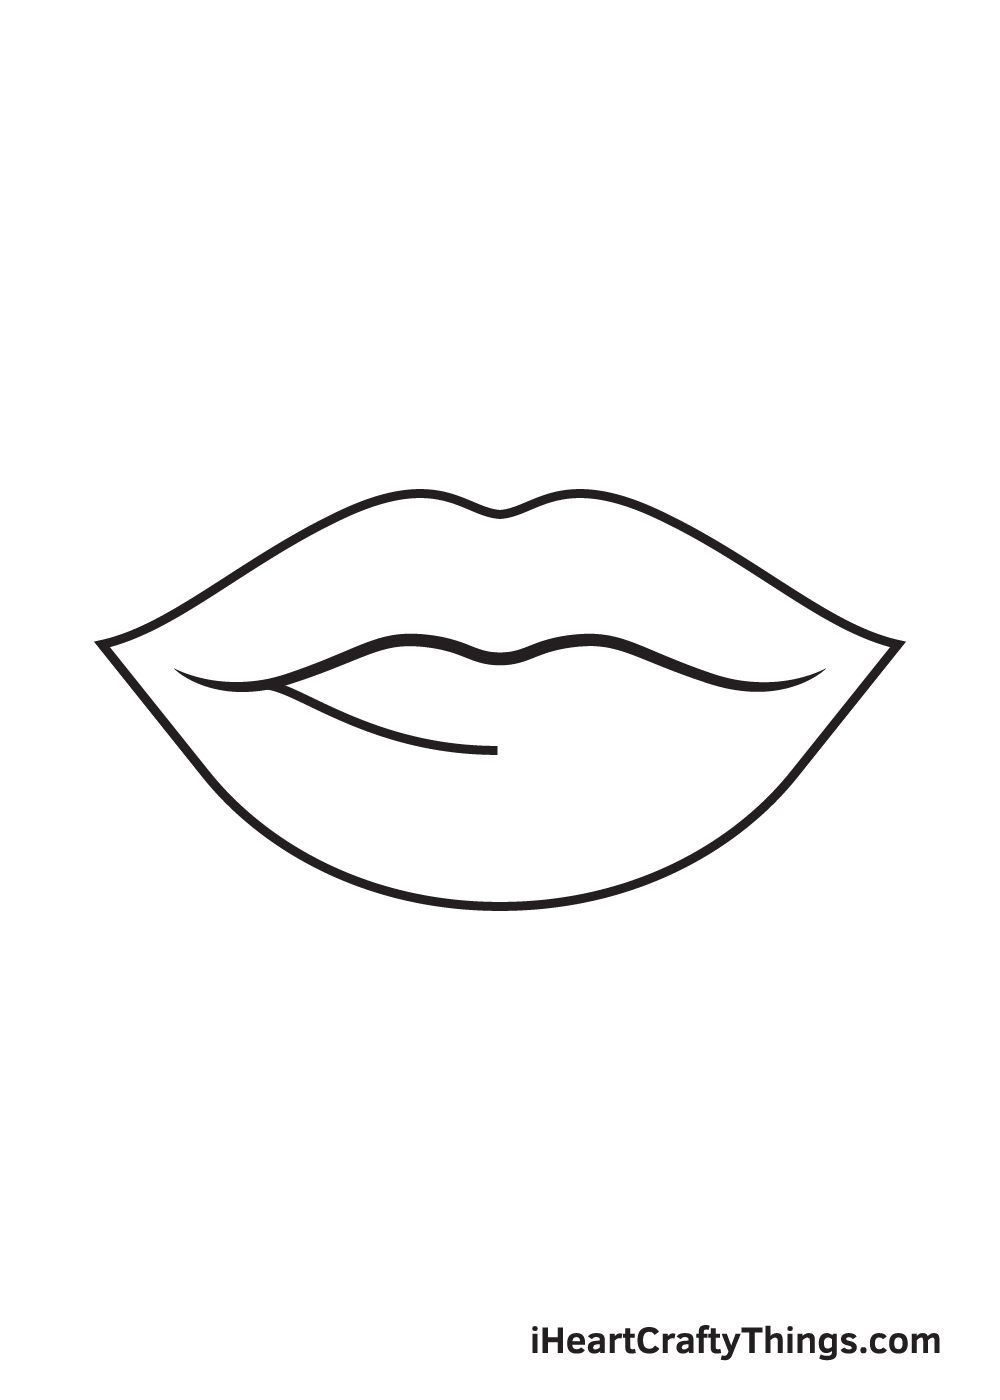
Draw a curved line emerging from the bottom left side of the upper lip.
Extend the line until you’re halfway through the lips.
Step 7 – Separate the Upper and the Bottom Lip
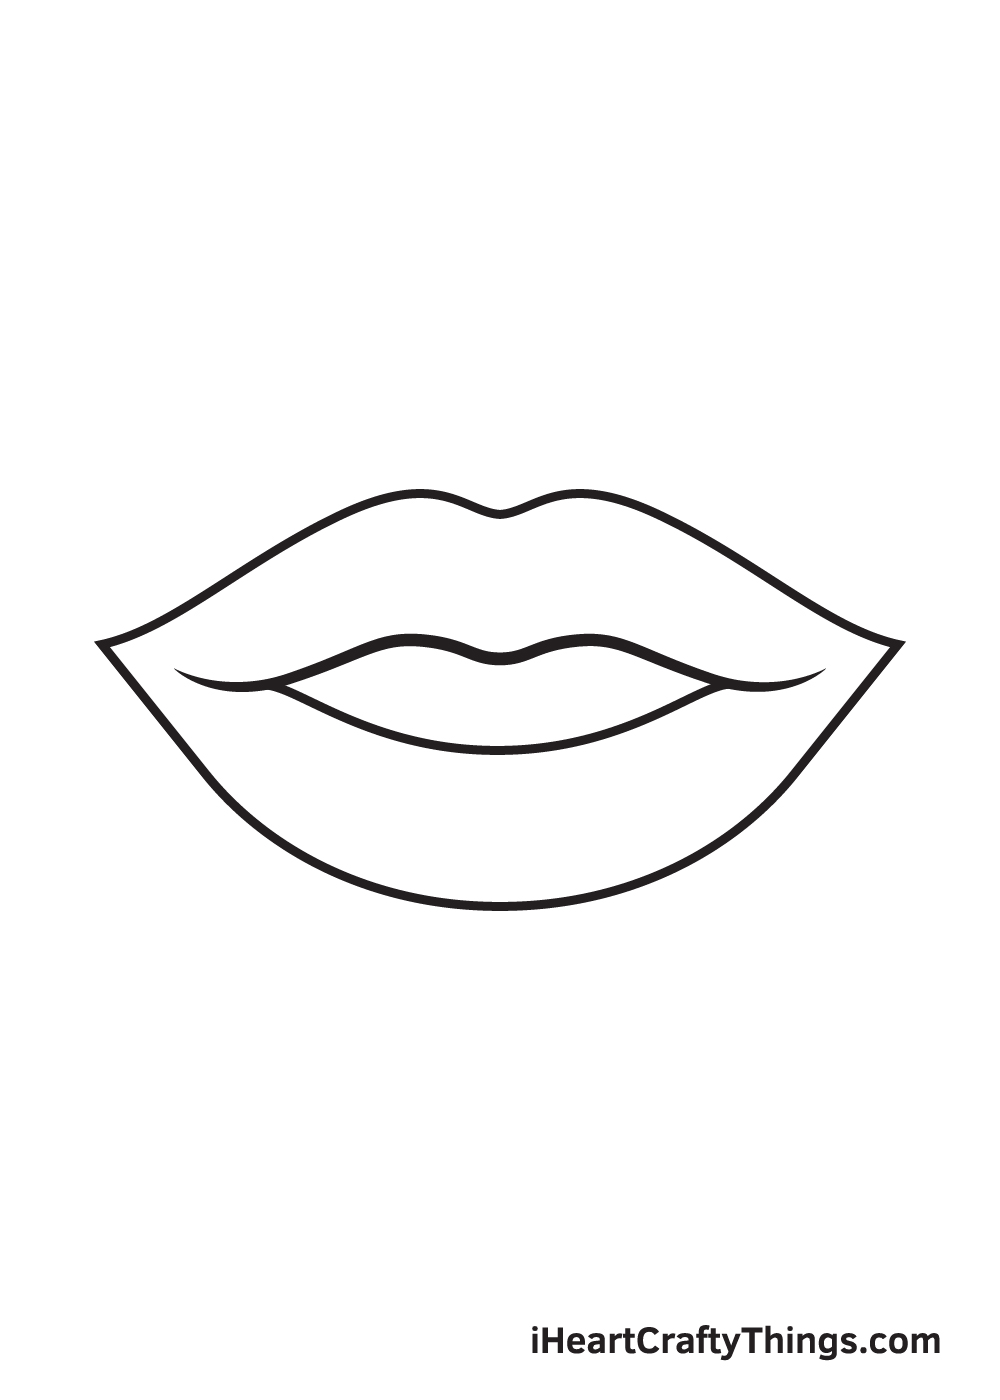
Increase the length of the line we drew in the previous step until you reach the opposite end of the upper lip, forming the tubercles on the bottom lip.
This also creates a division between the upper lip and the bottom lip.
Step 8 – Next, Draw the Teeth Inside the Mouth
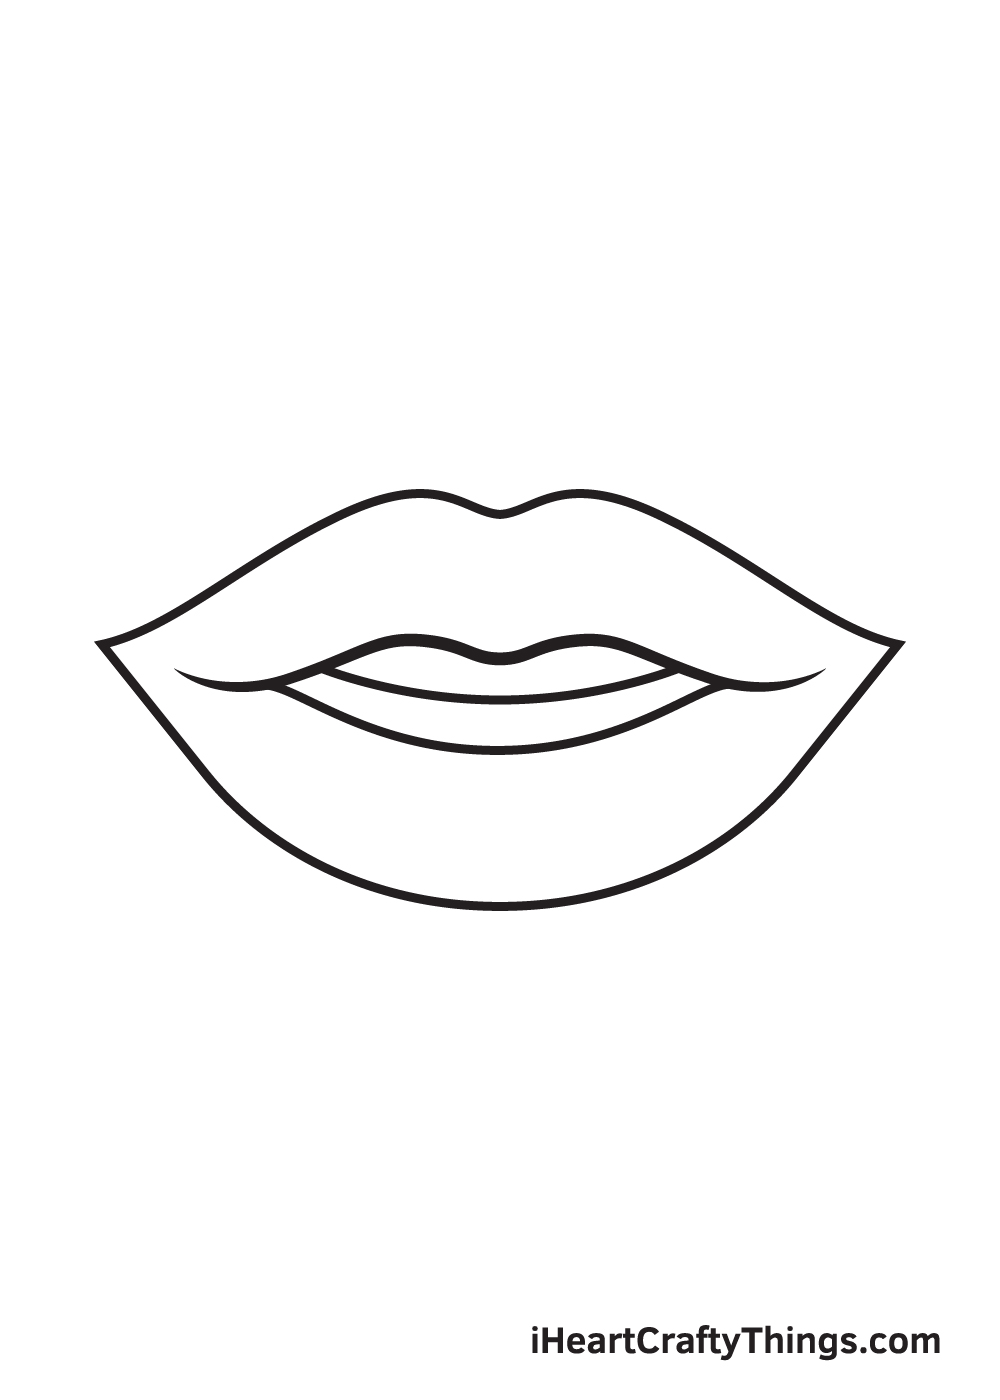
Draw a slightly curved horizontal line within the outline we drew in the previous step.
This creates the teeth inside the mouth.
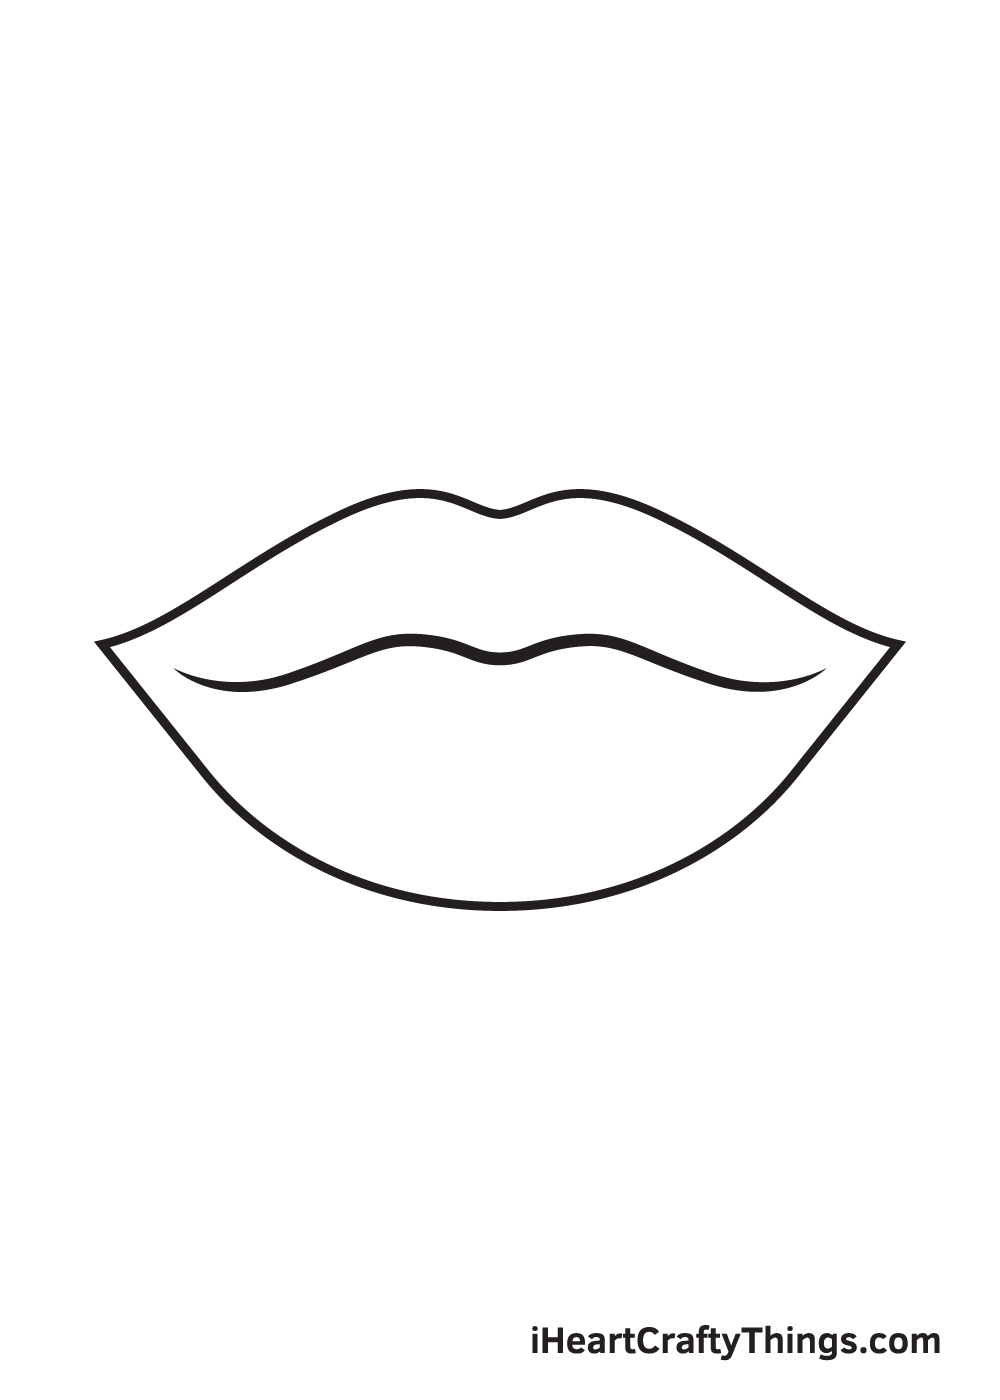
Step 9 – Add Texture on the Surface of the Lips
A human’s lips have a distinct texture to its surface, so make sure to add lines on it. These lines are essential especially if you’re aiming to draw a realistic looking human face.
Proceed by drawing multiple curved lines on some parts of the edge of the lips. Typically, these lines exist on the edge of the lateral tubercles of both the upper and bottom lip.
Avoid pressing down too hard with your pencil when drawing these lines. It’s important to draw light strokes to make the lines look more natural and realistic.
Now that we have successfully drawn the lips, it’s finally time for the most enjoyable part, which is picking the colors and coloring the lips.
Without lipstick, the color of the lips varies greatly depending on one’s complexion. That means, you can color the lips using any colors you like!
You can even apply a vibrant lipstick on it to make it look even more colorful!
Bonus: Make Your Drawing Even More Unique
In this guide on how to draw lips, we went for a pretty standard interpretation of what we would imagine lips to look like. As you will know from your own life, lips can come in all manner of shapes and sizes.
Now that you have drawn these lips, you can take what you have learned in this guide and use the tips to design some different variations. One way you can start this process is with the people around you.
You could look at the lips of your family and friends and try to identify what makes them different and unique. Try to pay attention to the general shape and the way each individual uses their mouth to form expressions.
You can even use a mirror and look at your own lips if your friends and family don’t want you staring at their mouths. You can try out different poses and expressions and then try to recreate them in your picture.
You could change the outer shape of the lips, or add some subtle details to make them more unique. Adding different colors to suggest different lipstick colors would also make for a fun touch.
Adding details like moles or beauty spots can also make a big difference, and you could even draw the entirety of the face these lips belong to.
These are just a few ideas, but you can see how some simple changes can bring a whole new look to this drawing of lips.
Remember that you can also use various coloring tools and art supplies to make the colors look more unique as well. What are some ideas you have to make this drawing look even more cool and special?
We can’t wait to see what you decide to do to make this drawing even better!
3 More tips to make your lips drawing easy!
Read our lips as we tell you 3 more ways to make this drawing as easy as a smile!
Learning how to create a lips sketch can be a lot harder than you might think, as there are very specific shapes and details that need to look right.
Whenever you are drawing something real, you can make it easier by looking up photos of whatever it is that you’re drawing.
When it comes to lips, you have a model at hand, as you can take a photo of your own lips and use them to help you with your drawing.
Otherwise, there are tons of photos that you can find online to help you!
The simplest tip we can offer to make this lips drawing easy is a small suggestion but one worth keeping in mind.
It’s as simple as suggesting that you don’t treat it as a race but take your time with it. It can be easy to get excited and start rushing through, and that’s a great way to make mistakes.
If you take it slowly and focus on each individual step as you go. That way you will be less likely to be stuck on any individual step! It may seem obvious, but it’s something that can easily be forgotten.
When working on this guide on how to make a lips drawing, it can be tempting to just grab your pen and start working on the steps.
That can work if you’re really careful, but you don’t want to land up in a situation where you’re right at the end and then make a mistake.
That’s why we suggest using a light pencil to draw instead of going straight for the pen. That way you can erase any mistakes as you go without losing work.
When you’re happy with it, simply use your pen to draw over the lines and then erase the leftover pencil.
Be sure to let the pen ink dry entirely before you start erasing though, as you can smudge the ink if you’re not careful.
Your Lips Drawing is Complete!
We hope you enjoy this step-by-step lips drawing tutorial. Whether you’re a beginner or expert in drawing, we’re sure you were able to follow the steps quickly and easily.
Now that you are capable of drawing lips, you’re one step closer towards drawing a realistic portrait of a human face.
We are uploading brand-new drawing tutorials on a regular basis, so make sure you keep re-visiting our website for your drawing activity resources and learning materials.
Which part of the human’s face would you like to learn how to draw next? Let us know and we’ll do our best to curate a tutorial for it. We always aim to deliver our beloved reader’s requests.
As soon as you finish drawing and coloring the lips, take a photo of your masterpiece and share it on our Facebook page and on Pinterest.
Don’t be shy! You’ve worked hard to create a work of art, so we can already tell for sure that it looks incredible!
We can’t wait to see your awesome lips drawing!