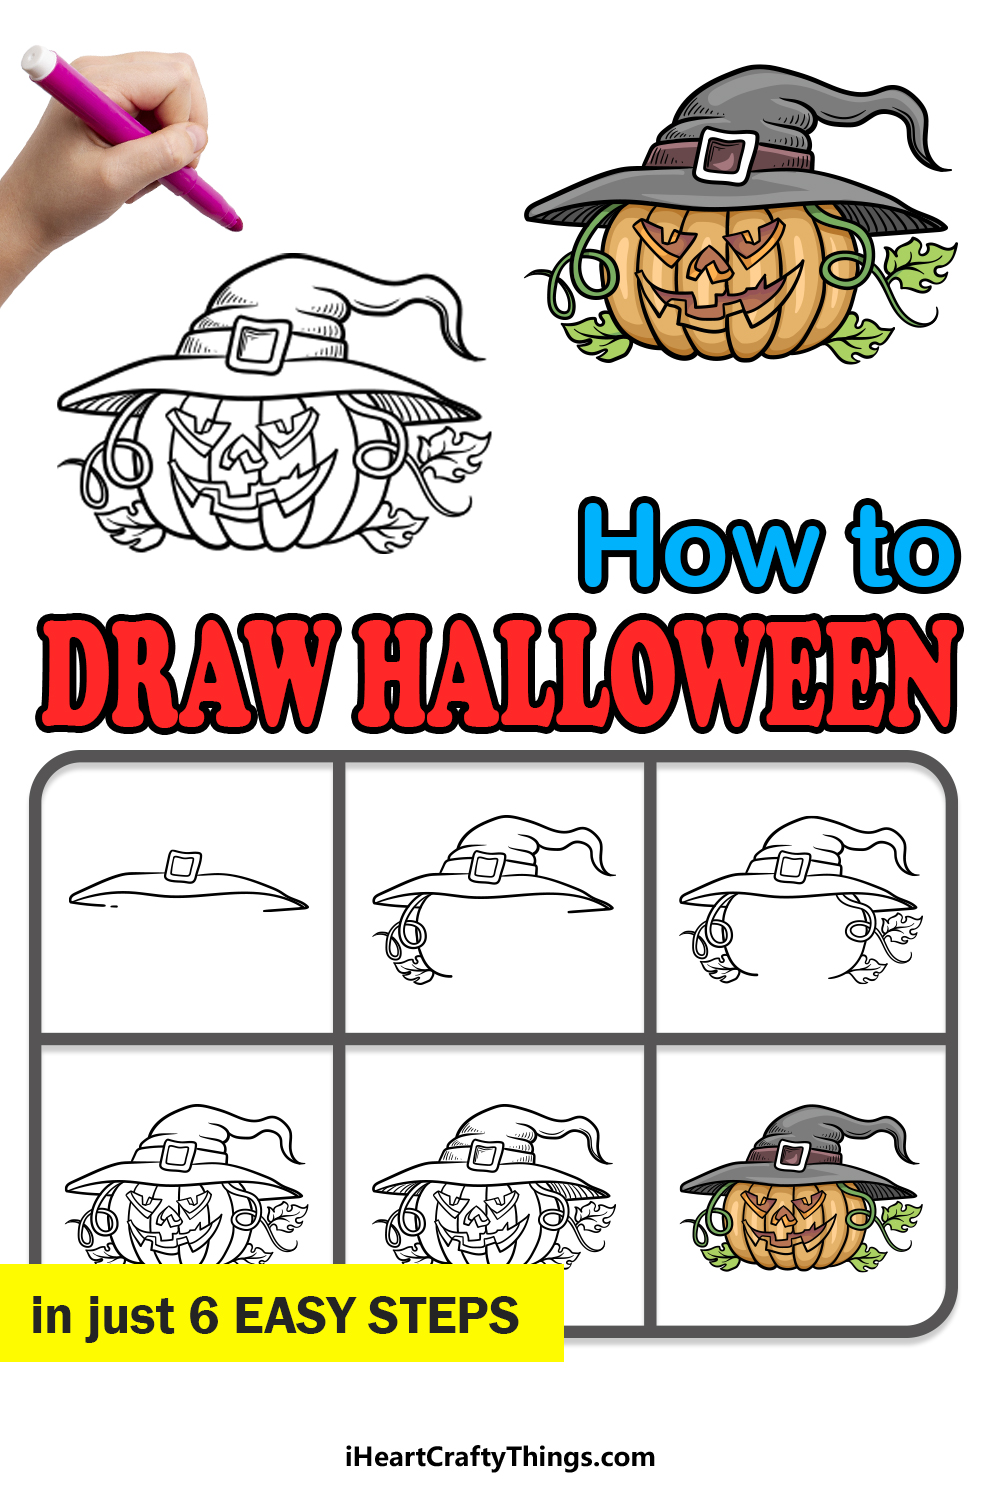
Crafting a drawing of Halloween is easier than you think with this step-by-step guide for kids! Follow along with me as we work together to learn how to draw Halloween.
Halloween is my favorite time of the year, as I love to see what kinds of scary decorations people put up in their neighborhoods.
Few decorations are as iconic to Halloween as the jack-o-lantern, and it’s a common theme in artwork related to the occasion. If you want to create some spooky Halloween art, this is the right place for you.
The design we have for you features a grimacing jack-o-lantern complete with a witch’s hat. Once it’s done, it will make everyone think of Halloween!
Even though it looks complicated, you’ll see just how simple it is to recreate this design, as we’ve broken it down into some simple steps for anyone to follow. Get ready to create a spook-tacular Halloween drawing as we begin!
Watch This Simple Guide On How To Draw Halloween
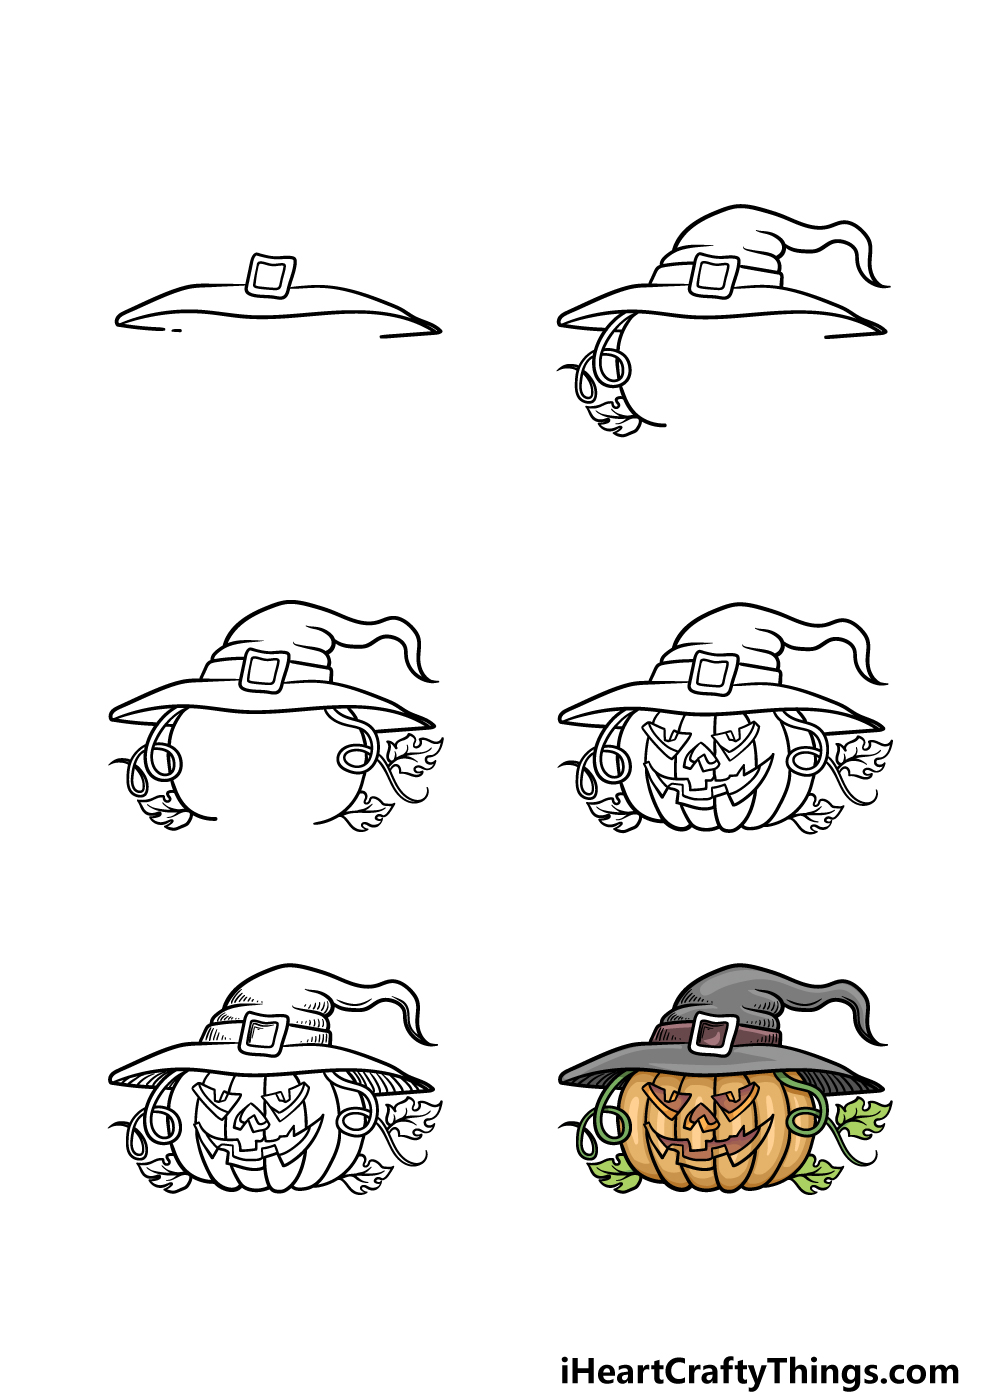
How to Draw Halloween – Let’s get Started!
Step 1
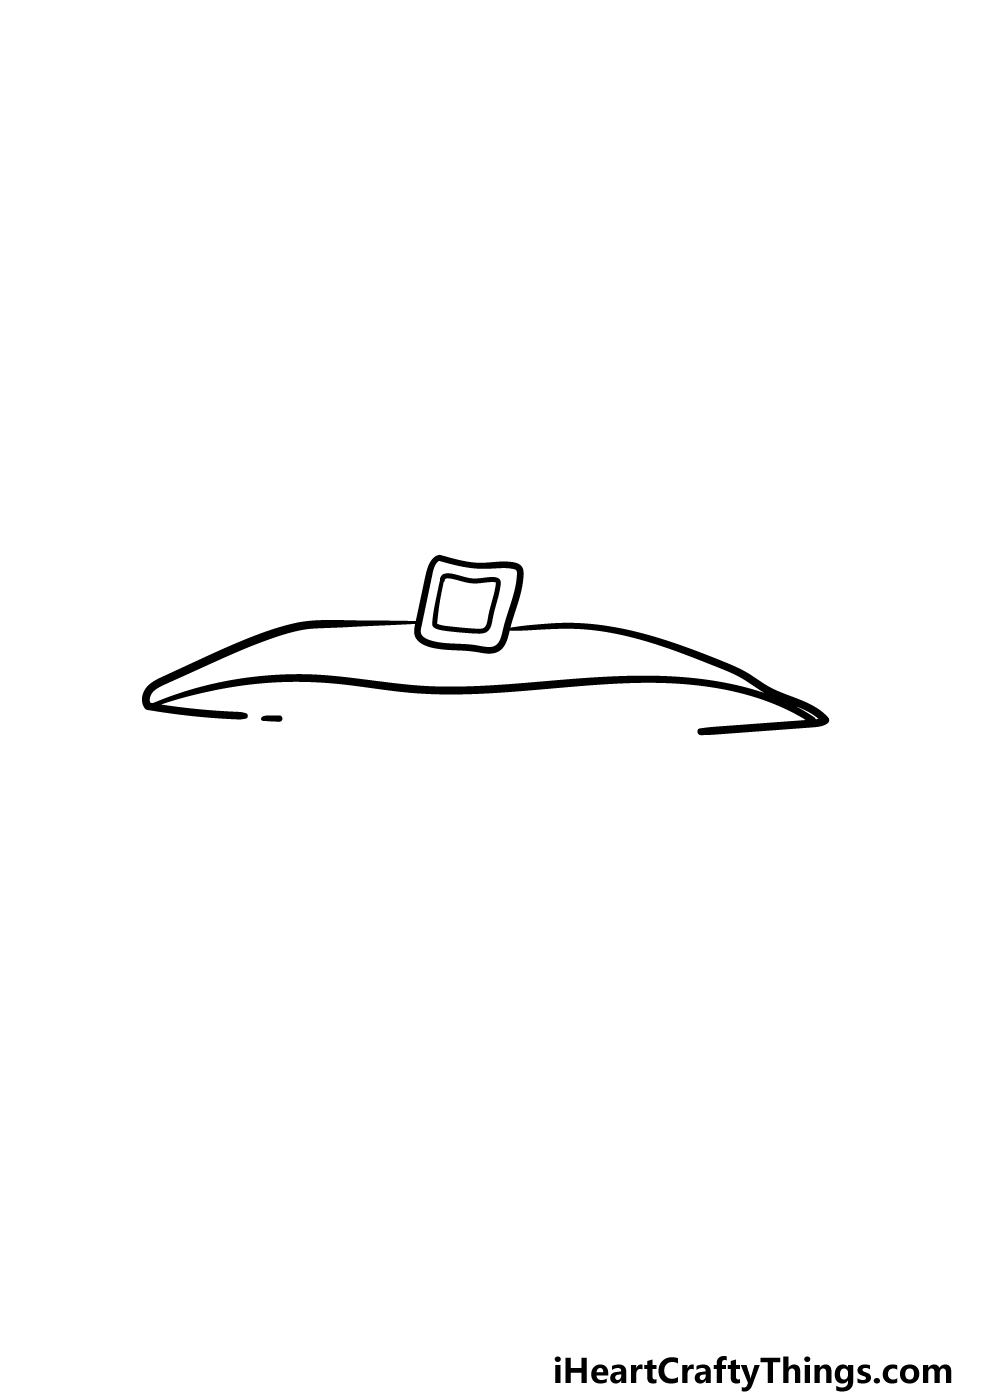
What could be more Halloween than a jack-o-lantern wearing a witch hat? If you answered “nothing” then you’re correct!
That is exactly what we will be drawing for this first step of our guide on how to draw Halloween.
You can start by drawing a small square shape, and then draw another square around it. This will serve as the buckle of the band around the witch hat.
Then we can start with the rim of the witch hat! You can use some curved lines for the rim of the hat, and then draw them curving inward for the bottom of the rim.
The reference image will show you what we mean if that sounds confusing, so once you have replicated the lines in our example then you’re ready to go to step 2.
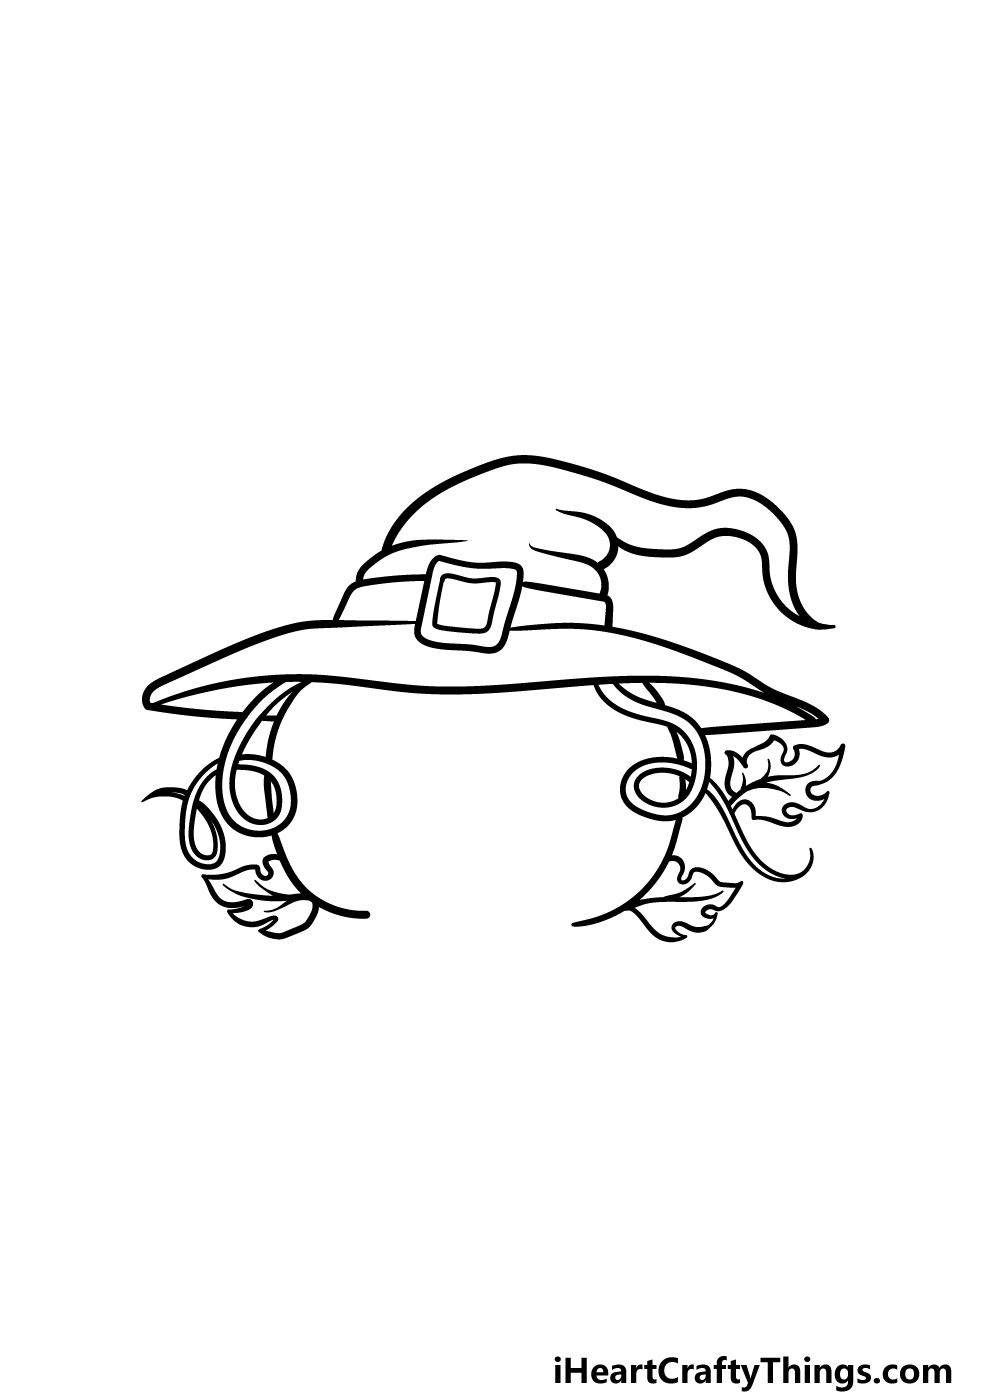
Step 2 – Next, start drawing the rest of the hat and the pumpkin outline
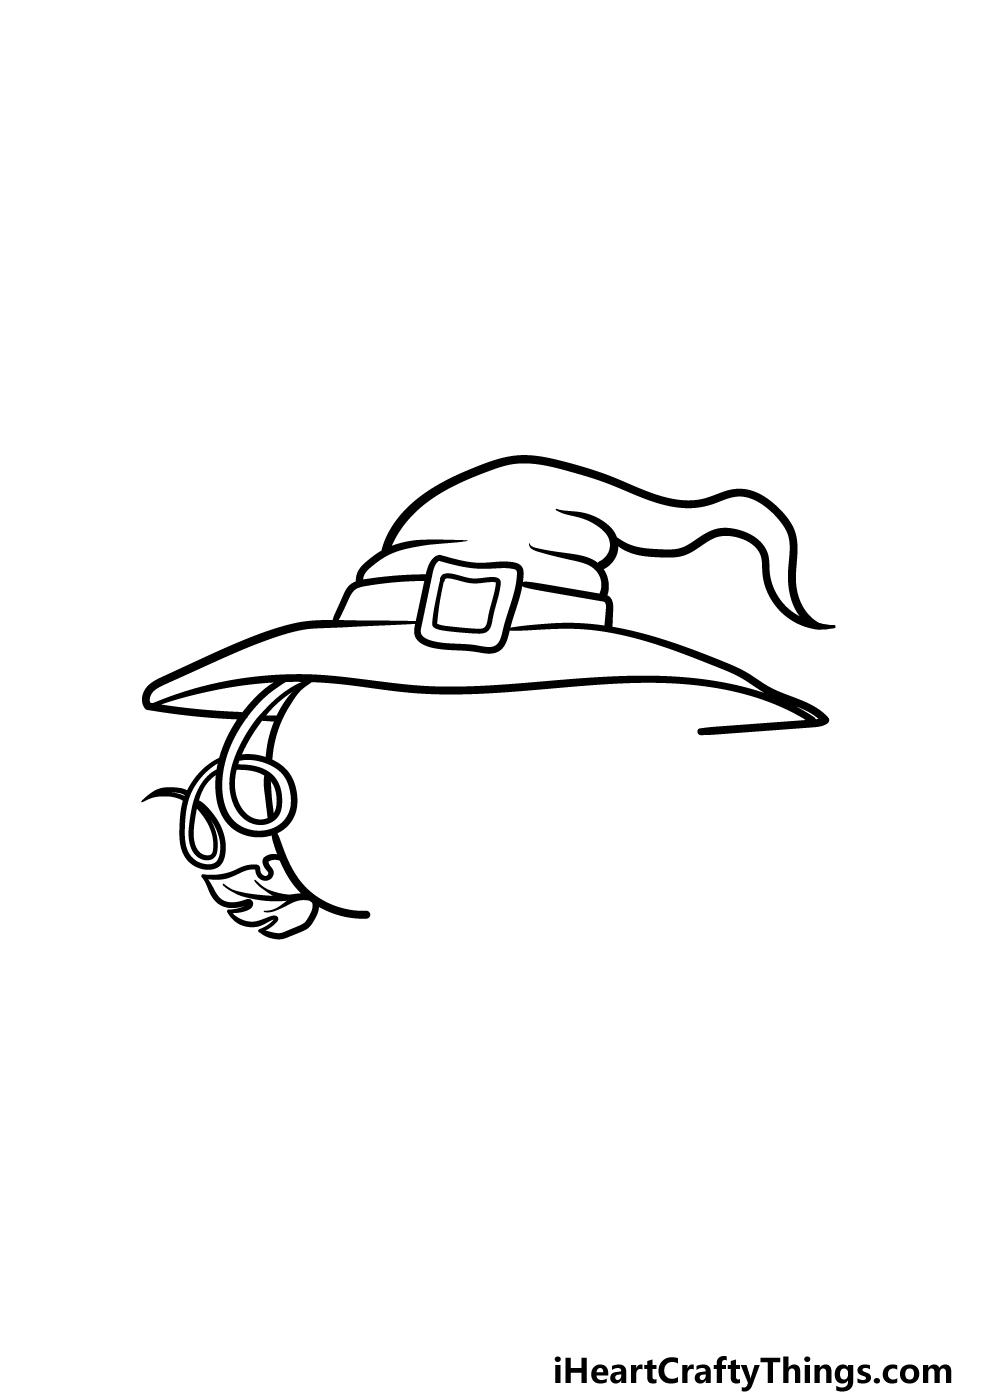
Now we can start to draw more of the hat and begin the pumpkin for your Halloween drawing. Let’s start with the hat first!
Use some straight lines coming horizontally off the buckle for the strap around the hat. Then you can use some curved and wavy lines for the tip of the hat bending over on itself.
Now it’s time to start the pumpkin! Start by drawing some twisty lines coming down from inside the hat for one of the vines of the pumpkin.
Then, use a rounded line for the left-hand side of the pumpkin, and then add a small leaf at the base.
Step 3 – Now, draw the other side of the pumpkin
In this third step of our guide on how to draw Halloween, we will be drawing the other side of the pumpkin. This side will look very similar to the one on the left, with just a few differences.
First, draw another twisty vine coming down from this side, and you can add a leaf to this vine for one of those differences.
The rest of this side will be pretty much the same as the other side, so use a curved line for the right side of the pumpkin and add another leaf at the base.
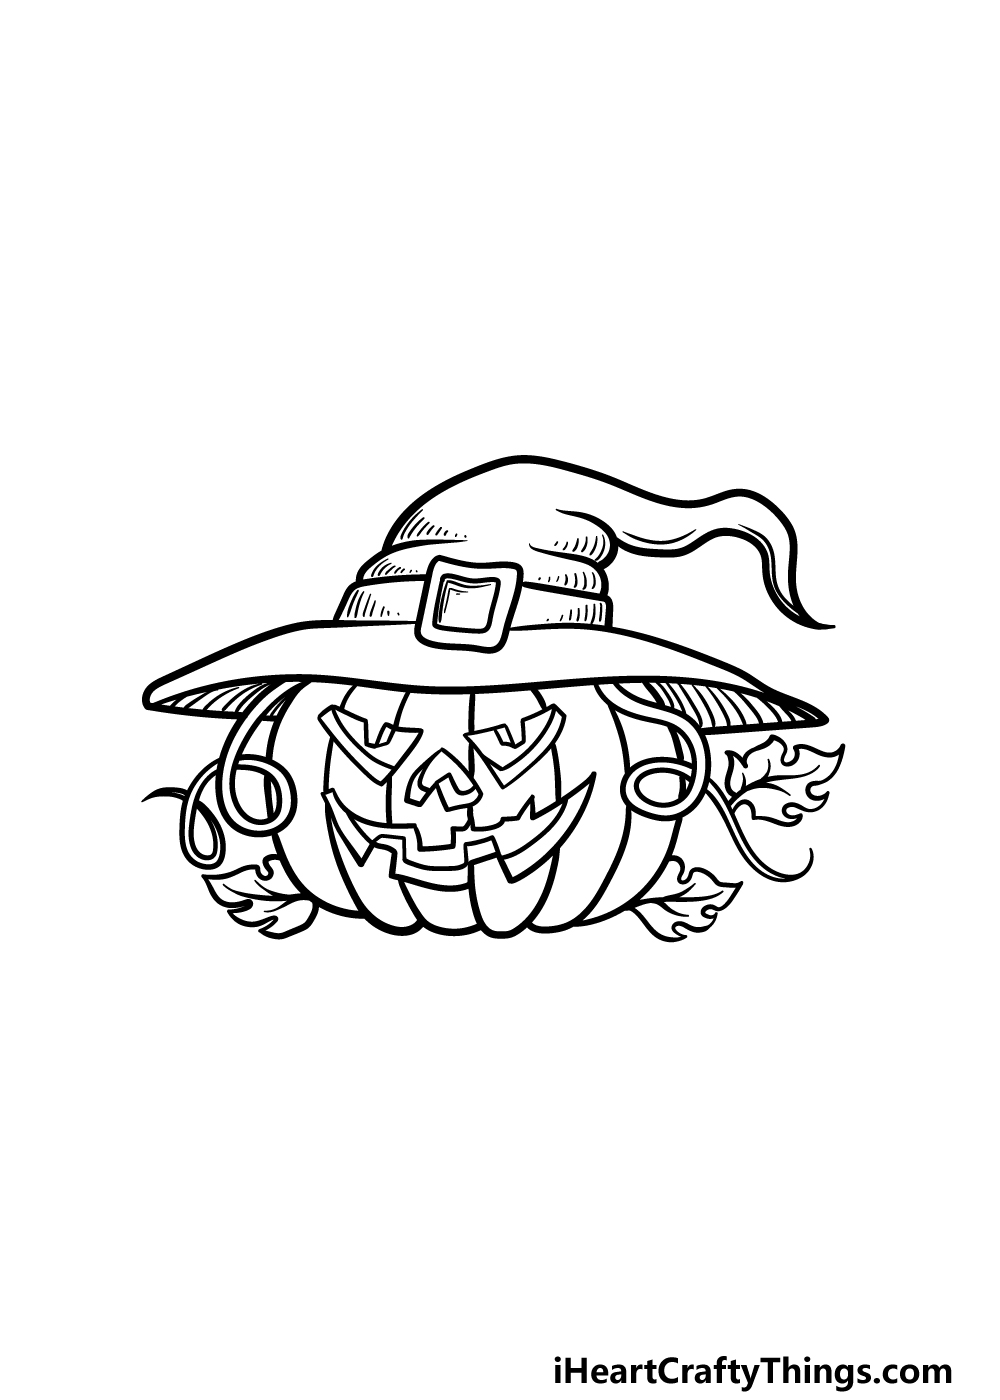
Step 4 – Next, draw the face and segments of the pumpkin

It wouldn’t be much of a jack-o-lantern without the face, so we shall be adding that in this part of the Halloween drawing.
The face is composed of the eyes, nose and grinning mouth, and as you can see in the reference image these will all be drawn with very angular lines to make them look carved.
You can also draw some lines in the interior of these shapes to make them look like they’re carved into the thick pumpkin.
Then, finish off this step by adding some curved lines for the segments of the pumpkin. There are just have a few final details to add in the next step, so let’s move on!
Step 5 – Now, finish off your Halloween drawing
In this step of our guide on how to draw Halloween, we will be finishing off some final touches to make it look even better.
The details we are adding will be subtle yet effective! Add some thin lines onto the hat for some shading detail, and then add some more to the underside of the hat.
Then you’re ready to move on to the final step! Before you do, you could also add some details of your own to finish it off.
There is a lot you can do here, and this is your chance to show what your perfect Halloween setup is! You could draw some candy, decorations or spooky ghosts and ghouls for a few ideas. How will you finish off this drawing?
Step 6 – Finish off your Halloween drawing with some color
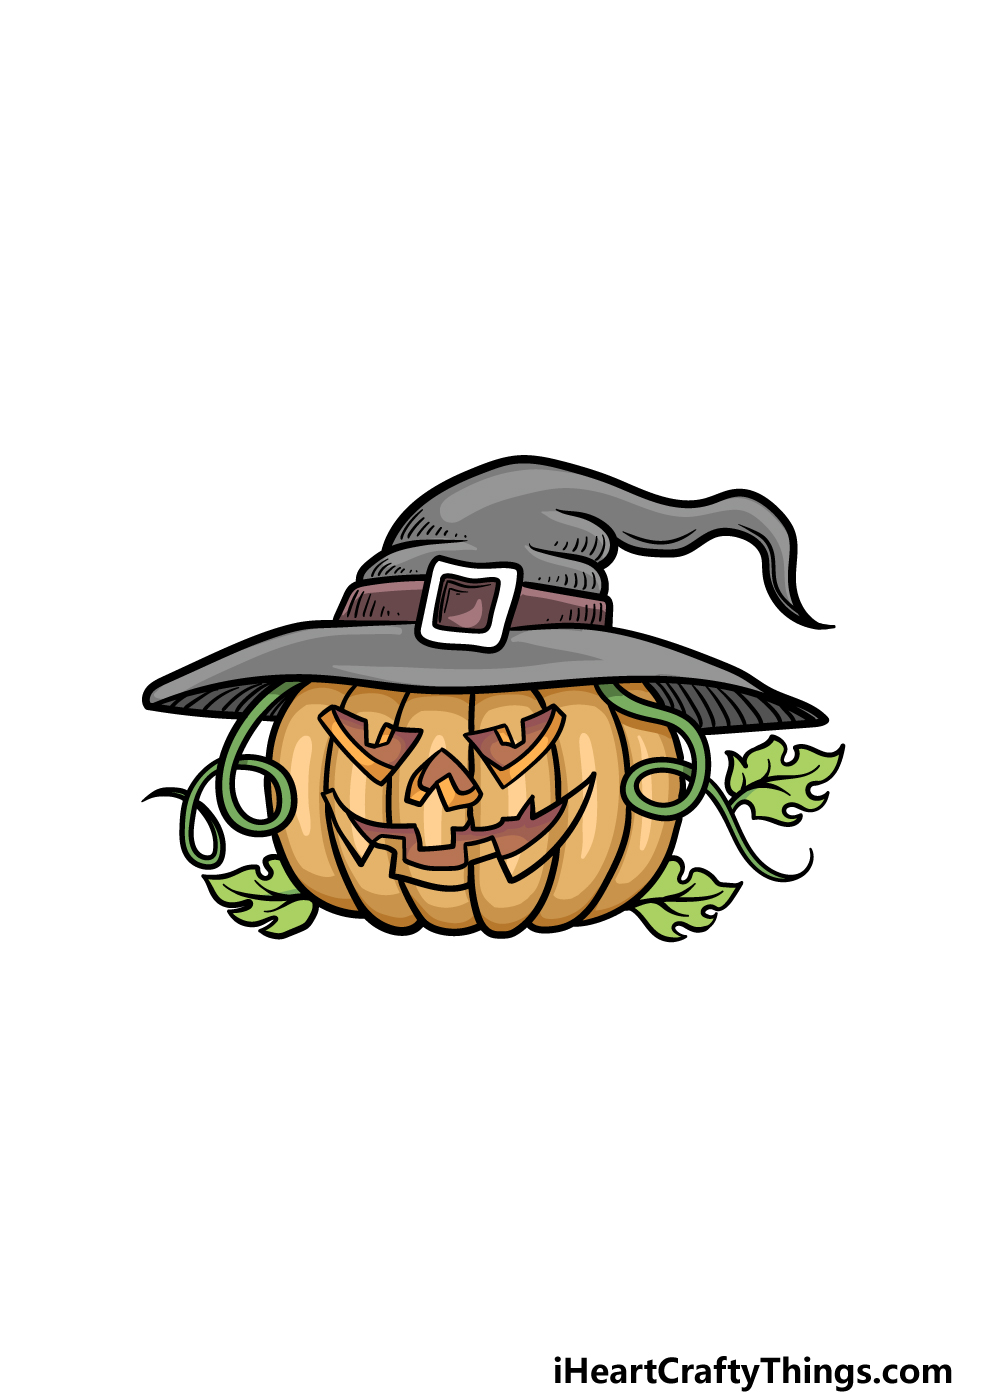
This step of your Halloween drawing will be all about bringing it to life with some color! We used some orange, greens, greys and browns for our image, but these colors are just a suggestion.
There are so many incredible colors you could go for, and this is your chance to unleash your Halloween creativity!
Depending on the kinds of colors you would like, you can also play around with various art mediums to achieve them.
For brighter colors, you could use some acrylic paints or colored pens and markers for a few suggestions.
More muted tones can be achieved with some mediums such as colored pencils or watercolors, so there are many options at your disposal! What colors and mediums will you use to finish off this image?
Bonus: Represent Some Other Celebrations In This Halloween Drawing!
For many people, Halloween is their favorite holiday celebration of the year. It’s an excuse to get dressed up in some cool costumes, put up spooky decorations and enjoy some tasty treats.
Some other people may prefer celebrations more, however. There are others who simply love all the various holidays and celebrations that we enjoy throughout the year.
If you’re one of those people that can’t choose between all of them, this extra step is for you! We think it would be fun to represent some other holidays in this Halloween drawing.
First, you would want to choose the holidays you want to represent. For argument’s sake, let’s use Christmas, Easter and Valentine’s Day as examples.
Together with Halloween, this gives us 4 holidays. You could separate the picture into a grid of 4. Then, we could have elements of all of these holidays in the image.
So, let’s look at the examples we provided. For Christmas, you could maybe have some stockings and Christmas presents.
Then for Easter, you could draw some colorful Easter eggs and maybe add a bunny. Lastly, for Valentine’s Day you could have a heart-shaped box with some hearts floating around.
These are some simple examples, but they show you how you can represent some of your favorite holidays in this image. If you can think of any others, then they could be added as well.
Another way you could do it would be by making separate images for each holiday you can think of. Each one could even be turned into a greeting card pertaining to each holiday.
This would give you a cool card to give to someone when each holiday rolls around! What are some other celebrations you coud commemorate?
Do this to take your Halloween drawing to the next level
There is nothing spooky about these tips we have for this Halloween sketch.
There are so many details to admire on this Halloween drawing we have created together, but we could add even more around it!
A pumpkin is a common sight on Halloween, but you could add many more decorations.
These could include some fake bats, snakes and other creepy creatures. Or you could add some cobwebs and skulls.
These are just a few ideas for some smaller decorations you could add, but what else can you think of?
Once you have added these smaller decorations, you could then add some bigger ones. There are so many different ghouls and creepy characters that are common to see around this scary holiday.
You could draw some ghosts, zombies or even a skeleton rising from the ground. These could be made to look like fake versions, but maybe they could even be real!
It all depends on the kind of scene you would like to create here.
What are some other creeps that would make this drawing of Halloween even more wonderfully creepy?
Next, it would be fun to finish off this Halloween sketch by adding the rest of the background. We have added lots of decorations, so now it’s time to decide where this Halloween setup is.
It could be in front of a house for trick or treaters to admire. Or, maybe this could be in a spooky graveyard with ghosts and ghouls frolicking around.
There are so many background ideas to choose from, so what will you go for?
Finally, the colors you choose will have a big impact on the kind of feeling you want to create. We shall cover a few more options for this Halloween drawing!
First, if you want a colder, spookier feeling then you can keep the colors lighter while using mediums like colored pencils or watercolors.
For a more vibrant feel, colored pens, markers and paints would be a great alternative to make the colors pop.
Your Halloween Drawing is Complete!
You have reached the end of this guide on how to draw Halloween, and you have a super spooky image to show for it!
We hope that this guide made it fun and easy for you to capture the spirit of Halloween in a creative way.
Our goal with this guide was to make it so that drawing this picture wouldn’t be a scary experience for you at all!
Now you get to be in charge as you add your own final details, elements and additions to the mix.
We mentioned a few ideas you could go for earlier on such as drawing some more Halloween decorations and characters, but what else can you think of to finish off this picture?
Once you’re ready for more drawing fun, you can find plenty more incredible drawing guides on our website!
We have guides covering many different topics, and we have many more coming your way. Be sure to check our website to never miss out!
We would love to join the scary fun by enjoying your awesome Halloween drawing! You can let us take a look by sharing it on our Facebook and Pinterest pages.