Grizzly bears are some of the most majestic animals in nature.
These large beasts may look kind of cute at first, but they can be rather dangerous and ferocious, and they are considered to be apex predators.
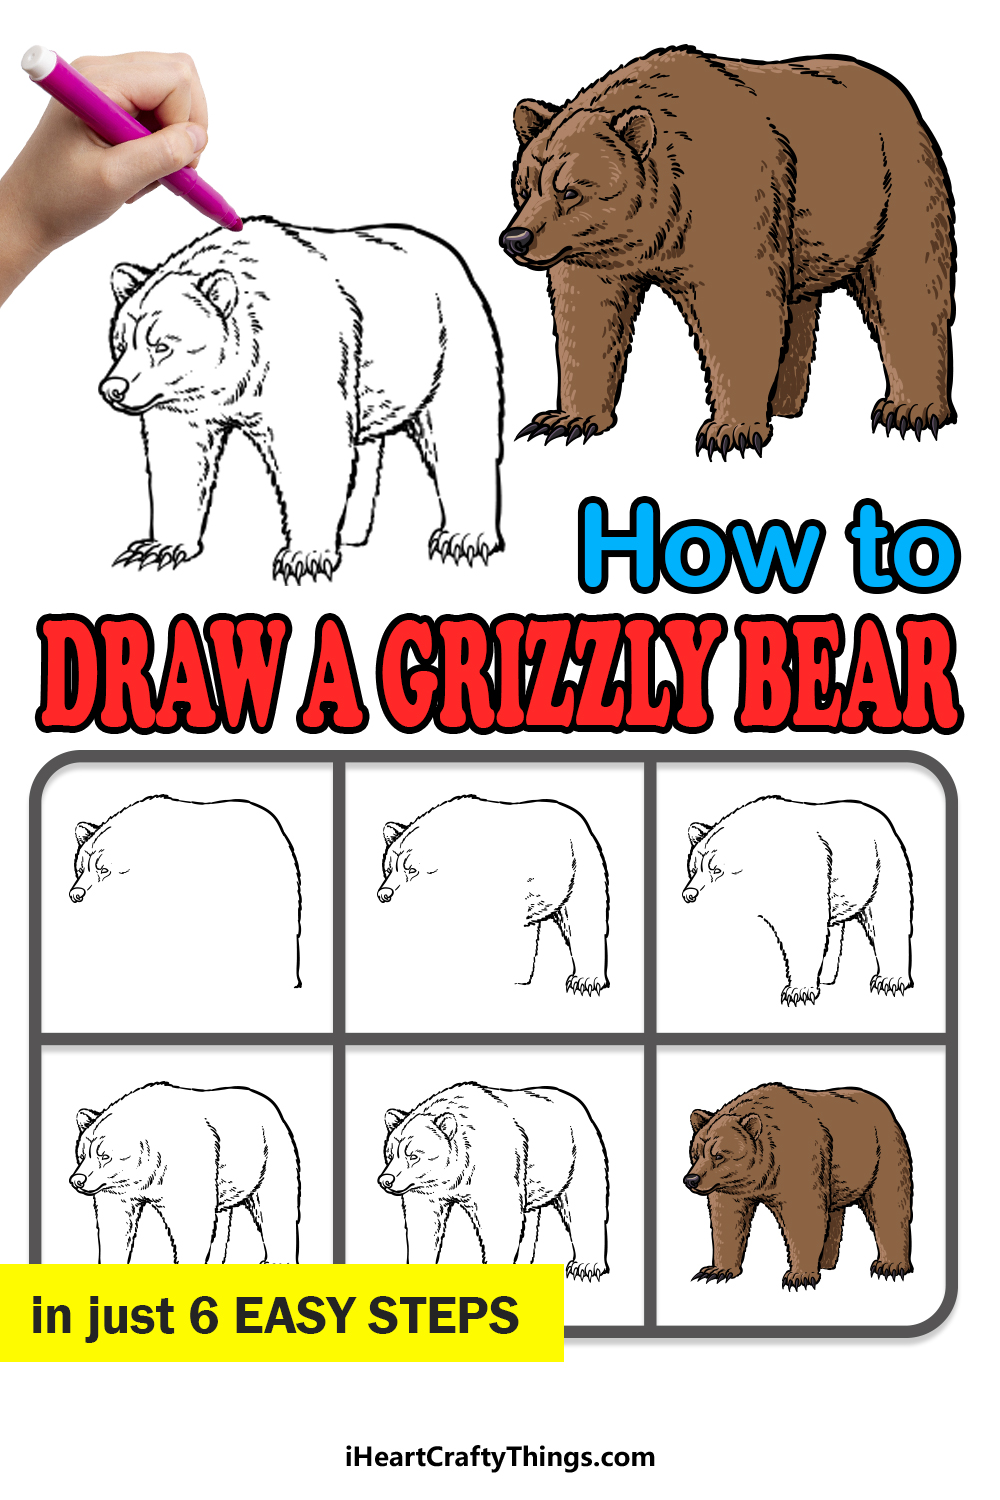
Even though they can be dangerous, they are still a beautiful species, and learning how to draw a grizzly bear is the best way to create some amazing artwork featuring this creature.
If you love grizzly bears, then this will be the perfect guide for you. You’ll definitely want to read all the way through to see how it’s all done!
Please enjoy our step-by-step guide on how to draw a grizzly bear in just 6 easy steps.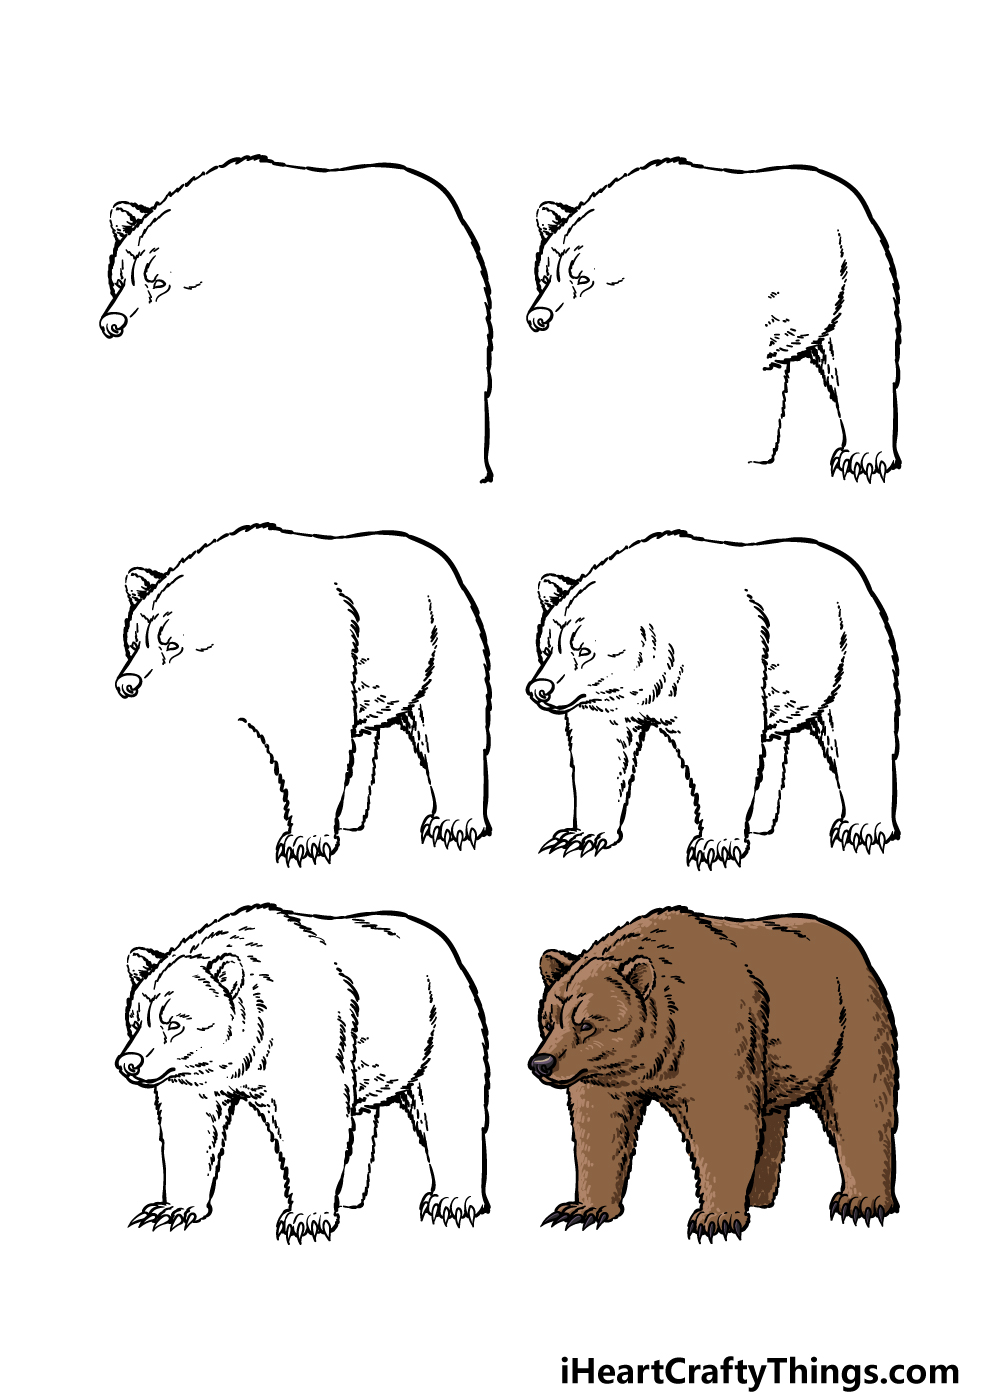
How to Draw A Grizzly Bear – Let’s Get Started!
Step 1
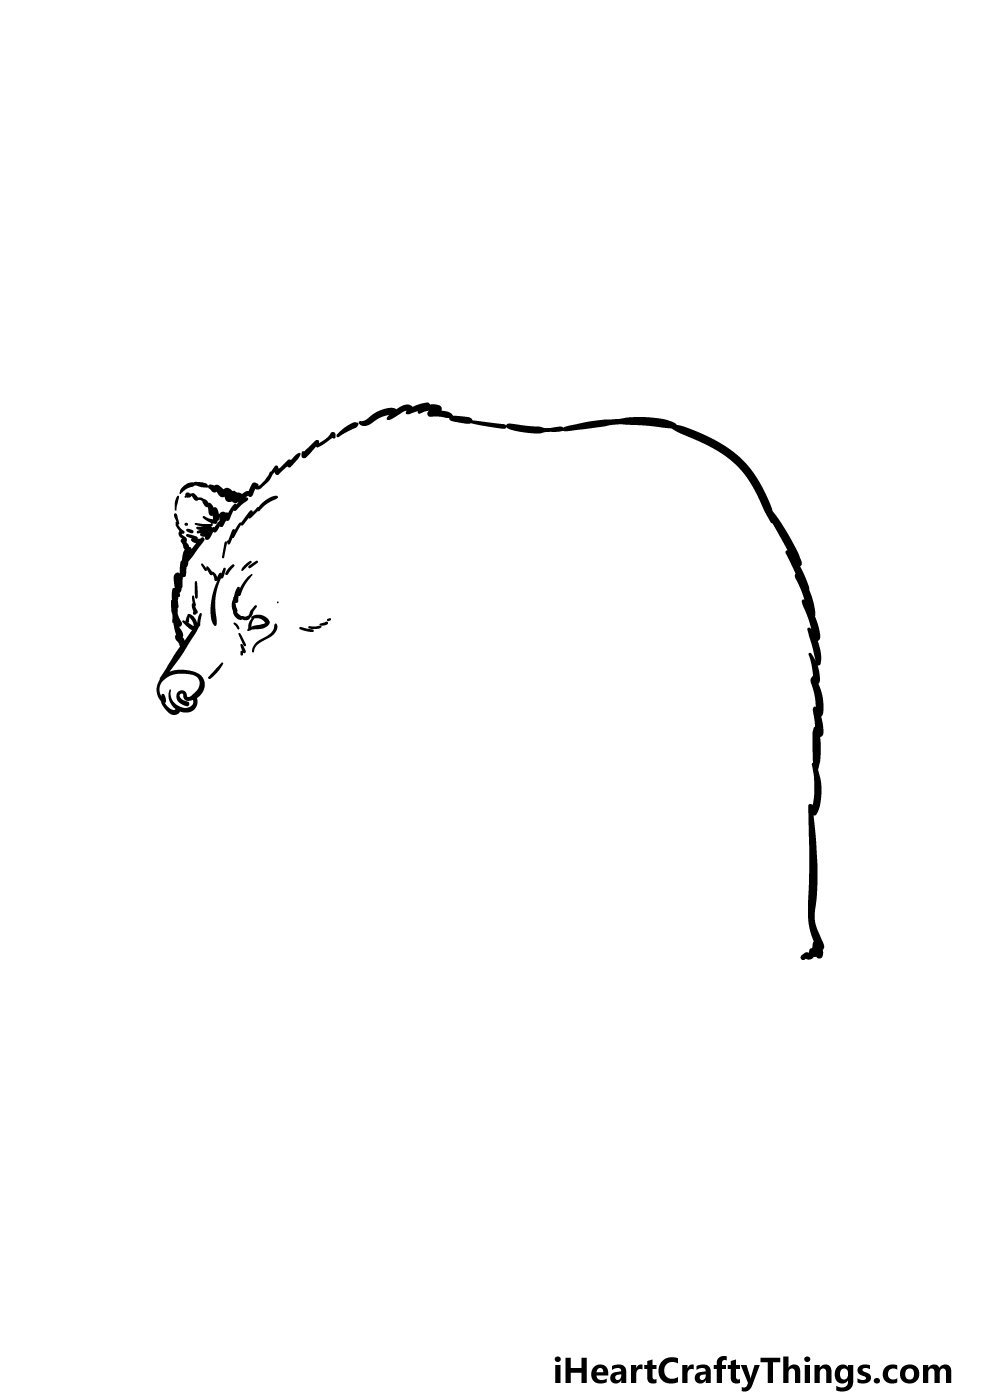
To begin this guide on how to draw a grizzly bear, we will start with the face of the bear and move towards the back of it as well.
First, start by drawing a smooth, fairly short line for the muzzle of the grizzly bear. You can then use some intricate curved lines for the large nose at the end of it.
Then we shall draw some smaller lines around the face for some details such as the small eyes.
You can then extend the head backward for the outline, and for this line we will be using a more jagged line to make it look furrier.
This jagged line will extend backward from the head to create the back, and then it will round downwards to form the back of the back leg. Finally, finish off by drawing a small, round ear on top of the head.
Step 2 – Now, draw the rest of the back leg and start the belly
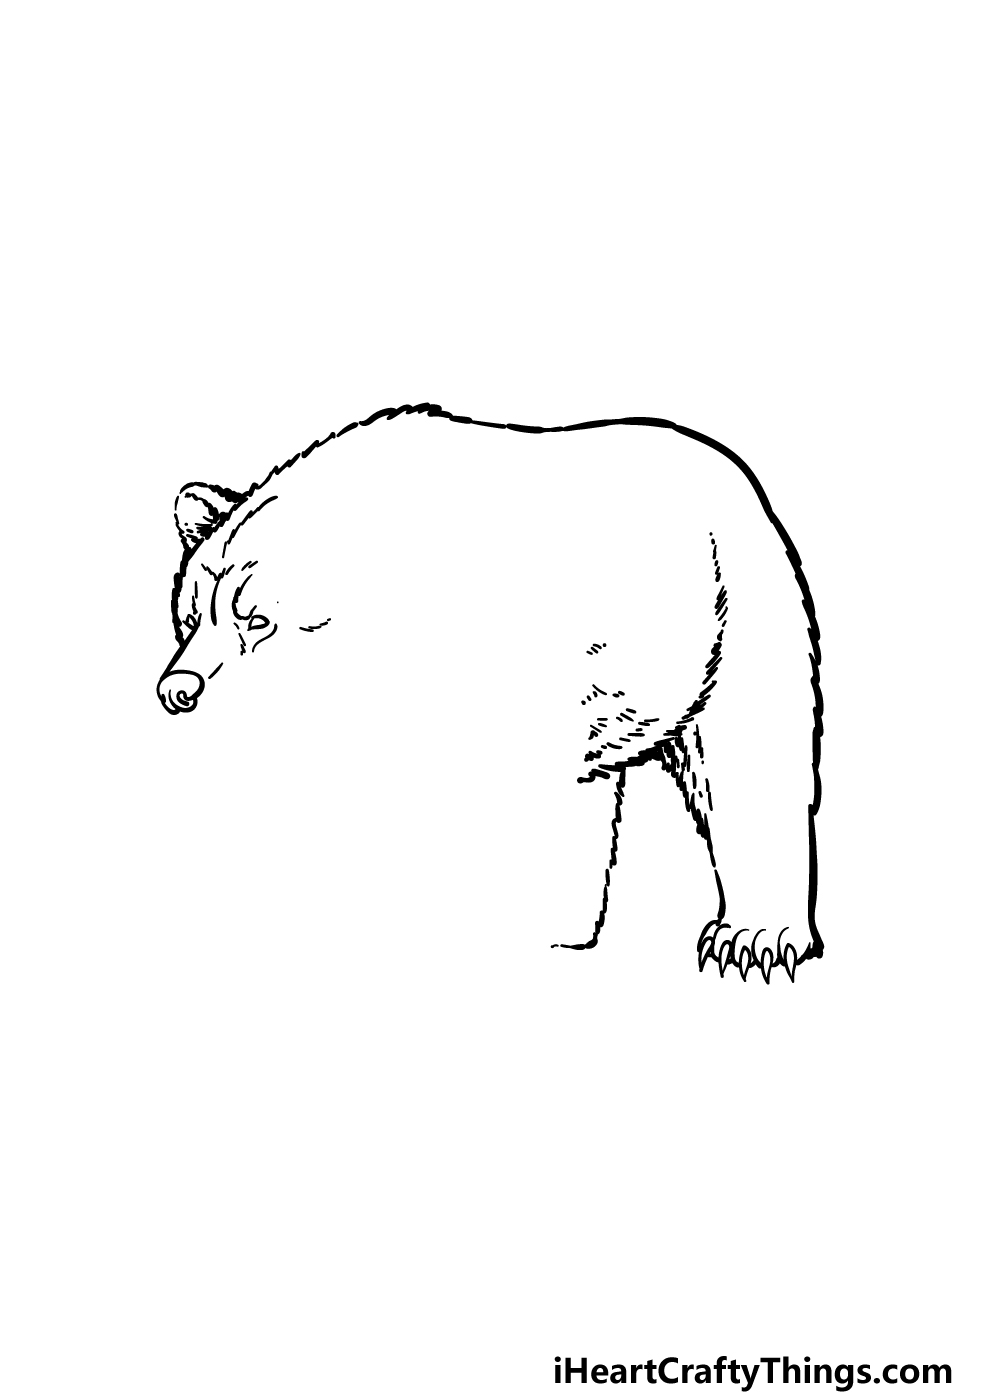
Now you’re ready to continue with this grizzly bear drawing by adding the rest of the back leg along with some of the belly for the bear.
You can start by drawing some small, curved lines for the toes with sharp claws at the base of the foot. Then you’ll be using some more of those furry, jagged lines for the front of this leg.
Once that leg is drawn, the next thing to do will be drawing some more lines to create the hairy belly of the grizzly bear curling out from the leg. Finally, draw another furry line for the back of the other back leg.
That’s all there is to it for this step, and now you’re ready for part 3 of the guide!
Step 3 – Next, draw the first front leg for the grizzly bear
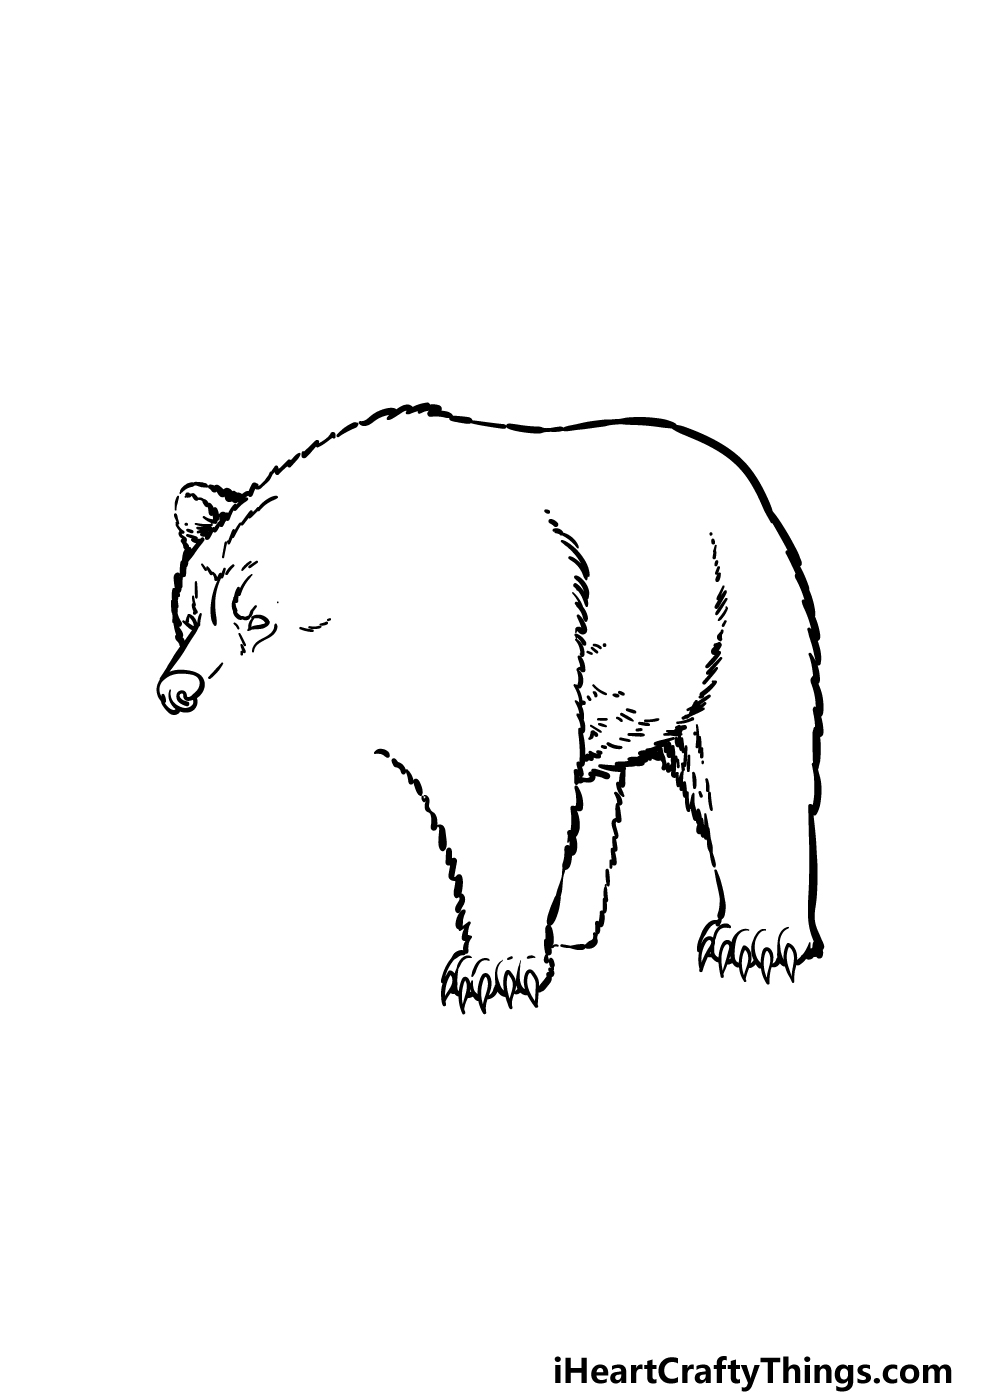
For this third step of our guide on how to draw a grizzly bear, we will be adding the first front leg for it.
This front leg will be drawn with the same jagged, furry line you’ve used for a lot of the grizzly bear, and the shape of this front leg will be pretty similar to the back ones.
It will have a fairly thick base with a back line that extends further up than the front line. The base of the leg will also end in some sharp-clawed toes as the other legs did.
In the next few steps, we will add the remaining leg along with some final details and touches.
Step 4 – Draw the final leg for the grizzly bear
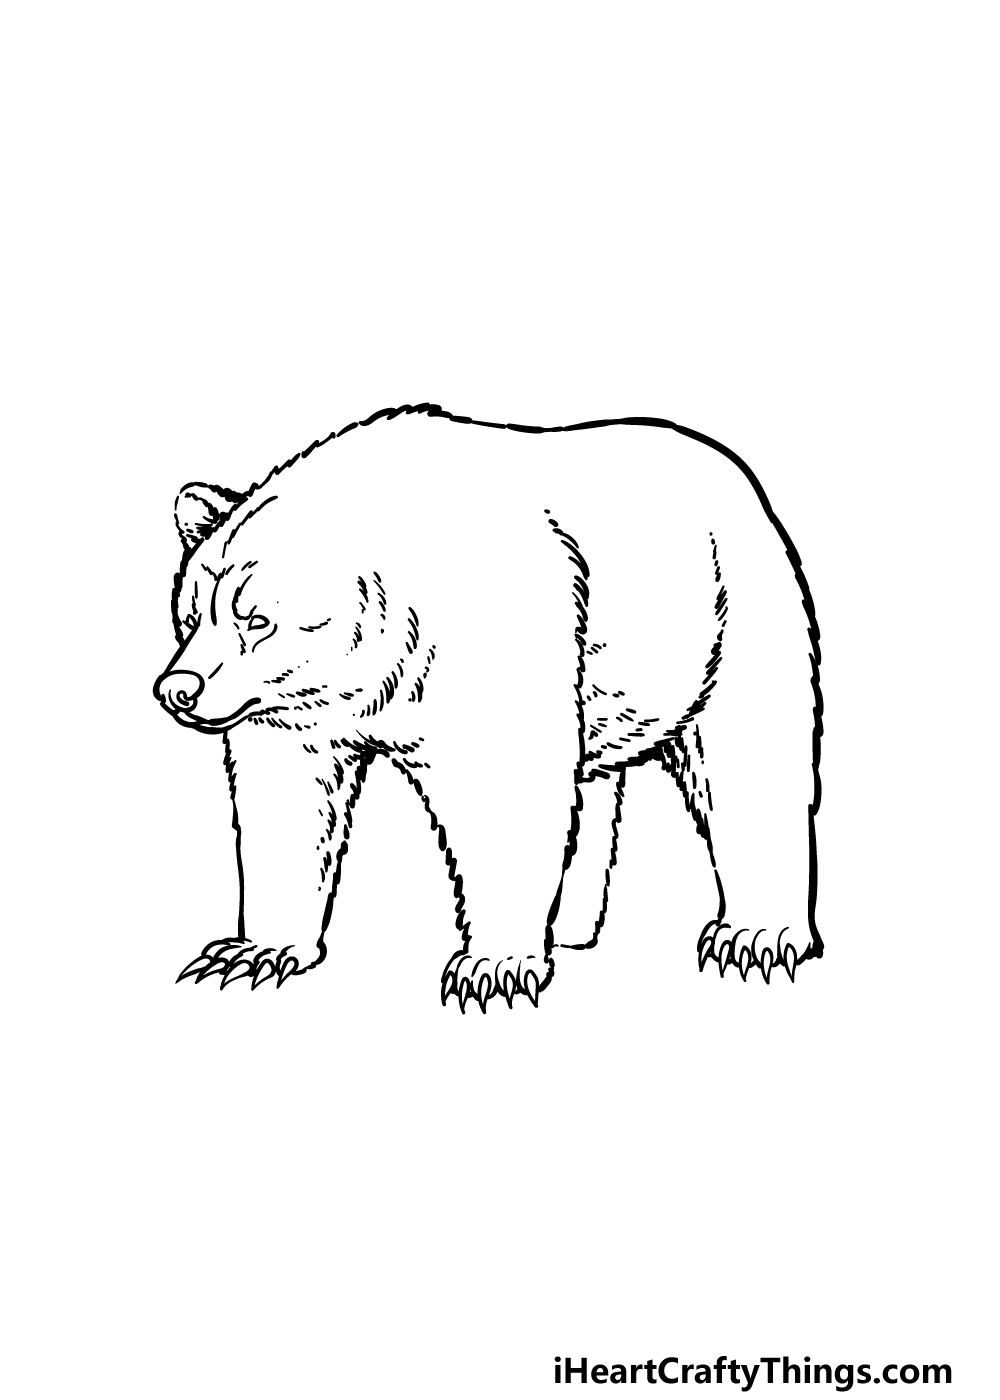
You’re now ready to add the final leg to your grizzly bear drawing in this fourth step.
This leg will once again be shaped quite similarly to the other ones, and it will fill in the space near the front of the bear.
Then, you can use some smoother curved lines for the mouth and muzzle of the bear. With some smaller line details, you can also add some fur details around the face to give this grizzly bear some more dimension.
Then you’ll be ready for the final details for this grizzly bear!
Step 5 – Add the final touches for your grizzly bear drawing
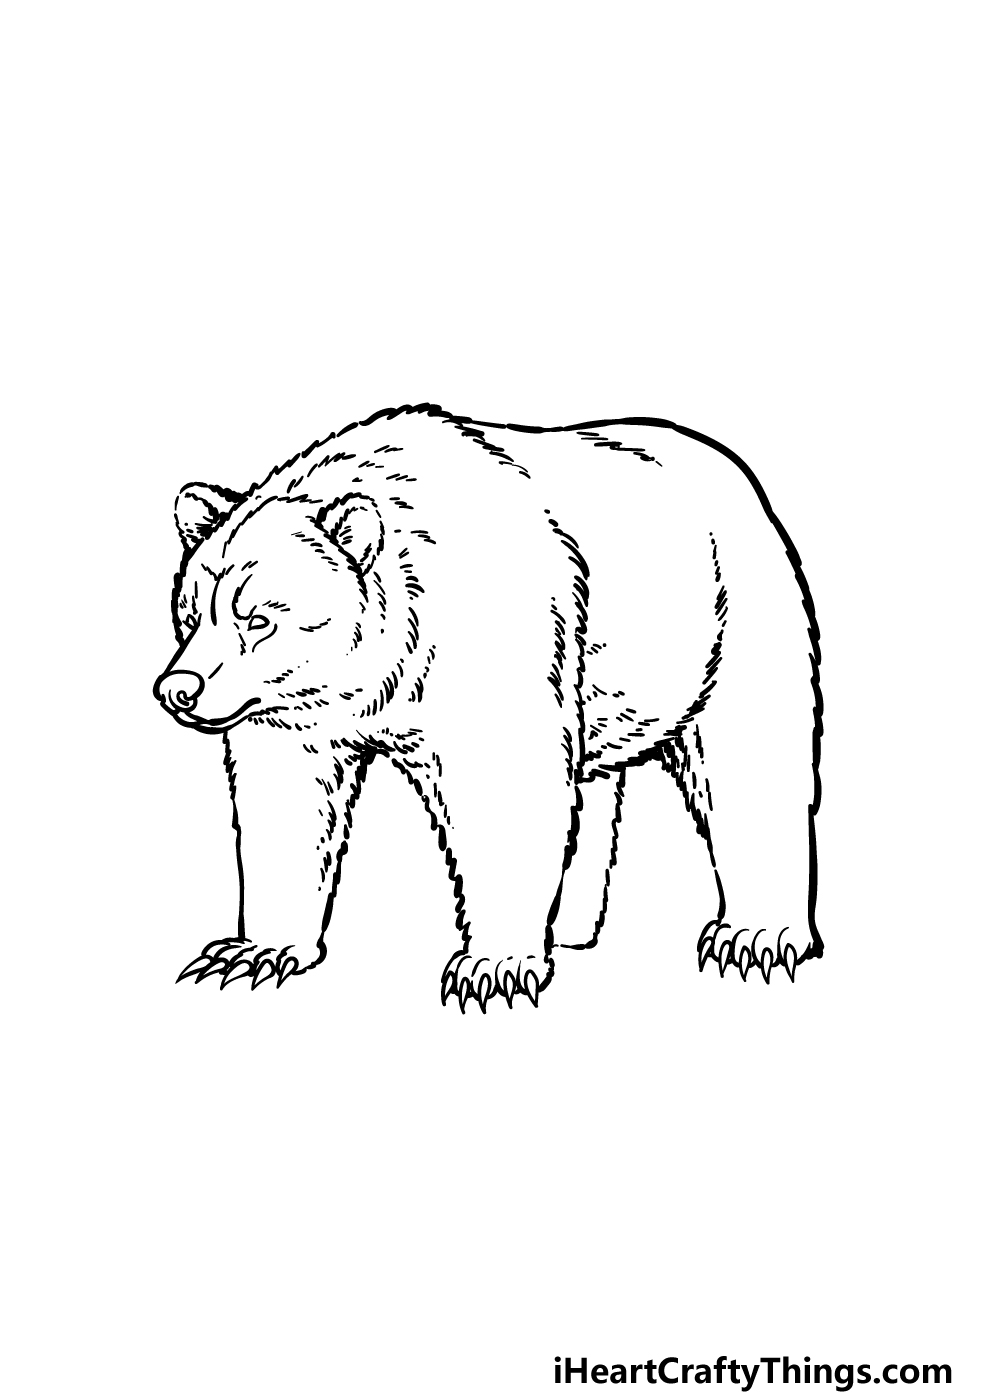
This step of our guide on how to draw a grizzly bear will be all about finishing off the final elements to have you ready for the final coloring step of the guide.
The main thing that we will be adding in this step will be the other ear for the grizzly bear, and it will be drawn with a similar shape to the other one.
Once this ear is drawn, we will just have a few more details to add to the picture. These will mainly consist of some more line details throughout the body to make it look even furrier.
We have shown you how you can draw some of these details, but you could also add even more if you’d like!
Then, perhaps you could take it even further by drawing a background or some extra details.
Step 6 – Finish off your grizzly bear drawing with some color
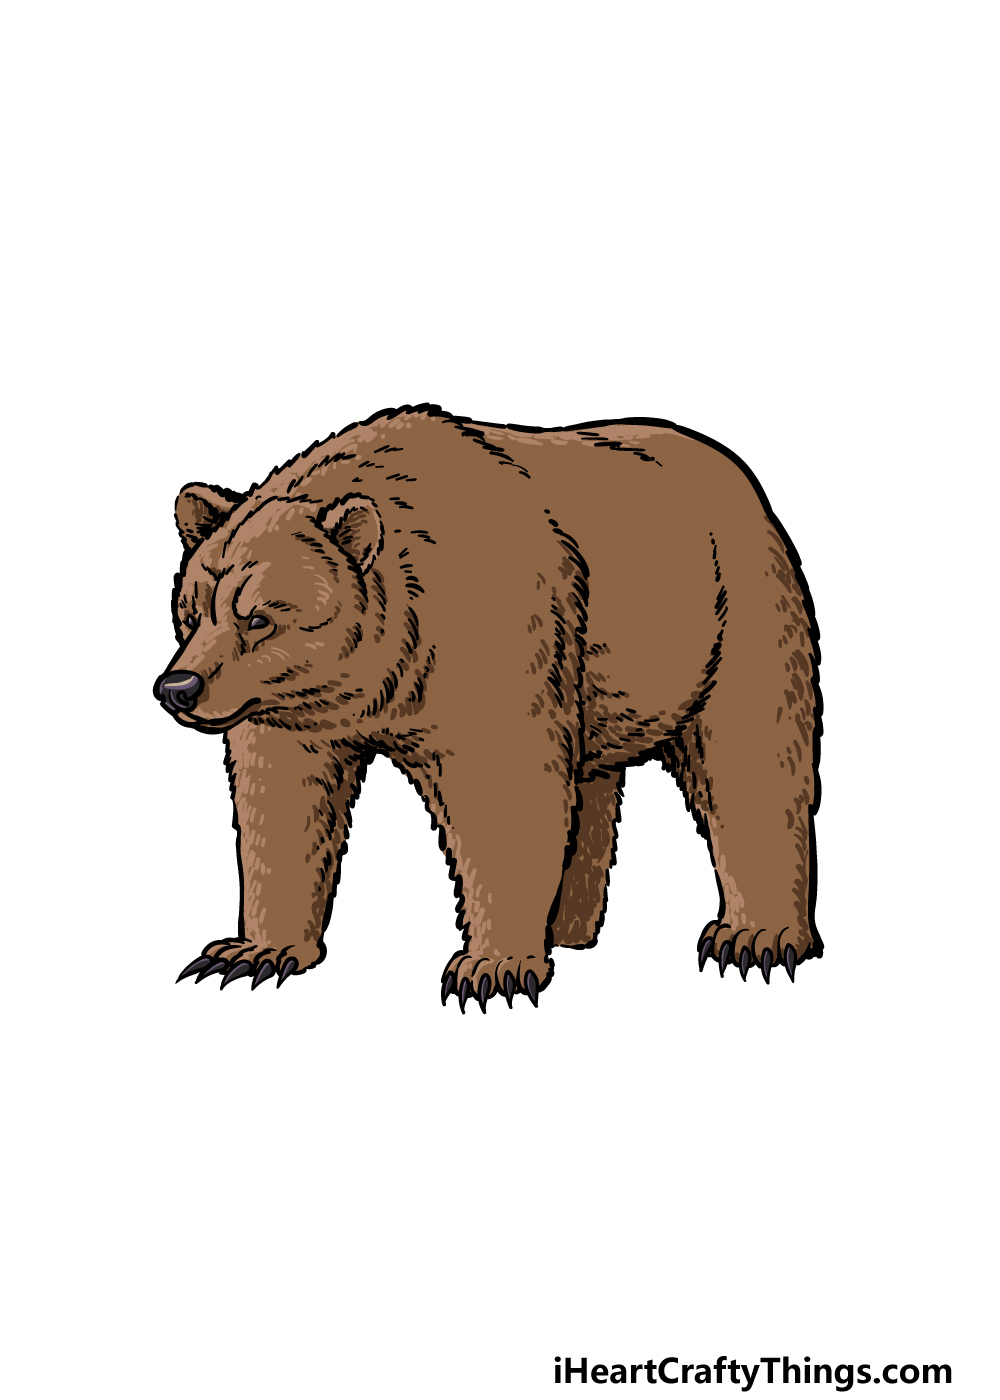
We can now finish off this grizzly bear drawing by adding some color to it in this final step. Grizzly bears can come in a variety of different colors, but for our reference image we went with a classic brown color scheme.
Even though we kept the colors to primarily brown shades, we shook it up by using various shades to create some more texture depth for the bear.
Will you use similar colors or will you take a different approach? You also have some options for how you can color it in by choosing some creative art mediums as you fill it in.
We can’t wait to see how you color it in!
4 More Ways To Make Your Grizzly Bear Drawing Unique
Make your grizzly bear sketch look even more impressive with these tips to try.
Seeing a grizzly bear in the wild is an incredible sight, but it’s even cooler to see more than one. You could show this aspect by adding one or two more grizzly bears to this drawing of a grizzly bear!
Now that you know how to draw a grizzly bear, you could easily do this by following the guide. If you add some more bears, you could change the pose or details of the new ones to make them distinct.
How many grizzly bears do you think this picture needs?
If you want to add some more life to this drawing, you don’t have to stick to just grizzly bears. You could also add some other animals to the scene.
This could include other species of bear that you like, or you could go for animals like deer or birds.
It would be a great opportunity for you to show off all of your favorite animal species and make the picture even more interesting!
Once you have populated your grizzly bear drawing with all the life you want for it, you could make it even better by drawing a background. When doing this, you would have many options to go for.
One would be to draw the natural habitat that you would find a real grizzly bear in. Or, you could go for something more creative and unusual.
Can you think of some interesting places you could find a bear?
Another way to make your grizzly bear sketch more interesting would be by using some new and unique art mediums. If you tend to stick to one kind of coloring tool, you might want to change things up.
For example, maybe you tend to rely mostly on crayons and colored pencils. If so, why not try out some watercolor paints or maybe some pastels?
Using different mediums can be a great way to challenge yourself and get some cool color effects.
Your Grizzly Bear Drawing is Complete!
You have finished this step-by-step guide on how to draw a grizzly bear, and you have successfully replicated this amazing apex predator.
We hope that this guide made it easier for you to draw all of the details and kinds of lines for the picture, and we also hope that it was tons of fun for you as well!
When you’re ready for your next drawing challenge, we hope to see you on our website, as we have some amazing guides for you to enjoy there.
We upload new ones frequently, so be sure to keep checking in!
Please also share your grizzly bear drawing on our Facebook and Pinterest pages, as we always love to see the finished products of these drawing guides!