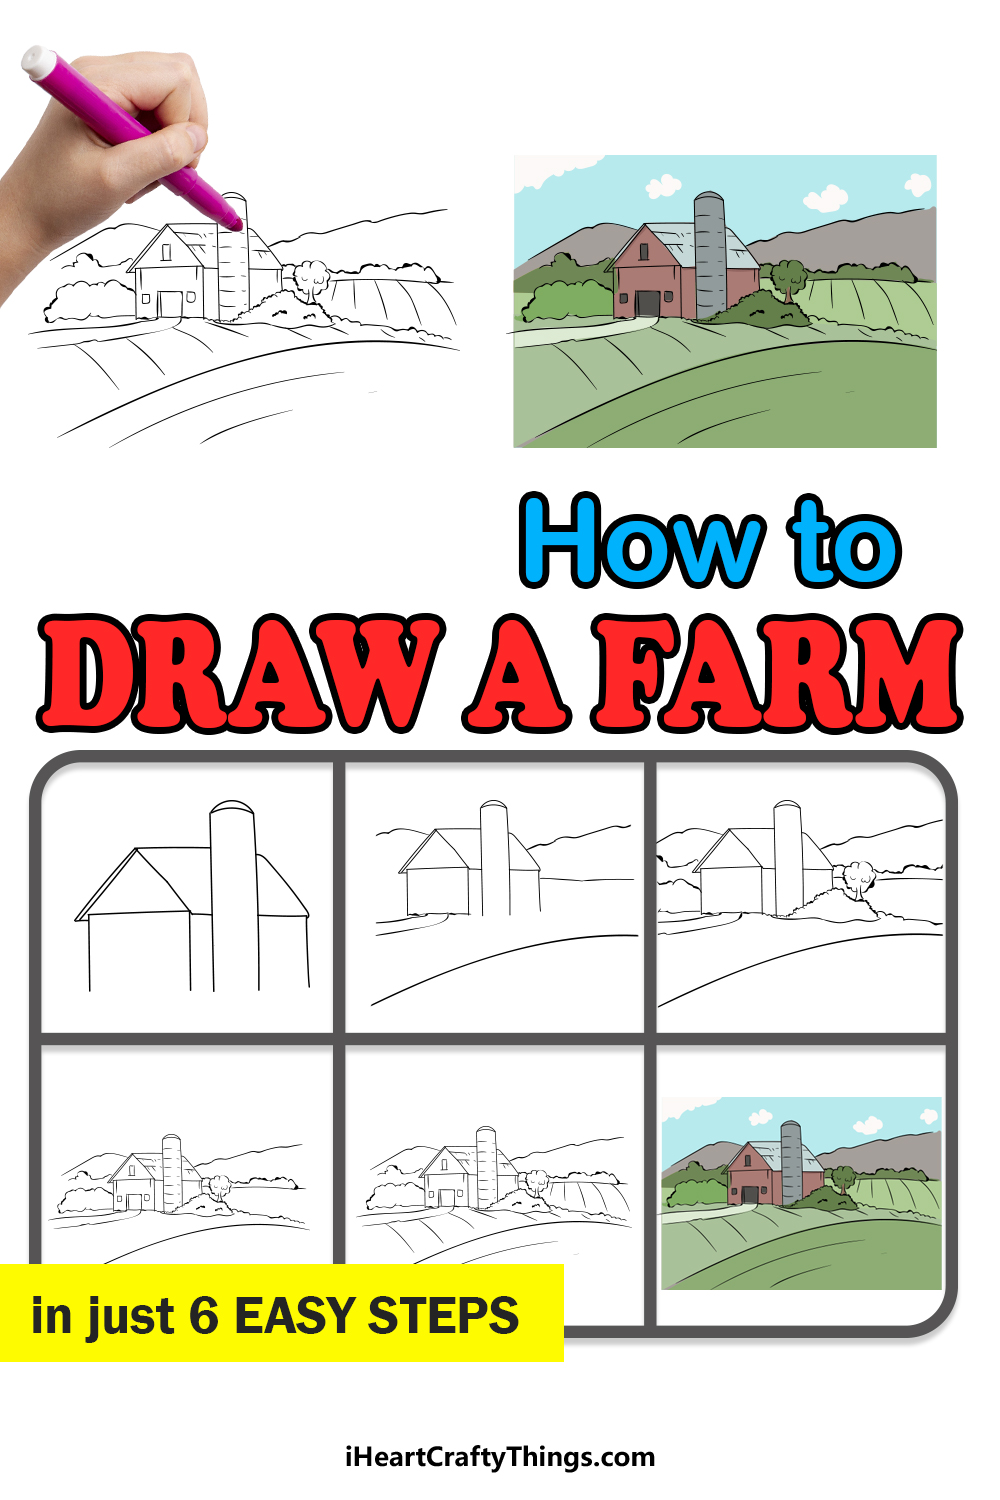
Learn how to draw a farm by following this fun and easy guide for kids! You can make your very own bucolic farm paradise by following along.
Farms are incredibly useful to society, as they contribute to the food and supplies that we all use in everyday life. Not only are they incredibly important, but there is also something peaceful about them.
Visiting and staying on a farm is a great way to enjoy a simpler way of life where you are closer to nature and the land. Drawing a farm can be the next best thing to staying on one!
If you’ve never known how to do this, then this guide is for you. I will show you how to draw the farmhouse with a silo as well as some of the land surrounding it.
After that, you can add your own ideas and elements to design your very own amazing farm!
Watch These Steps On How To Make A Farm Drawing
How to Draw A Farm – Let’s Get Started!
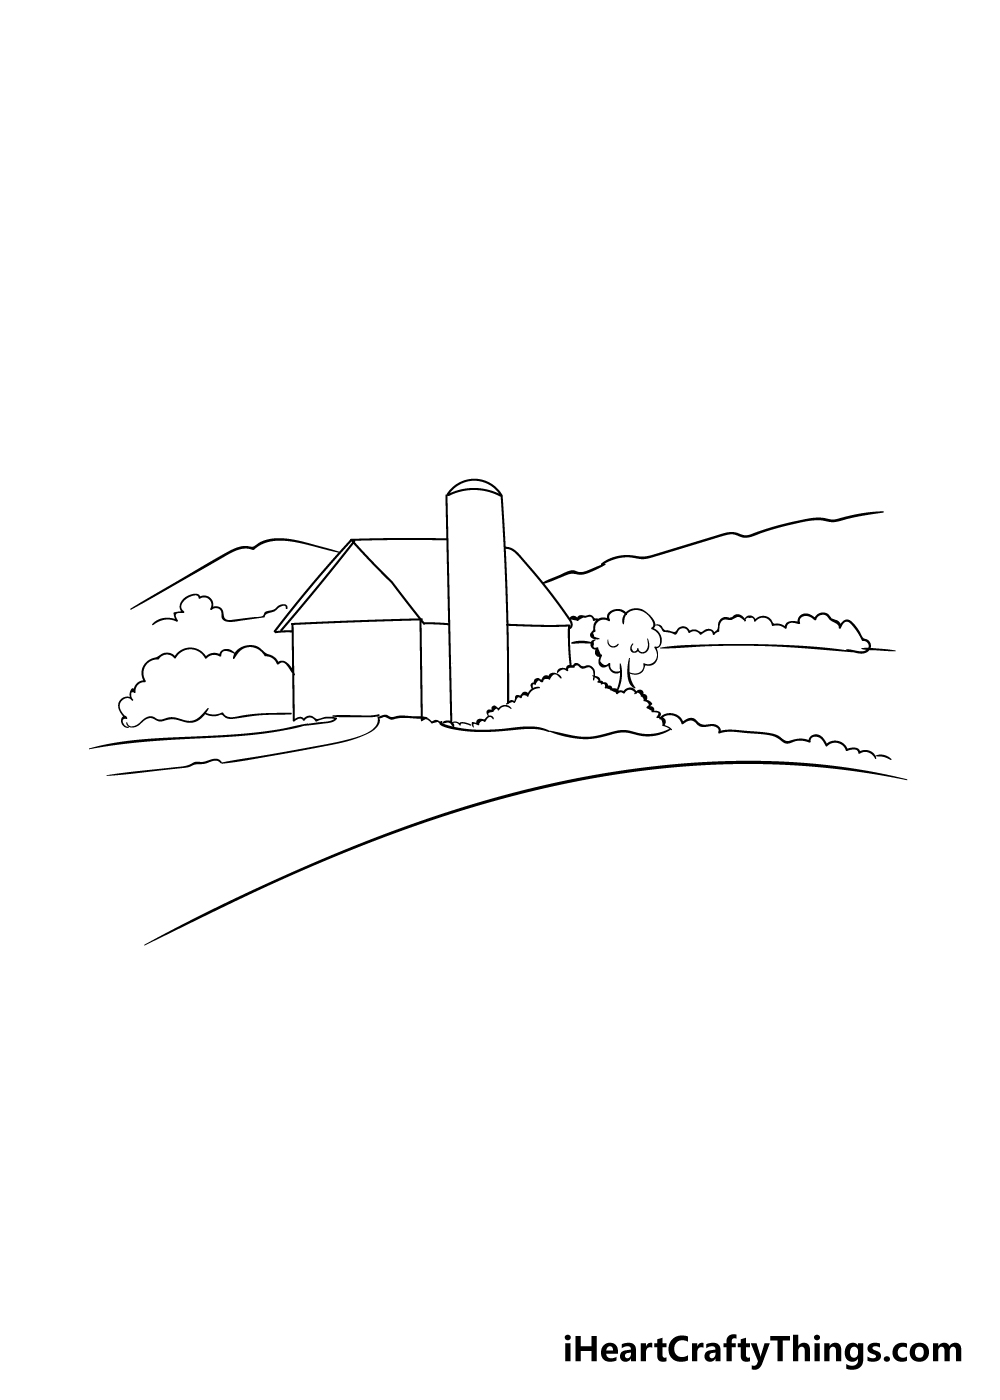
Step 1
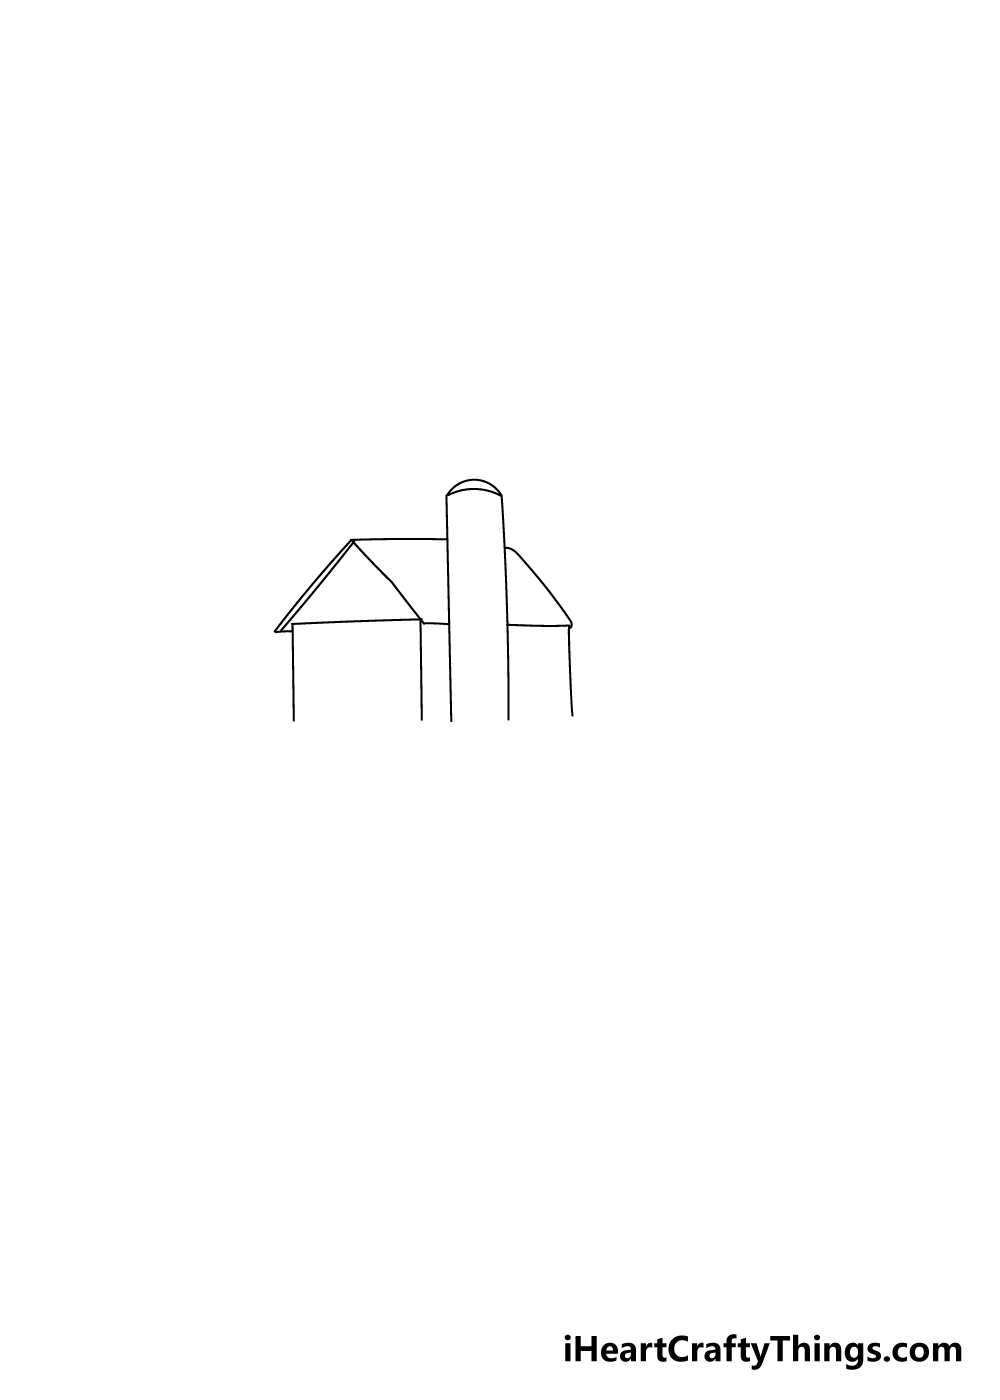
This guide on how to draw a farm is a slightly more complex one, so don’t be shy to refer closely to the reference image and take it slow!
For this first step, you will need a ruler along with your favorite drawing tool to make your life much easier.
You might also want to use a light pencil to begin with and then switch to a pen when you’re happy with how it looks.
For this step, we shall be drawing a farmhouse with a silo attached to it. Using your ruler, you can create some square walls with a triangular section for the side of the farmhouse.
Then, you can use your ruler to add a silo to the side with a rounded top as it appears in the reference picture. Once you’re happy with how it looks, you’re ready for the next step!
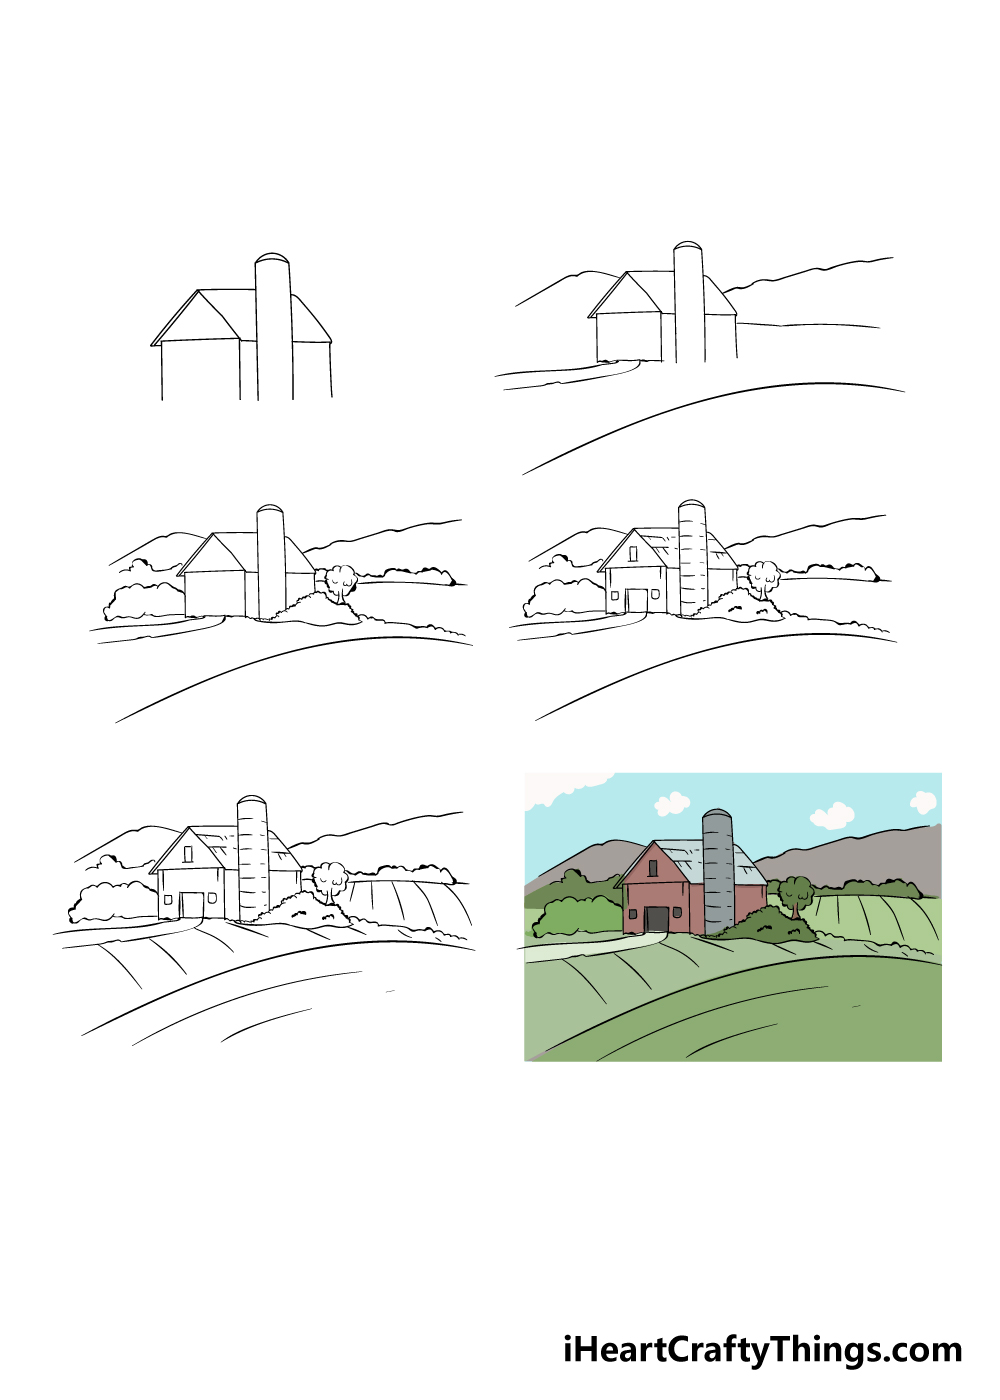
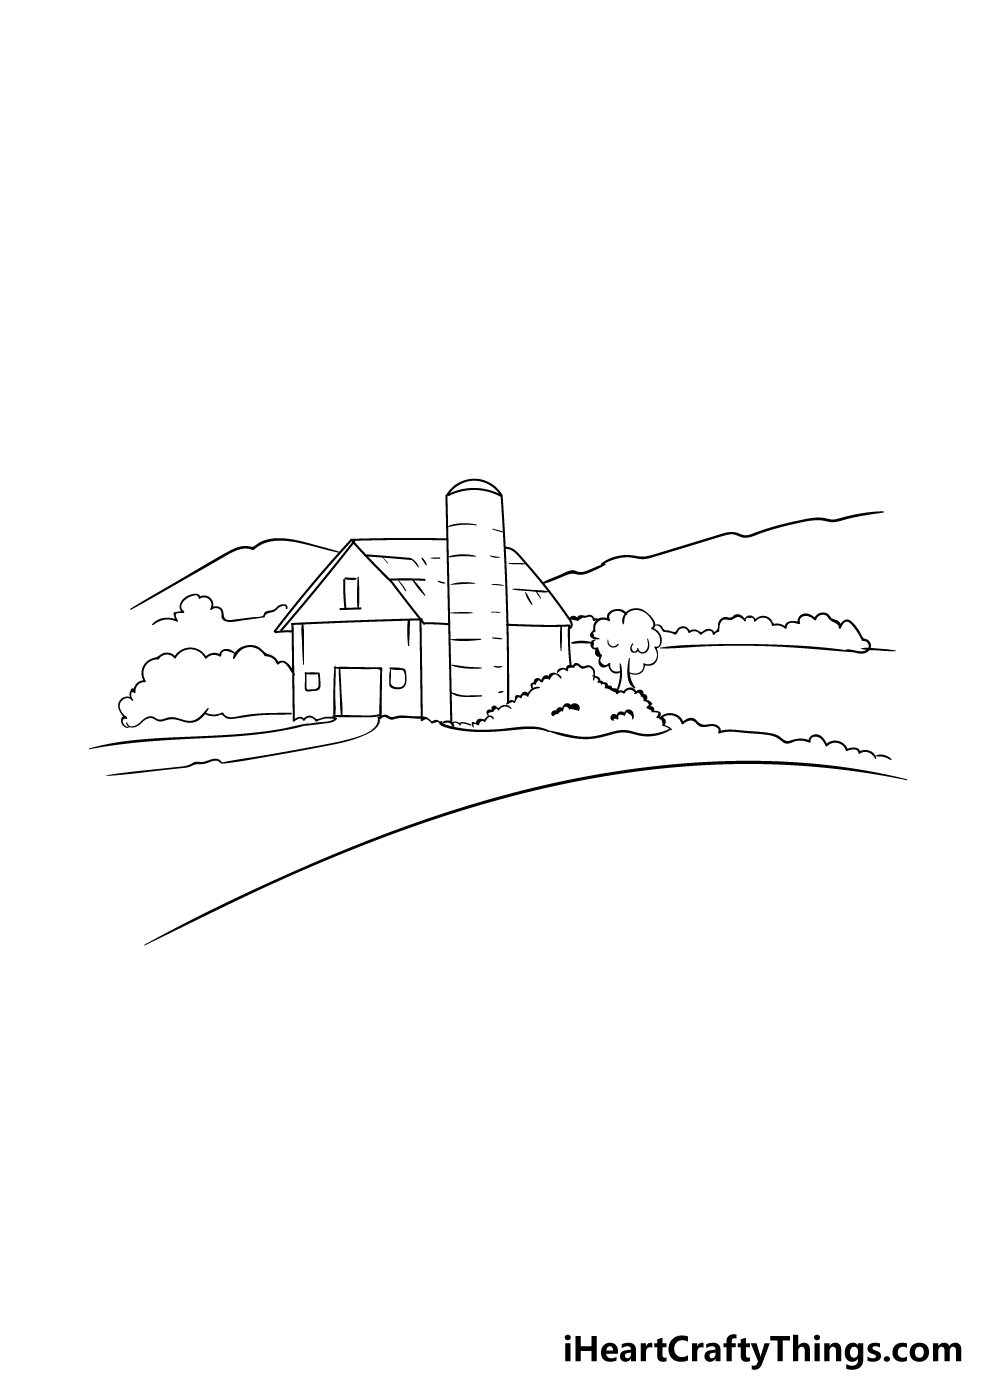
Step 2 – Start drawing the farm landscape
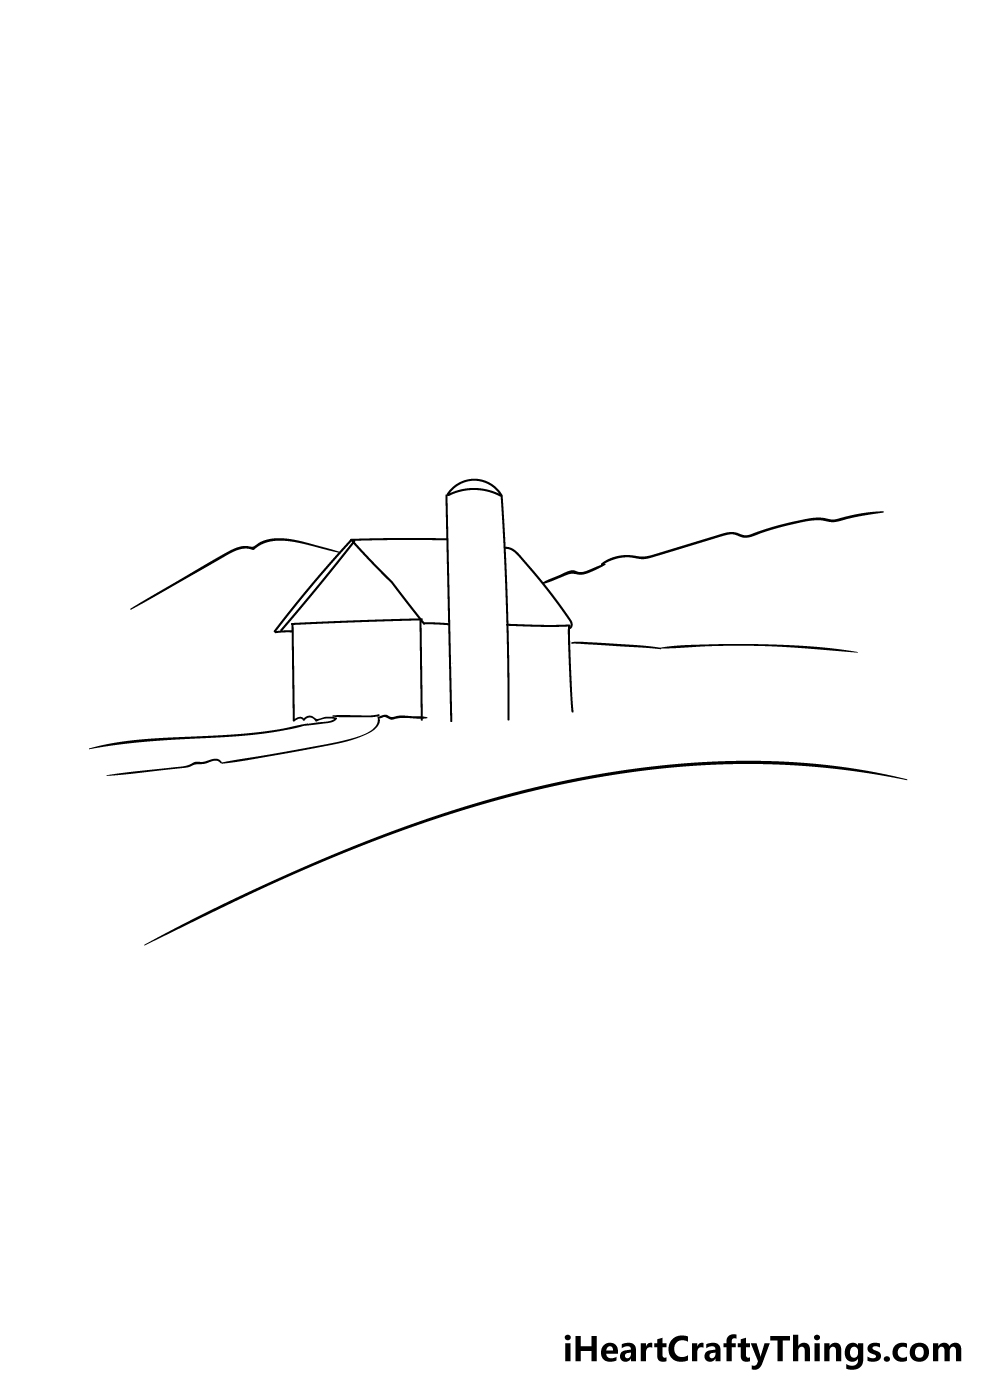
We will be starting on the landscape of the farm for this part of your farm drawing.
To start with, draw two curved lines running parallel to one another coming from where the door of the farm will be in order to make a pathway.
Then, you can use another curved line going across the lower right of the picture as it appears in the reference image.
Finally for this step, you can draw some mountains in the background of the image behind the farmhouse to further add to the scenery.
Step 3 – Now, add some trees and shrubbery to the farm
In this step of this guide on how to draw a farm will see you adding some trees and shrubbery to your farm.
Farms are beautiful, lush places so it seems appropriate to have some plantlife present! First, using some bumpy lines you can draw a big bush on either side of the farmhouse.
Then, draw a small tree coming up from the bushes on the right. Finally, you can use a similar line that you used for the bushes to add some treetops beneath the mountains to finish off this step of your farm drawing.
Step 4 – Next, draw some detailing for the farmhouse
You can bring the farmhouse to life with some great detailing for this part of your farm drawing. First, you can draw a door above where the pathway connects to the farmhouse.
Then, you can add some windows to the walls and under the roof of the farmhouse.
Then, you can use some smaller lines on the roof and on the silo to give them some texture detailing as well.
Finally, add some small jagged lines to the bushes to give them a more leafy appearance.
Step 5 – Now, you can finish off with some final details for your farm
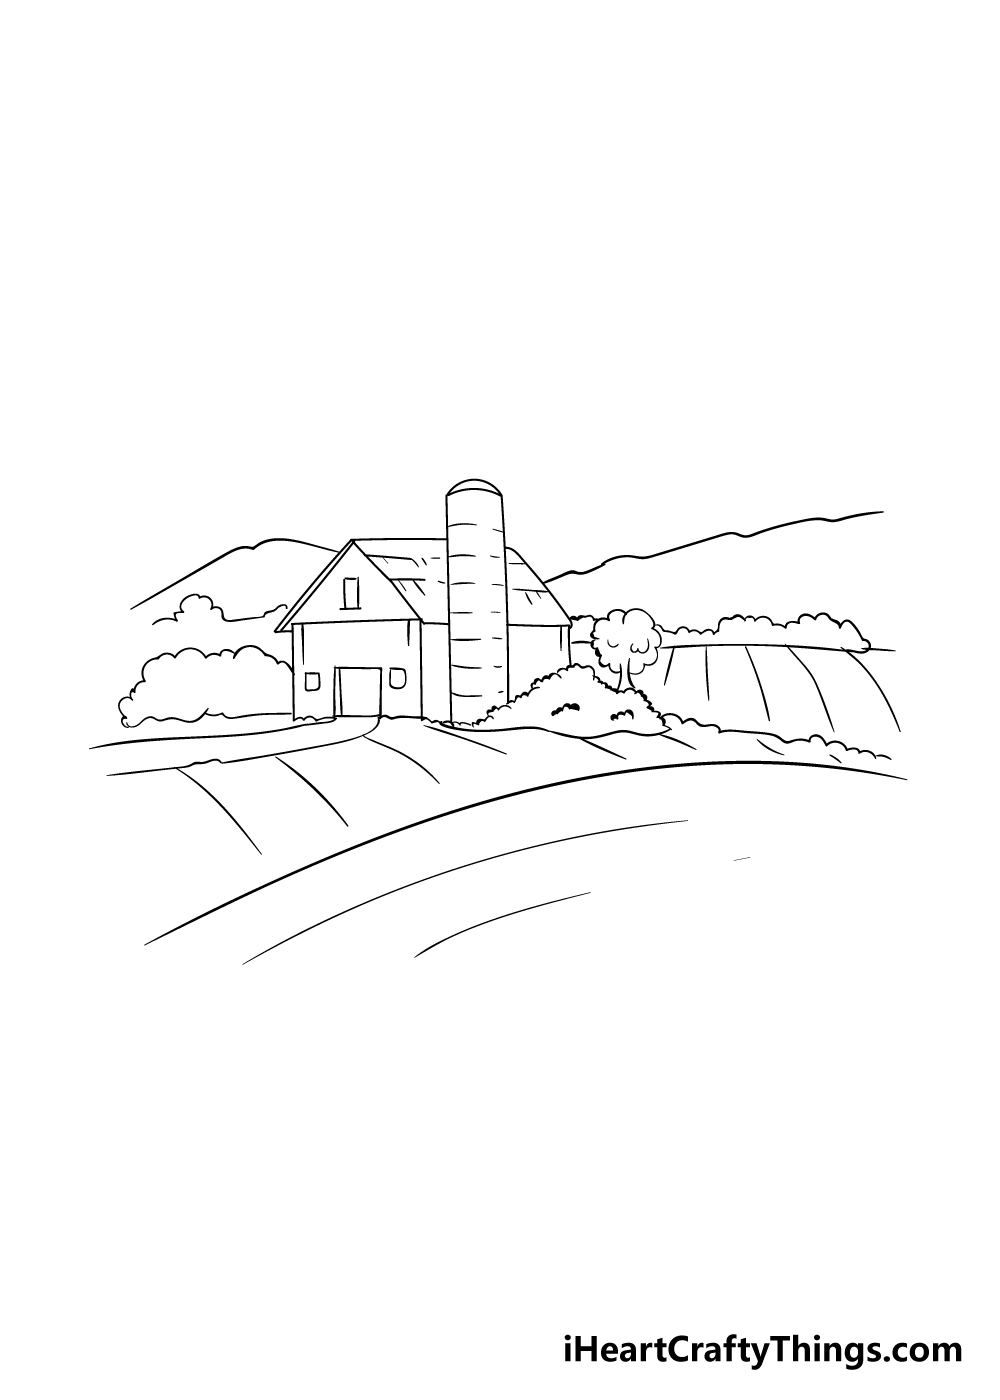
Before you move on to the coloring stage of this guide on how to draw a farm, we have a few final details to add!
You can draw some simple lines across the ground on the farm as you can see in the reference picture. This will give the impression of lines in the soil where it has been worked on by the farmer.
These are the details that we would add, but you can also add any of your own details! One example would be to draw some farm animals like cows and chickens wandering around on the farm.
You could even draw something like a tractor or a windmill to further add to the farm feeling of this image.
What details can you think of for your farm drawing?
Step 6 – Finish off your farm drawing with some color
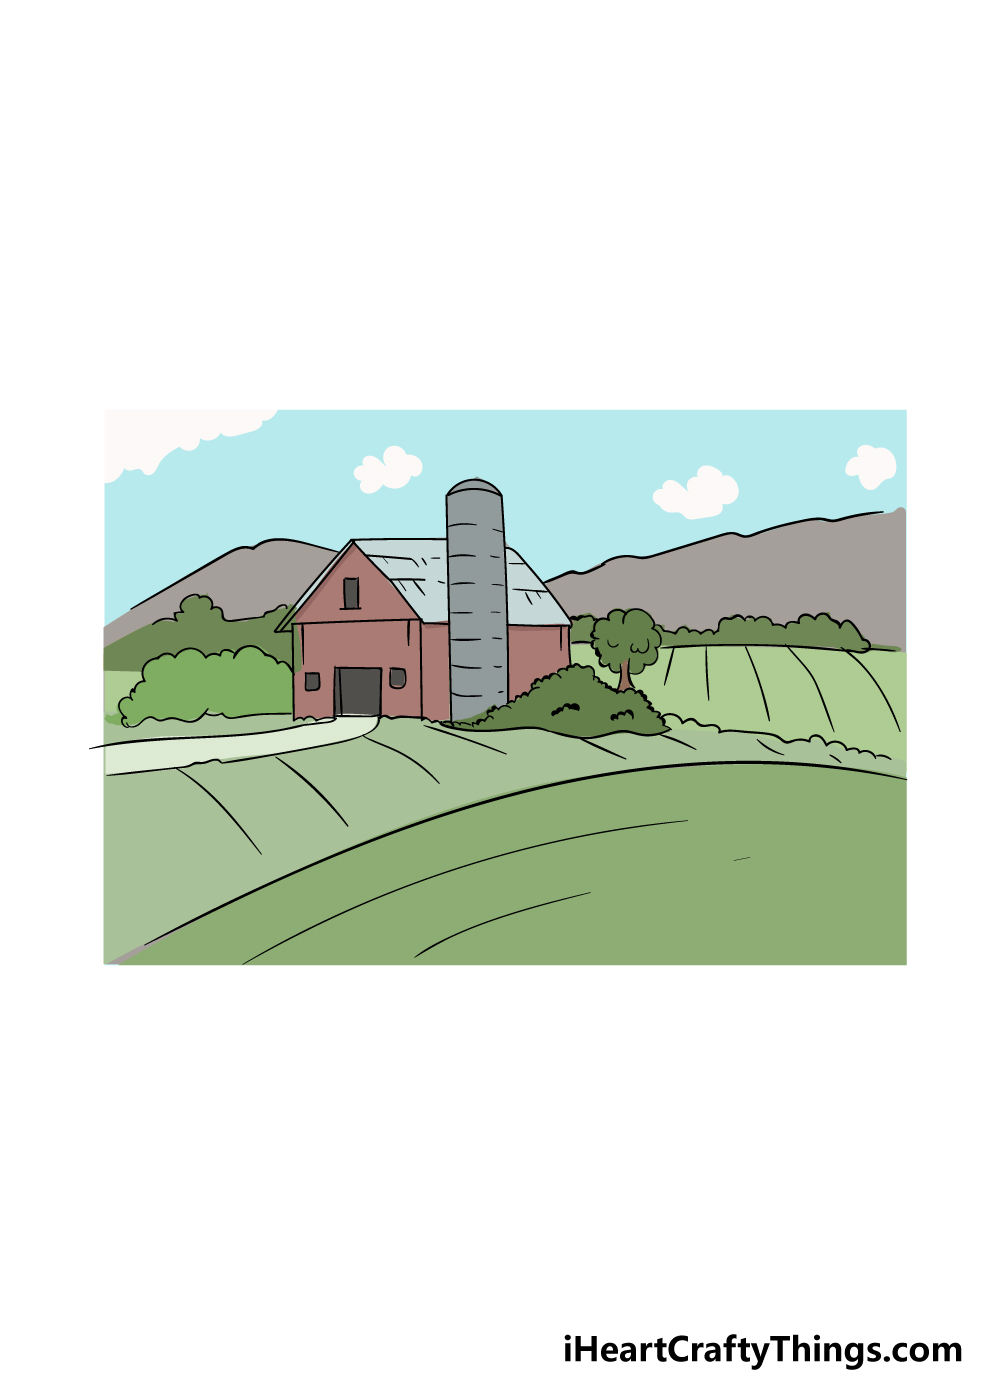
You’ve finished drawing your amazing farm, and now you get to have fun coloring it in!
We’ve shown you just one way that you could color in your image, but for this step you should feel free to use any of your favorite colors to bring your farm to life.
You can also get different looks for your colors depending on which art mediums you use.
Mediums such as acrylic paints and colored pens would be great for a more colorful and vibrant look to the image.
Alternatively, you could use watercolor paints for a more muted look to the image.
If I were coloring in this image, I would go for the watercolor option and draw a picture frame around the farm for a classic look to it. That’s just one idea, though, and anything you choose will look great!
Here’s how you can make your farm drawing even better…
Make some peaceful landscape art with these fun tips we have for you!
Many farms will have all kinds of animals on them, and you could add some to this farm drawing! We have a zoomed-out view of this farm, and you can fit lots of animals into the scene.
You could draw cows, horses, pigs or chickens for some small details. These are just a few suggestions for some farm animals you could draw, and there are many more you could draw! What are some other farm animals you could add?
Now that you have mastered this farm sketch, you could add even more details to complete the setting. For example, you could add a big windmill next to the farm.
Or, maybe you could add another barn or a silo. If you need some inspiration, you could look up common farm structures online and use them to help you enhance this drawing.
Even if the structures are simple, you may be surprised how much they can add to the drawing!
We created a lovely clear day in this guide, but you could also change the weather to dramatically alter this scene. You could add some heavy clouds and some rain to create a moodier drawing of a farm.
Or you could create a brilliant sunrise or sunset over the farm that will look stunning with some bright colors.
These are a few ideas, but what other kinds of weather could you depict for this picture?
In the guide, we mentioned that using some watercolor paints would be great for this farm drawing. We still would suggest that, but there are many other mediums you could use as well.
These could range from acrylic paints to colored markers and anything in between. There are also some other creative options you could use.
For example, you could use shades of greys to make this look like an old photograph. There are so many fun things to try with colors, so definitely let your creativity flow!
Your Farm Drawing is Complete!
You have reached the end of this tutorial on how to draw a farm, and you should be very proud of your drawing!
This was a bit of a tricky drawing to do, so we hope that this guide helped walk you through and see that it can be easier than you thought it could be.
Most of all, however, we hope you had a great time working on it!
Now that you have finished your farm drawing, you can keep the creativity going by adding your own details to this image!
You could draw some more farm tools, some animals or extend the detailing of the landscape.
Maybe you could draw four versions of this picture to represent the four seasons!
The possibilities are endless and we can’t wait to see what you come up with!
Our website has many more awesome step-by-step drawing guides for you to enjoy, so be sure to visit us there! We bring out new guides all the time, so checking in often is the best way to never miss out.
We would love to see your incredible farm drawing when it’s done, so please be sure to share it on our Facebook and Pinterest pages for us to enjoy!