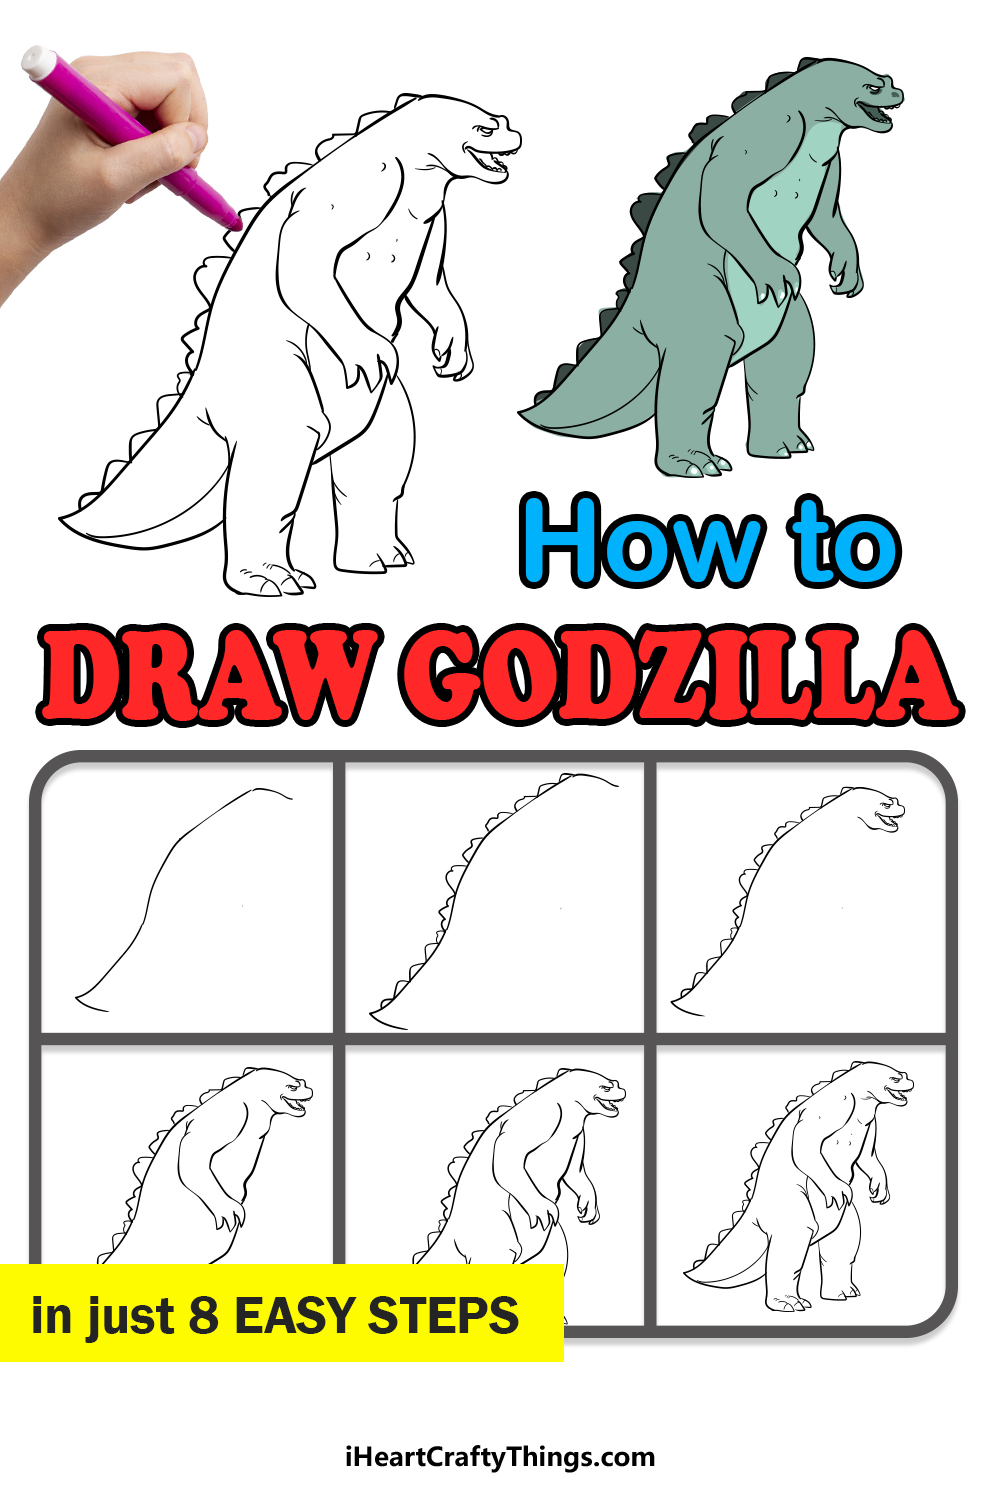
This step-by-step guide will teach you how to draw Godzilla in a simple, cartoon style, perfect for kids. Godzilla, first appearing in 1954, has become an iconic monster featured in movies like Godzilla vs. Kong and Godzilla Minus One. With this easy guide, you’ll be drawing your own Godzilla, whether you’re going for a classic look or something a bit more modern like Mechagodzilla.
Godzilla drawing doesn’t have to be complicated. With a few simple steps, you’ll create a fun and recognizable version of this famous monster. The video below will help make the process even easier as you draw Godzilla on a white background, ready to stomp through your imagination!
Watch Me Draw Godzilla: Easy Cartoon Style for Kids
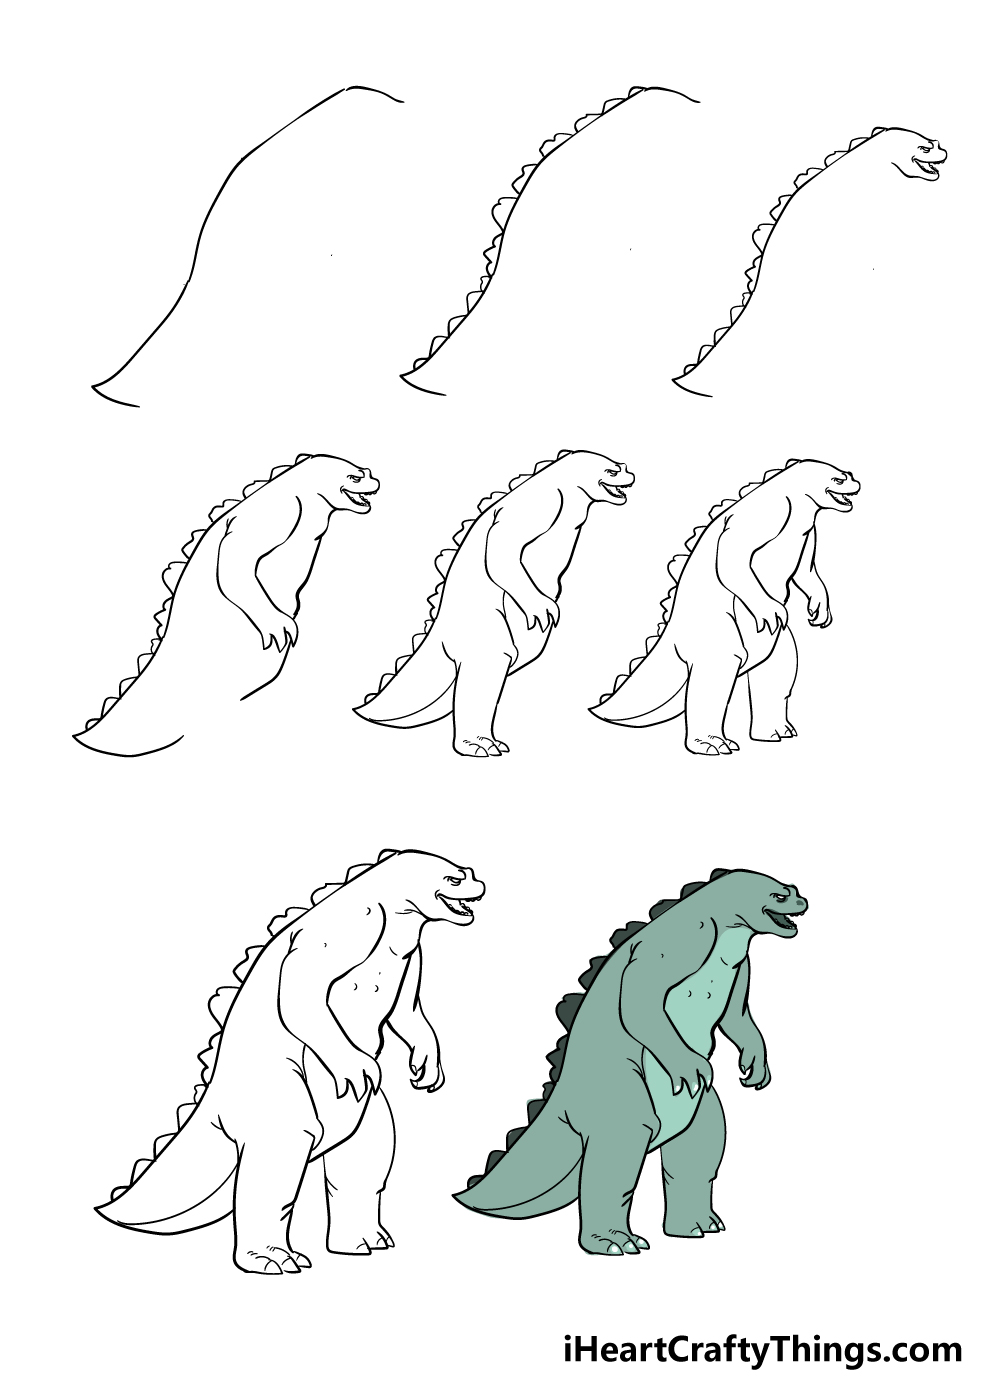
Step 1

To kick off this guide on how to draw Godzilla, we shall be starting with a line that will form the back and beginning of the tail for Godzilla.
The line will have some curves to it as it slopes at a slight horizontal angle. There will also be a bit of a sharp point near the end of the line at the bottom for the tip of his tail.
The reference image will show you how it should look, and once you’re happy with it we’re ready for the next step!
Step 2 – Next, start drawing the spine plates
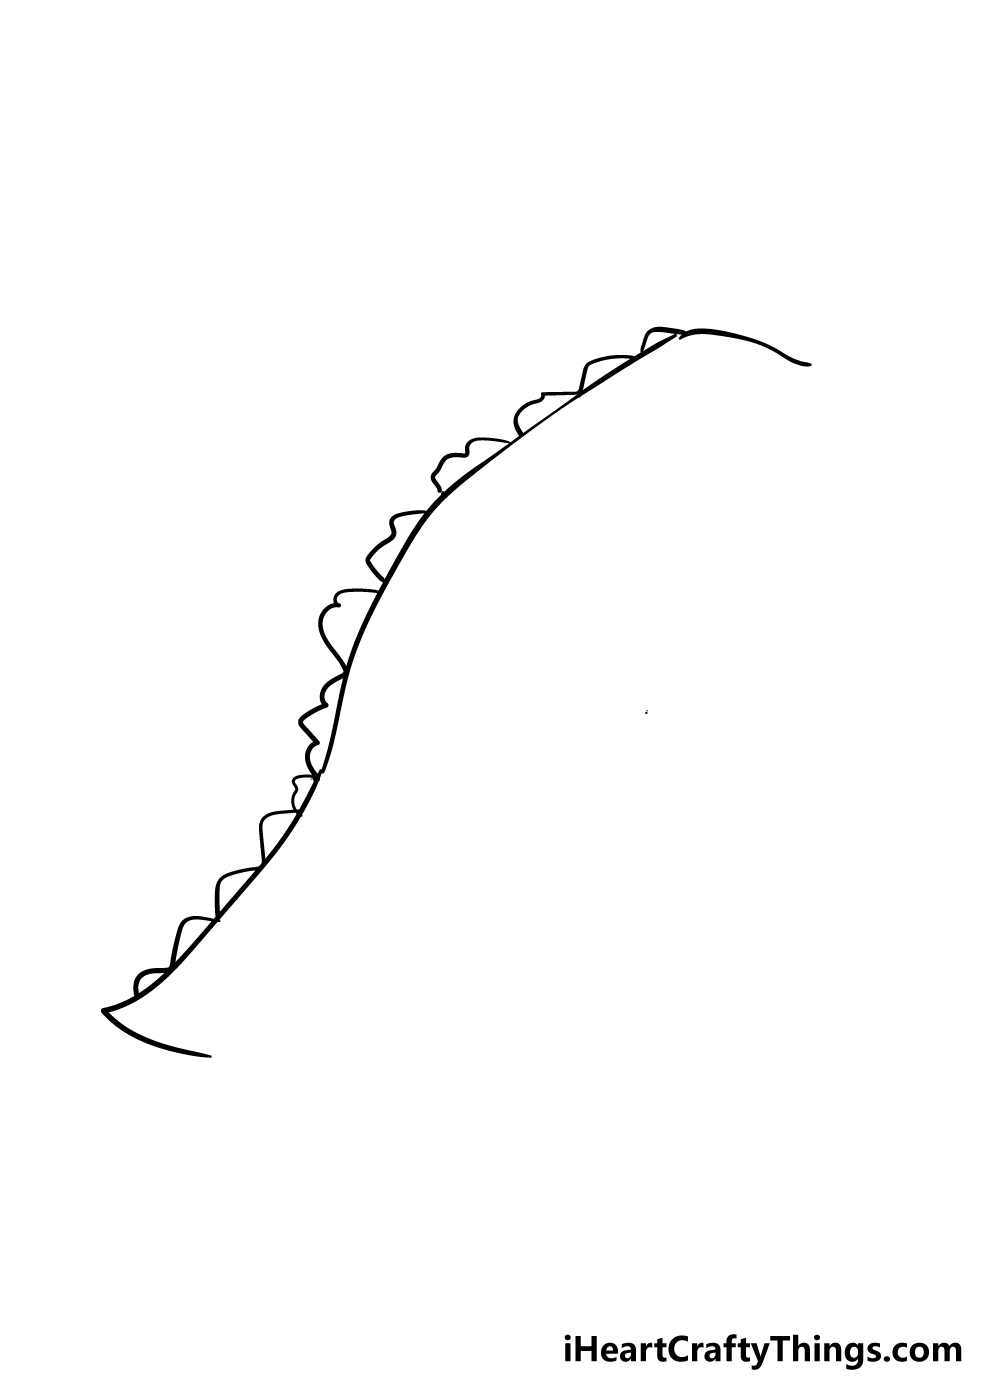
Godzilla has some distinctive plates sticking out on his back, much like the plates of a stegosaurus.
We shall be drawing some for your Godzilla drawing in this next step. These plates are made with some jagged lines, and the plates have quite irregular sizes and shapes as they go down.
Step 3 – Now, draw a face for Godzilla
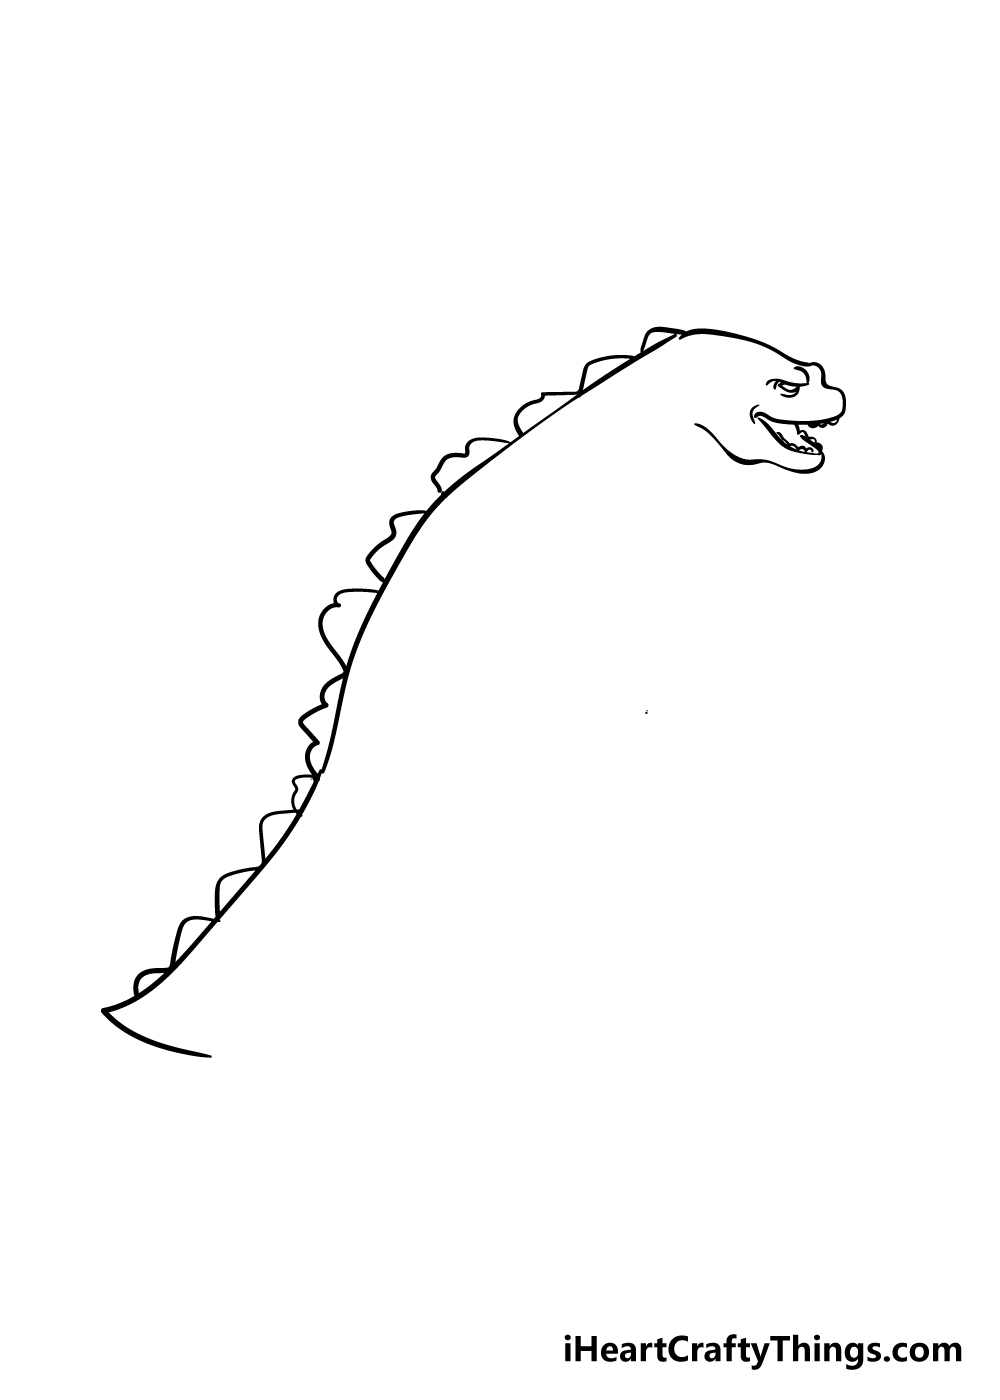
In most appearances that Godzilla has made, he has a short, squat face. We shall be adding that very face in this step of our guide on how to draw Godzilla!
The head will come off the line that you drew for his back. His eyes and mouth are at the end of his long face, and his eyes are quite small as well.
You can follow the reference image in order to see how the face should look.
Step 4 – Next, an arm and some of the body
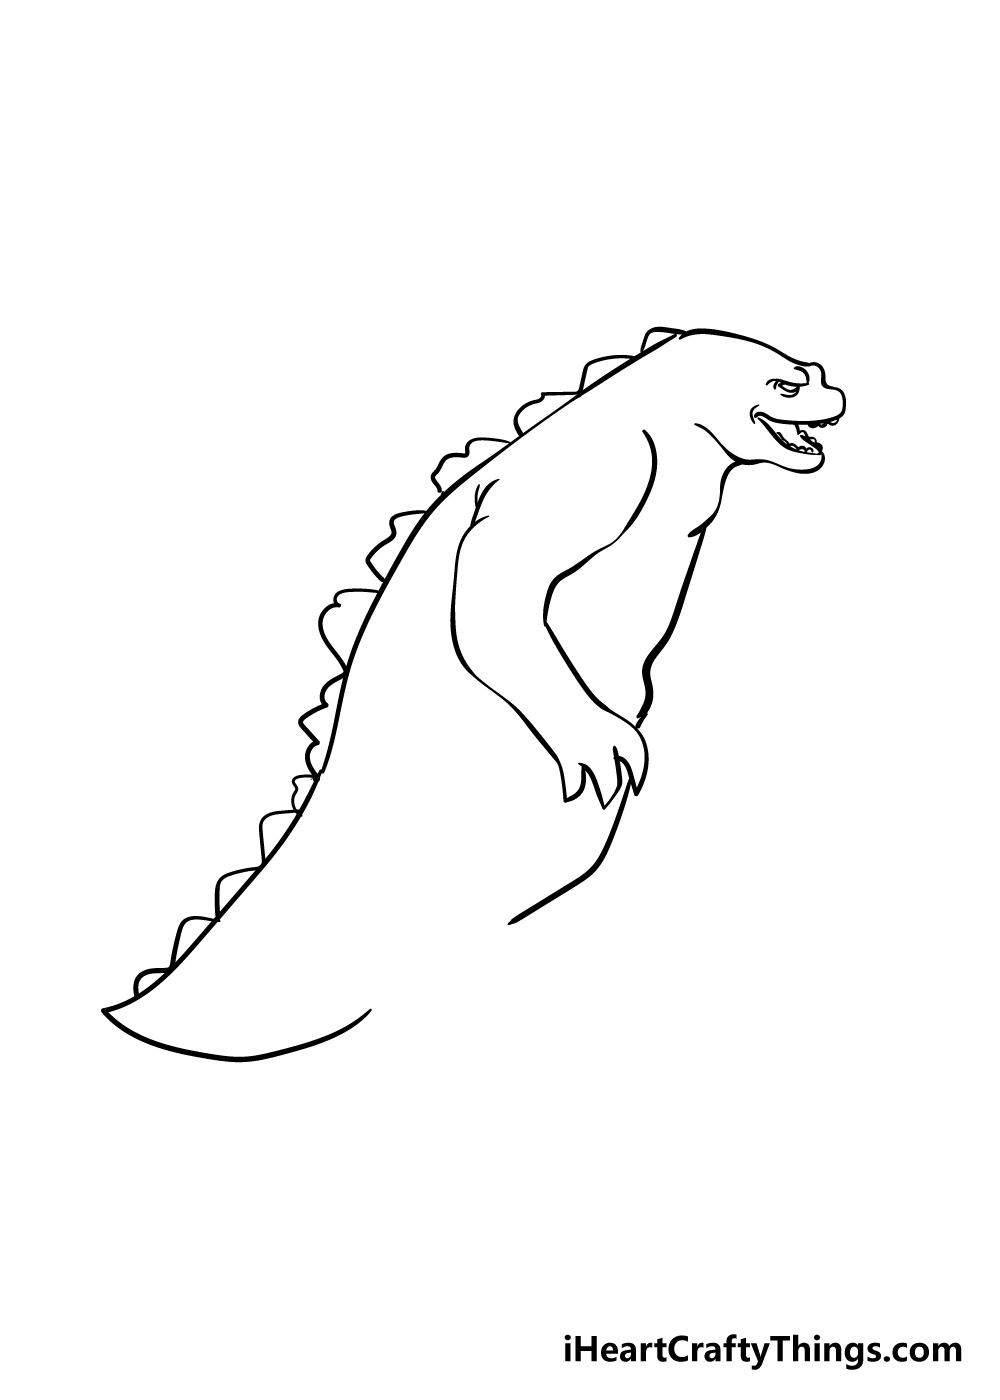
For this part of your Godzilla drawing, we shall add his first arm. Godzilla’s arms are long and thick, so we shall be representing that in this image.
It will be slightly bent, and there will be some sharp points at the end for his claws. Once you have drawn that arm, you can use a curved, slightly jagged line for his stomach.
Finally, add another curved line from the base of his tail to give him his big, thick tail.
Step 5 – Now, draw one of his legs
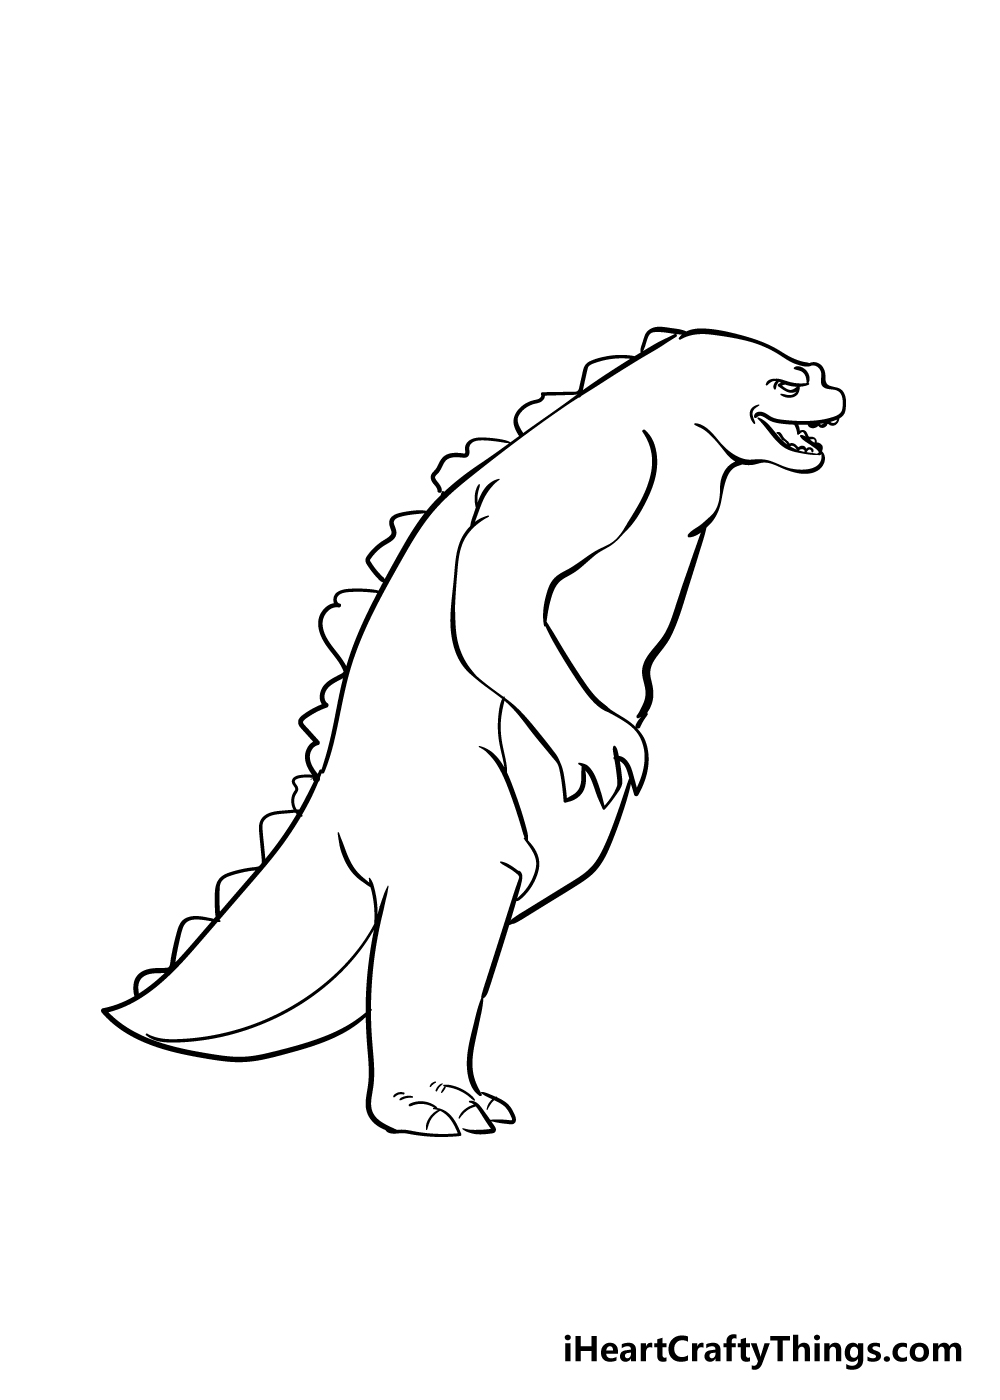
Godzilla has long, powerful legs to match his arms, so we shall draw the first one in this step of our guide on how to draw Godzilla.
The leg will be even thicker than his arm was, and will also have some sharp nails at the end of it.
Finally, once you’ve drawn that leg you can add a line inside his tail to create the underside of it.
Step 6 – Next, draw the other arm and leg
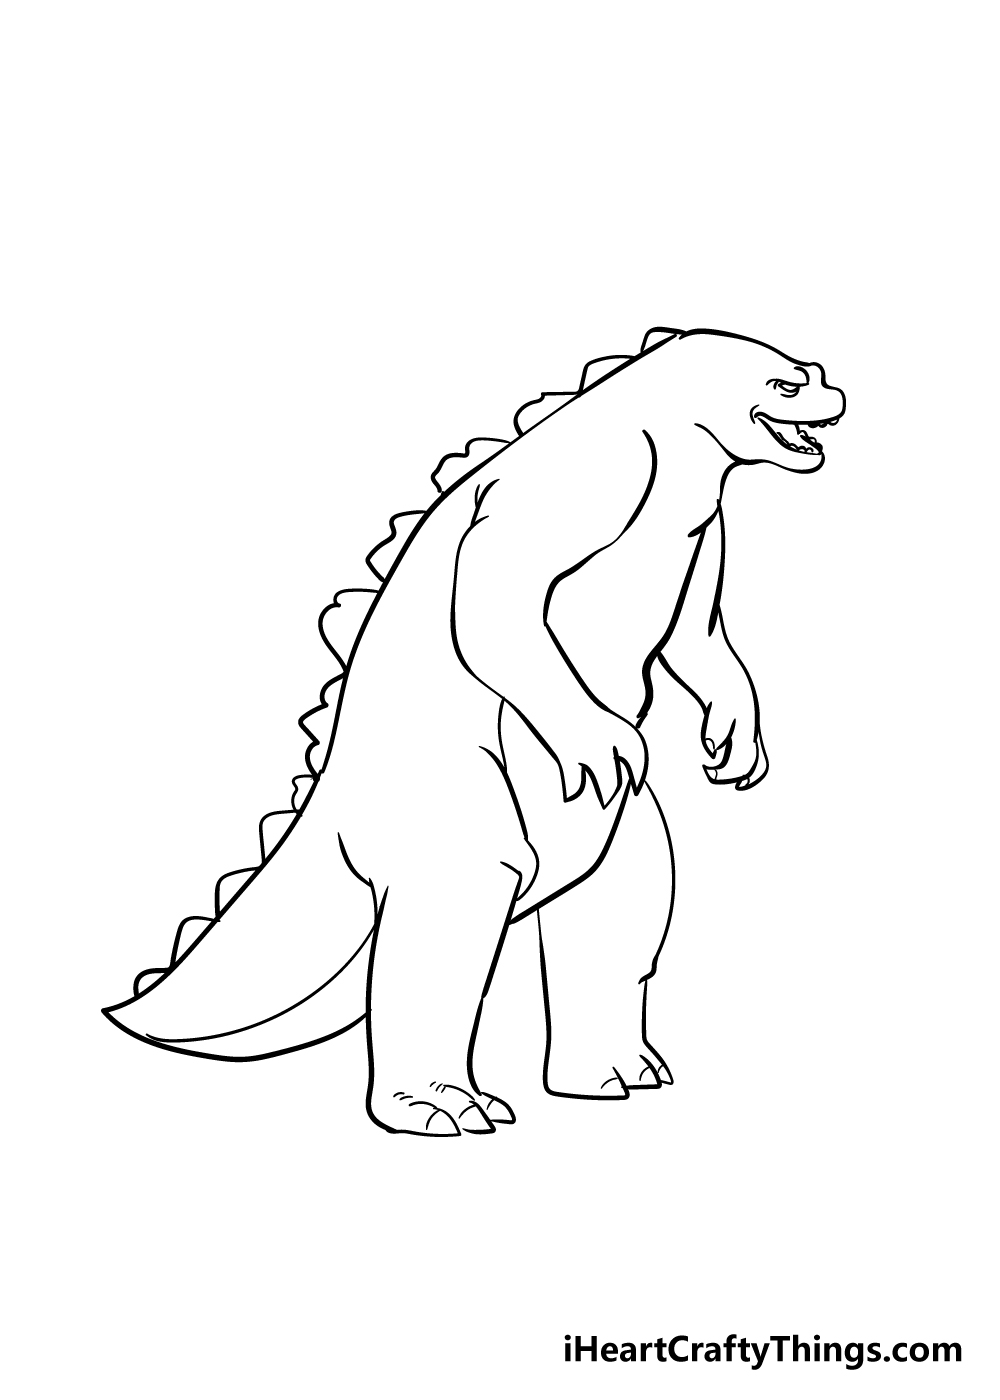
You’ve already drawn an arm and a leg for your Godzilla drawing, so you should have no problem adding more in this next step!
First, draw another arm coming out from the side of Godzilla as you can see in the reference image. The hand of this arm will be at a slightly different angle to the other arm.
Next, draw the other leg coming off from the body as well.
Step 7 – Draw the final details for Godzilla
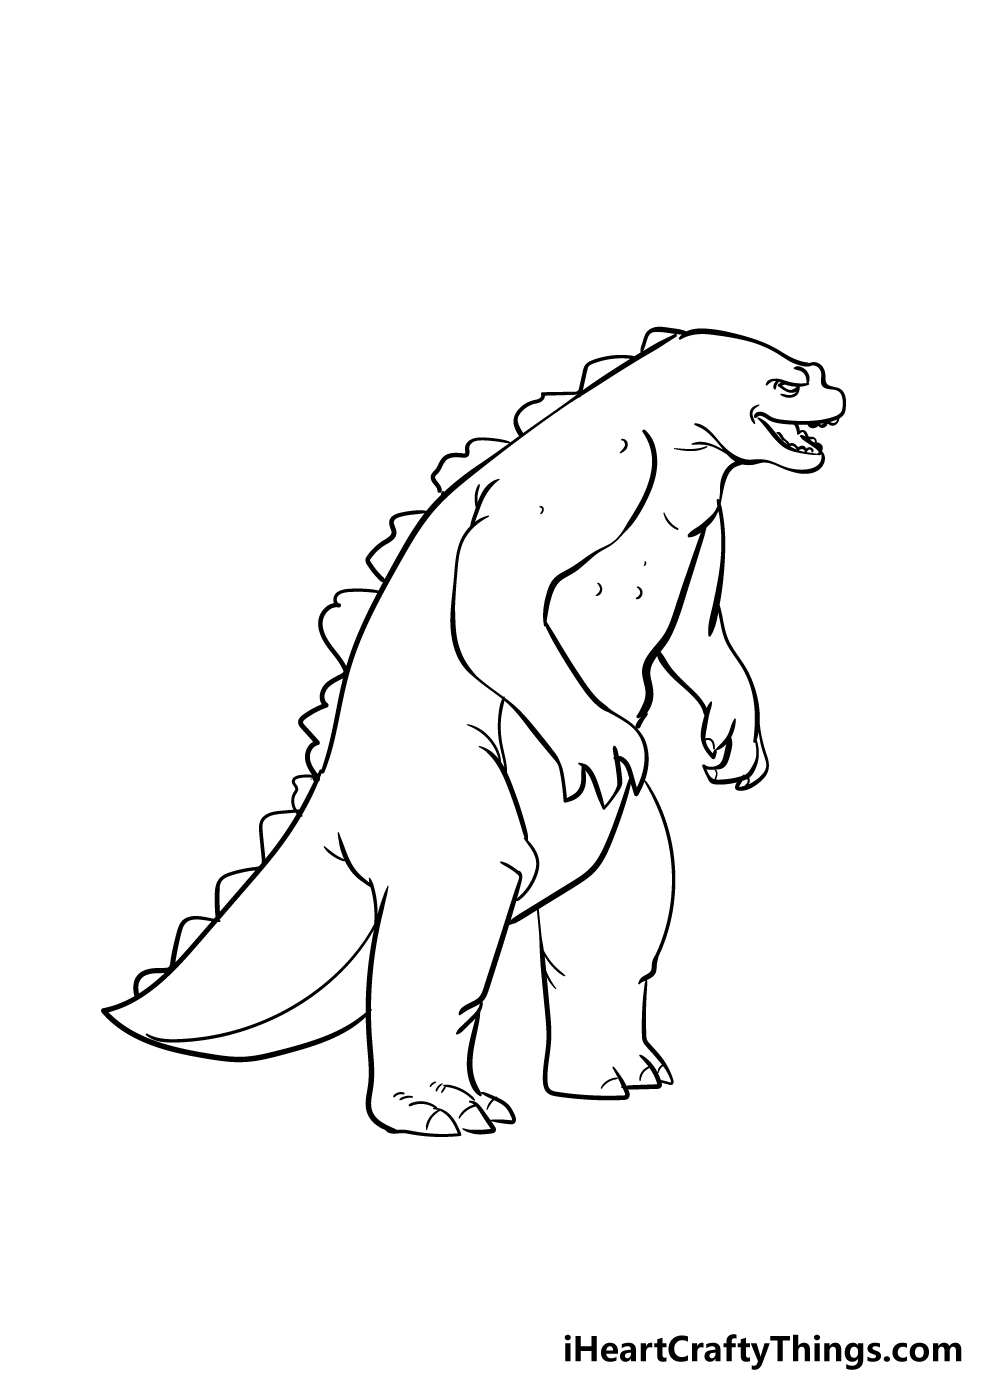
In this seventh step of our guide on how to draw Godzilla, we shall add some final details before moving on to the final step.
You can add some small lines throughout his body to create a scaly, textured look for Godzilla. Then, you can draw some lines at his joints to create some folds in his skin.
Those are the details that we chose, but what extra details can you think of? Perhaps you could draw a city below him and have some choppers flying around him for an action-packed scene!
Step 8 – Now finish Godzilla off with some color
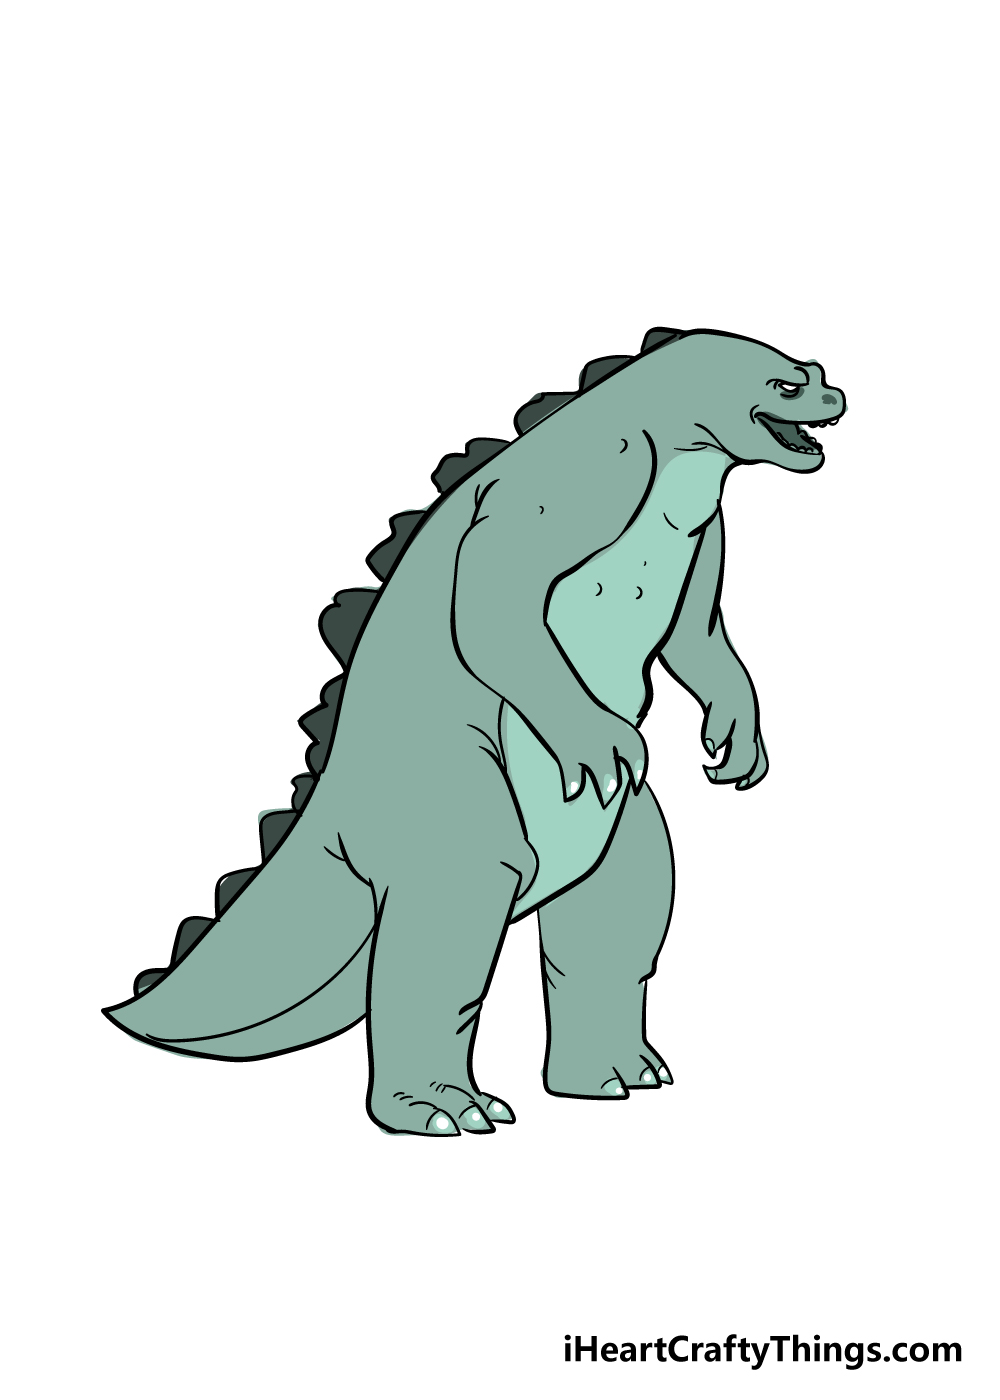
For this final part of your Godzilla drawing, you can really bring him to life with some incredible colors.
This is a step where you should let yourself be as creative and bold with your colors as you would like! This is your drawing, so you should make it look exactly how you want.
Godzilla has made many different appearances in several iterations throughout the years, so this is your chance to create your own interpretation of the famous monster.
Once you know which colors you would like to use, you can have some fun with the art mediums that you choose!
Will you choose intense mediums such as acrylics and colored markers or keep it more subtle with watercolors and colored pencils? There are no wrong choices, so we can’t wait to see what you decide on!
4 More Ways To Make Your Godzilla Drawing Unique
Make this iconic movie monster look even better with these 4 tips for your Godzilla sketch!
- Add Different Godzilla Iterations. We created a really classic look for this Godzilla drawing to show the design from most film incarnations. If you wanted to create a contrast, you could add a different iteration of Godzilla to go with this one.He has been displayed in various ways throughout film history, so you would have many options. Maybe you could even show them battling for a truly epic scene! What iterations of Godzilla would you like to add to this drawing?
- Introduce Other Movie Monsters. Speaking of battling, Godzilla will often go up against various movie monsters. These would also be great to add to this drawing of Godzilla! Once again, you would have so many options to choose from.There are tons of monsters called kaiju that Godzilla goes up against, and you could use some of these as inspiration. Or you could get really creative with it and design your own adversary for Godzilla to face. What are some monsters you could add to this design?
- Add A Background. You could also make this Godzilla sketch look even better with a background. Godzilla is famous for terrorizing Tokyo, so you could draw this city setting for one idea. Another classic image is to show Godzilla emerging from the ocean, so that would look really cool as well!These are two ideas, but there are loads of ways that you could portray the famous monster. What kind of setting would you choose for this image?
- Experiment With Colors and Textures. We went for a lighter color scheme for this Godzilla drawing, but it is just one way to color him in. As we mentioned, Godzilla has had many different looks over the years, so you could recreate your favorite for this picture.If there is texture on the skin of your design of choice, then you could replicate it using various art tools and mediums. Mixing various mediums and techniques can also be really effective when it comes to getting the colors you want.
Your Godzilla Drawing is Complete!
We hope that you had as much fun creating this icon of monster movies as we did while we made this guide on how to draw Godzilla!
This was one of the more detailed pictures we have featured in our tutorials, so we hope you found it helpful and fun to work through!
Even when a picture is a bit more complicated, it can be made so much easier when you have some steps to follow!
Now you can bring your incredible Godzilla drawing to life with your colors and extra details.
This would definitely be an image very well suited to an awesome background, so let your creativity run wild!
Please be sure to check in to our website whenever you can!
We upload more awesome step-by-step drawing guides such as this one for you frequently, so checking in often is the best way to never miss out!
We would also love to celebrate Godzilla’s legacy with your amazing Godzilla drawing, so please be sure to share it on our Facebook and Pinterest pages when it’s done!
Here Is Another Godzilla Sketch To Inspire You!
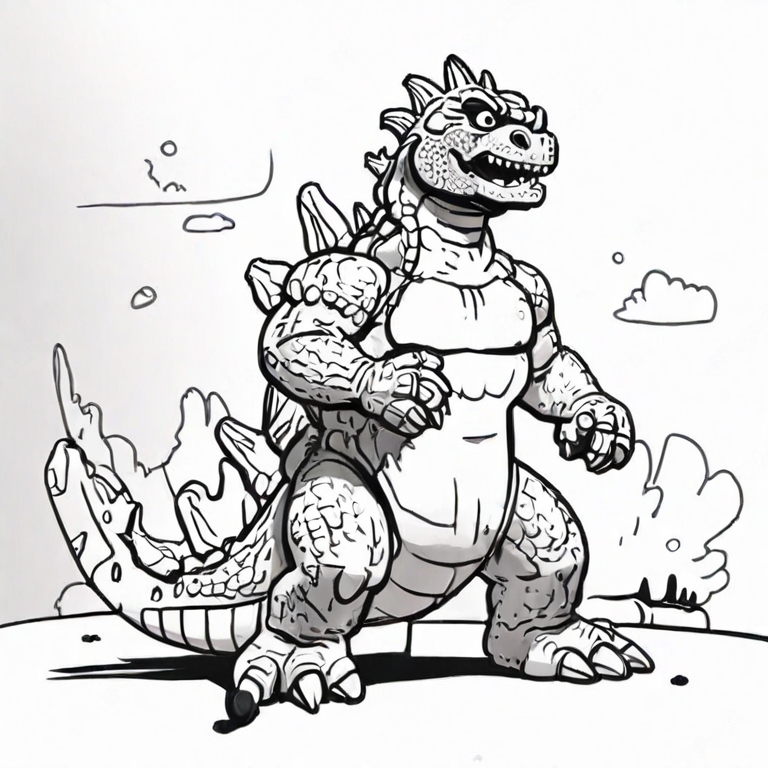
Godzilla is one of the most iconic and recognizable movie monsters in all of history. So, it’s no wonder that he’s popular to put in various forms of art and pictures.
This Godzilla sketch for kids done by our artist Amanda is truly a work of art. She has put in so many details in this picture that you hardly know where to look first!
She included so many scales and texture details on the skin of Godzilla that it makes him look so much more real. If you find this level of detail too intimidating, then you can simplify it.
Even if you were to stick with the outline, you could simplify the details immensely and still maintain the look of the design. Then, you may want to add even more to the background to make this a terrifying scene.
