There are many different breeds of dogs in the world, and that leaves a lot of options for a favorite type! Some like big dogs, some like small ones and some like any canine pal they meet!
Some breeds have even more fame due to famous people who like them, too. It’s hard to beat having the Queen of England as a fan, as she famously loves the adorable corgi.
This has made many other people love this breed, and has made many people wonder how to draw a corgi themselves.
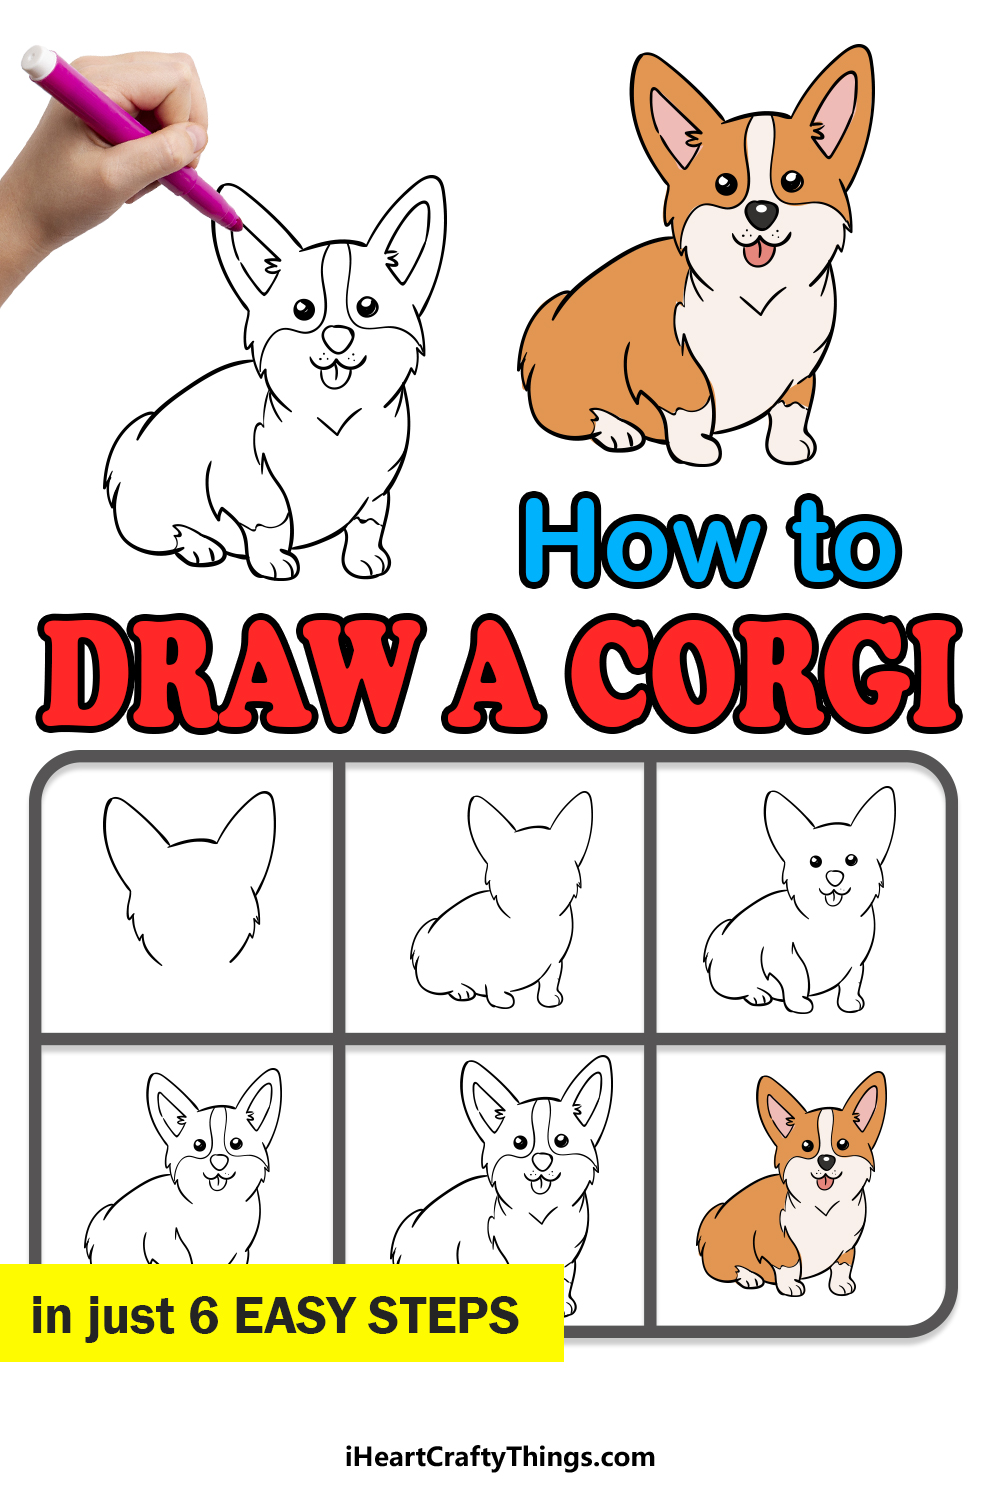
This step-by-step guide on how to draw a corgi in six steps is a tutorial fit for a queen!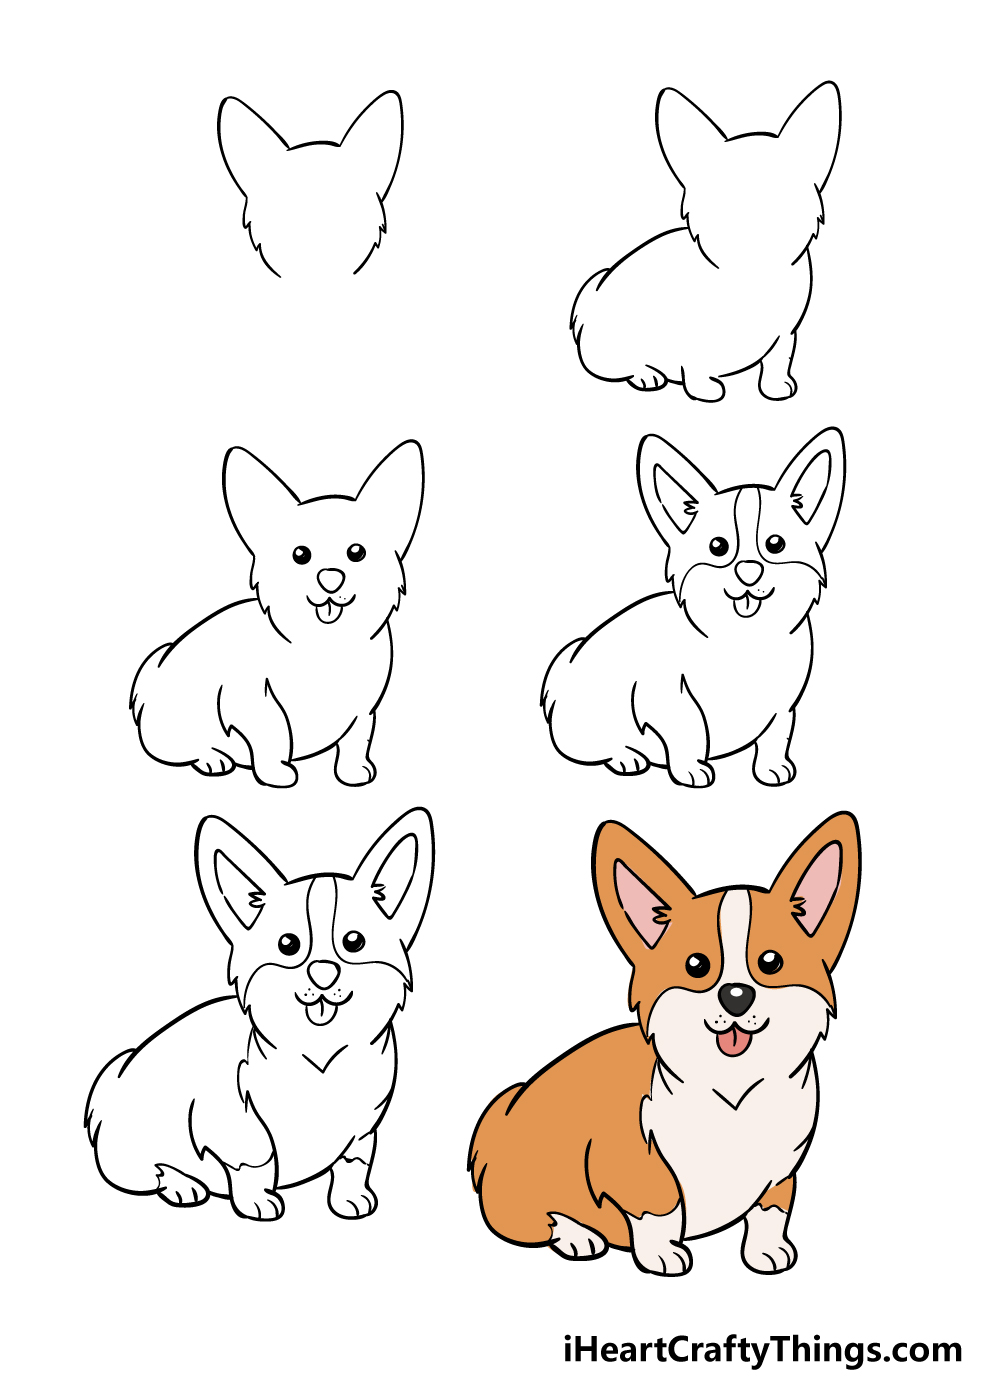
How to Draw A Corgi – Let’s get Started
Step 1
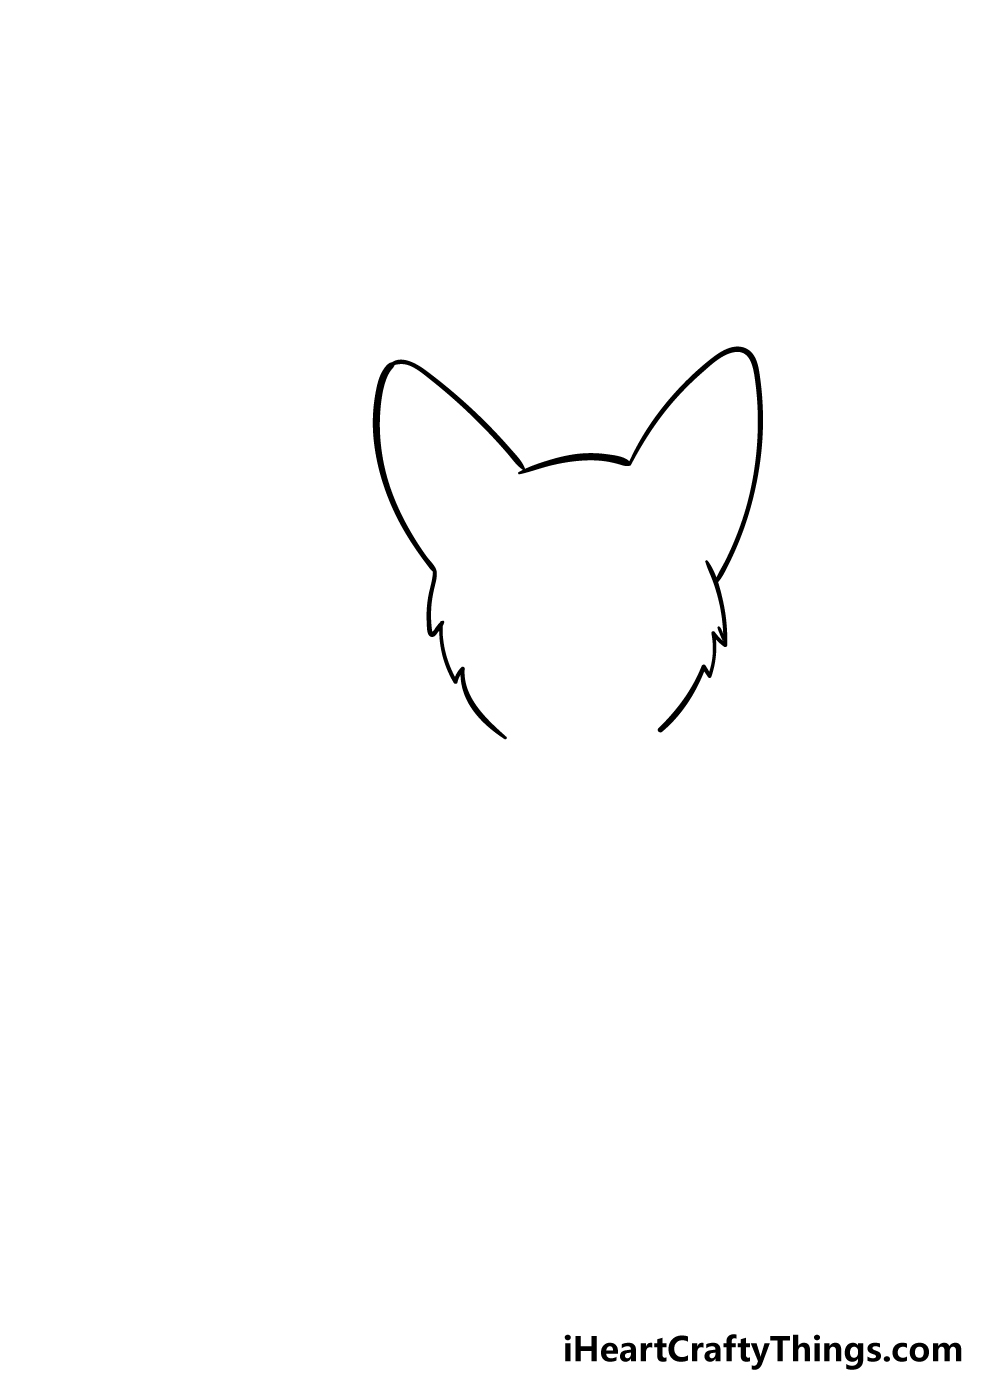
We shall start off this guide on how to draw a corgi by beginning with the head. Corgis have fuzzy heads with big ears, so we shall draw those elements for your corgi.
First, you can make the two ears by drawing two large, curved lines with a smaller curved line between them for the top of the head.
Then, you can draw some curved lines with sharp, jagged portions for the side of the head.
Once you have this outline done then you’re ready to move!
Step 2 – Draw the body of your corgi in this step
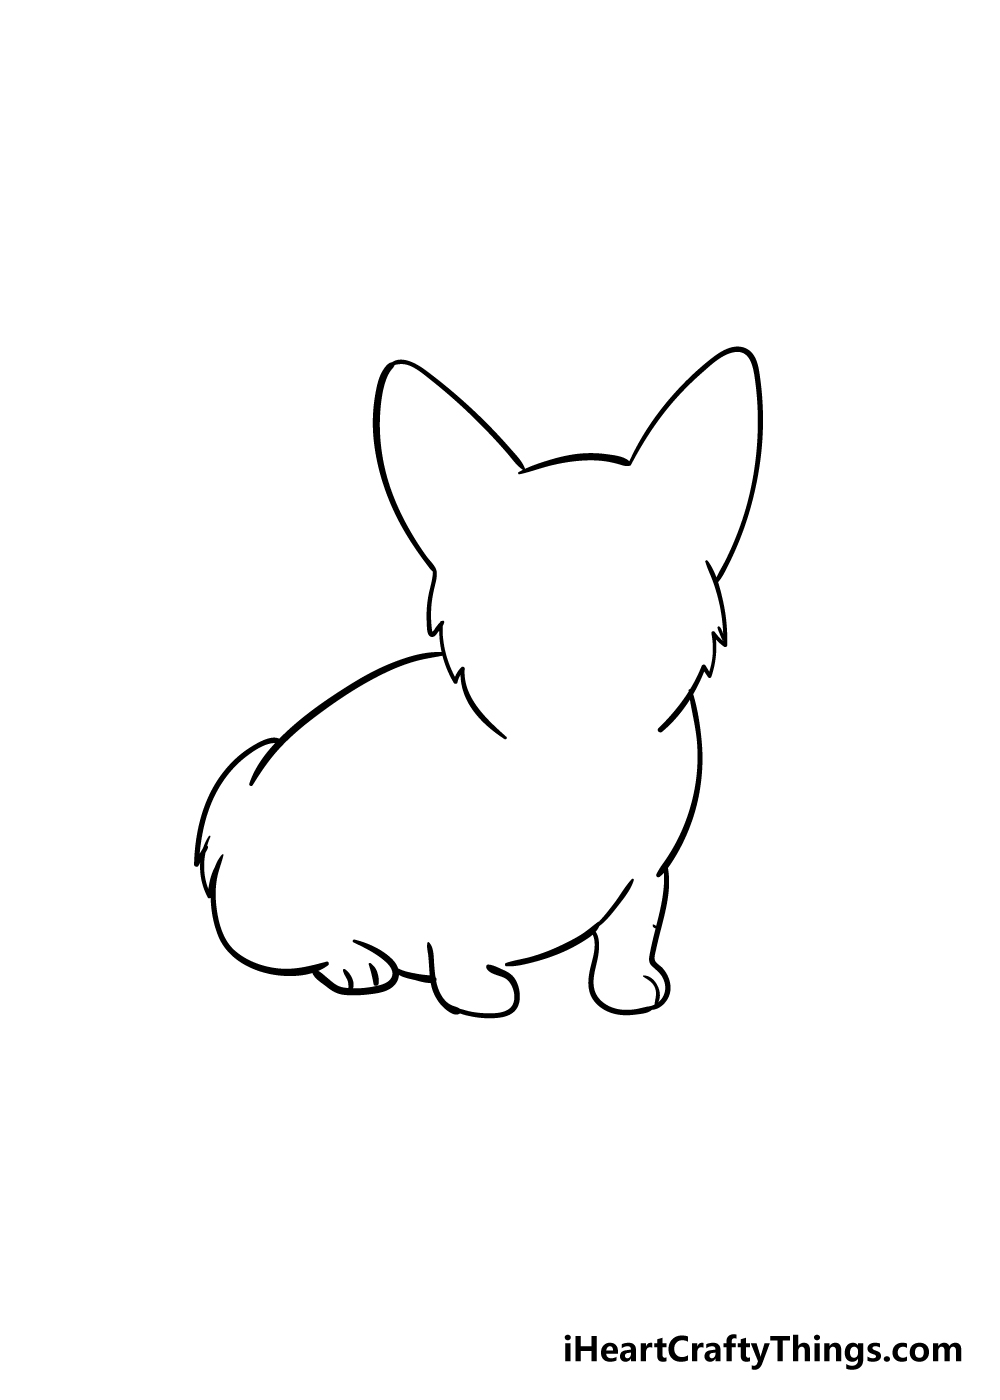
Now that you have the head outline of your corgi drawing done, you can start on the body for your corgi. Corgis have small, squat bodies with short legs, so that’s how we shall draw your one!
Using some curved lines, carefully draw down from the head outline to make the back and chest of your corgi.
Then, you can draw some short little legs and paws under the chest. Finally for this step, draw a tail at the back with another short leg attached to another curved line.
It can sound a little bit complicated, but be sure to follow the reference image closely to make sure you don’t get lost!
Step 3 – Now, you can draw a cute face for your corgi drawing
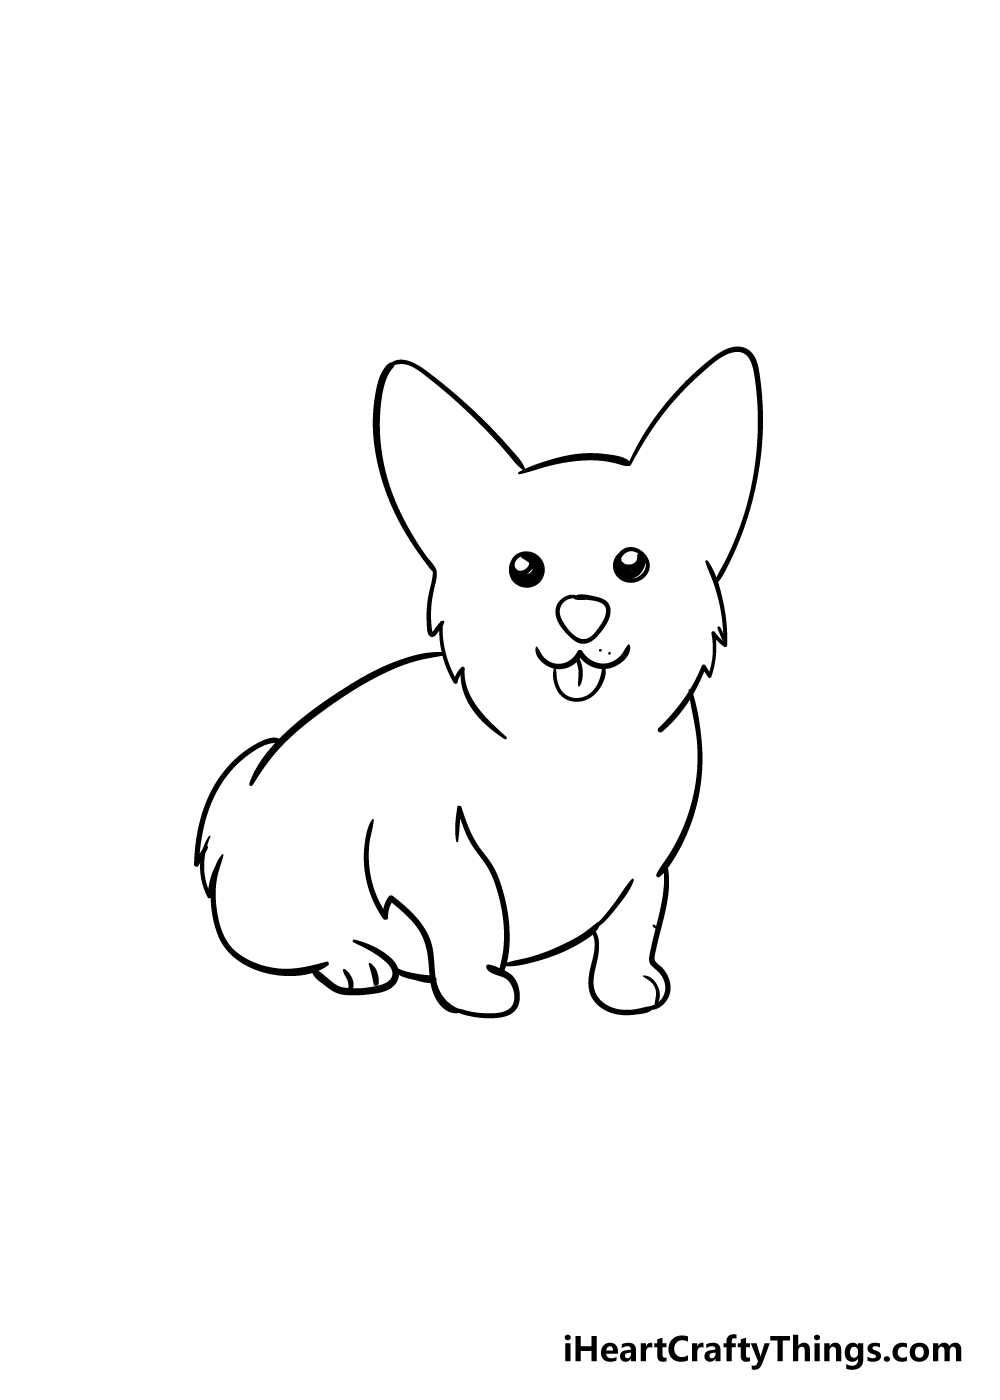
You will be drawing an adorable face in this step of our guide on how to draw a corgi! For the eyes of the corgi, you can use two black circles that are colored in, but have a small white spot in each one for a glint.
The nose will be made with a rounded triangle shape, then you can use two rounded lines for a smiling mouth beneath the nose. Be sure to add a little tongue coming out for extra cuteness!
Finally for this step, add some lines to the foot on the left at the front of your drawing to create the leg.
Step 4 – Draw some face and ear details in this step
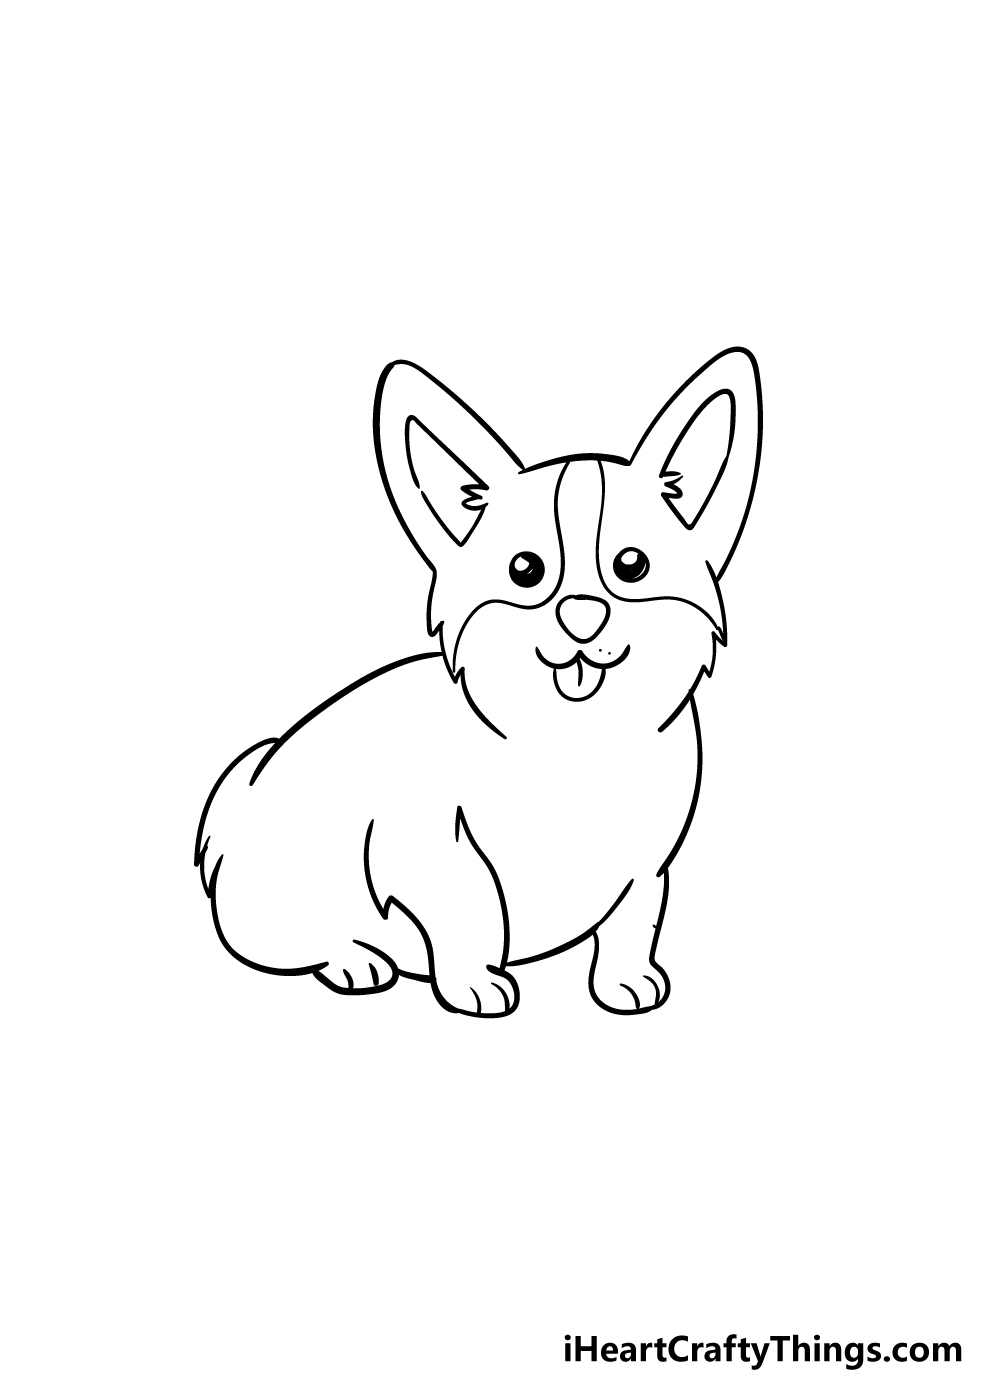
We shall start adding to the details of your corgi drawing in this next step. First, draw some shapes within the outlines of the ears to create the inner ear sections.
Then, you can draw some curvy lines coming down from the top of the head and around the eyes as shown in the reference image.
Finally, be sure to add some detailing to the paws to show the toe divides.
Step 5 – Now, you can some final details for your corgi drawing
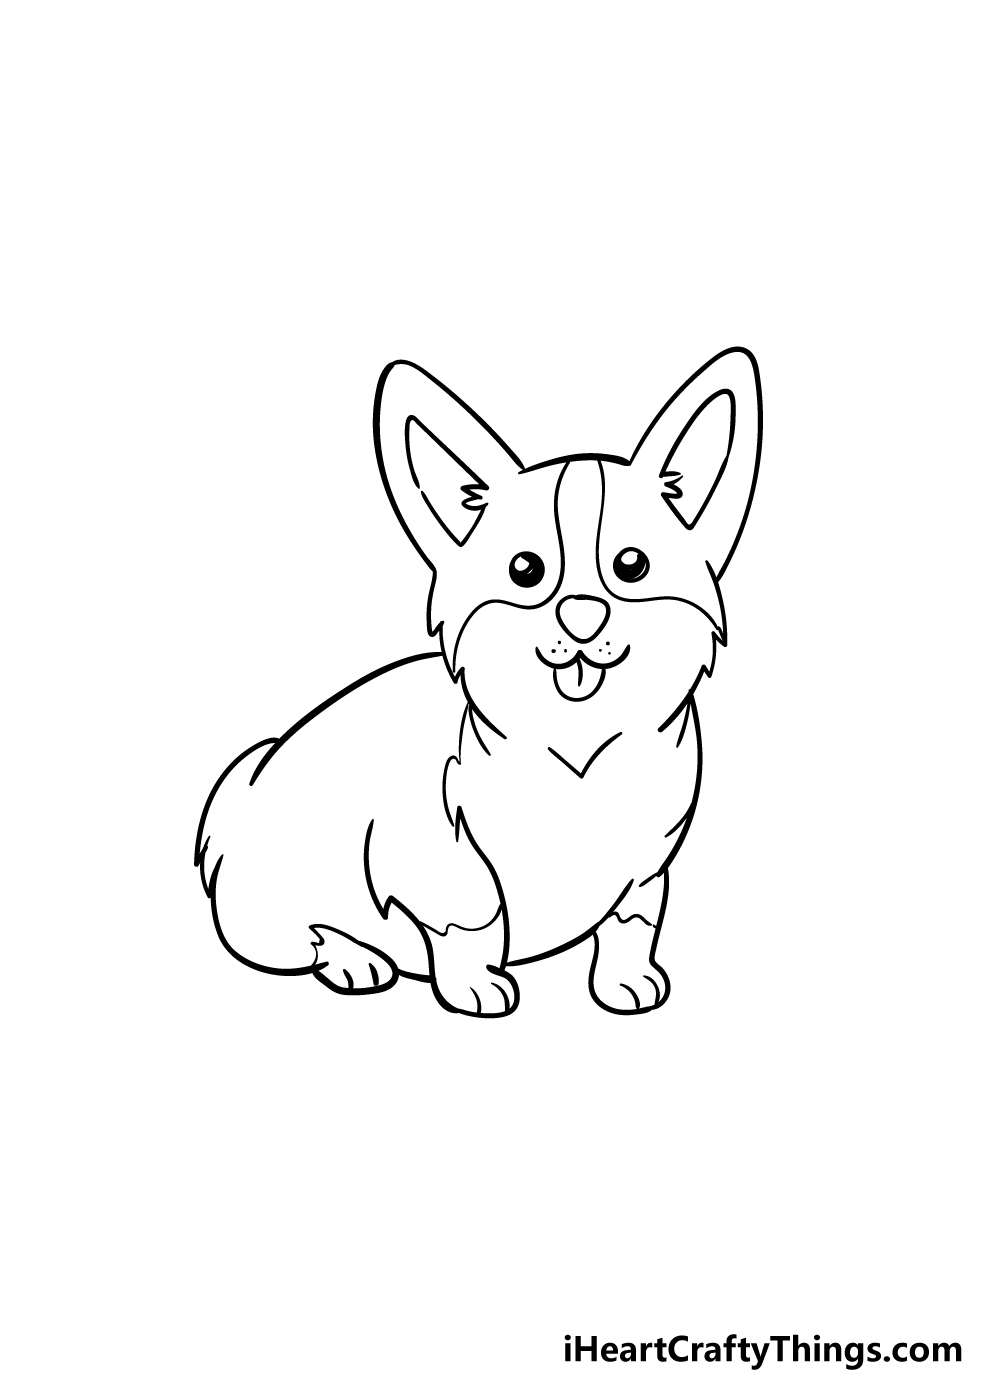
It’s almost time to move on to the final coloring stage of this guide on how to draw a corgi, but before we do that we have a few more details to add.
These details will go around the shoulders of your corgi and also just above the feet. You can achieve these details using some jagged lines to create a furry effect.
Then, you can add some whisker details and other small lines throughout the drawing as some final touches.
Once you have added these details, what else will you add to put your own spin on this drawing?
You could draw in some toys for your corgi to play with or create a fantastic background as well!
Seeing as corgis have a royal reputation, perhaps it could even be wearing a crown! The possibilities are endless and you should really let your creativity run wild.
How will you personalize this adorable corgi drawing?
Step 6 – Finish off your corgi drawing with some color
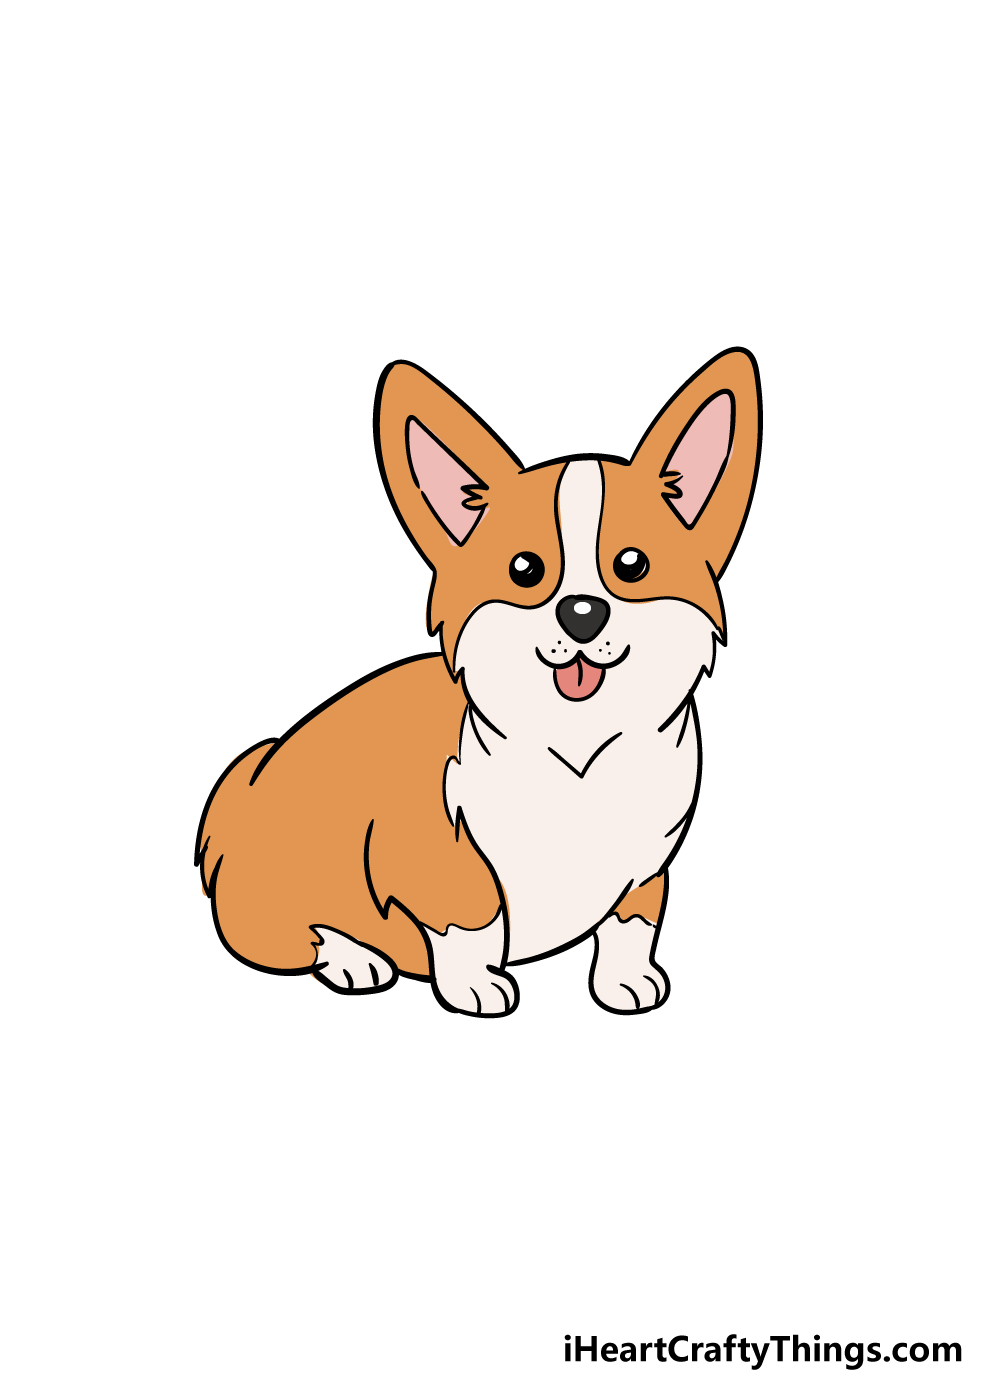
This final part of your corgi drawing is where you get to let your creativity flow as you incorporate some beautiful colors to your image!
As you can see in our reference picture, we used brown, beige and pink for our corgi picture, but you should feel free to use any colors that you love!
This is your drawing, so you shouldn’t feel restricted as you express yourself through color.
Even if you decide on a more realistic color scheme for your corgi, you can still inject some color to your image by coloring any background details you may have added.
You can also shake up the color appearance by playing with different art mediums.
Whether you use a painterly medium such as acrylic or watercolor or perhaps go for crayons, colored pens and pencils there is no wrong answer and anything you choose will look great!
How will you bring color to your drawing?
Do this to take your corgi drawing to the next level
Create some artwork fit for a queen with these fun tips for your corgi sketch!
Corgis are a famous breed, and they are possibly most well known for being a favorite of Queen Elizabeth. For that reason, we think it would be fun to create a royal setting for this corgi drawing!
To do this, maybe you could have the corgi sitting on a big fancy pillow in a palace bedroom. It could be wearing a crown for a fun touch!
Then, you could add all the toys and fancy food a pup could want to finish it off. What are some royal details you would like to add here?
If you want to add a background for your drawing of a corgi, you could keep it a bit more down to earth instead.
The background could be in a more normal house setting, and the corgi could be sitting in a pretty yard.
Just because it might not be a royal corgi doesn’t mean you can’t give it plenty of toys and nice food to interact with! What kinds of settings can you think of?
We love the design of this corgi, but you could also add some more pets to join it. These could include some other dog breeds so that the corgi has some friends.
Or, you could use some other kinds of pets to join this corgi sketch! These could include parrots, lizards or bunnies to name a few.
What other animals can you think of that you can add to this adorable scene?
Adding some more pets is one idea, but you could also add some human characters to the scene! If you were to do this, you would have many options you could go for.
For example, you could have a queen character spending time with her corgi to go with the royal theme. Or, you could use yourself as a model and show yourself hanging out with this cute pup.
If you add people to the page, will you make them cartoony or more realistic?
Your Corgi Drawing is Complete!
That brings us to the end of this step-by-step guide on how to draw a corgi! We created this guide to show you how you can learn to draw one of these adorable dogs without difficulty or frustration.
When you break a drawing down into steps, it can not only make it much easier but can also make it lots of fun to do! We really hope you had an amazing time completing this guide along with us.
Now it’s up to you to have some fun putting a personal touch on your drawing by drawing extra details and choosing your colors and art mediums!
We try to have guides for every taste and skill level on our website, so be sure to visit us there as there is sure to be a guide that will catch your eye!
We also upload new tutorials constantly, so logging in often is the best way to never miss out.
Once you have finished your cute corgi drawing, we would love to see your artwork! Please do share it on our Facebook and Pinterest pages for us to see!