When you think of a fish in a fishbowl, one of the first fish species that will come to mind will probably be a goldfish.
These little shiny fish are popular as pets around the world due to their low maintenance and pleasing colors.
They may be common, but that doesn’t make them any less special or pretty as fish, and it can be a lot of fun to learn how to draw a goldfish as well.
If you love goldfish and would like to create some artwork featuring them, then be sure to read on!
This step-by-step guide on how to draw a goldfish will show you how you can draw one of these cute and pretty fish.
How to Draw A Goldfish– Let’s get Started!
Step 1
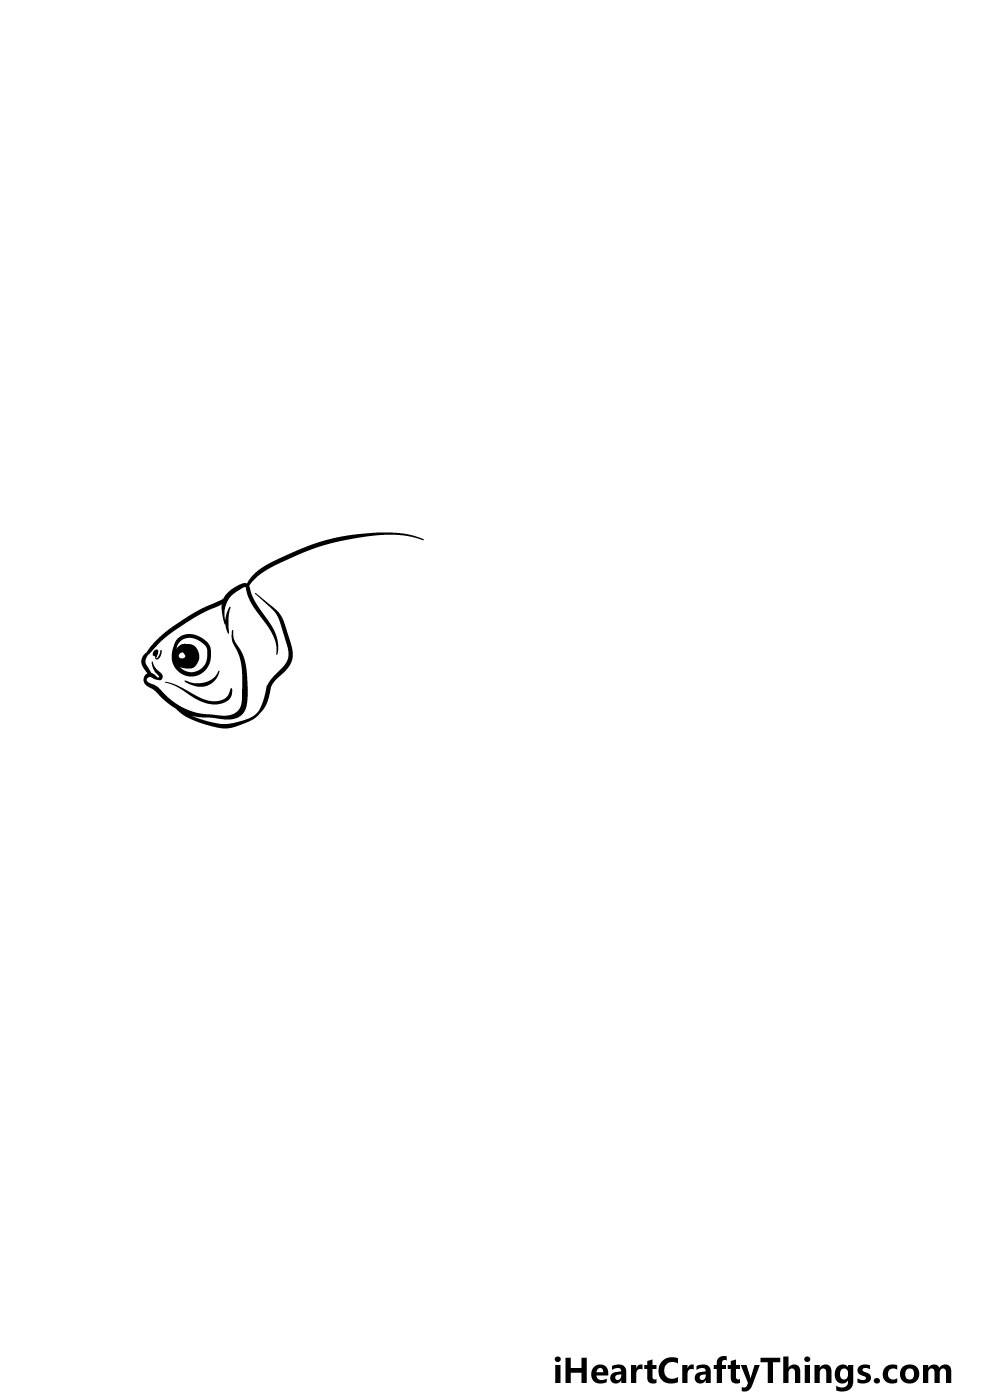
In this first step of our guide on how to draw a goldfish, we will be starting with the head of the fish.
To do this, you can start with a small circle for the eye of the goldfish. Then, add another solid black circle within it for the pupil of the eye.
Once you have that eye drawn, we can then start drawing the front of the face.
This will be drawn with some curved lines to create the pointy front of the face. There will also be some line detail on the face, and then you can use some more curved lines for the section leading to the back of the goldfish.
Step 2 – Next, draw the top fin and start the tail
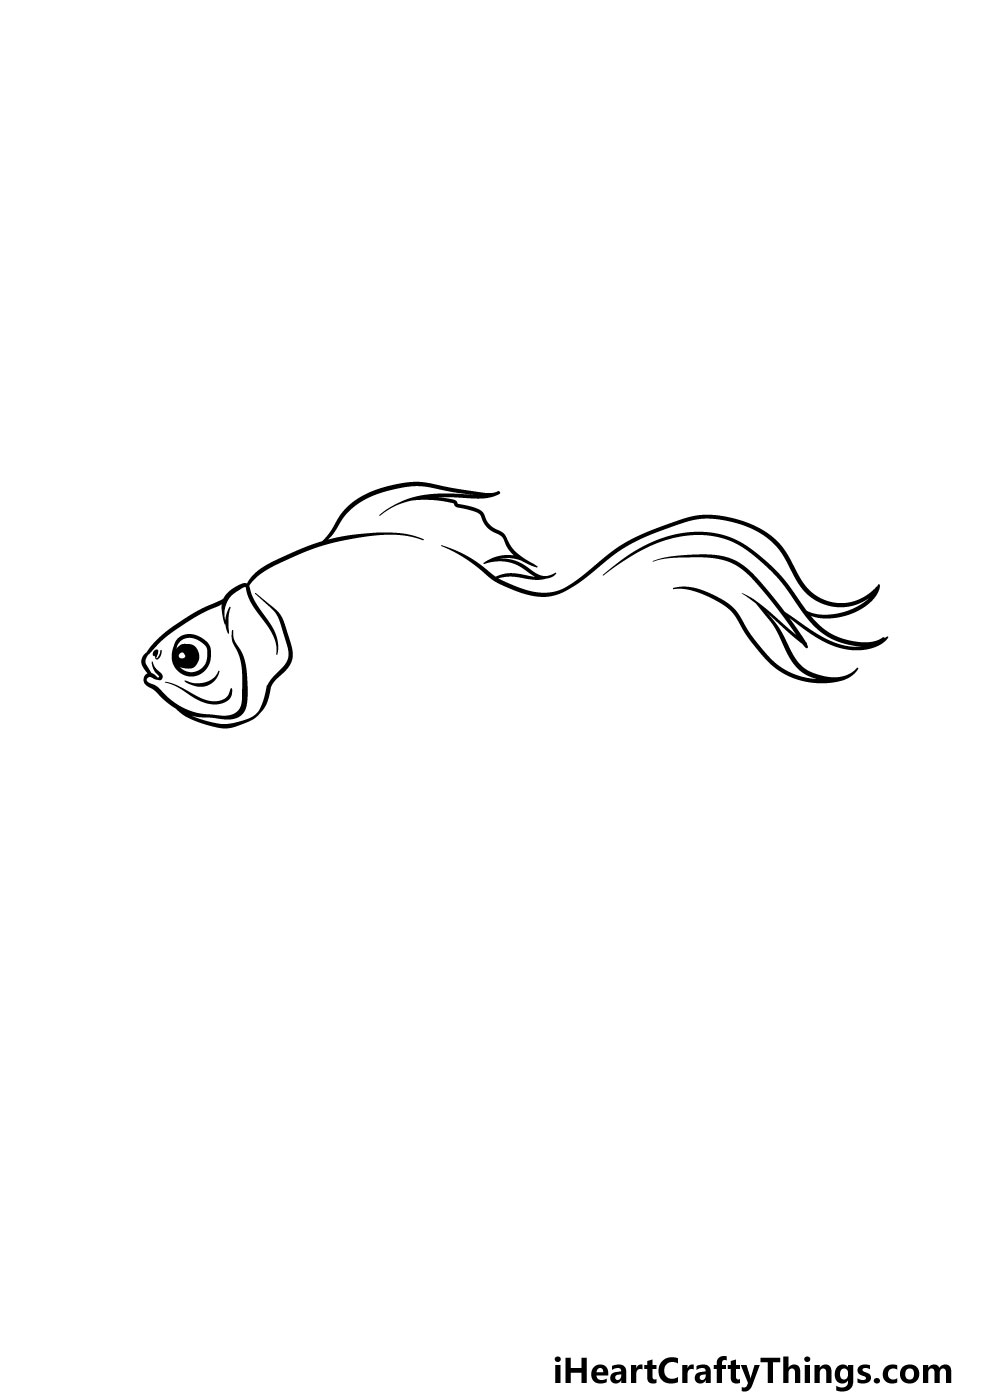
Now that you have the head of your goldfish drawing, we can start on the body. We will be using a combination of curved and sharp lines to do this as we start on the back and fins of the fish.
First, using the line that you started for the back previously, you can draw the flowy top fin of the goldfish.
Then, the back will curve inward to the fish, and then it will morph into the tail of the fish. The tail will end in several long, curved and sharp lines to show that it has several sections at the end.
Once you have it looking as it does in our reference image then you’re ready for step 3!
Step 3 – Now, start drawing the belly and bottom fins of the fish
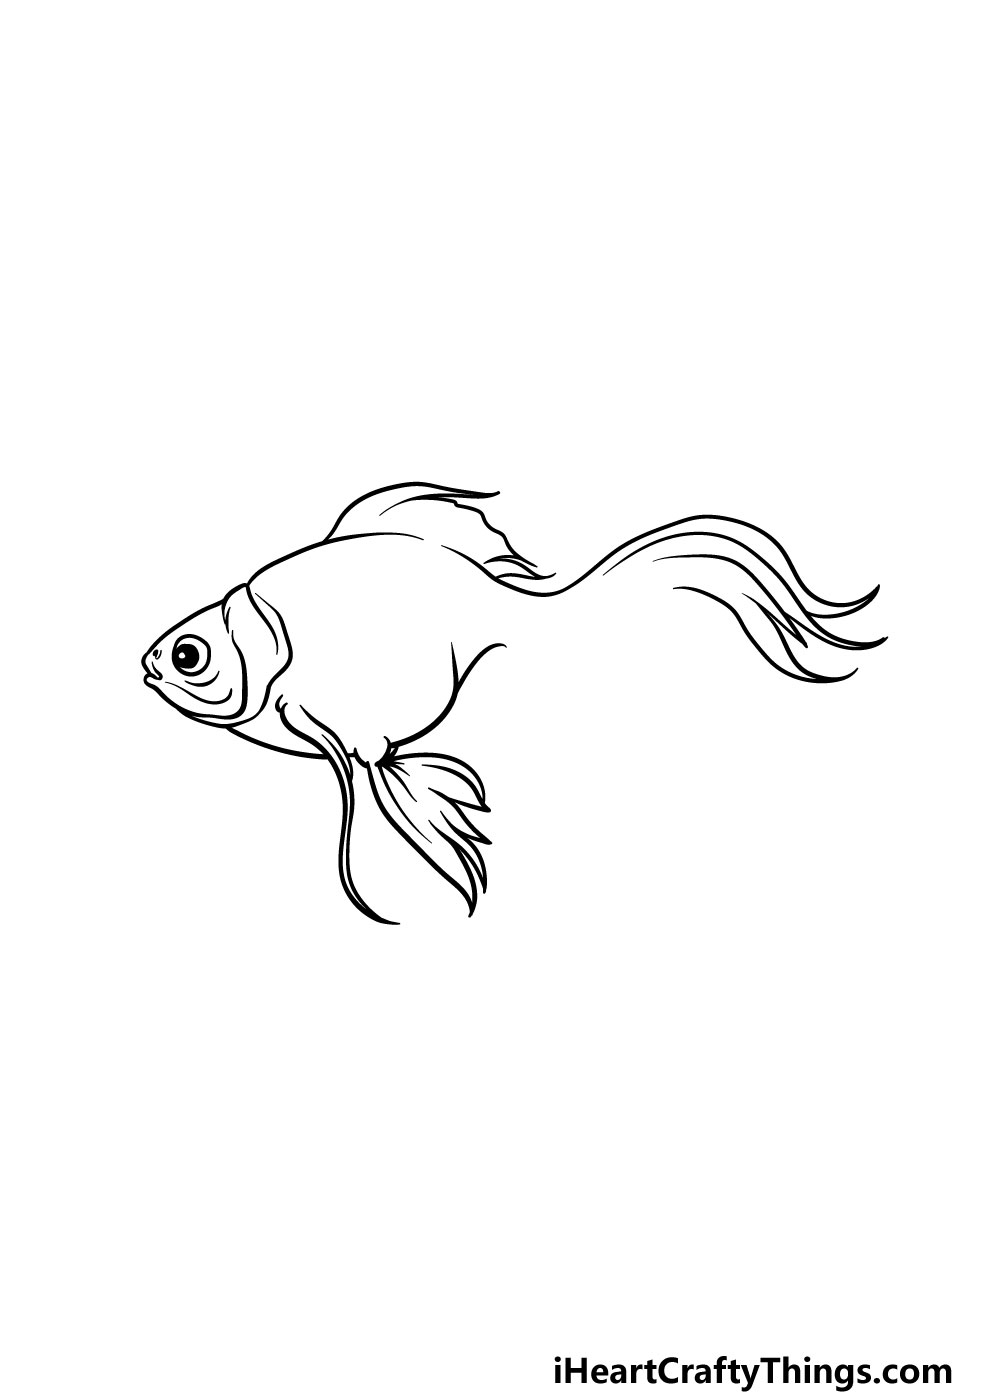
We focused on the top of the goldfish in the previous step of our guide on how to draw a goldfish, and we will focus on the bottom of the fish in this step.
First, we will be using some wavy lines to create a long and very thin fin flowing down from the goldfish.
There will then be a larger curved line for the belly of the fish, and then you can add another wide fin underneath the belly.
The belly will also curve inward, so ideally when we draw more of the tail later on there should be a very thin section where the tail starts.
Step 4 – Next, draw the rest of the tail outline
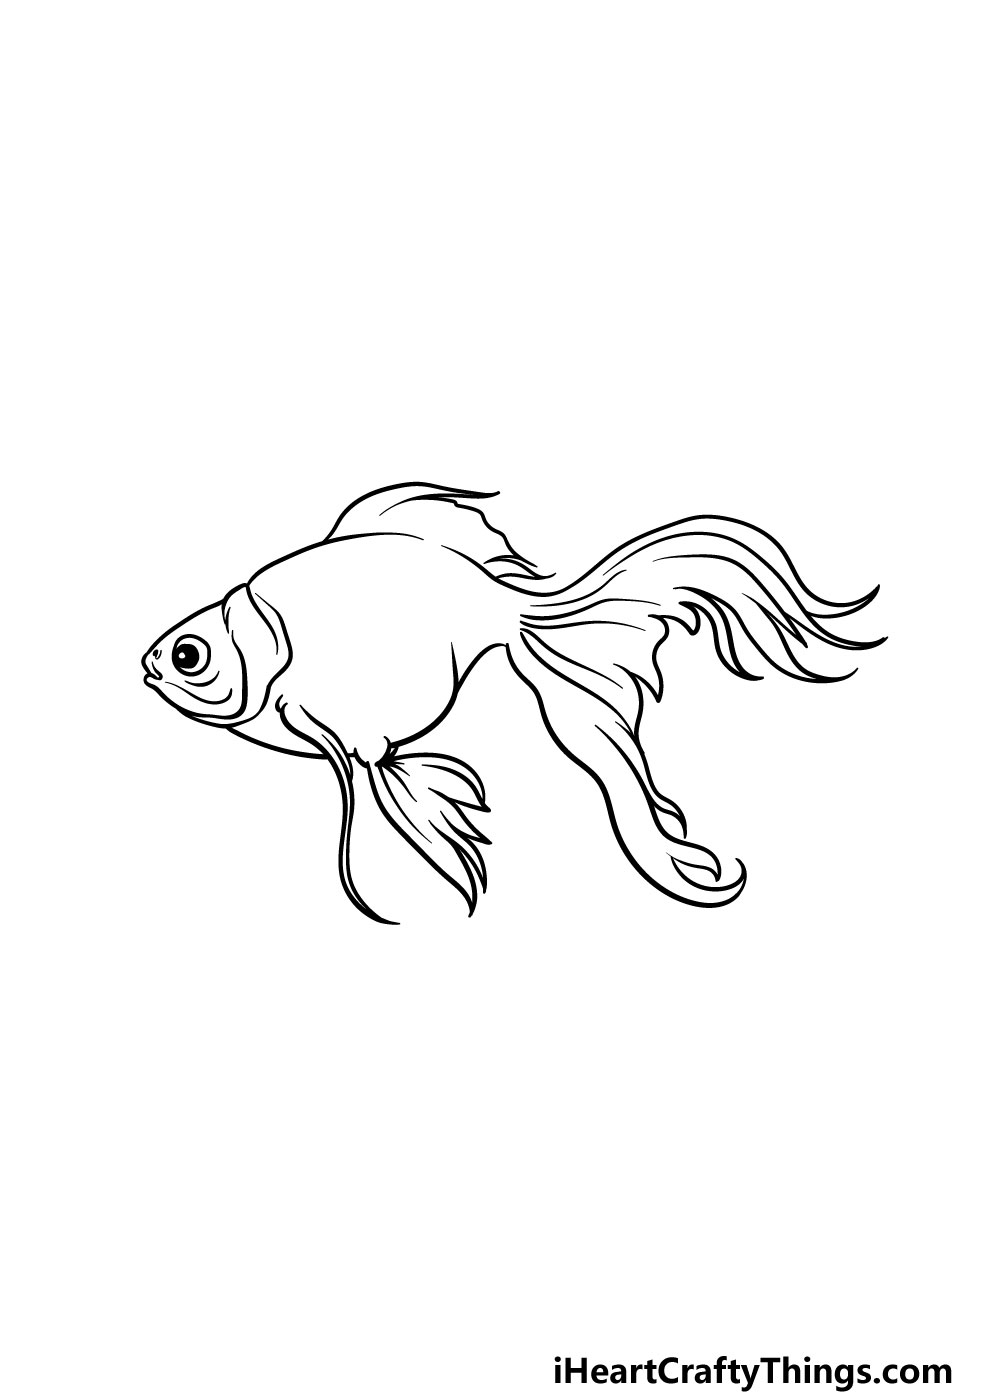
Now it’s time to finish off the outline of your goldfish drawing in this step. For this part, we will be focusing on the tail.
To draw this tail, we will be using some long and curved lines to have the tail flowing out. A goldfish’s tail is quite large compared to the rest of its body, and it’s separated into two sections, as shown in the reference image.
You can then finish off the tail by adding some line details throughout both sections of the tail.
The goldfish is now looking great but still a bit bare. We shall add some more details to it in the next step though, so let’s proceed!
Step 5 – Now, you can finish off the details of your goldfish drawing
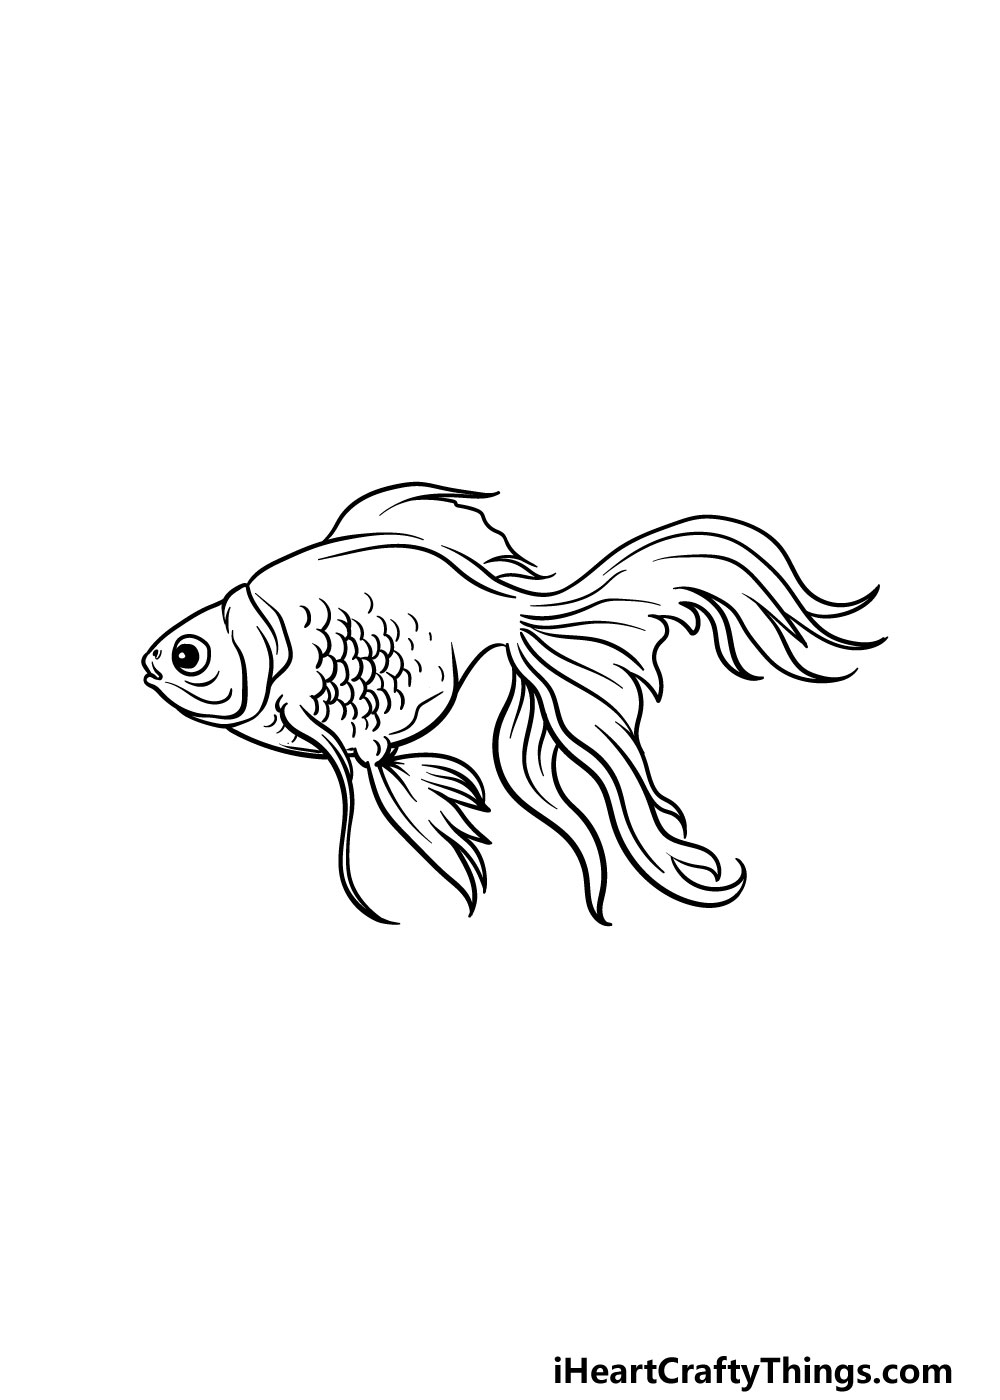
As promised in the previous step, this fifth part of our guide on how to draw a goldfish will be dedicated to finishing off the final details of the fish before coloring it in.
First, you can draw lots of small, curved lines onto the body of the fish for some scale details. We will then finish off by adding another thin section of the tail coming down from the other parts.
Then you have finished all of the details! Before moving on, you could draw some extra details too. Some ideas could include drawing a background to show the fishtank this goldfish is in.
You could even draw some more goldfish as friends for this one! What other ideas can you think of to finish off this drawing?
Step 6 – Finish off your goldfish drawing with some color
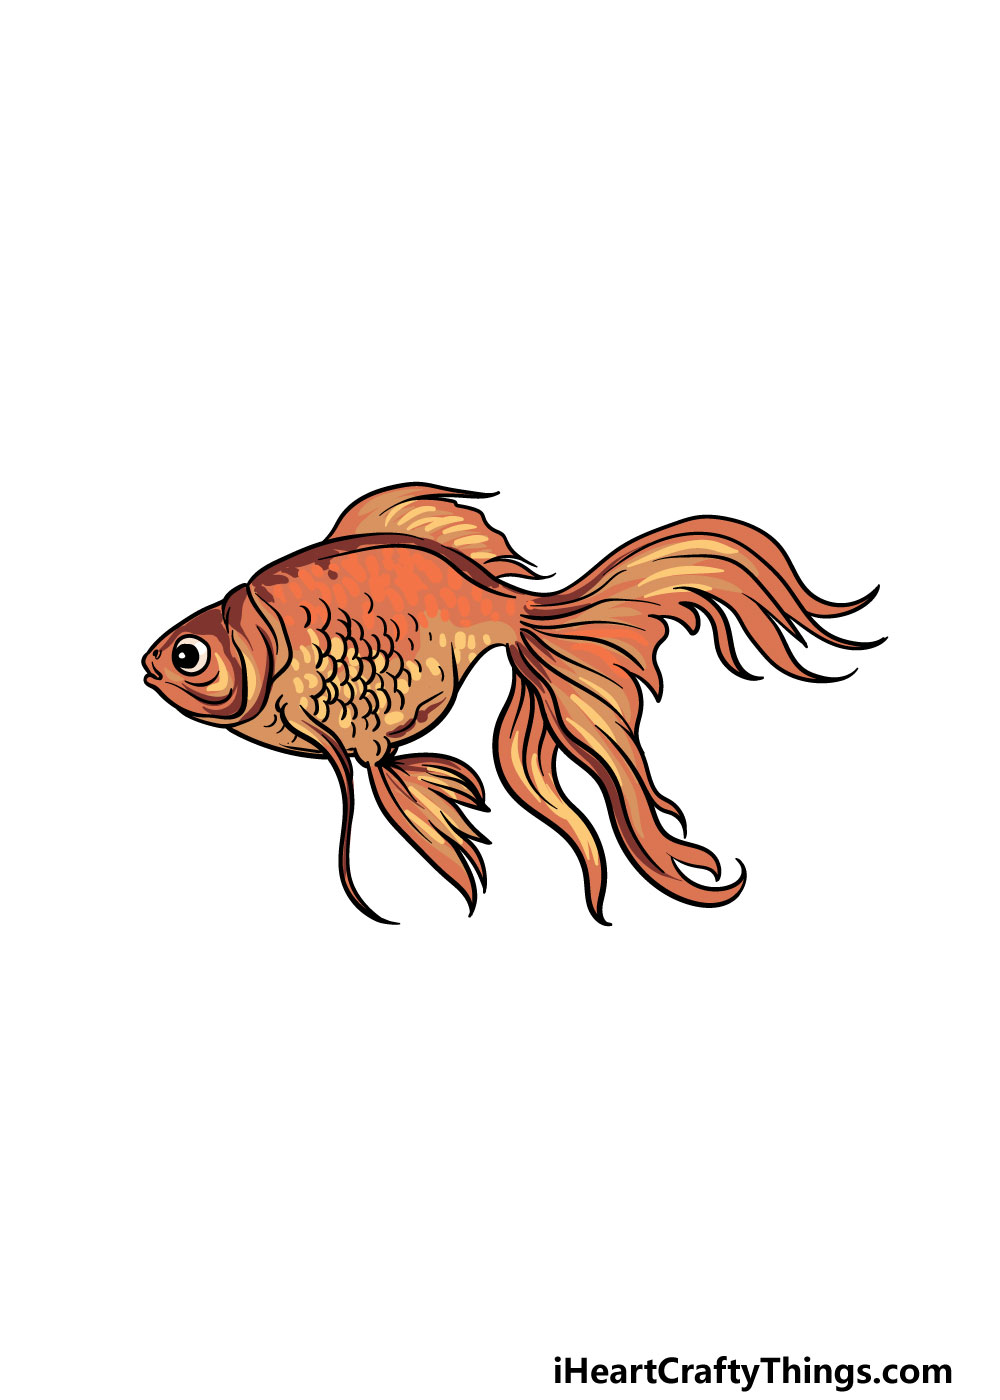
Now that your goldfish drawing is done, you can have some fun coloring it in!
Due to the name of the fish, you may feel that you’re limited to gold for the colors, but you could use any colors that you love, as goldfish can come in many different colors.
We went with a gold color scheme for our example, but we kept it interesting by using a nice variety of different shades.
You could also experiment with different art mediums and crafts. It would look amazing to use some glitter pens or glues to give this goldfish a bit of sparkle, and you could incorporate other favorite mediums to bring it to life.
What colors and mediums will you use to finish off this goldfish drawing?
3 More tips to make your goldfish drawing easy!
Make this easy to draw goldfish even simpler with these helpful tips!
We made this goldfish drawing very detailed and complicated, and this makes it very interesting to look at.
If you find yourself getting frustrated from drawing all of these details, then you should certainly go ahead and simplify them.
You could start by removing some of the curved lines from the tail or the scale details on the side of the goldfish.
These wouldn’t ruin the design by any means, and most viewers won’t even notice their absence!
Those are just a couple of examples of details you could remove or modify. However, if there are other specific ones you are having a tough time with, you can change those.
Next, you could also make this goldfish drawing easy by changing the style of the drawing entirely. As mentioned, we went for a more realistic and detailed portrayal, but maybe you feel more comfortable with other styles.
You could make this goldfish look more cartoony or stylized if that’s what you tend to prefer drawing. Even if you change the style entirely, you could still use the steps of this guide to aid you.
Simply change some of the steps to suit the design you want to create, and you’ll have your finished goldfish sketch in no time! What styles would you like to create?
No matter what styles or details you choose to create, you can use other sources along with this guide. There are many different ones you can use to make this goldfish drawing all that it can be!
The best one to use would be a real goldfish if you or someone you know has one as a pet. Not everyone has one, so you could also go to a pet store and take some pictures of goldfish.
Otherwise, you can find many images of goldfish online that you can use. By using the real thing, you will find the smaller details and proportions much easier to do.
What sources will you use with this guide?
Your Goldfish Drawing is Complete!
All six steps of this guide on how to draw a goldfish have been completed, and you have an incredible drawing to show for it!
For such a seemingly simple fish, goldfish can be trickier than expected to draw as they have a surprising amount of detail and elements to them.
We hope that this guide made tackling these elements easy and fun for you to do!
Now you can show off your creativity by showing us what details, colors and additions you can think of to take this to the next level. We know you will do an incredible job, and we can’t wait to see the end result!
When you are ready for more drawing, you can visit our website for many more incredible guides to enjoy. We upload new ones frequently too, so be sure to visit often!
We really would love to see your completed goldfish drawing, so please be sure to share it on our Facebook and Pinterest pages so we can admire your artwork.