Few things are as relaxing and fulfilling as cultivating a garden of your very own.
You can choose from a huge array of different plants, flowers and even vegetables to populate your garden, and it’s a great way to bring some vibrant color and life to your yard.
It can be expensive and time-consuming to do, however, so sometimes learning how to draw a garden can be the next best thing!
By the end of the guide you have before you, you will be able to design your own beautiful garden.
We hope that you have a wonderful time working with us on this guide on how to draw a garden!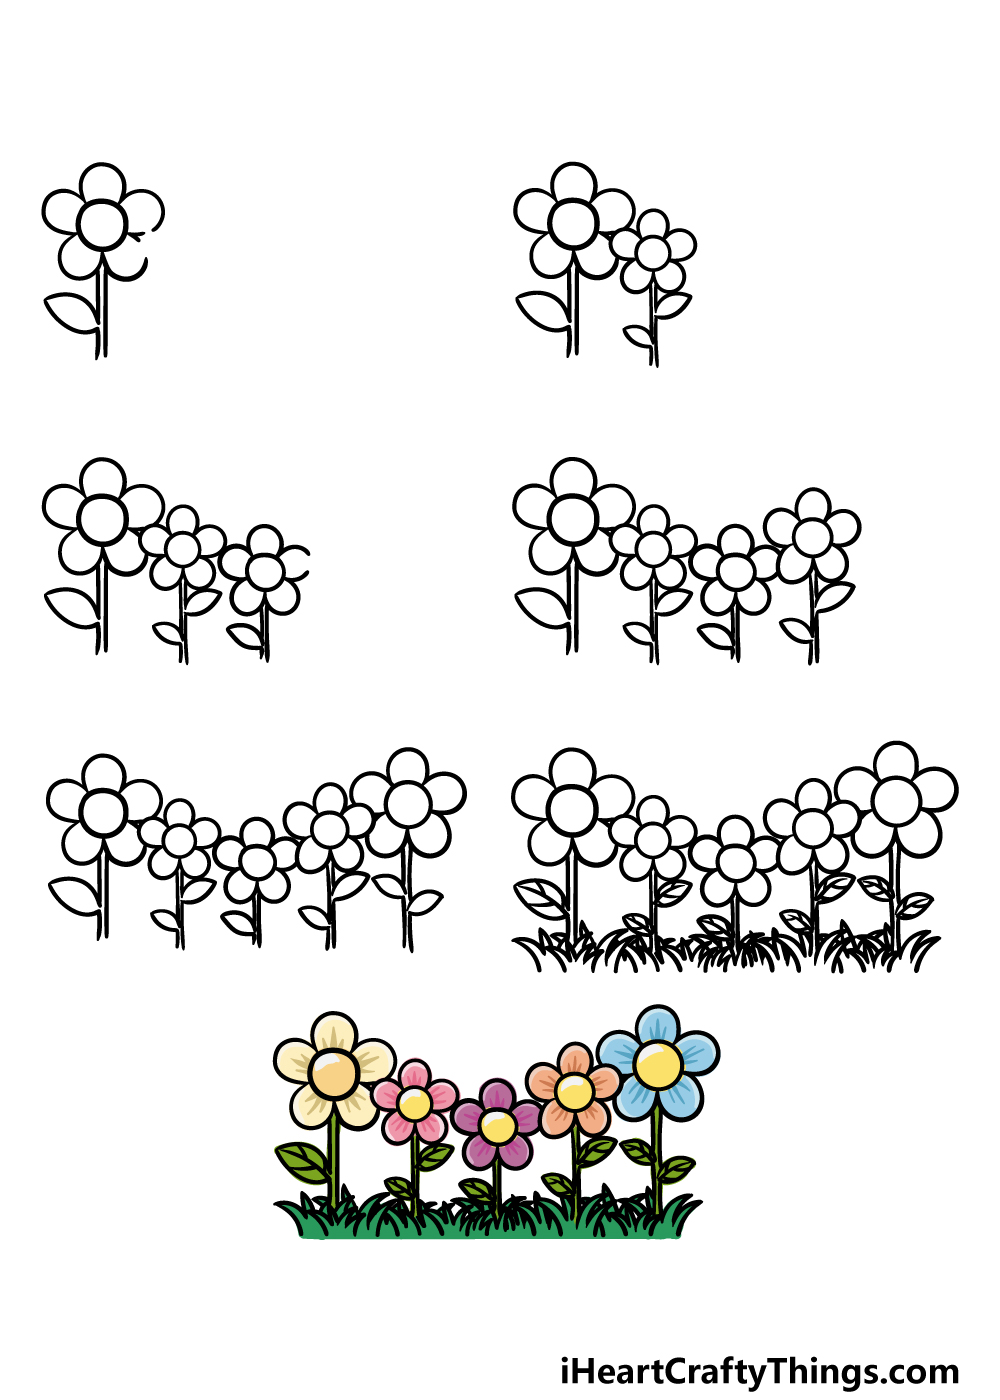
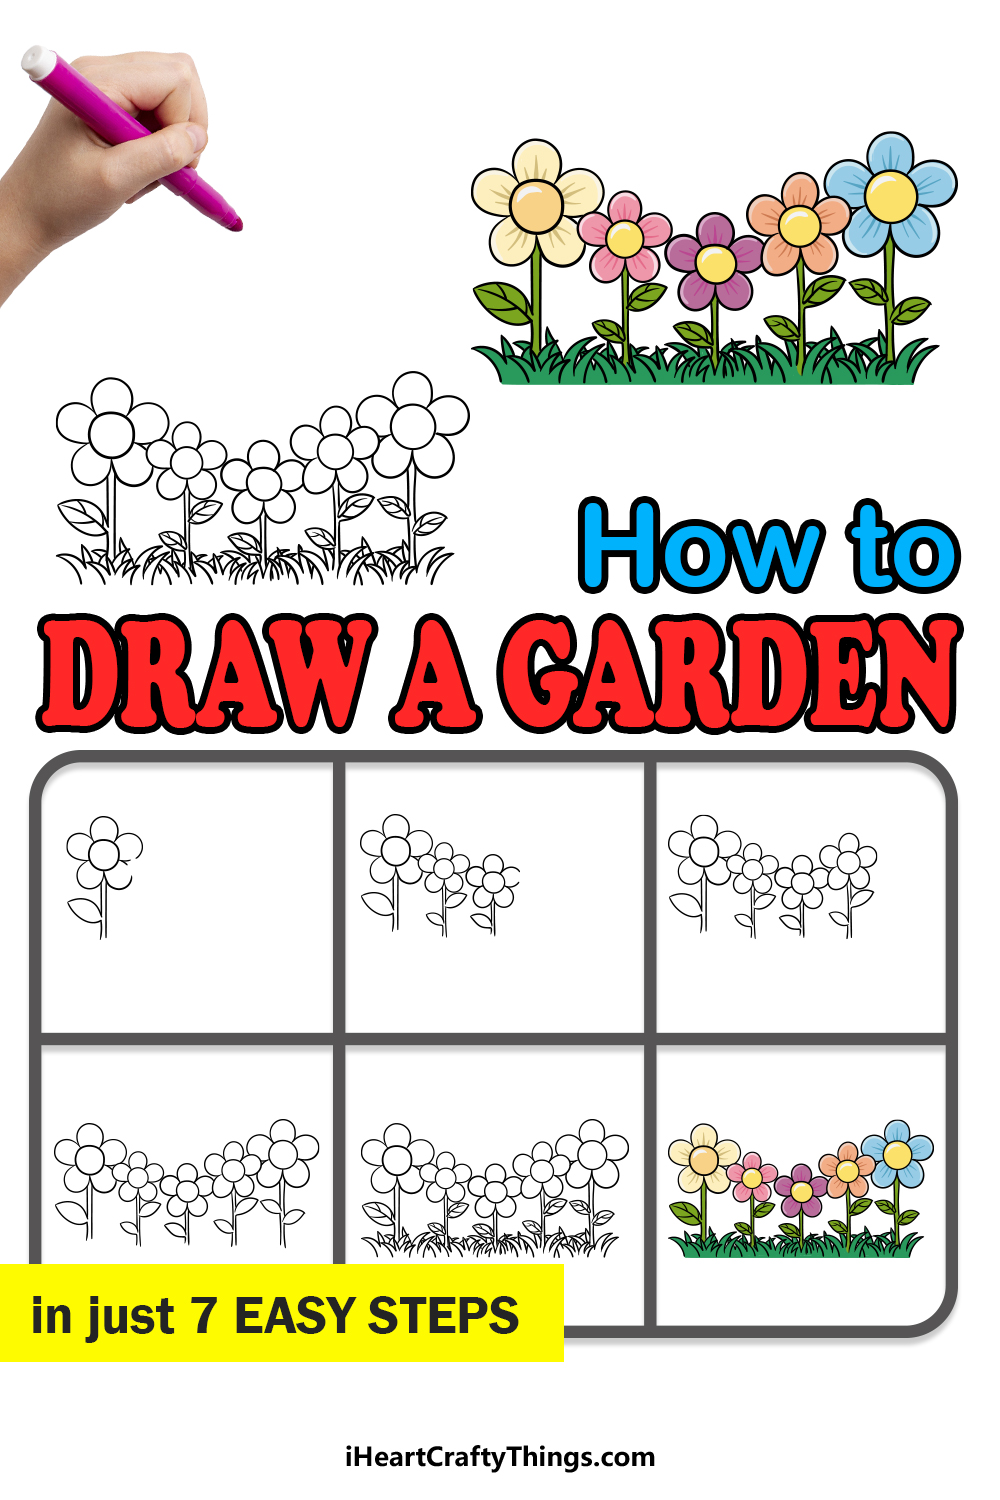
How to Draw A Garden – Let’s get Started!
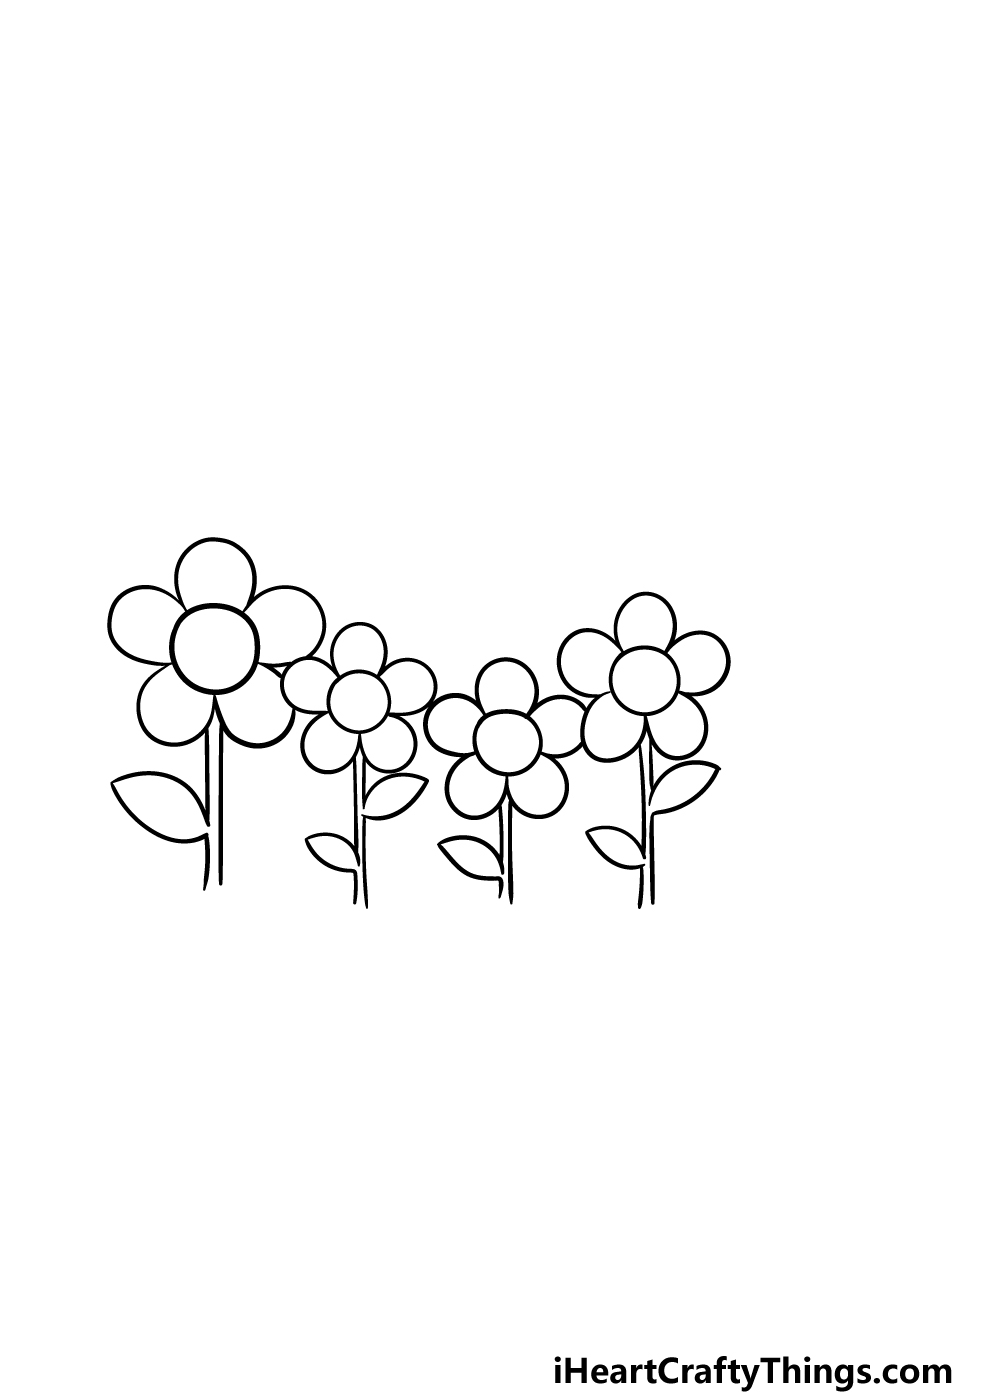
Step 1

This garden that you will be working on will be filled with some simple, pretty flowers, and we will draw the first of these in this first step of our guide on how to draw a garden.
To start this flower, we will be drawing a circle for the center of the flower. Then, we will be drawing five large, round petals onto the flower, and the petals on the right will have some small gaps in them.
These gaps will be there as those will be the areas where the next flower is touching this one.
Then, we will finish off this step by drawing some straight lines for the stem, and we will also be adding a leaf on the left-hand side of the stem. Then you’re ready to draw some more flowers in the next few steps of the guide, so let’s move on!
Step 2 – Draw another flower for your garden
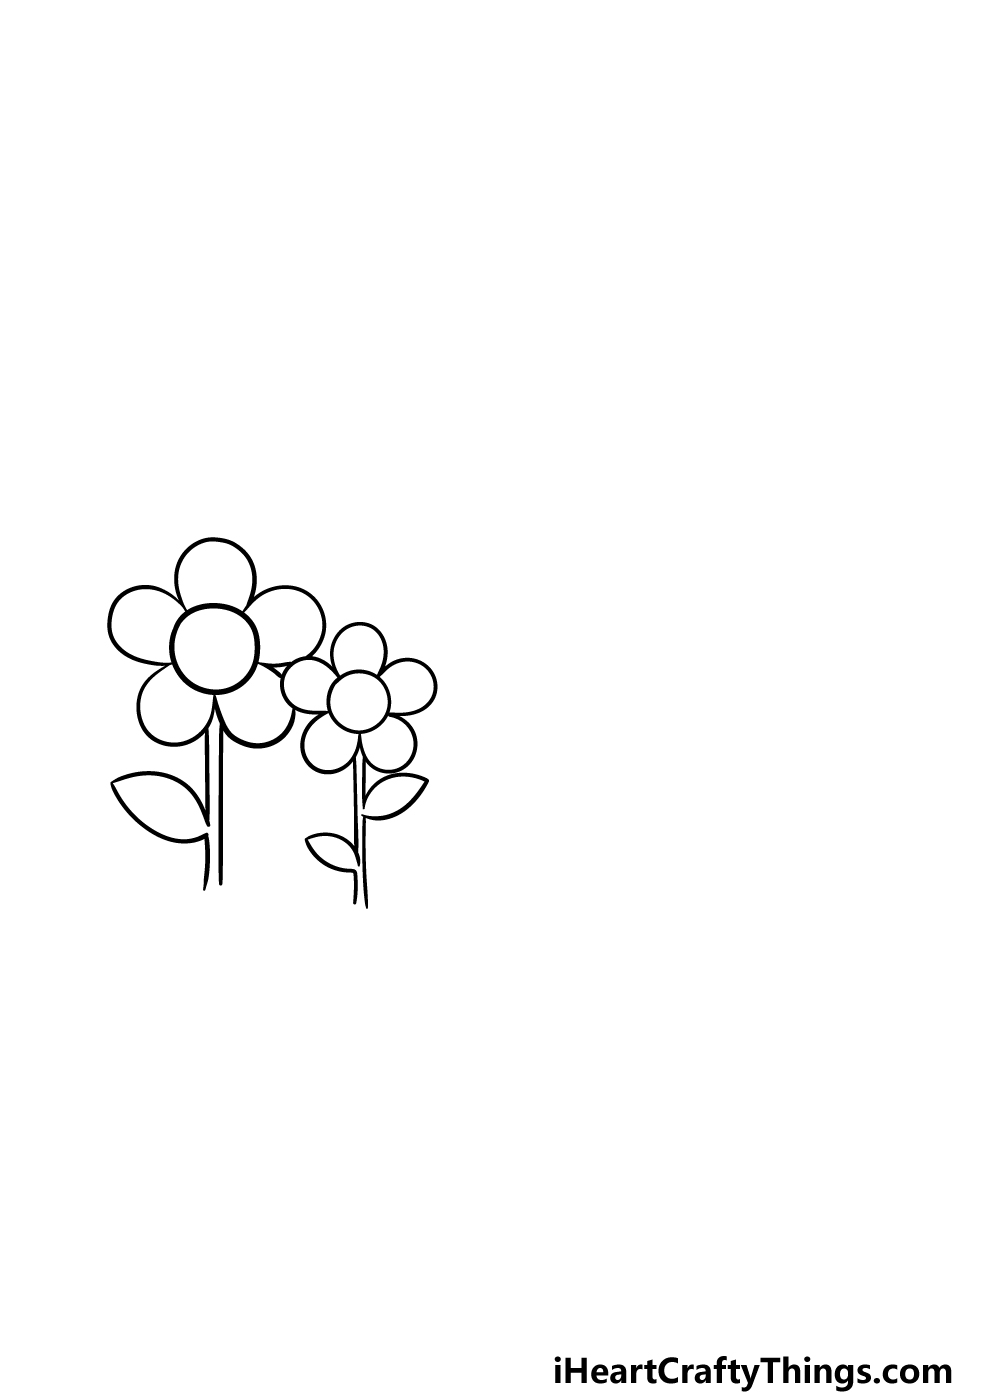
Now that you have drawn one flower for your garden drawing, you should have no problems drawing another one!
This flower will look very similar to the first one, except it will be a bit smaller.
The petals of this second flower will also fill in the gaps that you left in the petals in the previous step. Also, this flower will have two leaves on its stem instead of the one from the first one.
Step 3 – Next, draw the third flower
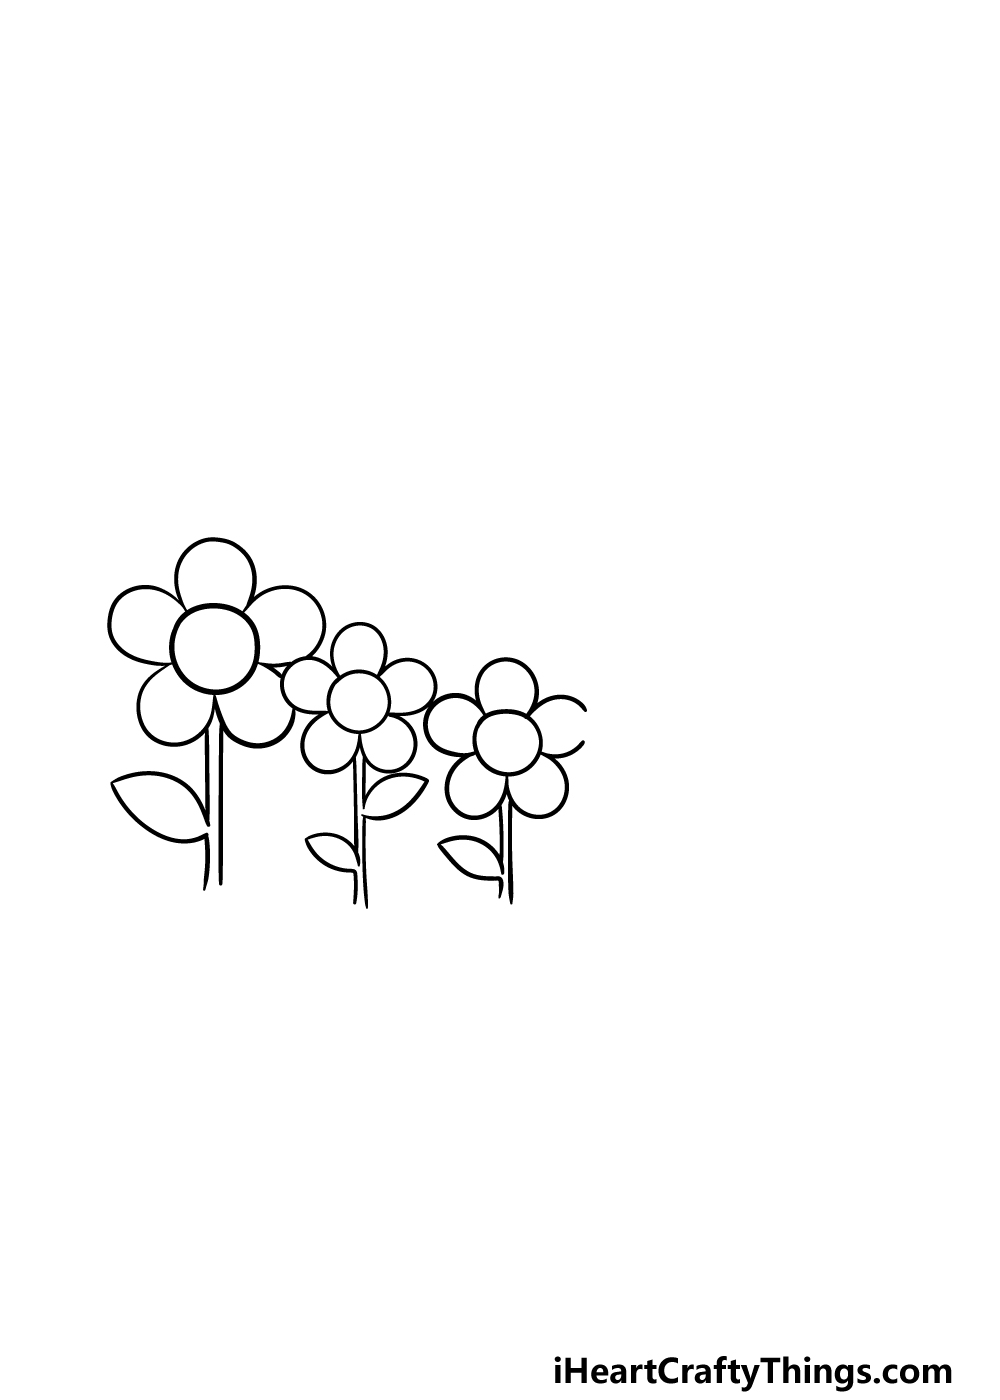
For the third step of our guide on how to draw a garden, we will be drawing another flower.
This one will be around the same size as the previous one, however the stem will be a bit shorter, making this flower sit lower than the previous two.
Much like the first flower, this one will have one leaf on the left-hand side. There will also be a slight gap on the petal on the right, and once again another petal will overlap there.
Step 4 – Now, add another flower
We will be drawing the fourth flower in this step of your garden drawing. This flower will be the same size and height that the second one was, and will also have two leaves like that one did.
Then, there will just be one more flower and some final details to add before you add some amazing colors to the image.
Step 5 – Next, draw the final flower of the garden
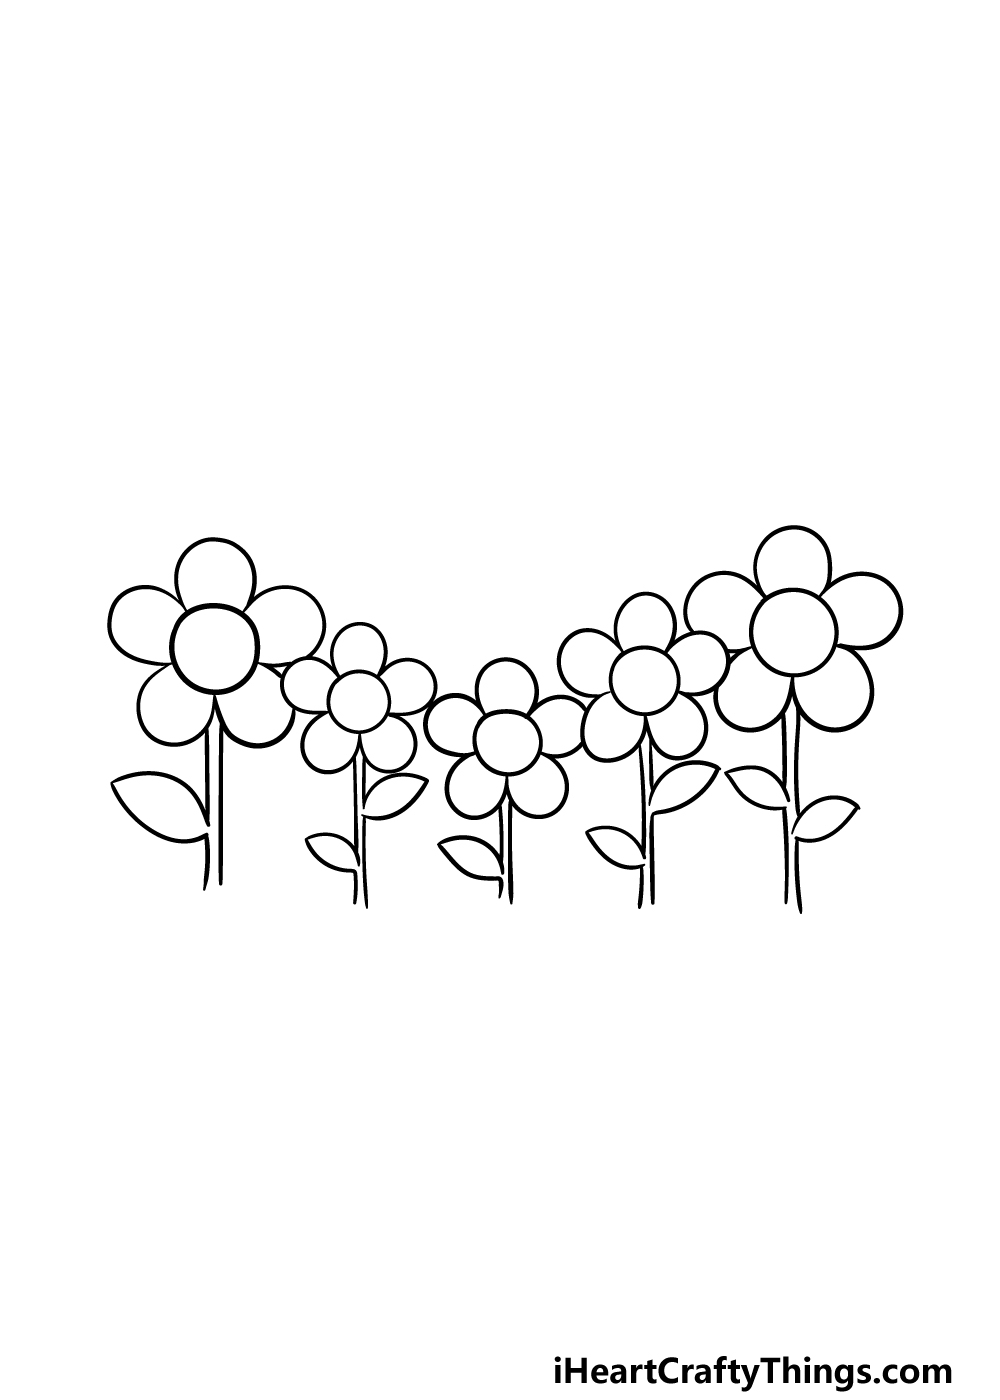
It’s time to draw the final flower for this guide on how to draw a garden! You’ve definitely gotten the hang of this, so you should have no problems doing just that.
This flower will be around the same height and size that the very first was, however unlike that one it will have two leaves on the stem.
Once you have all five flowers drawn, you are ready to add some final details in step 6!
Step 6 – Now, add the grass and final details
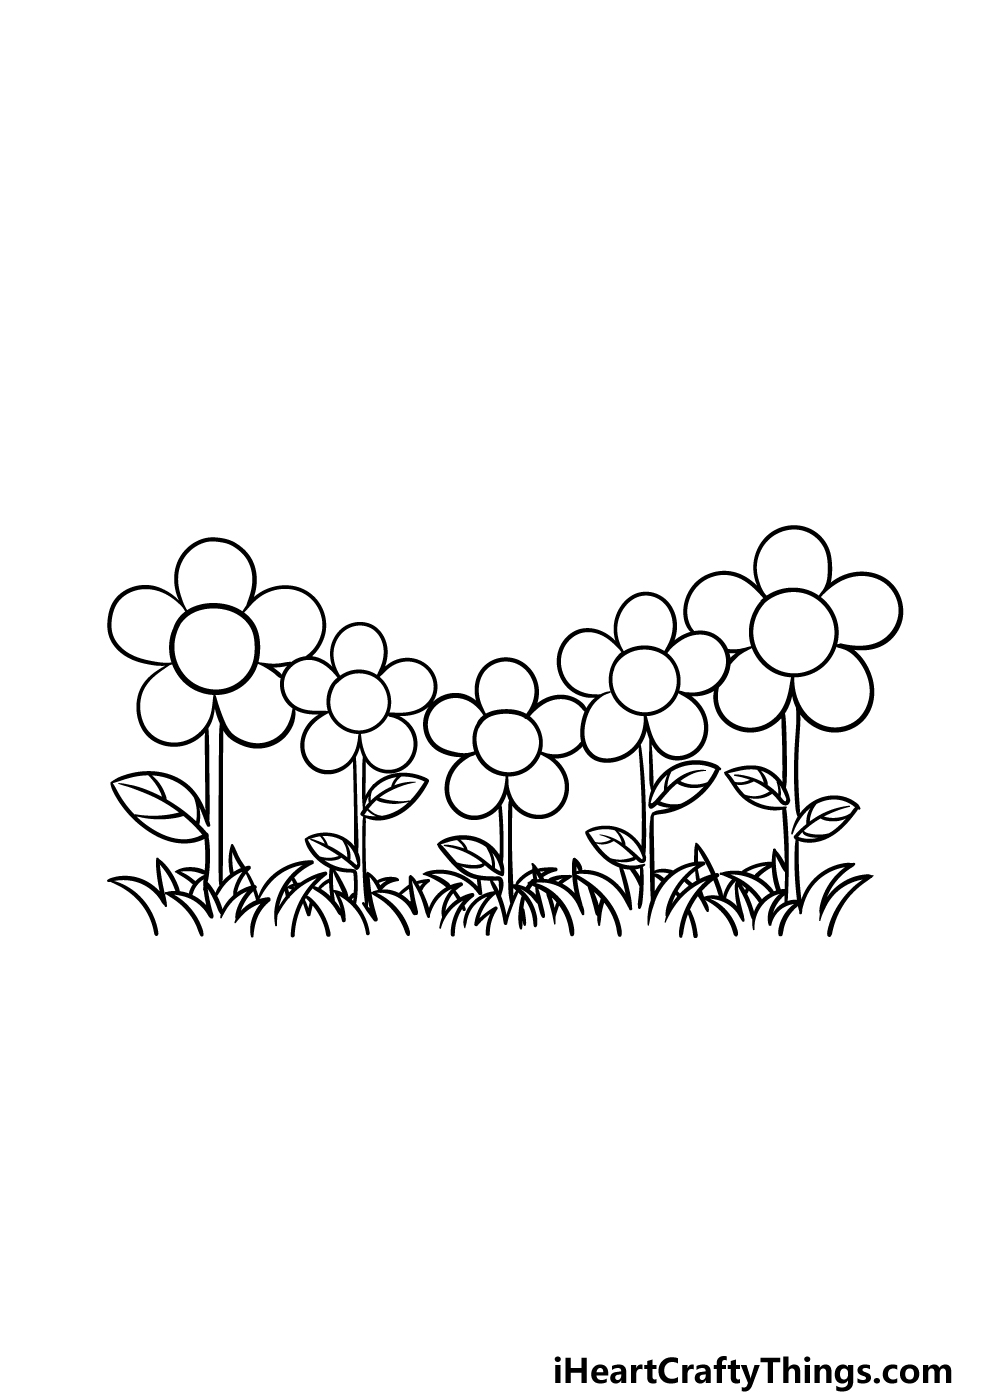
All of your flowers are drawn now, so for this step of your garden drawing we will finish off with some final details before the final step.
First, we will use lots of sharp, curved lines between the flowers for some grass growing between them.
Then, we will add some vein details onto all of the leaves on the stems of the flowers for some added realism.
Before you move on, you could also add some details of your own to really finish it off! There are lots of ideas you could go for, and we will cover a few of them now.
You could draw some pretty insects such as butterflies and bees buzzing around or draw a beautiful sky above the garden.
Another idea would be to draw a background for it, and this would be a great opportunity to add some of your favorite flowers to the picture.
These are a few ideas we had, but what else can you think of to finish off this garden drawing?
Step 7 – Finish off your garden drawing with some color
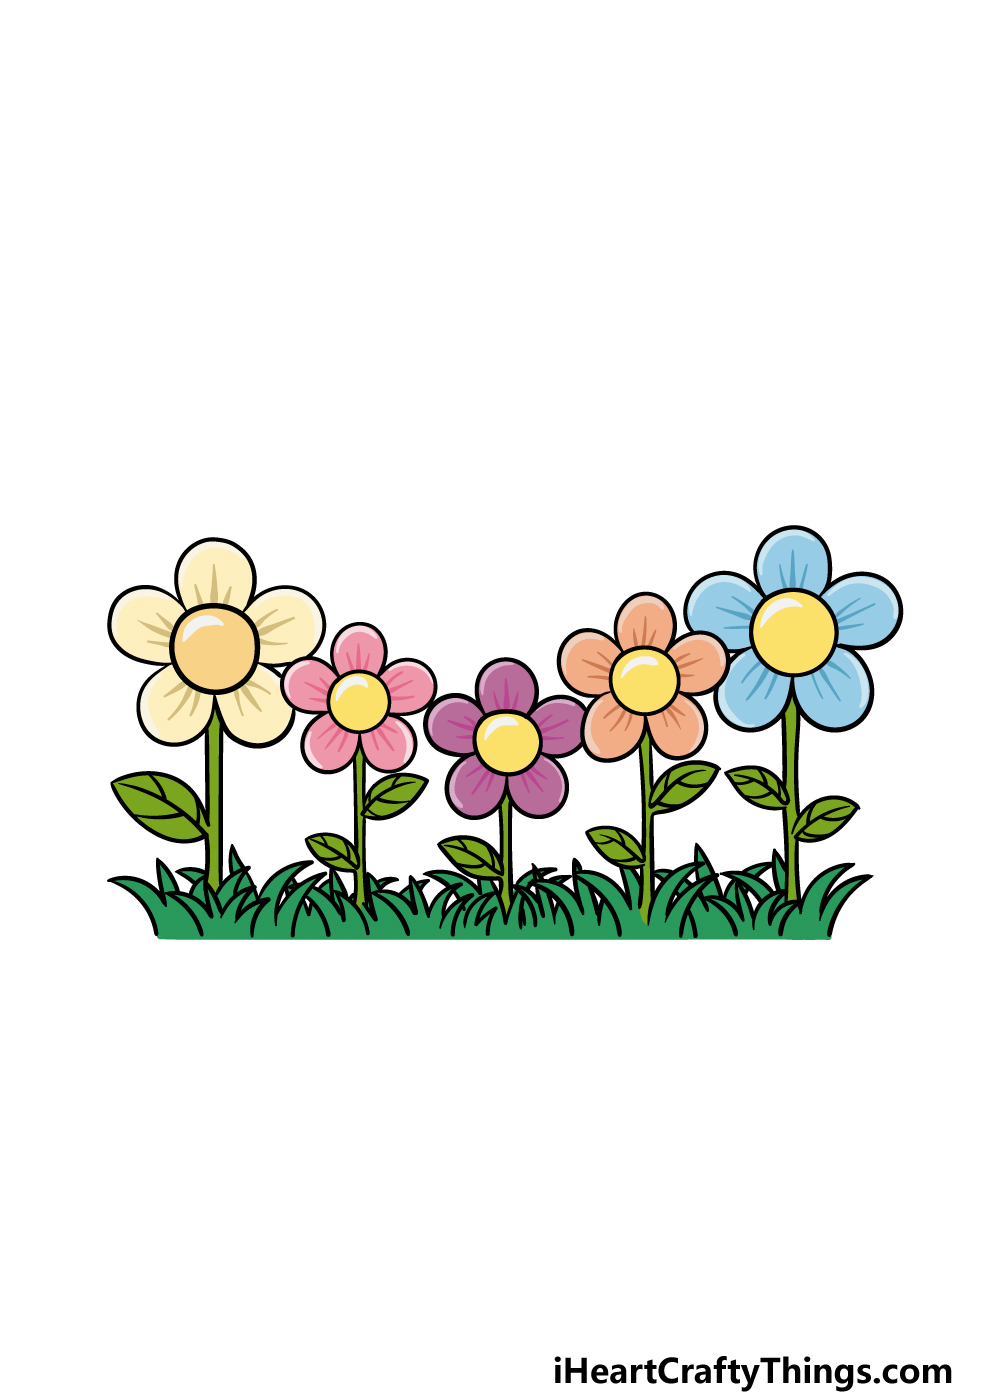
You have reached the final step of this guide on how to draw a garden! For this step, you can have some fun adding some amazing colors to your image.
In our example picture, we showed you just one way that you could go about coloring in your picture with some pretty colors.
You could use these colors for your own picture, but you could also experiment with your own favorite colors to make this drawing pop!
Then, you can decide on the art tools and mediums that you would like to use for this picture.
Watercolors and colored pencils are great for a softer look, whereas mediums like acrylic paints and colored pens are good for brighter hues.
You could stick to one approach or mix both for a nice vibrant look to the picture.
How will you finish off this garden drawing with some color?
Do this to take your garden drawing to the next level
Get ready to plant some extra details in your wonderful garden sketch!
This drawing of a garden contains a few lovely flowers. They have a simple and fun design, but this garden looks ready for even more flowers!
To do this, you could add flowers that look like these ones, or you could go for some more specific flowers that you love.
Adding more flowers would also allow you to add some amazing colors to the image.
Which of your favorite flowers do you think would look great in this peaceful garden?
Adding flowers would be just one way to add more life to this garden. There are other kinds of plants that would also look amazing in this garden.
For example, you could add some fruits or vegetables growing in the garden. This would be a feature that would go really well with the previous suggestion of adding more flowers.
It would also be great for adding some beautiful colors to the image. What are some other kinds of plants that you would like to add to this garden?
Once your garden drawing has all of the flowers and plants you like, you could then add some other living creatures to it. For example, small animals such as rabbits, squirrels or mice would work really well.
Or, you could go for bigger animals such as deer or even cows. Adding a human character would also be a great addition to this garden scene that would finish it off nicely.
Finally, you could extend the landscape of this garden sketch by adding more features to it. The extent to which you do this would depend on your own preferences.
For example, you could add a small pond or maybe a bird bath. Or, you could get more drastic and add an entire background setting to the image.
This could include some small buildings like a house or a shed, or you could even have some majestic mountains looming in the background.
How else could you add to the landscape?
Your Garden Drawing is Complete!
That will finish off this guide on how to draw a garden! We hope that the guide made it easier for you to create your own unique garden picture, and also that it was a lot of fun to do so.
By following this guide we know that you will end up with an incredible picture in no time.
Then, we have more drawing guides for you to test your skills on when you visit our website! Be sure to visit often to sample the many guides we will be adding to the collection soon.
Once your garden drawing is complete, we would also be thrilled if you would share it on our Facebook and Pinterest pages. We can’t wait to see your amazing artwork!