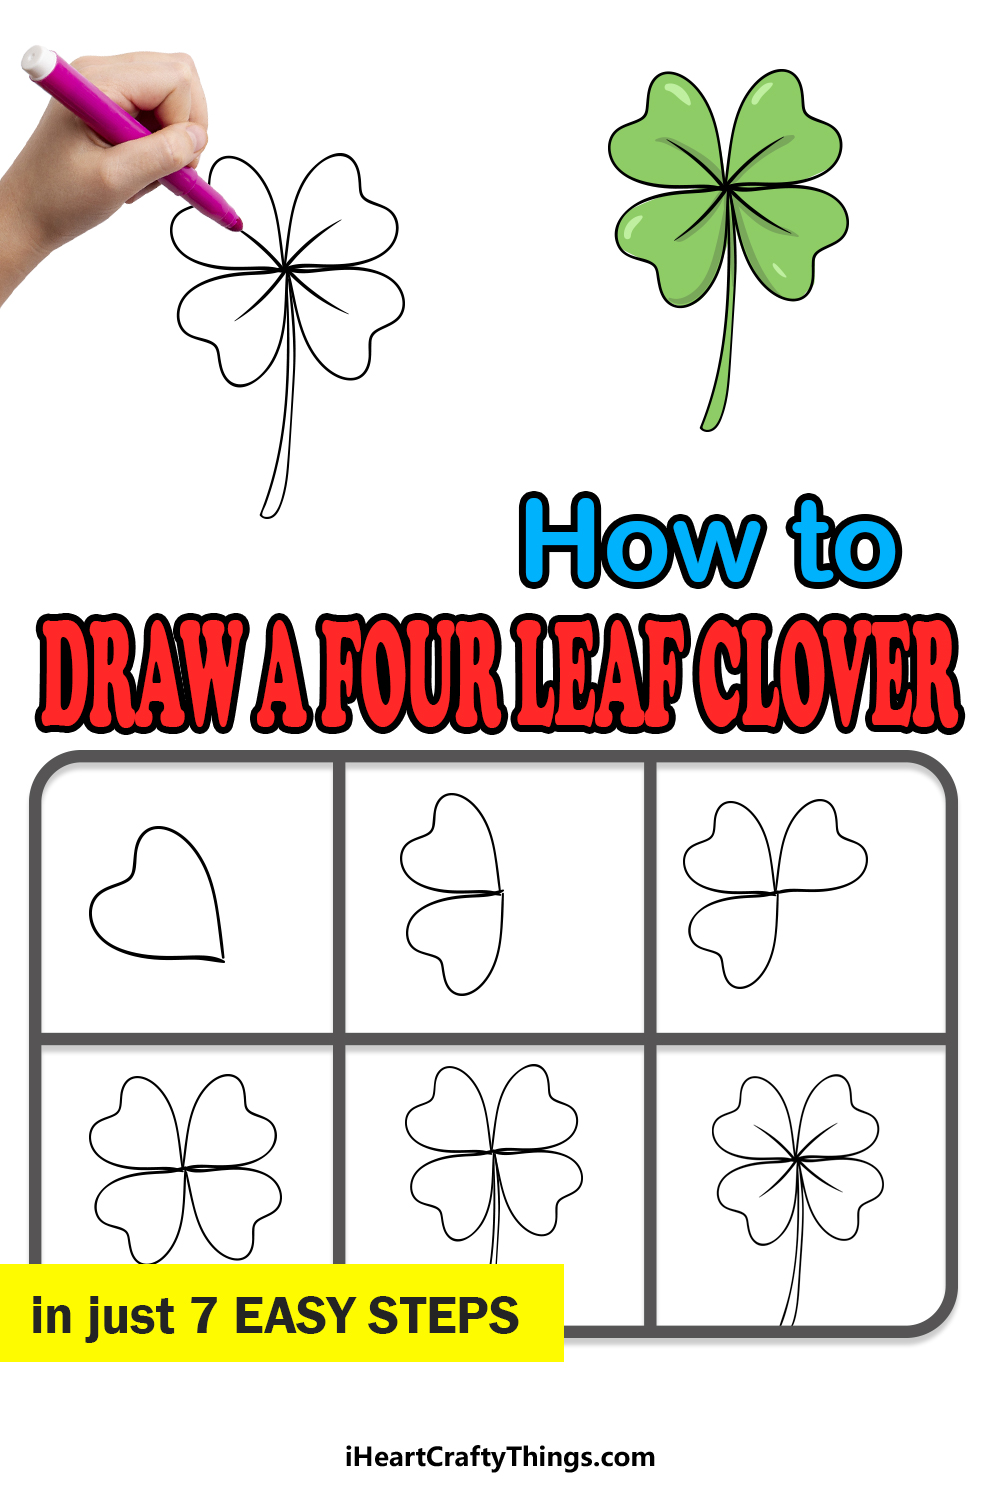
You won’t need luck to learn how to draw a four-leaf clover! You can draw this iconic little plant in just a few steps.
The four-leaf clover is traditionally said to bring luck to anyone who finds one. Most clovers have three leaves, so finding one with four isn’t as common as all that!
Because of this, it has become a symbol of luck and is often associated with Irish culture as well. There are many reasons why you may want to make a four-leaf clover drawing.
Whatever these reasons may be, you have everything you need to complete your task in this guide! I’m about to break it down for you so that you can create this drawing and then use it for whatever you like.
Whether you want to keep the drawing as is or add some of your own ideas, it all starts by embarking on the first step of the guide.
Watch And See How To Make A Four-Leaf Clover Drawing
How to Draw A Four-Leaf Clover – Let’s get Started!
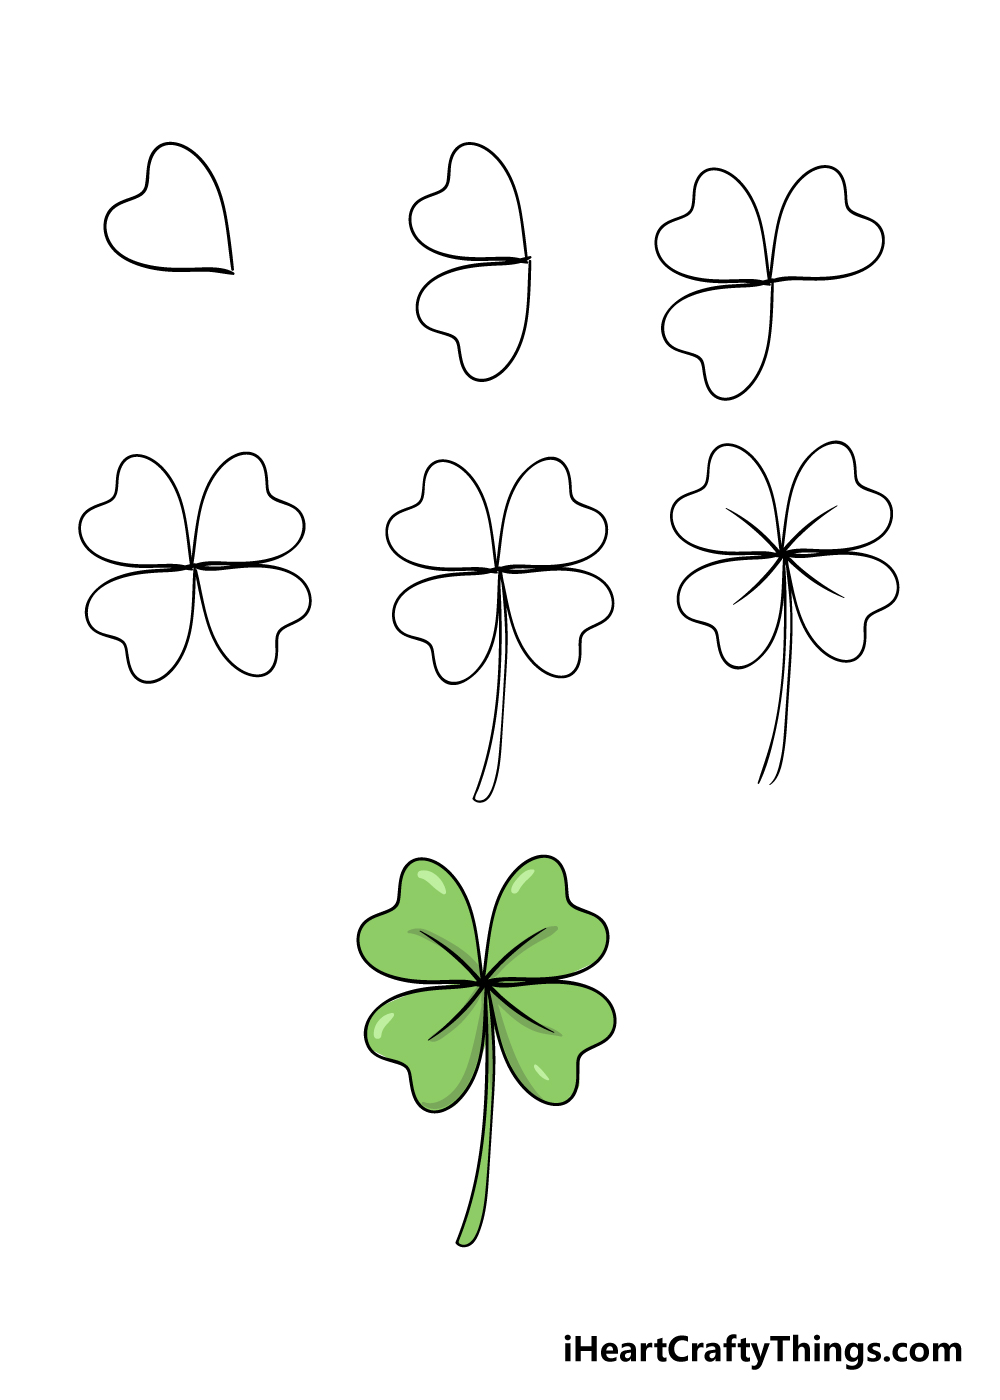
Step 1

As we start this guide on how to draw a four-leaf clover, we shall begin with something in the name: the leaf!
As you might imagine, there will be four of these that look identical, but we will tackle them separately as each is at a separate angle, potentially making it more difficult.
Each leaf will have a heart shape to it, and the first one will have its curved side to the upper left of the clover.
The leaves will all meet at a central point, so you may want to draw a dot in pencil to make sure that they all start at the right place. Once you have this first leaf drawn, we shall start adding more!
Step 2 – Draw the second leaf
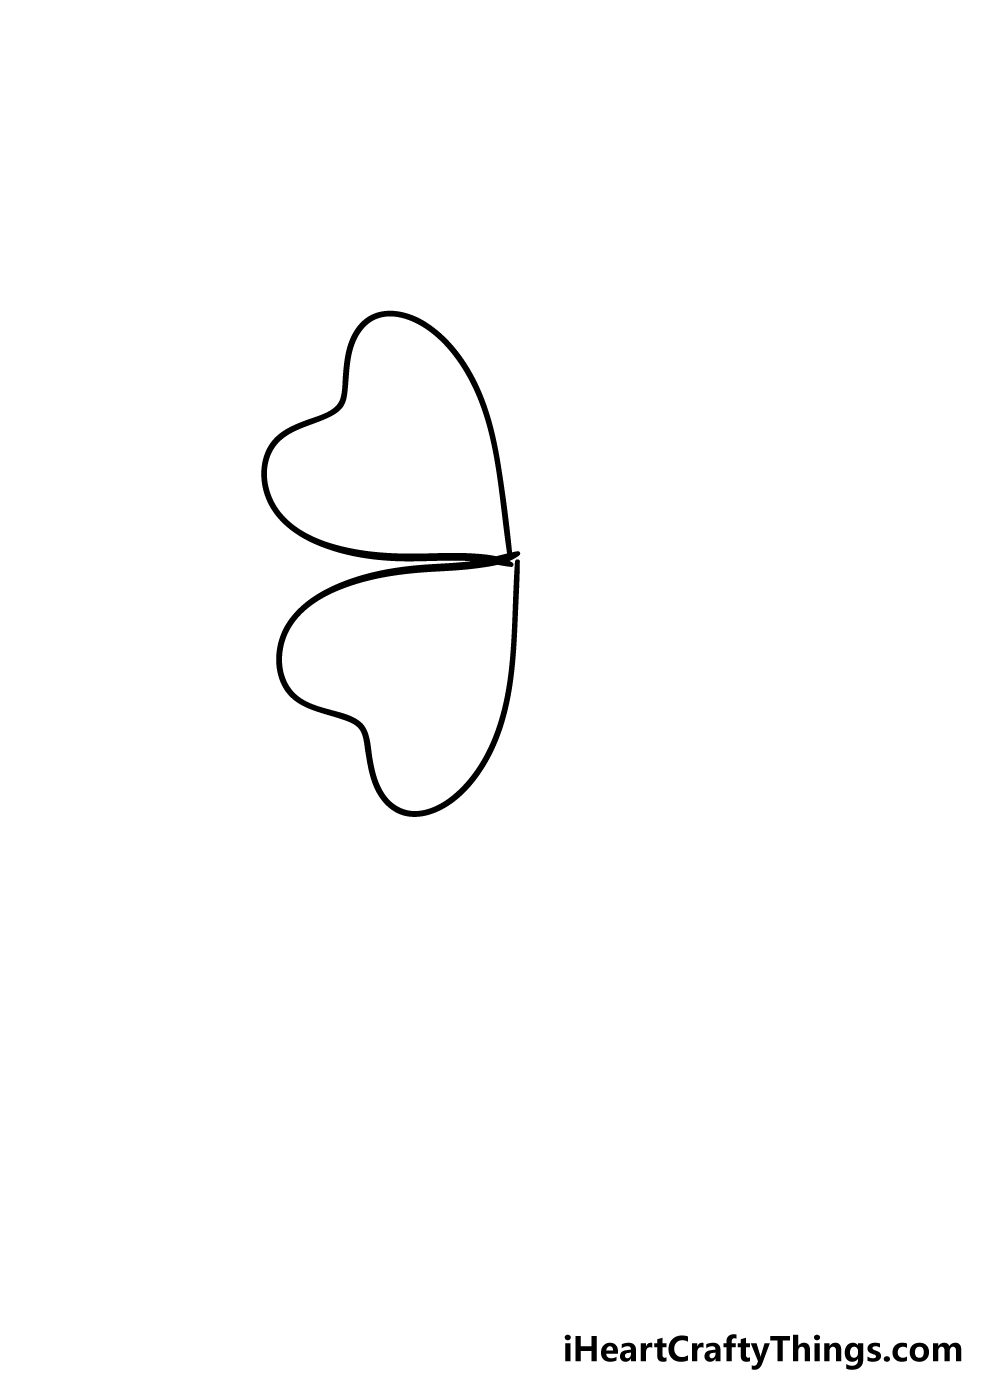
As we mentioned in the previous step of your four-leaf clover drawing, the leaves will all technically be identical.
However, getting them looking that way at different angles can be tricky! For this next leaf, it will be pointing to the bottom left of the clover.
Step 3 – Now draw the third leaf of your four-leaf clover drawing
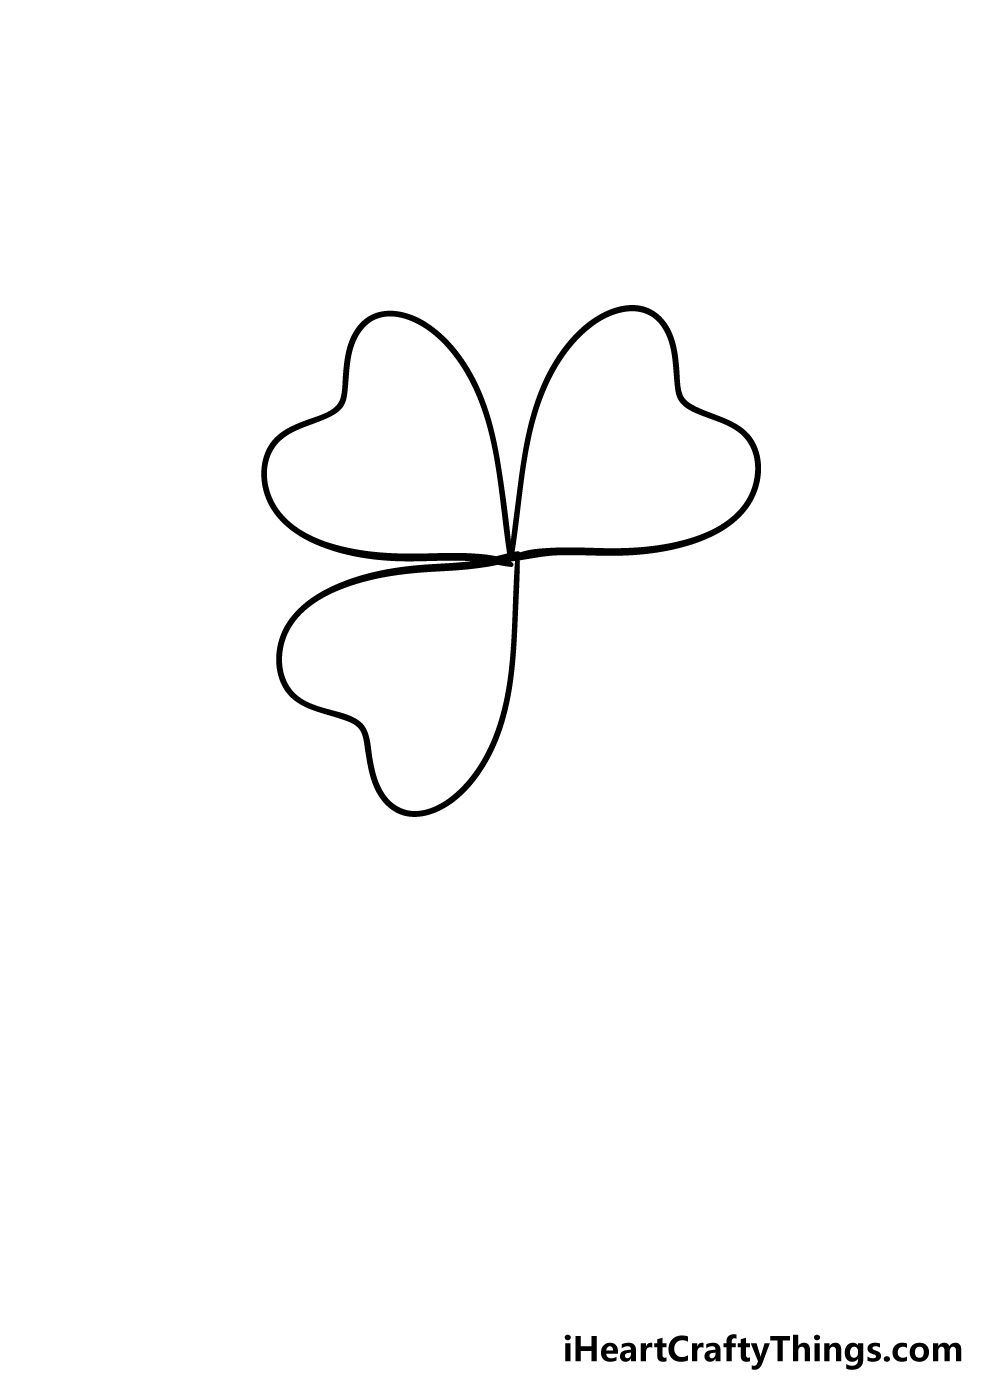
You’re starting to get the hang of it now! As you might imagine, we shall be drawing the third leaf in this step of our guide on how to draw a four-leaf clover.
This one will start at the same point as the previous two did. This one will be pointing to the upper right of the clover, as you can see in the reference image.
In the next step, we shall add the final clover, so let’s move on!
Step 4 – Next, draw the final leaf of the clover
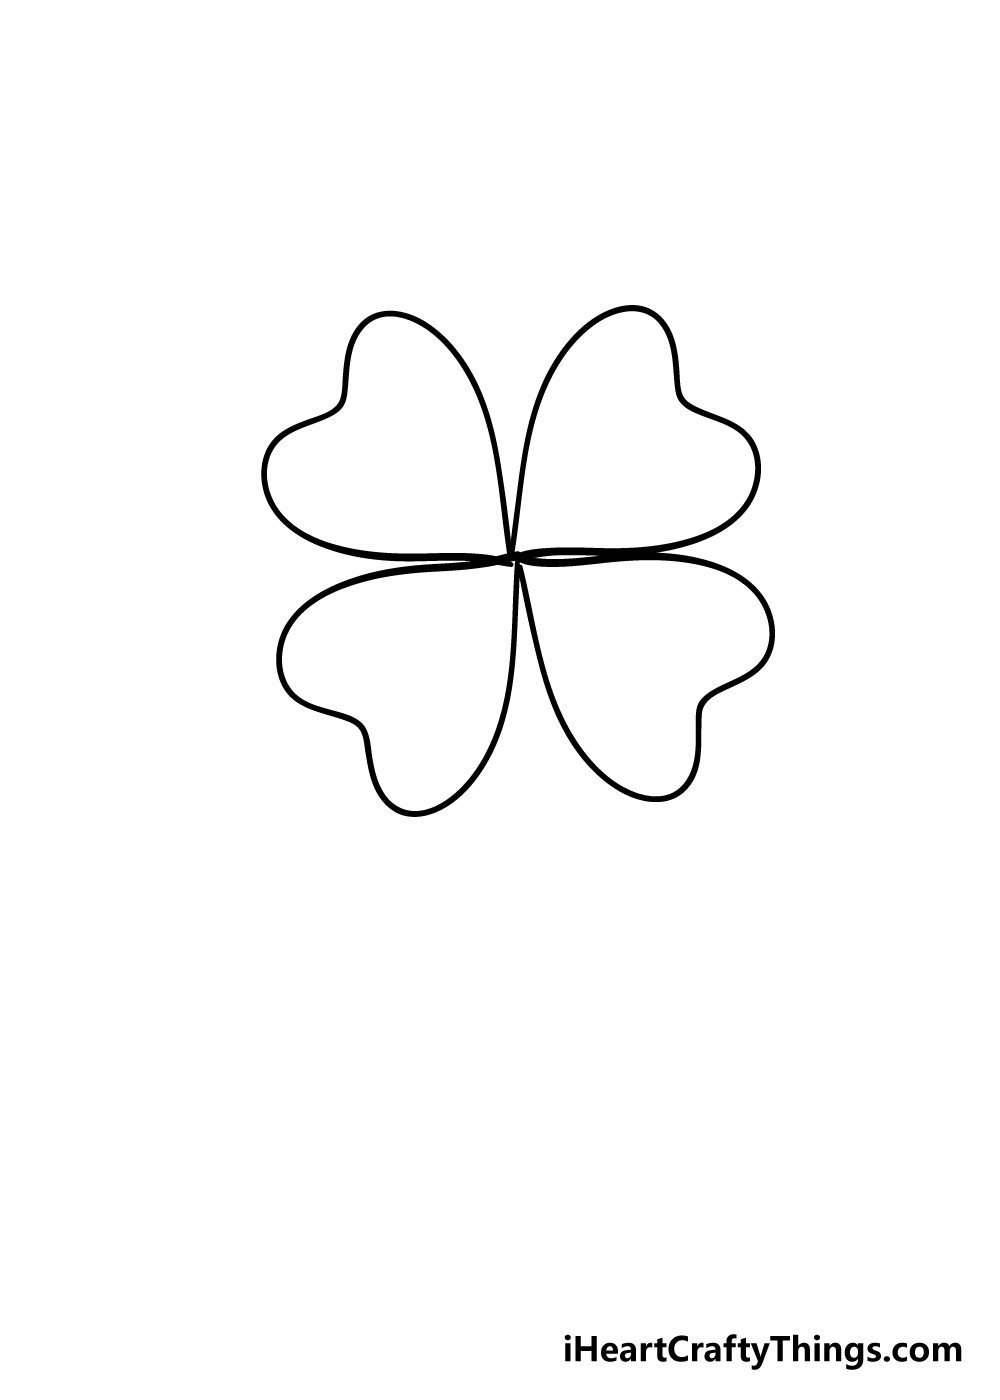
This final leaf of your four-leaf clover drawing should be no problem for you! This one will be pointing to the bottom right of the clover and will start at the central point as usual.
Once all four leaves are drawn, you can erase the pencil dot at the center if you drew one to help you.
Step 5 – Now, draw the stem of the clover
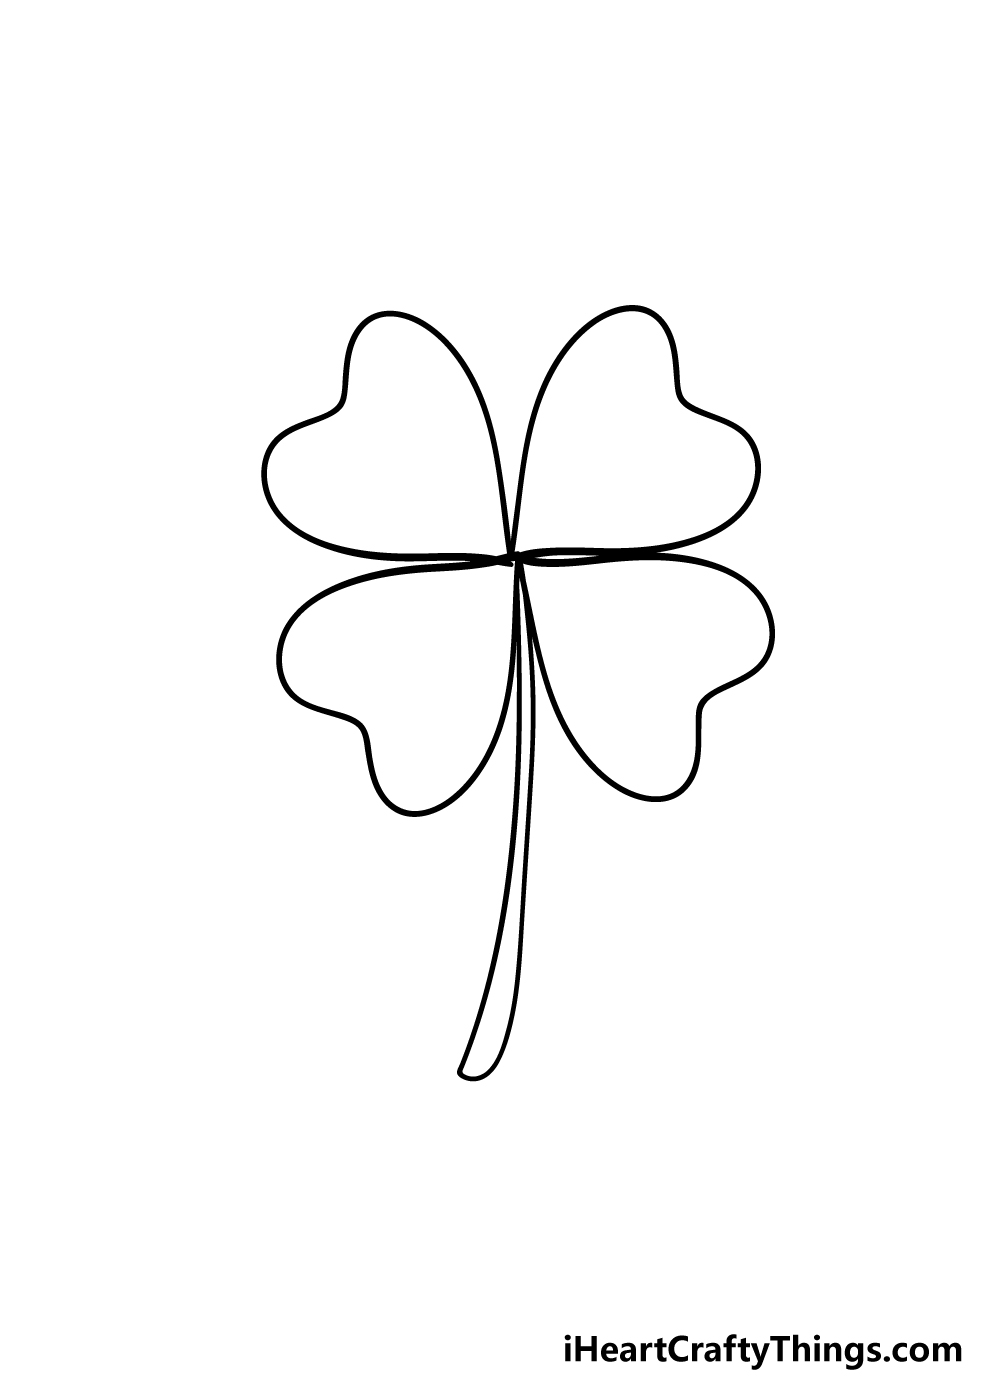
If you’ve had enough of drawing clover leaves, then you’re in luck because we shall be moving on to new aspects in this step of our guide on how to draw a four-leaf clover.
For this part, we shall be focusing on the stem of the clover.
This will start from the very center of the clover and then extend down. It will be very thin near the top and then get gradually thicker as it goes down.
It will then have a slightly rounded end at the bottom to complete the stem.
This part shouldn’t be too difficult, but it can require a steady hand, so don’t be afraid to take it nice and slowly!
Step 6 – Draw the final details and extra elements
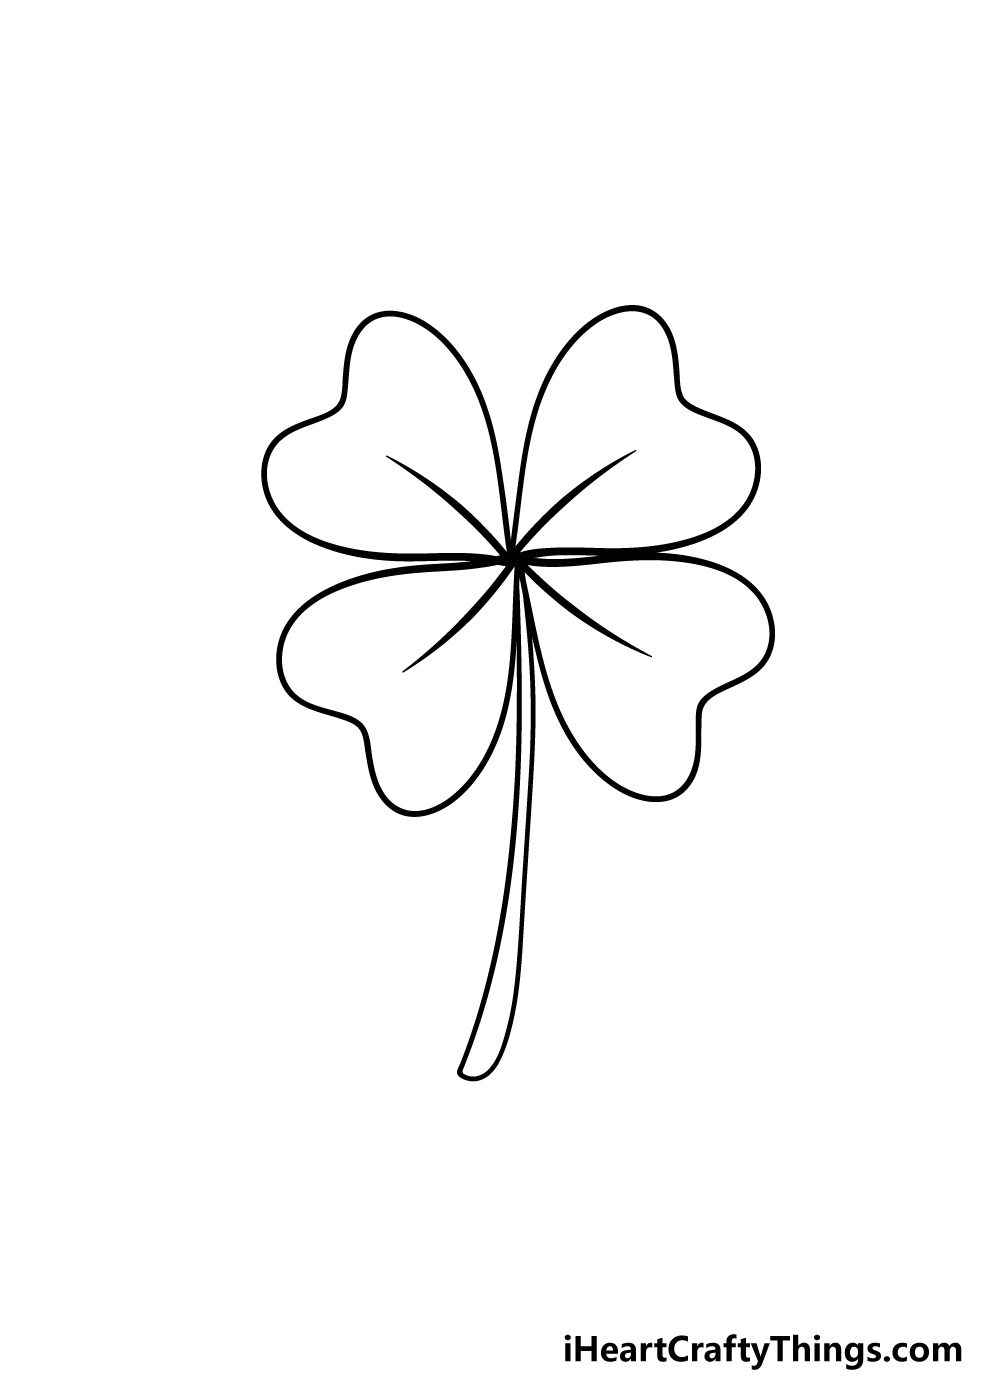
Before you finish off in the final step, you can add any final details to your four-leaf clover drawing.
For our guide, we drew a line in the center of each leaf to finish it off nicely. Once you have drawn those, you’re ready to move on!
Before you do, however, be sure to add any final details that you would like for your drawing!
Some ideas you could consider would be to draw a beautiful background for the clover. Maybe you could use what you learned in this guide to draw some three-leaf clovers behind it!
Another idea you could try would be to draw a little insect onto it, perhaps a ladybug?
These are just a few ideas that you could do, but what else can you think of for your four-leaf clover drawing?
Step 7 – Finish off your four-leaf clover drawing with some color
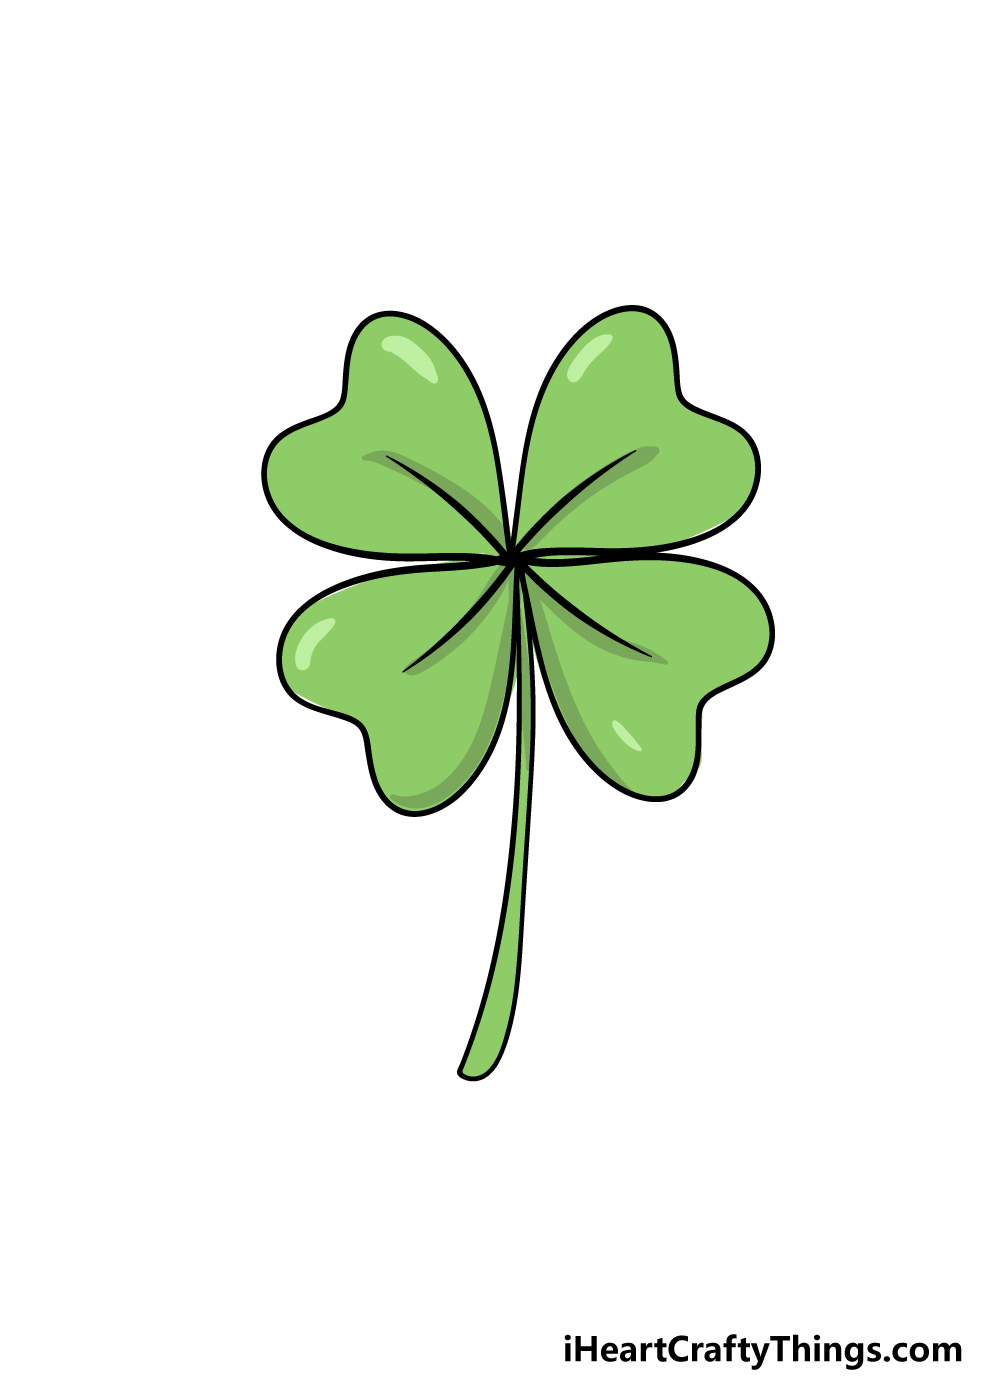
You have reached the final step of this guide on how to draw a four-leaf clover! For this step, you can kick back and relax with some fun coloring for your picture.
A four-leaf clover is green, so that would be the obvious choice! Even if you stick to this color for your clover, however, there are ways that you can inject even more color into it!
If you drew any extra details such as an insect or a fun background then you can use some brilliant colors for those.
You could also go in another direction and use some vibrant colors for a more stylistic four-leaf clover!
Whatever you choose to do, you can also have some variation with the art mediums that you use!
Something like watercolor paints look lovely for a natural setting like this, but anything you choose will look great! How will you finish off this picture?
3 More tips to make your four-leaf clover drawing easy!
You won’t need luck to make this easy to draw four-leaf clover drawing even easier!
For this four-leaf clover drawing, we showed you just one kind of design for this famous plant. The design is somewhere between being super simple and a bit detailed, and you can change it up a bit if you need to.
If you find yourself struggling with any of the details, shapes or proportions then you should absolutely alter the design.
The four-leaf clover has been portrayed in every style and form imaginable, so you could really get creative with it.
If you find yourself changing details or aspects, then you should try and focus on the parts that are specifically giving you trouble. That way, you can maintain as much of the design as possible!
When the focus is on one aspect of a drawing, that opens it up to a lot more scrutiny. The same is true for this four-leaf clover sketch, so you could incorporate it into a larger design.
This will make the drawing a bit more complicated, but it will also make it so that the four-leaf clover will be a smaller aspect. The obvious theme would be a St Patrick’s Day theme.
This could include common symbols like leprechauns, rainbows and other things associated with the holiday.
That way, there will be a ton of things to look at and any difficulties with the four-leaf clover will not be as apparent!
Lastly, you can make this drawing of a four-leaf clover much easier by preparing a bit more for it. The best way to do this would be by using a pencil to plan it out.
There is always so much more pressure when drawing with a pen, as you have to get it right the first time. Using a pencil will allow you to plan out the shapes, proportions and details with no fear of mistakes.
Once you have the design as you want it, you can then use your pen to finish off the final lines.
Your Four-Leaf Clover Drawing is Complete!
We really hope that you had a lot of fun working through this step-by-step guide on how to draw a four-leaf clover!
We wanted to make this guide informative, helpful and fun to use, so we hope it achieved all of that for you! When you use this guide, you shouldn’t need any luck to finish this drawing!
Now you can take this drawing even further with the amazing colors and extra details that you add to it.
You could also work in a great background to make it even better! We can’t wait to see how you put your own touches on this image.
We have many more step-by-step drawing guides for you on our website! We upload new ones frequently, so be sure to check in often to never miss out!
We would also love to see your awesome four-leaf clover drawing when it’s done, so please do show us by sharing it on our Facebook and Pinterest pages!