We have many different instruments available to us with which to create some beautiful music. There are percussion instruments, string varieties and many more.
There are also woodwind instruments, and of all of these the flute is probably the most well known.
This simple instrument can create a wide variety of sweet tones, and in the hands of an expert can be incredibly versatile. It can be fun playing one, but learning how to draw a flute can also be great fun!
That’s what this tutorial is here for, and by the end of it you will know how to go about it.
We hope that you have a great time as you work with us on this step-by-step guide on how to draw a flute in just 6 steps!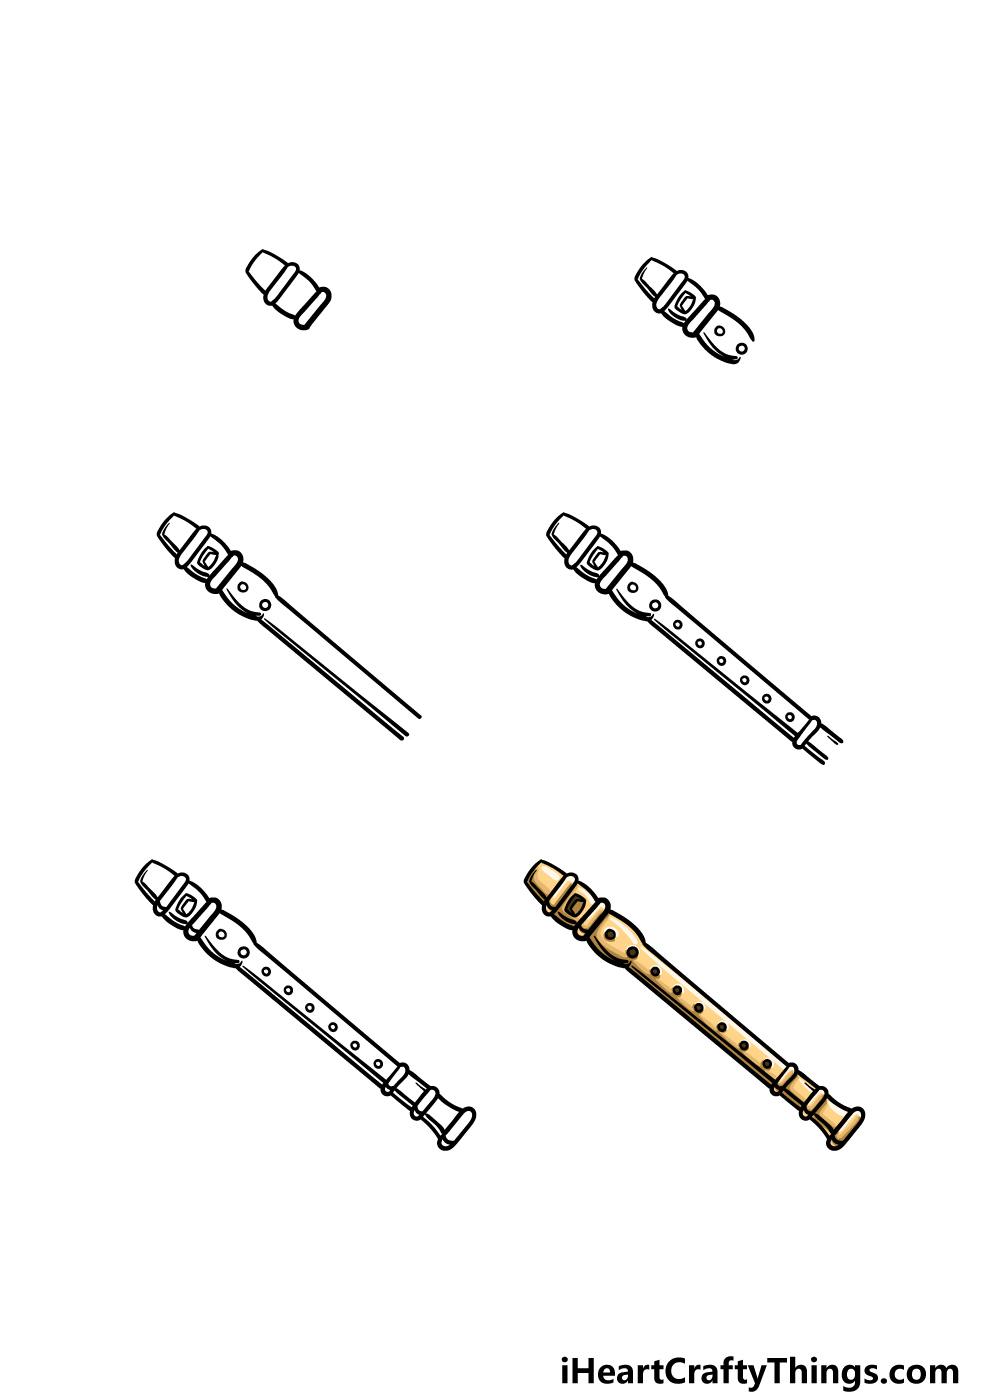
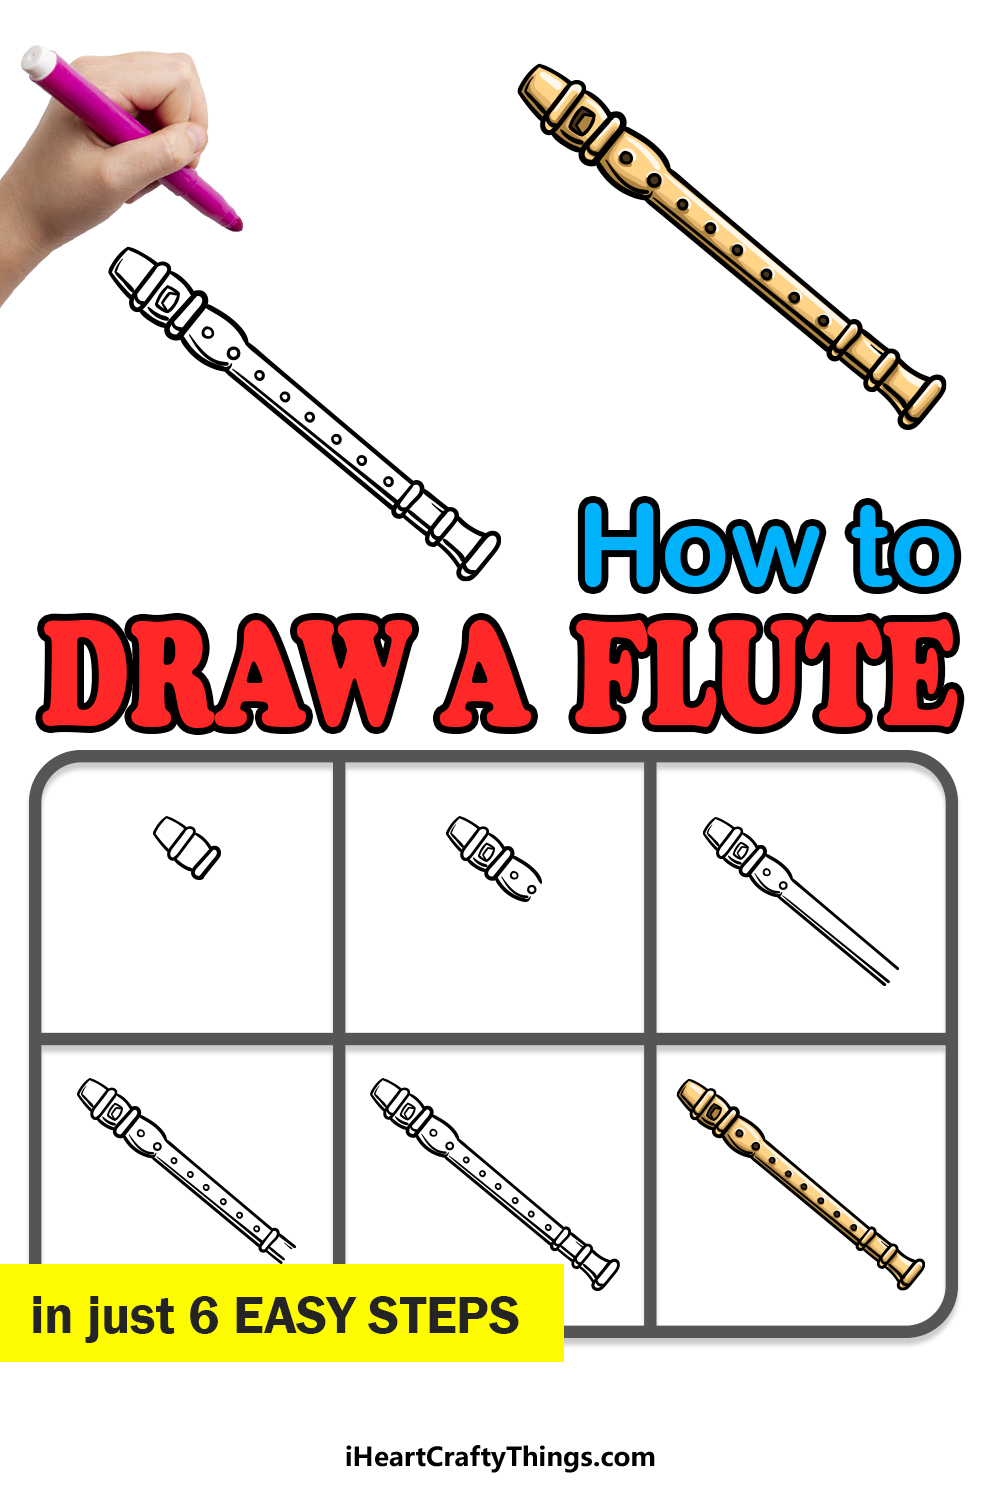
How to Draw A Flute – Let’s Get Started!
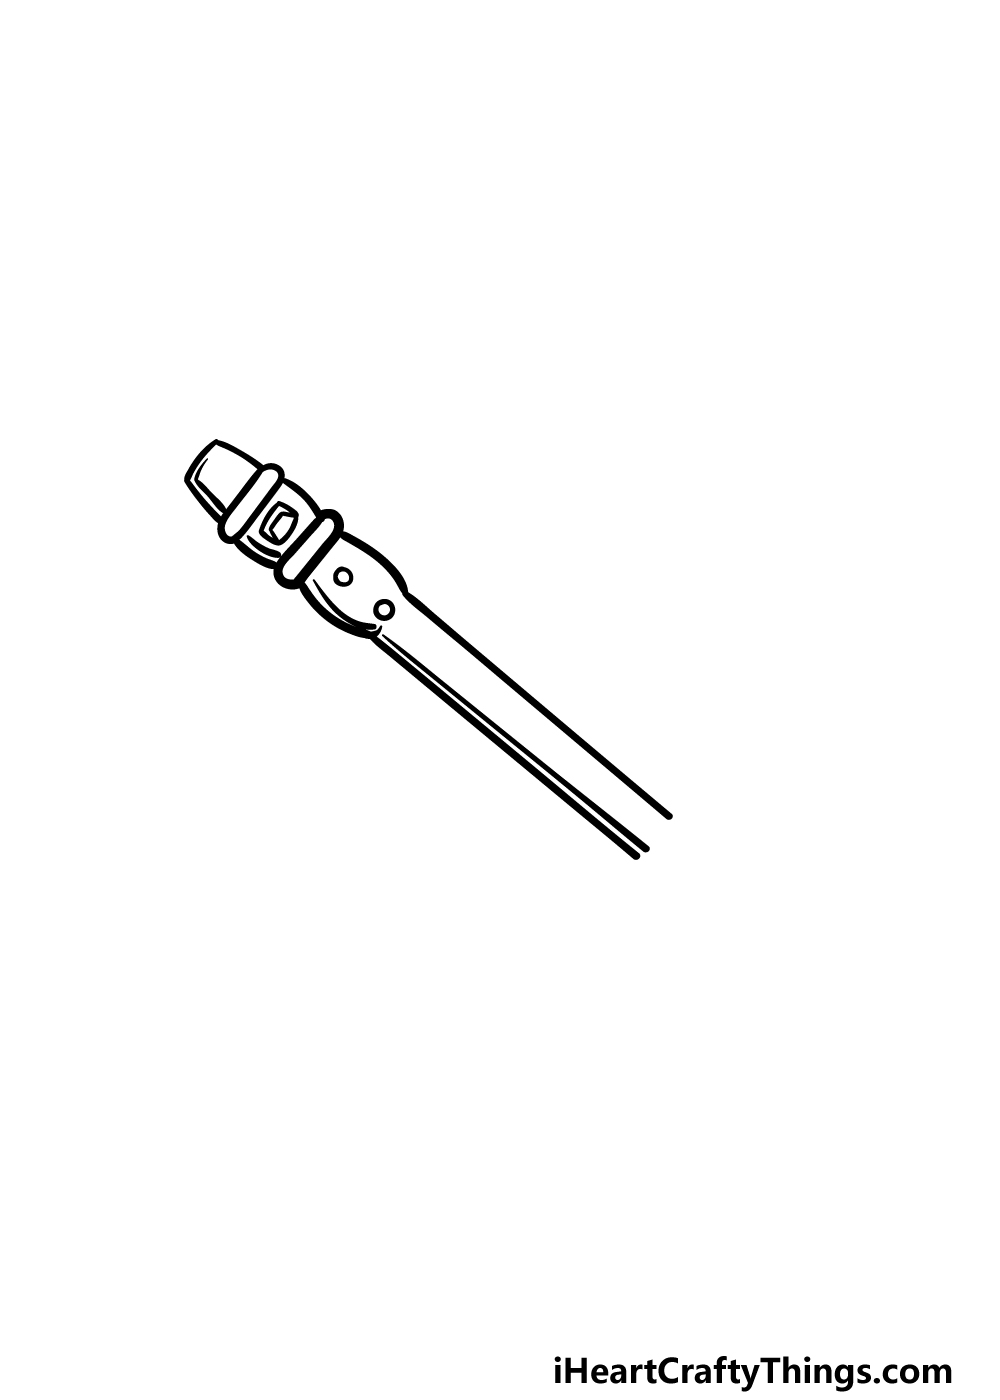
Step 1
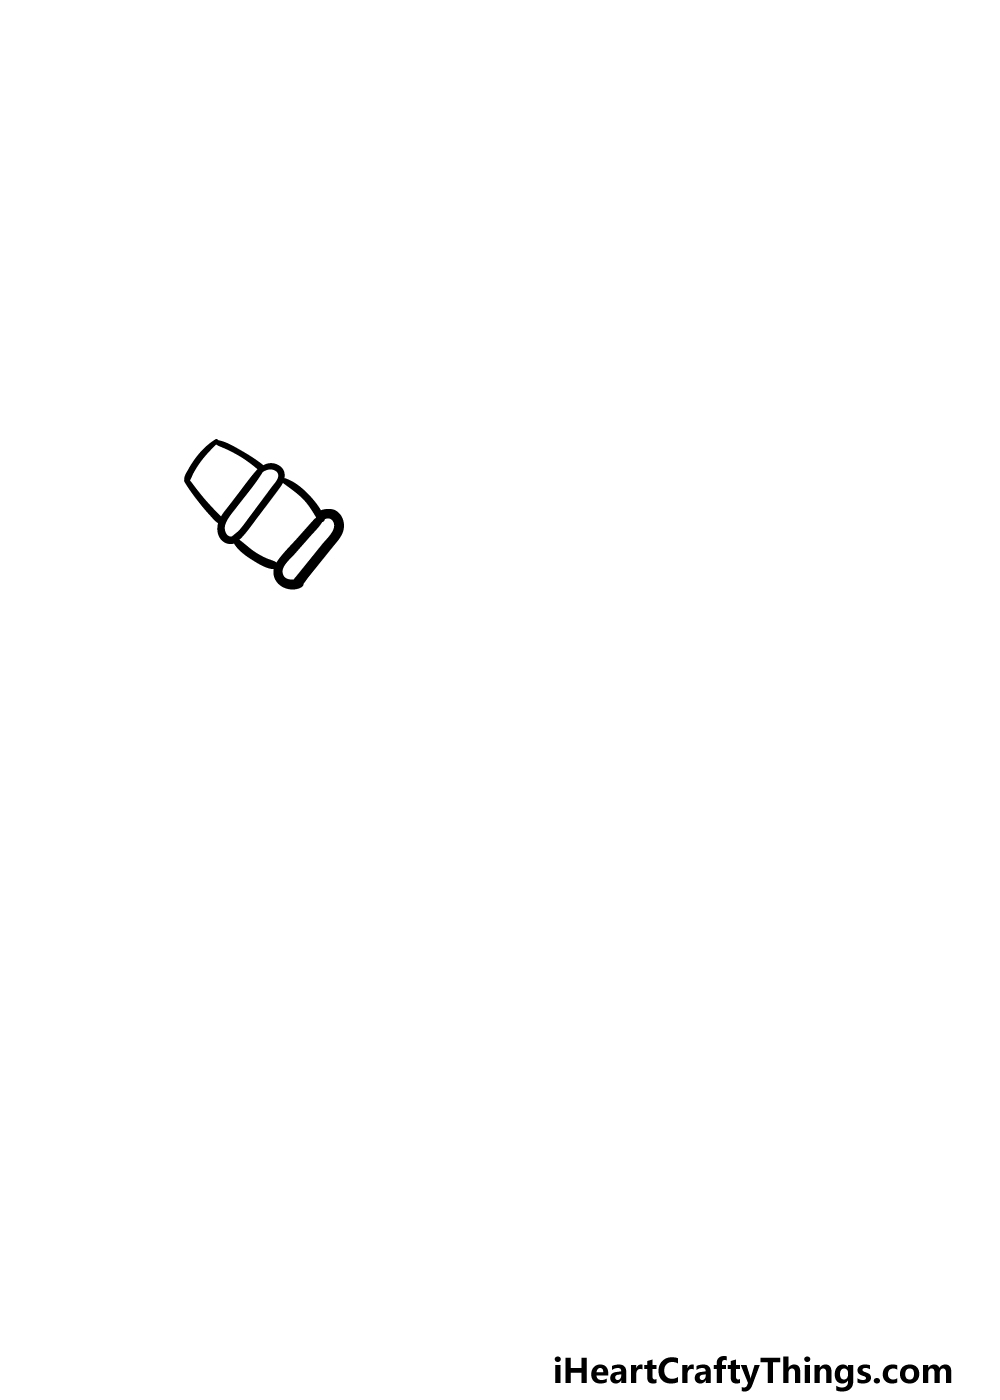
We shall kick off this guide on how to draw a flute by drawing the mouthpiece. This is quite a simple part of the flute, and we will be adding some more details to it later on.
For now, start by drawing two rounded rims somewhat close to one another. Then, connect them with some slightly curved lines.
Then, we will be adding one more section onto the mouthpiece of the flute. This section will be drawn using some straighter lines that will create a more squared shape.
With that drawn, you will then be ready to move on to the second step of this guide.
Step 2 – Now, draw some more of the mouthpiece
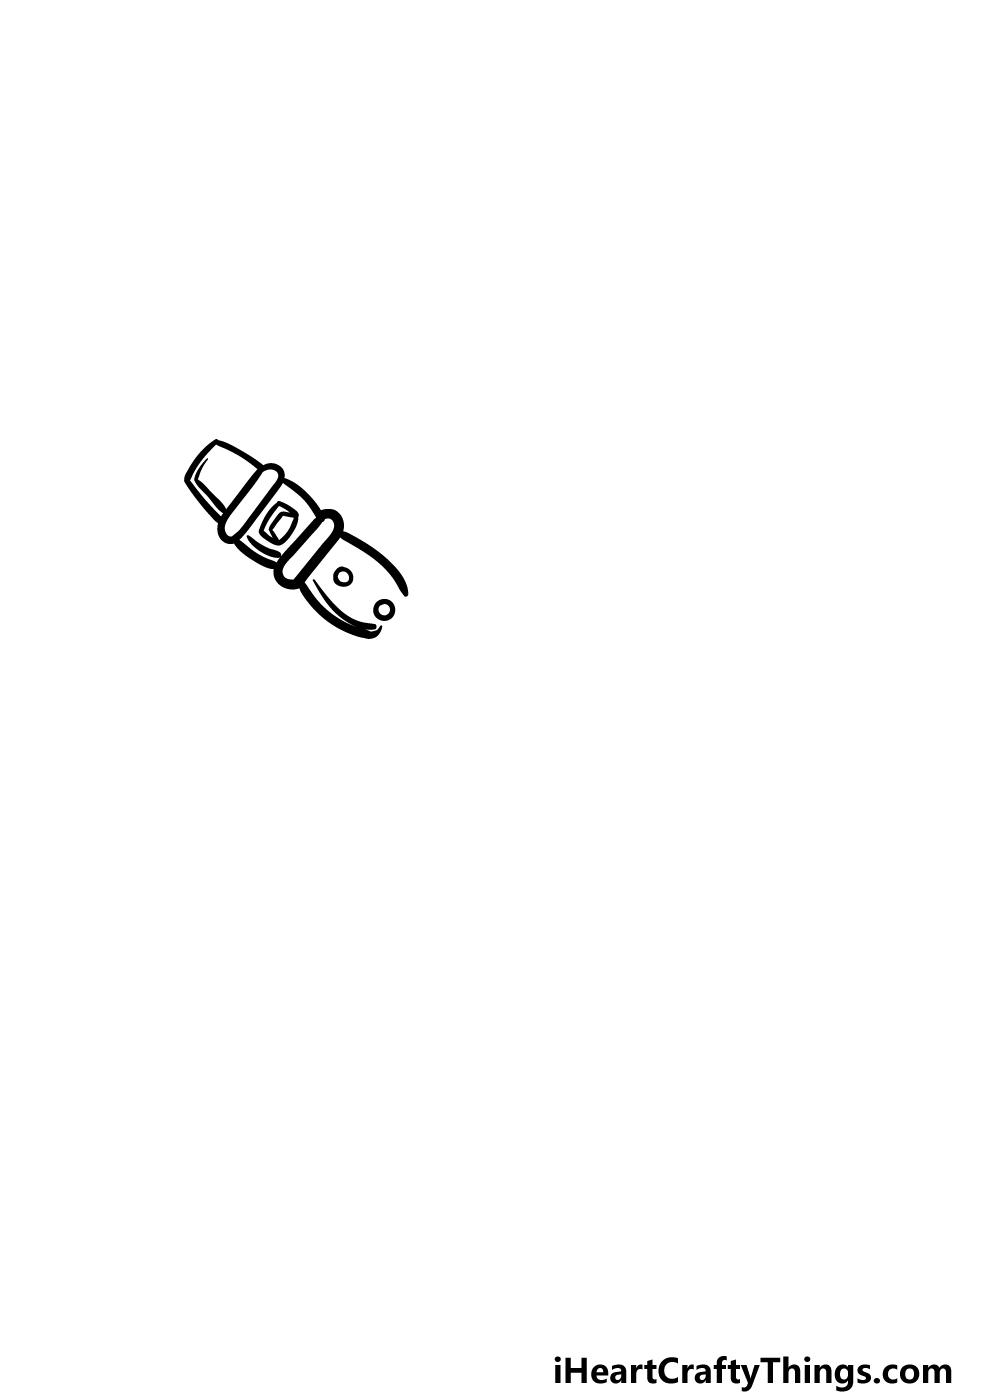
In this second part of your flute drawing, we will be adding another section and some more details to the mouthpiece.
First, extend two more curved lines coming from the second rim of the mouthpiece.
Add a curved line to the inner perimeter of the new section, and then finish it off with two small circles for the first holes of the flute.
Then, we will be adding some details to the sections of the mouthpiece that you started in the first step.
There will be another hole in the central section, and this hole will have a squared shape to it.
Finish off this step by then adding some curved line details to the various sections, and then we can proceed with the guide!
Step 3 – Draw the neck of the flute
We will be leaving the mouthpiece and will head further down the flute in this third step of our guide on how to draw a flute.
For this step, you will want to use a ruler if you have one available, as we will be aiming to have this next section be as perfectly straight as possible.
Simply extend a long, straight line from each side of the mouthpiece, and then you can add a straight line along the inner perimeter of the one on the left.
That inner line will help to show the curvature of the flute. Then, we will be adding some more sections and details in the next few steps of the guide.
Step 4 – Next, draw some holes and the start of the last section
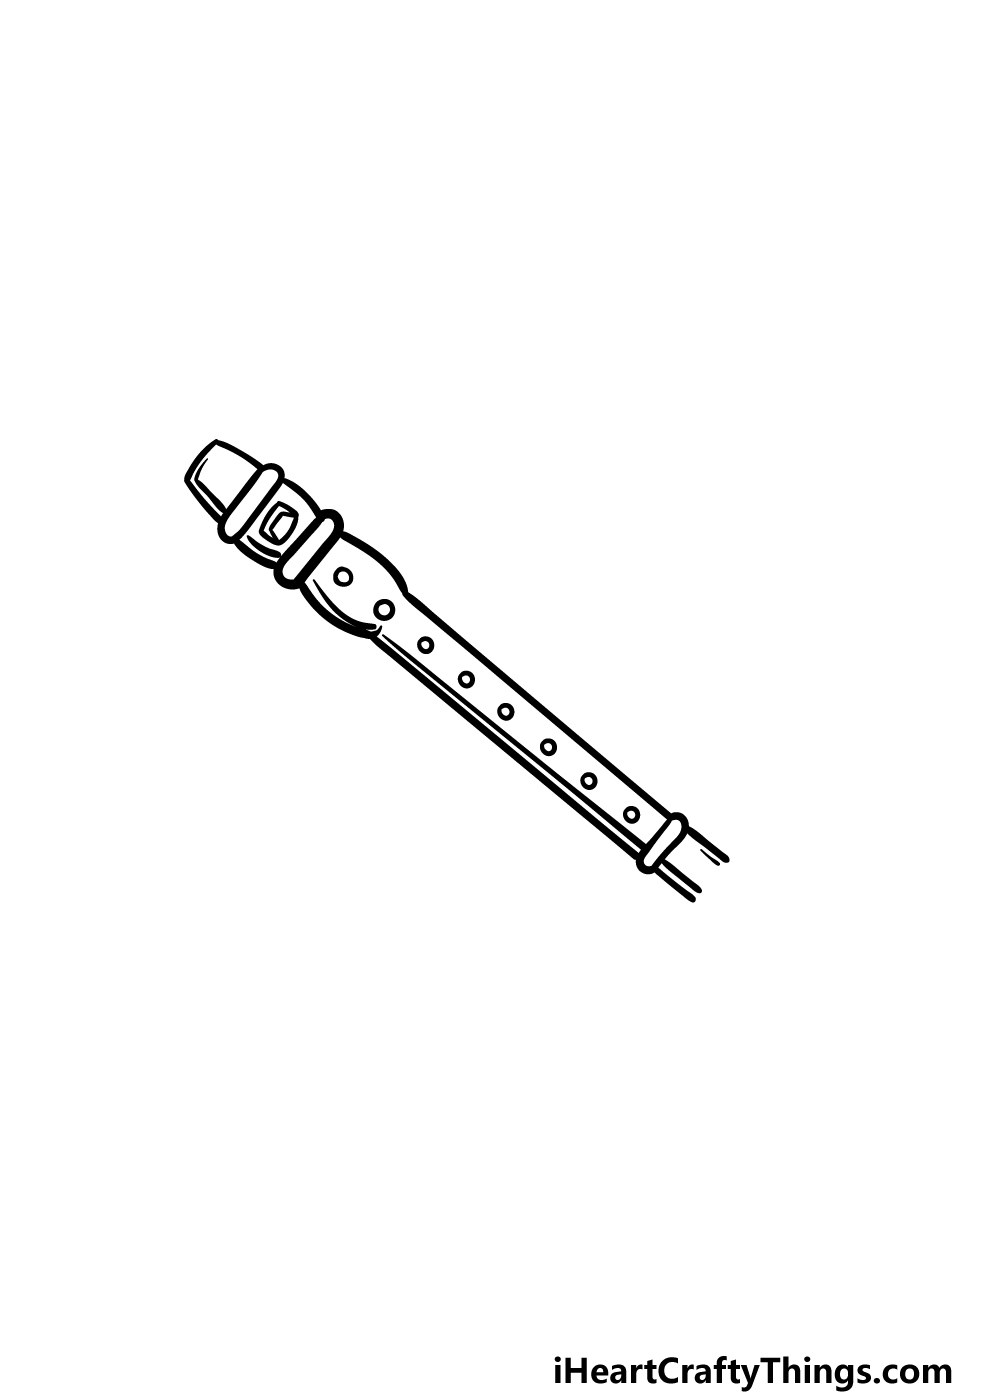
Now we will be adding some more details to the neck in this part of your flute drawing. The main aspects to draw will be some more small, round holes.
These will line down the center of the flute neck, and they will be of roughly equal length away from one another.
Then, once these holes have been drawn you can add another rim to the end of the neck. Then, draw some more small straight lines for the beginning of the final section of the flute.
In the next step, we will finish off the final details and elements to have you ready for some coloring fun!
Step 5 – Add the final details to your flute drawing
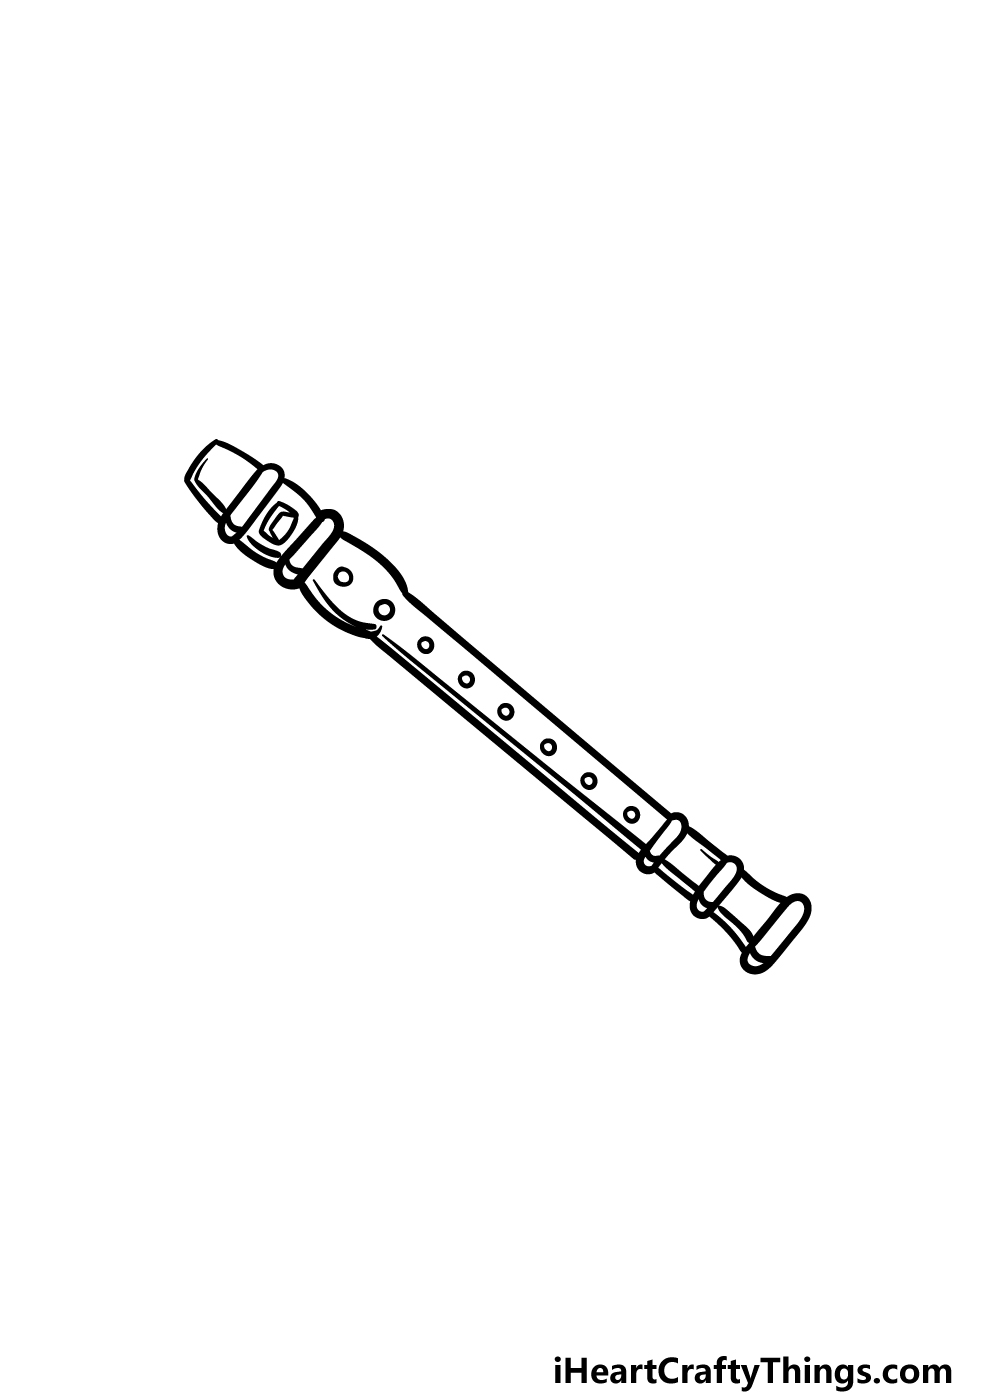
In this fifth part of our guide on how to draw a flute, we will complete the drawing before you move on to the colors in the final step.
First, draw another rounded rim onto the last part of the flute that you drew in the previous part.
Then, draw some short lines that curve outward a bit, and finish off by drawing one more rim at the end of this section.
Finish off with some more line details on this section, and then we can move on to the coloring!
Before you do, be sure to add any cool background details, extra elements or additional details that you would like for the image.
Step 6 – Finish off your flute drawing with color
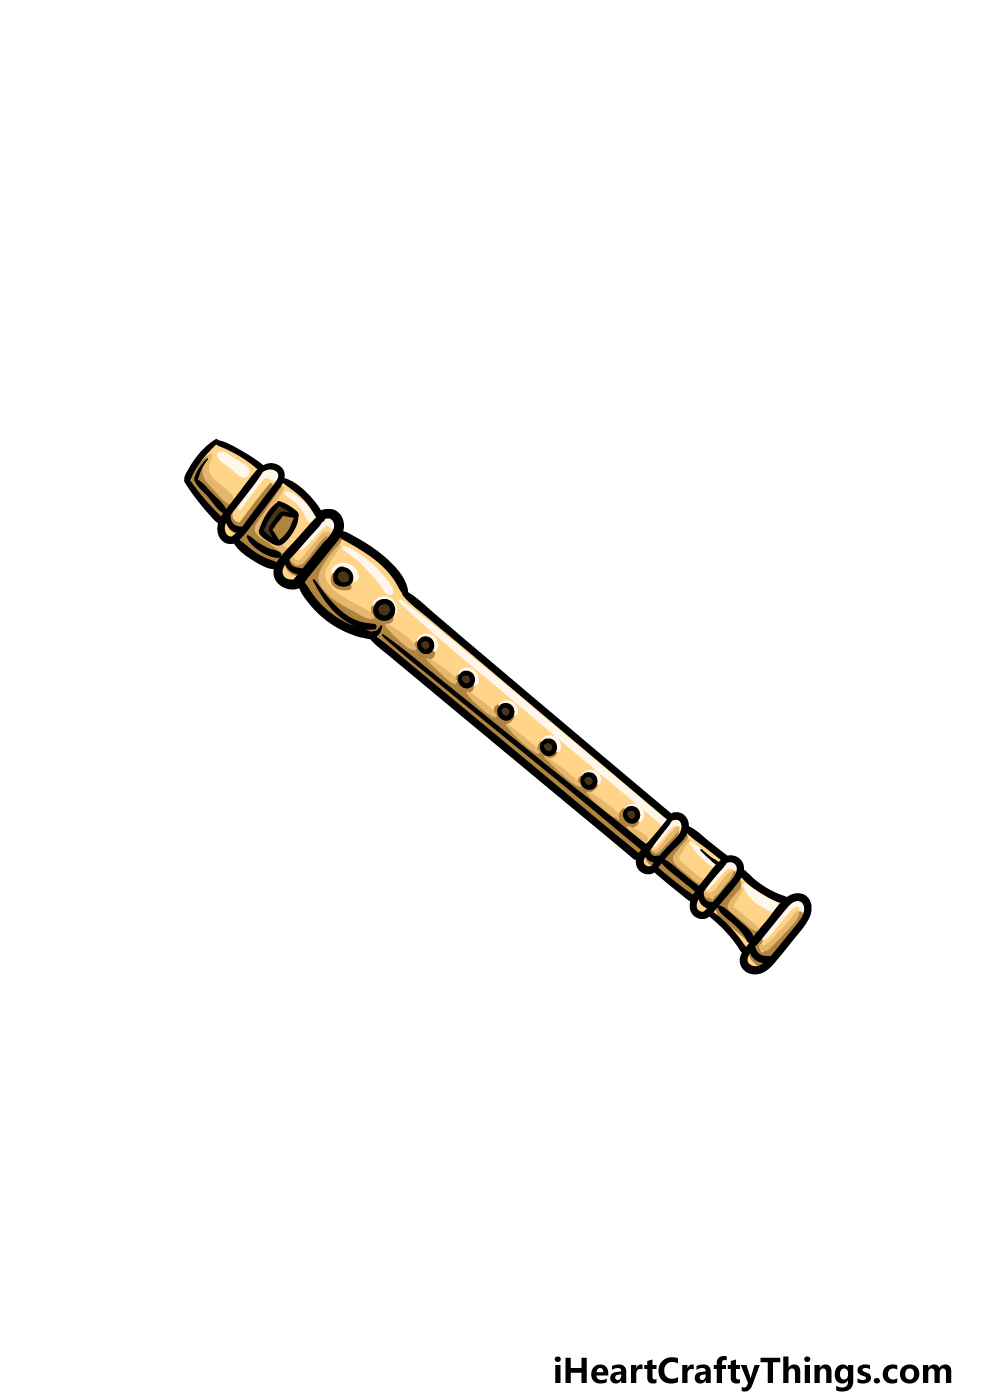
You’re now ready to finish off this flute drawing with some color! Flutes can come in pretty much any color you can think of, so you have a lot of freedom with how you could color this instrument in.
In our reference image, we showed you just one way that you could go about coloring this flute.
We used some light yellows and beige colors for the flute, and we used even lighter shades to show the reflection on the surface of the flute.
These are just some of the colors that you could go for, but you could use any of your favorite colors and art mediums to finish this picture off.
What do you think you will use as you complete this image?
Here’s how you can make your flute drawing even better…
These tips for your flute sketch will be music to your ears as we make it even better!
This drawing of a flute shows a simple version of this instrument, and it looks really good. Despite that, you could add a few more details to make it more distinct,
This could be some wear and tear to make it look more used, or you could add a logo or other small details. How else could you differentiate this flute to make it more distinct?
Many flutes can be disassembled into several pieces to make cleaning it easier. This is another approach that you could take for this flute!
The flute could be in a few pieces, and you could even add a detail such as a rag to show that it is in the process of being cleaned.
To get some help with this, you could look up some pictures of a disassembled flute to see what it looks like, that way you can make sure it’s accurate in your picture.
A flute can sound great on its own, but it’s best paired with other instruments. These could be added to your flute drawing to make it more of an ensemble!
You could stick to a theme when doing this, such as other woodwind instruments like a recorder or a clarinet. These are not the only options, and you could add any other instruments you like.
If you play a few instruments, then it would be fun to draw all of the instruments that you play!
A flute isn’t much use if it’s not being played, so our last suggestion would be to add a human character to this flute sketch.
The character could be drawn in a simple cartoon style if you’re not as used to drawing humans.
Another way of making it easier would be to use yourself as a model. Not only would that allow you to star in the image, but it would also make it easier as you can refer to a mirror or a selfie.
Your Flute Drawing is Complete!
You worked hard on this guide on how to draw a flute, and you did an incredible job working on it!
Even objects that may seem quite simple can prove to be more of a challenge than expected, so in this guide we aimed to break it down to make it much easier for you to complete.
Learning how to draw this instrument is just the start, as now you can keep the fun going by adding your own extra details and ideas.
We mentioned a few ways that you could do this, but this is your chance to show off your creativity!
Then, you’ll want to head over to our website for more drawing fun. We have many amazing guides to enjoy there, and we have plenty more that we plan to bring out soon, so be sure to keep checking in!
When you’re ready to show off your amazing finished flute drawing, you can share your artwork on our Facebook and Pinterest pages for us to enjoy!