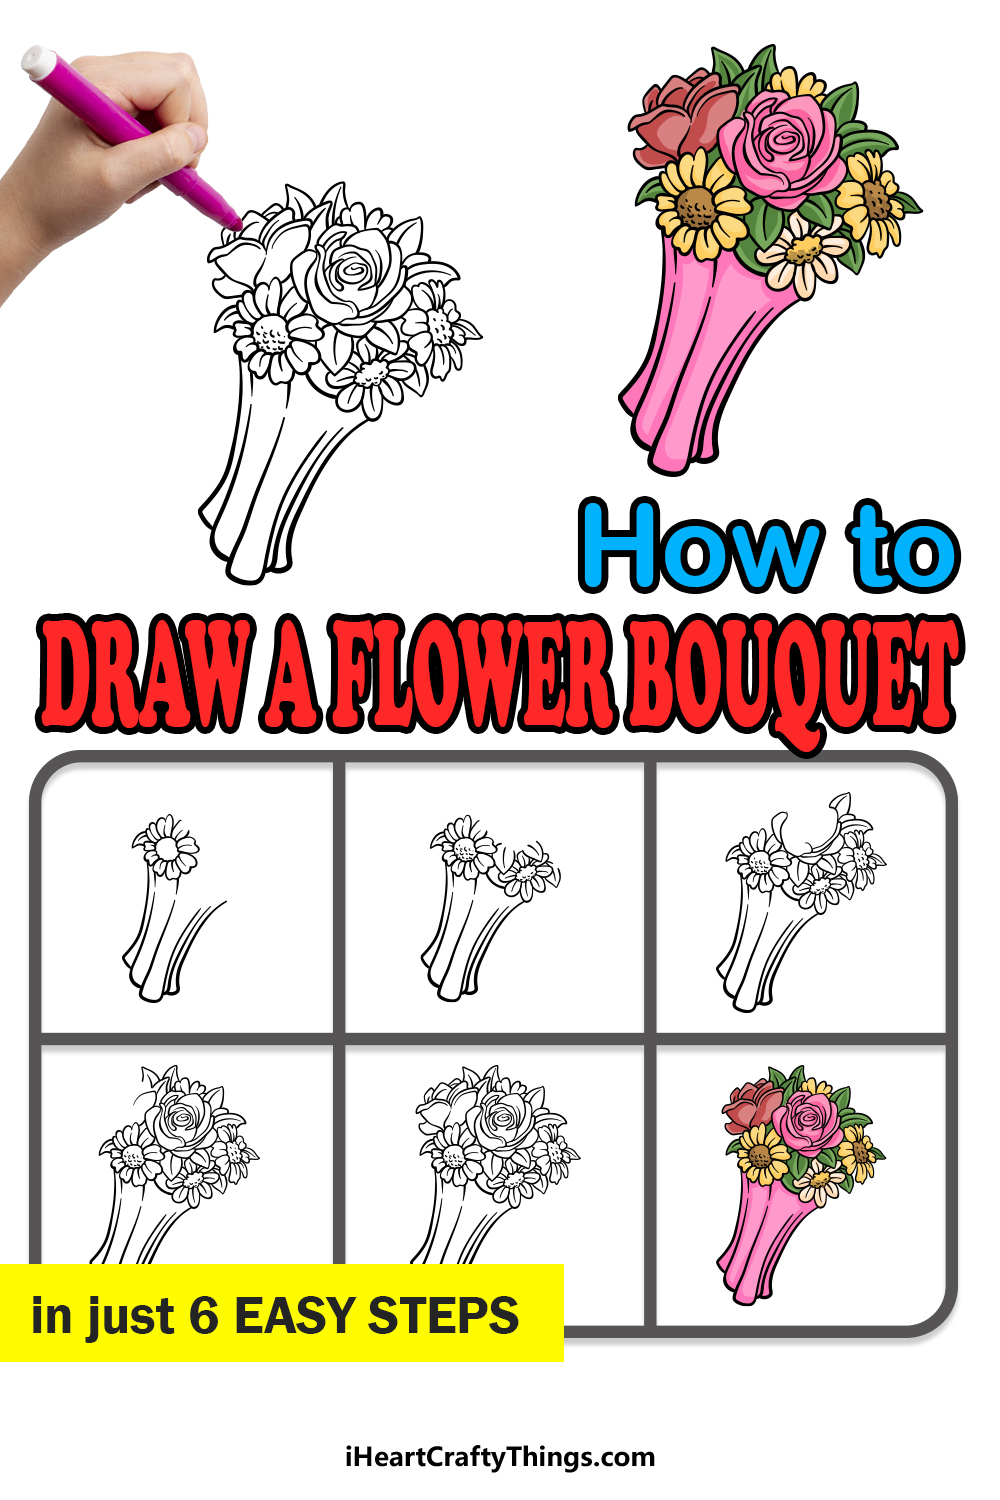
Find out how to draw a flower bouquet in this fun and easy guide for kids! Anyone can make a stunning bunch of flowers by following the steps I have laid out for you.
Flower bouquets can be used in many different scenarios and situations. They can be used to show congratulations, condolences or just as a pretty gift.
Of course, they can also have many different types of flowers contained within. When you follow the steps of this guide, you will see how to draw this standard bouquet.
Once you have the hang of it, it’s up to you to change it in any way you may like! You could change some of the flower types or you could add a background, additional object or anything else you can think of.
Let’s begin and see how to draw these pretty flowers.
Watch And See How To Make Your Flower Bouquet Drawing
How to Draw A Flower Bouquet – Let’s Get Started!
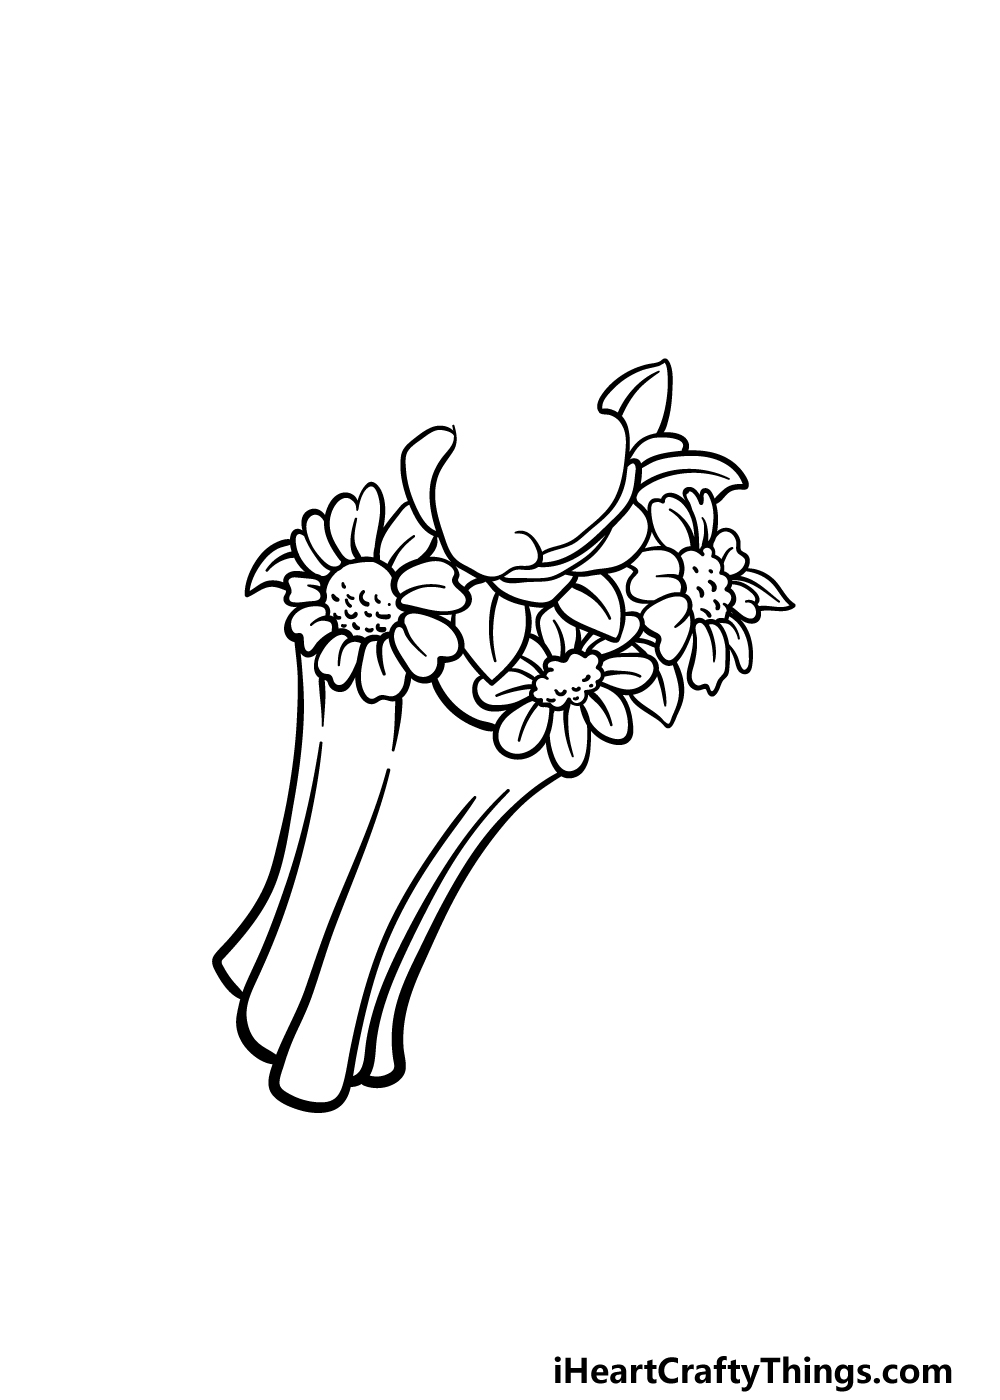
Step 1
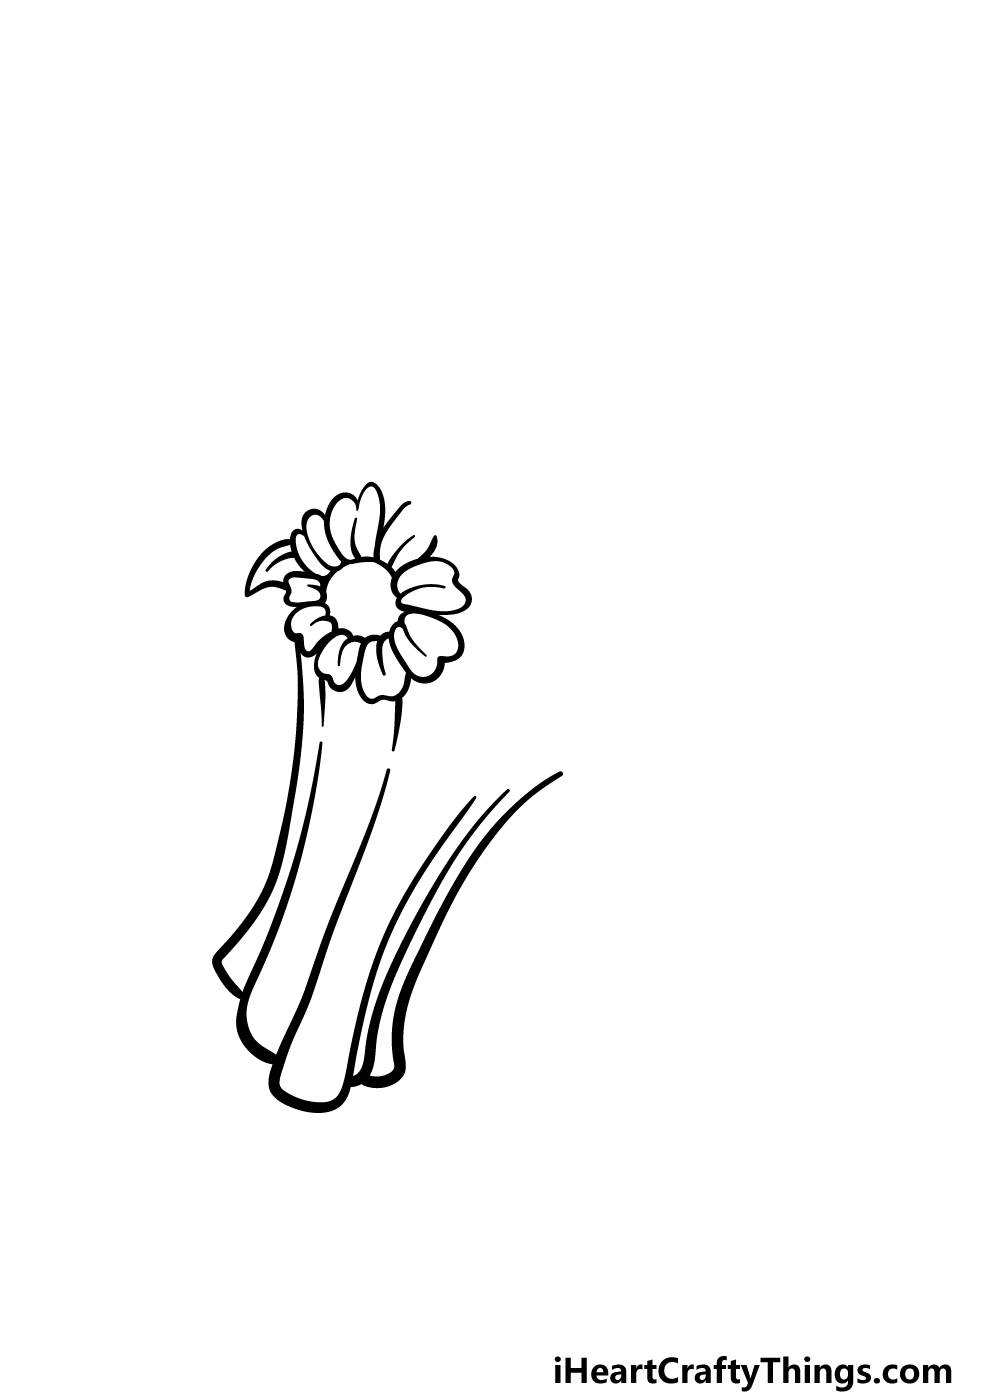
We will start this guide on how to draw a flower bouquet by drawing the first flower for the arrangement along with the wrapping holding the bouquet together.
The first flower we will be creating will have a circular center surrounded by lots of rounded petals.
Each petal will also have a line at the center of it, and you can also draw a small leaf poking off of it.
Once you have drawn that first flower, you can then draw the wrapping holding the flowers together.
These will be drawn with some curved lines to create the crinkled-up wrapper. This wrapper will also be thicker at the top and get thinner as it goes lower down.
Be sure to leave some spaces on top of the wrapper as we will be adding some more flowers there shortly. Then we can move on to the next step!
Step 2 – Next, draw some more flower details
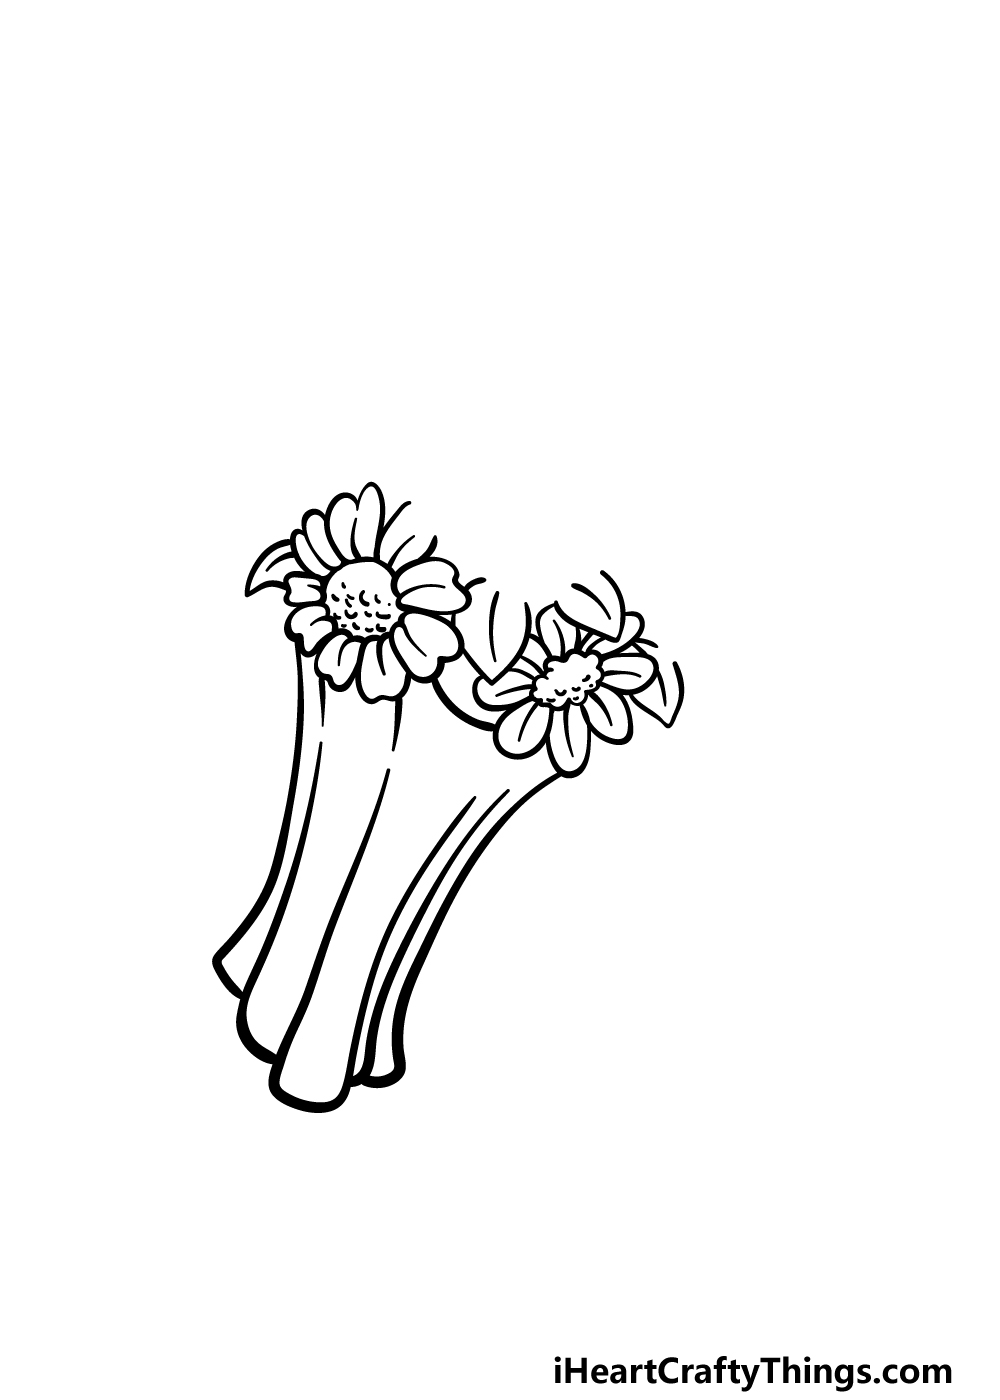
This second part of your flower bouquet drawing will see you adding another flower with some additional detailing as well.
First, you can draw another flower into the space that you left at the top of the wrapper in the previous step.
This flower will look very similar to the first one that you drew, but the center will be a bit bumpier than the previous one.
Once that flower is done, you can then draw some rounded leaf shapes surrounding the flower and filling up some of the empty space.
Finish off by adding some simple detail to the center of the first flower, and then it’s time for step 3.
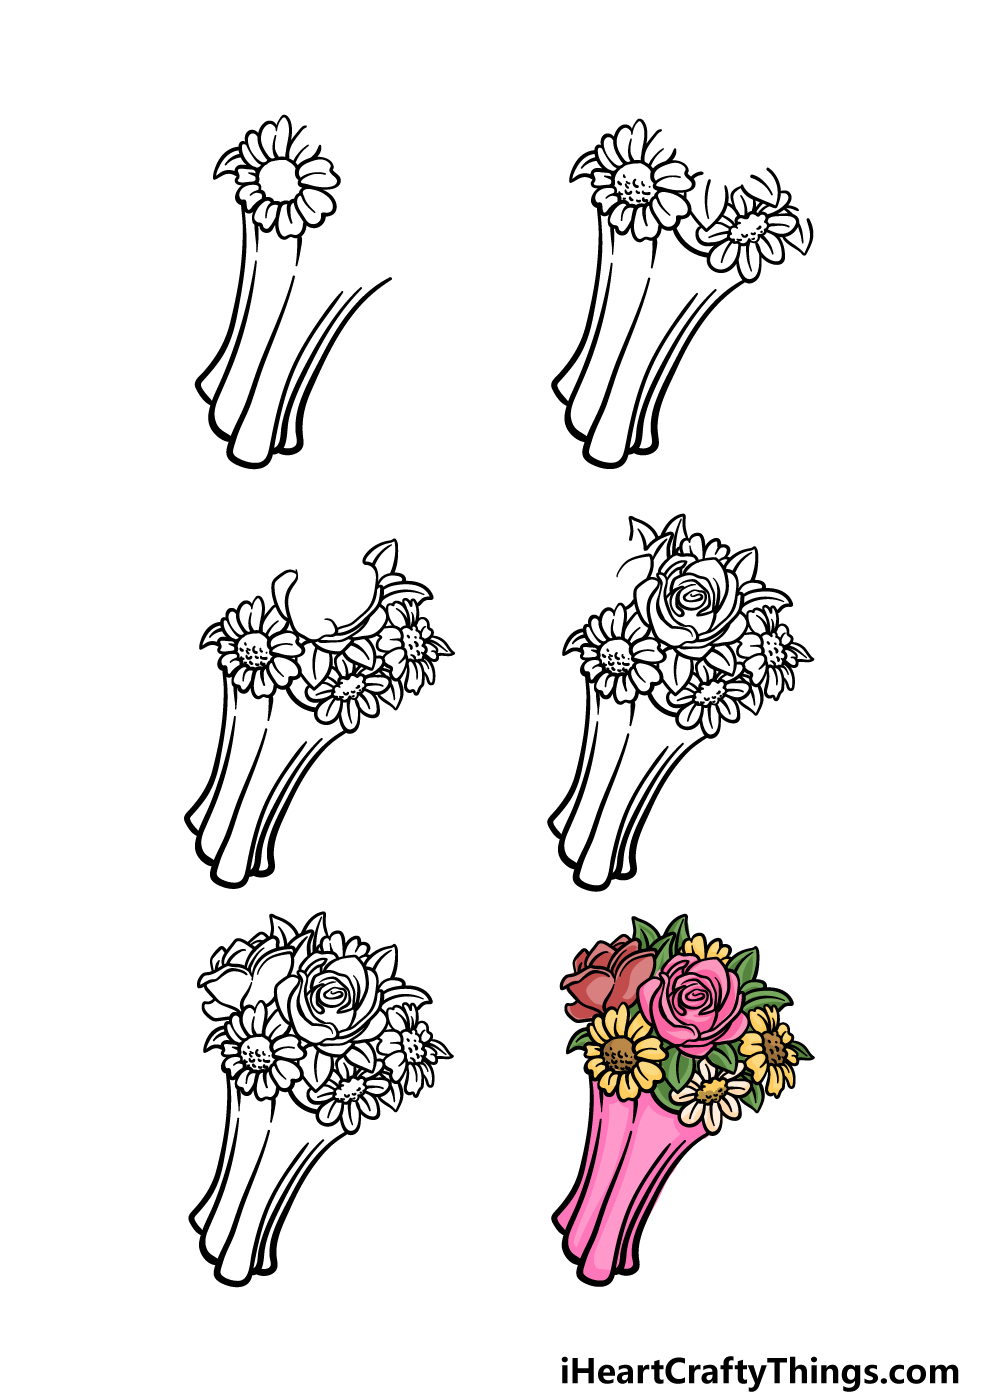
Step 3 – Draw some more flowers
When it comes to a bouquet, the more flowers that you can add the better! For that reason we will be adding some more flowers in this step of our guide on how to draw a flower bouquet.
Start this step by drawing another flower similar to the second one on the right-hand side of the picture. This one will also be surrounded by some leaves to fill in the gaps.
In the next step, we will be drawing a large rose for the arrangement, and you can start to draw it now.
Use some curved lines to begin the outline for this rose as it appears in our reference image, and then we will finish it in the next step.
Step 4 – Next, finish off the rose that you started

You can now finish off the rose that you began for your flower bouquet drawing in the previous step. Using the outline that you began, start building up the various petal layers for the rose.
These will lead up to the twisty center of the rose, and once it is drawn you can also add some more leaves and petals around it for even more volume to the bouquet.
Then we will just have a few final details to add in the next step before you start to color it in!
Step 5 – Finish off your flower bouquet drawing
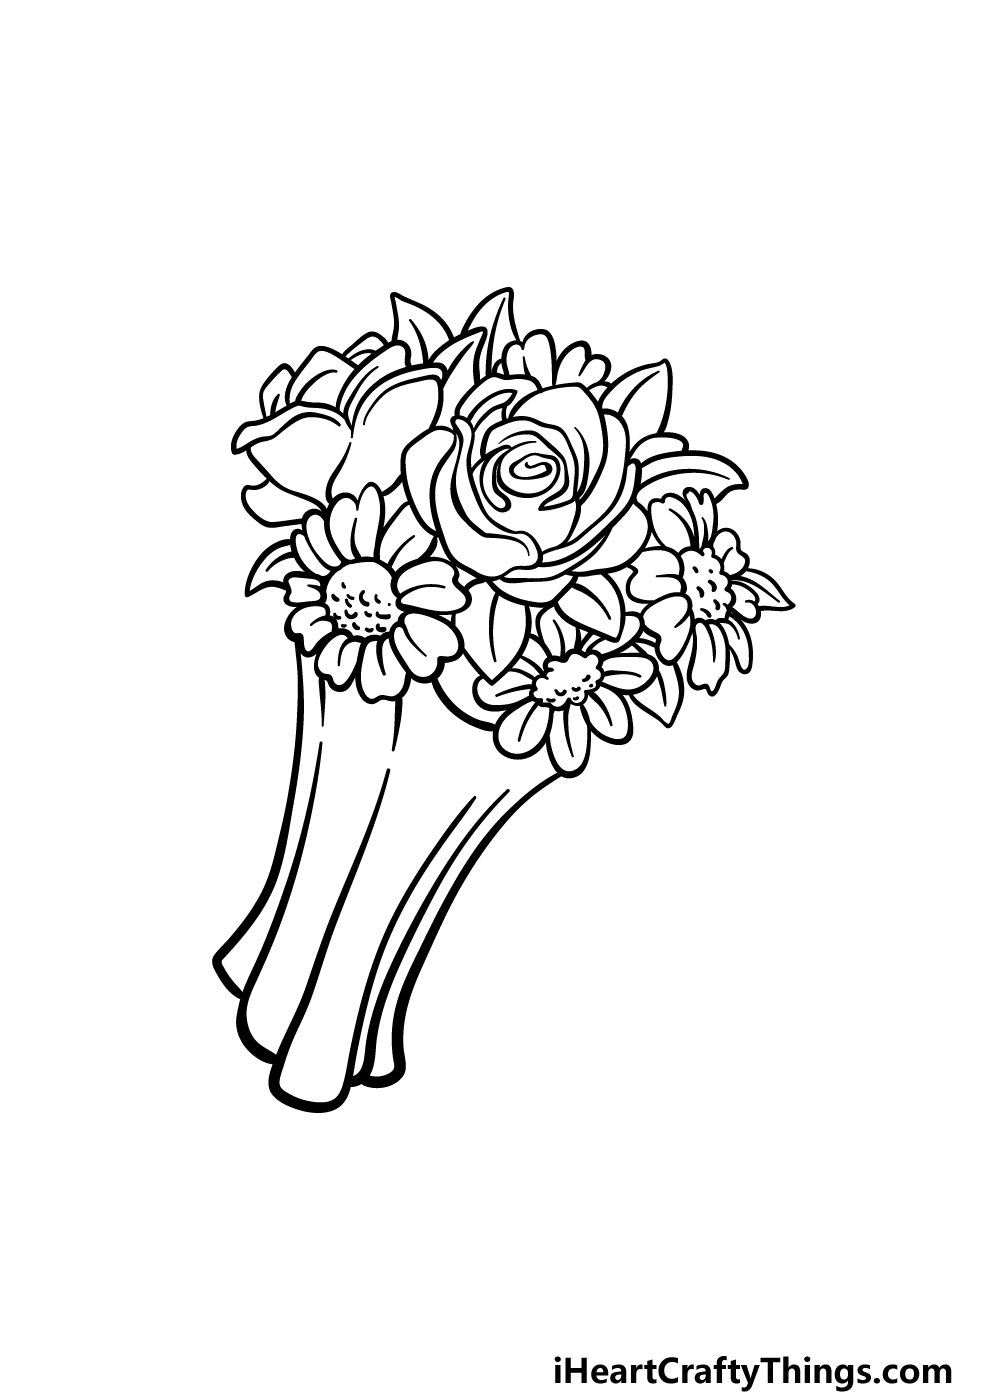
This part of our guide on how to draw a flower bouquet will be all about finishing off the final flower details for the image.
To do this, we will be adding another rose onto the picture, but this one will be facing the side, unlike the first one.
Even though it is at a different angle, it will still be drawn with layers of petals connecting to one another.
Once you have drawn this second rose, you will be ready for the final step! There are some additional details that you could change or add before moving on, and this can be a great way to personalize your picture.
You could add some of your own favorite flowers to the bouquet or draw a background to show where this bouquet is being gifted.
What can you think of to finish off this beautiful flower bouquet drawing of yours before you complete it with color?
Step 6 – Finish off your flower bouquet drawing with some color
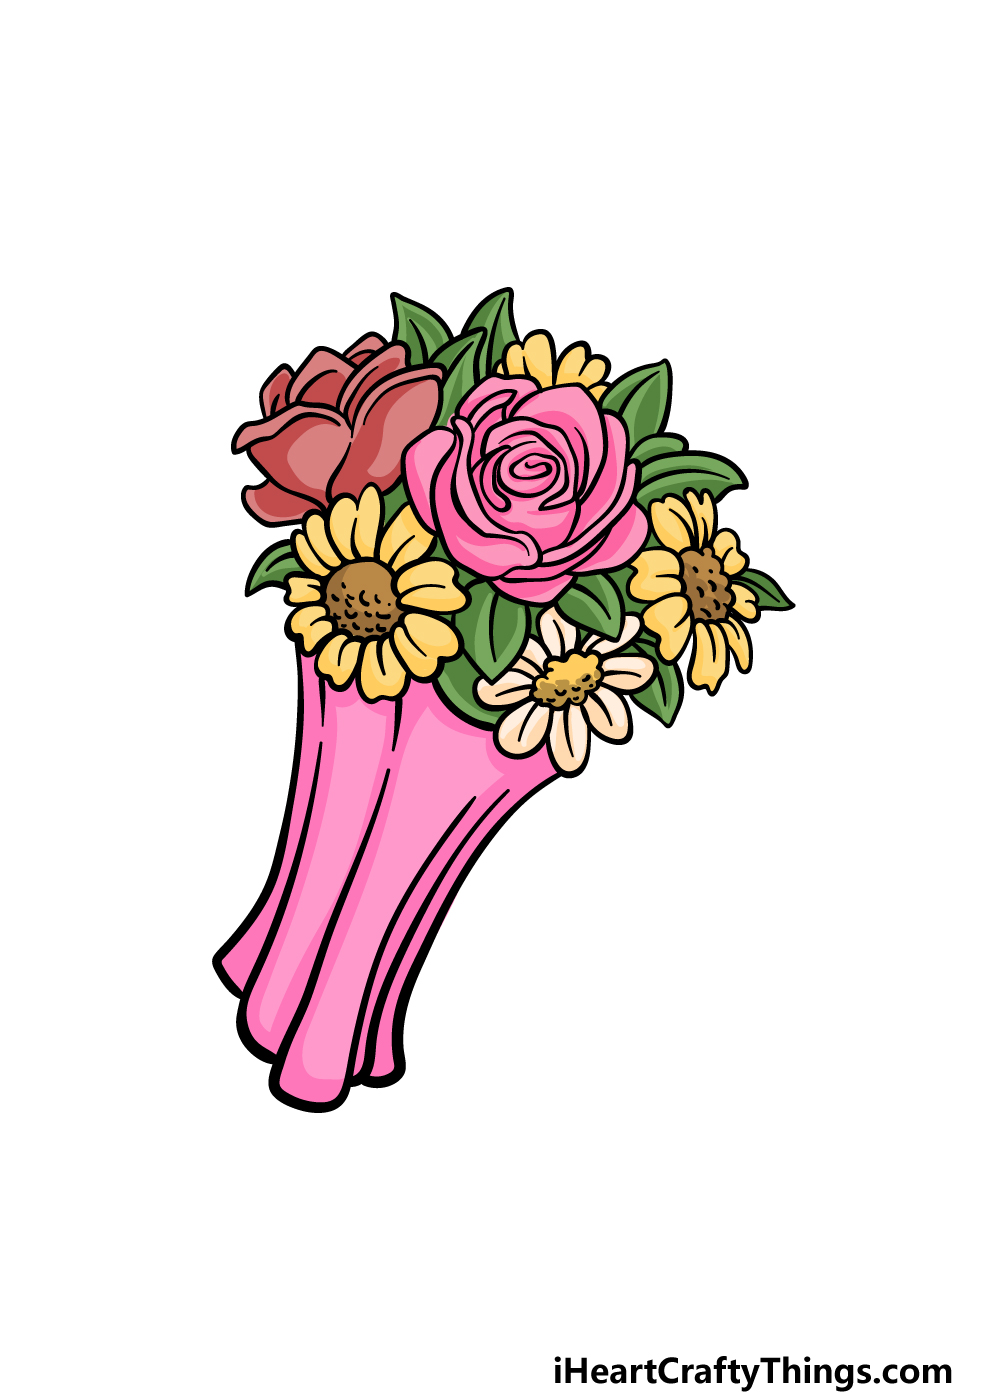
One thing that almost all flowers have in common is that they have beautiful colors to them, and that’s why for the final part of your flower bouquet drawing we will finish off with some color.
We showed you some beautiful colors that you could use in our example image, but these colors are just a suggestion, and you should feel free to use any colors that you like for it!
You could also experiment with different art tools and mediums to achieve the colors that you want, and you have tons of options for what to use.
This is really your chance to show off how creative you can be, so be sure to have fun with it!
Do this to take your flower bouquet drawing to the next level
We’ve arranged a selection of 4 tips to make your flower bouquet sketch even better!
This drawing of a flower bouquet has a lovely selection of flowers included. While the selection is already varied, you could make it even more varied by adding some more of your favorite flowers.
These could include any flowers that you love, and you could choose some that will bring even more color and vibrancy to the arrangement.
There are no wrong answers when it comes to choosing flowers!
What are some favorites you would like to use for this image?
If you have too many favorite flowers that you want to include, then you could use some of the extra flowers in a second bouquet.
You don’t need to stop there, as you could include as many flower bouquets as you like!
This would be a great way to showcase all of your favorite flowers, and you could even have themed bouquets. How many flower bouquets would you like to fit into this image so that it will be a flower celebration?
A flower bouquet will often be used at certain occasions. You could let out your inner wedding or party planner to show where this flower bouquet drawing is located!
Some classic locations you could find a flower bouquet would be at a wedding, engagement party or funeral if you want a more somber setting.
Choosing your setting will allow you to design other decorations and additions. What kind of occasion would you choose for your background?
This final tip for your flower bouquet sketch can be considered an extension of the previous one. It involves adding a human character to your drawing to really bring it to life.
Adding humans to a drawing can be tricky, but you can draw in a simpler style and base them on a real person to make it easier. This can also go with your chosen theme.
For example, if you drew a wedding setting then this flower bouquet could be held by a beautiful bride!
Your Flower Bouquet Drawing is Complete!
You have reached the end of this guide on how to draw a flower bouquet, and you have created a stunning flower arrangement!
As with any new drawing, breaking it down into smaller steps is the best way to make it more fun and easy, so that’s what we attempted in this guide.
Now that you know the basics, you can also use what you learned to create your own unique flower arrangements.
This is your chance to show off your creativity, and we can’t wait to see what you come up with!
Be sure to check out our website for more fun, free drawing guides like this one. We also have more coming your way, so definitely stay tuned for that!
When your flower bouquet drawing is complete, please do share it on our Facebook and Pinterest pages so we can appreciate your beautiful arrangement!