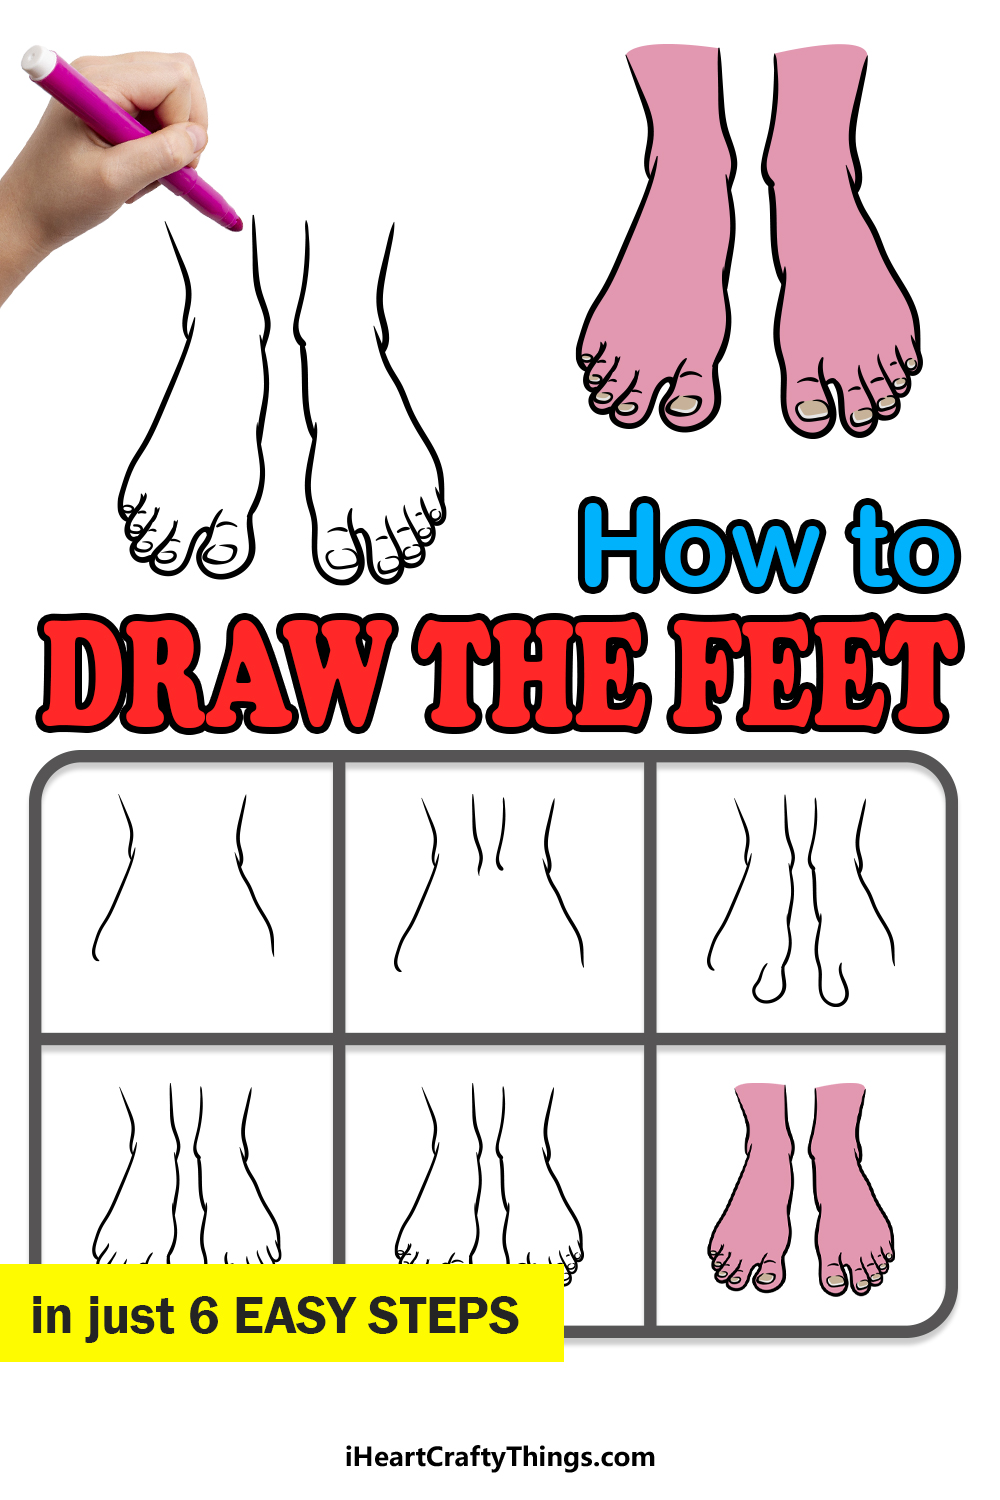
The human body is made up of many parts, and seeing as each of us occupies one of these bodies you may assume it would be easy to draw any part of it.
This is quite often the opposite of reality, however, and drawing parts of the body can be some of the most difficult drawing challenges to take on. Feet are no exception, and many have given up in frustration while trying to learn how to draw feet.
Once you know what to do, it can be made much easier though!
This step-by-step guide on how to draw feet will show you how easy and fun it can be.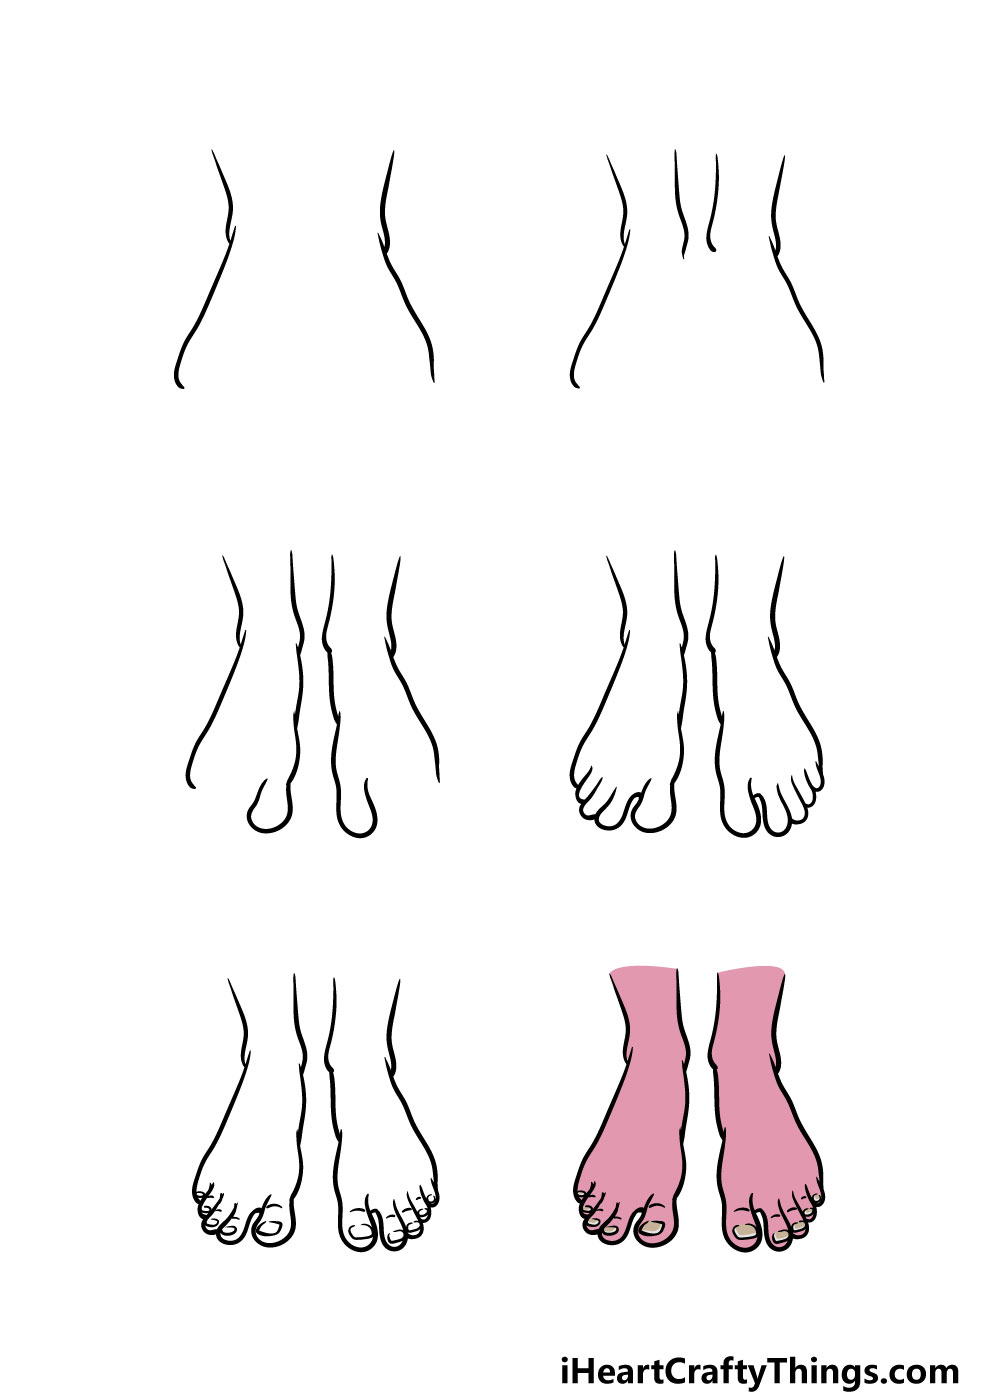
How to Draw Feet – Let’s Get Started!
Step 1
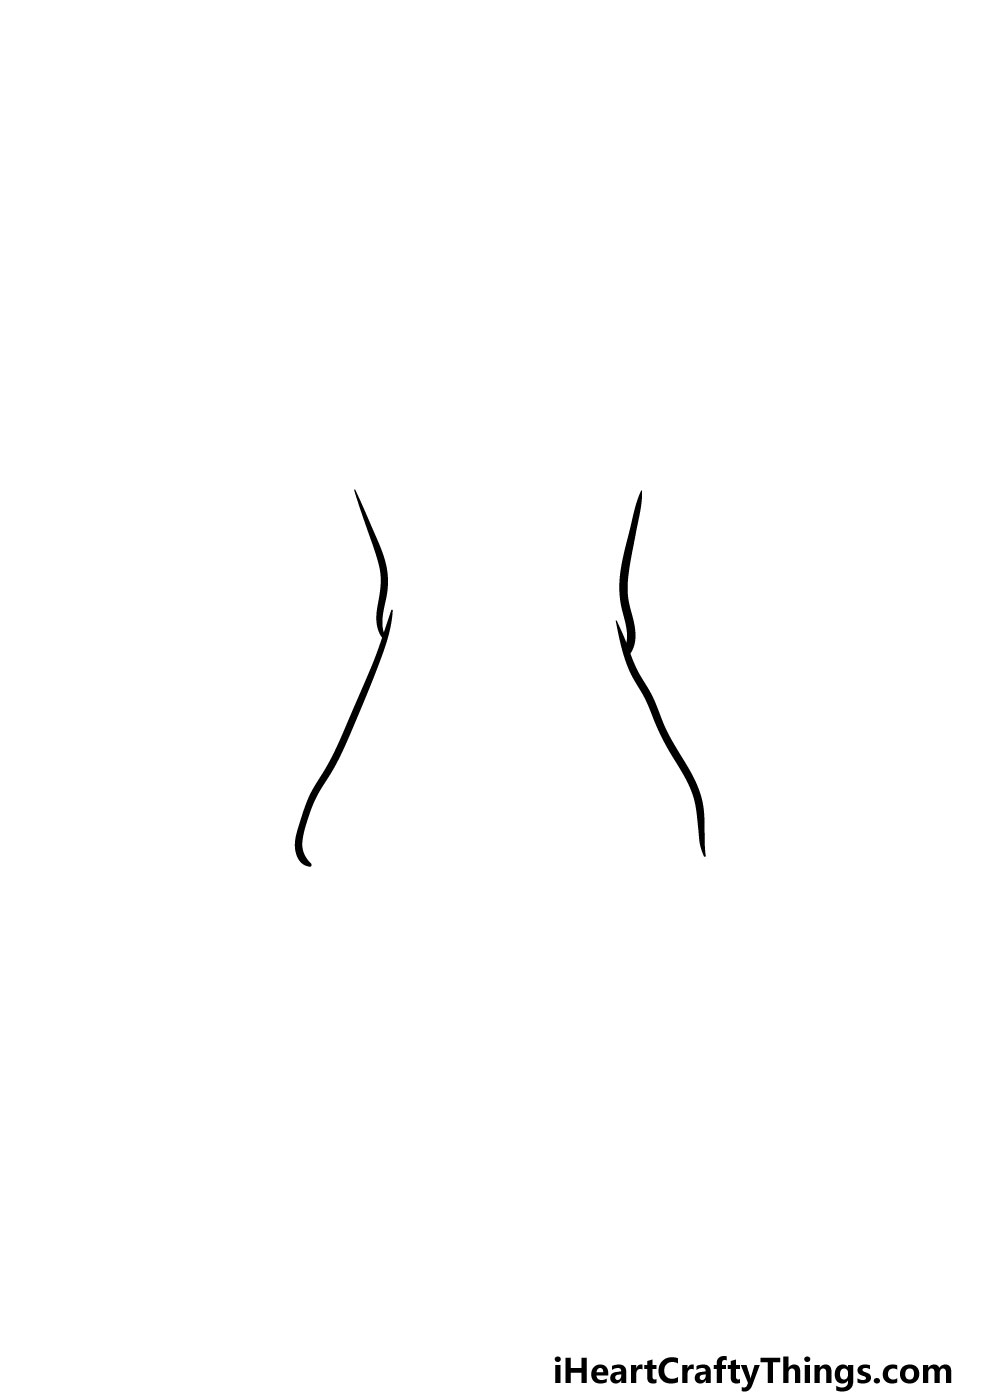
We will begin with the outline of the feet in this first step of our guide on how to draw feet. For now, we will focus on the outer outlines of the feet, and each of these will be drawn with two lines connecting to one another.
The first of these lines will be shorter and curved at the end, and the lines for each foot will mirror one another.
Then, you will be adding another slightly longer curved line beneath them and connecting as shown in the reference image.
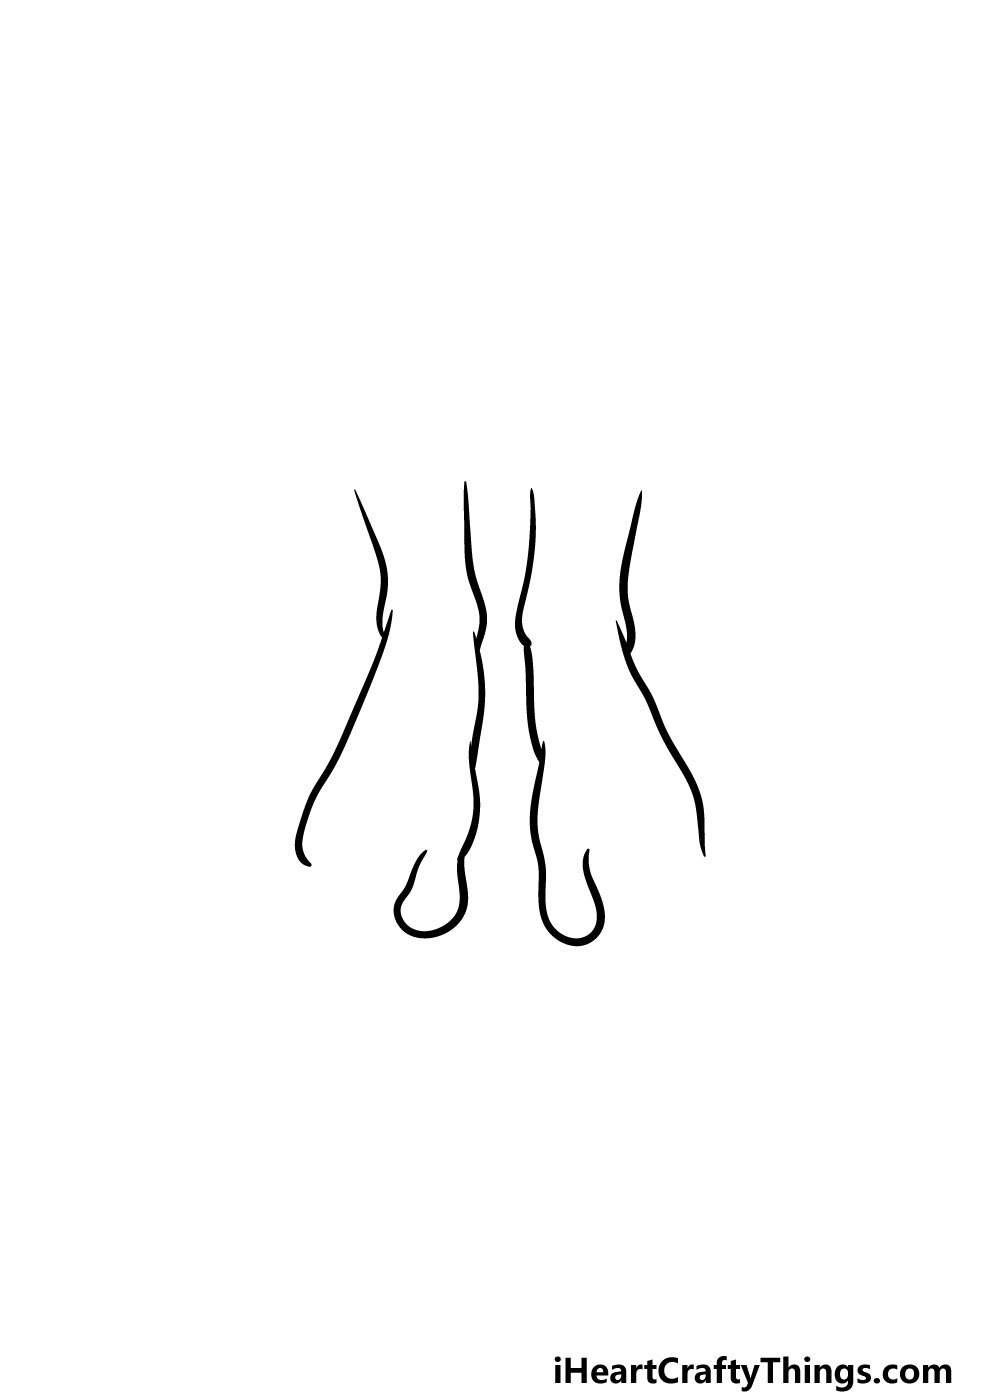
Step 2 – Draw the ankles next
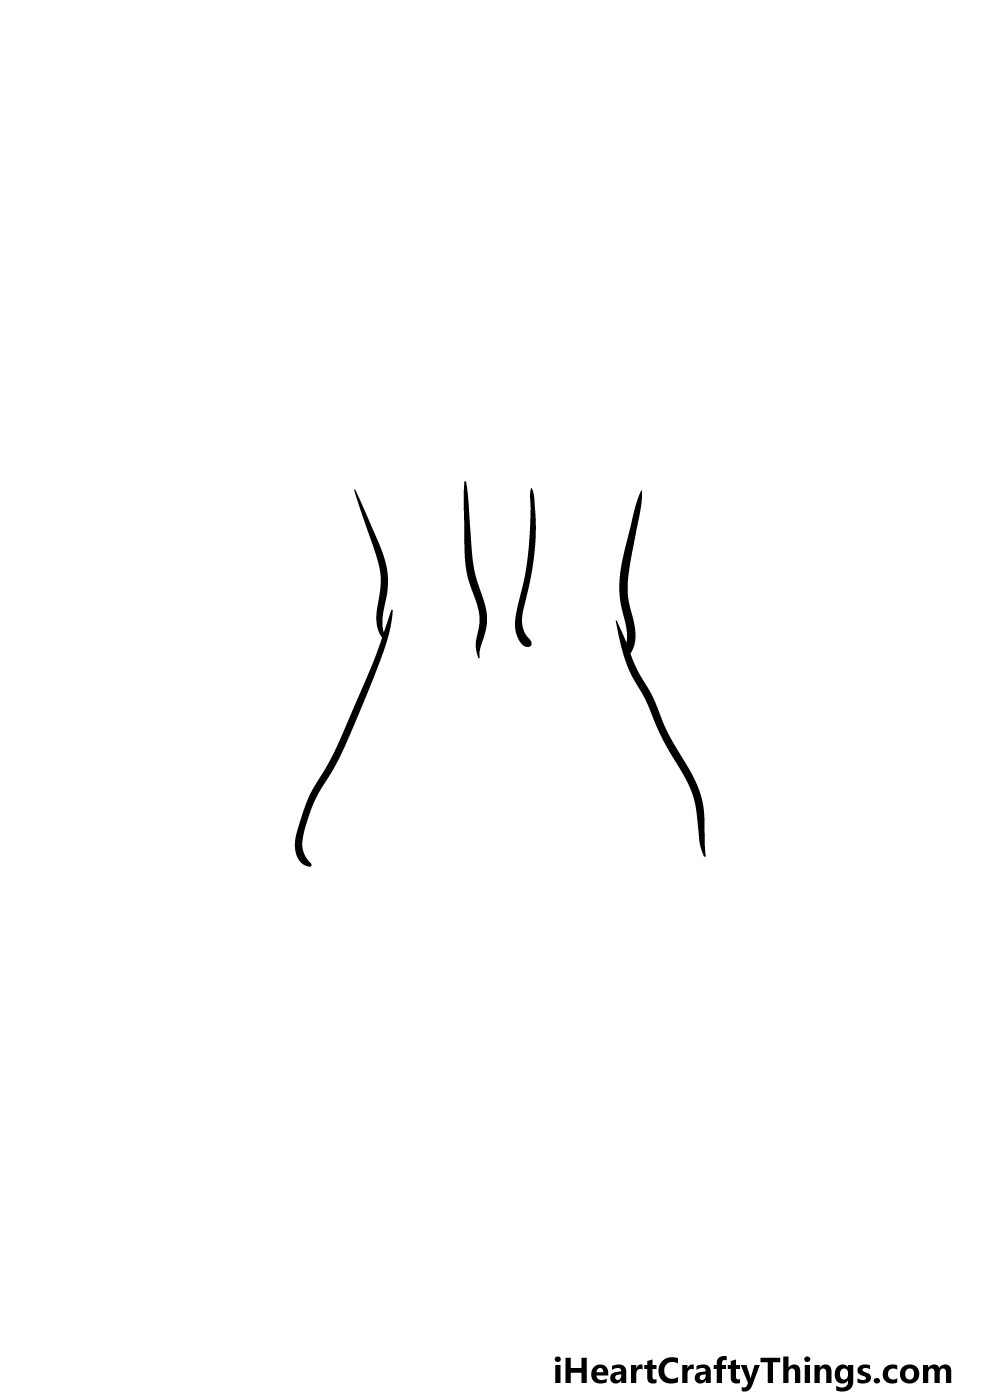
For this second part, we shall be drawing the ankles next. This step should be pretty simple to do, as all you will need to do is draw two more lines between the first two that you did in step 1.
These lines will also be slightly curved with a small bump at the end. Once you have these lines looking as they do in our reference image then you’re ready for step 3!
Step 3 – Next, you can draw the inner edge of the feet
We will start on the feet themselves in this step of our guide on how to draw feet. We will also be drawing the first of the toes, which we’ll get to in a moment.
First, you can draw some curved lines coming down from the ankles that you drew in the previous step. These lines will connect to one another again, and at the bottom each foot will curve into the big toe.
Your foot drawing is already taking shape, and we will be finishing off the outline of the rest of the toes in the next few steps.
Step 4 – Draw the rest of the toes in this step
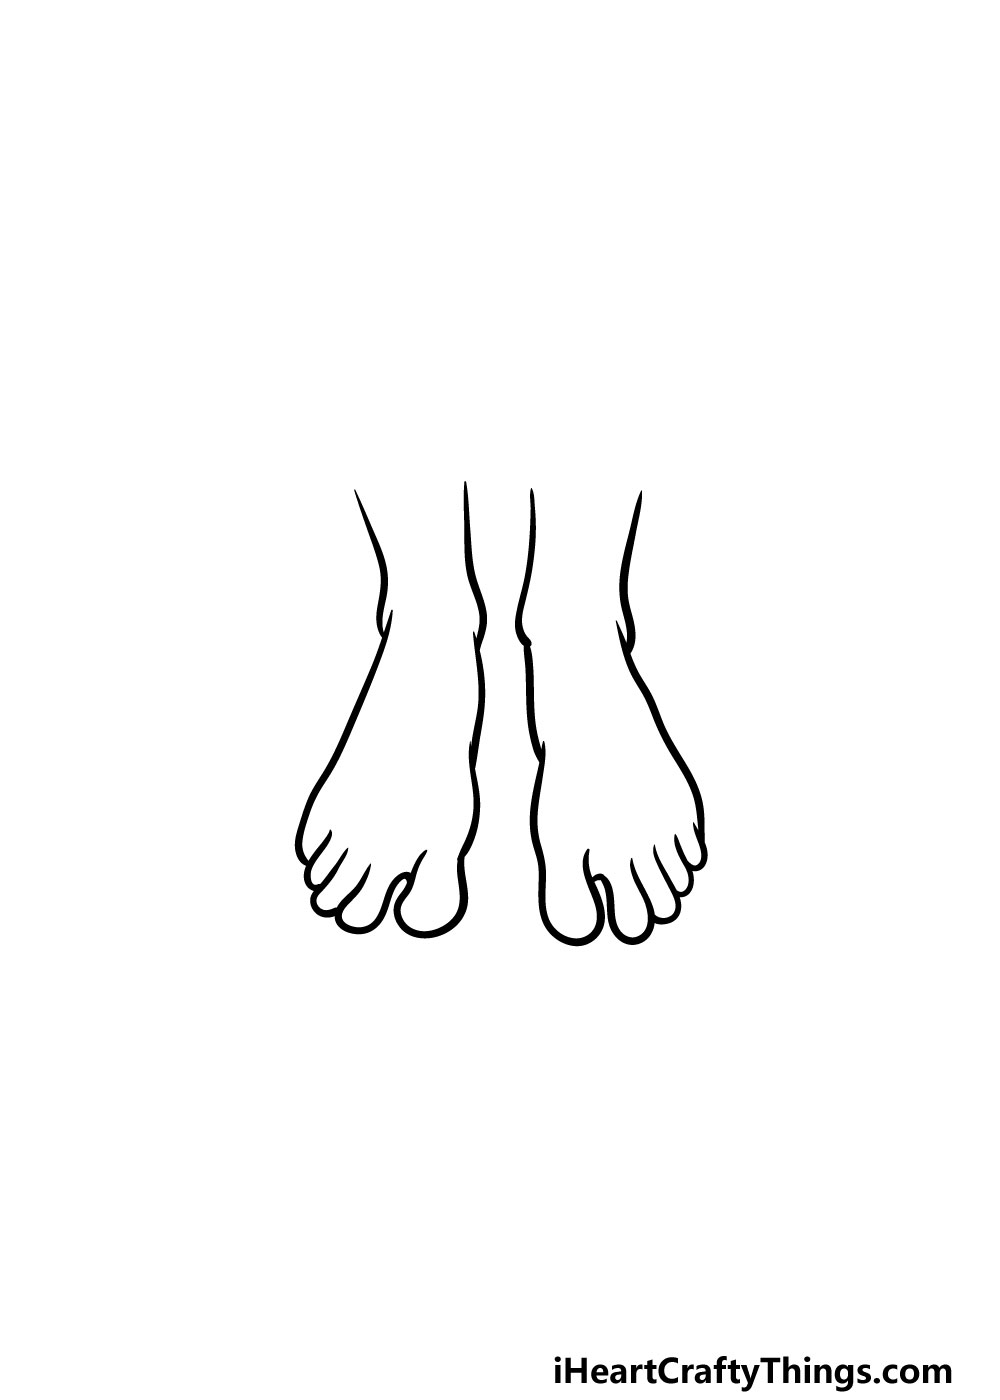
This step of your feet drawing will see you drawing the remaining three toes.
There will be a small gap between the big toe and the next one along, but otherwise there will be no gaps between the rest of the toes.
Each toe will be drawn with a curved, rounded line, and each one will get a little bit shorter as you go along.
Then it will just be a matter of adding some final small details in the next step before you start to color in.
Step 5 – Now, you can add some final details to your feet drawing

You’re almost ready to start adding some color in the last step of this guide on how to draw feet, but first we have a few final details to add.
Once we have added these, you will also have the chance to add some details of your own to finish it off!
First, you can finish off our details by adding some tonsils to the feet. These will be small, rounded shapes at the end of each toe, and you can also add a curved line at the midpoint of each toe to show where the knuckle is.
That will finish off our details, but as we mentioned you can also add some of your own! You could draw a background to show where these feet are standing.
Maybe they could be on a beach or in a lush forest! You could also add some smaller details like mud splatters or bandaids to show that these feet have been on some grand adventures.
What else can you think of to finish off this drawing before the final step?
Step 6 – Finish off your feet drawing with some color

This final step of your feet drawing is the one where you get to relax with some coloring fun!
We shoed you just one way that you could color in these feet, but this is just a suggestion, and it’s up to you to decide on how you would like to color in.
Once you have chosen your colors, you can also have great fun choosing which art mediums and tools you will use to make them a reality!
Whether you would prefer a bright and vibrant look or would like to keep it more muted and subdued, you have many options to choose from.
We know that whatever you choose will look amazing!
5 Tips To Make Your Feet Drawing Even Better!
Dip your toes into this pool of 5 tips for making your feet sketch even better!
This drawing of feet that we created in this guide are colored in a neutral flesh tone. Now that you have completed the drawing, you could make them a more specific color.
If you need some inspiration, you could look at your own feet and then use your art tools to try and replicate your own flesh tones. What colors would you like to use for these feet?
Many people like to decorate their feet in a few ways, and you could draw some of these features on these feet. There are a few examples you could go for!
For example, some people will wear toe rings or have long and colored toenails. What are some other adornments you could add to these feet?
Adding some clothing to this feet drawing would be another great way to personalize it a bit. For example, you could have the feet wearing a pair of funky socks!
You could also take it a step further and draw some shoes on the feet. These are two ideas, but what other articles of clothing could you add?
Next, you could take this drawing even further by adding more of the legs that these feet are attached to. This could be just the shins, or you could draw the entire person if you have enough space!
This is another step where you could use yourself as a model for this person, or you could use someone else you know or are related to.
How much more of this character could you add to the image?
Finally, why not finish off this feet sketch with a cool background? The scope of this background would depend on whether you added to the feet or kept them as they are.
If you didn’t add any more, then the background would need to be fairly limited in scope. If you did draw an entire character then you could have quite an involved background!
Your Feet Drawing is Complete!
You have now reached the end of this step-by-step guide on how to draw feet!
As we mentioned earlier, feet can actually be quite a hard thing to draw, as there are a lot of smaller details and shapes that you have to get just right to have them look realistic.
We hope that by breaking it down into smaller steps that you discovered that it can be fun and easy to do when you have steps to follow!
Now that you have mastered this guide, you can also take it much further with your own awesome details and additions!
We mentioned a few cool ideas to try such as drawing a background or extra fun details, but this is your chance to be creative and show us what else you can think of. Be sure to experiment with your favorite colors and art mediums too!
When you’re ready for more, we look forward to seeing you on our website! We have tons of amazing guides for you to enjoy there covering a huge variety of subject matter.
This library of drawing guides is made larger all the time, so be sure to check in often!
We would love to see your finished feet drawing, so please be sure to share it on our Facebook and Pinterest pages. We look forward to admiring your brilliant artwork!