The letter X is one of the final three letters of the alphabet, coming in at 24. It also happens to be one of the least used letters in terms of how often it appears in the English dictionary.
We still tend to use it as a shorthand for things referencing excitement and excess. In this guide, we will be aiming to add some X factor to this letter!
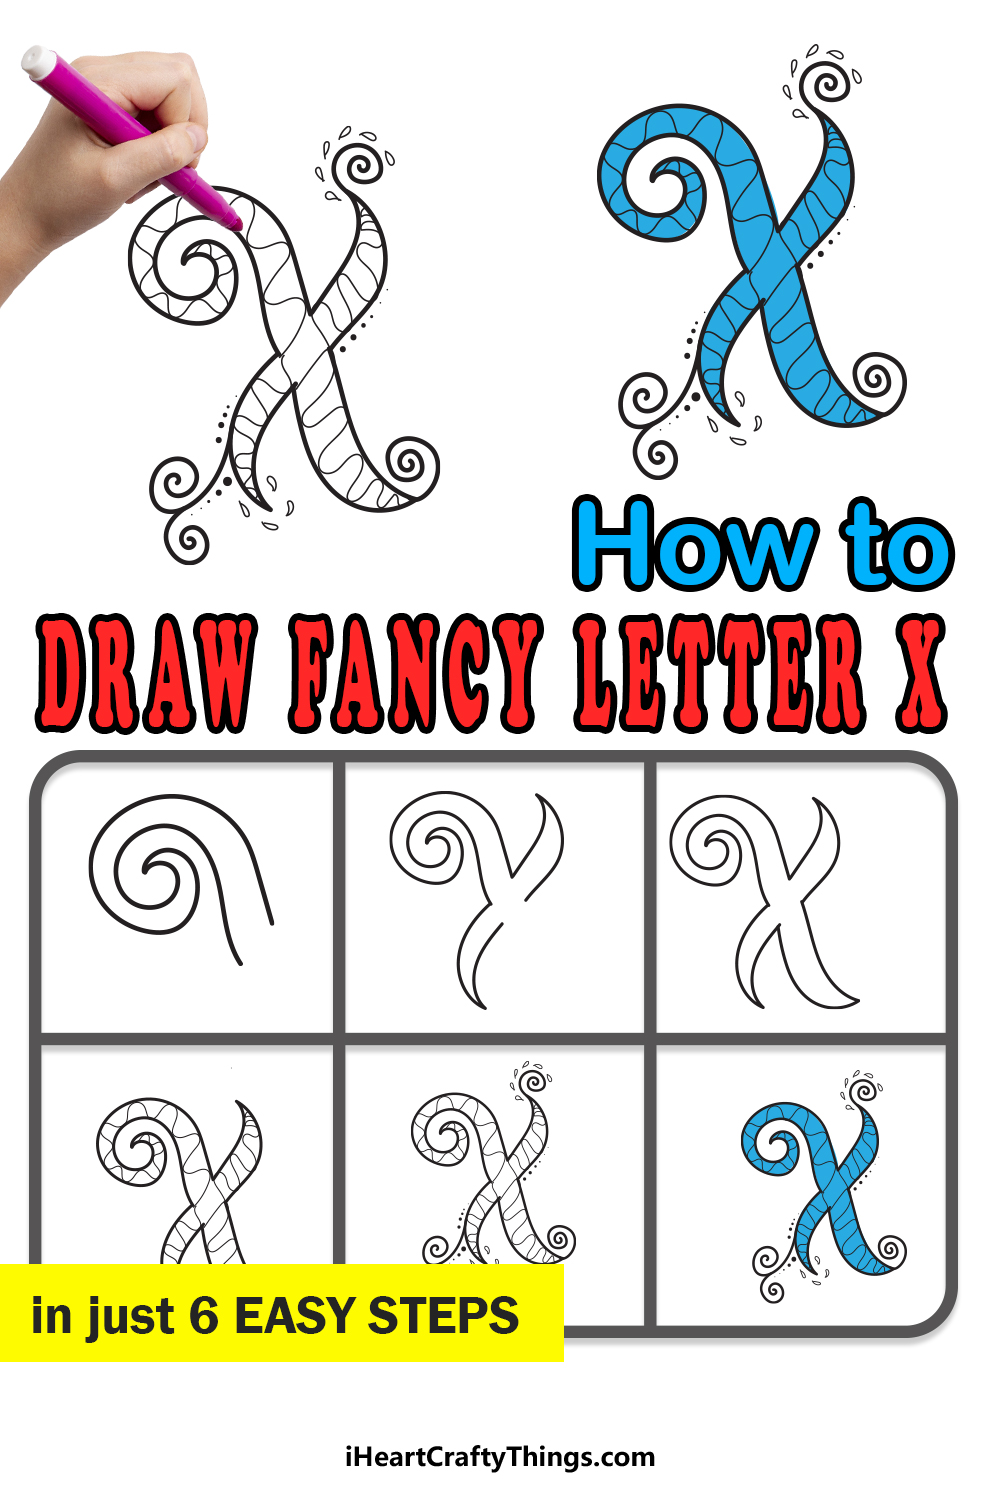
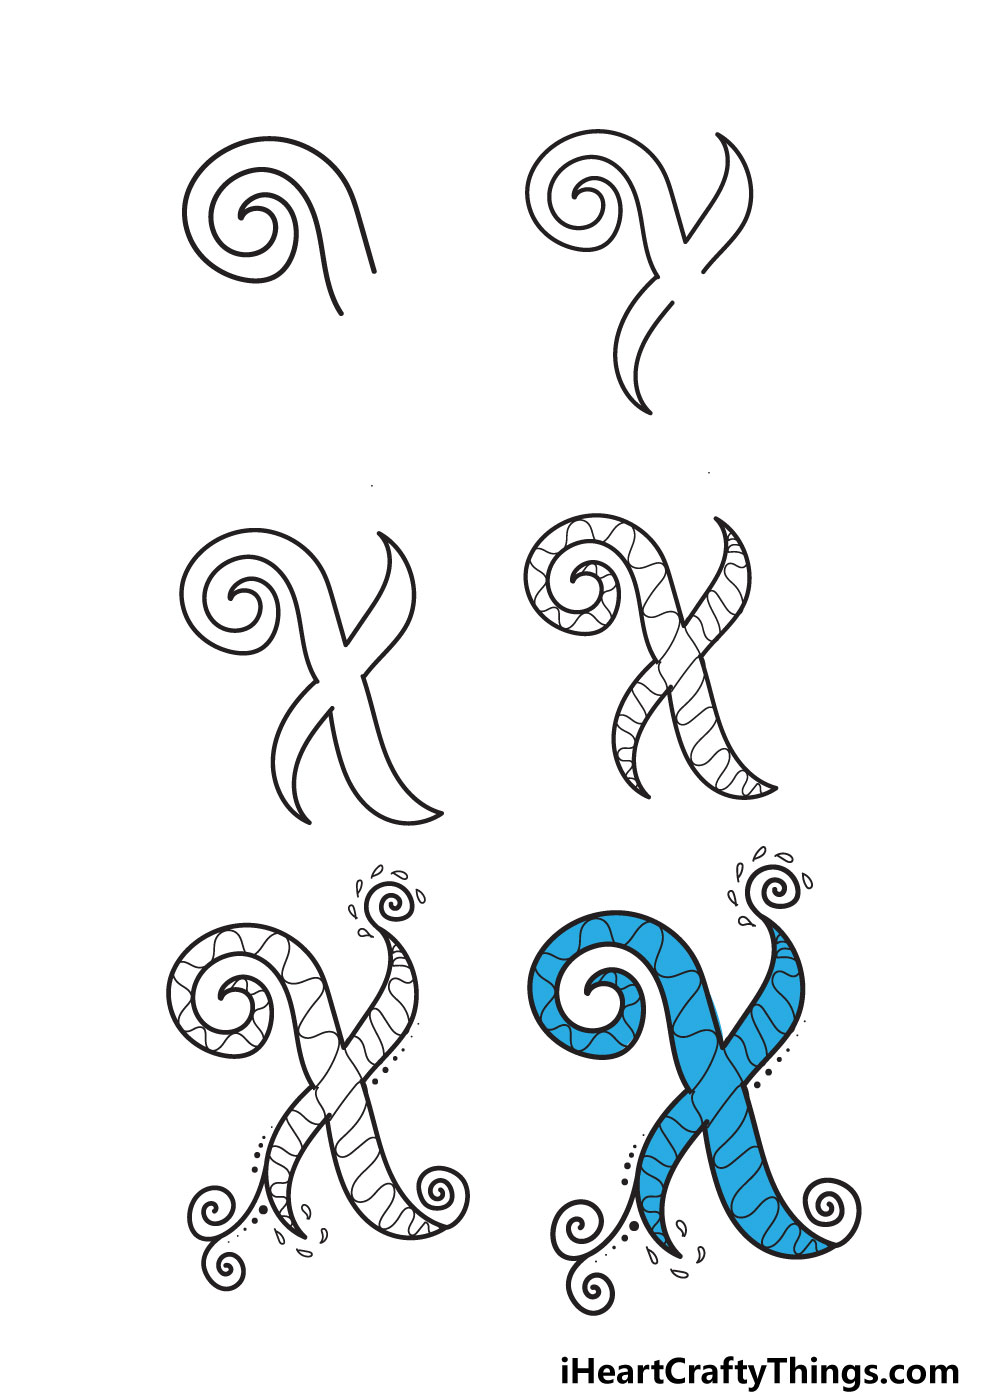
We will do this by learning how to draw a fancy letter X. In 6 steps, we will show you how to recreate this awesome design we planned out.
Additionally, we have some tips on how you can color and decorate your artwork to make it as cool as possible. There’s a lot to cover in this guide, but it will be a lot of fun!
Let’s get it started with the first step of the guide and see how it’s done.
Let’s Get Started
STEP 1:
When written as a regular letter, X is a fairly straightforward letter to write. It’s basically just two straight lines crossing each other, making it easy to learn.
This version of the letter we are drawing is essentially just that, but with some fancy flourishes. To prepare for this design, you can draw out a regular letter X.
Using a pencil is the best way to do this, and this planning X can be drawn using straight lines to guide you, even though the fancy version will be very rounded.
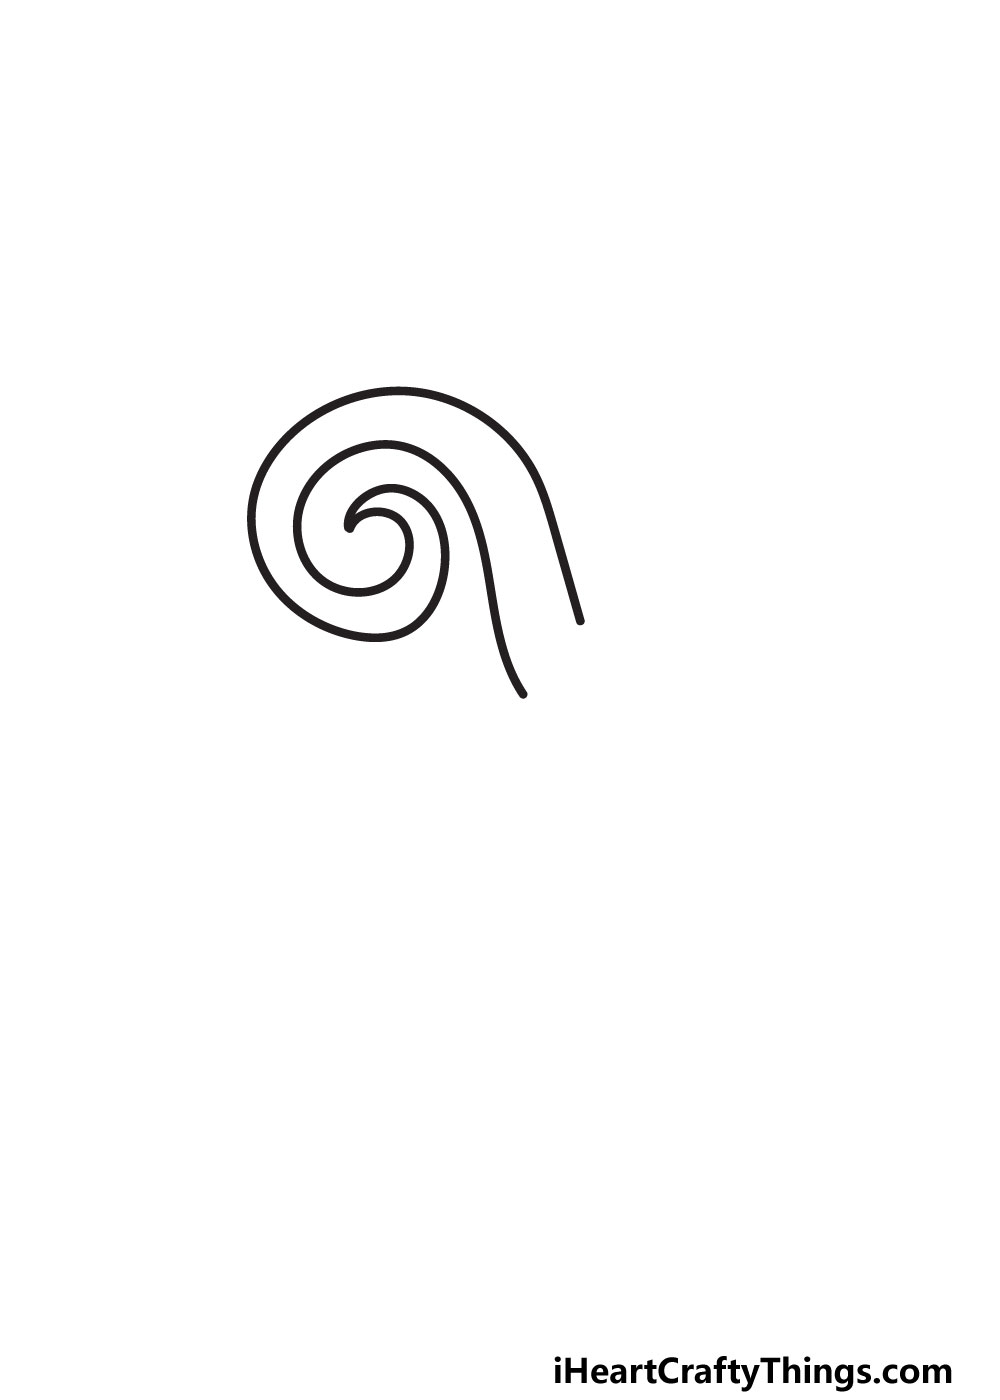
When you’re ready to begin the actual design, we will start with the top left arm of the letter. Instead of a straight line, it will be a curled spiral shape.
When drawing this spiral shape, you could either draw it as one long, twisting line, or you could split it into two lines that connect at the central point.
As you will see in the reference image, this spiral looks almost a bit like an octopus tentacle curling in on itself.
Once this spiral shape is drawn, we can then move on to step 2 of the guide to keep going!
STEP 2:
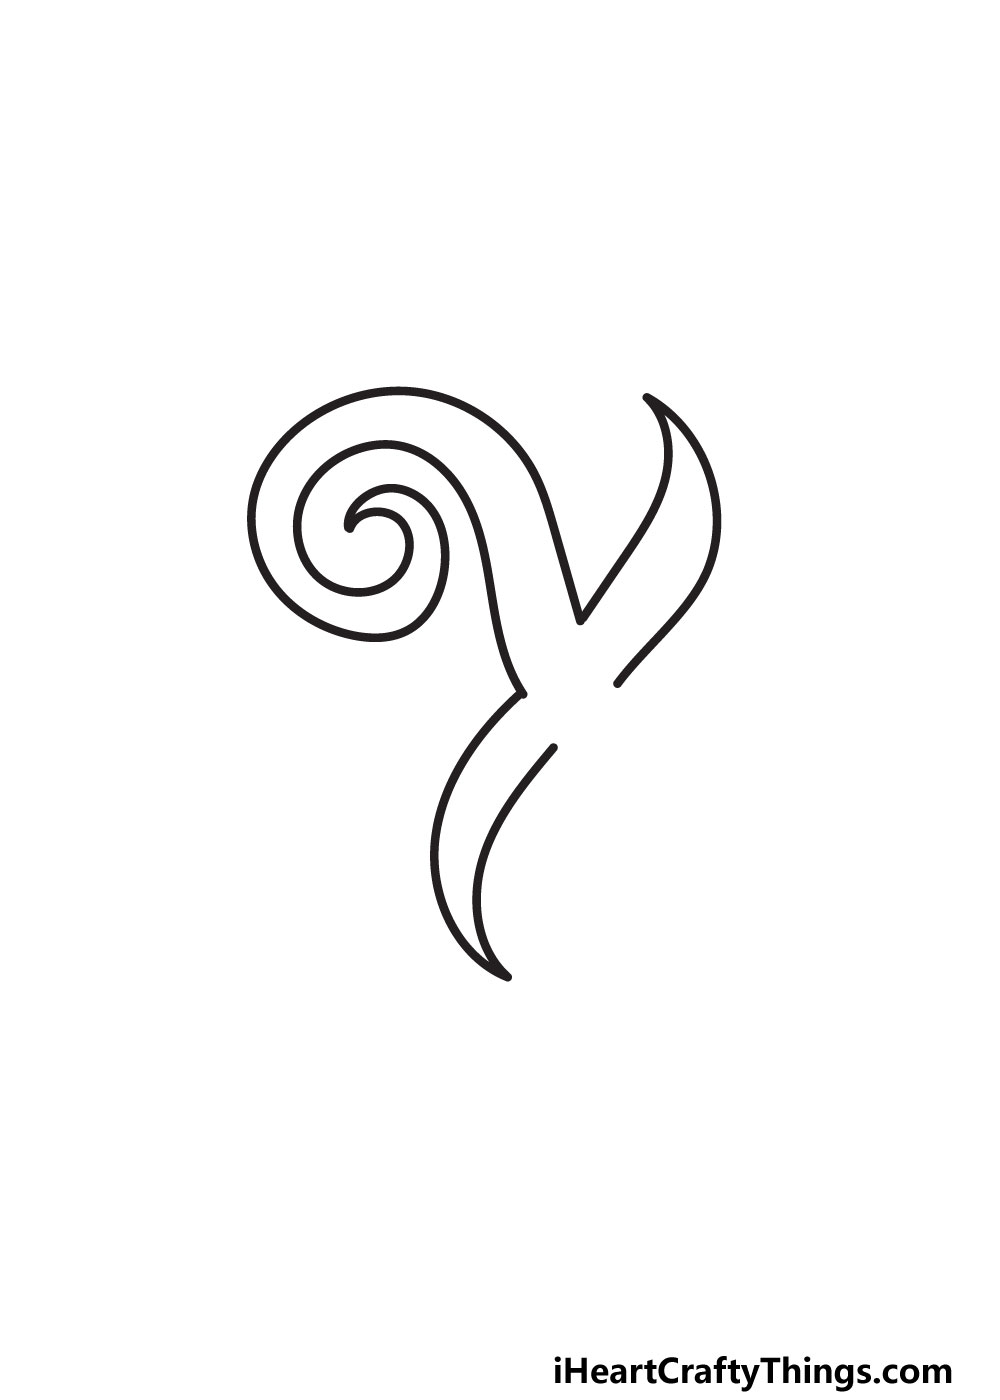
We added one of the arms of the letter X in the previous step, and this one will see us adding two more. The arm from the previous step is quite unique, though.
It’s the only one that is curled into that kind of spiral, but the other arms are also different from a regular X. We will start with the one on the upper right side of the letter.
It will begin where the previous line ended, and it will extend up at a slight, sloping angle. At the very top of this arm, there will be a sharp pointy tip.
The arm on the bottom left side of the X will be very similarly shaped, but it will naturally be at a different angle to the previous one.
The tips of each arm will also be facing in opposite directions. Now, you will see that there is a gap left on the right-hand side of the letter X.
That won’t be the case for long, however, as we will fill it in when we get to step 3 of the guide and complete the outline of the letter.
STEP 3:
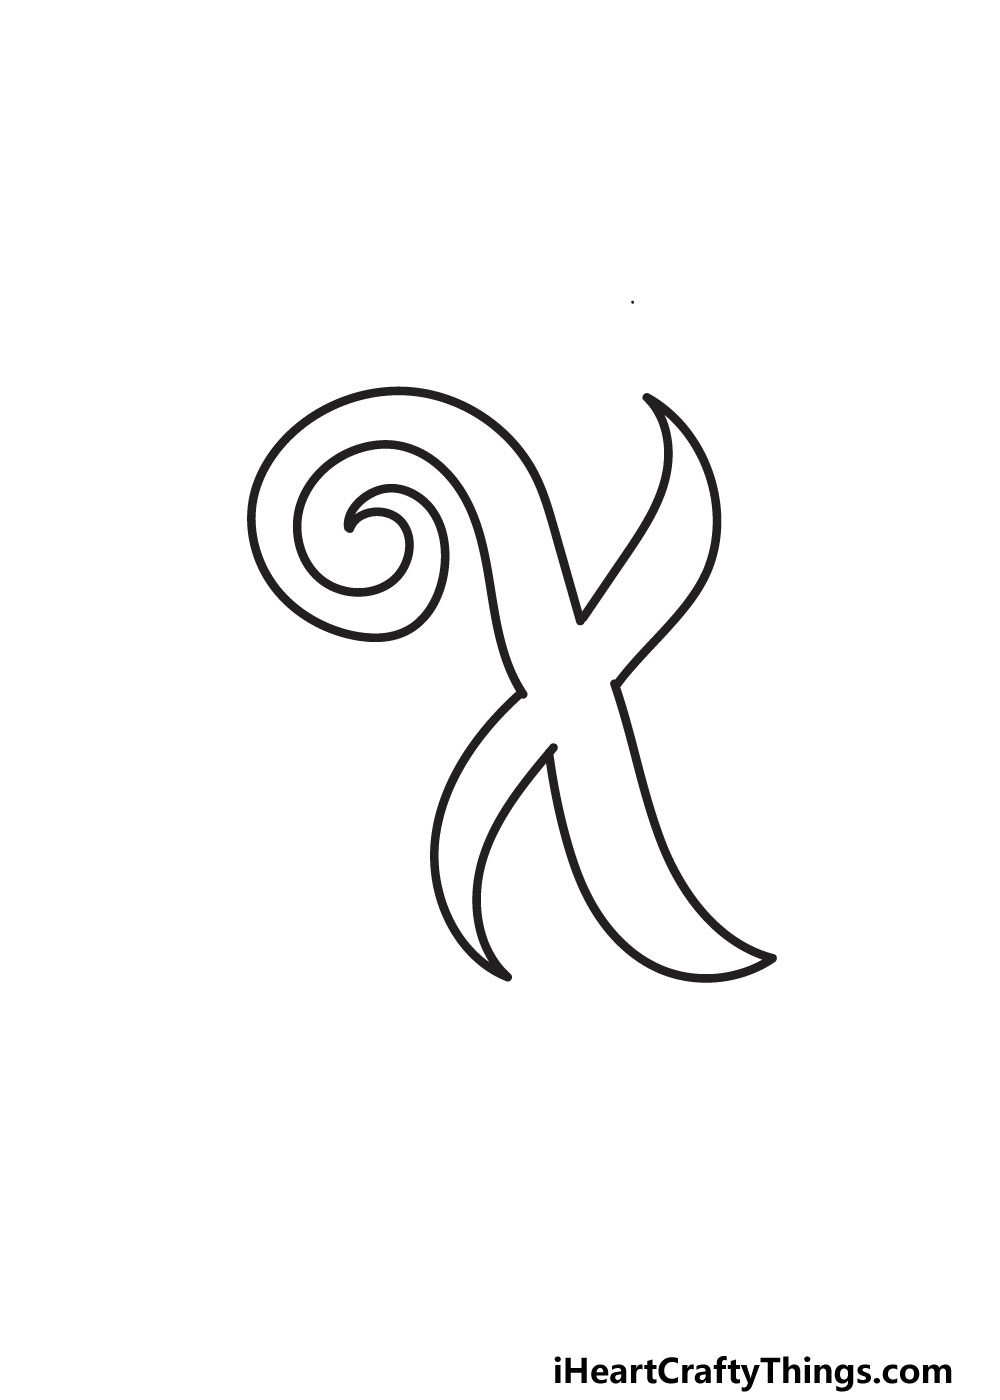
Now you’re ready to finish off the outline of your fancy letter X. This will mean adding one more arm to the shape.
This final leg will be opposite to the spiral from the very first step, and it will be shaped similarly to the previous two we drew in step 2.
You will see that this final arm of the letter is quite a bit larger than the previous two, even though it is shaped the same way.
As with those ones, it will be drawn with two slightly wavy lines that connect in a pointy tip. And with that, you have the complete outline of your letter X!
The next two steps will be focused on details in and around the letter, so you can erase the pencil lines we recommended in the first step.
Now would also be a good time to neaten up the lines of the outline and make sure you’re happy with how it’s looking so far.
With that done, we shall head to step 4 and begin some of those interior details to make this letter look even fancier than it already does!
STEP 4:
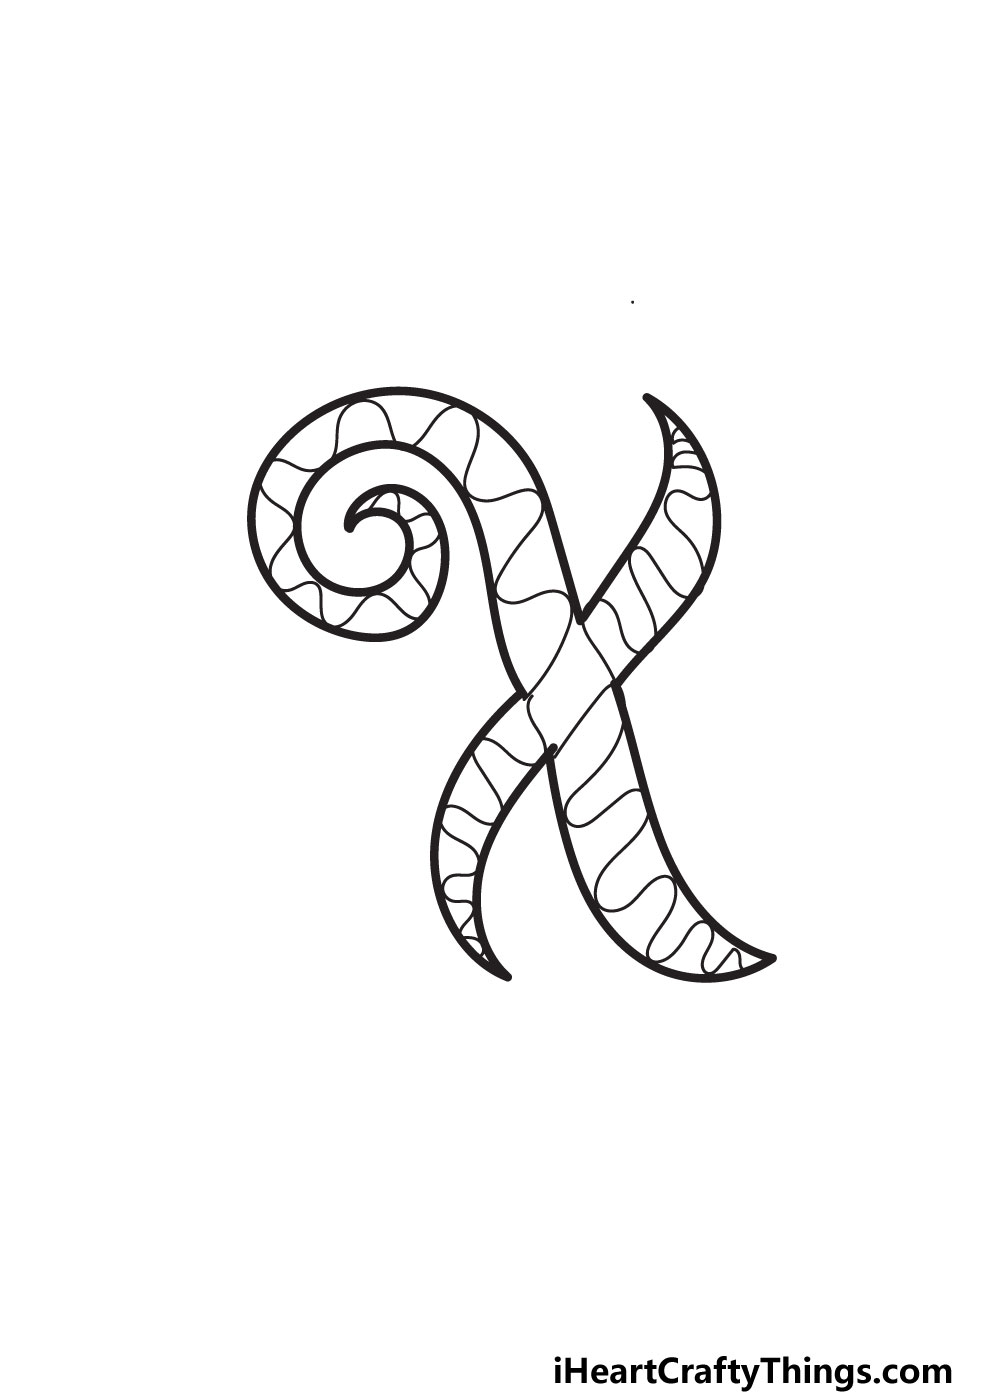
Details can make all the difference in any drawing, even when they’re fairly minor. That will be apparent as we add some simple yet effective details to the letter in this step.
We wanted to create a simple, textured look for the letter, and we did this with some simple wavy lines across the entirety of the letter.
These are really simple to add, and they make the letter even more interesting to look at. Of course, there are many other ways you could decorate this drawing!
The letter could be filled with smaller shapes or different kinds of lines. You could even stick crafts like colored paper, beads or glitter onto the letter.
There are no right or wrong ways to decorate the interior, and you may even like to leave it blank for now and fill it with colors later.
We’re not done with the details just yet, as we will have many more to add in the next step. When you’re finished experimenting in this step, we can move to step 5.
STEP 5:
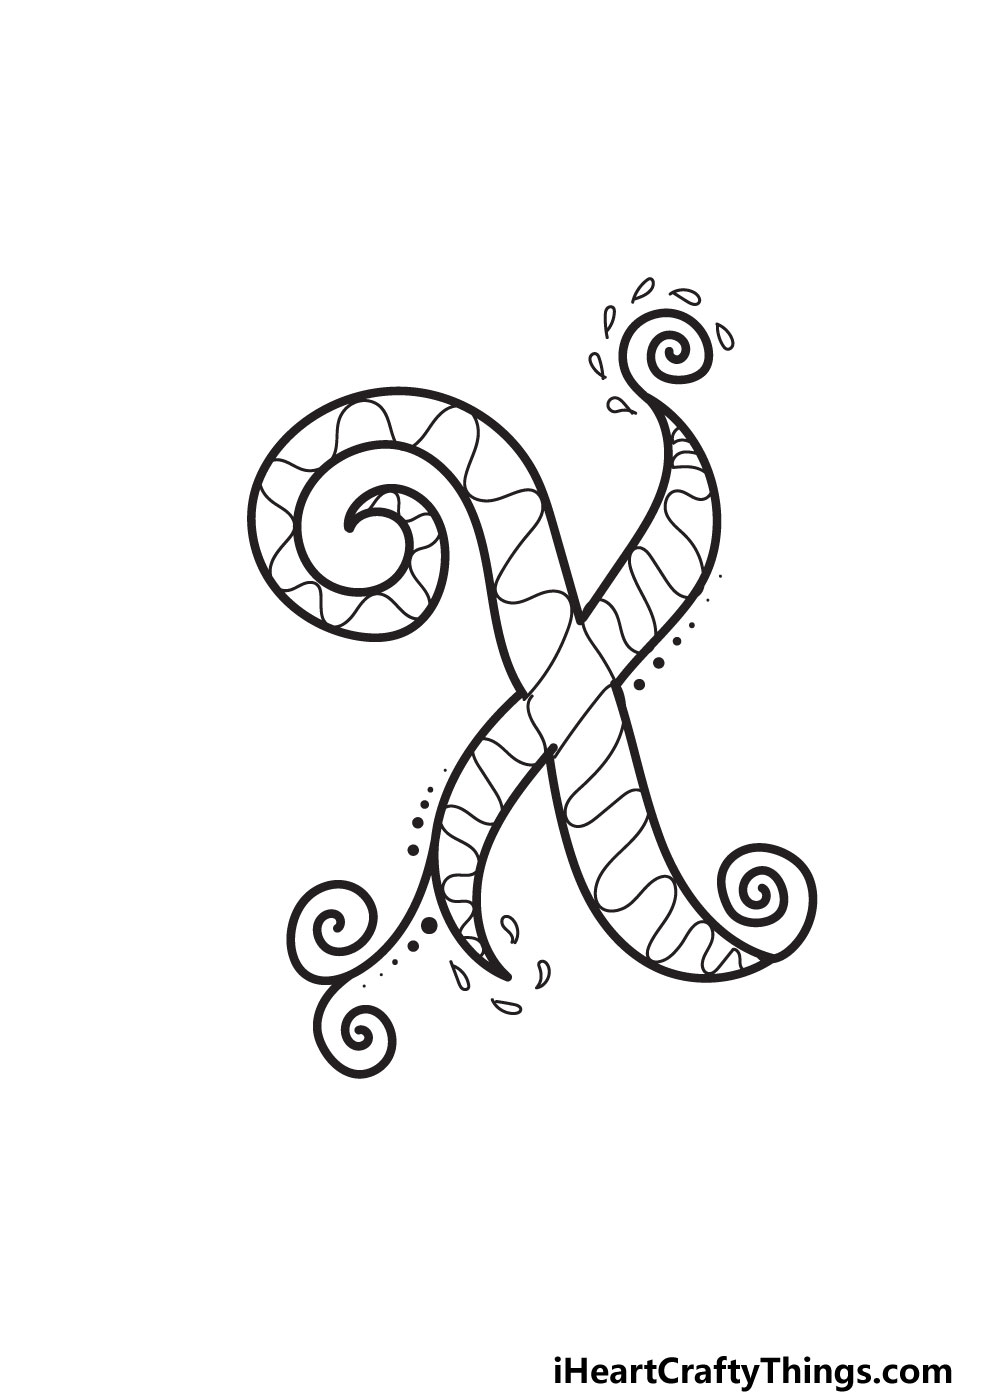
Now, we will be adding some really cool details to the outer area of this letter X. First, we will add some spiral lines poking off the two tips on the right.
Then, we added a double spiral on the leg on the bottom left side of the letter. For some extra detail, we also drew some little teardrop shapes.
We chose to place these around the spiral on the top left and around the tip of the bottom left leg. Finally, we added some dots along the outline.
These details are all a suggestion that you can take and add in your own way, and you could add some of your own ideas as well!
If there are any details you don’t care for, then they can be left out. When it comes to adding extra details, they don’t have to be limited to just the letter.
You have plenty of space in the background to add all sorts of different details! These could include more patterns, shapes or anything else you can think of.
We will also give a few more ideas for how to fill the background after the next step, so remember to keep reading after the final step.
STEP 6:
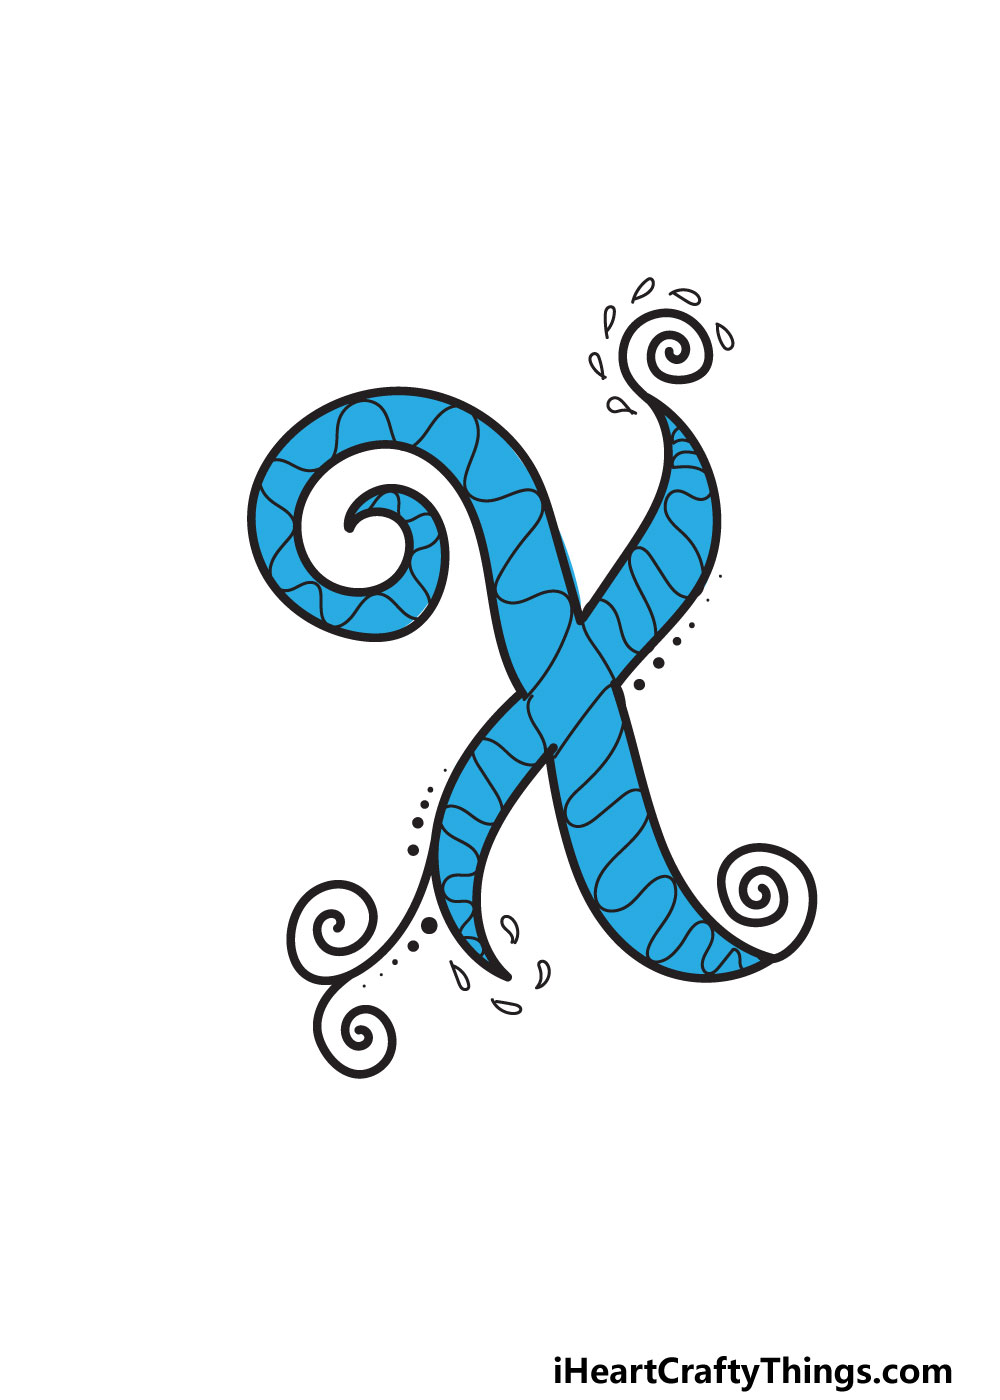
Now it’s time for the final step where we will add some color to your fancy letter X! In our example image, we went with a really cool blue color.
Blue always helps to create a calming feeling for a picture, so it creates a nice vibe for the picture. It can also be great to have warmer colors like red or orange!
There are really no bad choices when it comes to colors. If you have a favorite color or two, then they would look great added to this picture.
You could even add a whole bunch of colors if you wanted to! Choosing the colors is one aspect, but there are also choices to be made when it comes to the art tools and crafts you use.
Also, you can think about how you would like to color the background. It could be filled with solid colors, or you could color any details you drew there.
It’s all up to you now! Will you go for the color we chose or do you have something else in mind for the color scheme of this artwork?
My Final Tips To Make Your Fancy Letter X Drawing Even Better!
Before we finish off this guide, we have a few more ideas that can make your picture look even better!
We always suggest choosing a word or a name to create a theme with this kind of picture, but X can be a tough one.
There aren’t as many words and names to choose from as with other letters, but there are a few! Xylophone and X-Ray would be a few examples.
But you could also write out something like X-Treme in this fancy style! Some names start with X as well, such as Xander.
Whatever you may choose, you can try to write out the rest of the name or the word and then create a theme around it.
For example, if you write oout the word X-Ray then you could add some cartoon bones to the background!