


U is the twenty first letter of the alphabet, and it is a vowel that is fairly common in many English words. It also happens to be one of the easiest letters to learn how to write.
It is simply a curved line, and this is true whether it’s the upper or lowercase version of the letter. Writing it normally may be easy, but what about when you create a more intricate version?
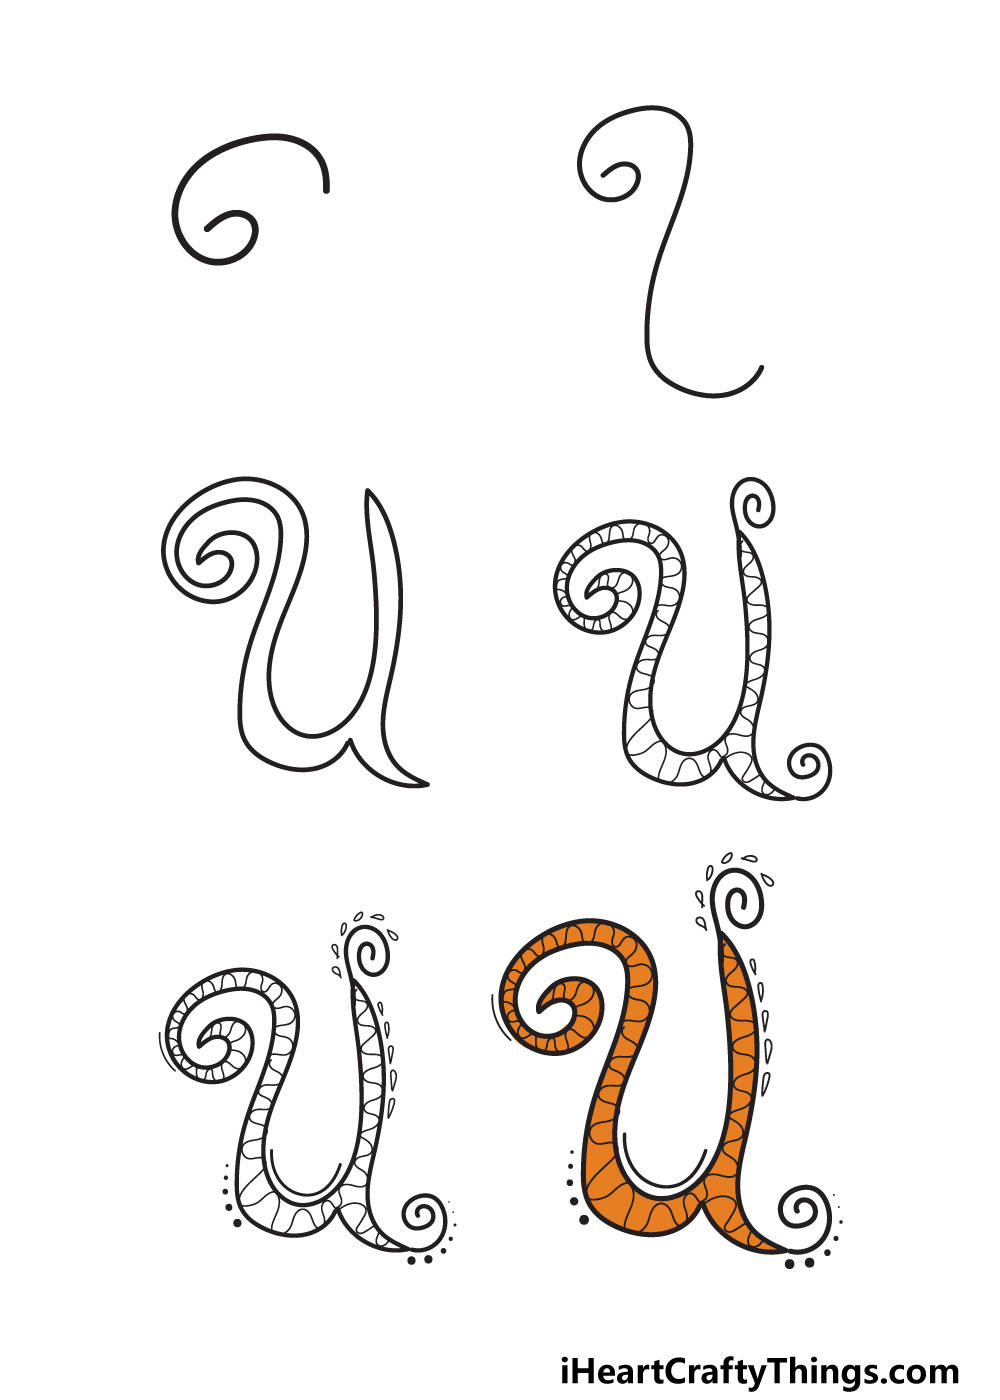
That’s what we will be covering in this guide, as we guide you through 6 steps on how to draw a fancy letter U. These 6 steps will show you how to draw this awesome design easily.
Not only will you learn how to draw it, but we will also cover a few ways you can add extra details, colors and themes to your drawing!
All of this and more awaits you in this guide, so let’s begin the first step and see how it’s done.
Let’s Get Started
STEP 1:

As we touched on earlier in the guide, the letter U is a fairly simple one to write. To make it look fancier, one of the tricks we will use will be to add some spiral shapes.
The first of these is what we will start this guide with. This spiral shape will go on the left-hand tip of the letter.
Because this is such a unique interpretation of the letter U, it could be helpful to draw it out with your pencil first.
This pencil guide doesn’t need to be shaped like the final drawing, as it is just there for you to make sure the shape is correct.
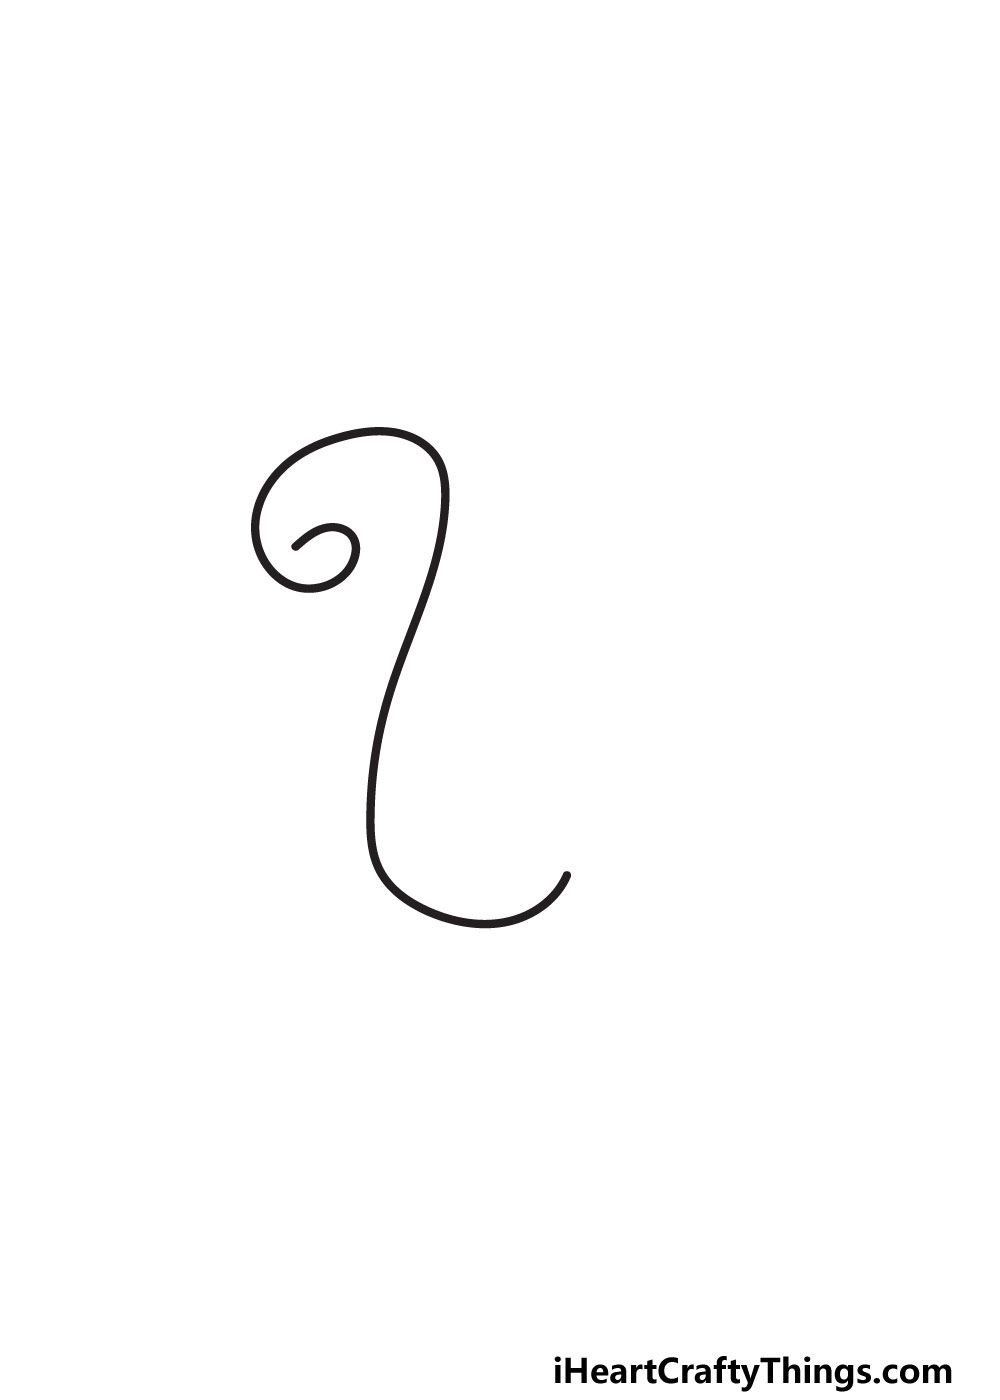
Once you’re ready, we will start drawing that first spiral. We will keep this very simple for now, as you merely need to draw a twisty line.
It will be shaped a bit like a loose number 6 that has been tipped over to its side a bit. Try to follow the reference image as closely as you can, as the angle will make a difference later.
Once you have this start of the spiral flourish, we can then move on to the second step of the guide.
STEP 2:
This second step should prove to be a rather simple one! We will be continuing directly on from where the previous line ended.
Simply drop a vertical line moving towards the base of the picture, as shown in the reference image. This will form the left-hand arm of the letter.
The line won’t be straight, as we want a slight curviness and waviness to it. Try not to make this too drastic, as we want it to still be relatively straight.
At the base of the letter, it will curve quite sharply to the right, as shown in our example. If you drew a pencil plan for the letter, you will see how this relates to the design as a whole.
Now that we have this line, you are ready for the third step of the guide. In that step, we will be adding the rest of the outline for the entire letter, so it’s a big step!
Let’s get started with that third step as soon as you’re ready.
STEP 3:
It all comes together in this third step of your fancy letter U. There is a lot to cover in this step, so we will take it slowly and break it down into smaller steps.
First, let’s go back to where this guide started and begin this step at that first spiral line. Beginning where the line ended, we will draw a pointy tip.
Then, we will spiral the line out, running parallel to that first line. This will turn it from a spiral line to a spiral shape.
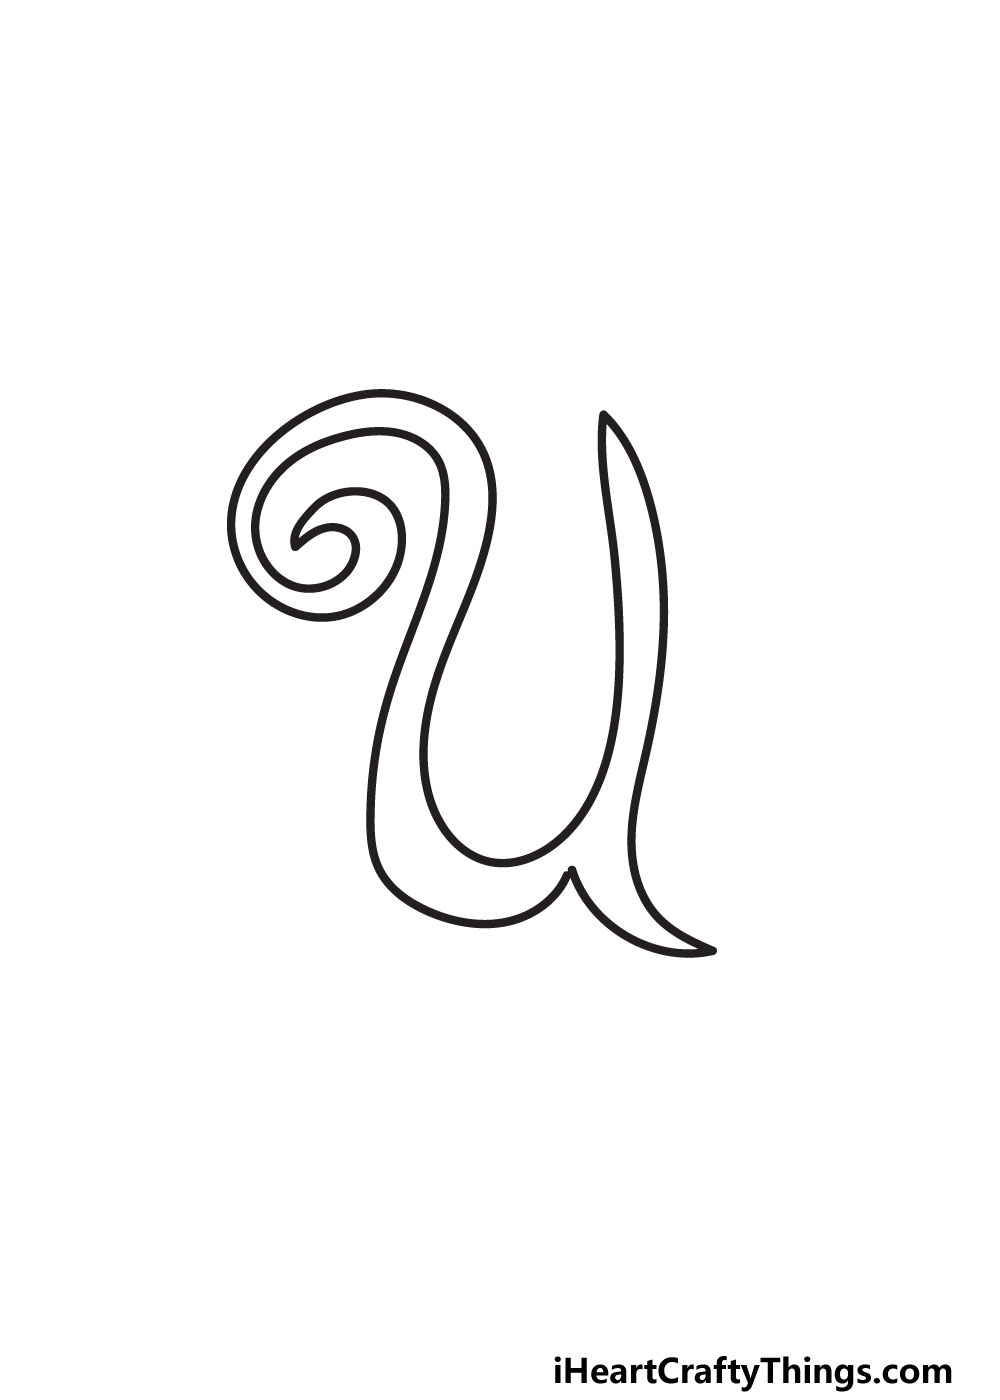
The upper line of this spiral shape will then curl over and then sharply down, running parallel to the main body of the letter you drew in step 2.
At the center, it will curve to the right and then up again in a vertical line. This will then curl over at the top and plunge down again.
At the base, we will add a pointy shape at the bottom right-hand side of the letter for a fun touch. With that, the outline is complete!
All of this may have sounded complicated, but it can be easy if you follow the reference images and steps. With that done, you can erase any pencil lines you used as a guide.
STEP 4:
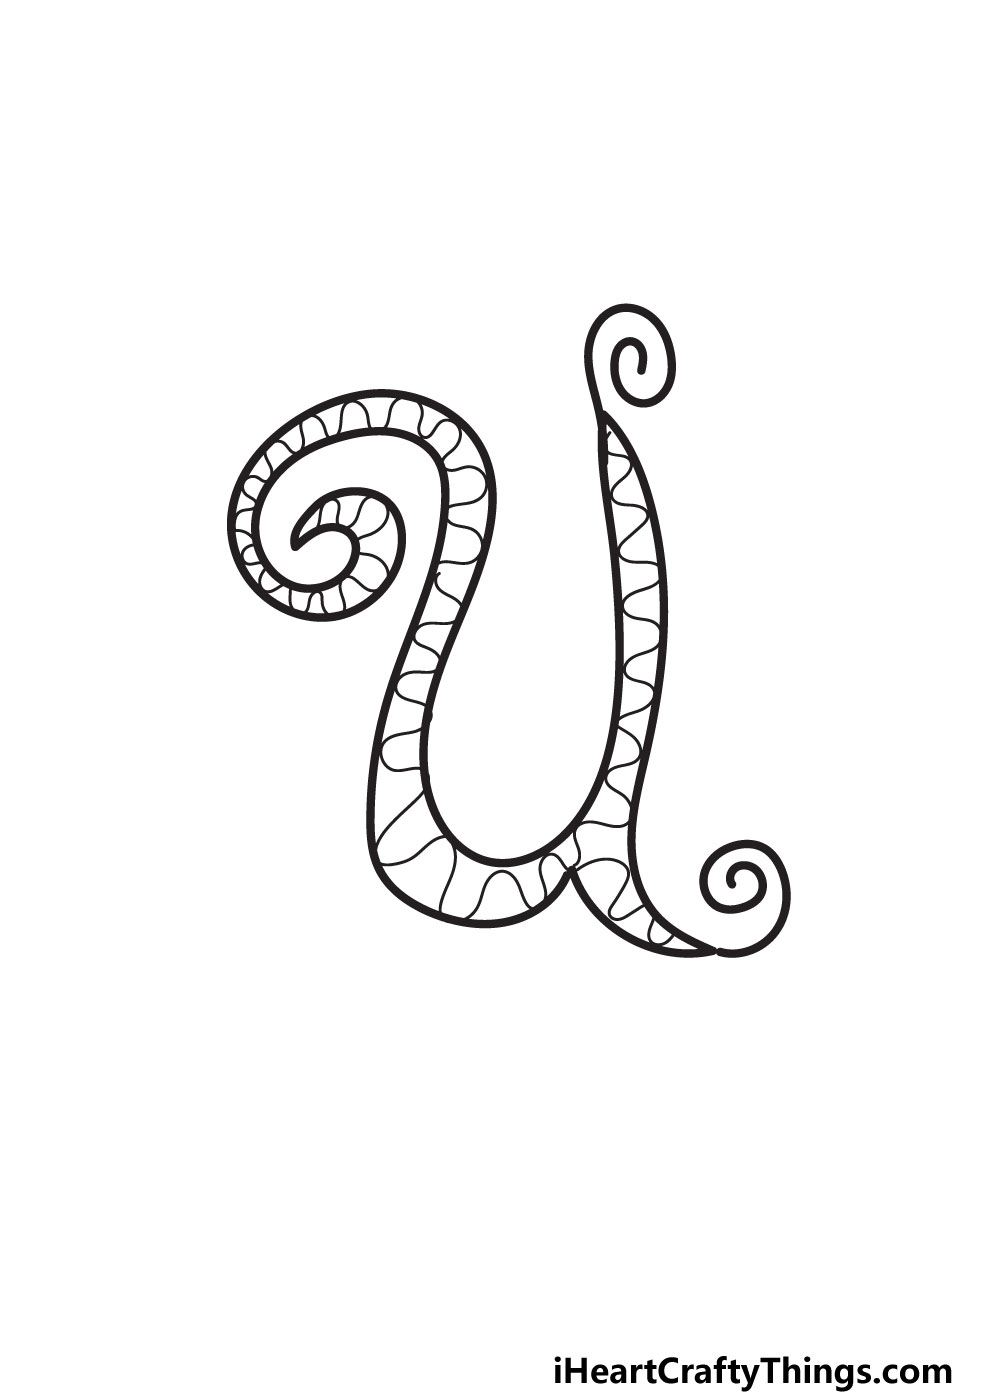
The letter U we have drawn together is really looking good, and now we will make it even better by adding some interior details.
In our example, we decided to create a pattern using a wavy line all throughout the letter. It’s a simple way to decorate the letter, but it’s pretty effective too!
You can definitely go for this pattern for your own drawing, but you can also go for your own pattern ideas instead.
We didn’t stop with just the wavy pattern, however. We also drew some spiral lines poking off the tips on the right side of the letter.
It’s another simple touch that adds a lot of personality to the drawing. You could add a few more of these spiral lines if you like the way that they look.
Be sure to add any other details you want to before moving on! Then, we will add some more fun details to the exterior of the letter in the next step.
STEP 5:
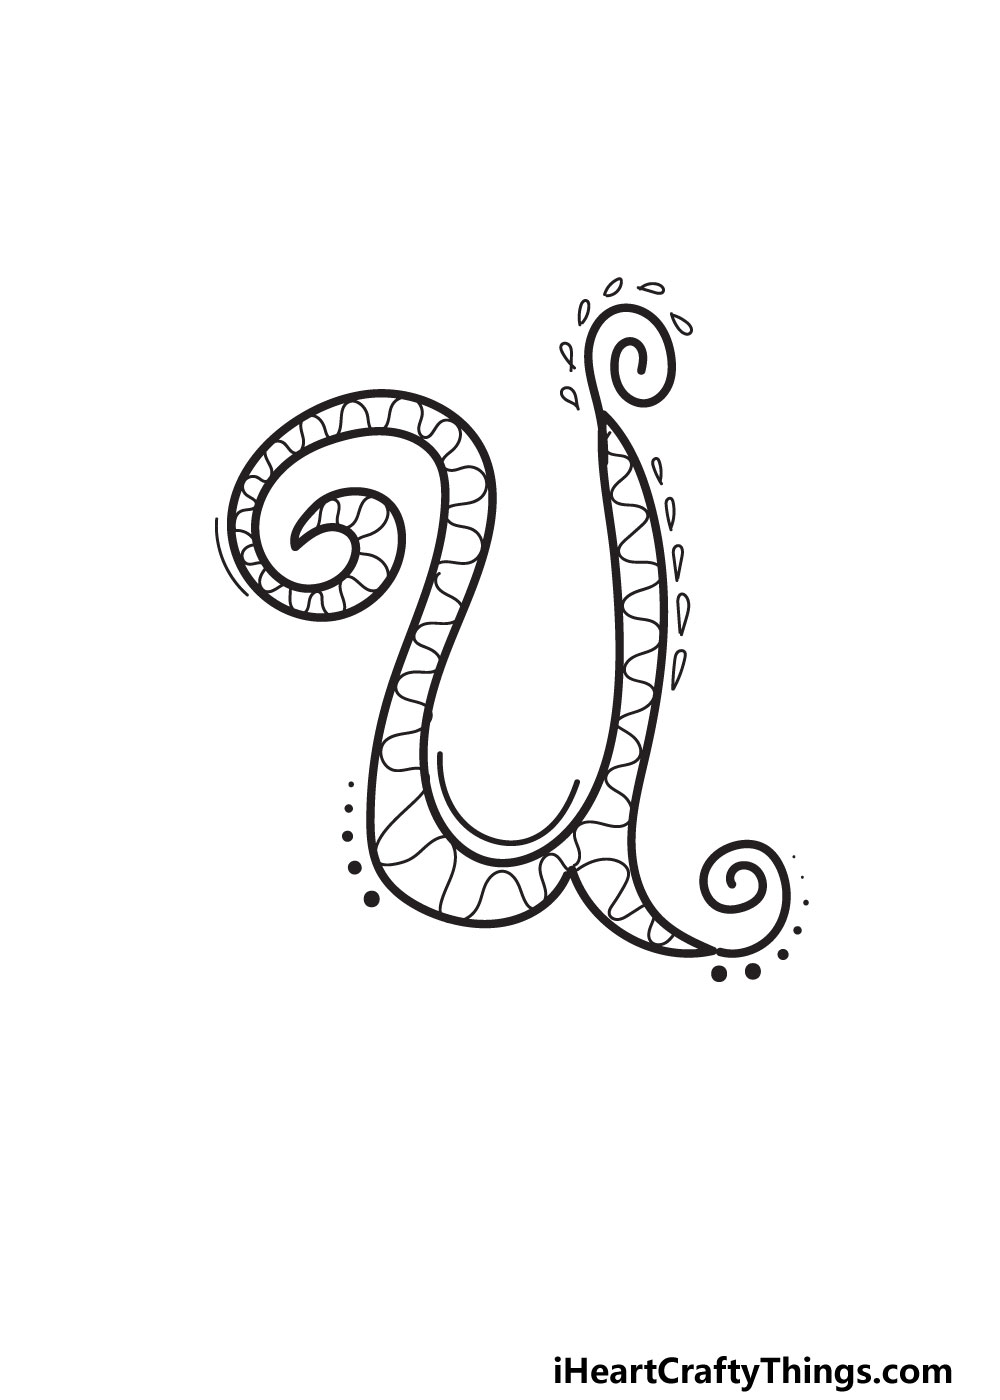
It’s almost time to bring some color to your artwork, but first we have a few more details to add. This time, they will go along the outer edge of the letter.
For starters, we drew a series of small dots along the lower edges of the letter. These are simple and vary in size, creating a dynamic look for the letter.
You could add a lot more of these dots to other areas if you wanted to! Next, we added some curved lines along the outer edges of the letter.
Finally, we drew some small teardrop shaps on the right-hand arm of the letter. It’s another simple touch that we kept minimal, but you may want to add more.
All of these details are examples of smaller details you could add to the drawing. You can bring your own ideas and add other shapes, elements and lines to make it more personal.
These can extend to the background of the image as well. You can try that for now, but we also have some more ideas for the background in the next step and afterward.
For now, let’s look at some coloring fun you can have with this letter!
STEP 6:
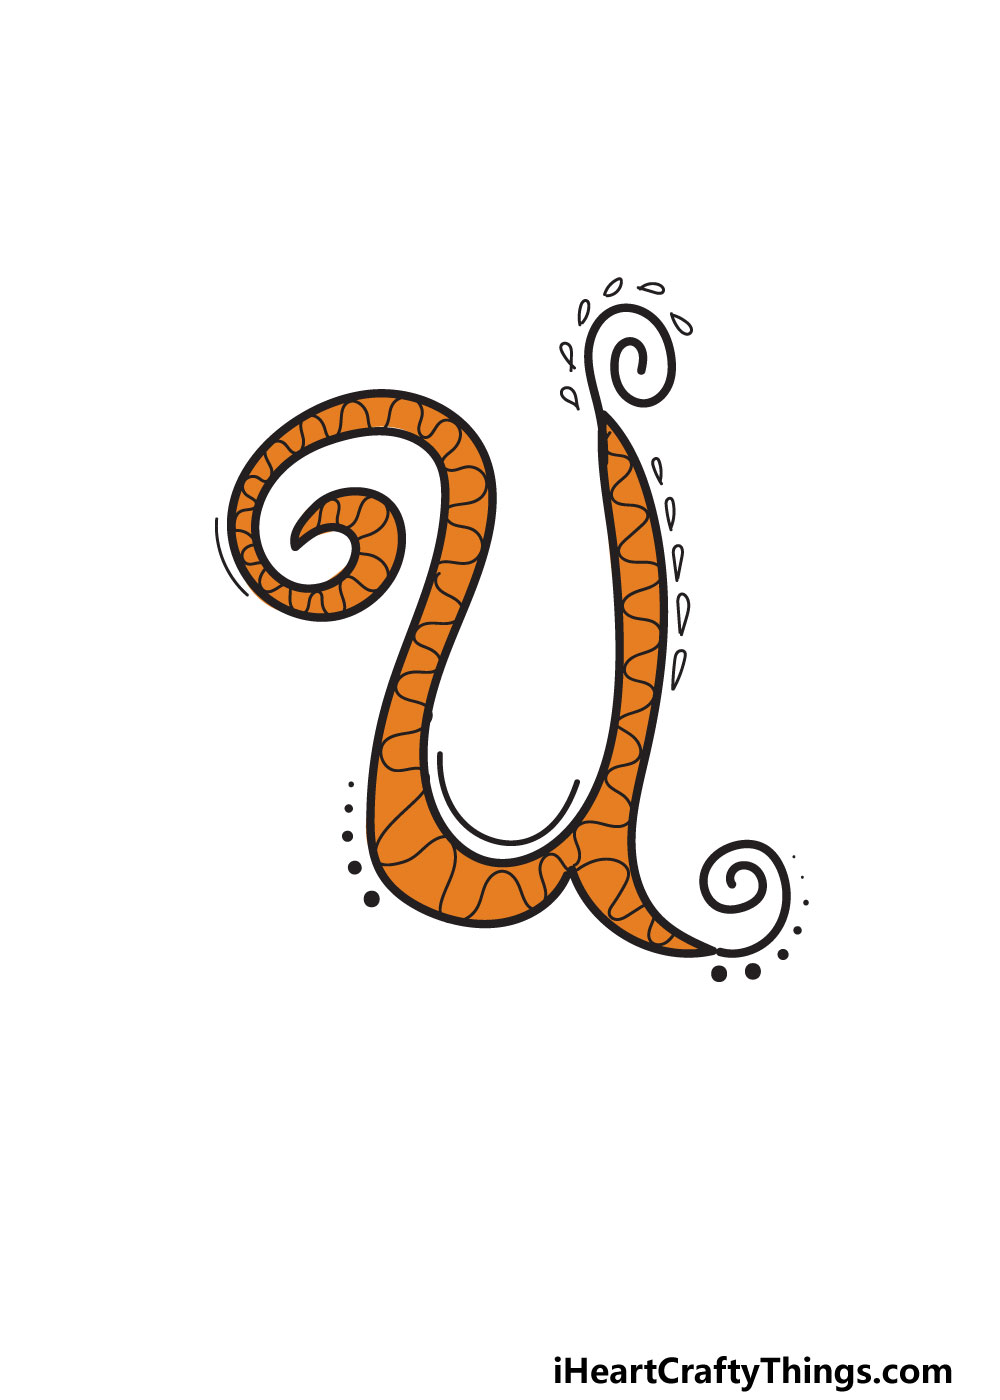
Coloring is a fun activity, as it’s something you can relax with and just get creative. There are no right or wrong colors to choose, so you have a lot of freedom!
We had to choose a color for our example, and we went with a rich orange. This orange makes the picture bright and eye-catching, and it looks great!
Using colored pens or even highlighters could be good for achieving similar color results for your drawing. However, there may be colors you prefer to orange!
If this is the case, then you should definitely go ahead and use that color. You could also use several different colors in one go.
Filling the background with color or colors is another great way to bring it to life. You don’t need to stick to just one art tool or medium, either.
You can really take over and experiment now, so what will you choose for your amazing artwork?
My Final Tips To Make Your Fancy Letter U Drawing Even Better!
We may be finished with the guide, but we don’t have to be done yet! Now you can have some extra fun incorporating even more elements to your drawing.
One way of doing this is to think of some words that start with the letter U. While U appears in many words, there is a limited amont of words that begin with the letter.
You could write words like uncle or umbrella, however. The other letters of these or other words beginning with U could be drawn in a similar fancy style.
With your chosen word, you can then create a whole theme around it. For example, there is the word umbrella.
If you chose that word, then you could draw raindrops all around the word. You could even draw a cartoon umbrella above it!
If you know of some names that start with U, then that would work too. Any word or name you choose can be made even better with a background that relates to it.
