Q is the seventeenth letter of the alphabet, and it’s a slightly unusual looking one. Many letters have similar upper and lowercase versions, but not Q.
The difference between the two versions is quite extreme, and this can make learning to draw it tricky when you’re starting out.
It also happens to be one of the rarest letters in terms of how often it appears in the English dictionary. Despite this, it’s still a pretty cool letter that has its uses!
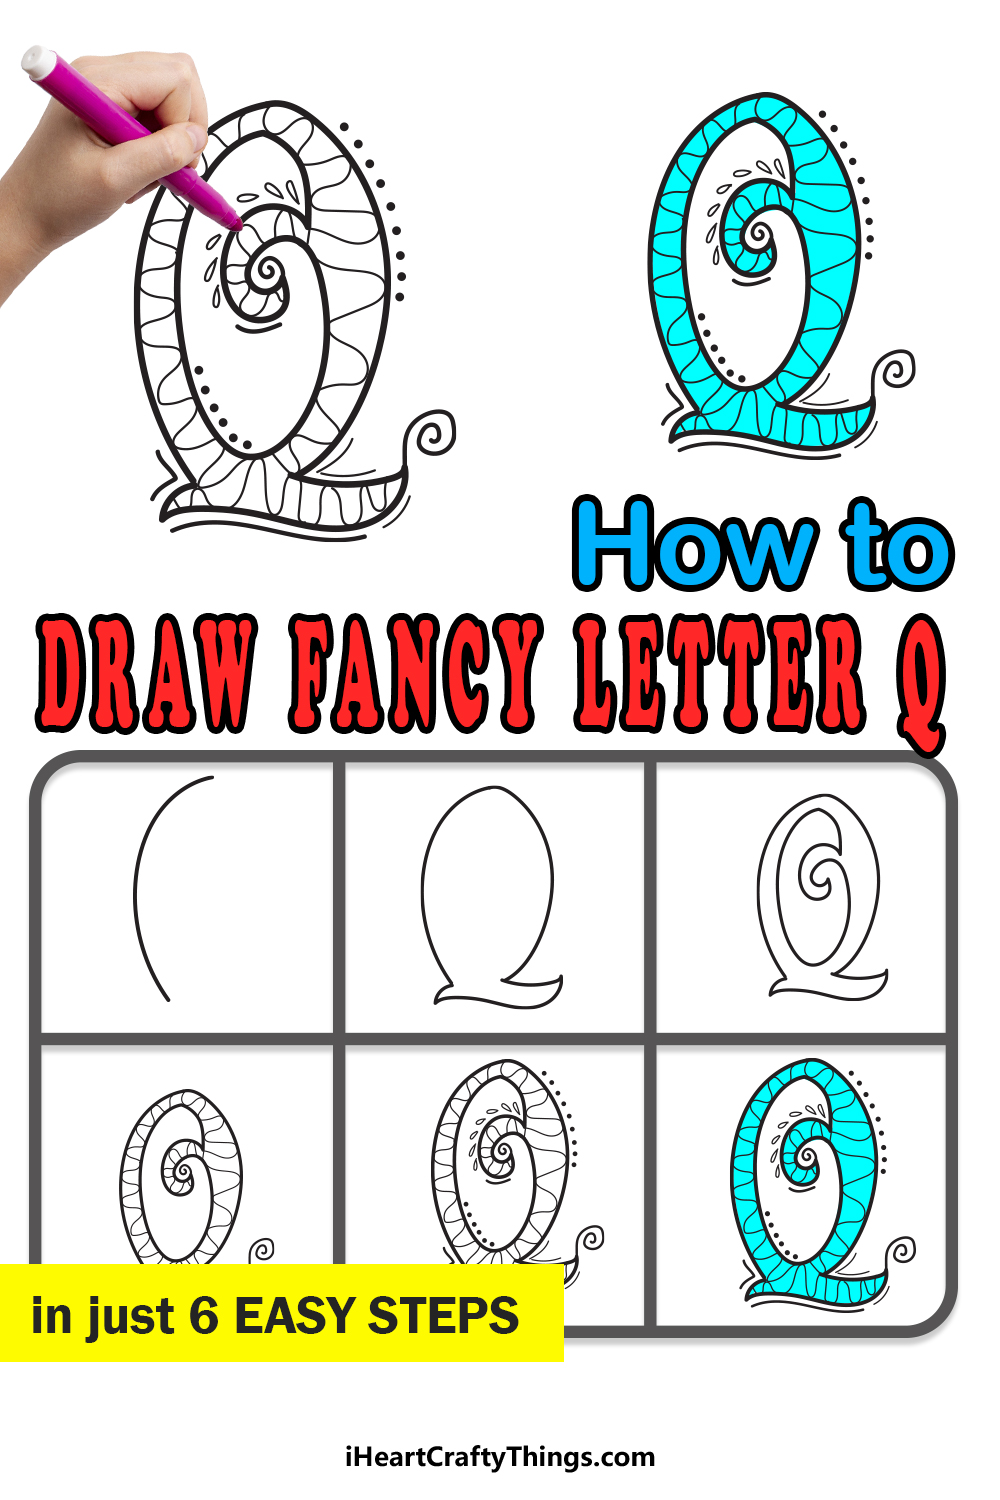
In this guide on how to draw a fancy letter Q, we will focus on the capital version of this letter and learn how to draw it in a really cool style.
Once we have shown you how to draw this design, we will also go over a few ways that you can color and decorate the letter!
You will also have the chance to decorate it with your own ideas, so let’s get the fun started with the first step.
Let’s Get Started
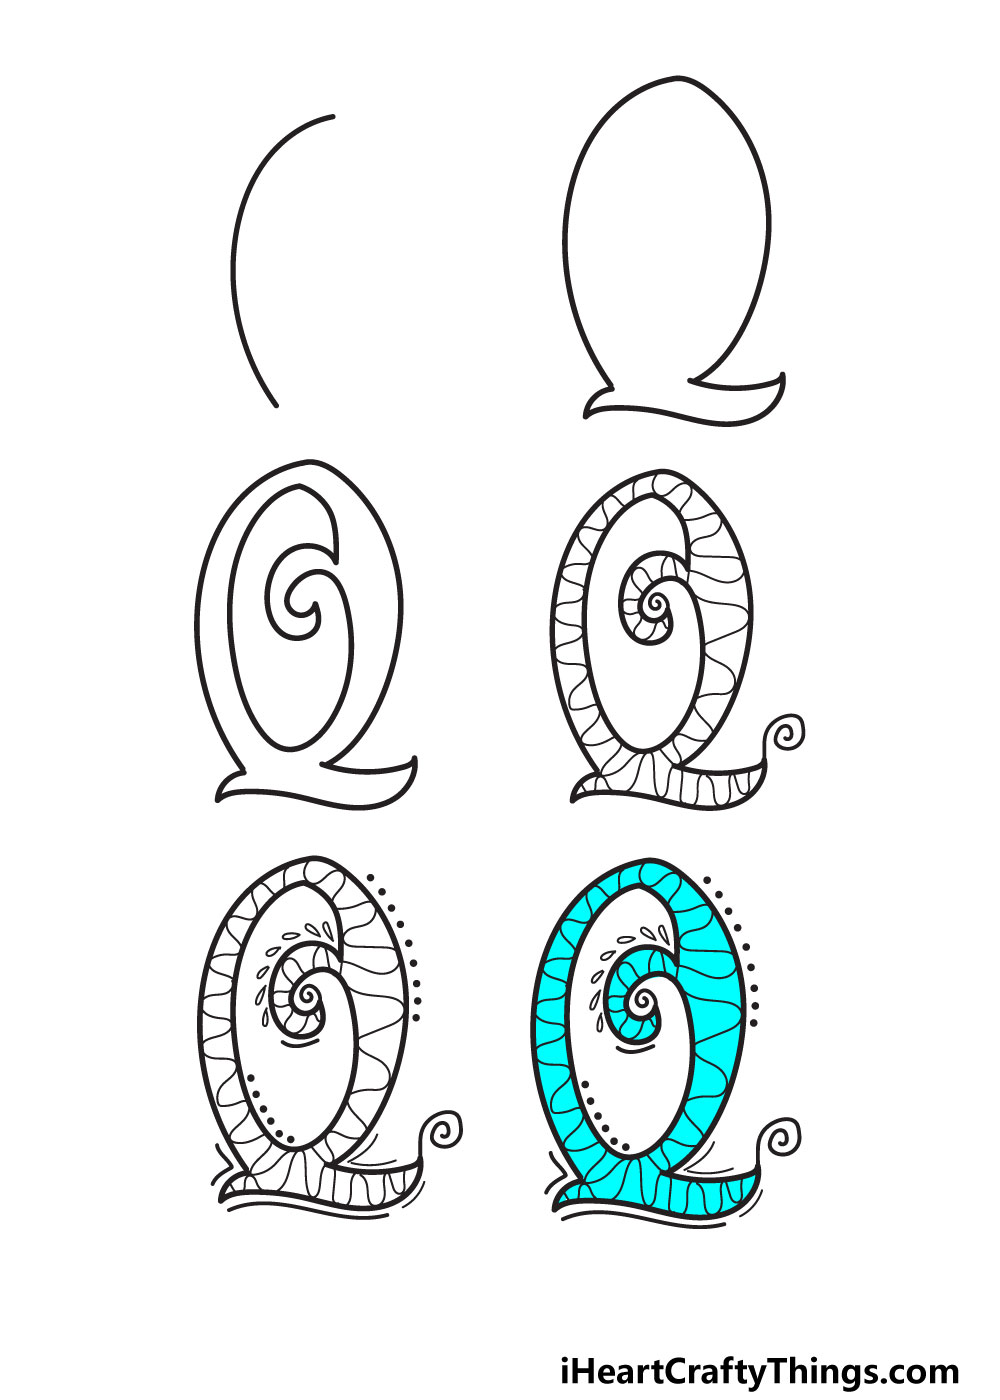
STEP 1:
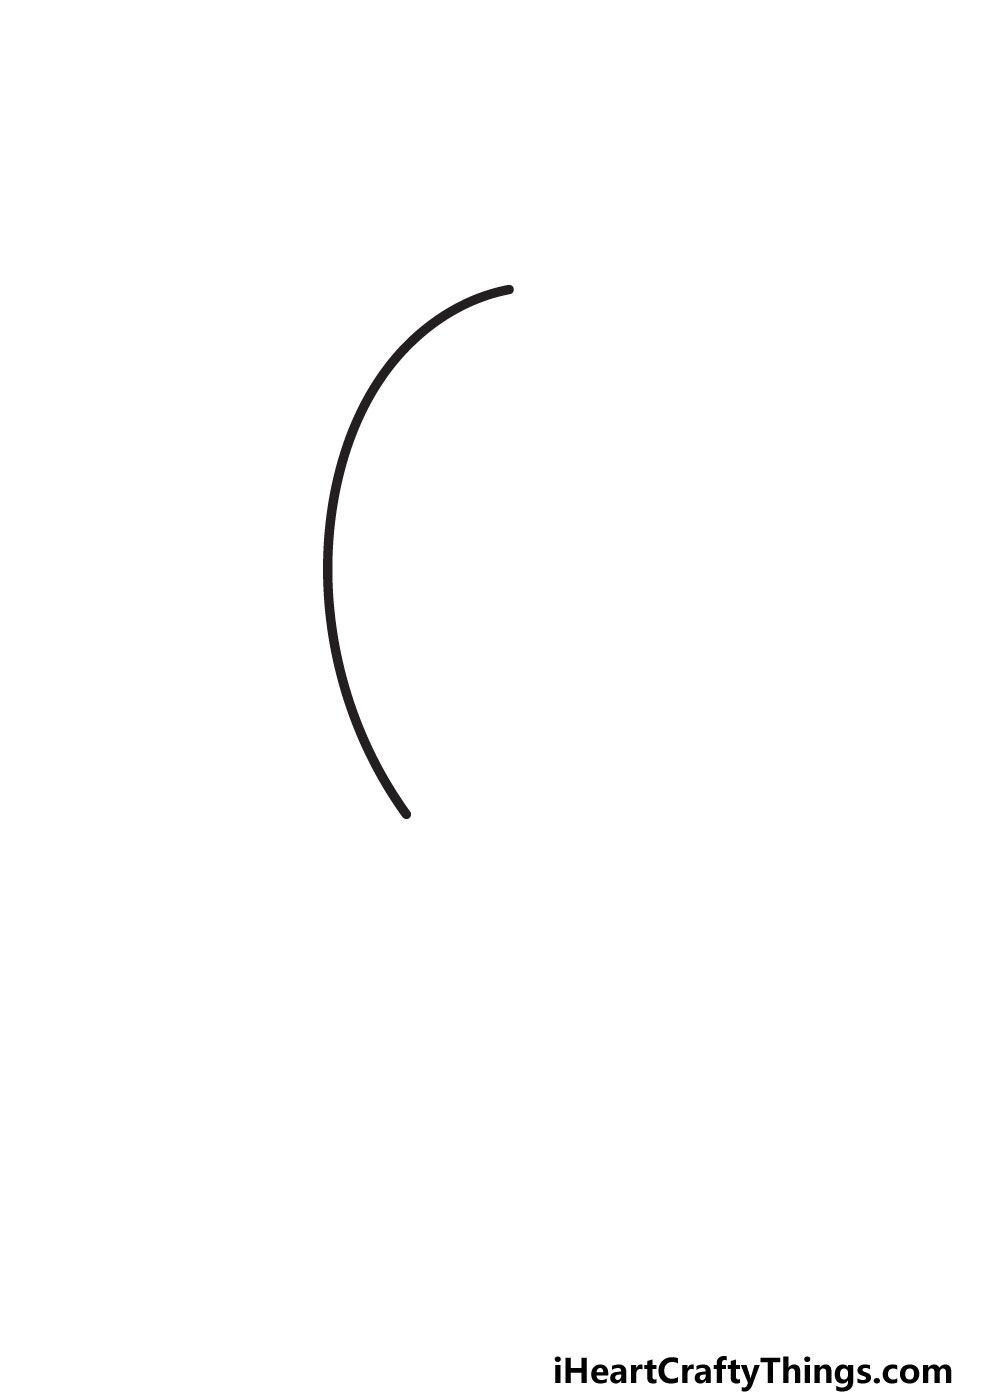
When you look at the final image of this guide, you may be thinking it’s going to be hard to draw this version of the letter Q.
It is a bit of a tricky design, but what if you could make it a bit easier by cheating a little bit? You can do just that by drawing a rough version of the letter with your pencil.
If you do this, try to keep the shape consistent with the final shape of the letter. This pencil version will guide you to keep the shape and the size of the letter consistent.
You can try to make the design without this planning guide, but we would highly recommend doing it to make the drawing easier.
Either way, we can then draw the very first line of the design. We shall start simply by drawing the left side of the letter.
This will be comprised of a simple vertical, slightly curved line that forms the outer left edge. That’s really all there is to it for now!
With that done, let’s finish off the rest of the outline in the next step of the guide.
STEP 2:
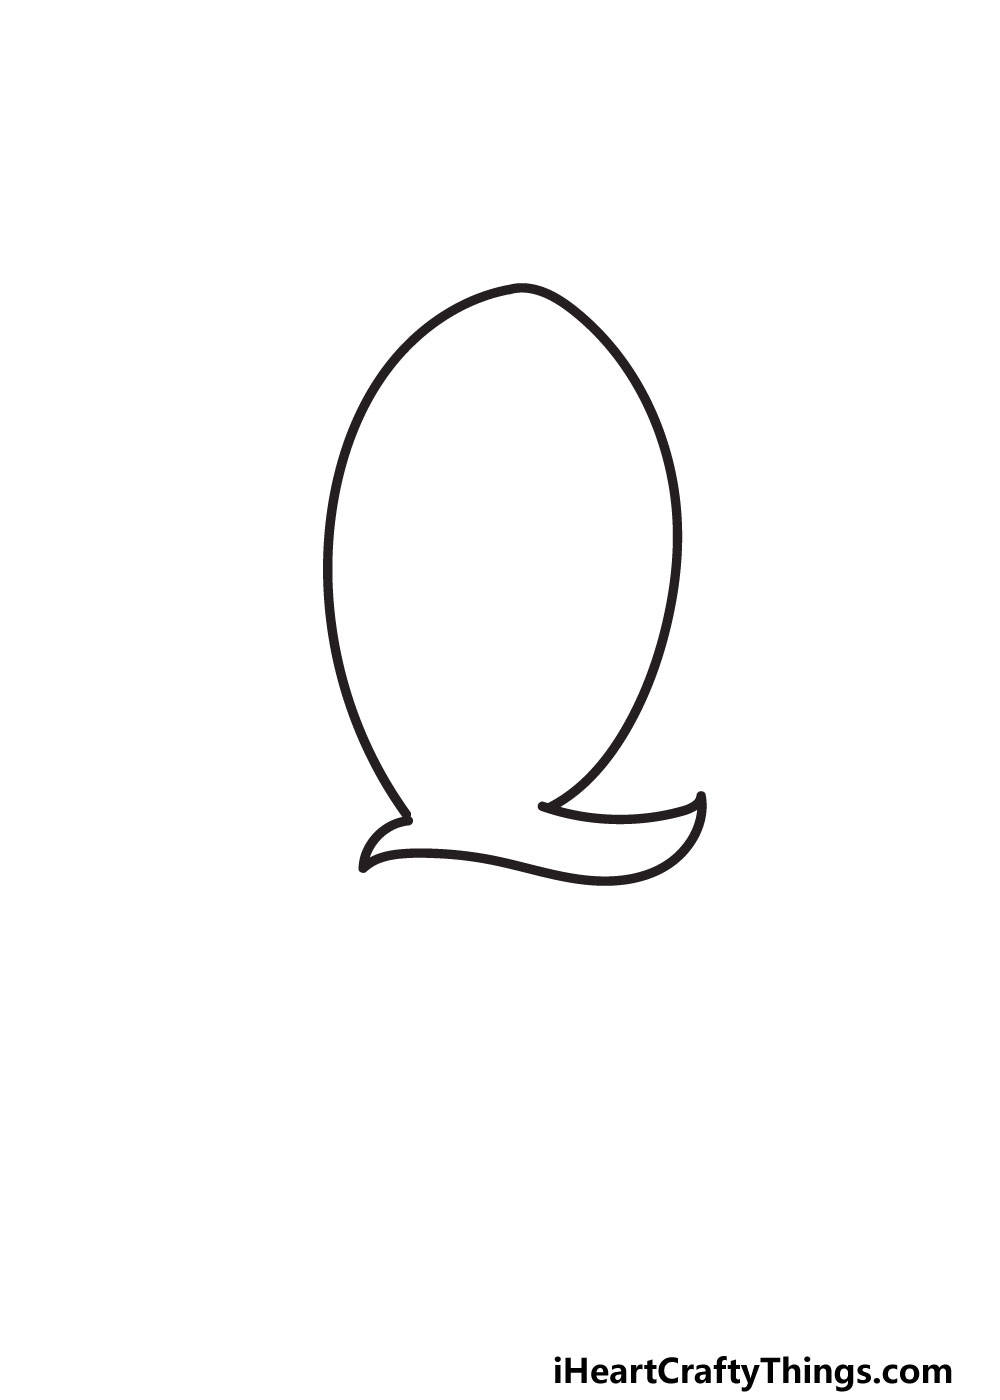
In this next part of the guide, we will be finishing off the rest of the outline for your letter. First, we will draw the right-hand side of the letter outline.
This will look like a mirrored version of the line on the left. Then, we will add the little pointy section at the base of the letter, which could be a bit tricky.
Where the vertical line on the right ended, add a small, slightly curvy horizontal line. This will end at a pointy tip on the right-hand side.
At this pointy tip, we will be adding a slightly wavy line to form the base of this little section. You will then add another small, pointy little tip at the end of this section.
Finally, there will be a small gap left, which you can fill with a small line. With that, the entire outline is complete! Now we can focus on the surprisingly tricky center part of the letter.
STEP 3:
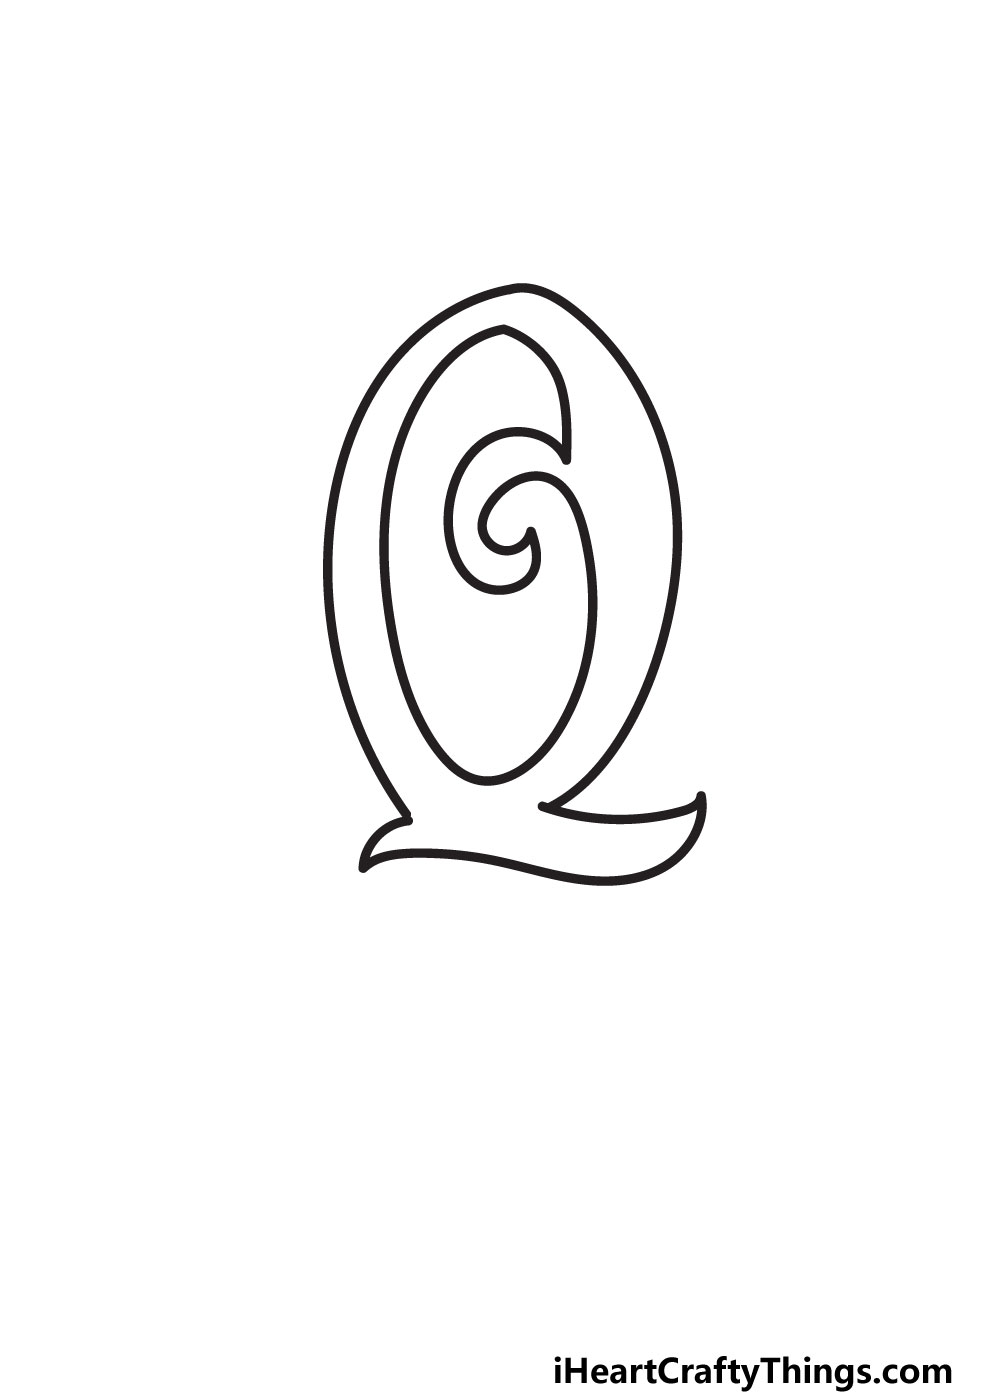
When you’re writing out a letter Q normally, you won’t even think about the hole at the center of it. This portion of the letter might be the trickiest part of this design, however.
Instead of a simple rounded hole, we will be using a shape that looks a bit like a letter G. We will make it simpler by breaking it down into smaller steps.
Start by drawing another slightly curved vertical line on the inner edge on the left side of the drawing. This will run parallel to the outline on the left side.
Next, we will add a small vertical line coming down on the upper right of this hole shape. This will also end in a pointy tip that curves inwards.
You can then draw a spiraling line extending inwards and then back out again. It can sound a bit complicated, so you’d benefit from following the reference image closely.
Once the spiral is done, one more slightly curved vertical line will finish off the gap. With that, the hardest part is done!
Before we add some inner details, you can erase your pencil lines if you took that suggestion earlier.
STEP 4:
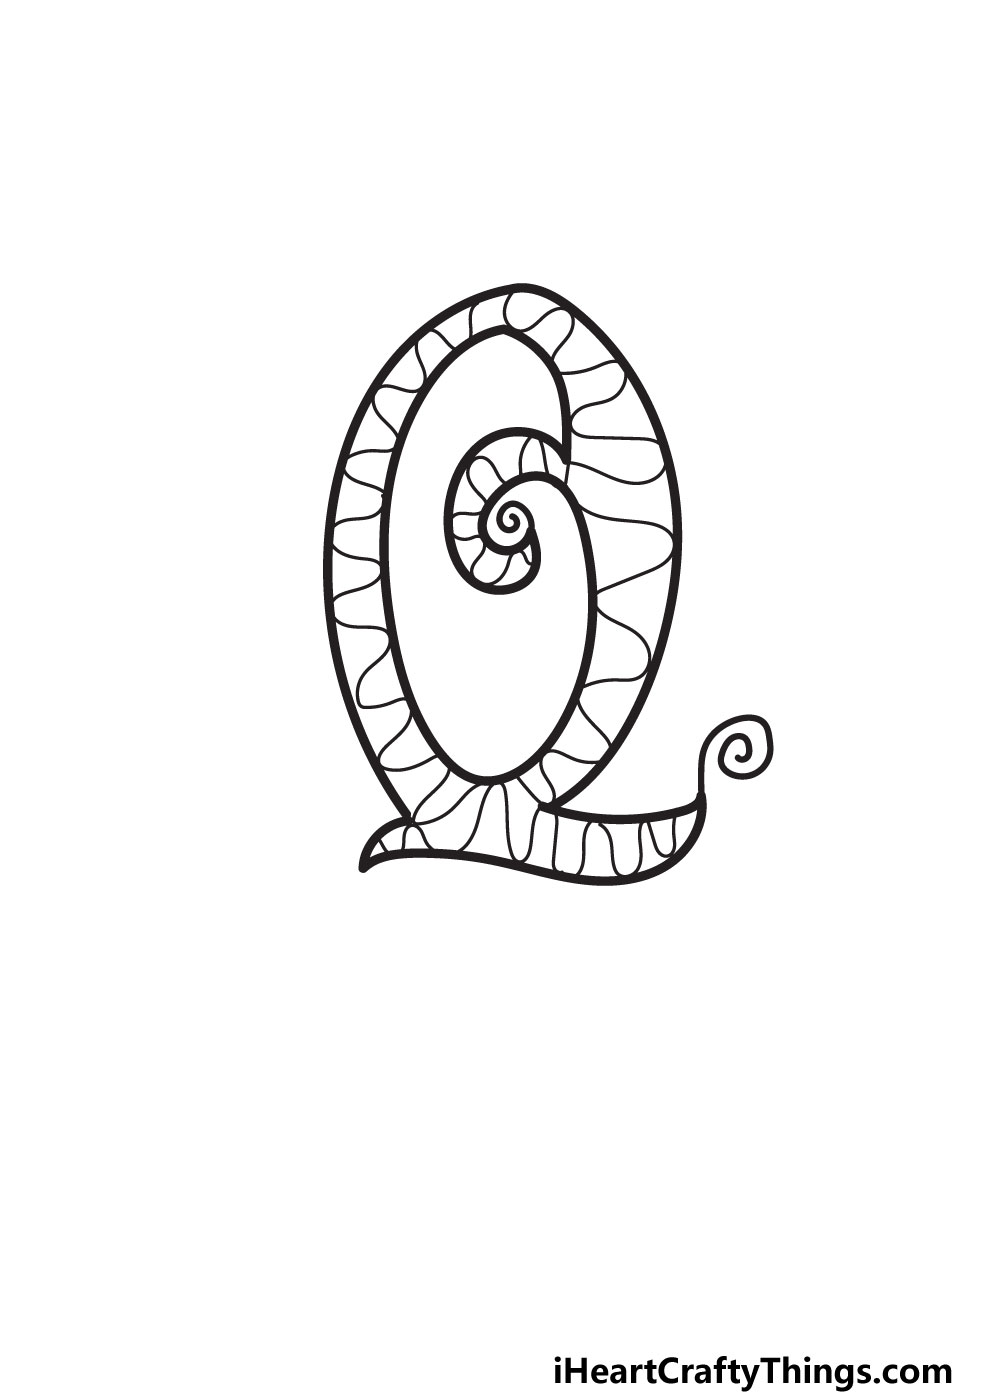
Now it’s time to add some extra details to your letter, now that you have finished all the difficult parts. In our reference image, we showed you one way you can start decorating the letter.
We started by drawing some small spiral lines from two of the pointy edges on the letter. You could add a third one to the remaining pointy tip if you like!
Then, we created a wavy pattern all throughout the interior of the letter. We did this with a long, continual wavy line all throughout the inside of the outline.
This looks really cool, and it’s a simple way to add a lot of detail to the picture. There are many other ways that you could decorate the letter instead if you prefer.
You could create some stripes using some straight lines instead, for instance. Or you may like to fill the letter with small shapes such as dots or triangles.
You can either take our design, or you could use your imagination and see what you can come up with! In the next step, we will add some extra details to the outline of the letter.
STEP 5:
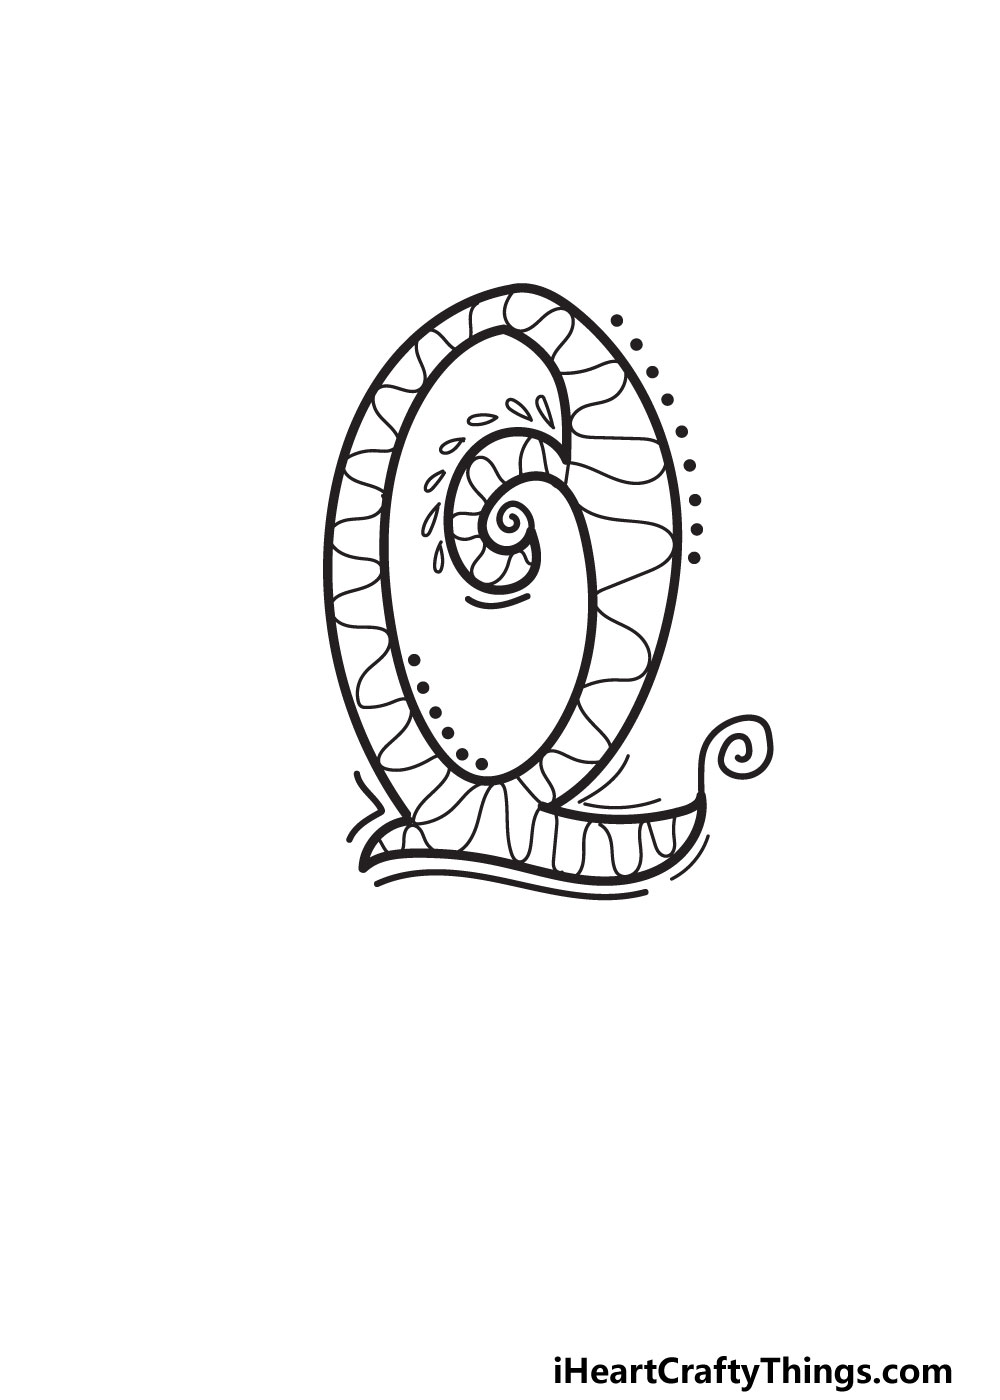
The details we chose for the outline of the letter Q we have been working on are quite simple, yet effective! To start, we added some dots along the outline on the outer and inner edges of the letter.
You could add more of these if you wanted, and you could cover the entire outline with them if you wanted! You might prefer to remove them entirely, it’s all up to you.
Next, we added some simple lines close to the outlines of the base section of the letter. They’re another simple touch that add some life to the drawing.
Finally, we drew some small teardrop shapes along the inner spiral at the center of the letter. You could replicate all of these little details if you like them!
Or, you could keep the ones you like and change them around a bit. Then, you have the background as well.
That could be filled with colors, small pictures, shapes or even other letters. You can play around with the background in the meantime, but we will also go over some ideas after the next step.
STEP 6:
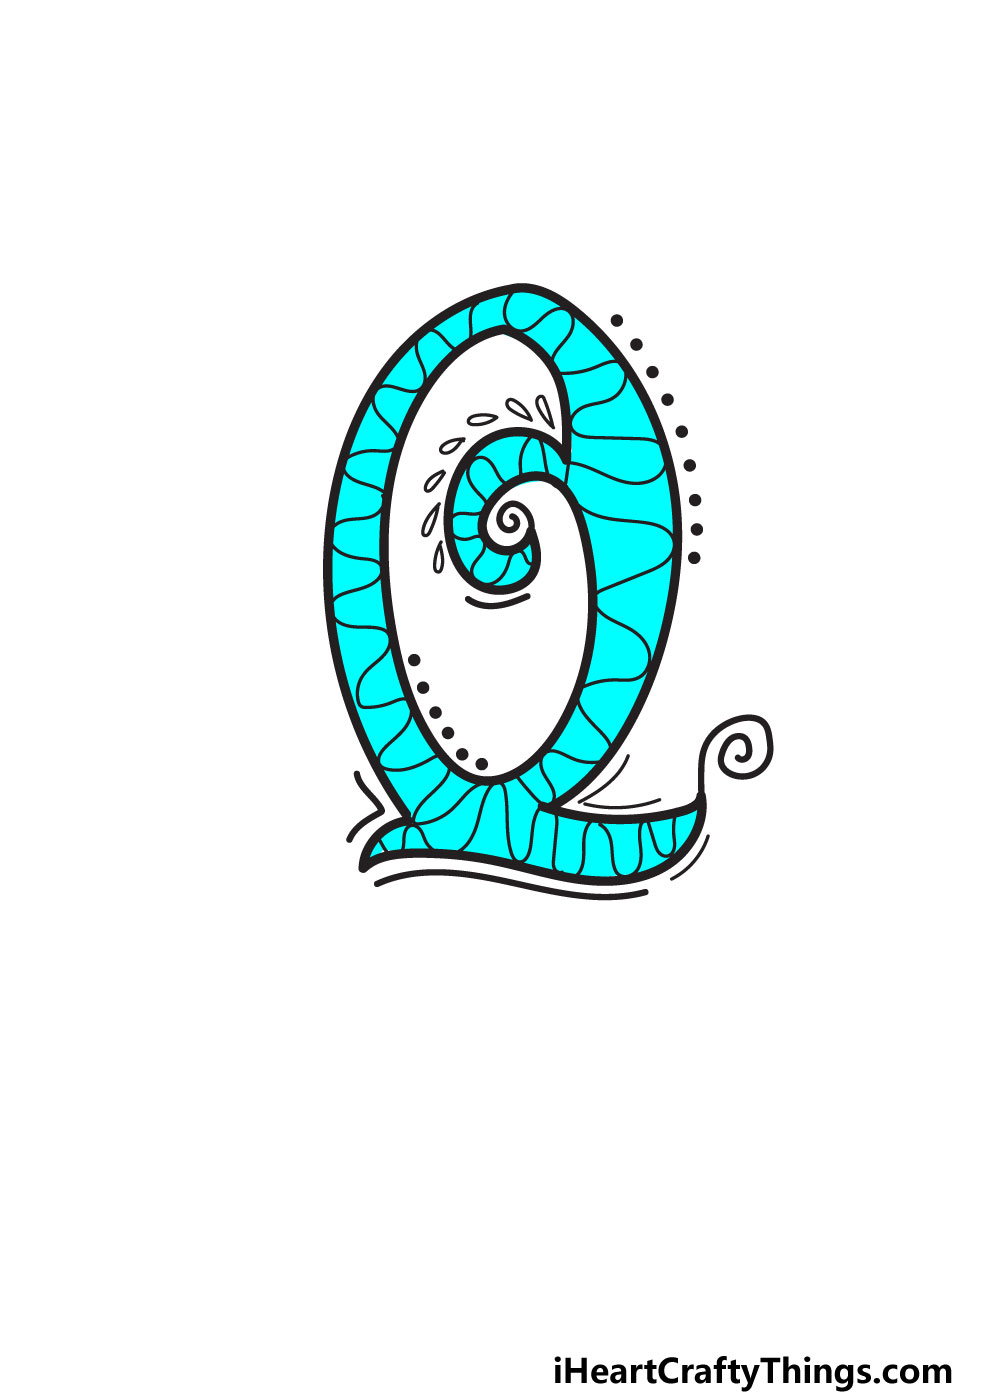
This has been a challenging drawing, and you should be very proud of reaching this point in the guide! Now, you can let loose with some coloring fun.
In our reference image, we show you one of infinite ways that you could color in this picture. We chose a light blue color to give the drawing a softer look.
If you like the color, try to find one that is close to it in your favoriyte coloring medium and try to match it!
If you have other favorite colors, then you should feel free to use those instead. Whether it’s a bright red, shining gold or deep green, there are so many colors to choose from.
Playing around with art tools, mediums and coloring techniques can also help to make things more vibrant and varied.
Also try to think about colors for the background and how they relate to your color choices for the letter itself.
We have given you one color to consider, but now you can show off all of your own color choices!
My Final Tips To Make Your Fancy Letter Q Drawing Even Better!
Before we finish off this guide, we have a few ideas for how you can take it even further. These ideas are fun to try, but may also inspire other ideas for you to come up with!
First, you can think of a word starting with Q. This could require a bit of thinking, but ‘queen’ would be a great example.
If you choose this word, then you could write out the word queen in fancy letters. Then you could draw little pictures that remind you of royalty and use crafts like glitter.
A few names like Quintin start with this letter, so you could use that or a different name that starts with it.
By writing out the name, you will have a great excuse to try out different letters in this style. These are a few ways that you can try to come up with a theme, so what are some words or names you could use?