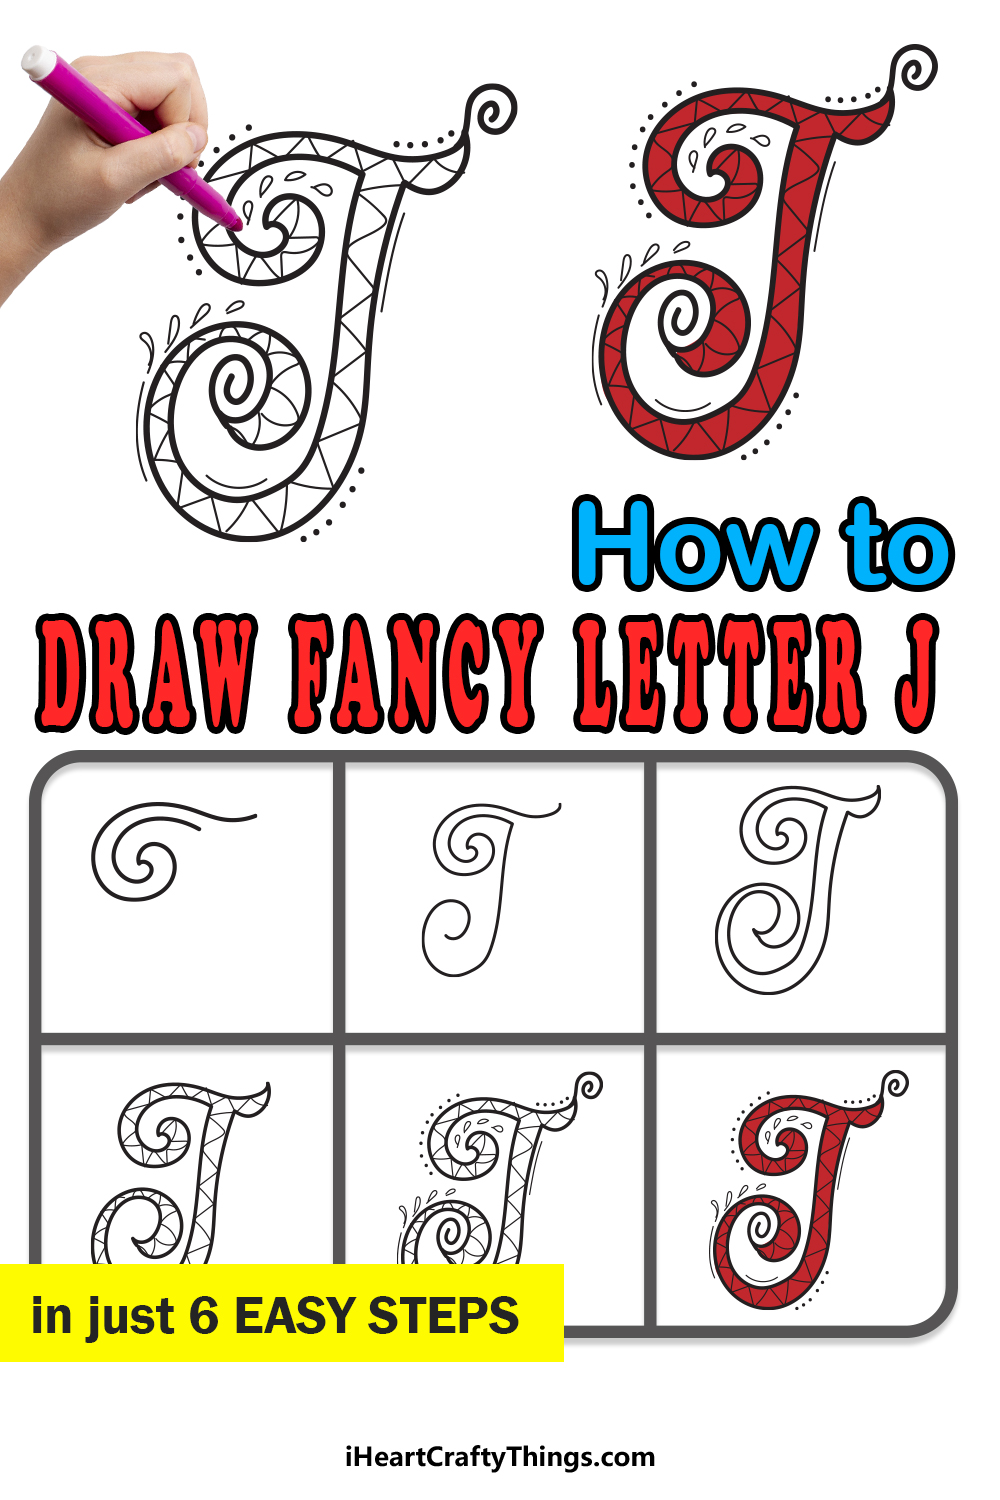
In this guide, the focus will be on the tenth letter of the alphabet: the letter J. This is a relatively common letter that we use a decent amount in the English language, and it is a fairly simple letter to write.
Writing this letter may as easy as can be, but we’re not here to create a regular version of this letter. Instead, our goal is to create a fancy letter J.
To do this, we will focus on the capital version of this letter and add all sorts of fun details and extra elements to the letter.
Once we’re done, you will have a letter J that would look right at home on an old, fancy document or manuscript!
Then, we will also cover some ways you can color it and add some of your own fun ideas and touches. Now, let’s begin with the first step of the guide.
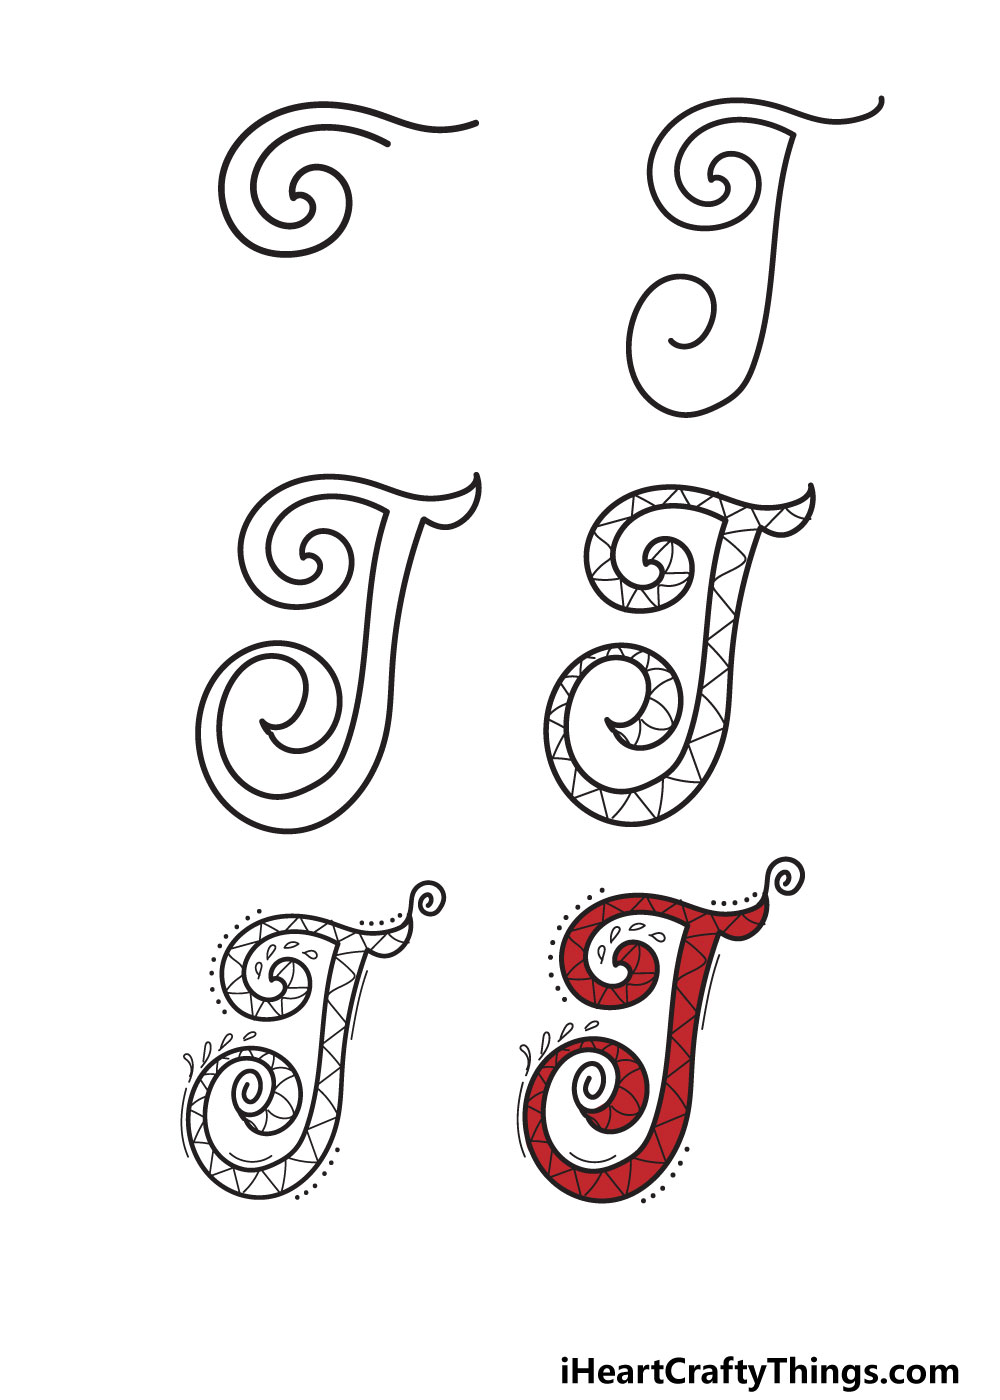
Let’s Get Started
STEP 1:
When you see the letter J as it’s typed out here, it is written as a single curved line. Sometimes, it can have an additional line at the top of the letter, and we will add this element in this design.
Before we start drawing the design, we think you would benefit from drawing out the letter with your pencil first.
This will give you a good idea of what the overall design will look like, and it can help you to visualize the design. When you’re ready, we can start drawing the actual design.
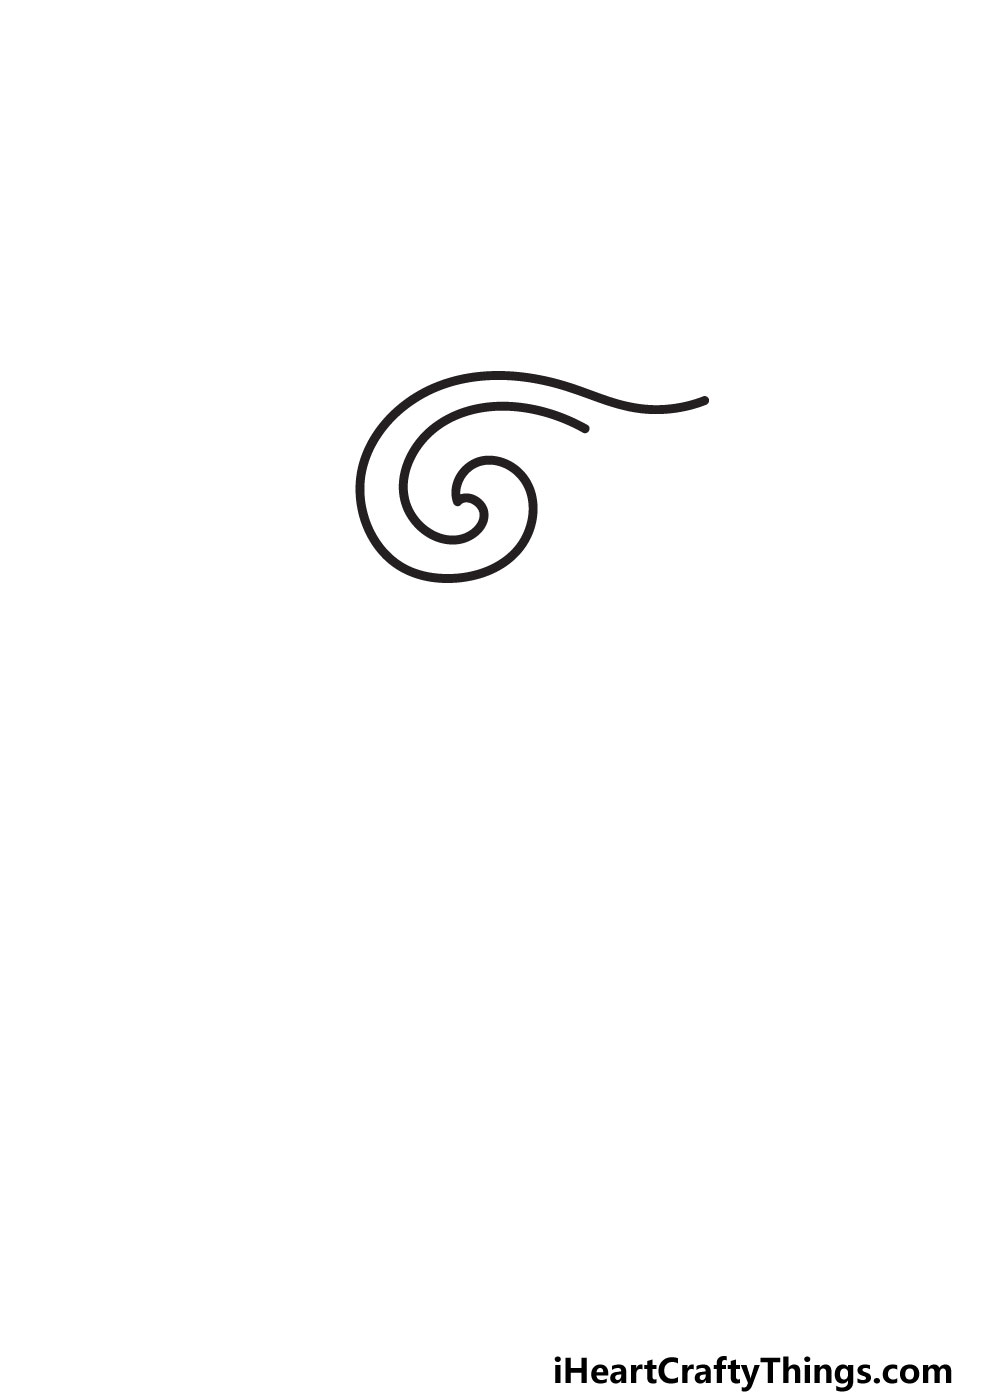
To begin with, we will be drawing the left half of the line that sits on top of the letter J in some instances. It won’t be a simple straight line, however.
Instead, we will be giving it a dramatic spiral shape at the end of it. That’s what we will draw in this first step, and there are a few ways to do this.
You could draw this spiral as one single continuous line, or you could separate it into two lines. As you draw, try to get it looking as close to our example as you can.
There will be an empty space on the right-hand side of the section, and we will fill that in the next step.
STEP 2:
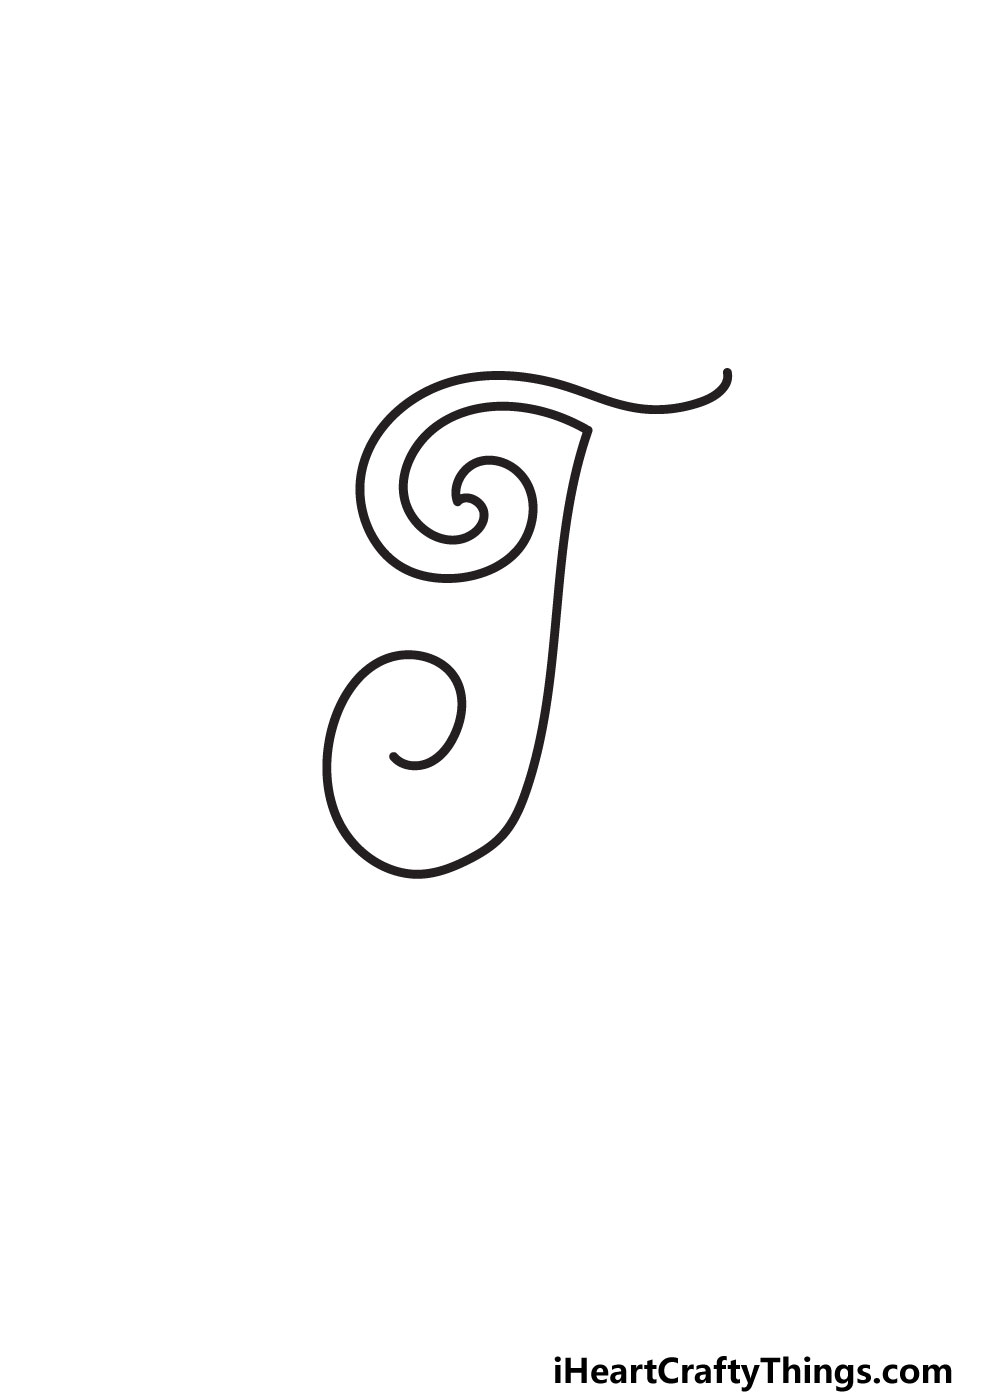
Next, we will focus on the long vertical section of the letter J, specifically the left side of the letter. This will begin from the base of the spiral shape from the previous step.
Start by drawing a mostly straight vertical line down from this point. You can give it a slight curve, and this curve will become a lot sharper near the bottom of the letter.
This will curve up and then around in on itself, as you can see in the reference image. We will leave that alone for now, as we will finish it later.
Before we proceed to the next step, you can add a small curved line to the very top line of the letter. That’s all there is to it for this step!
In the next step, we will be finishing off the outline of the letter, so let’s proceed when you’re ready.
STEP 3:

We will be adding quite a lot to your fancy letter J in this step, so let’s take it slowly as we draw the next sections. Start by drawing a small, rounded line attached to the last line we drew in the previous step.
This shape we have just drawn will look a bit like a leaf poking out the top right edge of the letter.
Next, we will draw another vertical, mostly straight line down from this.
It should run parallel to the other vertical line, and it will follow the same spiral that the other side did.
Eventually, they will meet at the center of the spiral.
It can all sound complicated, but when you follow the example we have then it becomes a lot clearer. If you have a hard time with it, maybe try drawing a few practice tries with your pencil first.
Speaking of your pencil, you can erase any pencil lines you used to map out the drawing now, as we won’t be adding any more lines to the outline from this point on.
STEP 4:
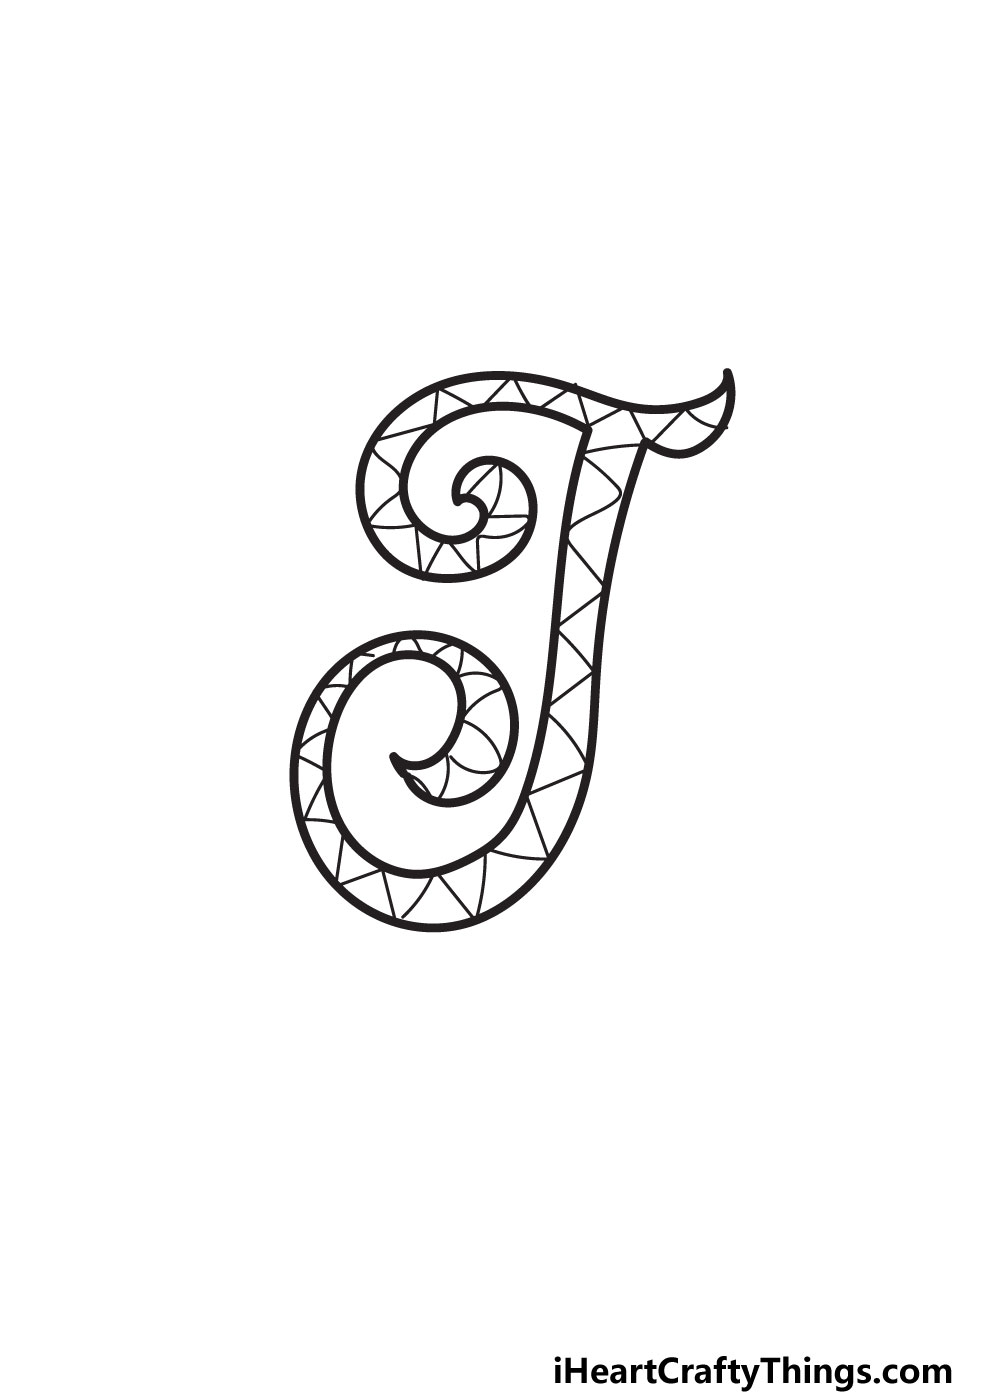
You’ve completed the outline, and now we have a world of possibilities as it waits to be filled. There are so many ideas you could use to decorate your letter!
You could leave the letter free of any interior details, but we decided to add some decorative elements inside the letter.
For our design, we used some straight lines zigzagging down the letter to create an intricate look to the letter. If you like the way it looks, you will find it easy to replicate for yourself.
Of course, you can also use other patterns inside the letter. You may prefer straighter lines, for example, or you may want them to be even wavier.
These are just a few of the ways you can decorate the letter, but there are so many more you can try. Be sure to unleash your creativity and see what happens!
When you’re happy with how the interior looks, we will then focus on some outer details of the letter in step 5.
STEP 5:
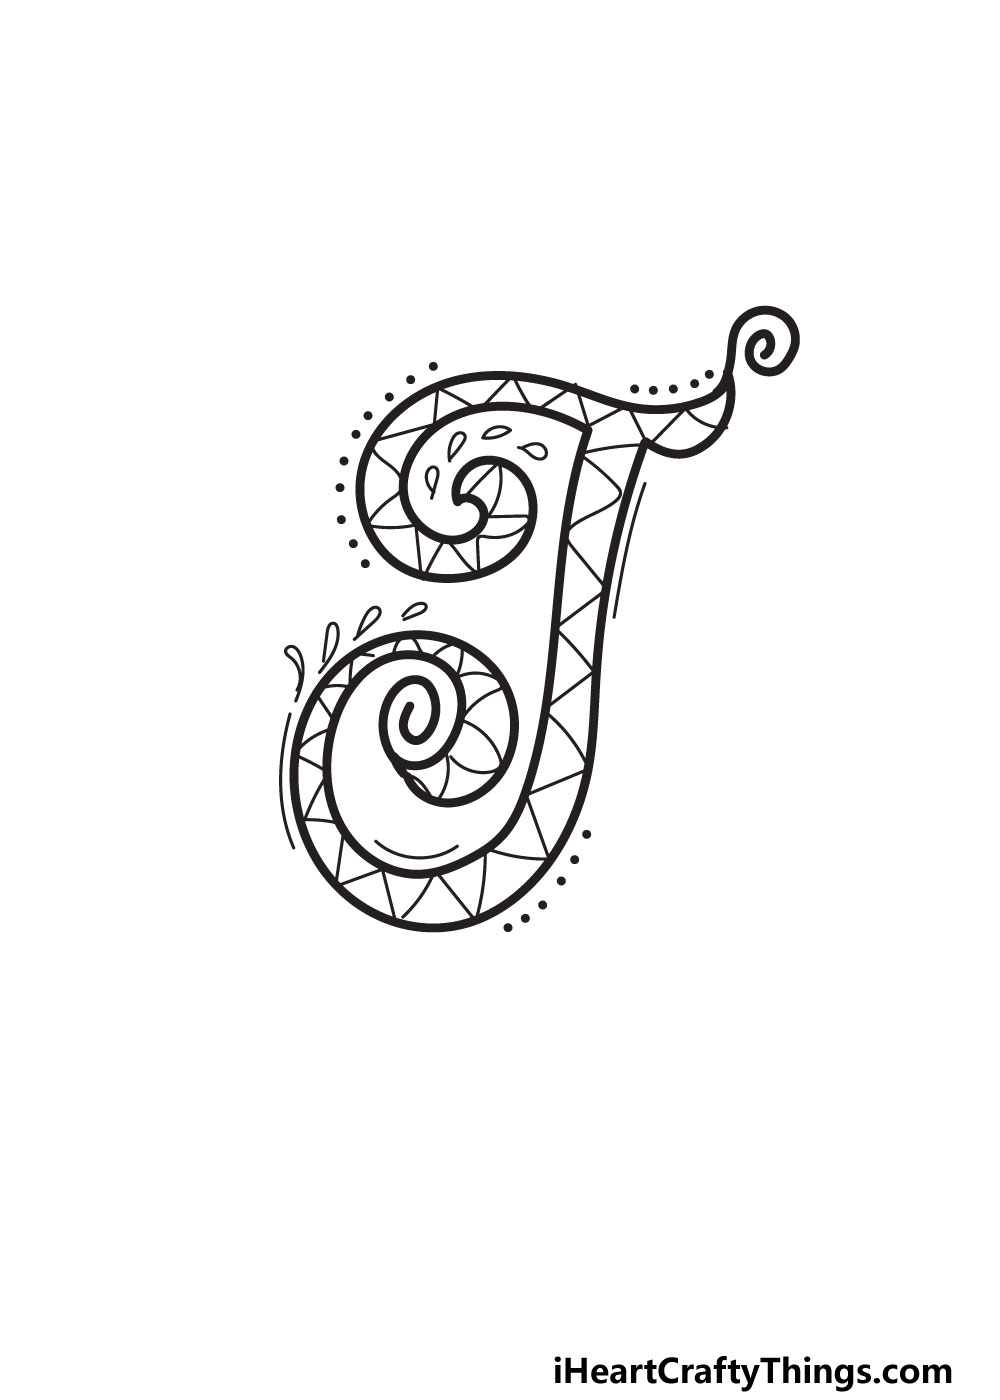
Sometimes, the simplest details and lines can make the biggest difference. In our image for step 5, you will see this on full display.
None of the details we added around the letter are particularly complex, but they help to make the letter look so much fancier.
First, we added another spiral to the top right-hand point of the letter. Next, we added some dots along certain edges of the letter, and you could place them in different places too.
We also added some simple lines around other edges to create a sense of movement and vibrancy. Finally, we drew some small shapes around other edges.
These are shaped a bit like leaves or maybe tears, and they bring it all together. The details we added in this step can be copied for your design, but they also serve as an example of what you can do.
You can build on what we’ve done in some unique ways, or you could add all sorts of other exterior details instead. Try to use the free space of the background as well.
After the final step, we will also go over a few more ways you can use th background to good effect, so remember to read all the way to the end if you want some more inspiration.
STEP 6:

Most fun of all the steps! In this step, we will be adding some color to your fancy letter J. Once again, the reference image we provided is there for more inspiration than instruction.
We chose a beautiful dark red for the letter, and we think it looks fantastic. It gives the letter a regal look, and you could achieve this color scheme with many of your favorite coloring mediums.
Of course, you could also use any other colors you like. It would also be nice to pick two or more colors and alternate them in the various sections of the patterns inside the letter.
When you have decided on the color scheme you want, you can also play around with different art tools and mediums to achieve them.
If you’re used to using specific art tools to color, then why not try something unique? For instance, if you’ve never used watercolor paints then this could be the perfect opportunity.
There are so many possibilities, and this is your chance to show off what you can do! What will you choose to bring color to your creation?
My Final Tips To Make Your Fancy Letter J Drawing Even Better!
Before we finish this guide, we have a few more ideas for you to have even more fun with this drawing. Earlier, we mentioned filling the background, and there are some fun ways to do that.
You could fill it with colors, or you could create a themed image using the letter J as a starting point. For instance, you could write out the word Jolly in this fancy font.
That’s a word that is often associated with Christmas, so you could add some festive decorations and elements around it.
You could also use the letter to write out someone’s name. There are many cool names that start with J, so you could pick one and try to write it out in this style.
If the name belongs to someone you know, then you could fill the background with things that relate to that person. Which words or names would you like to write in this style?