


I is a letter that we use a lot in our lives. Not only does it appear in many words in the English language but is also used when we are referring to ourselves!
It’s also one of the simplest letters to write out of all the letters. When typed, it’s usually as simple as a vertical straight line.
When written, there will sometimes be small lines added at the top and bottom of the letter. In this guide, we will be looking at the letter I in a unique form.
We will be learning how to make a fancy letter I that you can then customize with extra details and color choices.
So let’s begin with the first of six steps that will show you how you can recreate this awesome design. Be sure to stick around to the end, as we will cover some additional ideas you can try.
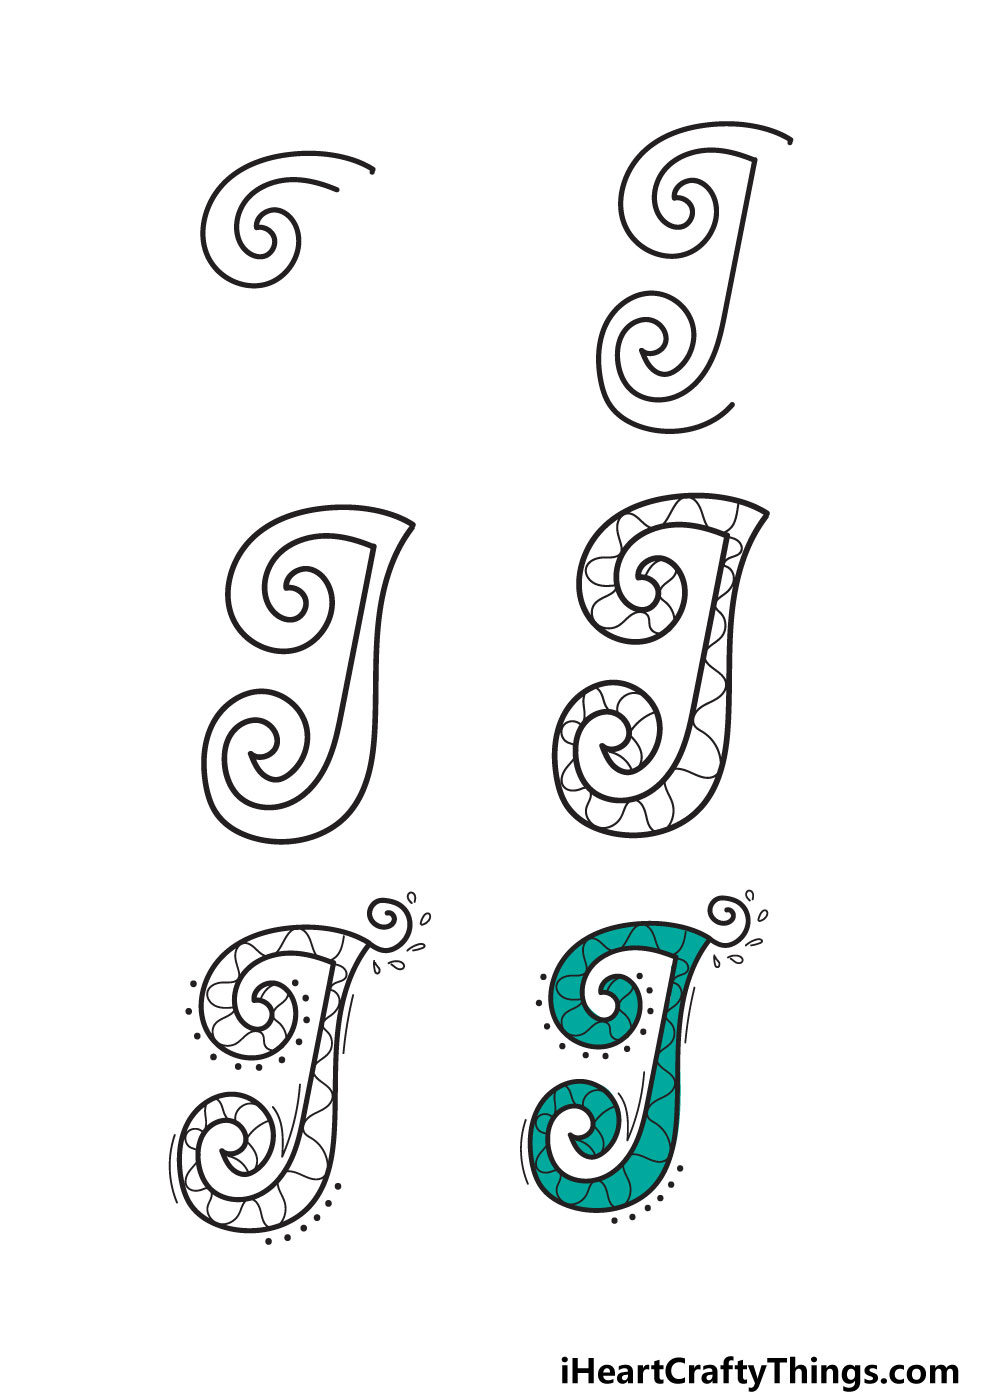
Let’s Get Started
STEP 1:
Earlier, we mentioned how the letter I when typed is just a straight vertical line. It would be hard to make that look particularly fancy, so we will make it a bit fancier.
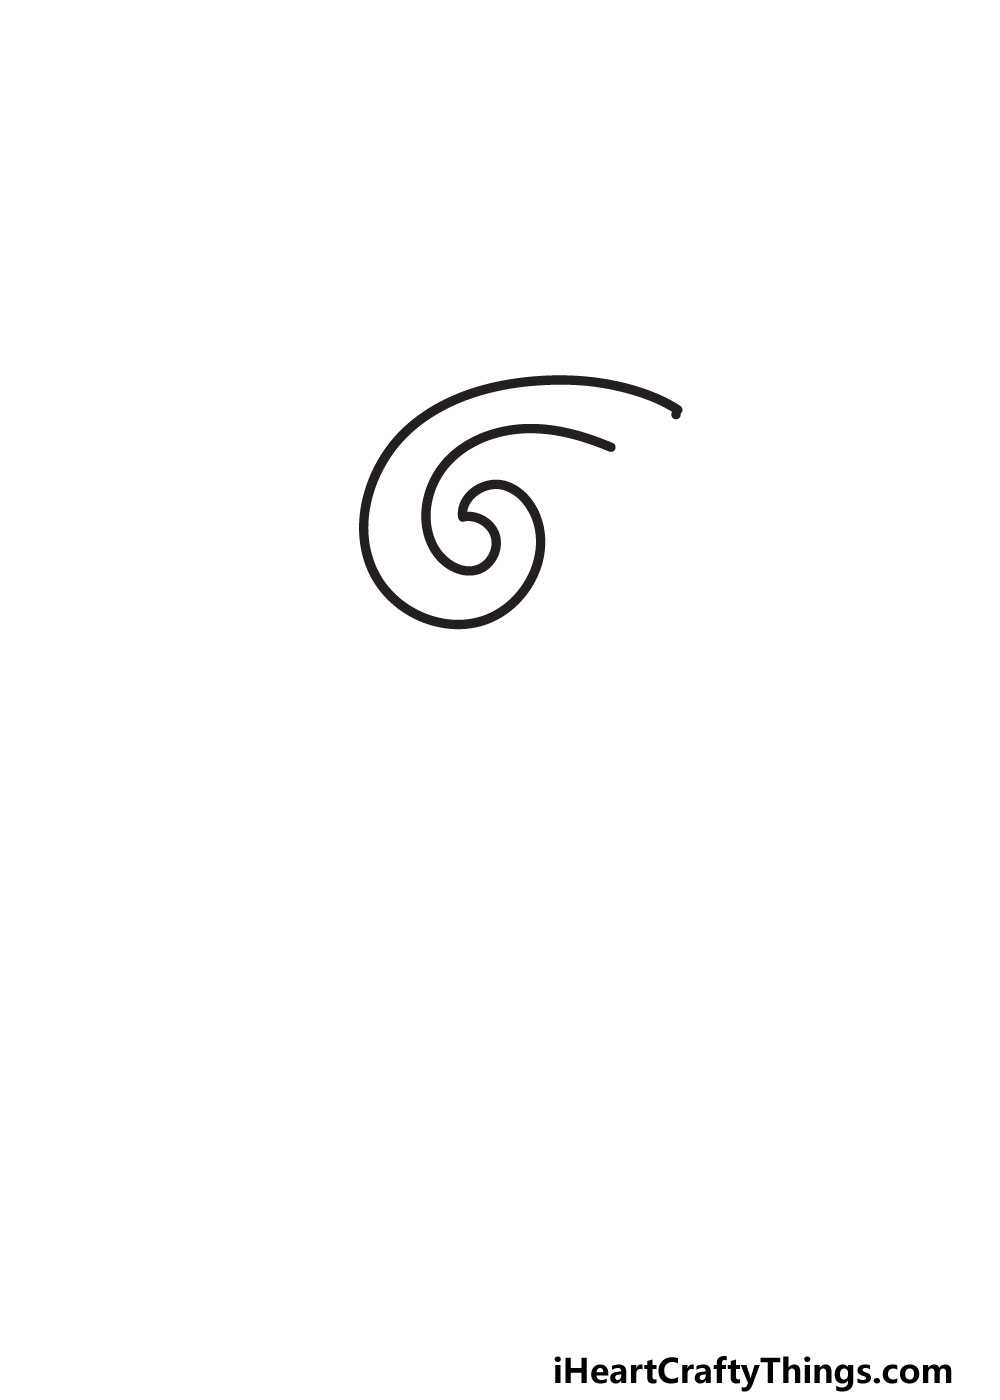
One way that we will do this will be by adding some spiraled details to the design. We will begin with one on the upper left side of the letter.
You could either draw this as one continuous line, or separate it into two separate lines.
The reference image will give you a good visual representation you can follow, but you can make it even twistier if you like!
Drawing this kind of spiral shape can be quite tricky, so you may need to practice it a few times before it looks as you want it to.
You can also draw it lightly with a pencil first so that you can map it out before using your pen or a darker pencil.
This is something you can do for the rest of the design as well, the more you plan the easier things will be! When you’re ready, we will then add to the design in the next step.
STEP 2:
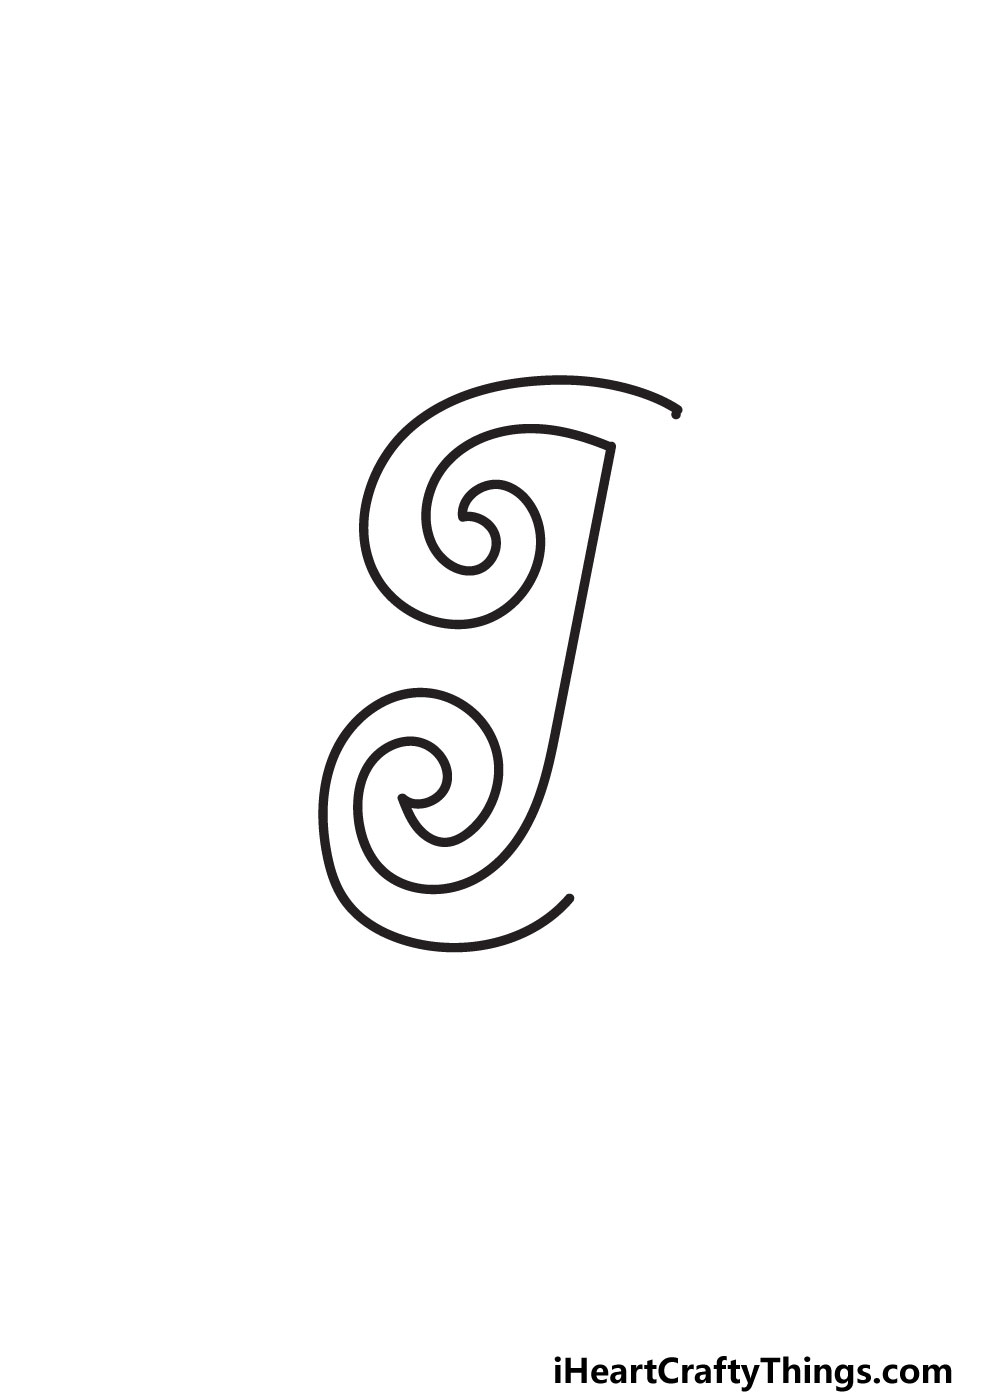
In this second step, we will be drawing the left side of the letter. You can start this step by drawing a vertical line down from the shape that you drew in step one.
This line will be mostly straight, but there will be a very slight curve to it. That curve will become sharper the lower you go, as it will start to turn into another spiral shape.
This second spiral will look very similar to the first spiral in shape and size, but it will be a mirrored version of the first one.
Once you have drawn it, you will have the entire left side of the drawing. There will be a large empty space on the right-hand side, but that won’t be the case for long.
In the next step, we will finish off the outline of the letter, so let’s do that when you’re ready.
STEP 3:
This third part of your fancy letter I will be fairly simple compared to the first steps of the guide.
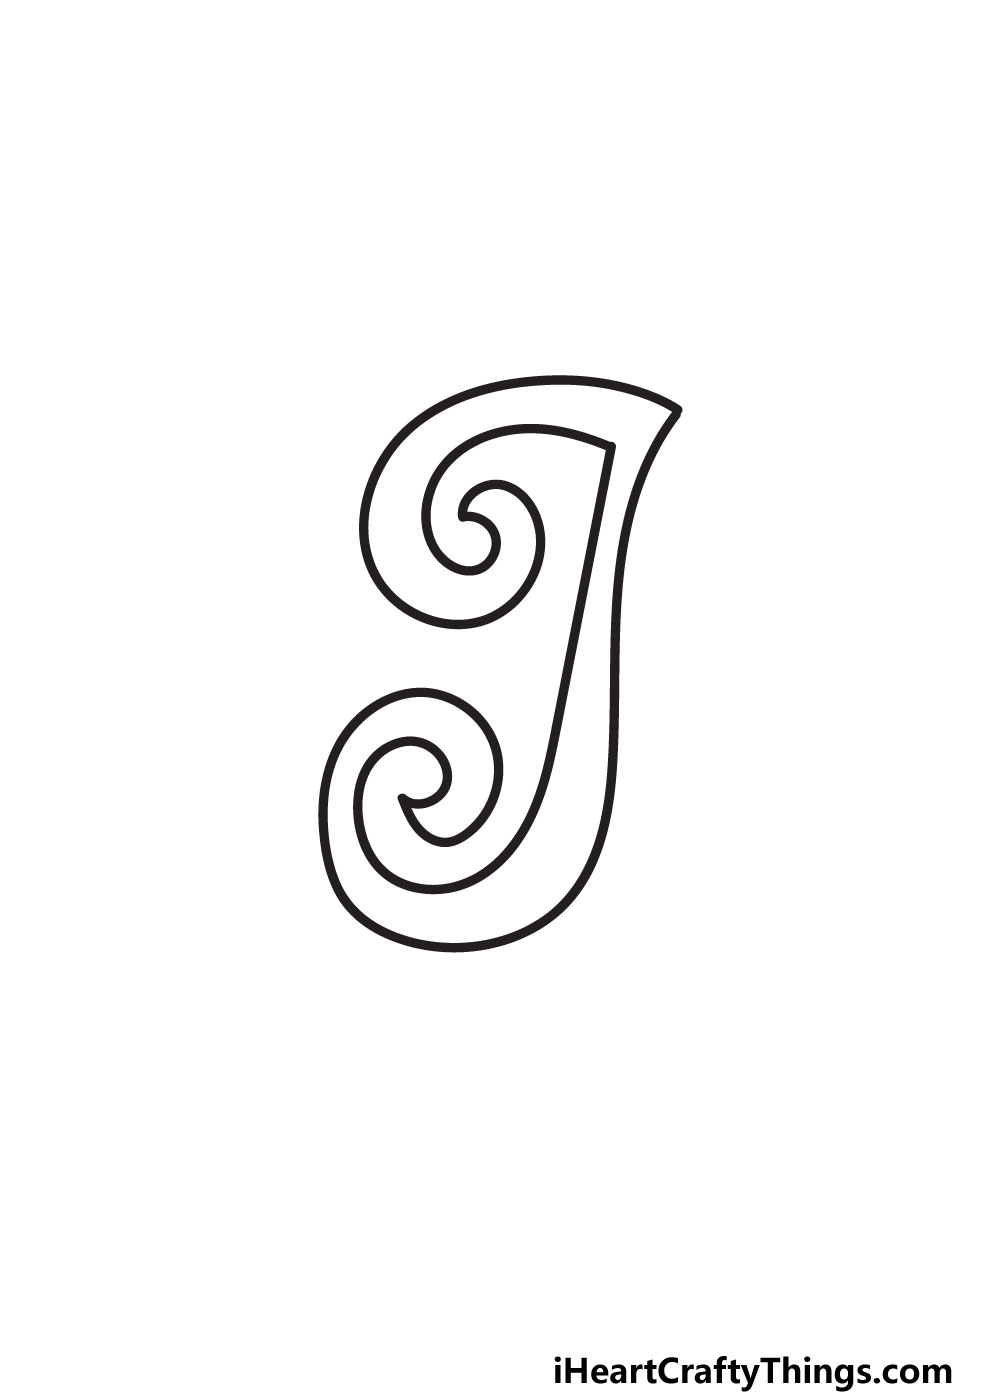
As we mentioned in the previous step, this one will see us finishing off the outline for the letter. To do this, we will start at the top of the design we have so far.
We will draw a vertical line down from the top of the letter, and it will have a slight curve to it. Near the top, the line will get fairly close to the line on the left.
As you get past the halfway point of the letter, it will very gradually move out from the center a bit until it curves down to join the line at the bottom.
With that, you will have the outline for your letter. There is still a lot to do, but it is taking shape now!
Before you move on, make sure that all the lines look as you want them to. You can also erase any pencil lines you drew now, as the next two steps will be about adding interior details.
STEP 4:

The outline of this letter is looking really good, but it could look even fancier with some more details! That’s what we will do in this step, and it’s a step where you can bring your own ideas to the picture.
For now, we will stick with the design that we chose. We added some details to the letter by using some wavy, rounded lines.
This looks really cool, and it is a simple way to make the design look more complex. While we like how it looks, you could use any other cool designs instead.
This is something that you could experiment with, and there are so many possibilities. You could make the lines straighter, make them form a different pattern or fill the letter with shapes instead.
These are just a few ideas, but you could go with anything you like! Once you’re happy with how the interior of the letter looks, we can then add some details around the exterior in the next step.
STEP 5:
It’s almost time to have some fun coloring your drawing, but first we have a few more details to add.
This is another step where we give you some ideas that leave things open for you to incorporate your own ideas.
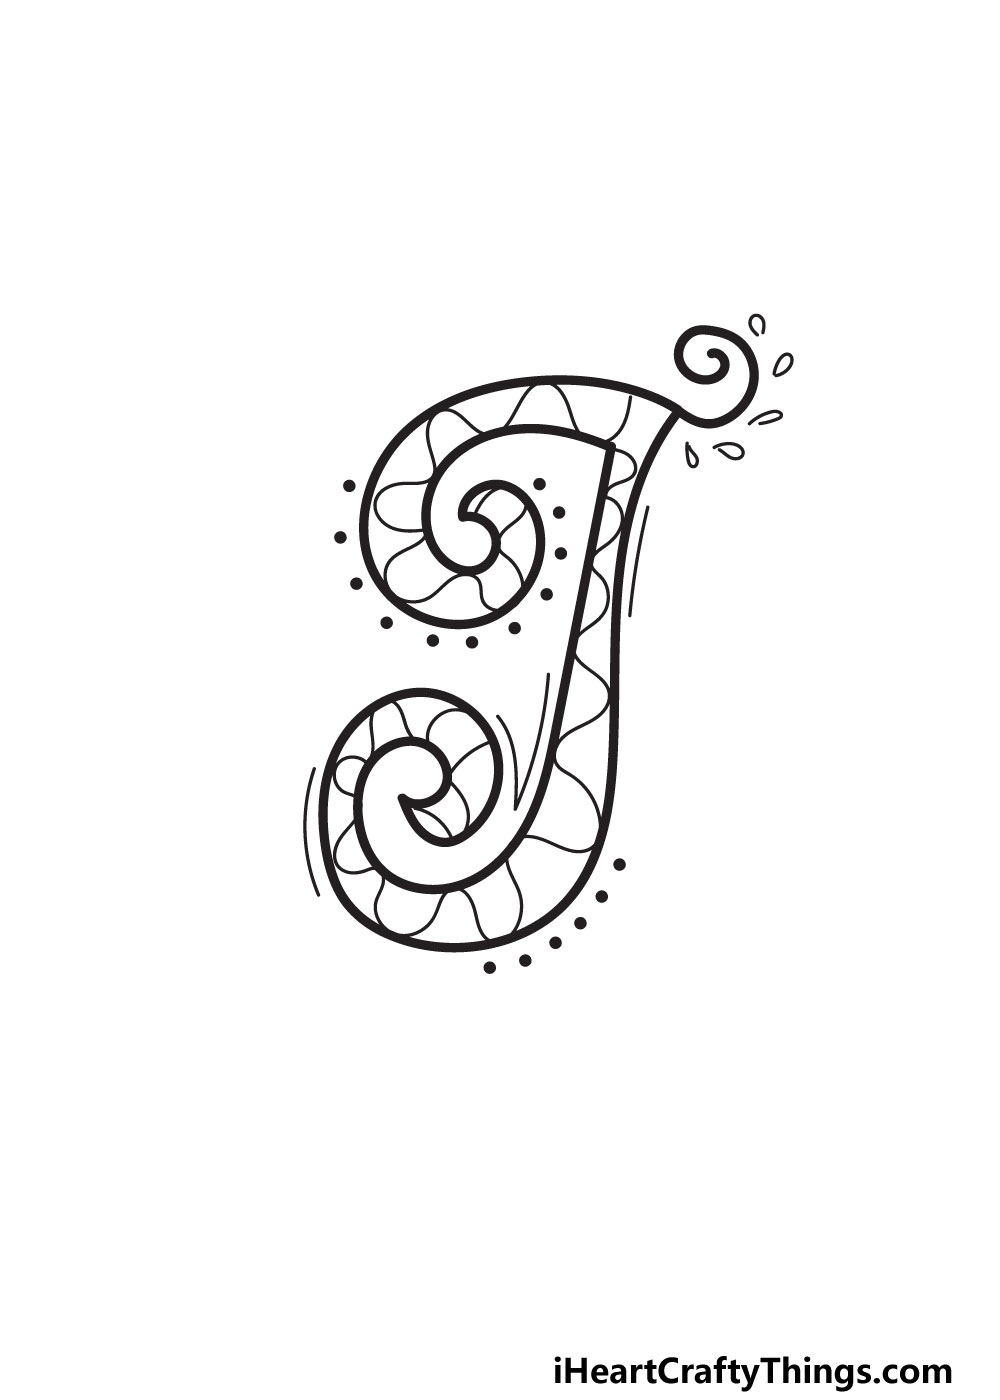
You can start by drawing a spiraled line poking off the top of the letter. Then, we chose to add some small leaf shapes around this spiral.
Next, we added some thin lines around the outline of the letter. We kept these pretty minimal, but you could add some more around the outline.
Finally, we finished off with a series of small dots all around the letter. We kept them small, but you could change up the size and positioning of these dots if you like.
As we mentioned, these details are a suggestion that you can use or change as you like. If you have other ideas for exterior details, then you should definitely go for it!
There are no wrong or bad ideas when it comes to decorating the drawing. You could also fill the background with different details or even write whole words in this style.
It’s something to think about as we color in the drawing in the next step. We will come back to this after step 6 as we go over some fun ideas for you to try.
STEP 6:
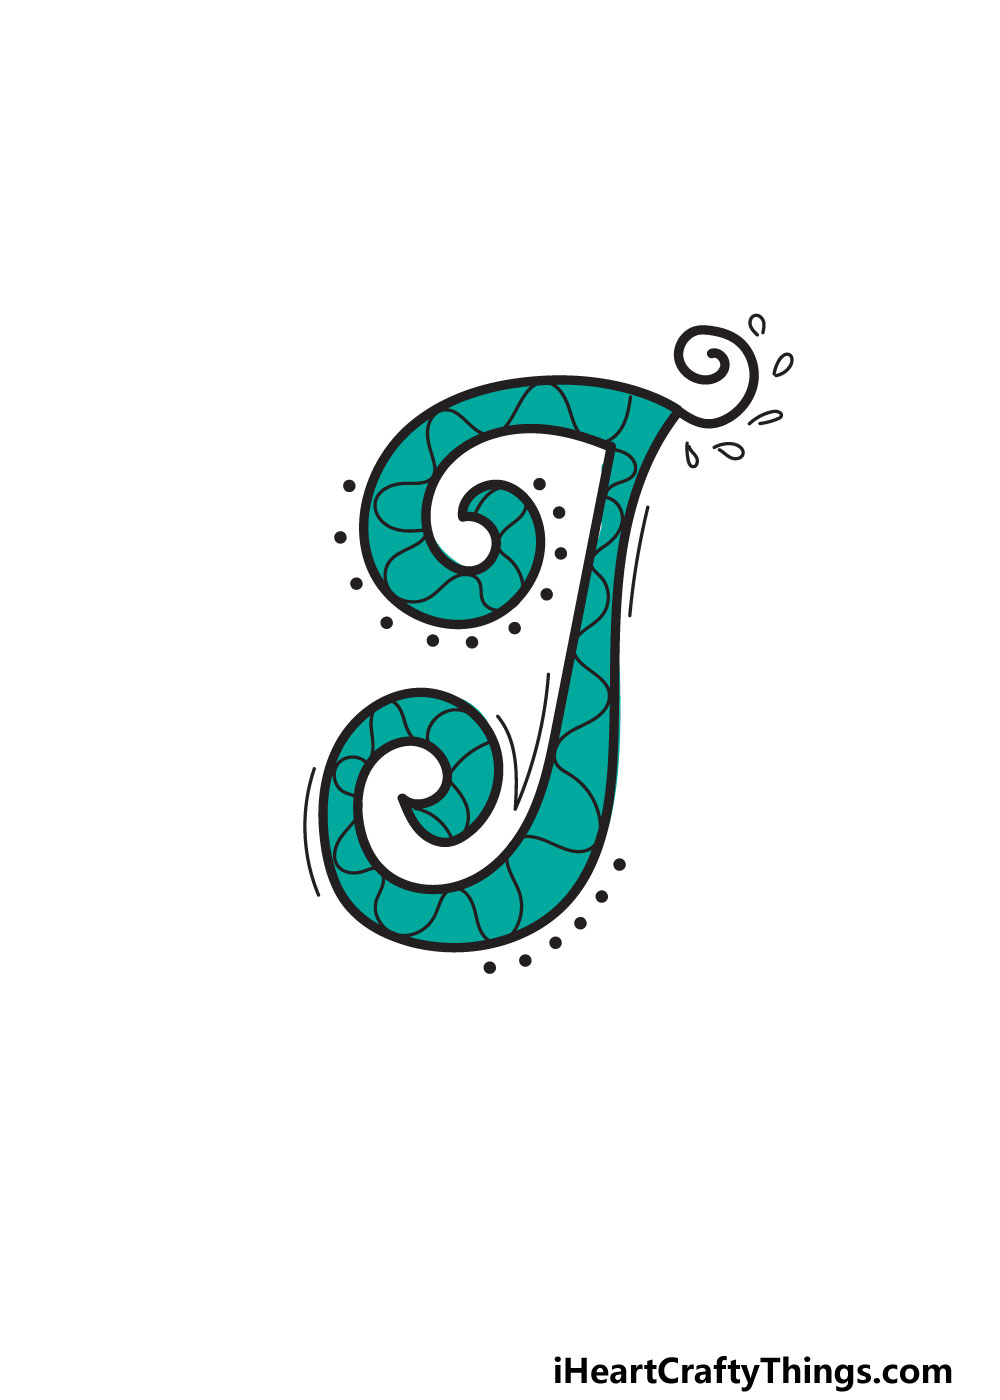
Now it’s time to finish off the drawing with some coloring fun! You can color your fancy letter I in any way that you like, and there are so many possibilities to try.
In our reference image, we show off one of the thousands of ways you could color the letter. We chose a dark turquoise color to give the letter a nice rich look.
It’s a simple yet effective approach to coloring the letter, but you should be sure to use your favorite colors for the drawing! You could stick to a single color as we did or use lots of different colors.
It would also be fun to use different art tools and mediums for the colors. For instance, you could use some colored pens for the lines of the pattern.
Then, you could use paint, a marker or something like glitter glue for the space in between. These are just a few ideas, but they show how you can get creative with it.
Remember that you can also use colors for the background and surrounding details of the drawing.
We’ve given you something to start with, and now you can take over and show us how you would like to color this drawing.
My Final Tips To Make Your Fancy Letter I Drawing Even Better!
You’ve done an amazing job on the steps of this guide, and you have created one fancy letter I! Before you finish off the guide, we have a few more ideas to try.
Now that you have drawn one fancy letter in this style, you could try to make a whole word in this style. You could start by thinking of some words that start with I.
You could use the word Imagine, for instance. If you wrote it out in this fancy style, you could surround it with stars, sparks, glitter and other details that represent imagination.
It’s one example of a way you could make a theme out of a word, but there are many other creative ways you could do it.
Another way would be to think of someone’s name which starts with I. you could write out their name and then fill the background with pictures that make you think of that person!
