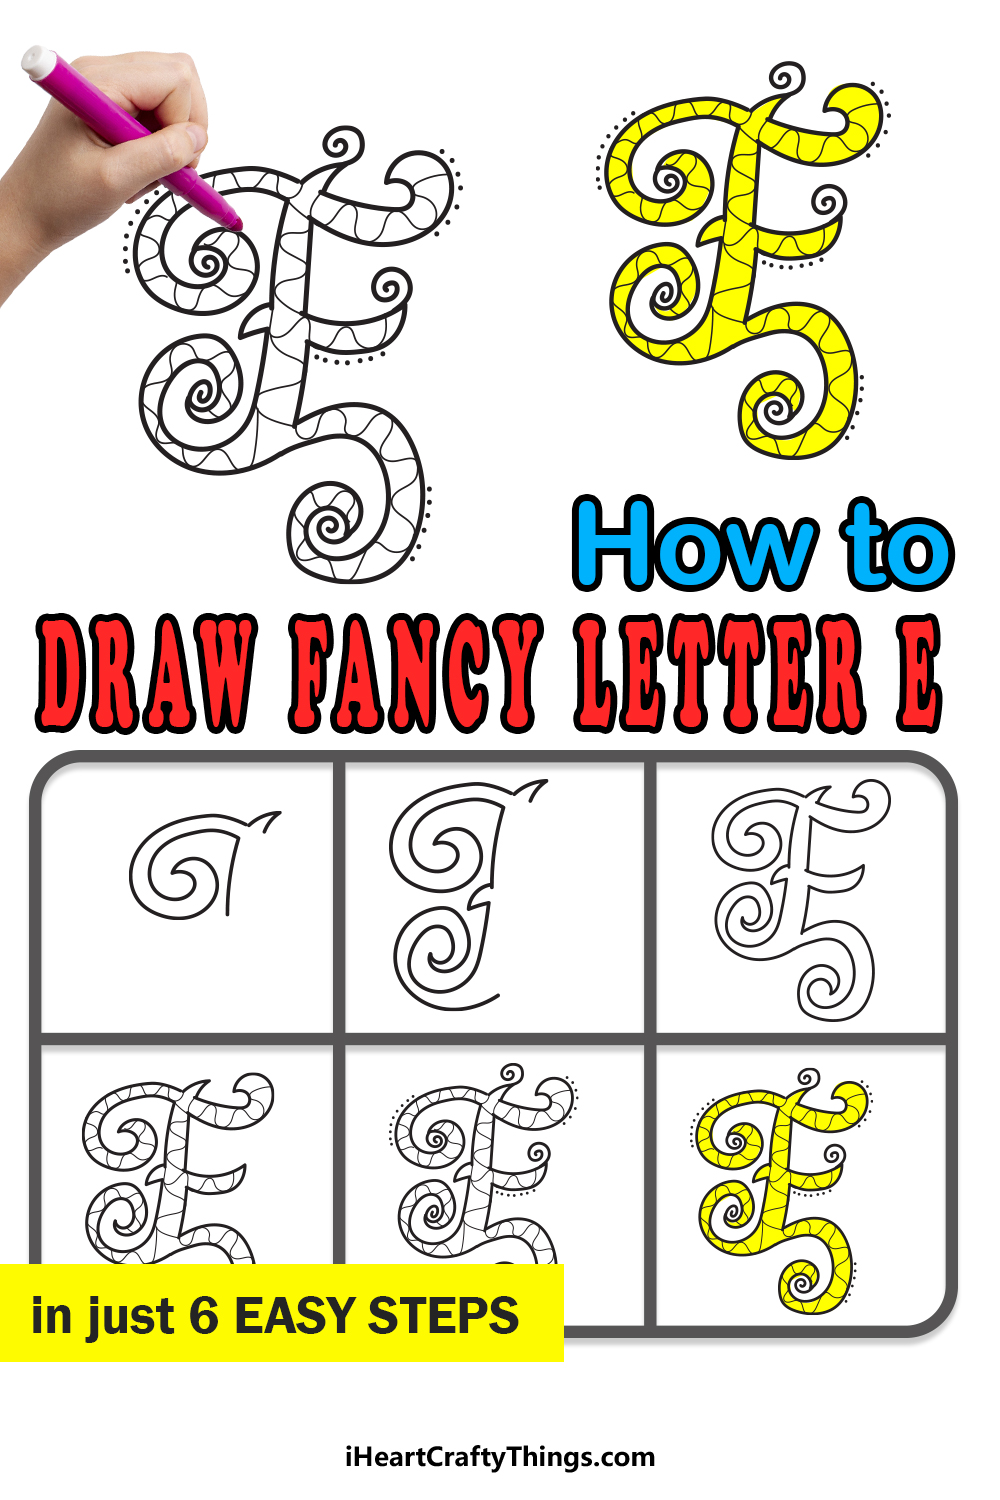
If you analyze all of the words in the English language, certain letters will appear more than others. The subject of this guide, the letter E, happens to be one of the most common.
Because it’s so common, each sentence you write is likely to contain at least one E, so we need to learn how to write it early.
You may know how to write it easily, but what about making it fancier? That’s what we’re here for, as this guide is all about learning how to draw a fancy letter E.
In just 6 steps, you will be able to draw this fancy design and color it in any way you like. You will also have the opportunity to change and add to the design any way you like!
Let’s begin with the first step of the guide.
Let’s Get Started
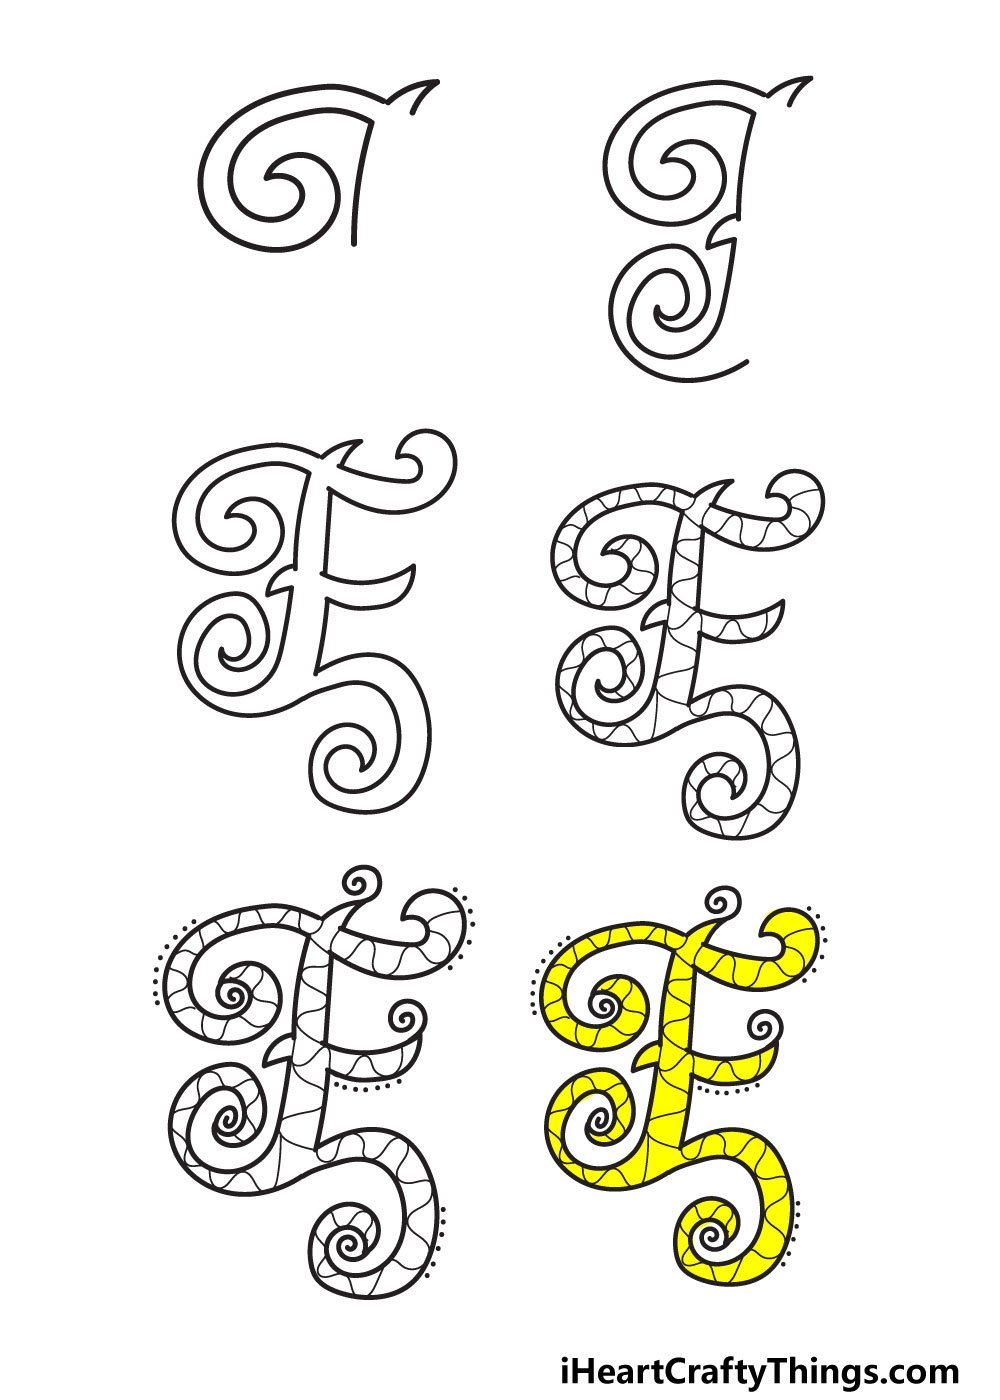
STEP 1:
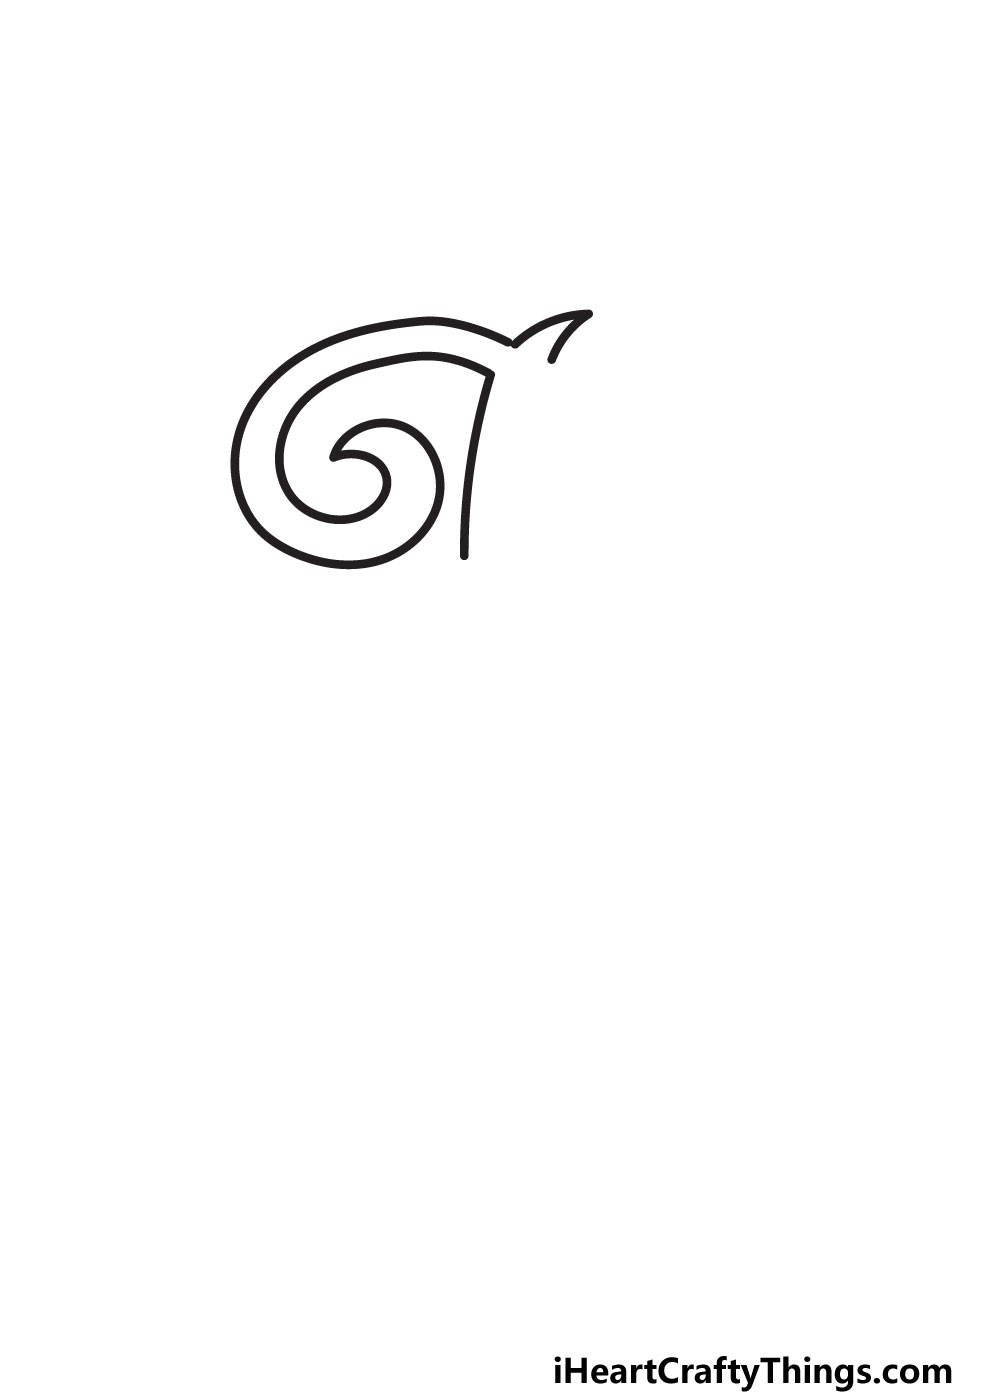
A capital letter E has three levels, and it’s fairly straightforward when you write it normally. But, we’re not here to write a regular letter E!
We will be making it fancier with some cool details and flourishes. It would make it much easier if you were to draw out a regular letter E with your pencil.
Even though the final product will look quite different from a regular E, drawing it out will help you to visualize the design better as you draw.
You can attempt it without doing this, but it should make it easier! However you decide to go about it, we can begin the first flourish of the letter.
We will be drawing a curled, spiral shape that will go on the upper left-hand side of the letter. This curled shape will look a bit like a rounded letter G.
Then, at the top of this curl we will add a small pointy section that looks like a rose thorn. Finish off this step with a very slightly curved vertical line coming down from the letter, and then we can move to step 2.
STEP 2:
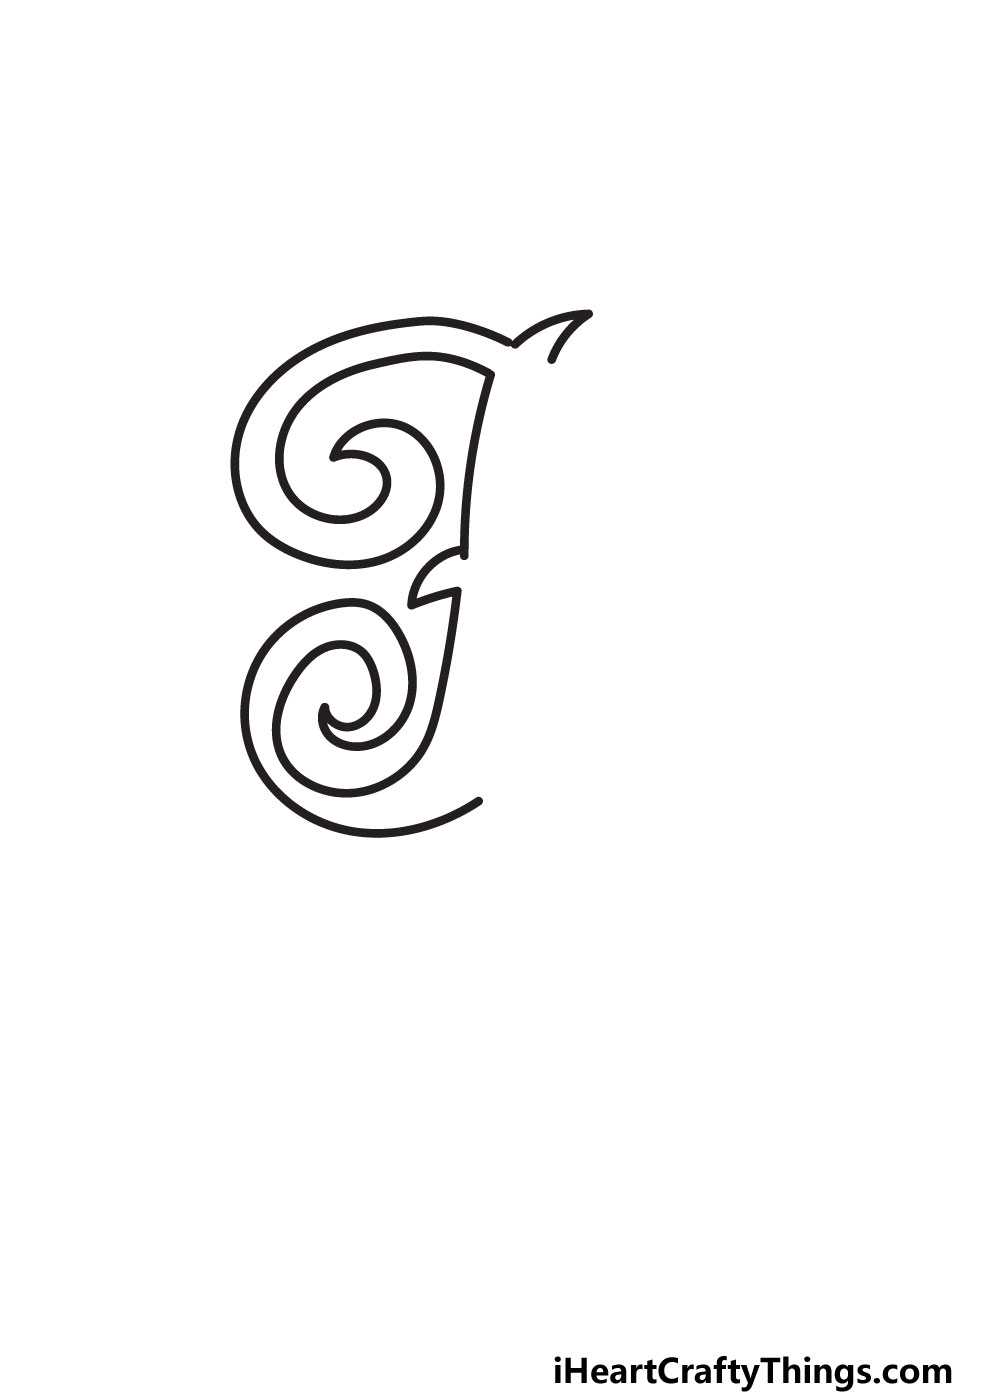
In the second step, we will essentially be replicating what you did in the first step but mirrored. Before you do, you can draw another little sharp shape like the one you drew near the top.
Then, you can draw a slightly curved vertical line down from the sharp point. At the base of the letter, it will curl to the left and turn into a spiraled shape that looked like the one above it.
As you can see in the reference image, it will be a bit smaller than the one above it. With that done, we shall take on step 3.
There we will finish off the outline of the letter so you’ll be ready to draw some inner details, so let’s move on when you’re ready!
STEP 3:
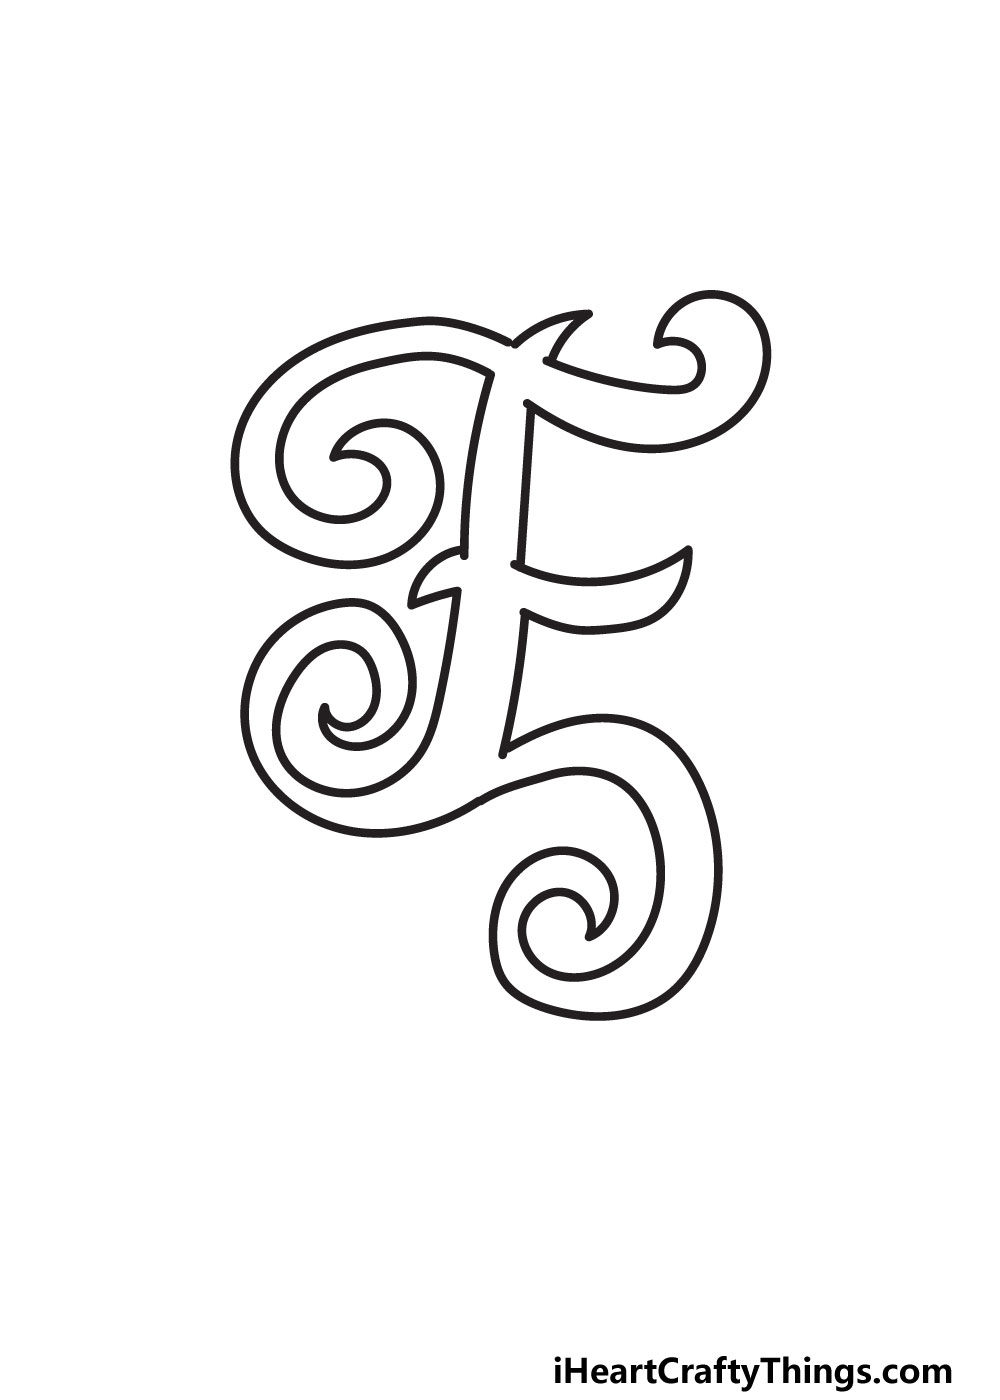
As we mentioned in the previous step, we will finish off the outline of your fancy letter E in this step.
We will be adding quite a lot in this step, so let’s take it slowly and follow the reference image closely.
It’s always best to take things from the top, and that’s what we will do now as we draw the first ‘arm’ of the letter.
You will see in our example, that it will start right beneath the pointy thorn shape you drew at the top of the letter. To make it more dramatic, it will be drawn as a curved shape that curls up.
Next, draw a standard straight line down from the base of this shape. Then, we will add a much smaller arm to the center.
It will have a slight curve to it, but a lot less drastic than the top arm. Next, draw another straight vertical line down from this arm.
Finally, we will draw another arm at the base of this section. This arm will have a similar dramatic curl to the ones we drew on the left side of the letter.
This time, it will curve down and below the letter. With that curl added, we have one fancy E outline! Now that it’s drawn, you can erase the pencil E we suggested drawing if you used that suggestion.
Now that the outline is done, the next two steps will be about adding details in and around the letter.
STEP 4:

In the past few steps of this guide, we encouraged following our guide images closely, but for the final three steps we think you should feel free to experiment!
To add details to this letter, we added wavy lines all throughout the design. We think this looks really great and will allow for lots of color details later, but there are other kinds of details you could add.
These patterns could have straighter lines, be made up of small shapes or anything else you can think of! You may even prefer to keep the inside of the design clear of any patterns.
There are no wrong answers here, so whether you choose our design or something else, we’re sure it will look great!
Next, we will add some final flourishes and external details to the design before we add some colors in the final step.
STEP 5:
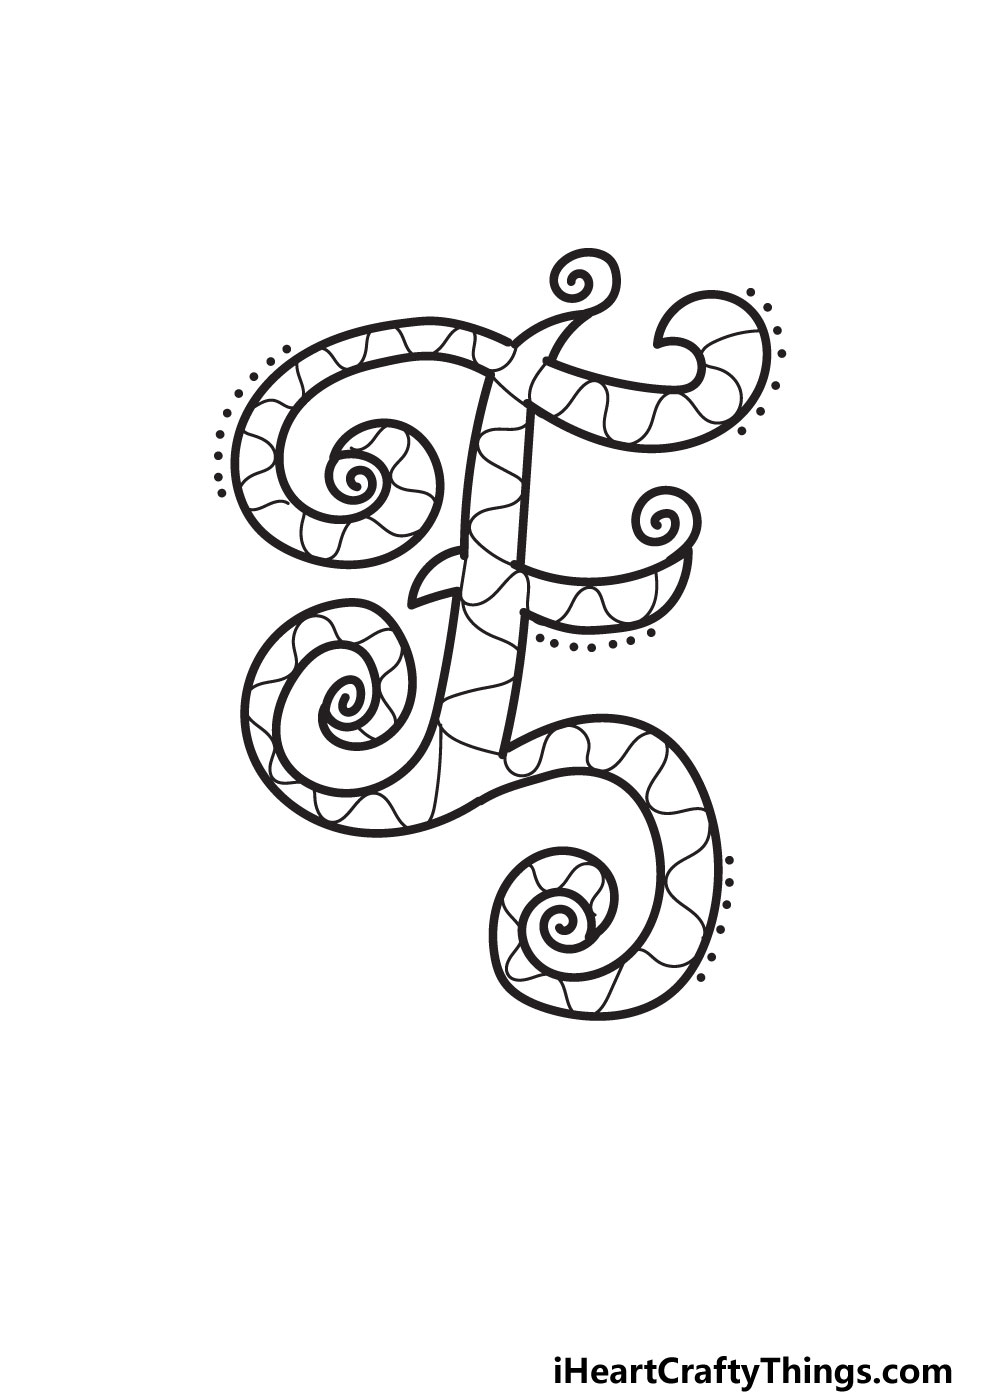
As with the last step, this is one where you can get really creative. You can take this design to whole new heights with the external details you add, and there are endless possibilities.
For now, we will stick with the details we chose. These include a series of dots of varying sizes. We chose to place these around some of the spiraling shapes extending off the letter.
If you like the way these look, you could add more around the letter or change the sizes of the dots. Next, we added some spiral lines to the design.
As you can see in the reference image, we added one of these spiral shapes to all but one of the pointy tips on the letter.
These spiral lines help to make the letter look even fancier! Now that we have shown you how we would like to decorate this design, you can show off your ideas.
You may want to add some more fun details, shapes and lines around the letter. Or, you could even draw a background or create a theme for the image.
If you don’t have any ideas now, don’t worry! We will go over some ideas to get you started after the next step, but for now we will focus on coloring your drawing.
STEP 6:
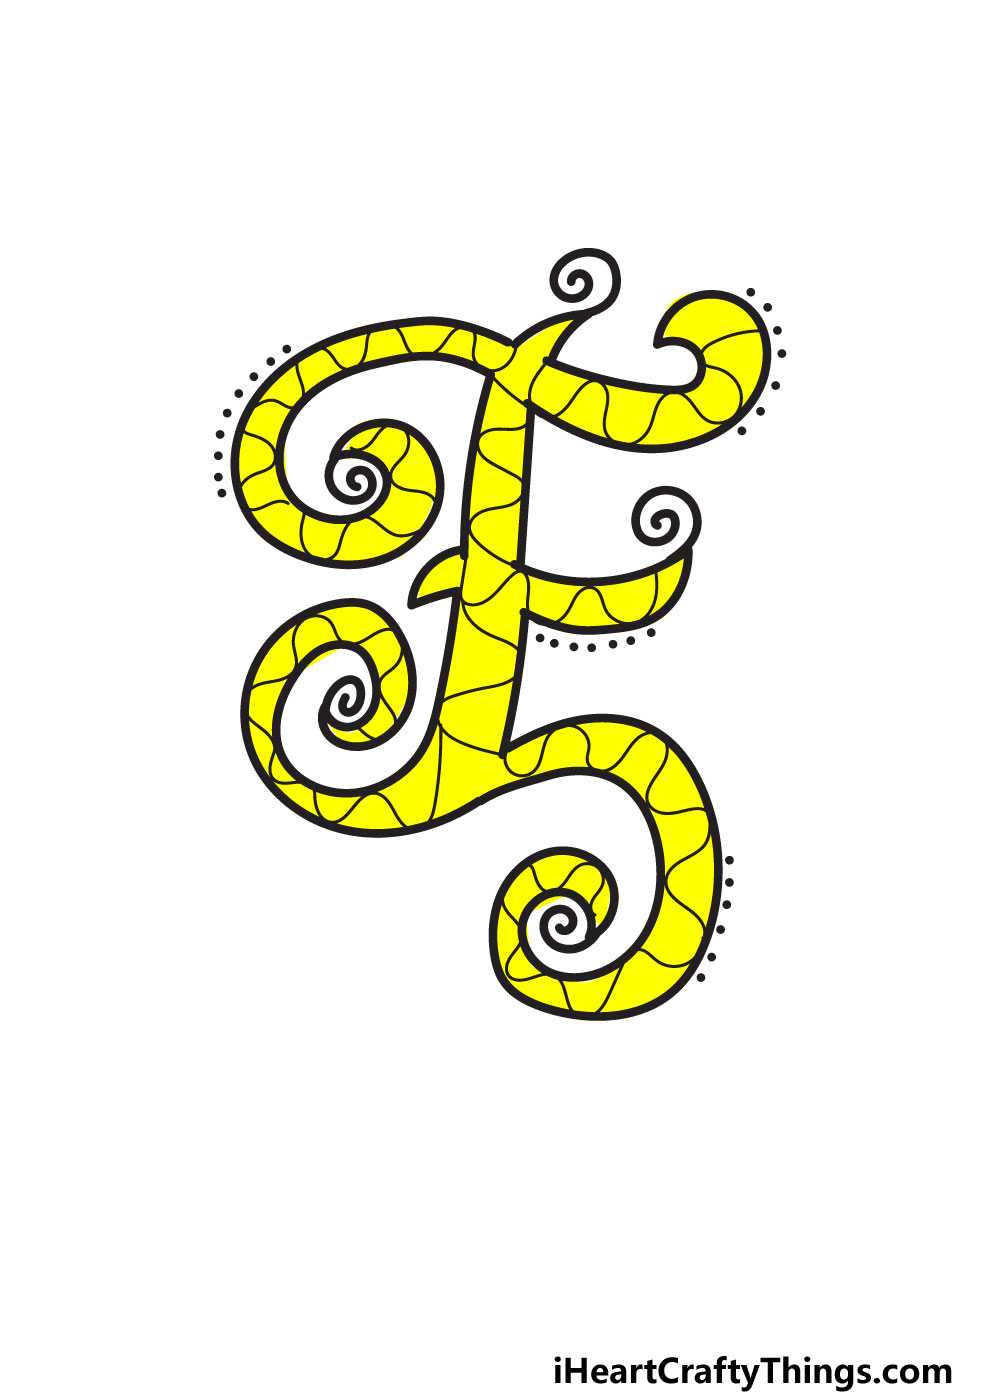
In the previous step, we mentioned how the possibilities for decorating your letter were almost endless, and the same is true for coloring it in!
There are so many great ways you could add color to your drawing, and in our reference image we showed you just one way.
We chose to use a bright, neon yellow for the letter. This color really makes the picture pop! If you like how it looks, you could get a similar effect by using colored pens or markers.
Of course, you could use any other colors you like for your fancy letter E. if you used the same pattern we did for the interior, then you could work in a multitude of colors.
When choosing your colors, try to think of what you will use to add them.
The art tools and mediums you choose can make a big difference, and different mediums will give the colors different intensities.
So when you’re coloring, let your creativity flow and be sure to make use of all the art tools you have available! We know whatever you decide on will look great.
My Final Tips To Make Your Fancy Letter E Drawing Even Better!
Earlier in the guide, we mentioned that we would cover a few more ideas for you to try out, and we will do just that!
With any drawing, you can create a theme for the details and the background. A good place to start would be by choosing a theme that has to do with the letter e.
This could be writing out a word like elephant or envelope. Or you could use a word like elegant, which would suit this fancy style!
If you write out a word, you could fill the background with something related to that word. You could also use various crafts and fun art supplies to emphasize your theme.
Writing out a name in this fancy font could be fun too. There are many names that start with E, so try to think of people you know with such names.
If you have a name to write, try to depict the whole name in the same style you drew the E in and the name will have never looked fancier!