Some letters in our alphabet are more common than others, and the letter D is one of the more common letters. It has a hard sound to it, and it comes in two distinct-looking forms depending on whether it is upper or lowercase.
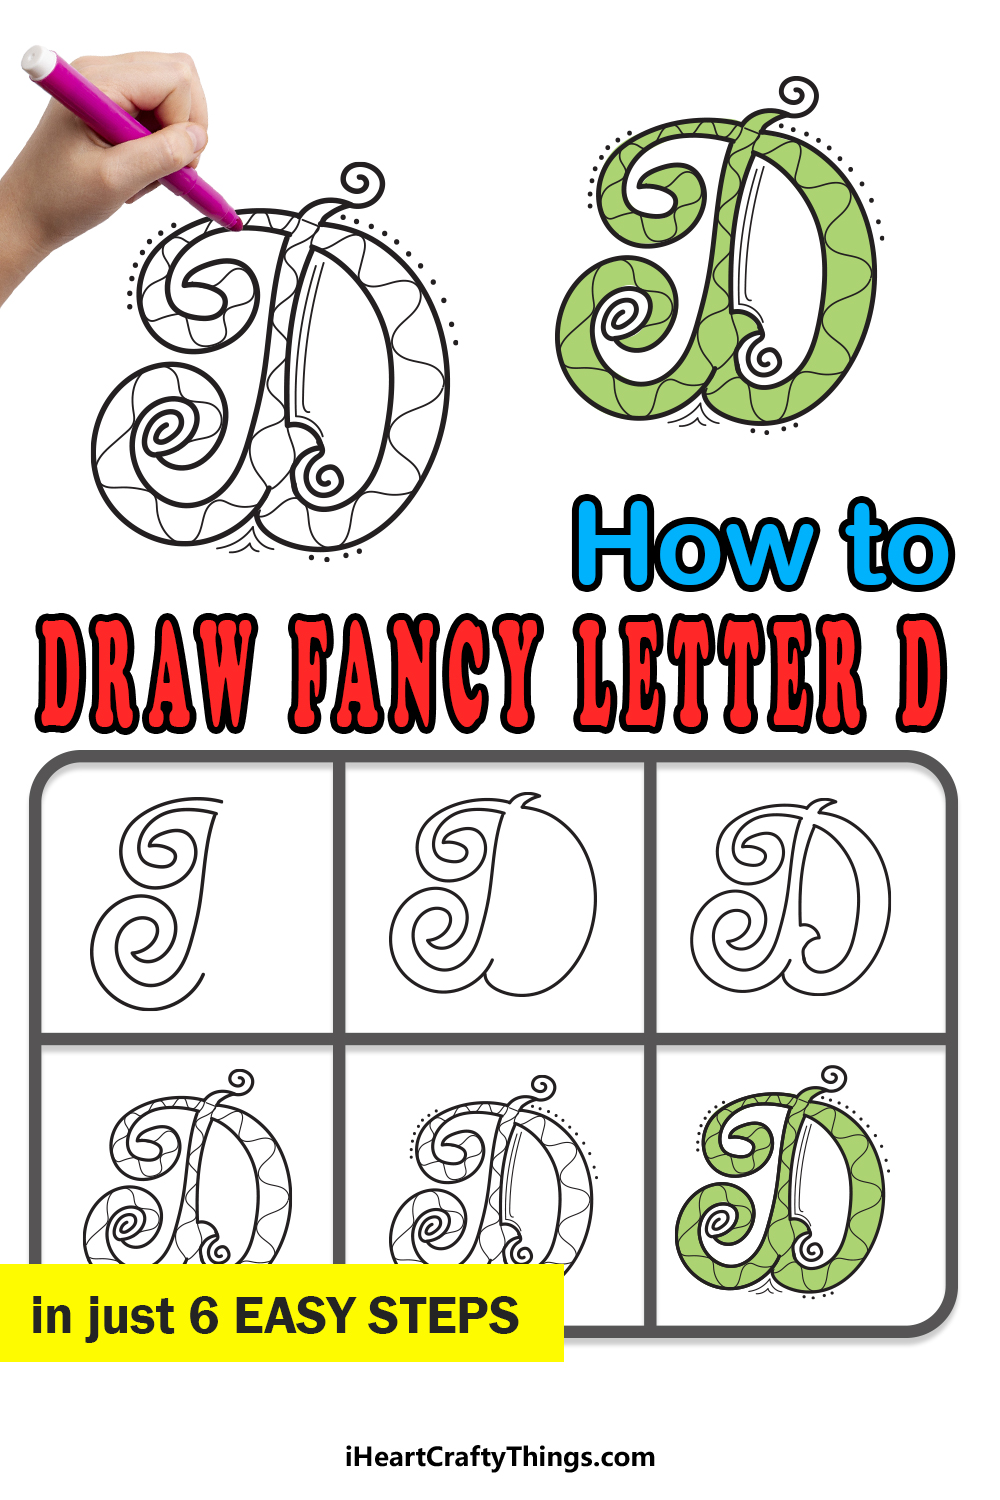
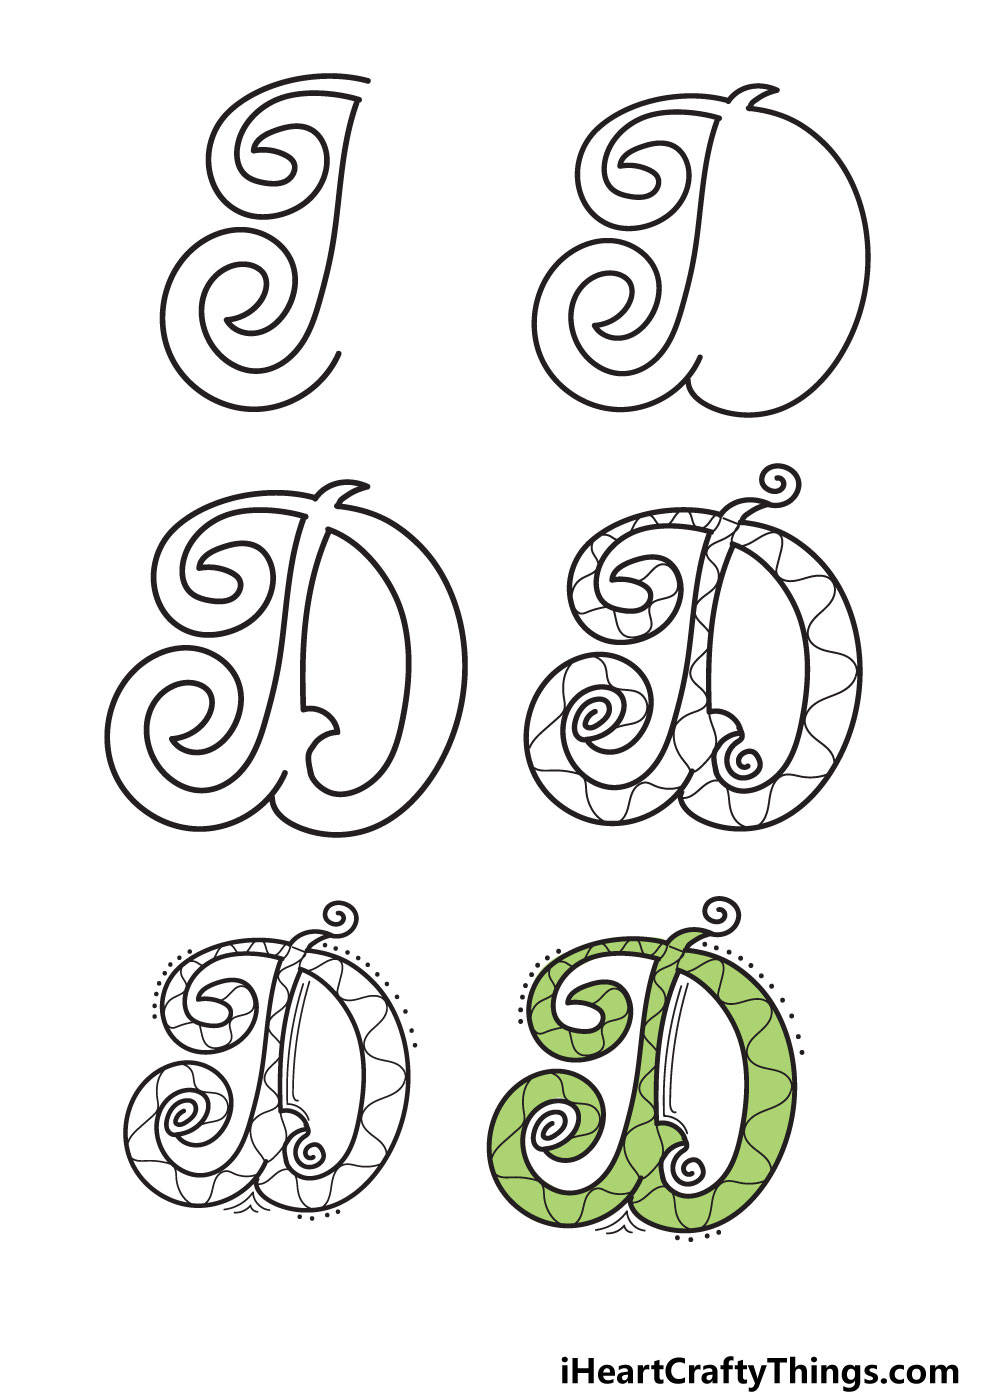
In this guide, we will be aiming to make this letter even more daring and delightful as we learn how to draw a fancy letter D in 6 steps.
We will show you how to make this letter look really cool and unique, and then we will cover how you can color it in.
While we have a great design for you to replicate, you will also have plenty of room to experiment! We will cover a few ways that you can add your own spin and ideas to the drawing.
So let’s begin with the first step of this guide!
Let’s Get Started
STEP 1:
In this guide, the fancy version of the letter D will focus on the capital version of the letter. Once you have the hang of it, maybe you could try to adapt a small letter d to the style!
For now, we will focus on the capital letter. It will have a curved, intricate design to it but it will overall be shaped like a regular letter D.
To make it easier to visualize, you can draw out a large, rough letter D in a more regular font and then build the fancier design around it.
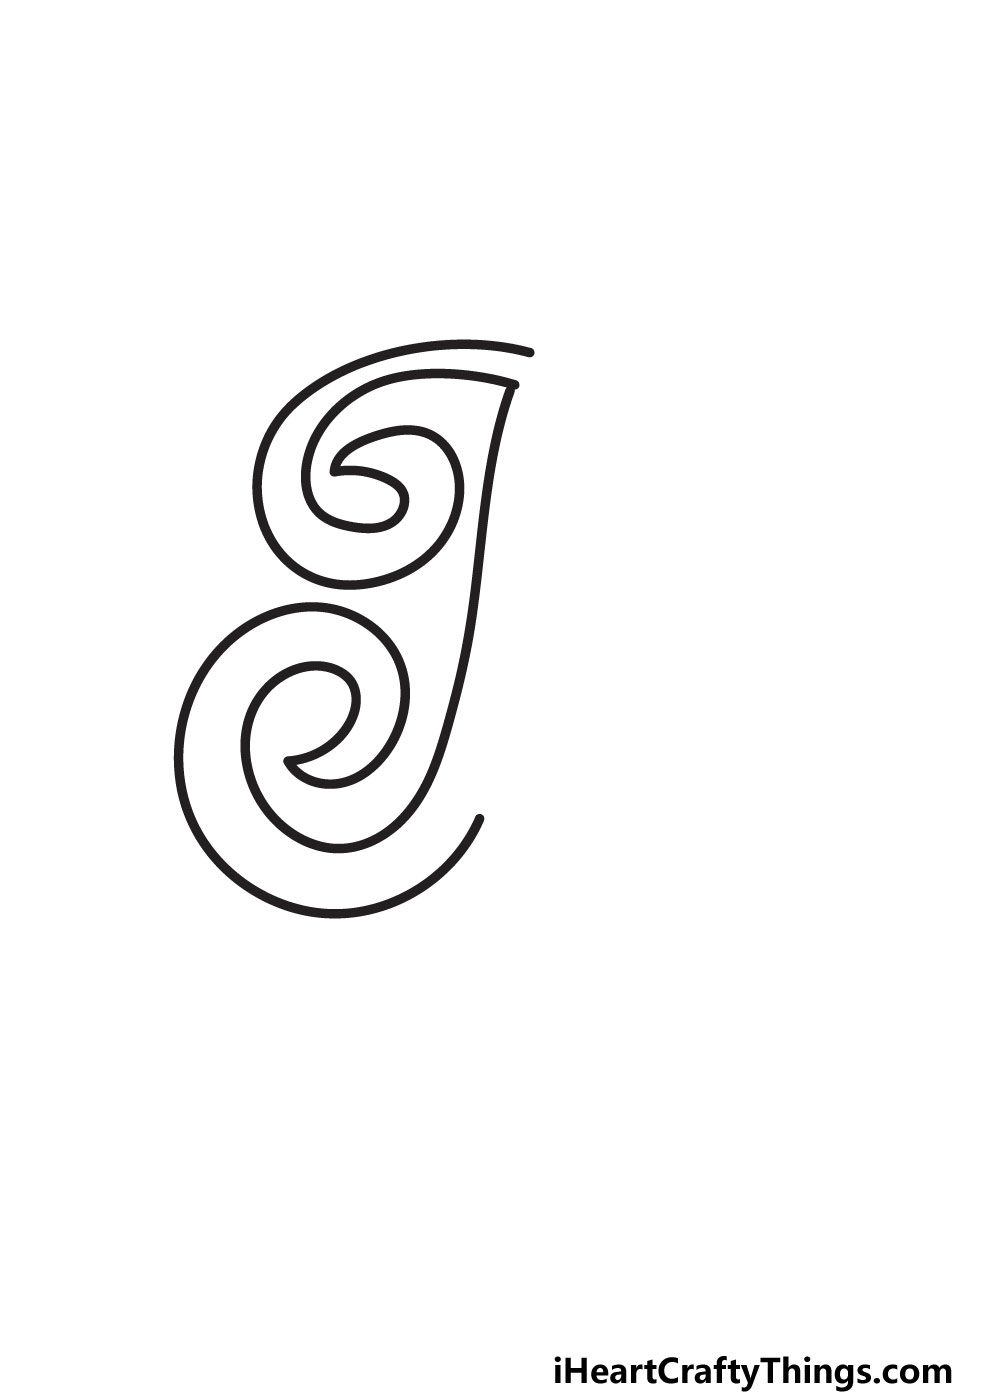
On a regular letter D, there is a straight vertical line on the left-hand side of the letter. But in this design, we will be adding some curling flourishes to this straight edge.
These two curling shapes will flow in opposite directions to one another, and the bottom one will be a bit larger. Try to replicate our example image as closely as you can, and then connect them with a slightly curved line.
Once that’s done, we can move on to the second step of the guide!
STEP 2:

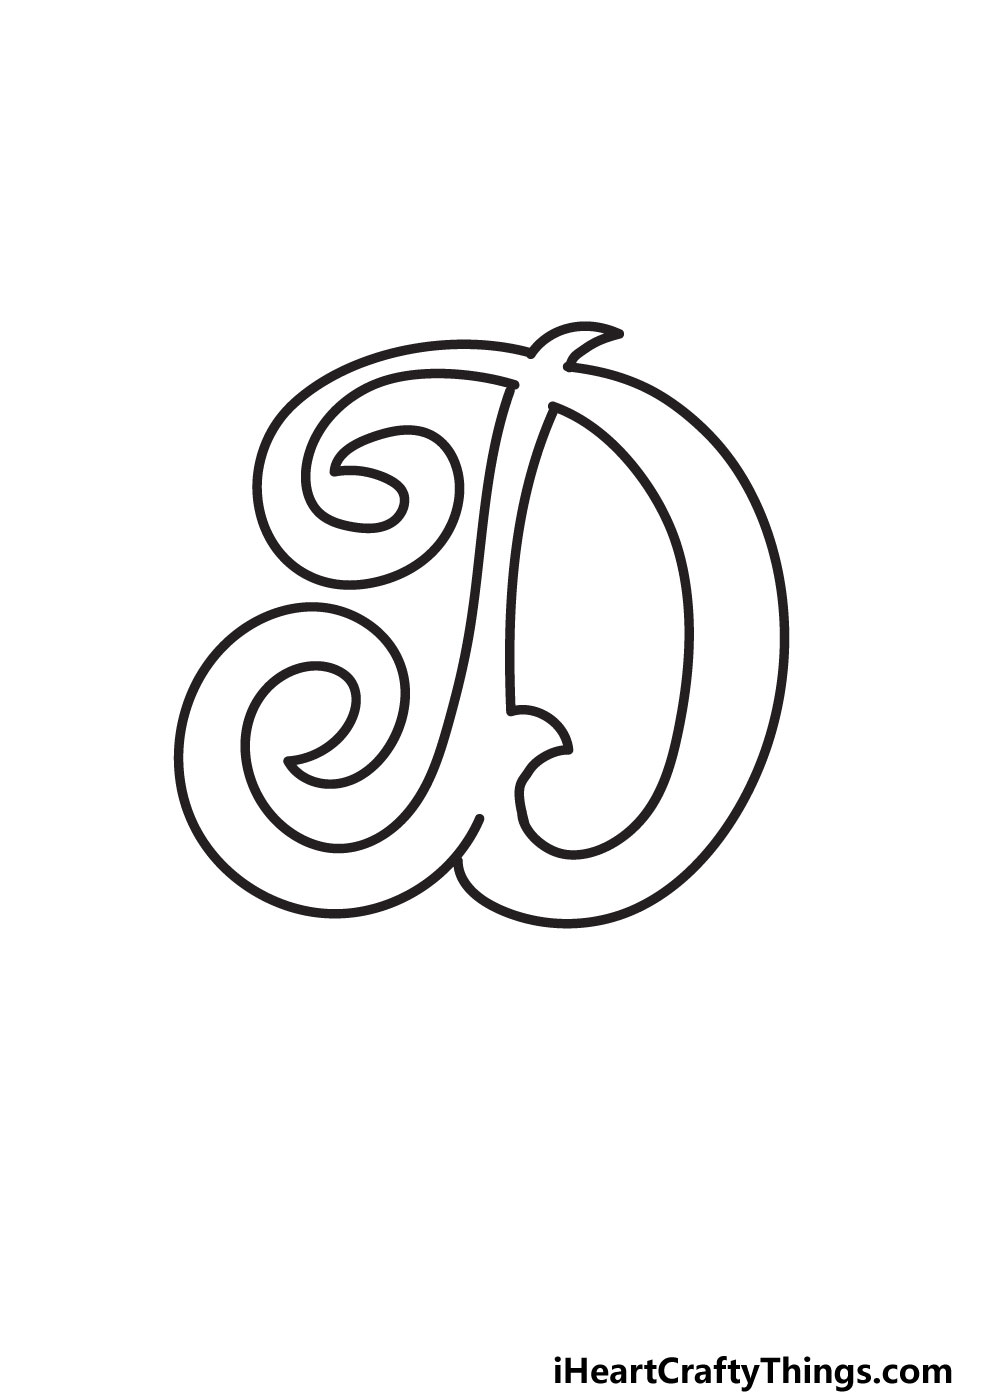
In this second step of the guide, we will be drawing the rest of the outline of this letter. First, you can draw a small pointy section near the top of the letter.
This is purely to make the letter look a bit fancier, so you can change the shape a bit if you prefer. Then, we will draw the right-hand edge of the letter.
As you can see in our example, this edge will be drawn with a simple curved line. While it may be simple, it can be harder than it looks!
Drawing a long, rounded line like this can be quite tricky, as your hand can start wavering if you rush it. Take your time with it and slowly draw a line that is curved and rounded outwards.
The bottom curved flourish we drew in the first step will overlap with this curved line, as shown in our example. That’s all there is to it for this step!
Once it’s done, you can erase the pencil planning lines if you drew them, as they were mainly there to help with the outline. Next, we will draw the inner section.
STEP 3:
There is a hole at the center of a letter D, and that will certainly be the case with your fancy letter D! Much like the rest of the design, this part will have some fancy flair to it.
It will be a rounded, long shape that has a pointy tip at the top. This is another part that may be trickier than you think to draw.
There will be a thorn-like section poking in on the left, which you can replicate from the reference image. This is the design we chose, but you could change it up a bit if you like!
You may prefer a simpler rounded shape for the hole, for example. Or, you may like it to look even fancier with some more of those thorn-shaped protrusions.
It’s up to you to decide, as even though we have created this design we want you to feel free to customize it!
Now that this part is drawn, we can focus on the other interior details in the next steps.
STEP 4:

It’s now time to start decorating this letter. The design of the letter is looking fancy already, but these details will make it look even fancier!
This is another step where you could add some of your own ideas and flourishes if you like. For now, we will stick to our design.
The first thing we will be adding will be some twisting spiraled lines from the tips of some of the shapes on the design.
Our example image shows you where we chose to place these, but you could add more in different places if you like.
Then, we will add a pattern to the interior of the letter. We chose to add some wavy lines to the image which adds a lot of extra details to admire.
You could go with different details if you like or simply change our design a bit. It’s up to you, and when you’re happy with this step we can add some final details in the next step.
STEP 5:
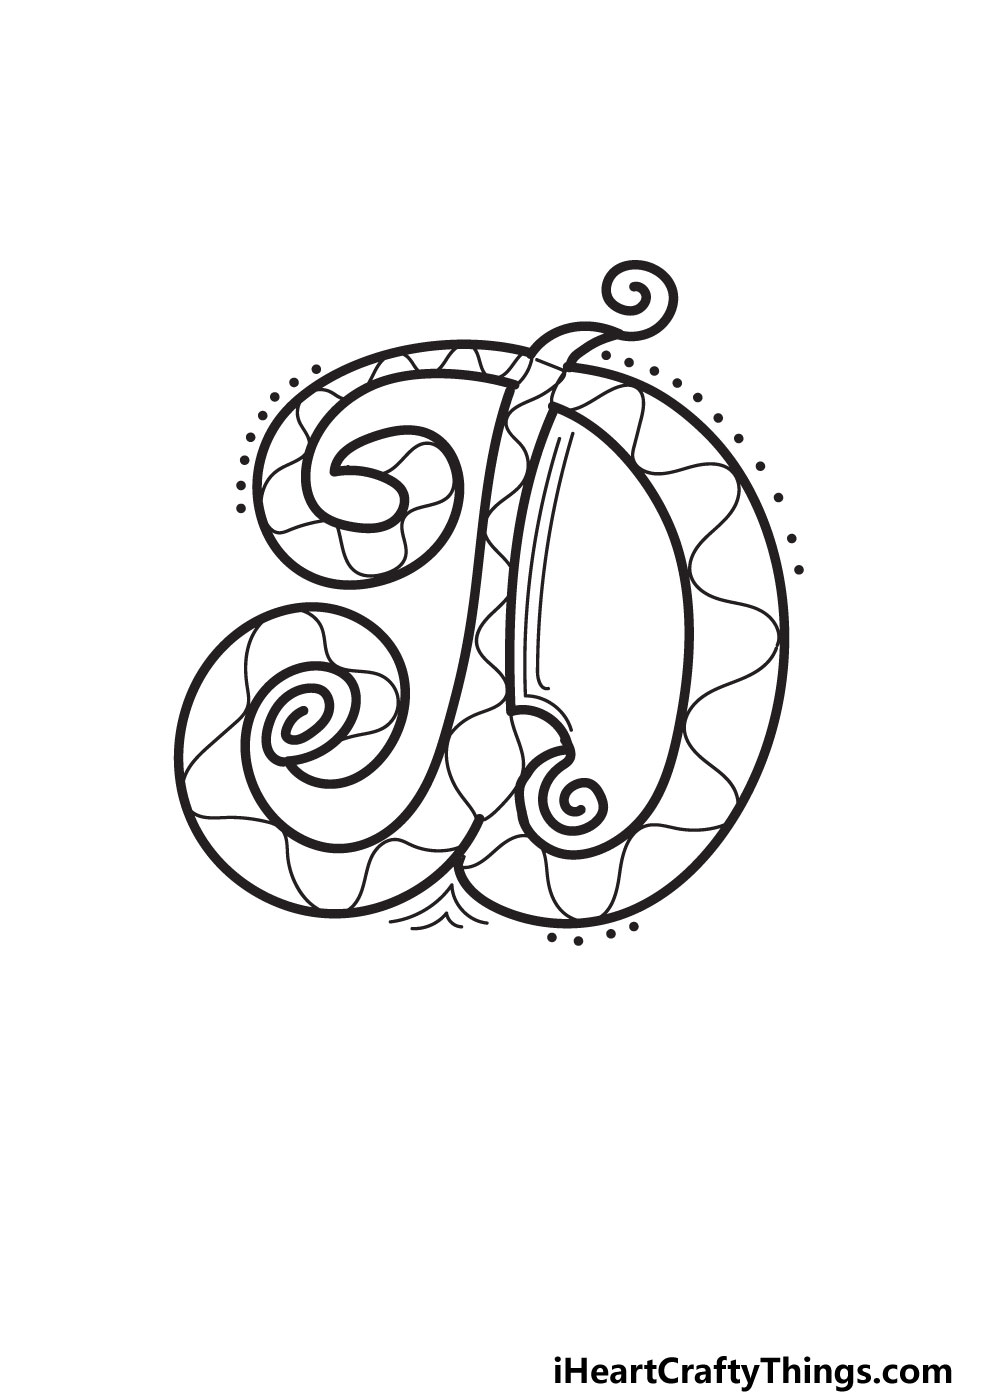
It’s almost time to add some colors to your drawing, but first we have some final details to add! These will finish off the effect of the design and help to make it look even fancier.
We kept it simple, and we started with a series of dots around the outline of the letter. You can see where we placed these, but they could go anywhere you like on the letter.
Finally, we added some thin lines on the interior of the hole on the letter and beneath the base to add some life to the design.
Now that you have drawn some details, you can either move on to some color or add even more details! The details don’t have to be as subtle as ours, however.
You could add a background, other text or shapes to the design to really make it come alive. You can play around with some ideas, but we will also go over a few ideas you can try after the next step.
Be sure to keep reading after you’ve added color in the final step, as there is plenty more fun to be had with this design!
For now, let’s have some coloring fun.
STEP 6:
When it comes to coloring, there are so many ways you can go about it. Not only can you choose any colors you like, but you can also choose how to apply those colors.
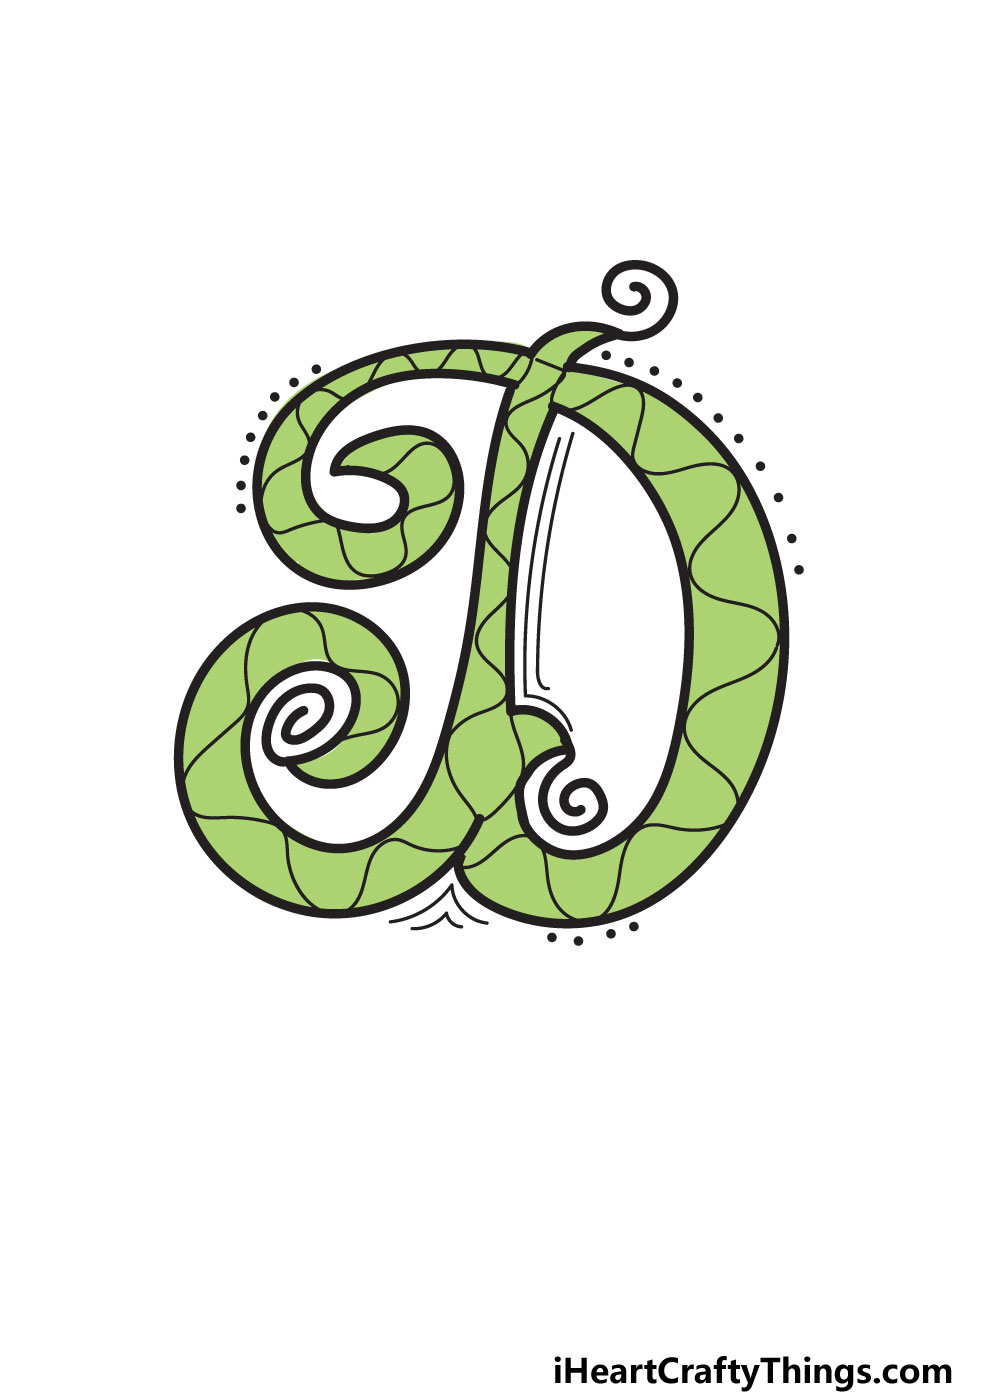
In our reference image, we show you just one of the many ways you could color this fancy letter D! We chose a light green shade for the image, and we think it looks great.
You could use a similar green color for your own one if you like it, but you have a whole spectrum of colors to choose from!
We chose to color the letter with a single color, but you could also fill it with a wider variety of colors. The pattern on the letter allows for lots of different color details, so you can really experiment.
When you know the colors you would like to use, you can then decide on the art tools, mediums and techniques you use.
Will you use some paint, colored pencils, pens, crafts or maybe a combination of all of them? Let your creativity flow and above all, have fun with it!
My Final Tips To Make Your Fancy Letter D Drawing Even Better!
You did an incredible job on this drawing, but there is still a lot that can be done to it. We wanted to give you a few ideas that you can use and build on to make your drawing even more unique.
First, let’s think of some words that start with D. There are simple words like dog, dirt or daisy.
These simple words would work if you want to write them out in this fancy style, but you may want to choose something fancier to write out, like delightful.
Dazzling would be a fun word to write out, and you could add some glitter to make the drawing look dazzling to suit the word!
Drawing out someone’s name in this style would be another fun idea. You probably know at least one person whose name starts with D, and that would be a great place to start.
If not, you could simply choose a name that you like or even make a new one of your own. Choosing a word to write out is a great way to give your drawing a theme!