


When it comes to beautiful insects, butterflies often get the spotlight as the most beautiful of all insects.
While there are many stunning butterflies to behold, there are some other insects that don’t get as much attention that can be just as beautiful.
The nocturnal cousins of the butterfly, moths, can also have some stunningly decorated wings.
The luna moth is one of the best examples of this, as this large moth has a rather striking and beautiful appearance.
For this reason, it is common for insect lovers to want to learn how to draw a luna moth.
If you love this pretty insect as well, then this will be the perfect tutorial for you!
Our step-by-step guide on how to draw a luna moth in just 6 easy steps will show you how it can easily be done!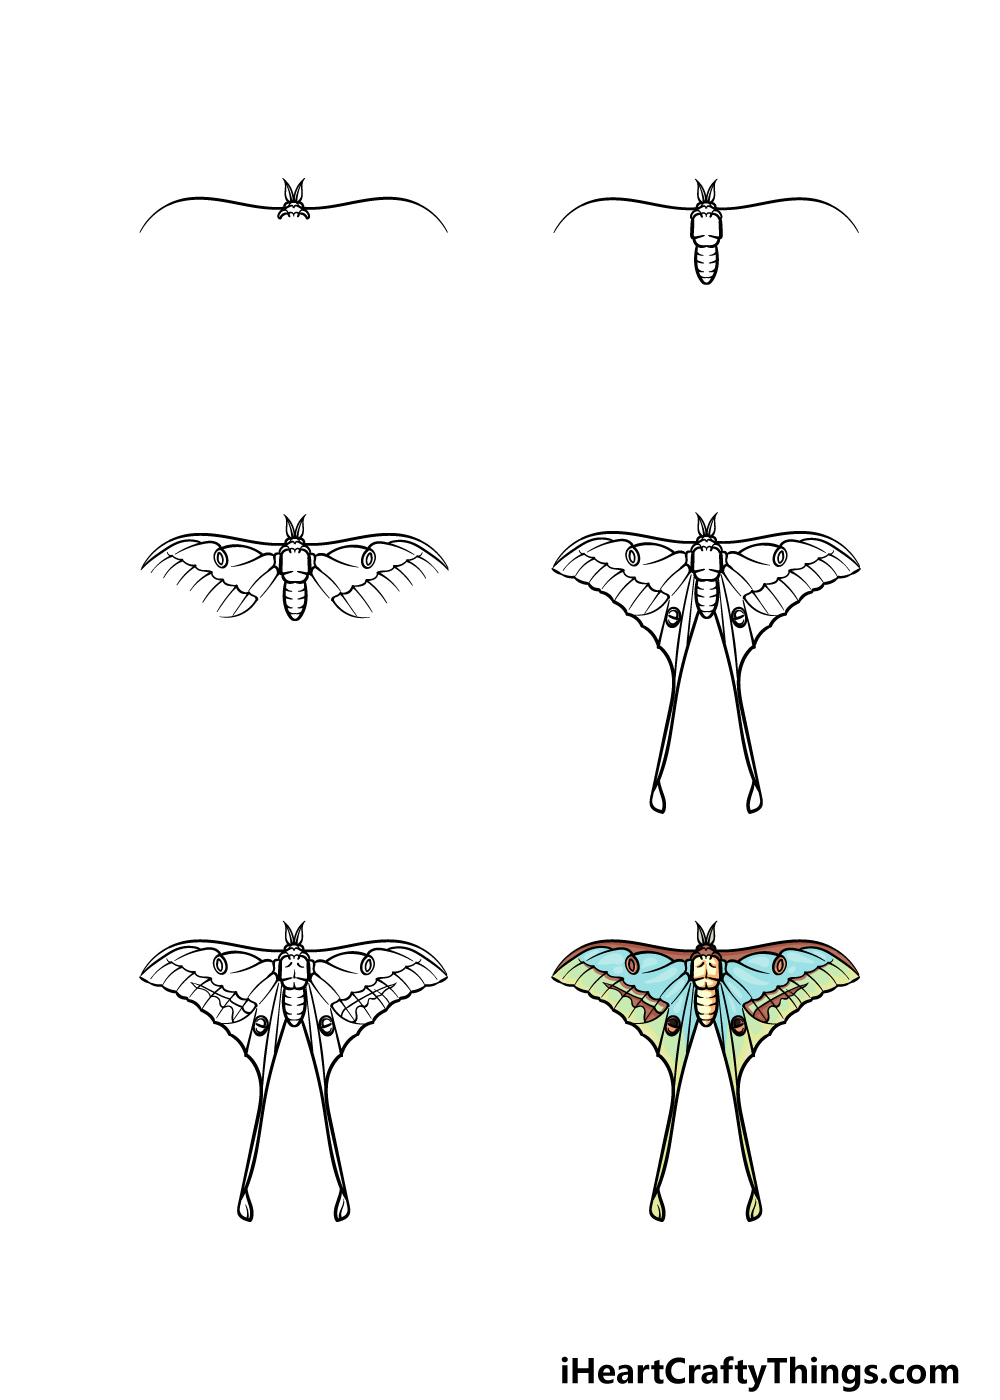
How to Draw A Luna Moth – Let’s Get Started!
Step 1
Like any moth, there is a lot of intricate detail and structure to be found with this particular insect.
For that reason, we have broken the drawing down into smaller steps in this guide on how to draw a luna moth.
This should make it easier to conquer any of those tricky elements and details that you may encounter!
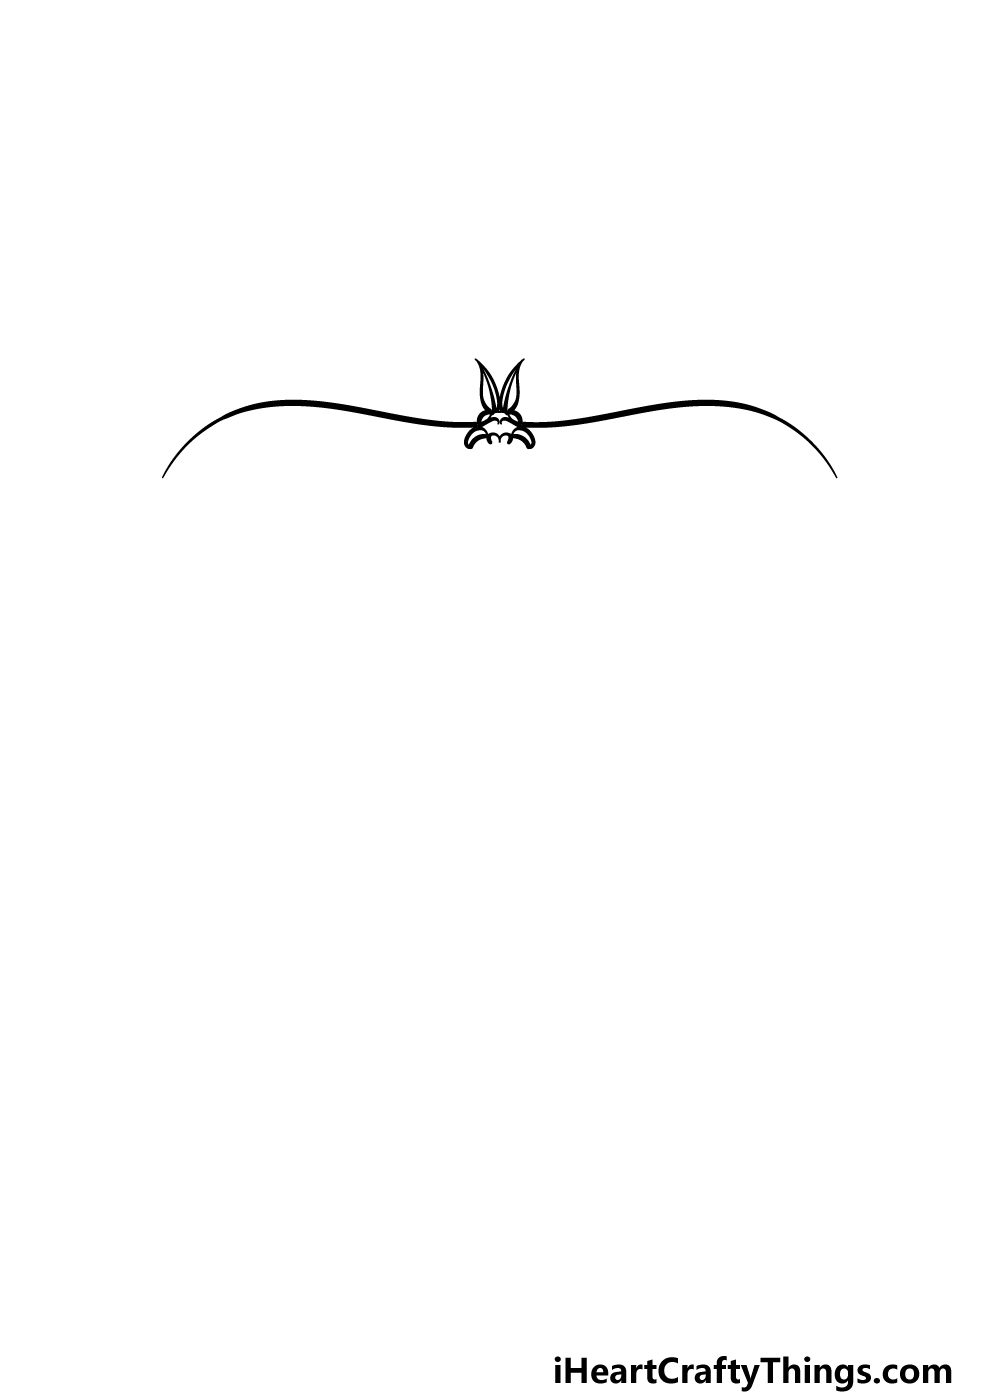
First, we will start with the central portion of this luna moth. To do this, you can use some small curved lines and rounded shapes for the head of the moth.
This will include the feelers of the insect, and these will be drawn as some curved, pointy shapes.
Then, we will be drawing the tops of the wings. To do this, simply extend some slightly curvy lines horizontally out from the base of the head.
With this drawing, we will be aiming for symmetry, so try your best to have them be the same length and angle.
Step 2 – Now, draw the body of the moth
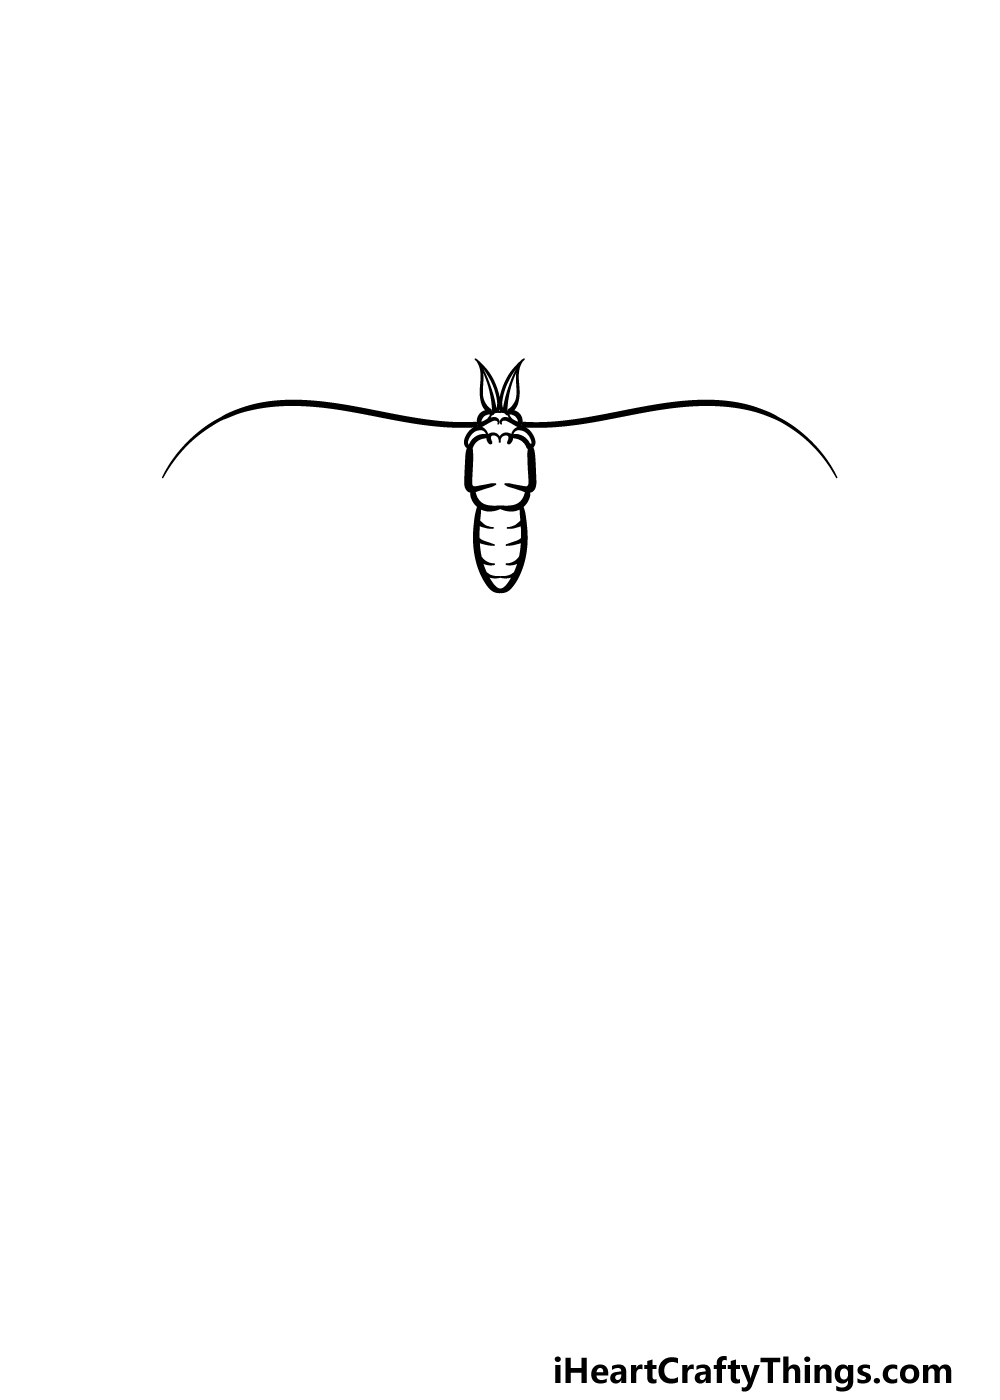
The body of this moth is relatively small, and we shall draw the outline for the body in this step of your luna moth drawing.
First, extend two short, curved lines down from the head. This will form a squared shape beneath that first section, and there will be a gap at the base of it.
This will be followed by some curved lines creating a rounded section beneath it, and then we will draw the abdomen.
This bottom section of the body is made up of a rounded outline that has short lines along it to form sections. Then you’ll be ready for step 3 of the guide!
Step 3 – Draw the start of the wing decoration
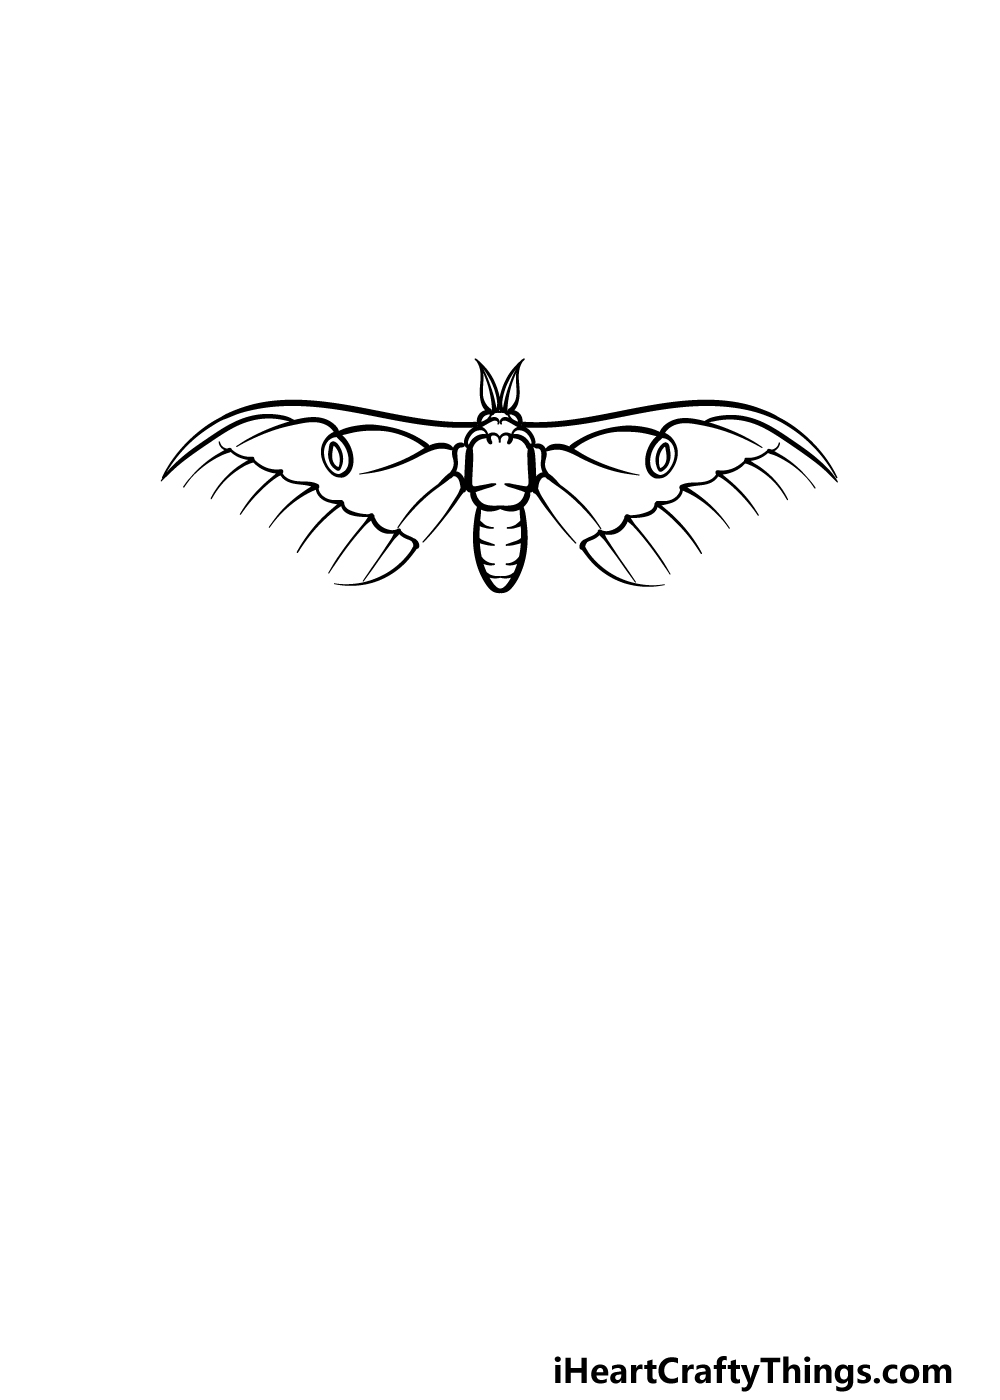
This third step of our guide on how to draw a luna moth is where things can potentially get a bit tricky!
That is because we will start working on the decorative elements of the wings, and this is the most intricate part of the moth.
As long as you follow our reference image closely then you should have no problems with it, however!
First, use some curved lines to create the bottom edge of this top portion of the wings. Then, we will be using some curved lines and round shapes for the pattern on the wings.
This is another step where it would be best to get it looking as symmetrical as you can. If you have any trouble with it, copying our reference image is the best way to make it easier!
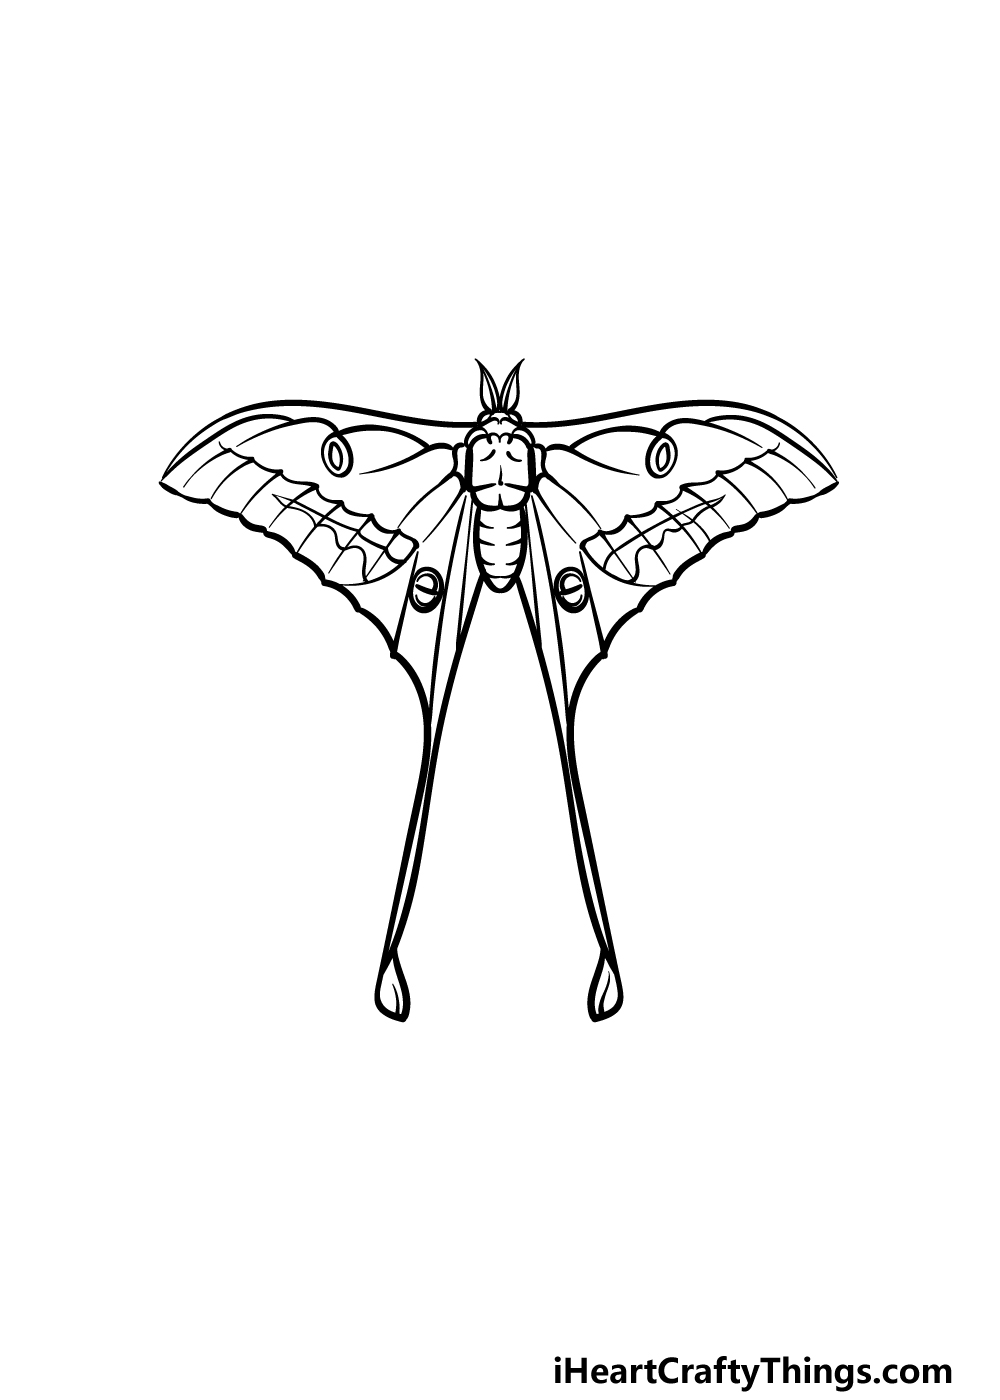
Step 4 – Next, add the rest of the wing outlines
Now we will be finishing the rest of the wing outlines before starting the final details of this luna moth drawing.
First, draw the bottom edges of the wings using some wavy lines. Then, we will be adding the long, thin tail sections of the wings that will trail behind the moth.
Once the outlines are complete, you can also add some more fine detail. When you have finished these details, we will then be ready for the final details and elements in the next step of the guide!
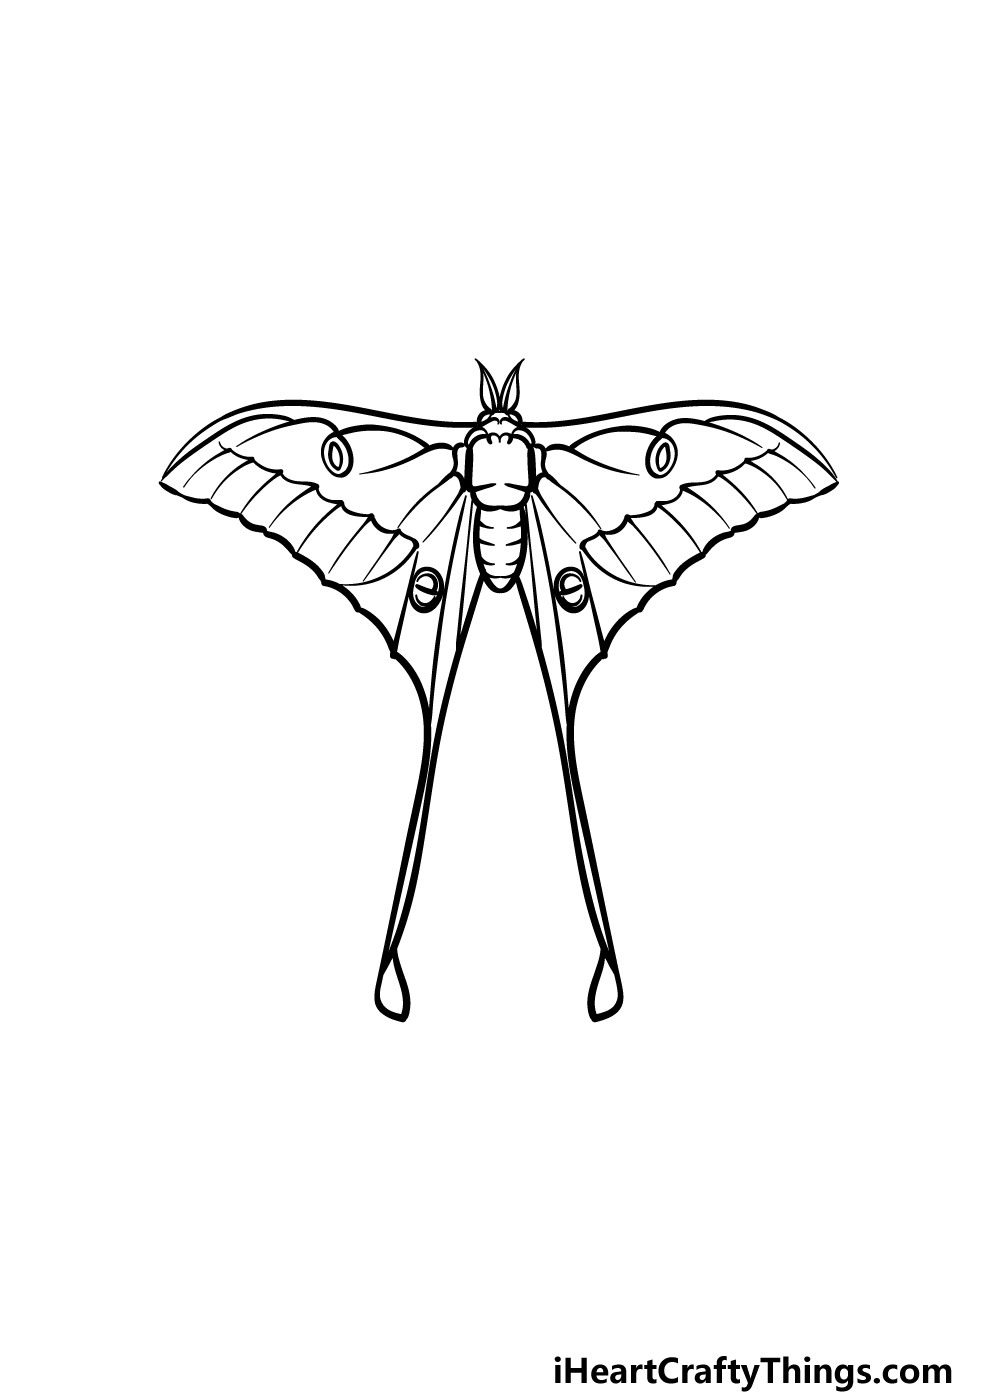
Step 5 – Add the final details to your luna moth drawing
We have just a few more small details to add before we get to the final step of this guide on how to draw a luna moth!
These details will be mostly contained to the patterns on the wings, and you can finish this off with some simple shapes and curved lines throughout the wings.
When these details are complete, you could also add any details of your own! These could include a background or maybe even some more insects. How will you finish off this pretty picture?
Step 6 – Finish off your luna moth drawing with color
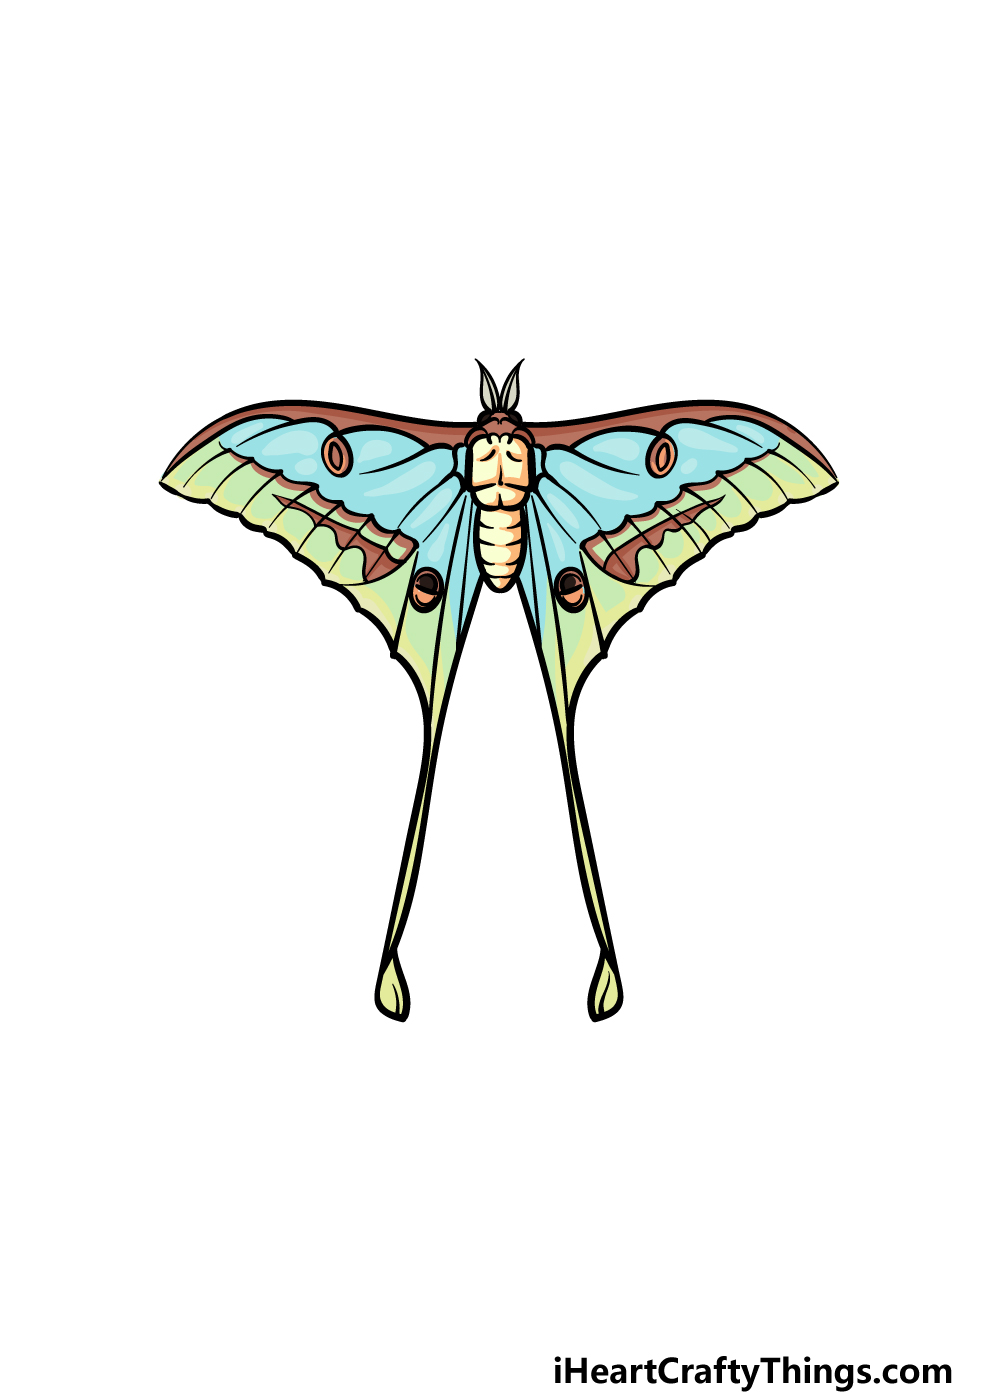
This is the final step of this luna moth drawing, and in it we shall finish off with some colors.
This particular moth is well known for its beautiful soft coloring, and this is what we went with in our example image.
This moth is most famous for its lime green coloring, and while we used this color we also included some light blues for some variety.
Will you go for these classic colors or maybe change it up to create your own unique moth? We also think that paints would be perfect for this image, but any mediums you choose will look amazing!
3 More tips to make your luna moth drawing easy!
Take flight for some drawing fun as we make this luna moth sketch even easier!
This drawing of a luna moth is really realistic and detailed. Having it be so detailed looks really good, but it can make this drawing quite a bit more challenging to complete.
If you find yourself having a tough time, you could start by simplifying some of the details. By doing this, you could potentially attempt several versions of the drawing.
These attempts could incorporate more layers of details each time until you have something closer to the original design. You may even simply prefer a less detailed version of this luna moth!
What are some details you could simplify or remove?
Following this guide is a great way to make this luna moth drawing much easier, but there can still be some frustrating moments.
This will be especially true if you start drawing with your pen, as there is increased pressure to get it right immediately. That’s why we would highly recommend starting with a pencil.
With your pencil, you could draw a basic shape outline for this luna moth, and then work on the finer details. If you make a mistake or aren’t happy with it then you merely need to erase and try again.
Then, when you’re happy with the drawing, you can go over with a pen or a darker pencil to finish off before erasing your planning lines.
Another way that you could make this luna moth sketch easier would be by using photos of the real thing. If you search luna moth online, you will probably find many pictures that are similar to our reference image.
Using these photos along with our example should help to make the details easier to see and replicate. Even if the photos aren’t exactly the same as our example, you may find that it helps to make it easier.
You could also use these photos to make the colors even more realistic and true to life.
Your Luna Moth Drawing is Complete!
Drawing insects as intricately patterned as this is not always an easy task, but we hope that this guide on how to draw a luna moth made it easy and fun for you to take on!
When tackling a tricky drawing like this, you can make it so much easier on yourself when you break it down into smaller steps, and that is what we aimed to do for you.
Now you get to take over with your own fun elements and additions! There is so much you can do to put your own spin on this image, and we can’t wait to see what you choose to go for.
There is also plenty more fun to be had when you visit our website! We have tons of awesome guides waiting for you, and we will be uploading new ones soon.
When you’re ready to show off your finished luna moth drawing, you can share it on our Facebook and Pinterest pages so we can see how it came out!