During the year, there’s no time quite as magical as Christmas.
There are many signs around when it’s this festive time of year, such as Christmas trees in the house and decorations in yards. Another signifier of this time is the elf on a shelf tradition.
It can be great fun creating some festive artwork to get into that Christmas mood, and it could be fun to learn how to draw an elf on a shelf!
Luckily, this guide will show you exactly how it’s done!
We hope that you have a lot of fun working with us on this step-by-step guide on how to draw an elf on a shelf.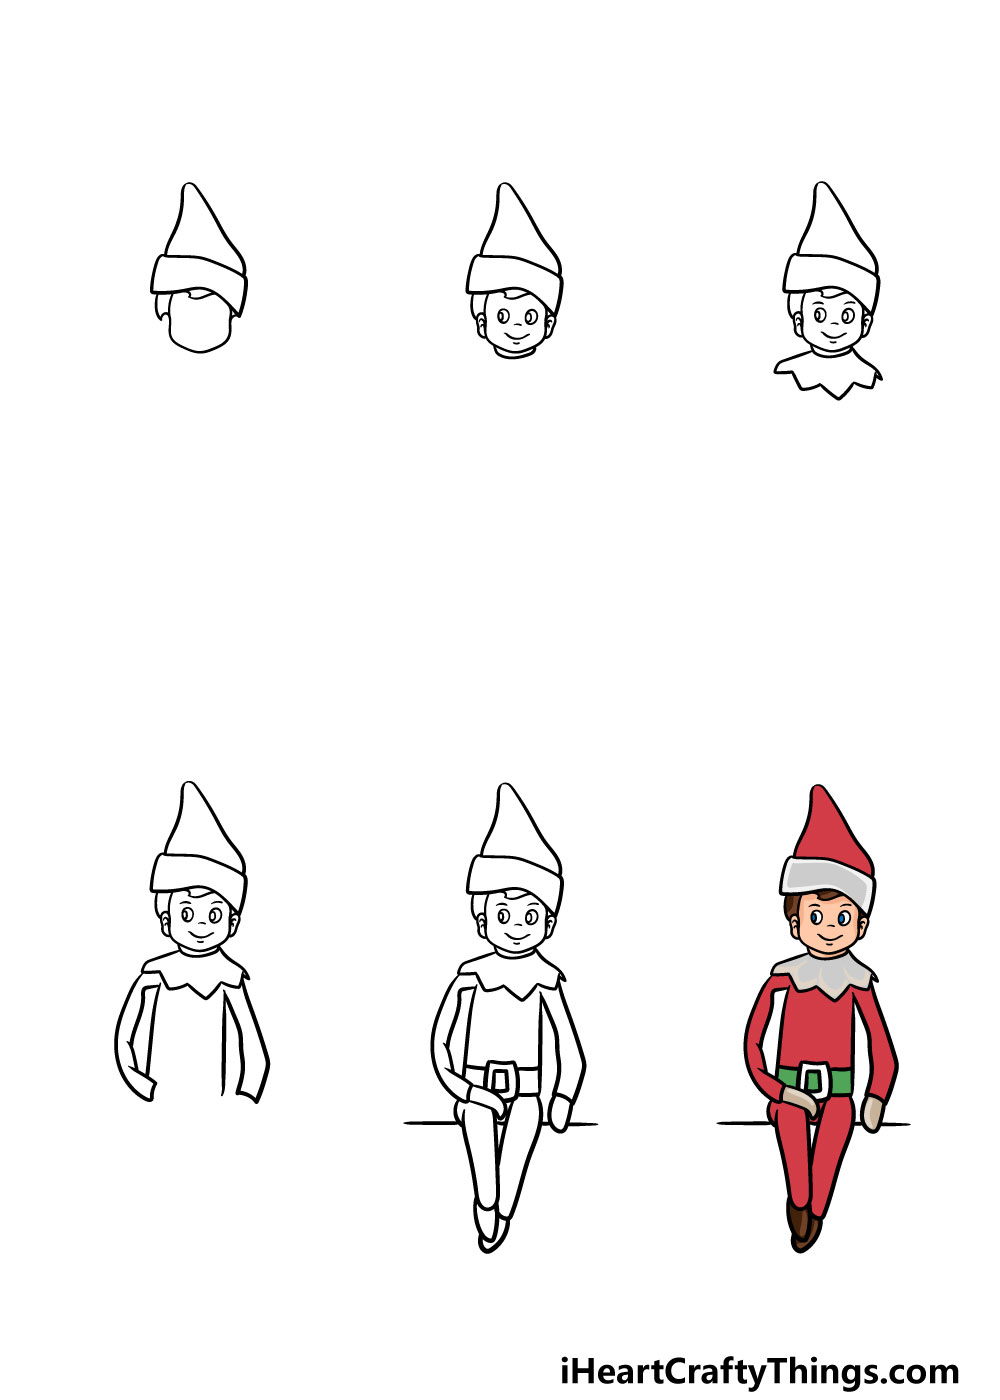
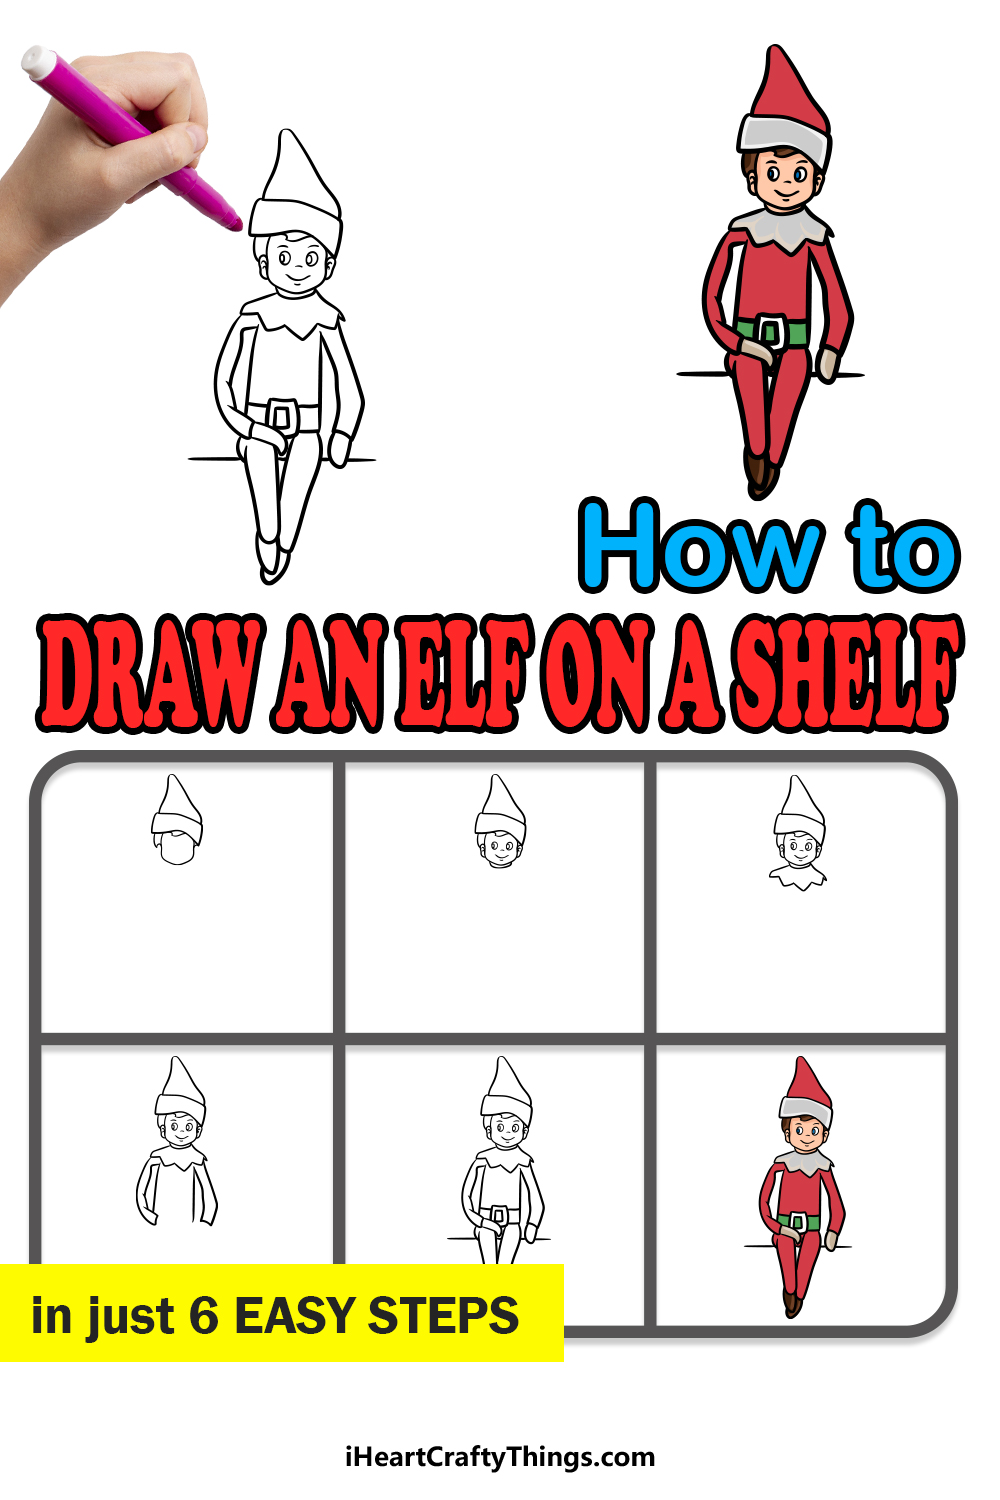
How to Draw An Elf On A Shelf – Let’s get Started!
Step 1
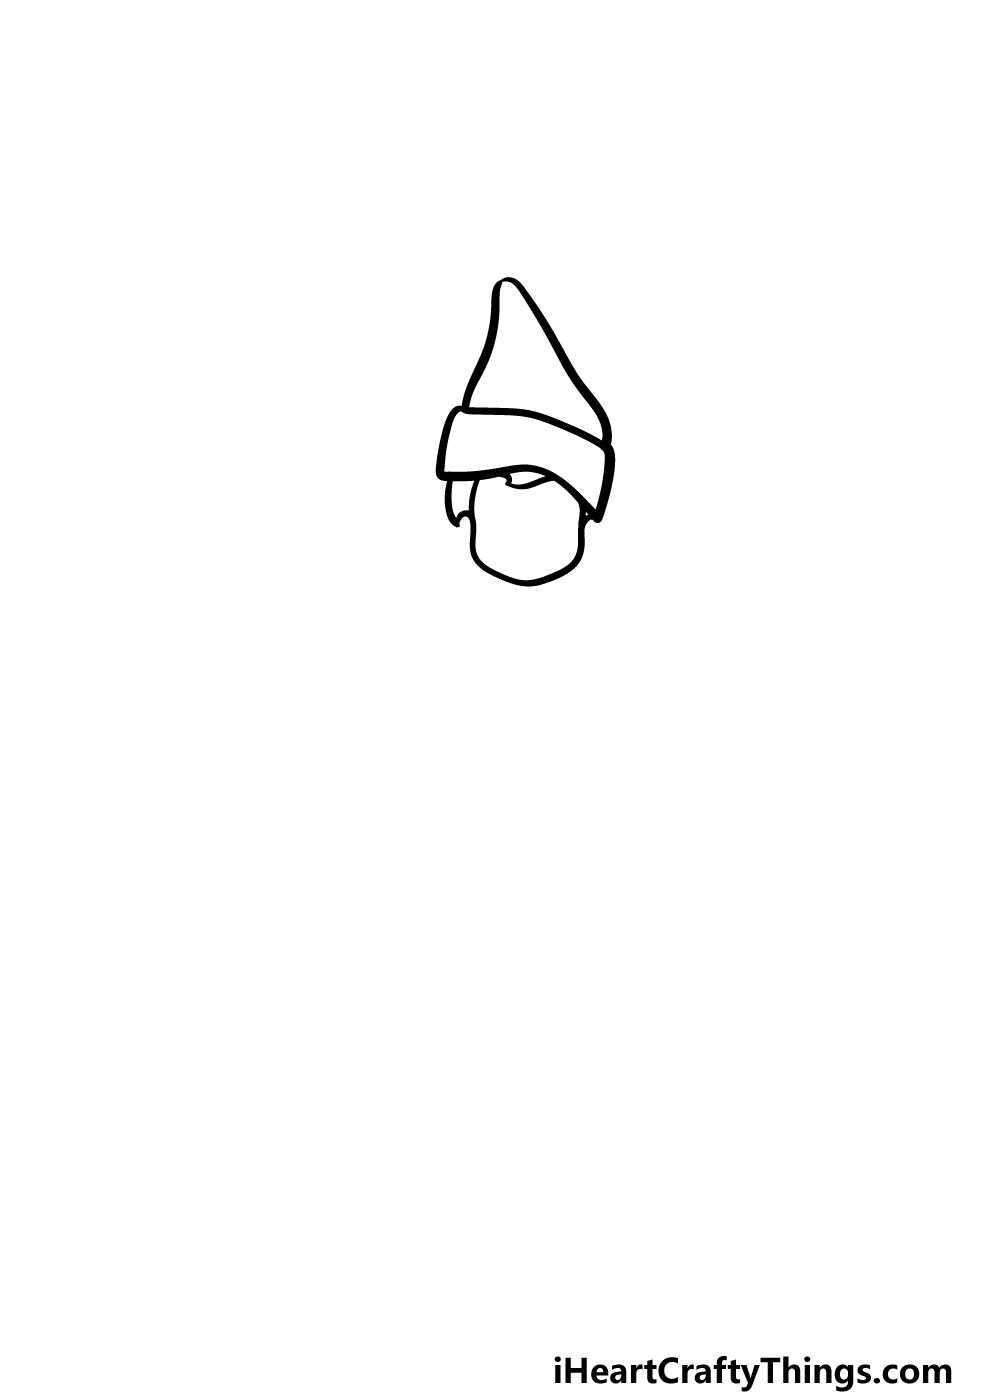
For this first step of our guide on how to draw an elf on a shelf we will be taking it from the top! This is meant literally, as we will be working on the head and hat of the elf.
The hat will be drawn with a curved line that makes it droop over to the side a little bit. Then, it will have a droopy rectangle as the base of it to show the rim of the hat.
Then, once you have finished the hat you can draw the outline of the face while drawing some hair on the sides.
That’s all there is to it for this step and you’re ready to proceed!
Step 2 – Draw some facial details for the elf
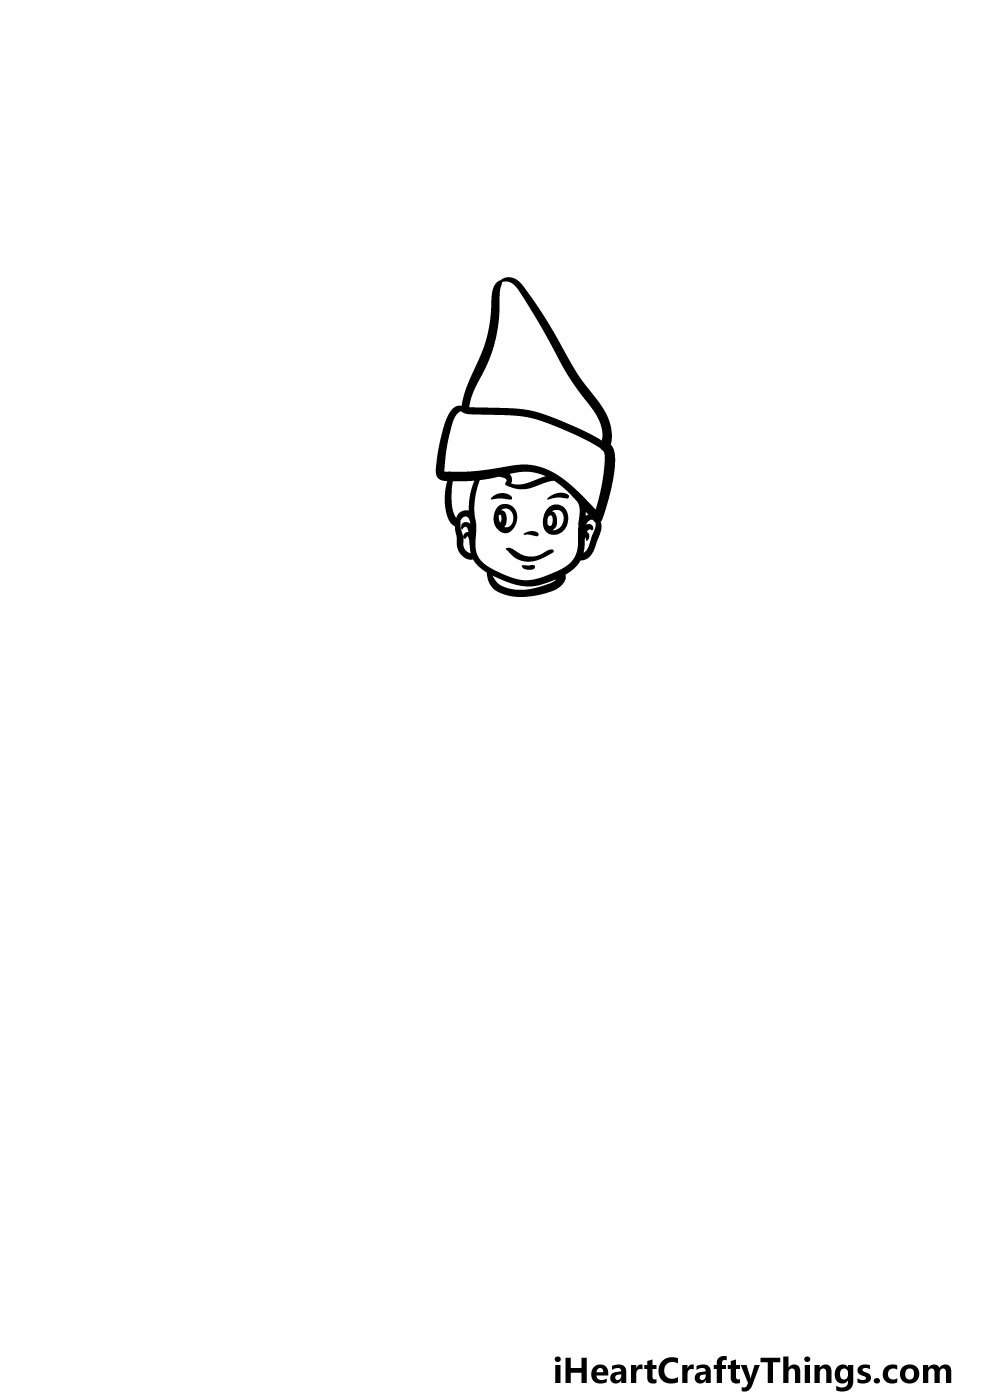
This part of your elf on a shelf drawing will see you adding some facial details onto your elf’s face!
You can use some simple circles for the eyes, and then add some smaller circles within them for the pupils of the eyes. Then, you can use some fairly simple lines for the nose and smiling mouth of the elf.
Finally, you can finish off this step by adding some ears onto the sides of the head.
Step 3 – Now, draw the elf’s spiky collar
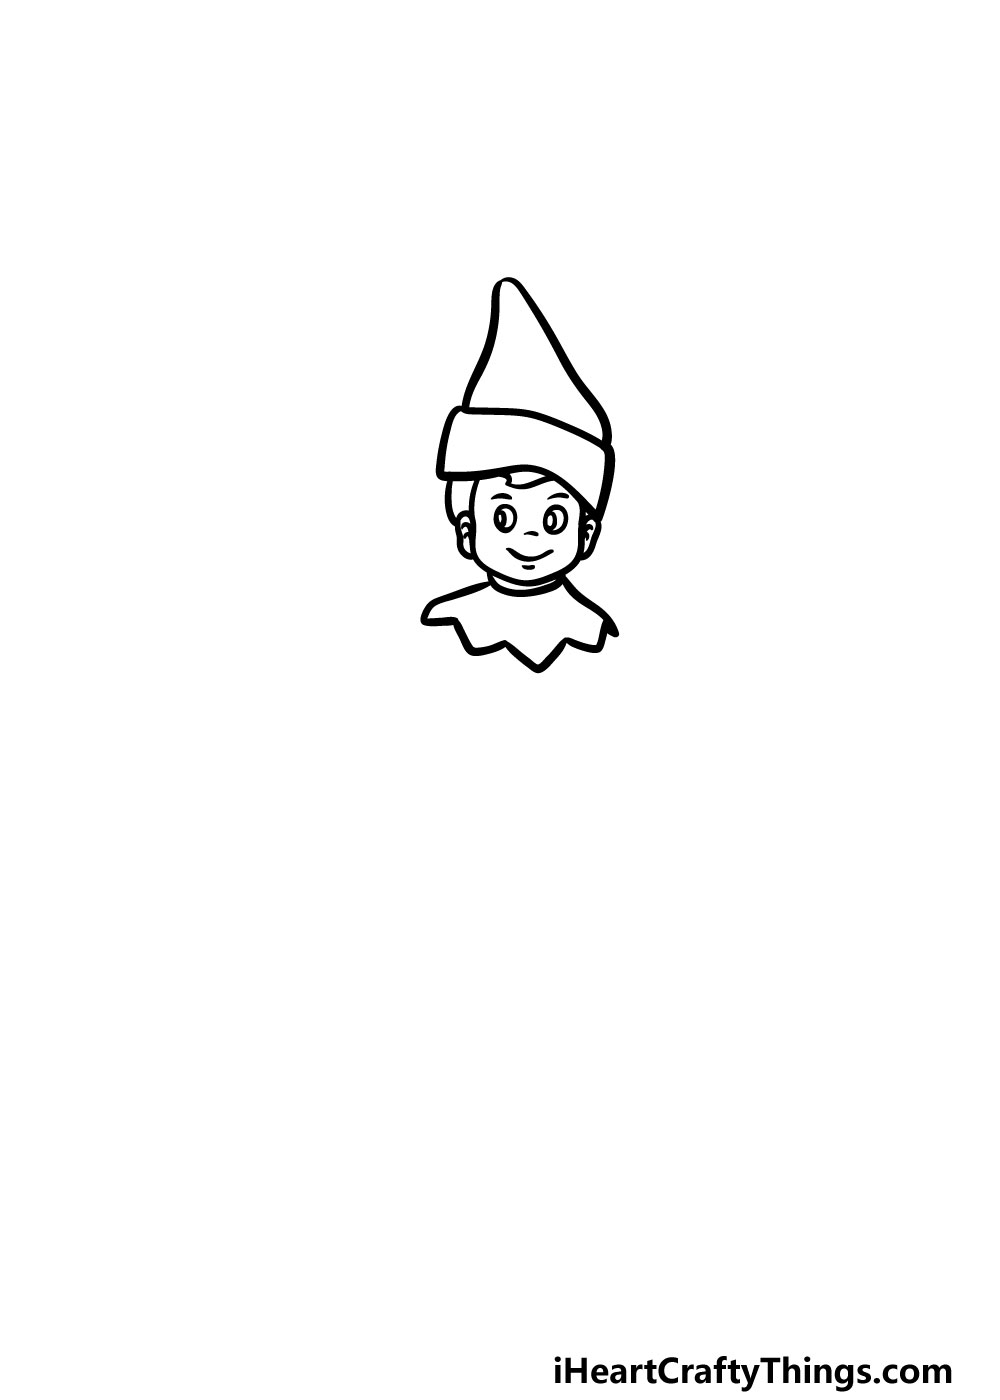
We will be leaving the head for a bit now, and you can start to draw the clothing in this step of our guide on how to draw an elf on a shelf.
For now, we will be drawing the big collar of the elf’s shirt. The collar will have some spiky edges at the bottom, so you can use some jagged lines to create these spikes.
That’s all we will be doing for this step, so next we will move on to more of the elf’s clothing.
Step 4 – Next, draw the arms of your elf

An elf on a shelf is known for its floppy limbs, and we shall be adding some floppy arms to your elf on a shelf drawing in this next step.
To do that, you can use some jagged curved lines coming down from the shoulders of the elf. As we mentioned, these arms will be quite thin and gangly, so try to keep that in mind as you draw.
The arm on the right will be resting on the surface that the elf is sitting on, whereas the one on our left will be resting on the elf’s lap.
That is how we drew the arms, but you could change up the positioning a bit if you so choose as well!
Step 5 – Now, you can finish off the legs of the elf
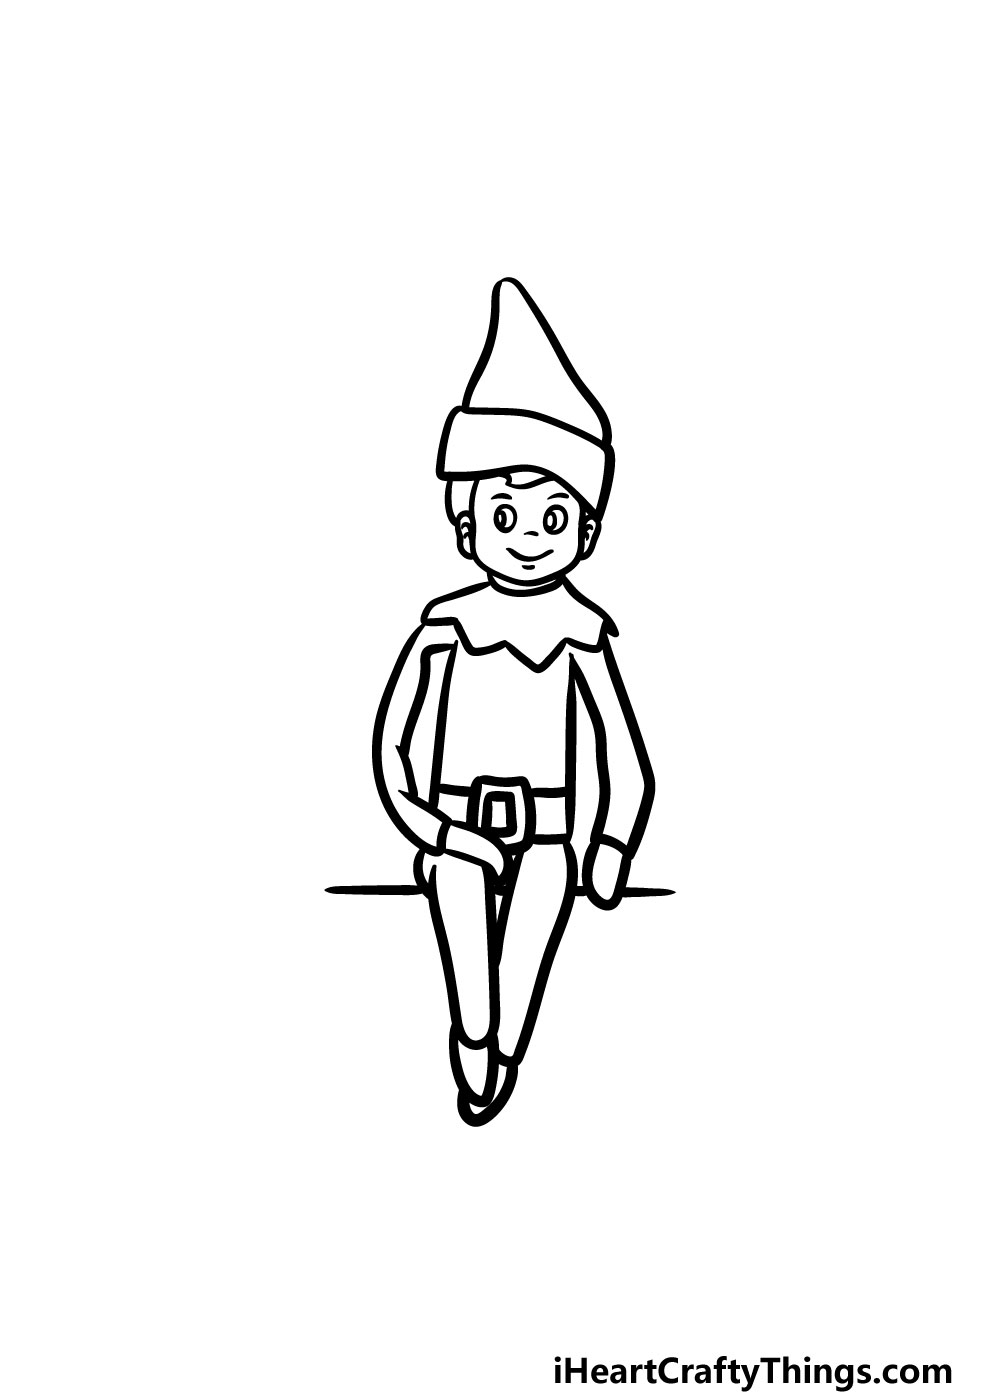
It’s almost time to bring some beautiful festive colors to your drawing, but before you do that there are some final details to add in this guide on how to draw an elf on a shelf.
The main elements that we will be adding will be the legs of the elf, but before you add those you can use some small circular shapes for the hands.
You can then use two squares for the belt buckle and extend two lines from the buckle for the strap of the belt.
Then, you can use some more lines down from the lap to make the floppy legs of the elf. You can finish off his shoes by using some rounded triangles at the end of the legs.
Without a shelf, this elf is just an elf, so you can draw that shelf by using some straight lines beneath him!
That will do it for the details in this guide, but before you move on to the final step you can also add any details of your own! Maybe you could draw some of your favorite Christmas decorations sitting beside the elf.
Step 6 – Finish off your elf on a shelf drawing with some color
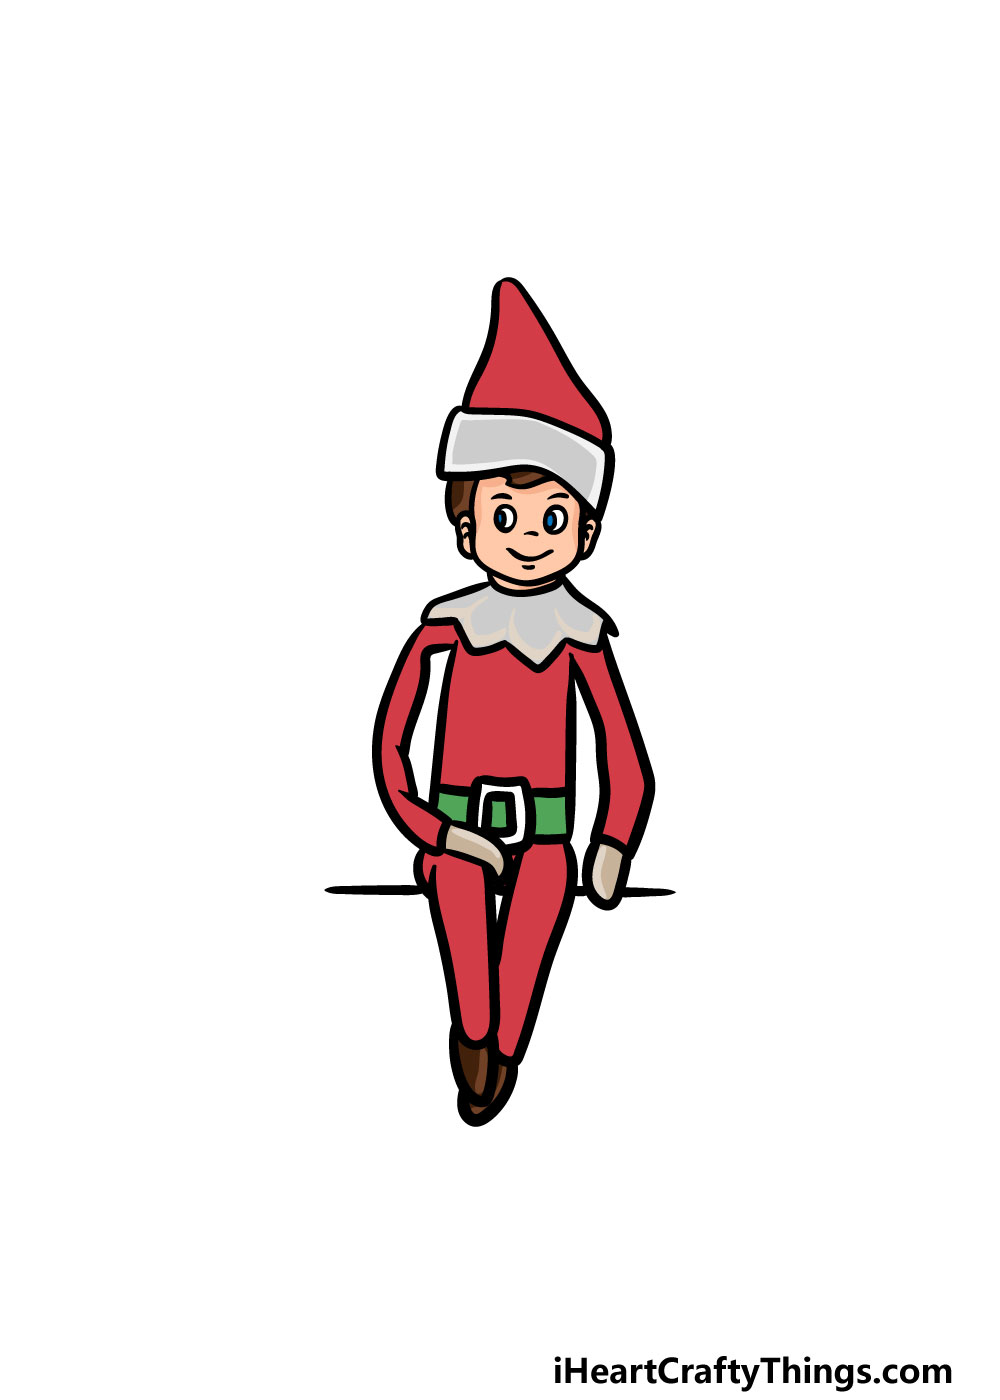
This final stage of your elf on a shelf drawing is all about adding some amazing color to it. Christmas time is associated with colors like red, green and silver, and these are the colors that we used in our image.
This is just one way to go about it, however, and you can use any colors that you love for this picture!
You could also give this picture some extra Christmas magic by incorporating some crafts and other fun art tools.
If you have some glitter or glitter glue then that would give your drawing some Christmas sparkle!
5 Tips To Make Your Elf On A Shelf Drawing Even Better!
Get into the festive spirit with these tips for your elf on a shelf sketch!
The drawing of an elf on a shelf that we created in this guide is dressed in a classic red and green color scheme. It looks great, but don’t feel shy about using different colors!
Different people have their own favorite Christmas color schemes, and you could show what yours would be in this drawing.
Whether it’s other classics like silver and gold or something less conventional, it will look great!
Once you have chosen the colors you want for this elf on a shelf, you could then customize or change some of his clothing. This could be as simple as a new hat or a brand new outfit.
Even adding a pattern to the existing outfit would look really cool!
If you think this elf on a shelf drawing looks a bit lonely, you could add a second one beside him! If you follow through the guide, you can create a second one and change any details you like.
This would also be a great way to incorporate other ideas you had for the elf and his clothing that you couldn’t use for the main one.
Another way you could add to this drawing would be to draw some different Christmas decorations beside the elf on a shelf. Some classics would include some Santa or some reindeer figurines.
There could also be some baubles, tinsel or even some mistletoe. This is a great chance for you to show off what your ideal Christmas decoration setup would look like!
The best part of an elf on a shelf is seeing where it turns up each morning. You could show this aspect by adding a background to your elf on a shelf sketch.
An elf on a shelf can show up in all sorts of crazy places, so this is your chance to have some fun with it and show where this one could be hidden. What would be a fun place to use?
Your Elf On A Shelf Drawing is Complete!
We really hope that you had lots of fun working with us on this guide on how to draw an elf on a shelf!
This guide was created to show you that taking on this drawing challenge can be not only easier than expected but also lots of fun!
Now that you have finished this guide, you can continue with it and add your own elements and details.
We would love to see what Christmas decorations you would have beside this elf on a shelf. Be sure to let your creativity flow and see what amazing results you come up with!
Once you’re ready for more, we hope to see you on our Facebook and Pinterest pages as we have many more drawing guides for you to enjoy!
We upload new guides frequently so you’ll want to visit often to make sure that you never miss out.
Once your elf on a shelf drawing is complete, we would love to see your artwork! You can let us take a look at it by sharing it on our Facebook and Pinterest pages.