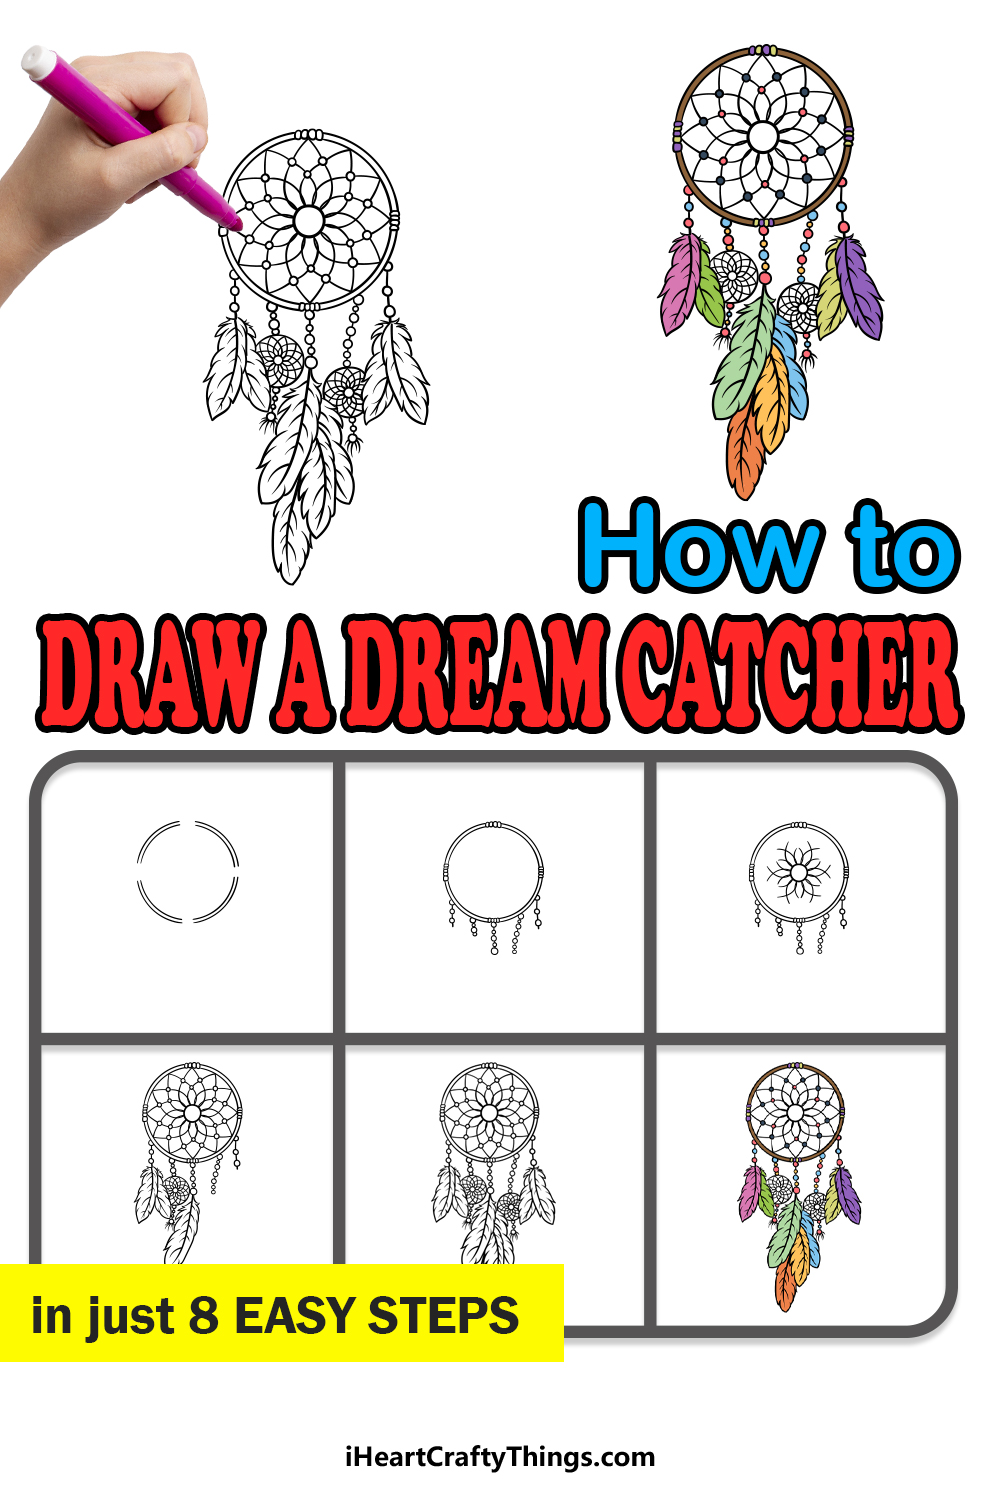
This guide on how to draw a dream catcher is everything you could dream of! By following this tutorial for kids, anyone can learn to draw one of these beautiful artifacts.
The origins of the dream catcher come from traditional objects made by Native American tribes. They would construct these intricate, spiderweb-like objects and hang them over the beds of children and infants.
It was believed that, much like a web, they would capture bad dreams that tried to reach the child. These beautiful designs are popular even today and are an iconic aspect of Native American culture.
If you’ve ever wanted to design your very own dream catcher, this guide will show you how it’s done. You will see how to plan out the shape, details and other aspects of the object.
Once you have the hang of it, you could even add your own elements and ideas!
Watch How To Make Your Dream Catcher Drawing
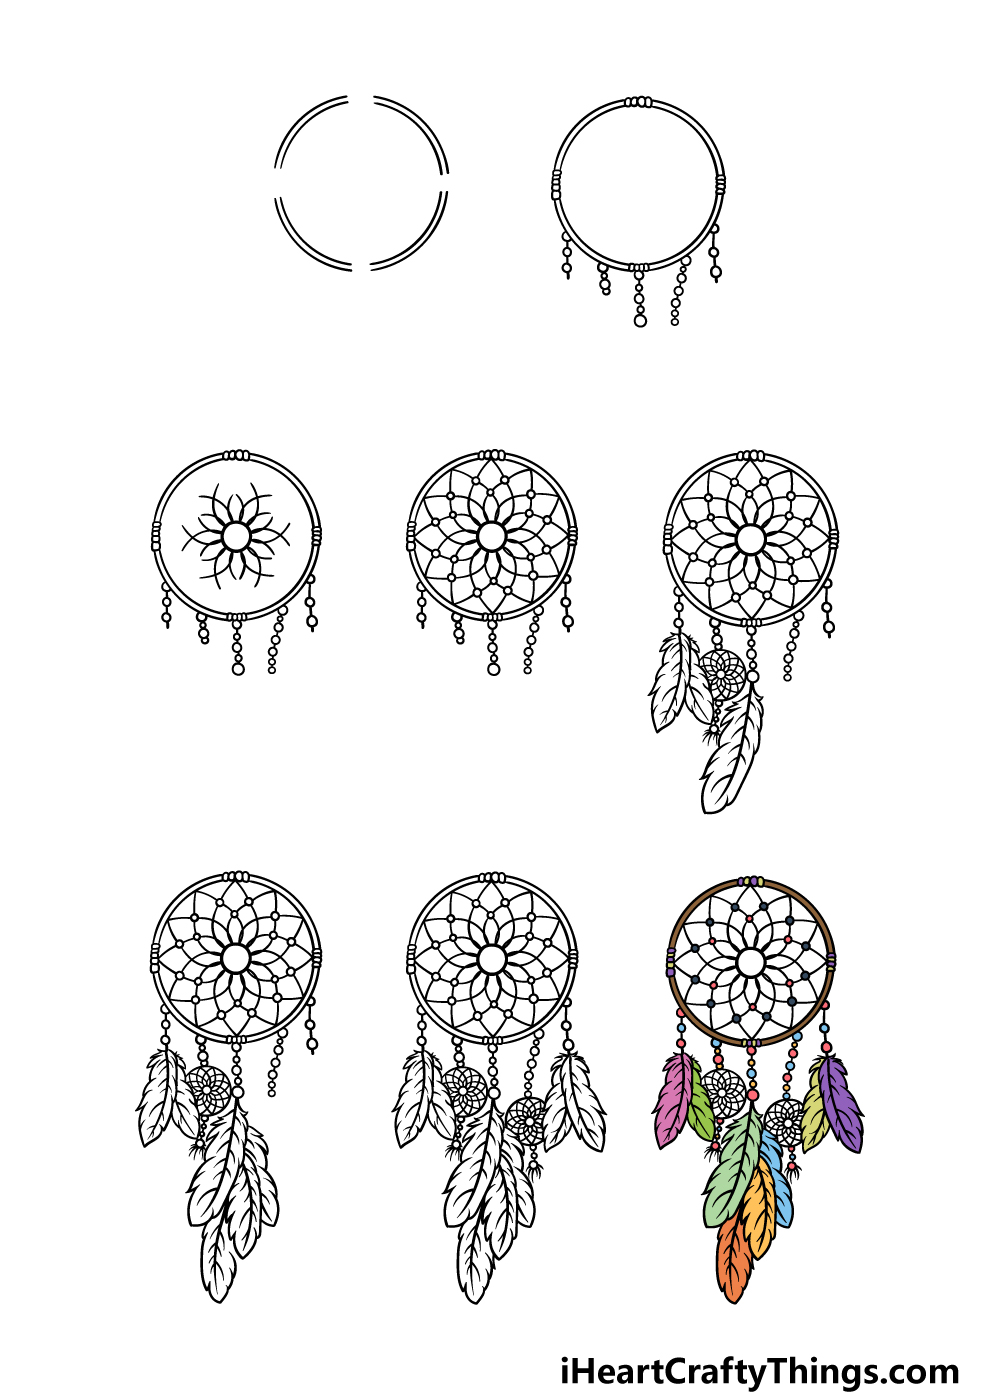
How to Draw A Dream Catcher – Let’s get Started!
Step 1
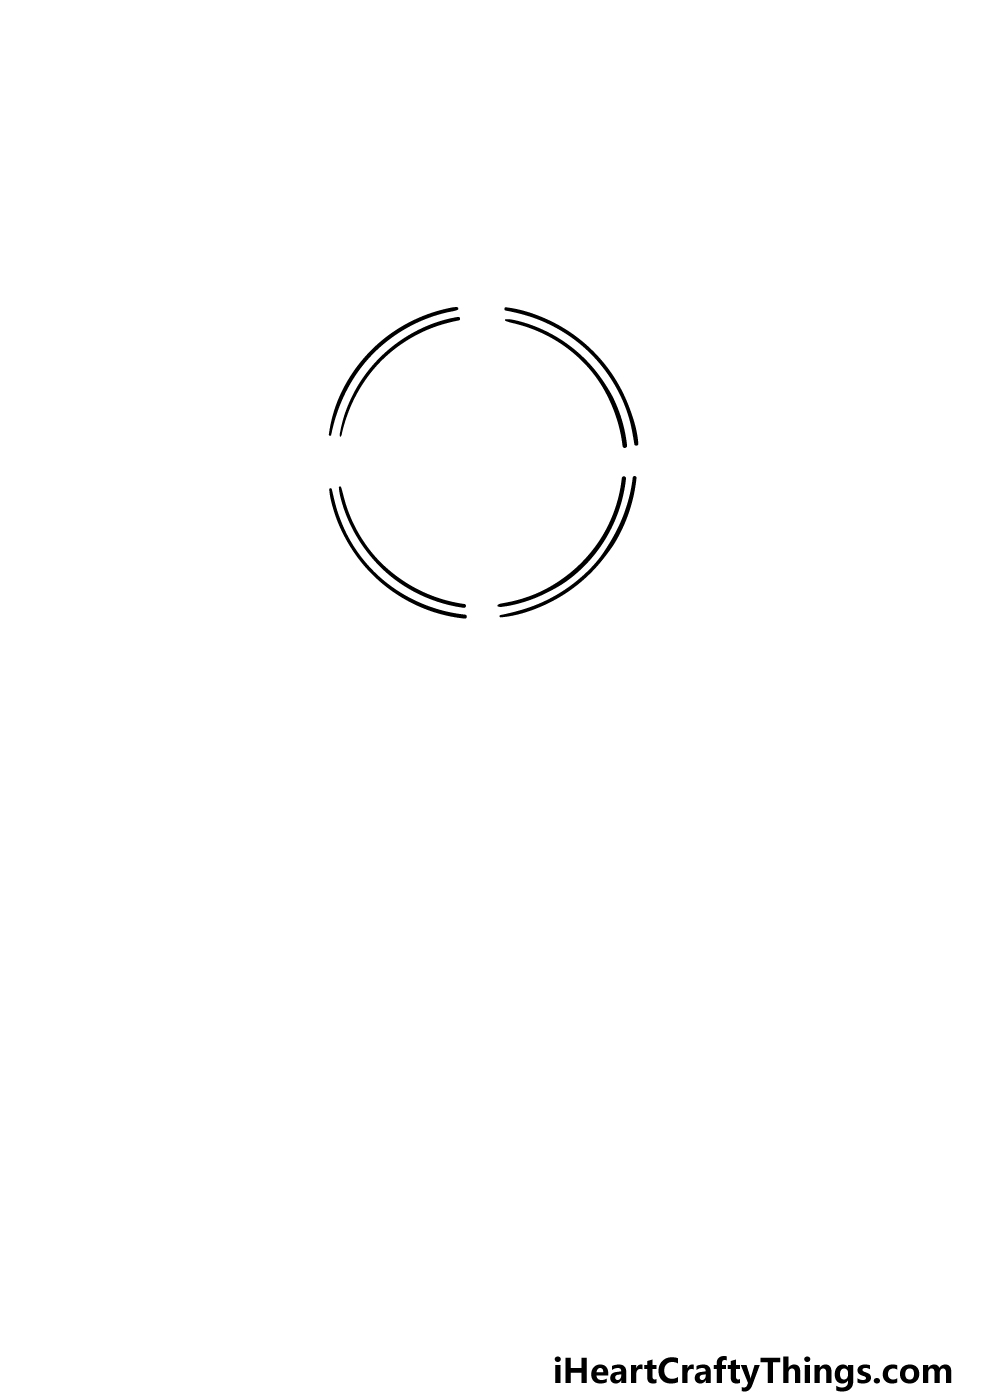
We will be starting with the outline frame in this first step of our guide on how to draw a dream catcher.
To do this, we will essentially be drawing two circles, but there will be some aspects we will alter. To make this easier on yourself, the best thing to do would be to use a drawing compass along with a pencil.
Even if you will use a pen for the final image, you may want to use a pencil for now.
With that in mind, draw a circle, and then draw another one inside of it very close to the first one. Then use an eraser to make a small gap at the top, sides and base of the circle.
Then, use your pen to draw over the lines that remain, and then you can move on to the next step.
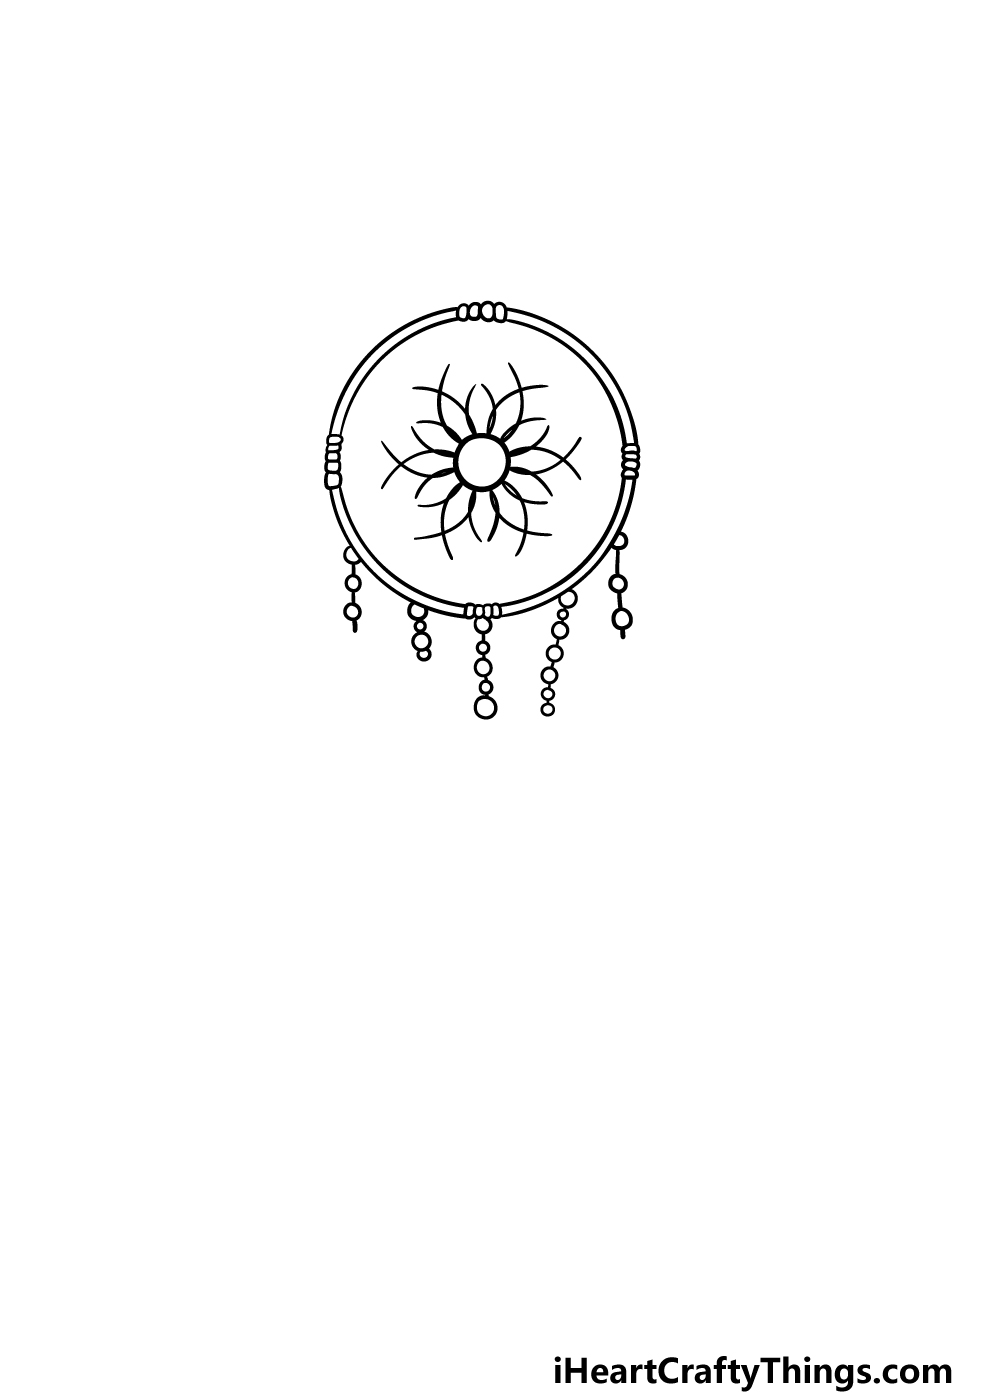
Step 2 – Next, draw some details for the dream catcher
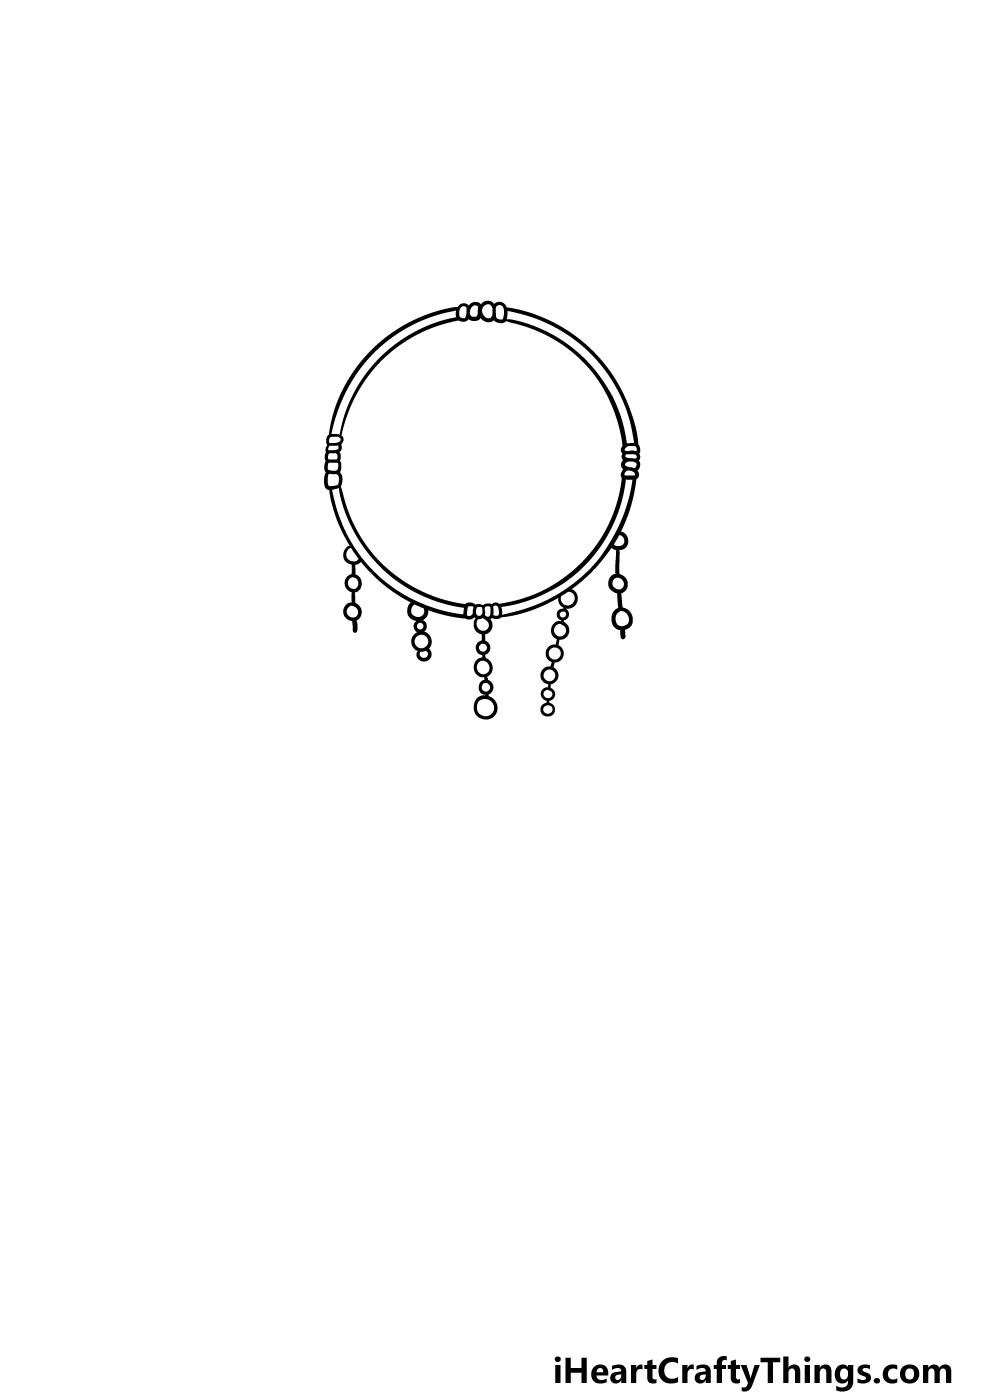
This second part of your dream catcher drawing will be based around adding some smaller details as we build it up. To start, we will be filling in the gaps on the frame.
To do this, draw four small, round shapes into each gap in order to look like string tied up there.
Dream catchers will almost always have small artifacts hanging from them, and you can draw some lines with small circles on them hanging from it for some bead details.
Step 3 – Now, draw the wire interior of the dream catcher
We shall start to draw the wired interior of the artifact in this step of our guide on how to draw a dream catcher, and this is where things can get a bit tricky!
Start by drawing a small circle as close to the center of the dream catcher as you can. Then you will be drawing lots of lines curving outwards from this center.
You may want to closely follow the reference image as you draw, as there is quite a specific pattern that we will be going for.
Once you’re happy with it, it will be on to step 4!
Step 4 – Next, draw the rest of the interior
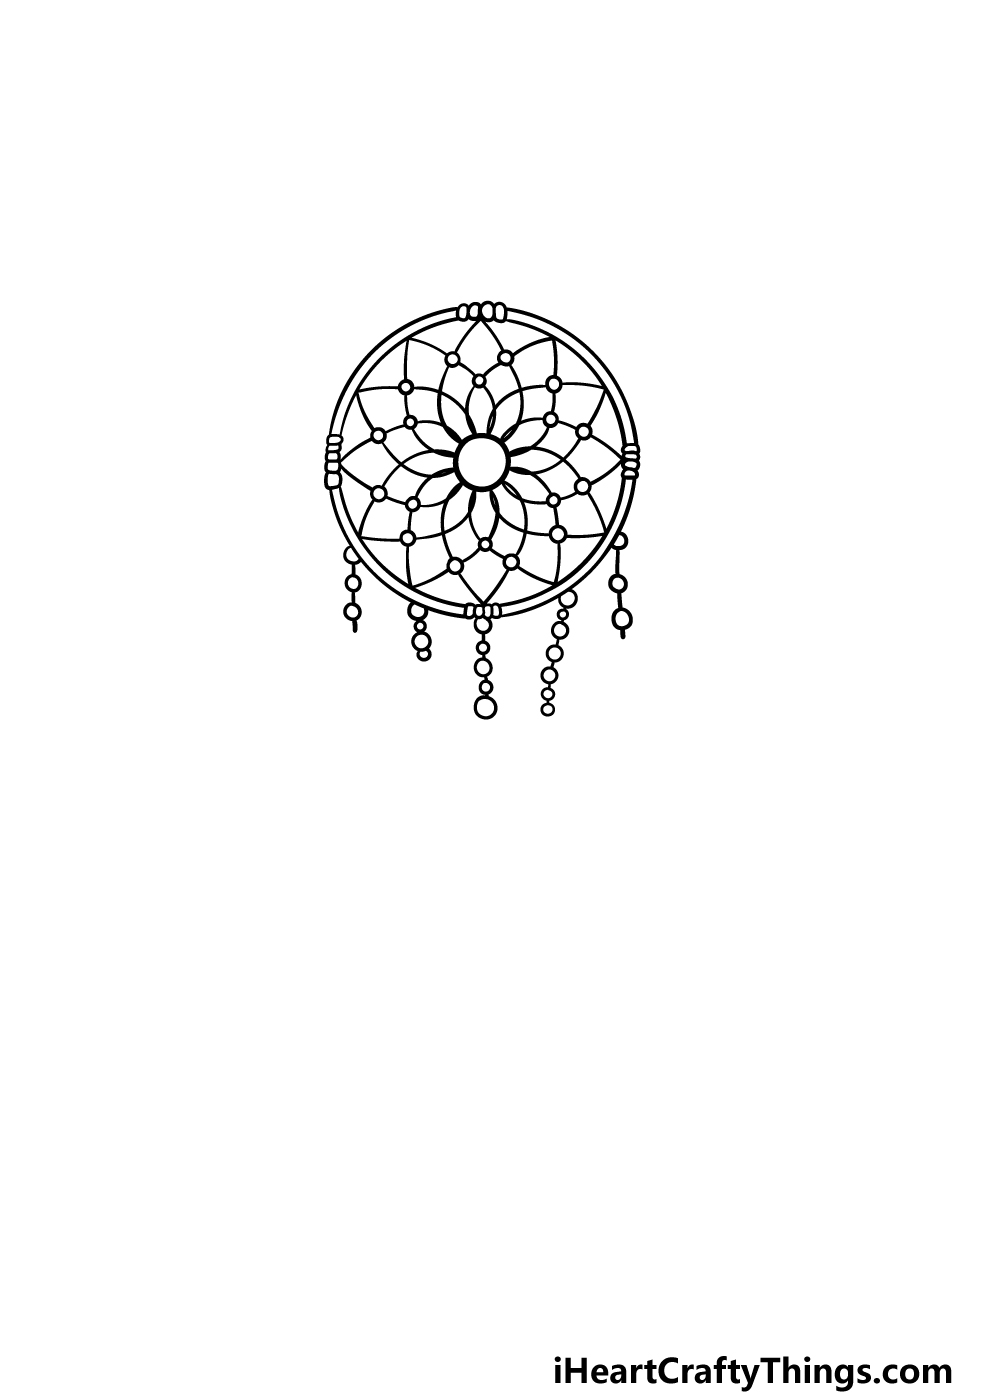
You did a great job starting the interior pattern in the previous part of your dream catcher drawing, and in this one we will be finishing it off.
Simply keep extending these curving line patterns outward until they reach the rim of the dream catcher.
Then we shall be adding some small circles to some of the joints of the wire pattern, as shown in the reference picture.
Step 5 – Now, add some of the hanging artifacts
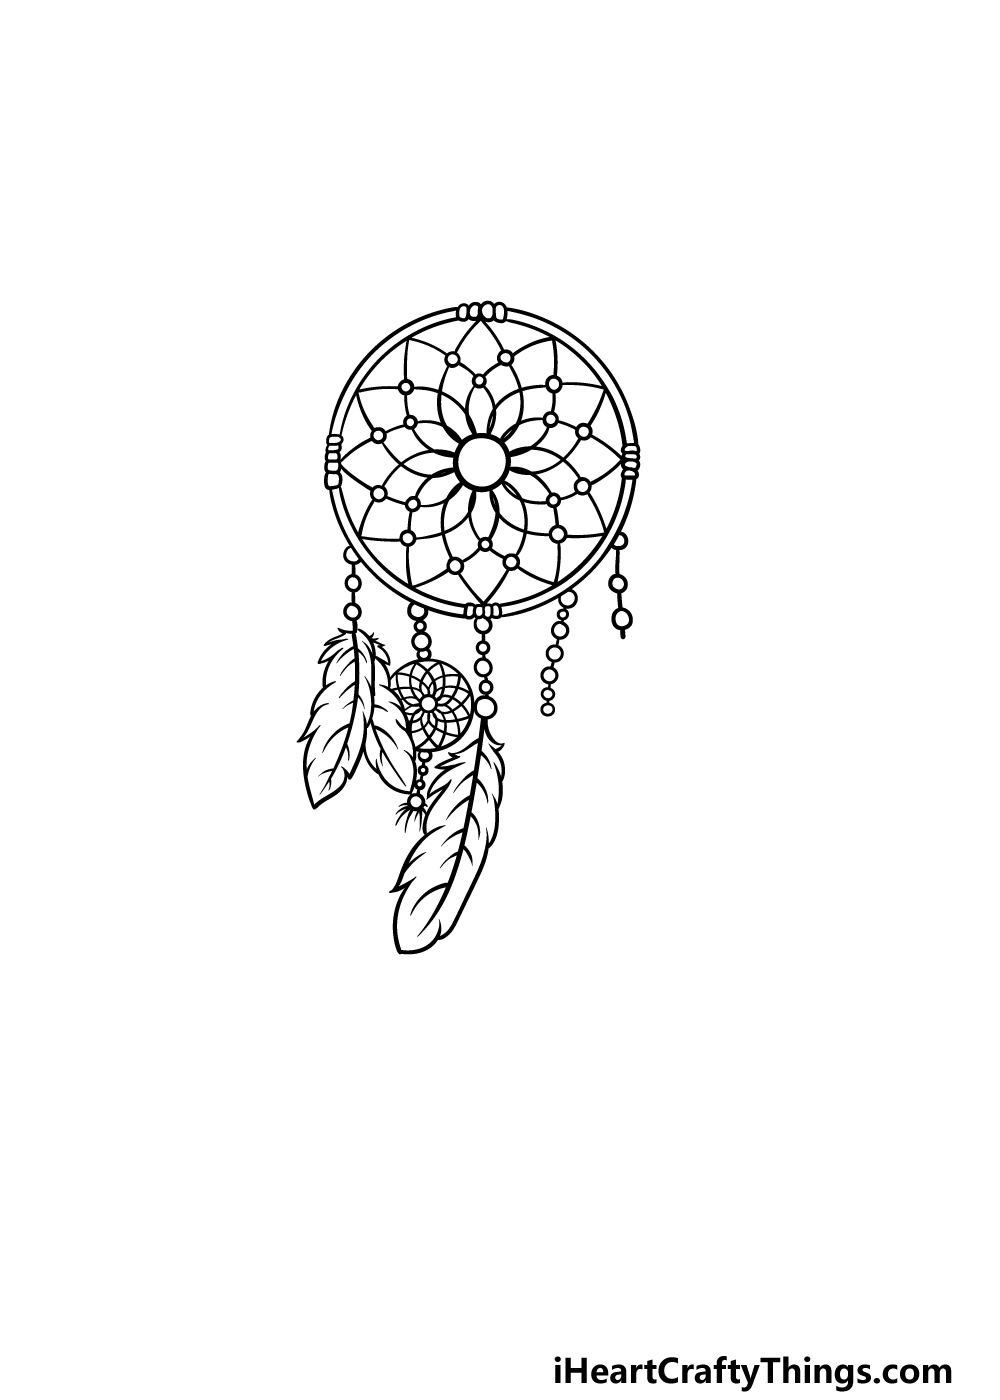
We have finished the interior of the dream catcher itself, and now you can start on some of the artifacts hanging from it.
Using the hanging bead lines that you drew previously, we will be adding some small objects such as feathers and small charms.
You can also add some different artifacts of your own choosing instead, and then we will add even more in the next step of this guide on how to draw a dream catcher.
Step 6 – Next, draw some more of the hanging artifacts
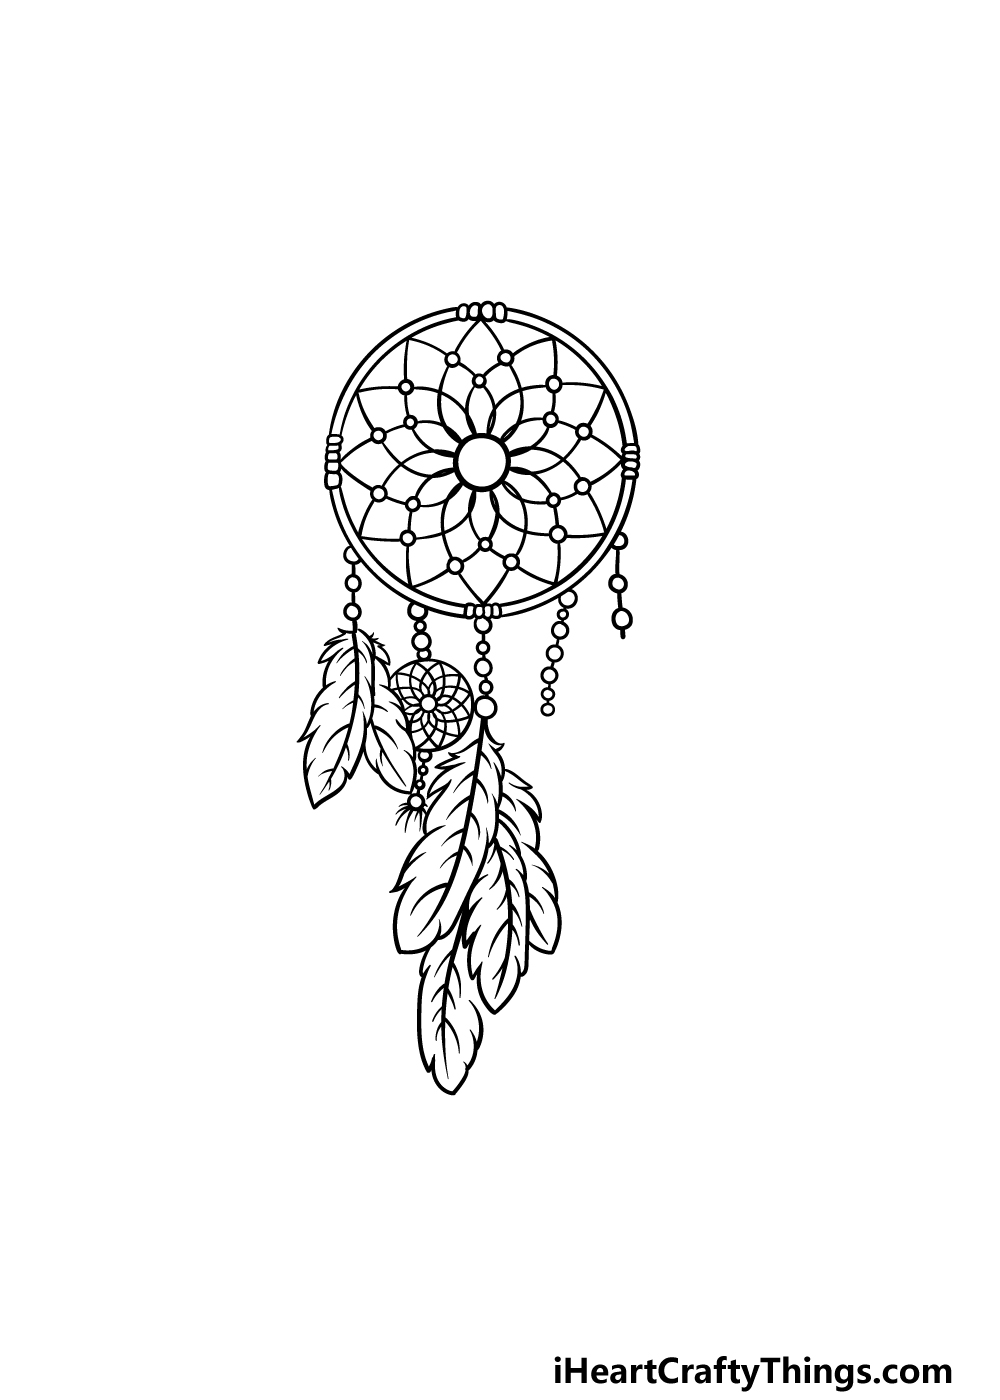
This part of your dream catcher drawing will be about adding more onto the hanging artifacts.
For the design we are working on, all you need to do is draw some more feathers hanging from the clump of feathers that you started in the previous step.
That’s all there is to it, and then you’re ready to proceed!
Step 7 – Finish off the final artifacts
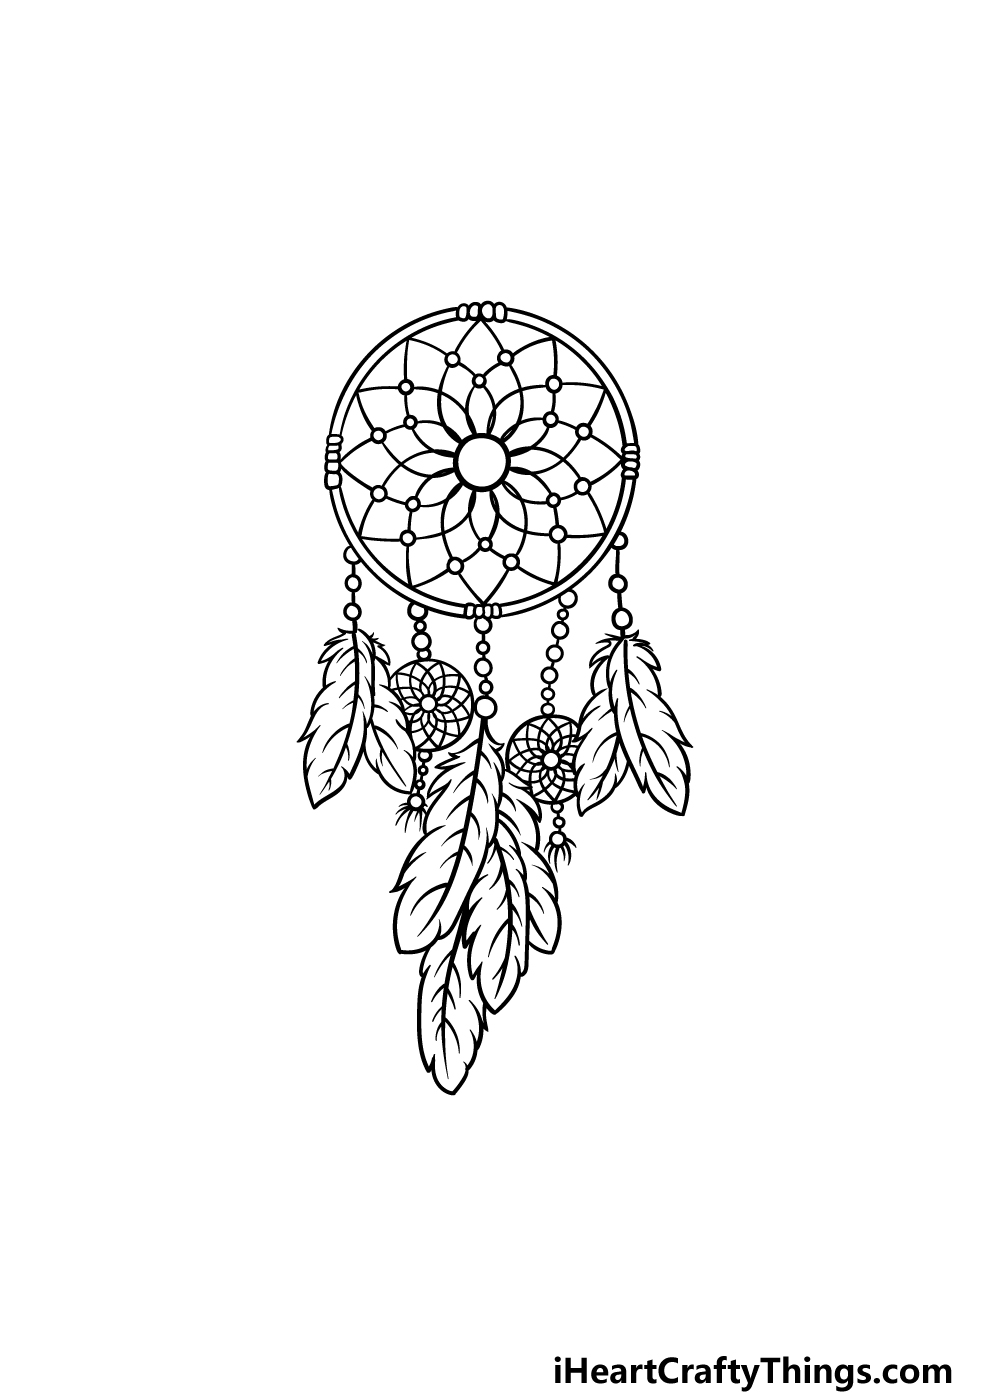
It’s almost time to finish off with some color, but first we will add some final details in this step of our guide on how to draw a dream catcher.
For our design, we added another small charm and some more flowers. Don’t forget that you could also change up the artifacts or add new ones!
Drawing a background is another great way to add your own touch to this design as well.
Step 8 – Now finish it off with some color
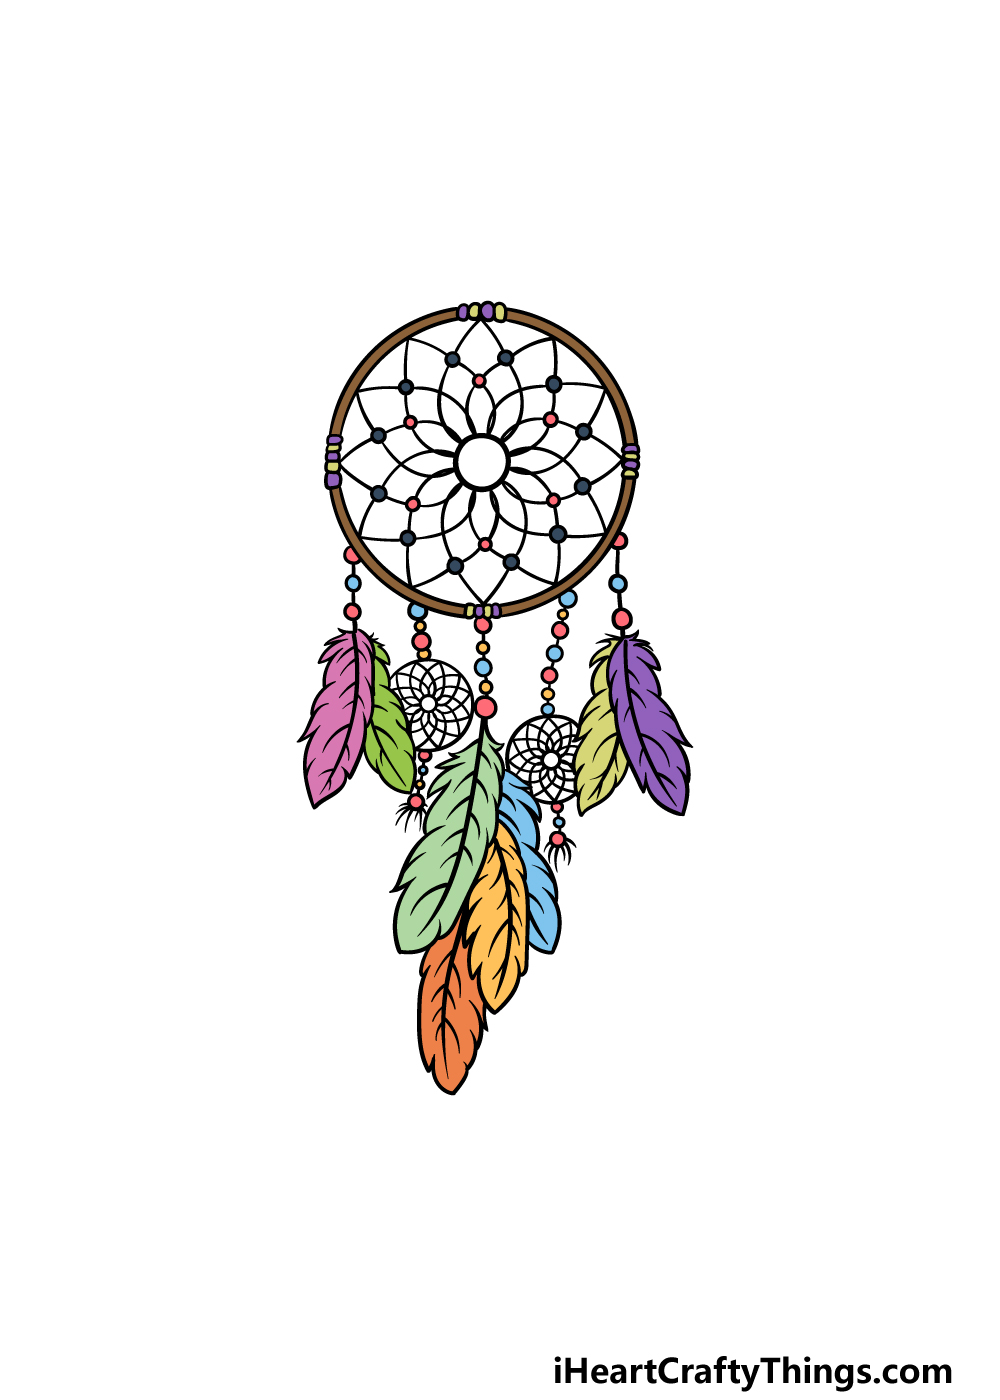
For the final step of your dream catcher drawing, you can finish it off by bringing some amazing colors to it.
We used a huge variety of different colors for the bead and feather detailing on it, and this helps to really make it pop off the page.
This is a step where you can take over and incorporate any colors that you love as well.
There is a lot of opportunity for some great colors, and you can switch it up a bit by changing up the shades, art mediums and tools you use. Maybe you could even stick on some real beads for more dimension!
How will you finish off your dream catcher drawing?
3 More tips to make your dream catcher drawing easy!
Find out how you can make your easy to draw dream catcher an even easier experience!
A dream catcher is a really complex little object, and that can make it difficult to draw! One of the best ways you can make this dream catcher drawing easy to do is by looking at a real one.
Authentic dream catchers are usually hand-made in a traditional way, but you can also find cheaper ones at various craft stores. If you can get your hands on a real one then that will help a lot!
If not, you’re sure to find many pictures of dream catchers online that you could also use to help you.
Part of what makes this dream catcher drawing we worked on so great is that it has a really intricate design. From the strings to the feathers, it is packed with detail!
We love these details, but if you’re having difficulty drawing some of them then you should definitely feel free to simplify them. For instance, instead of having a multitude of feathers hanging from it, you could draw fewer and add more beads and other simple objects.
You could also simplify the design of the web at the center of the dream catcher, and this can also make it easier. These changes can also be done in such a way that they can create a different style you may even prefer!
Finally, one of the best ways to make this dream catcher sketch so much easier would be by preparing as much as you can. Even top artists do a ton of preparation, and you can do the same.
For this tip, you’ll want to grab a set of pencils. Having a variety of different shades is best, but if not then you’ll want to at least have a lighter pencil.
Then, you can build up the layers of the drawing using basic shapes and other art tools. Slowly the drawing will start to take shape.
Then, when you’re ready, you can draw the final pen lines and erase your planning pencil lines.
Your Dream Catcher Drawing is Complete!
You have completed all of the steps, and that means that this guide on how to draw a dream catcher was a success!
We hope that by using the steps in this guide that you found it to be a fun and creative experience not marred by any frustration. Remember that finishing the guide doesn’t have to be the end of it!
You can also take over and create your own unique variations by changing up details, adding accessories to it or by drawing a background.
Experimenting with colors and art mediums is another great way to bring some variation, so have fun creating!
Don’t forget to keep visiting our website, as we have tons of amazing guides for you and will be uploading more soon as well.
We would be thrilled to see your incredible dream catcher design, so please do share it on our Facebook and Pinterest pages for us to admire!