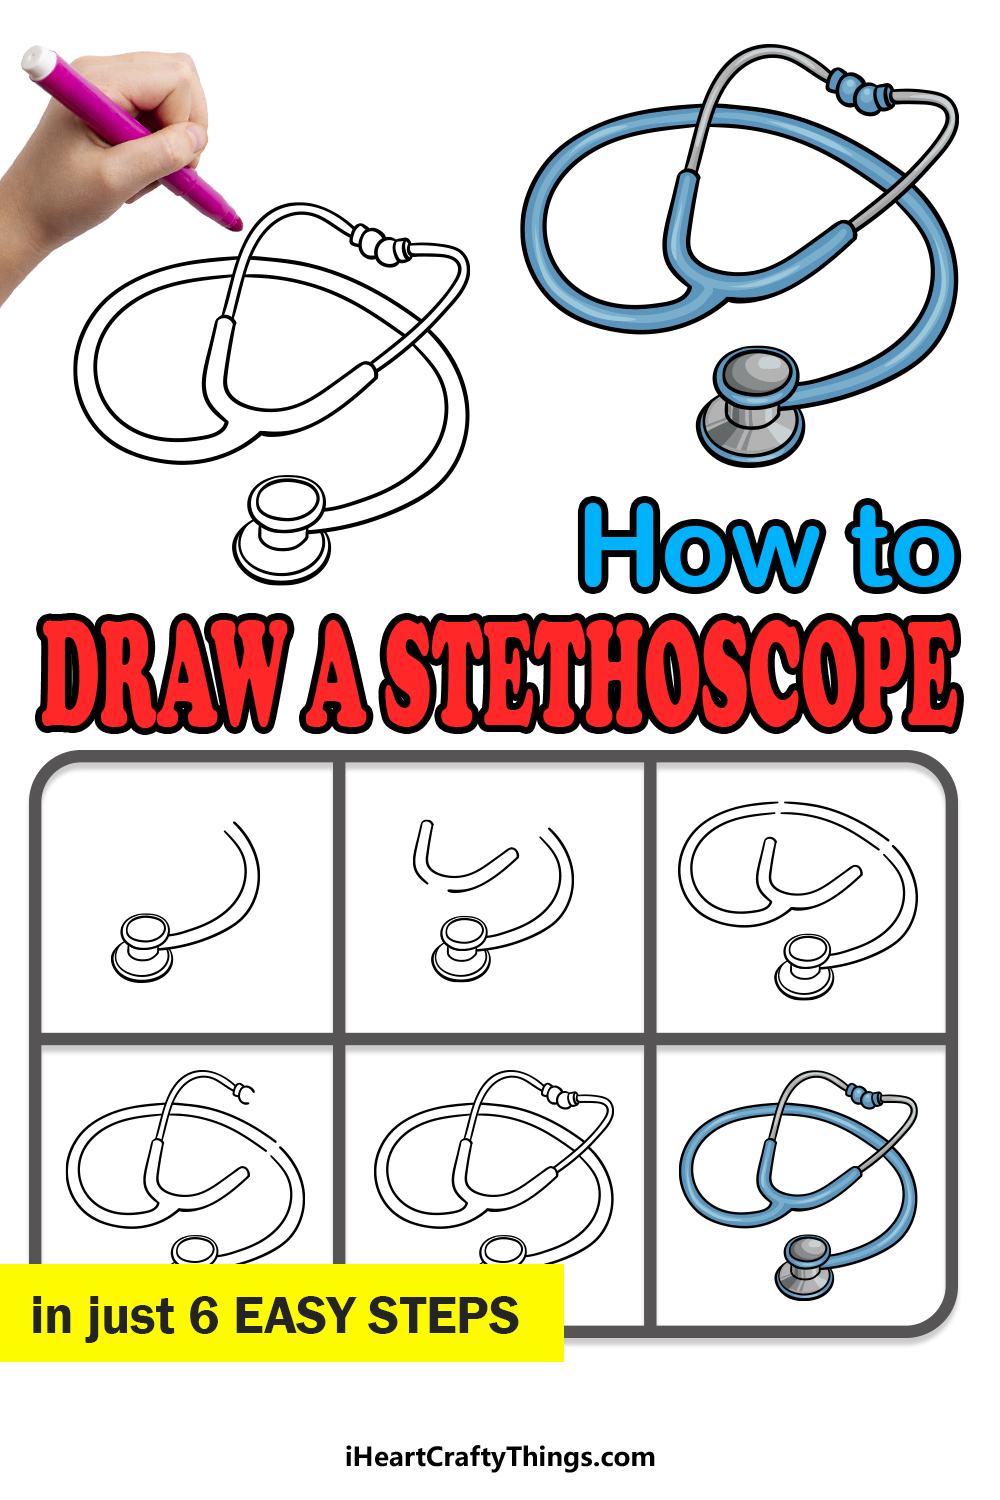
Kids of all ages can learn how to draw a stethoscope by following this fun and easy guide! Learn the best way to draw this important medical tool.
Stethoscopes are used by doctors to hear heartbeats and breathing so that they can tell what sicknesses somebody may have. They have also come to represent doctors in general.
For some reason, stethoscopes are one of the most iconic tools a doctor uses. There are many reasons why you may want to draw one, but their fiddly design can make them quite tricky,
In this guide, I will take you through the steps and explain how to draw each one. By the end, you will have your very own drawing that you can change and add to as you wish!
You could even draw a background or add some other tools that a doctor could use.
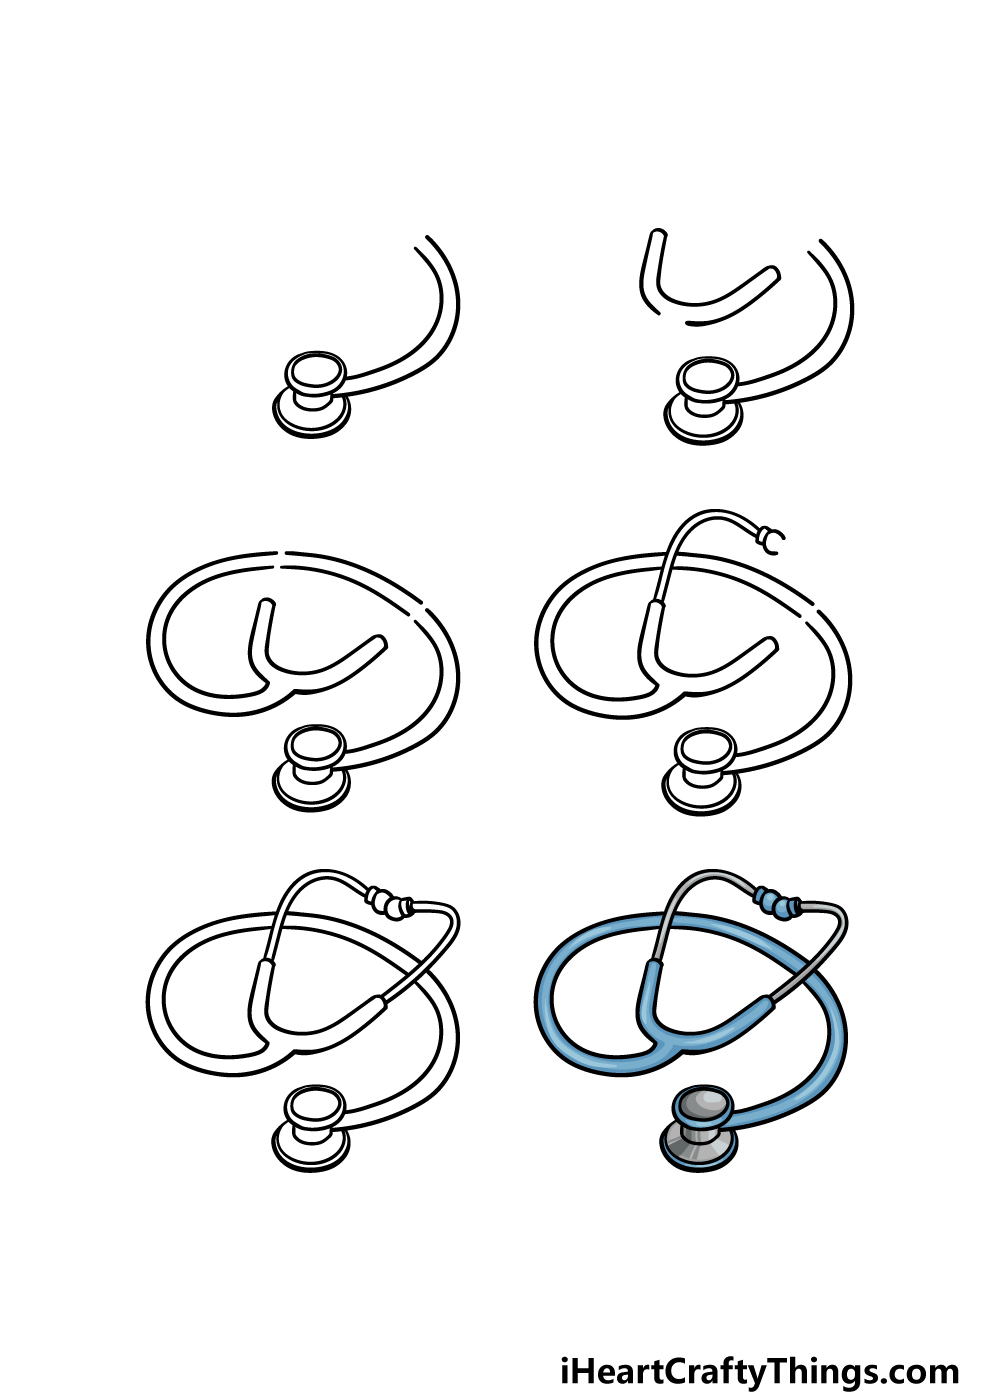
Watch These Steps On How To Make Your Stethoscope Drawing
How to Draw A Stethoscope – Let’s Get Started!
Step 1

As we go through this guide on how to draw a stethoscope, we will also be naming the various parts of the tool. For this first step, we will be drawing what is known as the bell.
The bell is what would get pressed against your chest to measure your heartbeat.
To draw this, start with to slightly flat circles, one inside of the other. Then, draw two small lines down from it before adding two more circles inside of each other.
These ones will be a bit larger than the first set of circles that you drew. Once the bell is drawn, you can then start to add what is called the stem.
This is the cord that attaches the bell to the other parts of the stethoscope.
Simply draw two curved lines from the bell, as shown in the reference image.
Step 2 – Next, draw some more of the tubing
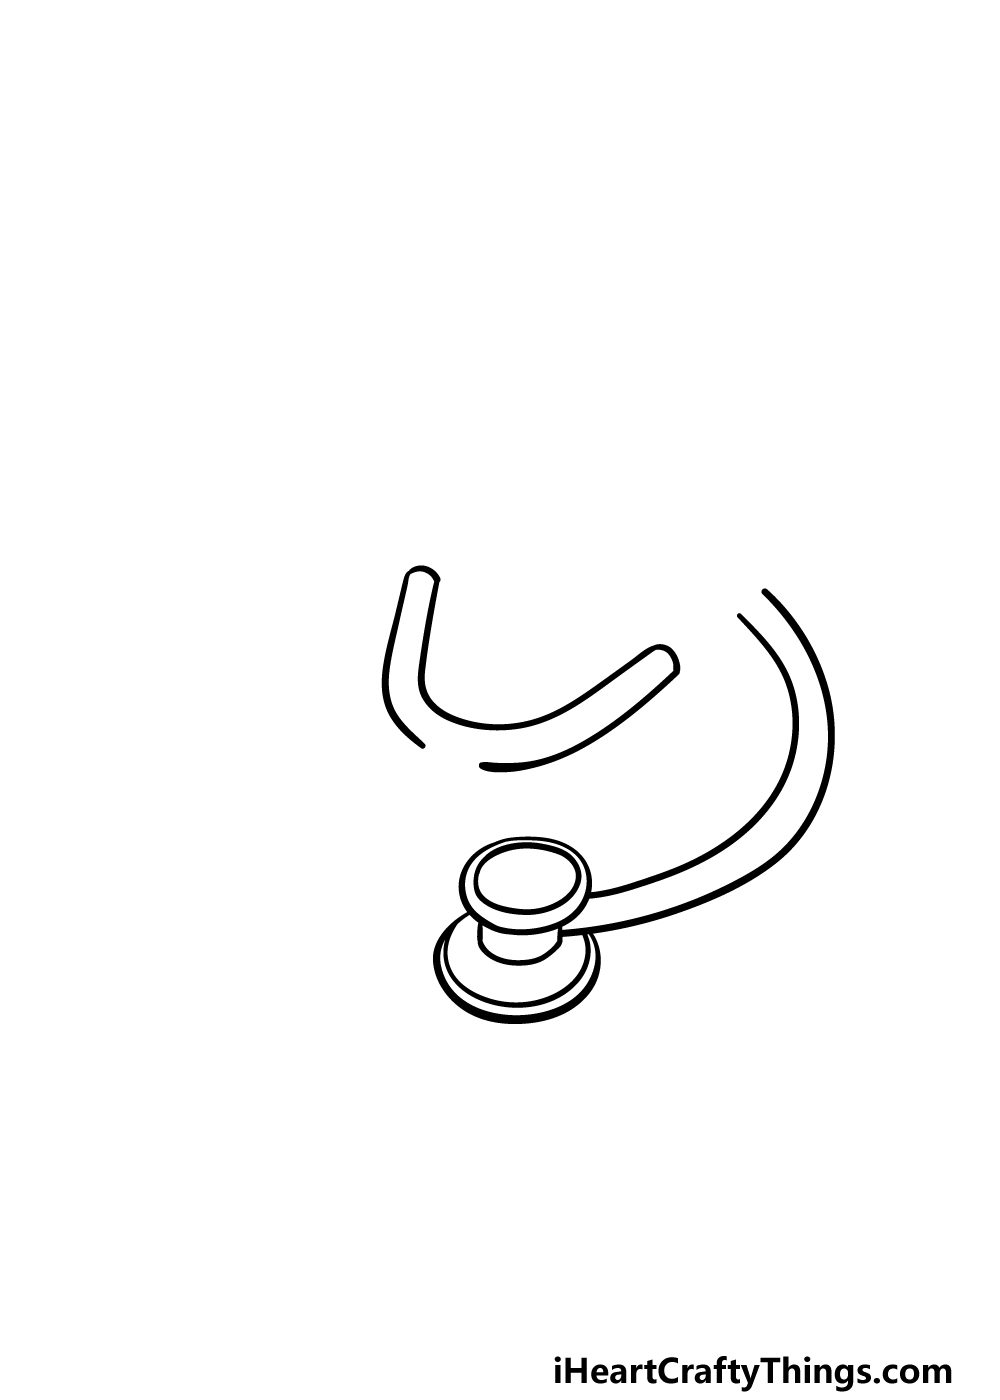
The various parts of this tool are connected by a pipe called the tubing. In this part of your stethoscope drawing, we will be drawing the part of the tubing that branches off to the parts that would go in a doctor’s ears.
To do this, simply draw some curved lines to make what looks a bit like a slightly stretched-out horseshoe shape.
Be sure to leave a small gap at the base of it! Then in the next few steps we shall connect more pieces to this.
Step 3 – Draw some tubing connecting to the last piece
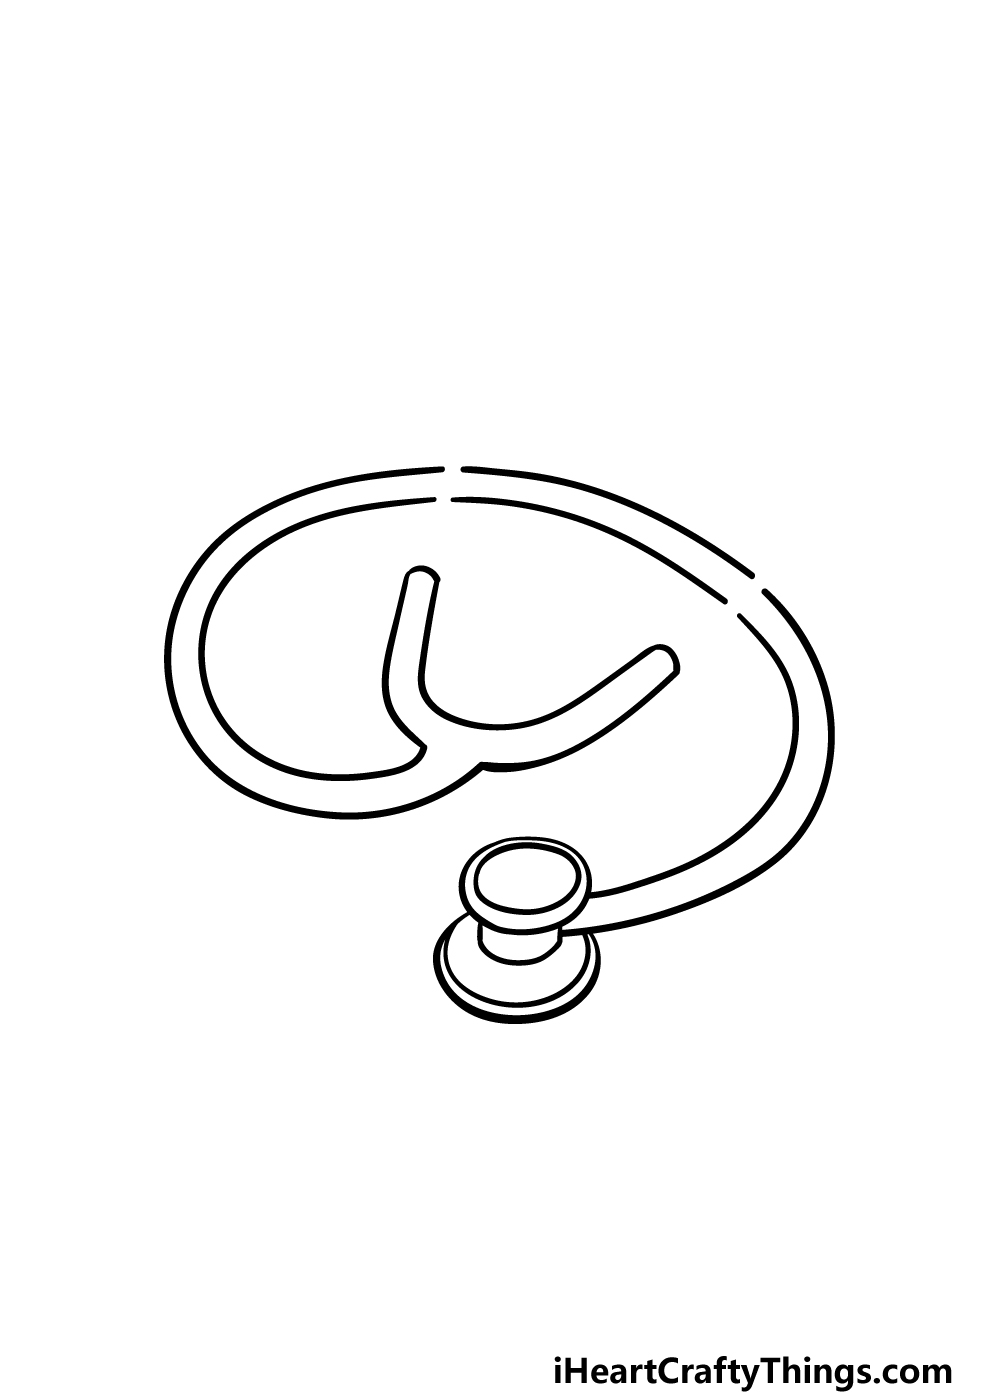
In this third step of our guide on how to draw a stethoscope, we will be extending that tubing that we spoke about earlier.
First, draw two curved lines coming from the end of that horseshoe shape that you started in the previous step.
This tube will bend, and then you can leave a small gap. Draw some more of the tubing after this gap before leaving a similar one not far down along the tube.
This second gap will go just before the first part of the tubing that you began back in step one. Once you’re happy with how it looks, we can then start on step 4!
Step 4 – Now, draw the binaural
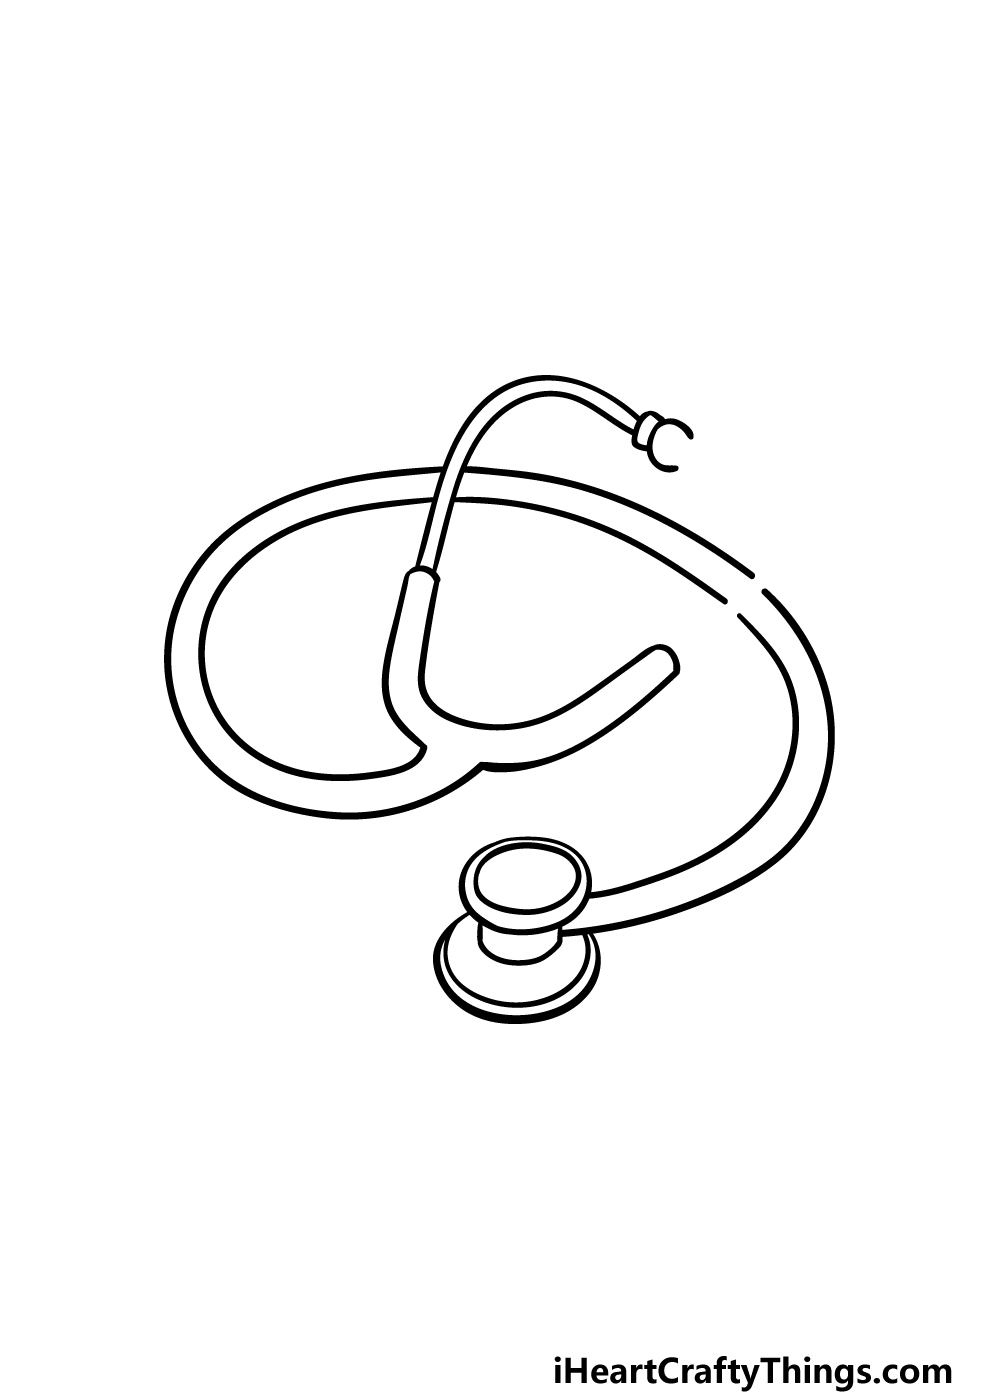
The two thin, metallic sections that the doctor would put in their ears to listen are called the binaurals, and we will be adding the first of these to your stethoscope drawing now.
To draw this first binaural, draw two curved lines up from the left-hand side of the horseshoe shape from earlier.
These two lines will go through the first gap in the tubing that you left before. At the end of this, draw a small rectangular shape before adding some rounded lines.
Be sure to leave a gap on the side of this rounded shape, as the second binaural will go into that space shortly.
Then we just have a few final details to add in the next step, so let’s proceed!
Step 5 – Finish off your stethoscope drawing
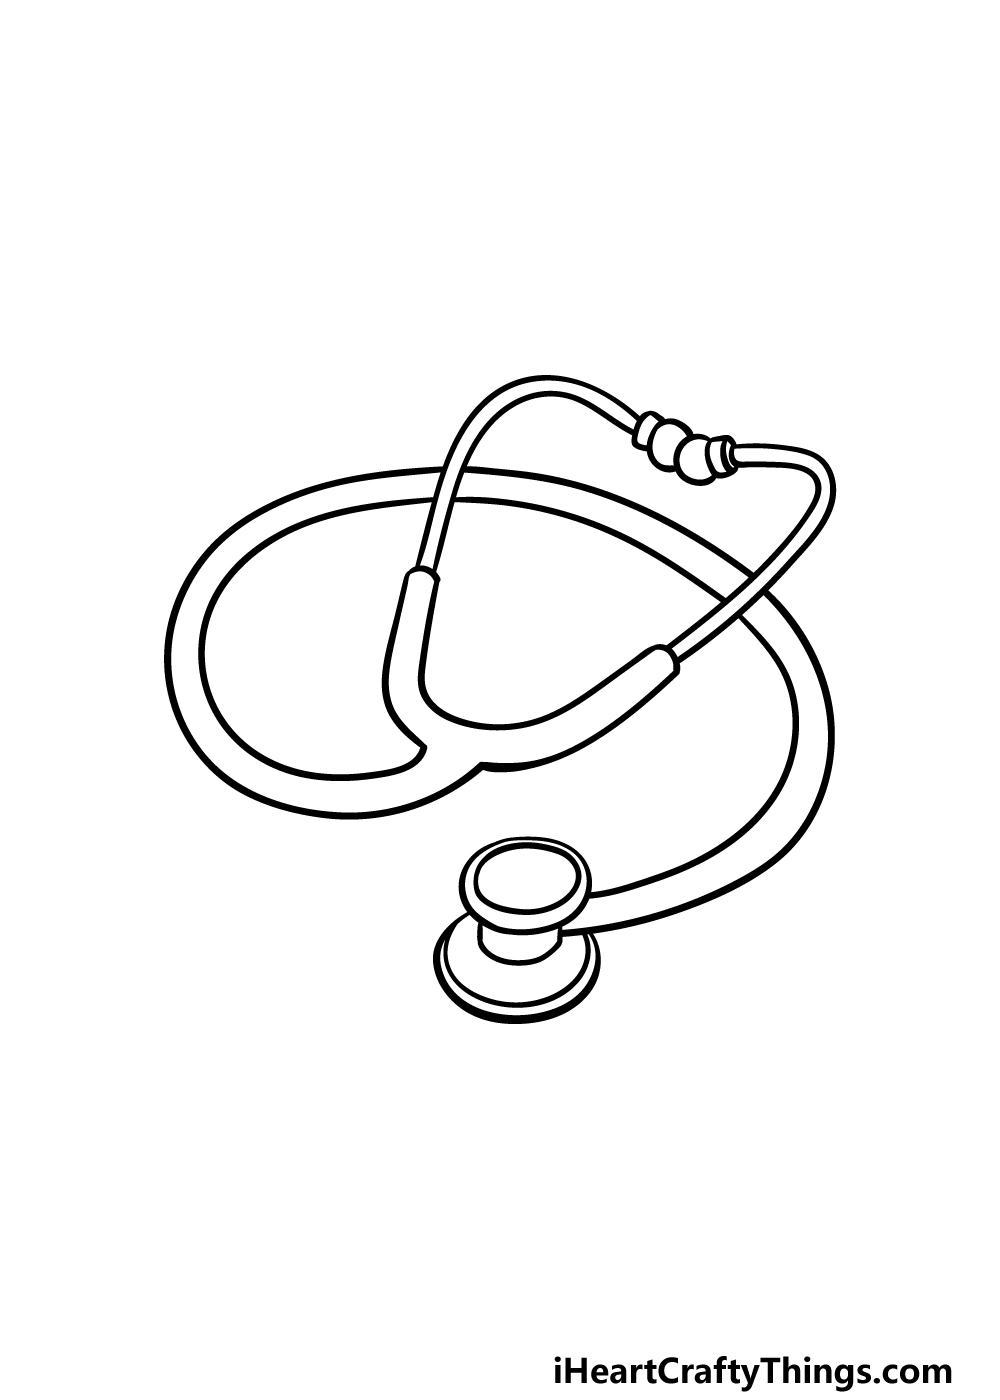
We will be finishing off the drawing by adding the second binaural in this step of our guide on how to draw a stethoscope.
You will be following a similar process for this one, as you can draw two more lines out from the right-hand side of that horseshoe shape.
Then draw those same shapes at the end for the ear tips that the doctor would use. This second ear tip will slot into the space that you left in the first one.
Then you’re ready to move on to the final step! You don’t have to proceed just yet though, and this is your chance to add any final details and elements of your own that you may want.
You could draw some more tools that a doctor may use, such as a thermometer or a reflex hammer.
What details can you think of to finish off this stethoscope drawing?
Step 6 – Finish off your stethoscope drawing with some color
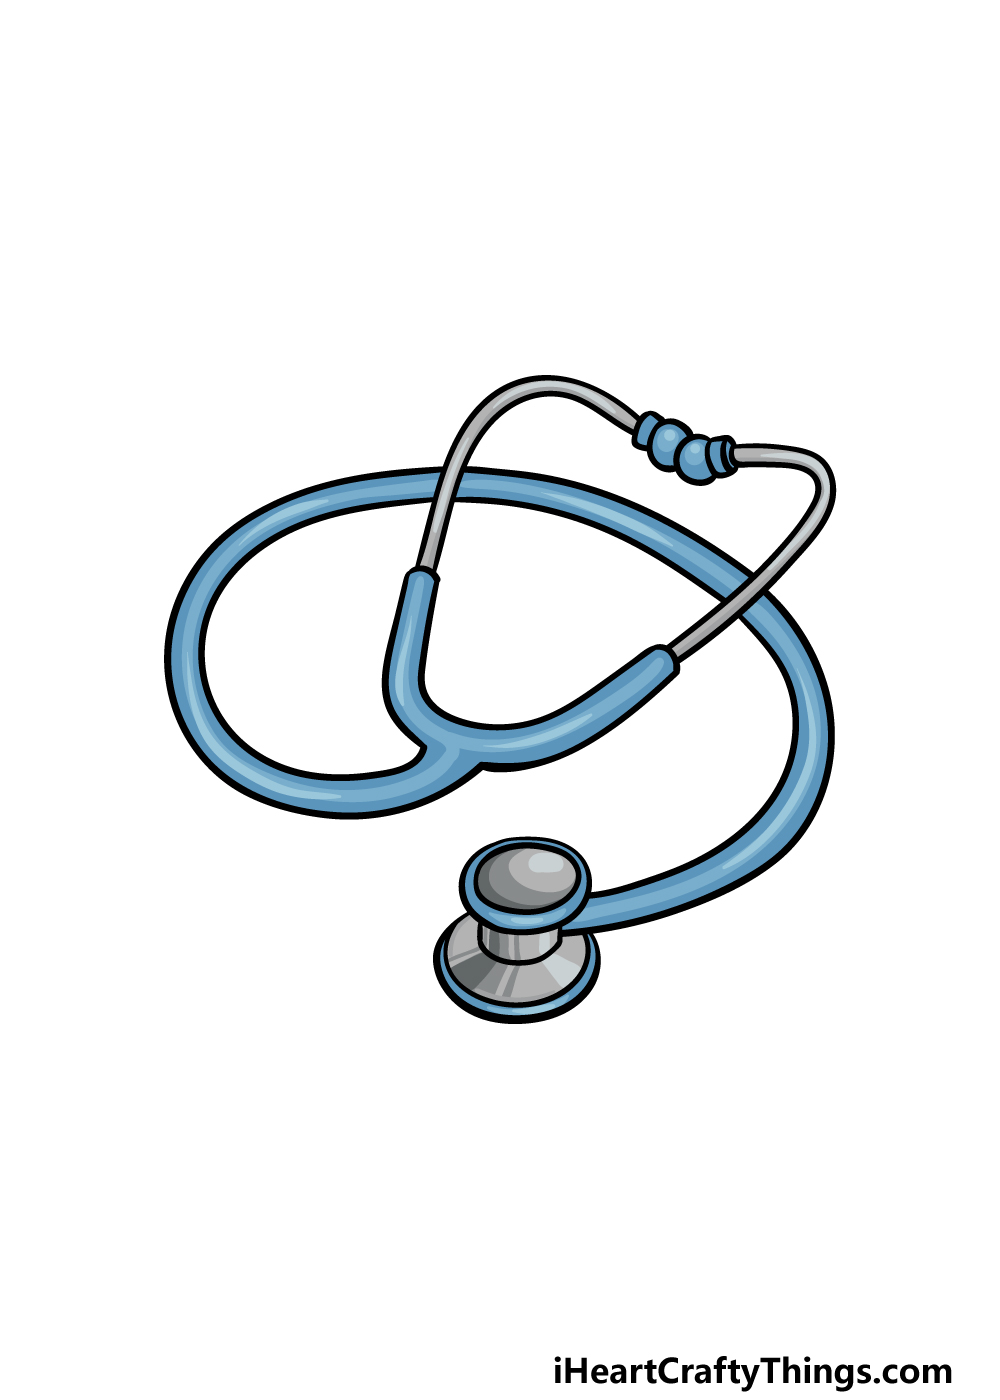
Now you have arrived at the final step of your stethoscope drawing, and in this one we will finish it off with some color!
In our reference image, we used some shades of blue for the tubing. Other than that, we used some grey shades for all the metallic parts of the stethoscope.
These are the colors that we chose, but you could use any other colors that you love for it instead!
When coloring in, another aspect to consider is which art mediums to use to bring the colors to life.
There are a lot of thin and fiddly aspects to this drawing, so it may be helpful to use some mediums that allow for more control and precision.
Using some colored pens and pencils would be great for this, and thin-tipped brushes would be best if you would like to use paint. What colors and art mediums will you use to finish this off?
4 More Ways To Make Your Stethoscope Drawing Unique
Detect how to make your stethoscope sketch even greater with these tips we have for you!
When it comes to the tools that a doctor will use, there is a huge variety that they will have on hand. The stethoscope is just one of them, and you could add some more to make this stethoscope drawing even better.
For a few examples, you could draw some scalpels, bandages and maybe a thermometer. You can look up some lists of tools most doctors use to help you as you draw!
What doctor tools do you think would go well with this stethoscope?
Whether you decide to add other doctor instruments or not, you could create a background setting for your drawing of a stethoscope.
This could be as simple as drawing it on a doctor’s table alongside the other instruments.
That would be a simple yet effective way of drawing a background, but you could also come up with some more creative ideas! What sort of environment do you think this stethoscope could potentially be in?
Another way you could create a setting for this drawing would be by adding a human character to the image. The obvious choice would be a doctor!
If you were to do this, then you would just need to change a few details on the stethoscope to have it around his neck. The doctor could be drawn in a realistic or a cartoony style, and you could even add a patient to the scene.
Looking up pictures of doctors using stethoscopes could be very helpful!
Finally, you can try out all sorts of colors for your drawing of a stethoscope! We kept the colors quite muted for this drawing, but you could definitely get a bit more experimental with it.
For instance, you could use some slightly more unusual art tools and mediums to add the colors. The drawing is quite fiddly, so you could use some colored pens or markers for the thin sections.
You can even get some metallic-colored pens that would be perfect for the metal parts of the stethoscope!
Your Stethoscope Drawing is Complete!
You have completed all six steps of this guide on how to draw a stethoscope!
Objects like this can be deceptively difficult to draw, so we hope that by following the steps and taking it slowly that you found it to be fun and easy to do!
Be sure to also add any extra details and touches you may want, and have fun experimenting with colors and art mediums to achieve the look you want!
Don’t forget to keep visiting our website, as we upload new drawing guides all the time for you to enjoy!
Once you have completed your stethoscope drawing, we hope that you will share it on our Facebook and Pinterest pages for us to look at!