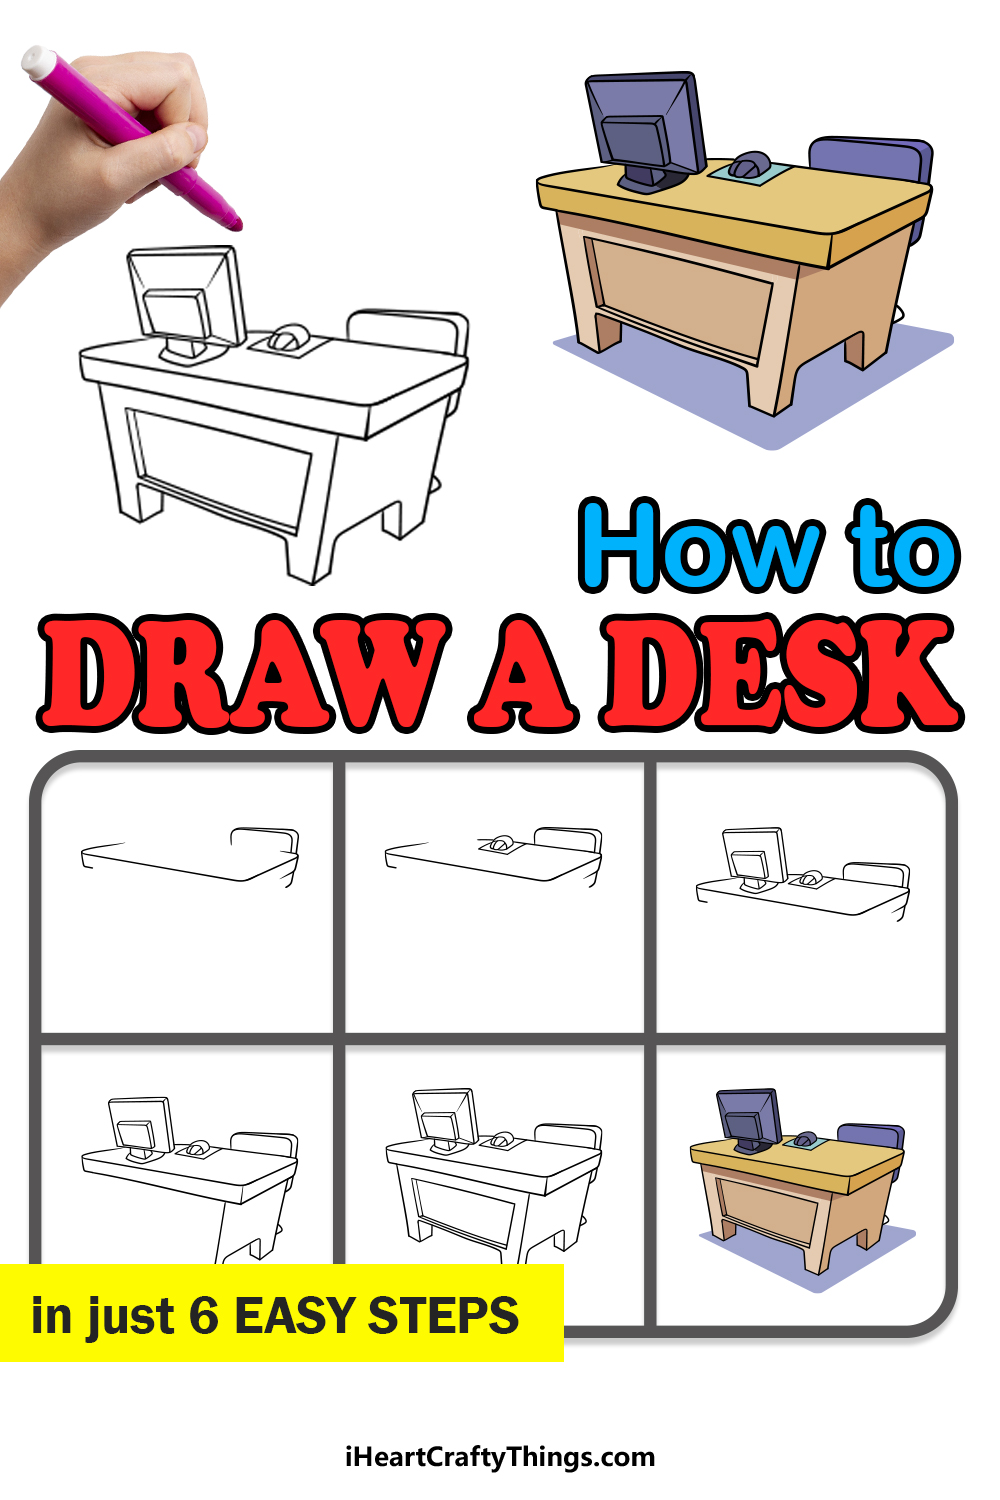
This guide on how to draw a desk will show you how to make a detailed piece of art! It’s great as is, or you can add your own details and ideas as well.
A desk is an unsung hero of our day to day lives, as we all use them at one point or another. There’s a good chance that you’re sitting at a desk while you work on this guide!
Even though we may not always pay attention to them, you can often tell a lot about someone by how their desk is organized. In this guide, we will start with a simple desk with a computer on it.
That’s just the start though, as after you have finished the design you could cusromize it to look like a desk that you or someone you know uses.
There are no limits to the objects you could put on this desk drawing, so feel free to be creative with it.
Find Out How To Make A Desk Drawing By Watching This
How to Draw A Desk – Let’s get Started!
Step 1
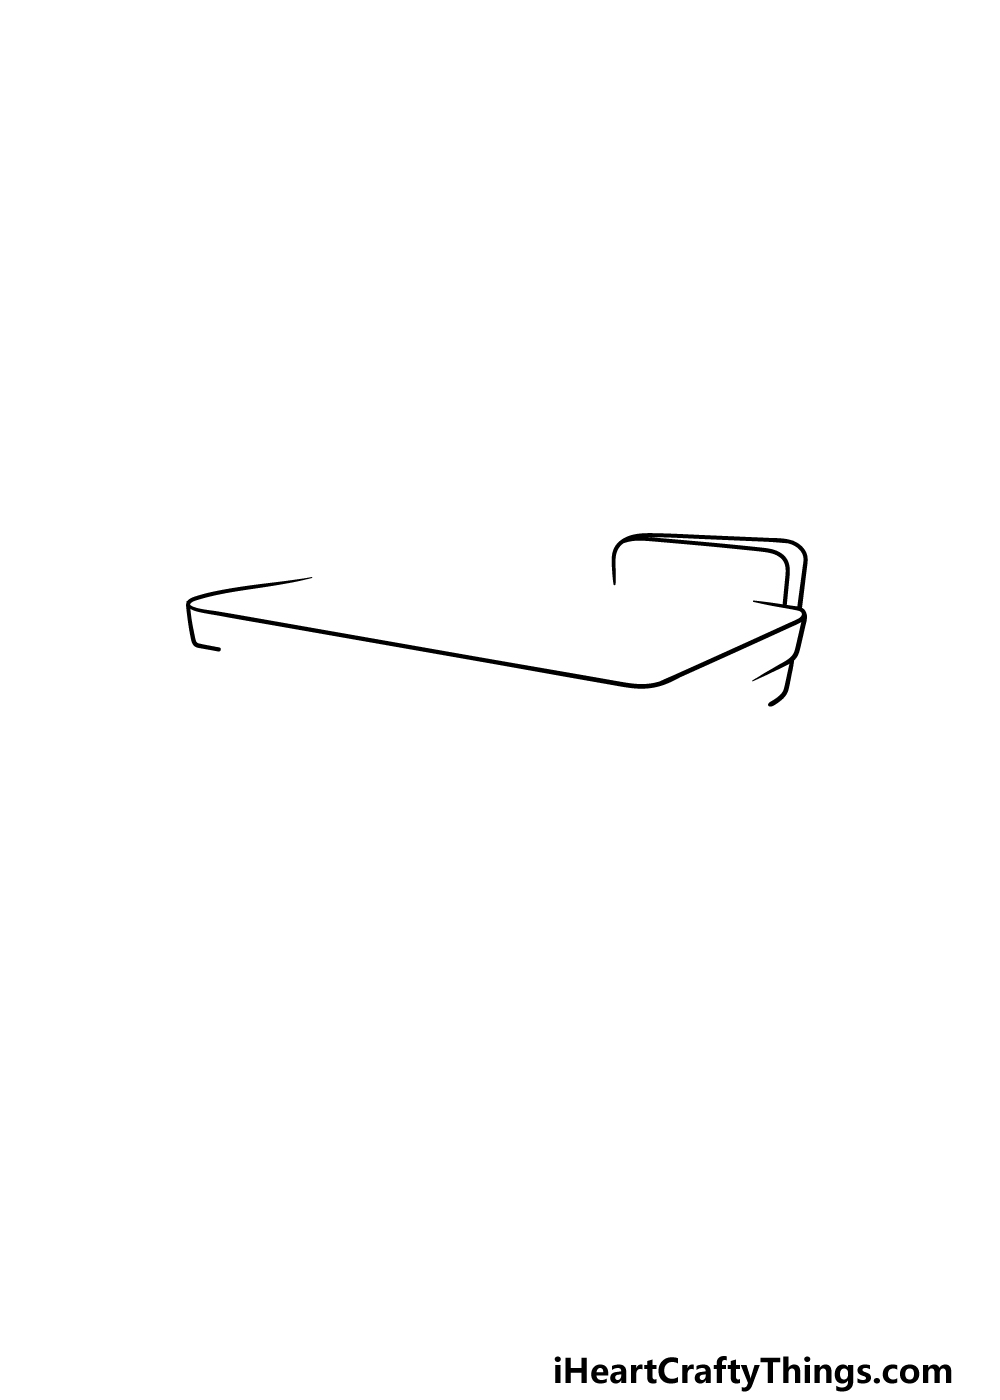
For this guide on how to draw a desk, you may want to have a ruler on hand, as you will be drawing lots of straight lines for this picture.
For the desk, we will be drawing a computer monitor and mouse onto the surface later on, but for now we will focus on the outline of the desk.
Using the ruler, we will be drawing the beginning of the surface for the desk, which will be at a bit of an angle.
We will be drawing some rounded corners for the desk, and then we will use some larger rounded lines for the chair at the table.
By the end of this step, there will still be a gap left on the upper left-hand side of the desk, but we will be filling that in soon in the next few steps.
Step 2 – Next, draw a mouse on the table as well as more of the outline

We will be drawing the first object on the desk for this next part of your desk drawing. This object will be a computer mouse, and it will be drawn in a small, round shape.
Then, we will use some short and straight lines for the mouse pad it is sitting on. Then, using your ruler you can extend the line from the mouse to the right-hand corner of the desk to fill that gap.
There will still be a space to the left of the mouse, but we will fill that gap in the next step.
Step 3 – Now, draw the computer monitor
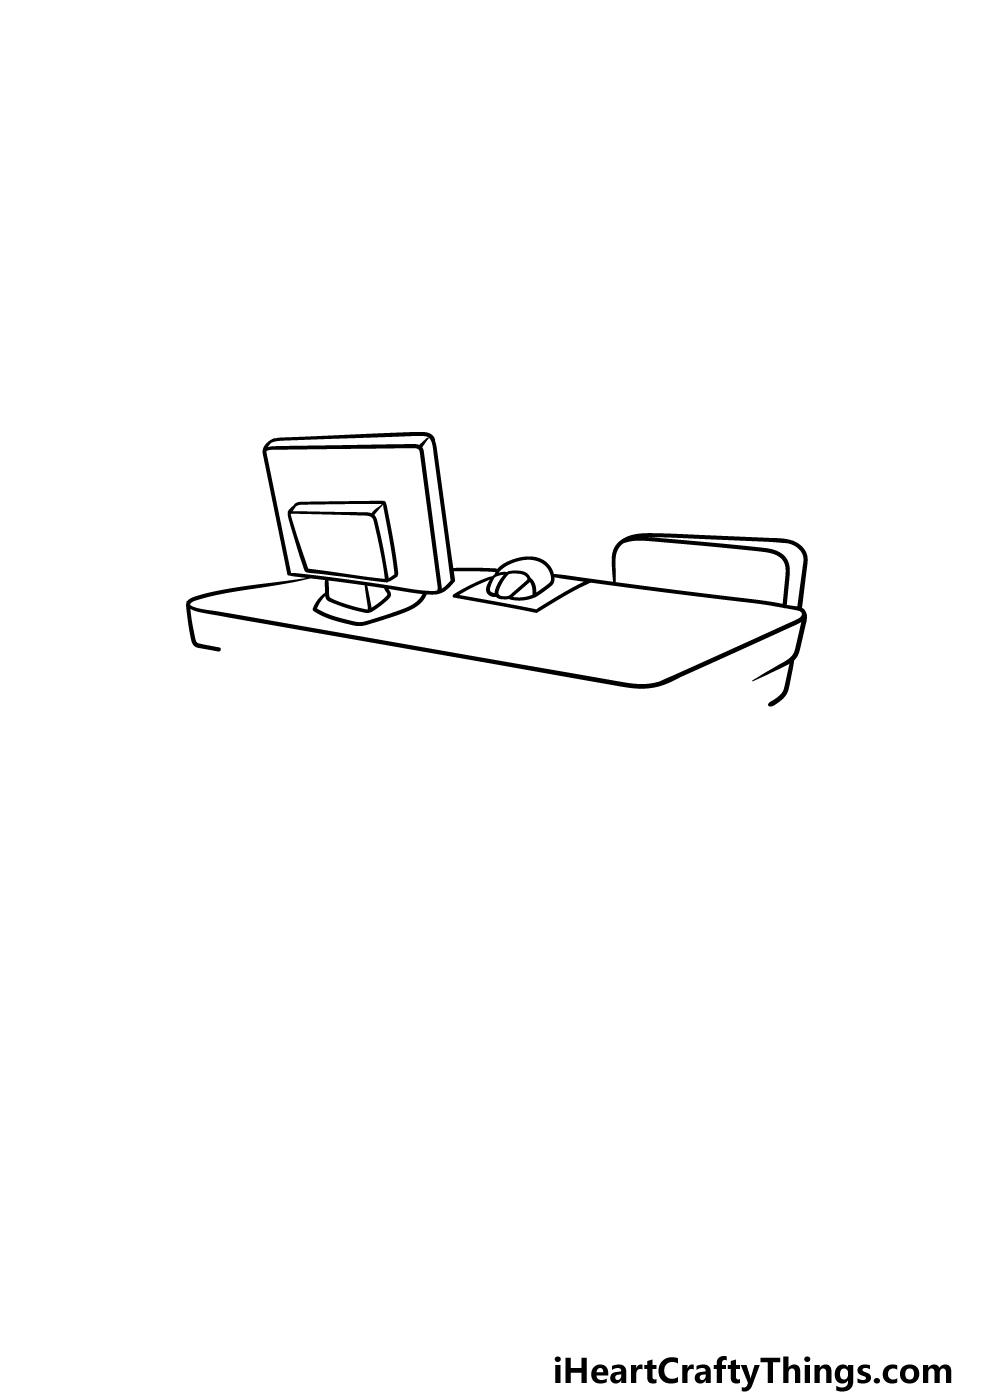
The second object we will be drawing in this guide on how to draw a desk will be a thin computer monitor sitting on the desk.
This will fill that gap we have mentioned a few times, and you can again use your ruler for this part.
You can draw a large square shape with some lines on the exterior for a 3D effect to start, and then draw another smaller square inside for the back of the monitor.
Then you can use some straight and curved lines for the base of the monitor.
Step 4 – Next, continue drawing the desk outline
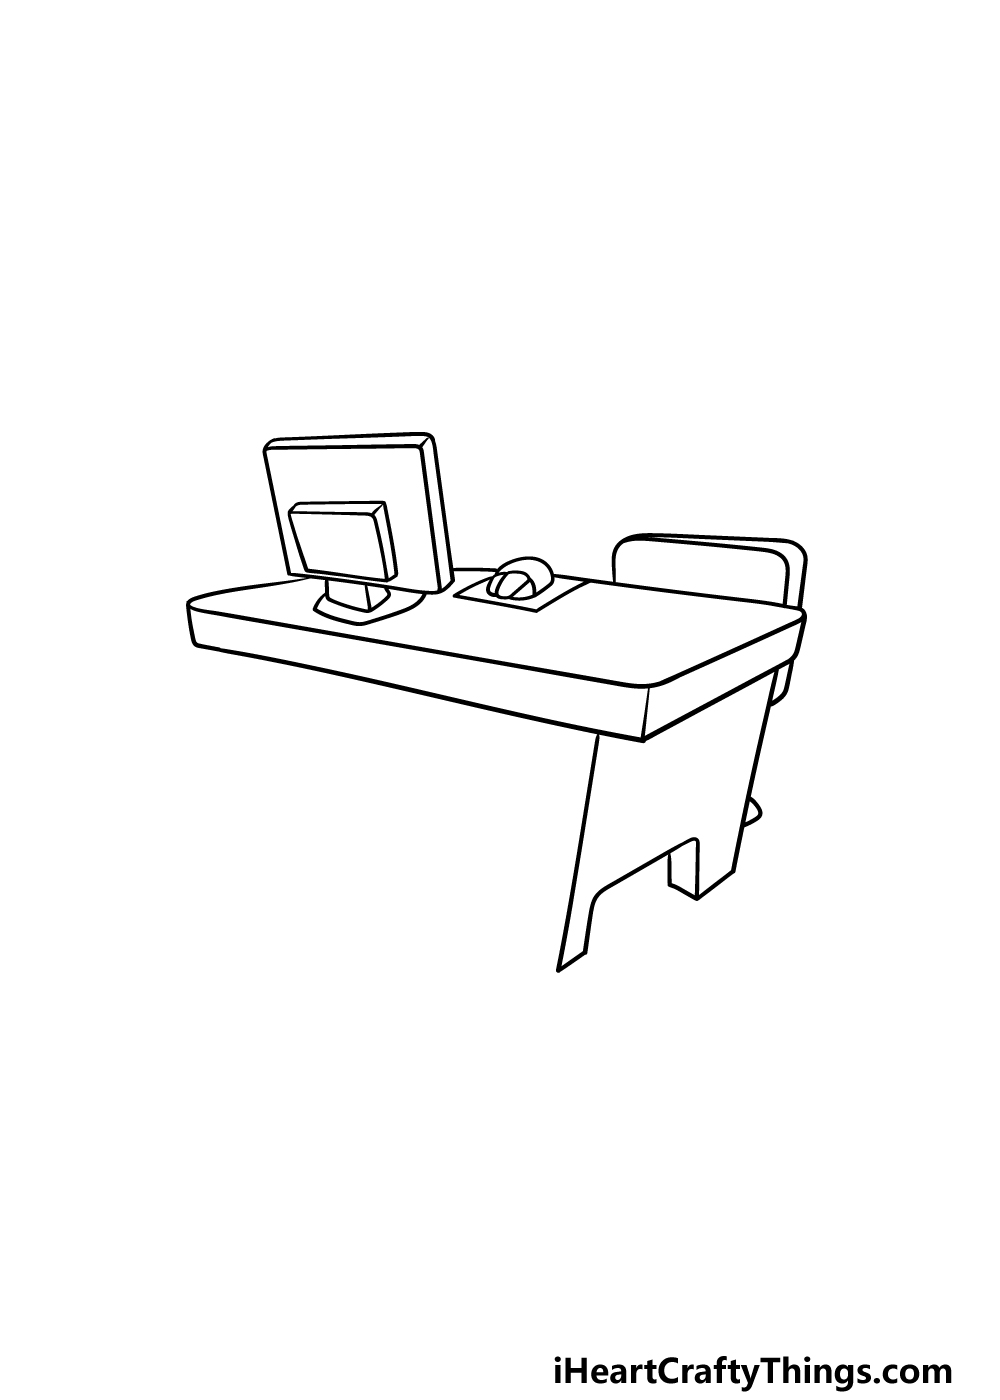
We will be leaving the surface of the desk for a little bit, and for this part of your desk drawing we will focus on the outline for the desk.
First, you can use your ruler to complete the line at the edge of the desk that is facing us, and then add a small vertical line for the corner of it.
Then, we will be using some more straight lines on the right-hand side for the side and legs of the desk.
Once you have it looking as it does in our reference image, you’ll be ready for some final details in the next step.
Step 5 – Now, you can finish off the final details of your desk drawing
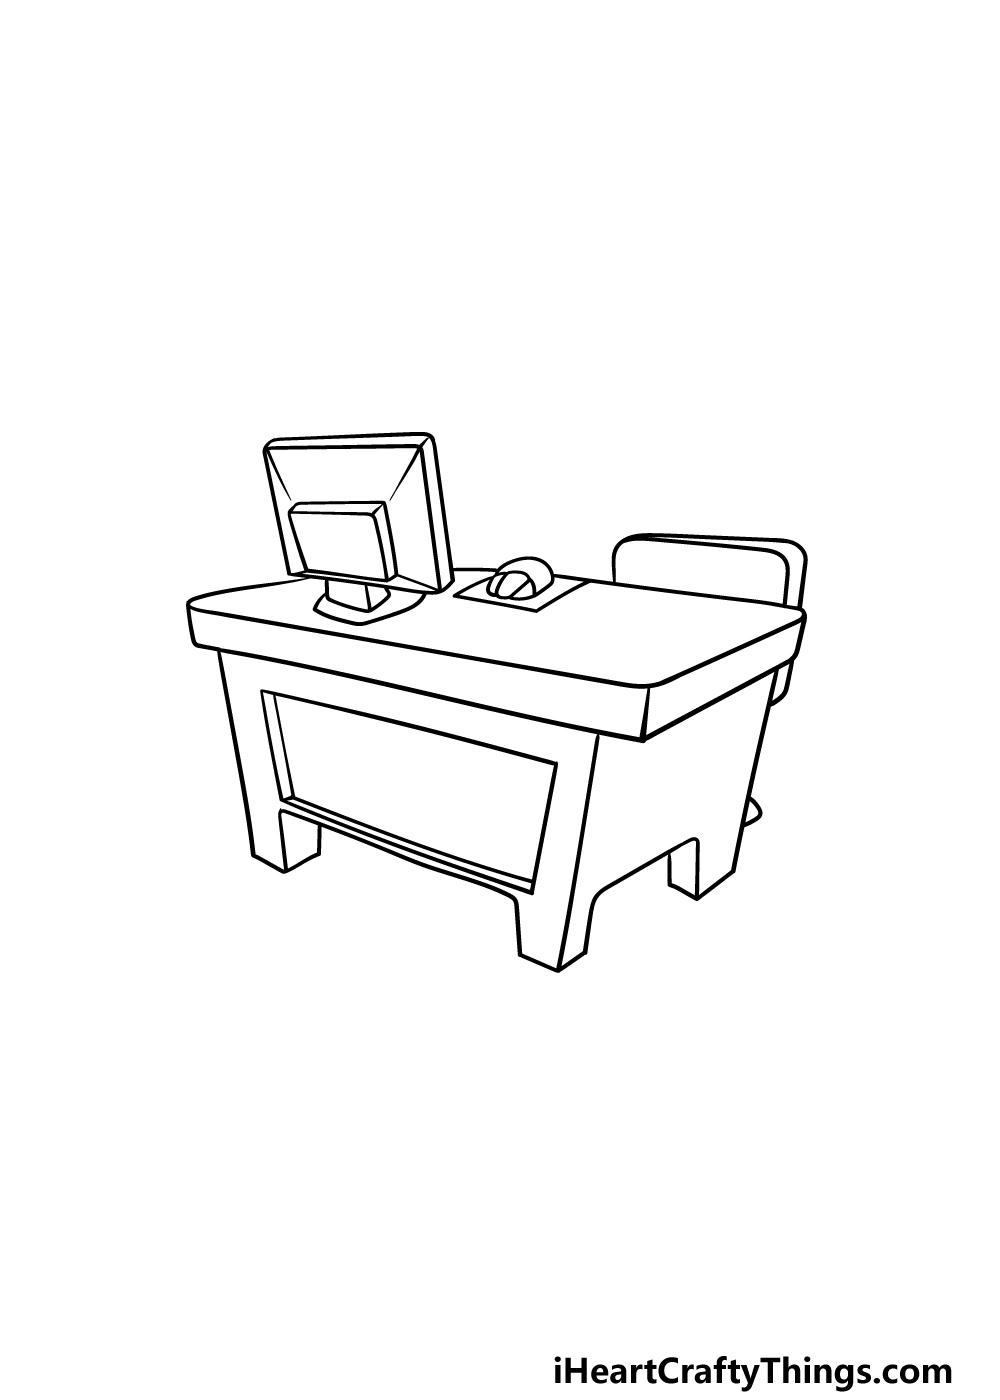
This fifth step of our guide on how to draw a desk will be all about adding the final details and elements before we add some color in the final step.
To do this, we will be using that ruler again to draw the back of the desk. We will also see the legs of the desk in this step, and you can draw some rectangular shapes into this section to add even more depth to this desk.
Finally, you can draw some more straight lines onto the back of the computer screen.
Then, you’re ready to move on to the final step! Before you do, you can also add some details of your own.
Perhaps you could show us what you would be storing on this desk. In real life, it is usually best to keep a desk nice and tidy, but maybe for this one you could have some fun creating a chaotic mess of objects!
We look forward to seeing what creative ideas you can think of for this picture.
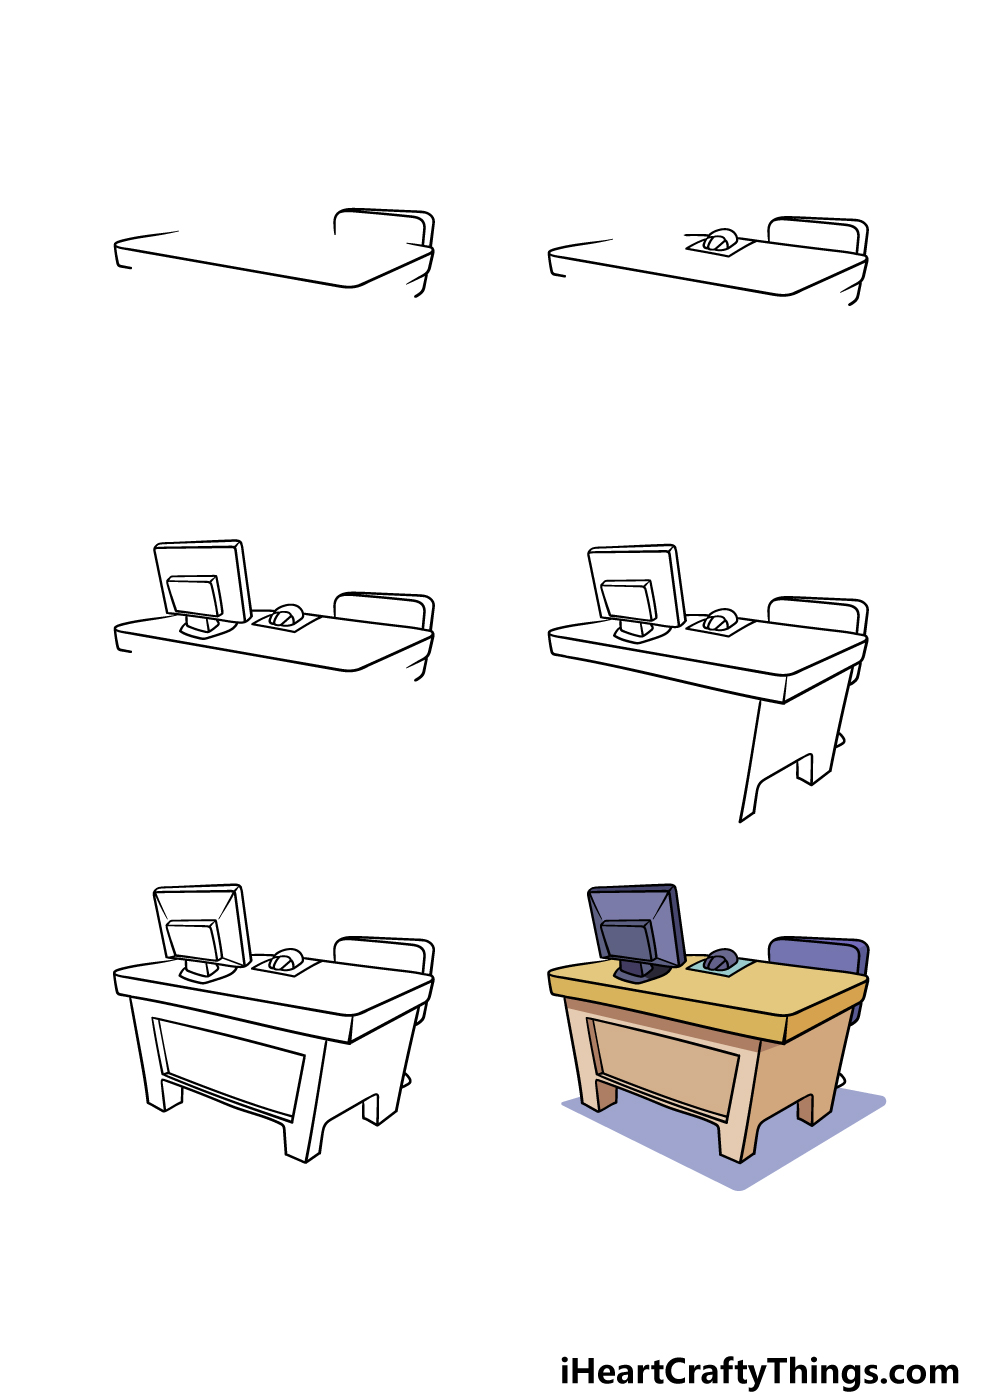
Step 6 – Finish off your desk drawing with some color

You have reached the final step of this desk drawing, and this is the step where you get to unleash your favorite colors on your drawing!
We showed you just one way that you could go about coloring in your image in our example picture, but you should feel free to use any colors you love for it.
Then you can experiment with your favorite art mediums and tools to help you bring the colors to life.
If you drew some extra objects onto the desk then that can be a great way to bring some color variation to the picture. Be sure to have fun with it and you’ll be amazed at what can happen!
4 More Ways To Make Your Desk Drawing Unique
Why not sit at your favorite desk and make this desk sketch look even better?
Desks can come in many different sizes, forms and styles, and this drawing of a desk shows just one. You could make this desk look quite different with just a few subtle changes.
For instance, you could remove some portions to make it look like it has legs instead of being as solid as it appears in our reference image.
You could look at some desks in your own house as inspiration for the different styles.
Do you have a desk style in mind already?
A desk can be used for many different purposes. This one we created has a computer setup on it, but you could add all manner of different objects to this desk.
It could have piles of books, a craft project or maybe an action figure collection for a few ideas.
Once again, you could look at some desks in your home or other places you frequent for some inspiration.
Why not try to think of something really unique and weird to go on this desk?
Another way you could add some more life to this desk drawing would be by adding a human character to the scene. For a fun touch, you could even use yourself as the subject of this drawing!
If you went with our suggestion of having something unique on the desk, then this person could be working on whatever you decided to put on the desk.
Who could be sitting at this desk?
Finally, we would also consider adding a background to this desk sketch to make it even better. There are so many settings you could use as a background.
It could be in a house setting or somewhere more formal like a school or workplace setting. Once again, the background could also be related to any specific activity you portrayed on this desk.
For example, if you added lots of books then you could go for a library setting.
Your Desk Drawing is Complete!
That will conclude this guide on how to draw a desk! A desk is something we are all familiar with, but it can still be surprisingly difficult to draw one and have it looking right.
We hope that this guide made drawing the humble desk easier and more fun for you to do!
Now you can show us what you would add to this drawing, and you could do that by adding objects onto the desk or by drawing a background. These kinds of details along with your color choices can lead to a wonderfully unique image.
When you’re ready for more, we hope to see you on our website to enjoy one of our many drawing guides. We upload more all the time, too, so be sure to check in often!
Once your desk drawing is complete, please be sure to share it on our Facebook and Pinterest pages for us to admire!