This guide on how to draw Charizard for kids will show you exactly how to make an adorable version of this iconic Pokémon!
There are hundreds of different Pokémon to enjoy in the series, and some are more popular than others. Charizard has always been a favorite, and it’s thanks to his power and his dragon design.
In fact, he happens to be one of my personal favorites! People like to draw different versions of this famous Pokemon, and this guide is here to show you how to draw a cute and cartoony version of him.
Once you have finished your design, you could draw some more Pokémon in this style or challenge yourself to draw him in different styles.
It begins with the first step, so let’s get started with it!

Watch These Steps To Make Your Charizard Drawing
How to Draw Charizard – Let’s get started!
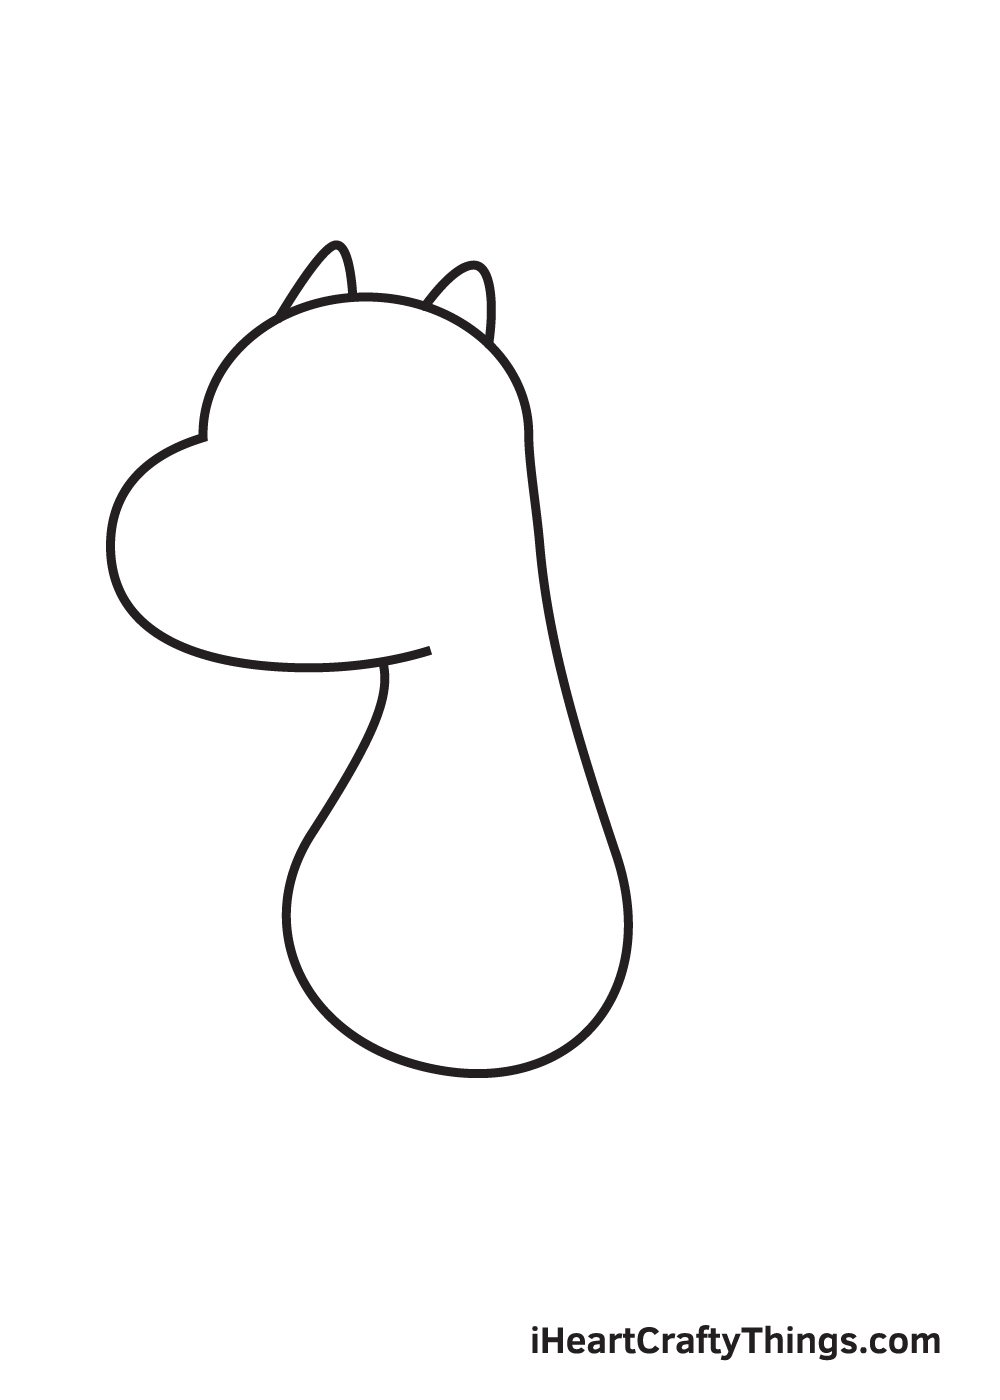
Step 1
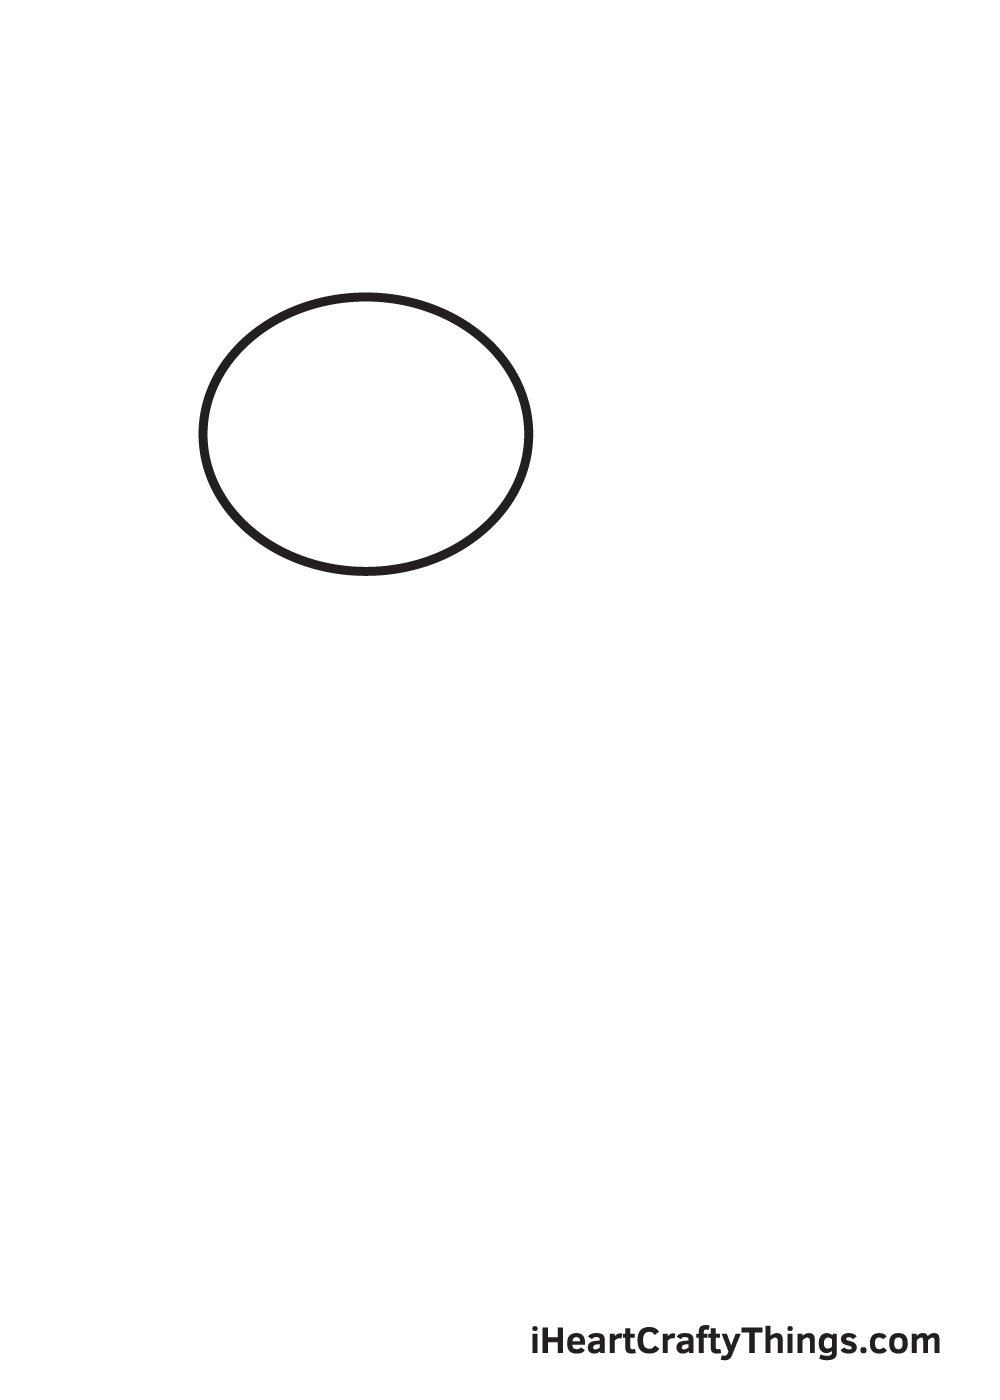
Starting on the upper left corner of your paper, draw an irregular circle shape to outline the head of Charizard.
The shape should have a greater width than length, as shown in the illustration.
Step 2 – Create an Outline of Charizard’s Head
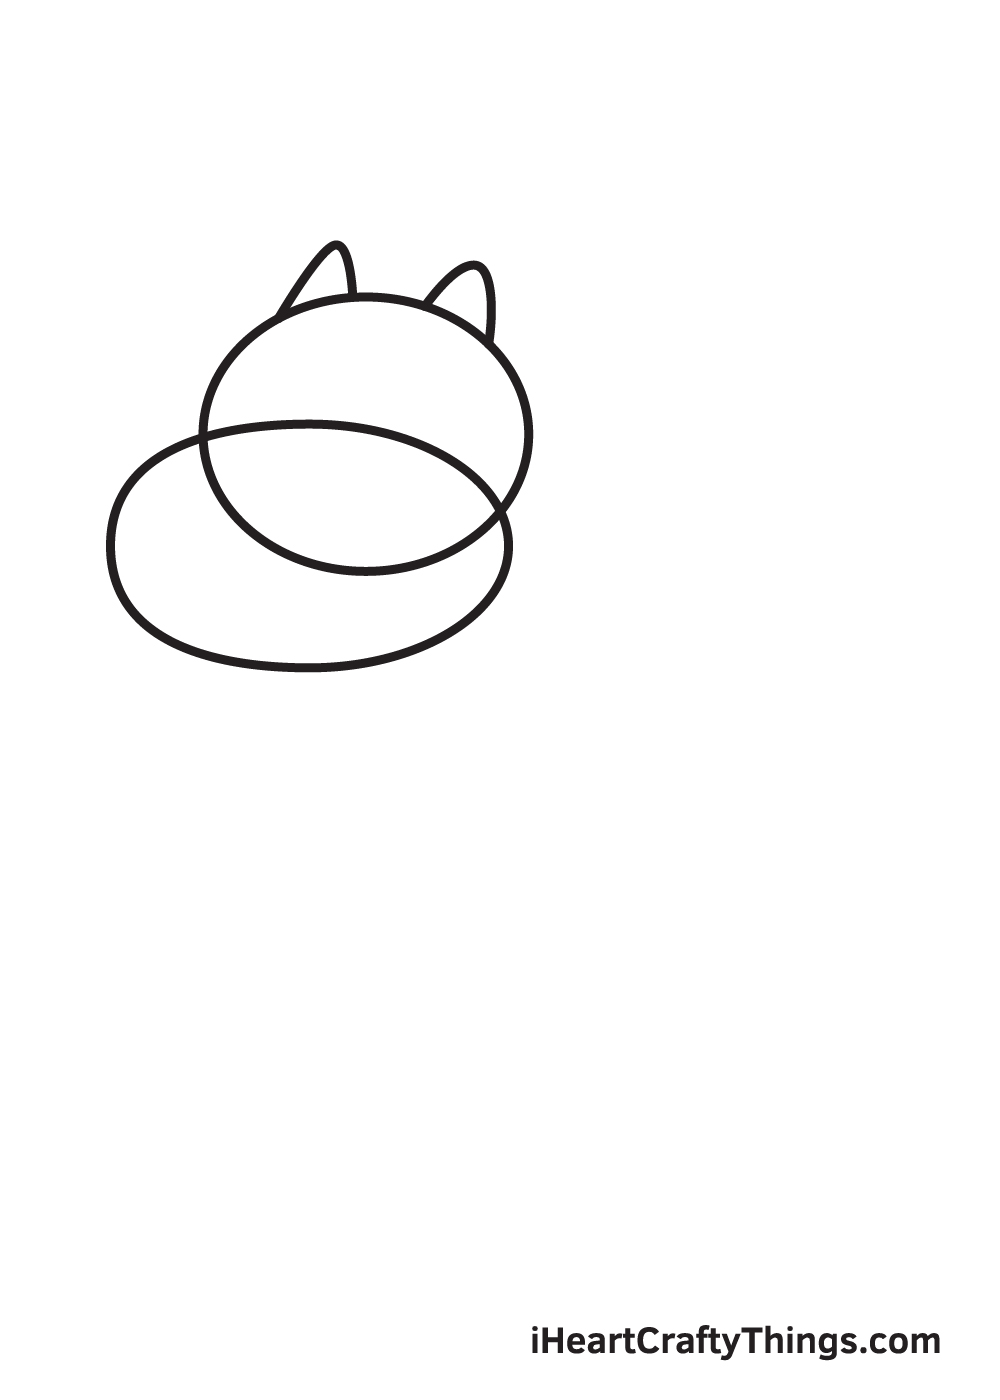
To complete the outline, draw two triangular shapes on each side of the top of Charizard’s head.
Then, draw a sideways oval shape at the bottom of the circle shape we drew previously, forming the snout of Charizard.
This shape should be significantly wider than the shape we drew in the previous step. Feel free to use the illustration as a guide!
Keep in mind to avoid pressing down too hard with your pencil when drawing the outline. It’s important to draw with light strokes so you can easily erase any unnecessary lines later on.
Step 3 – Polish Up the Shape of Charizard’s Head
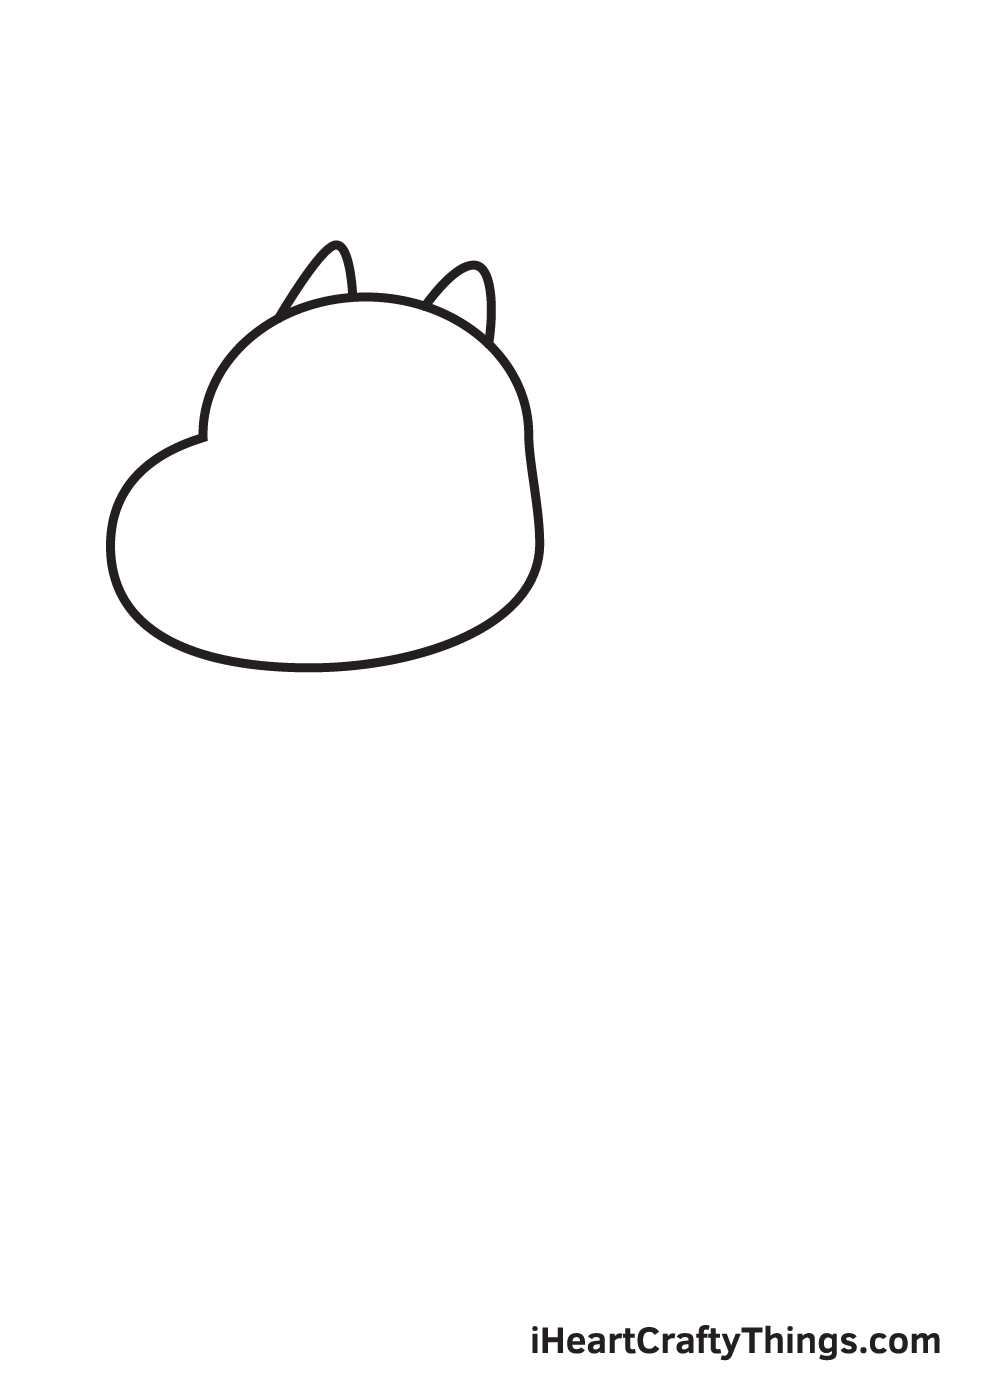
Get rid of the lines overlapping within the shapes we drew in the previous steps using an eraser.
This will reveal a refined outline of Charizard’s head.
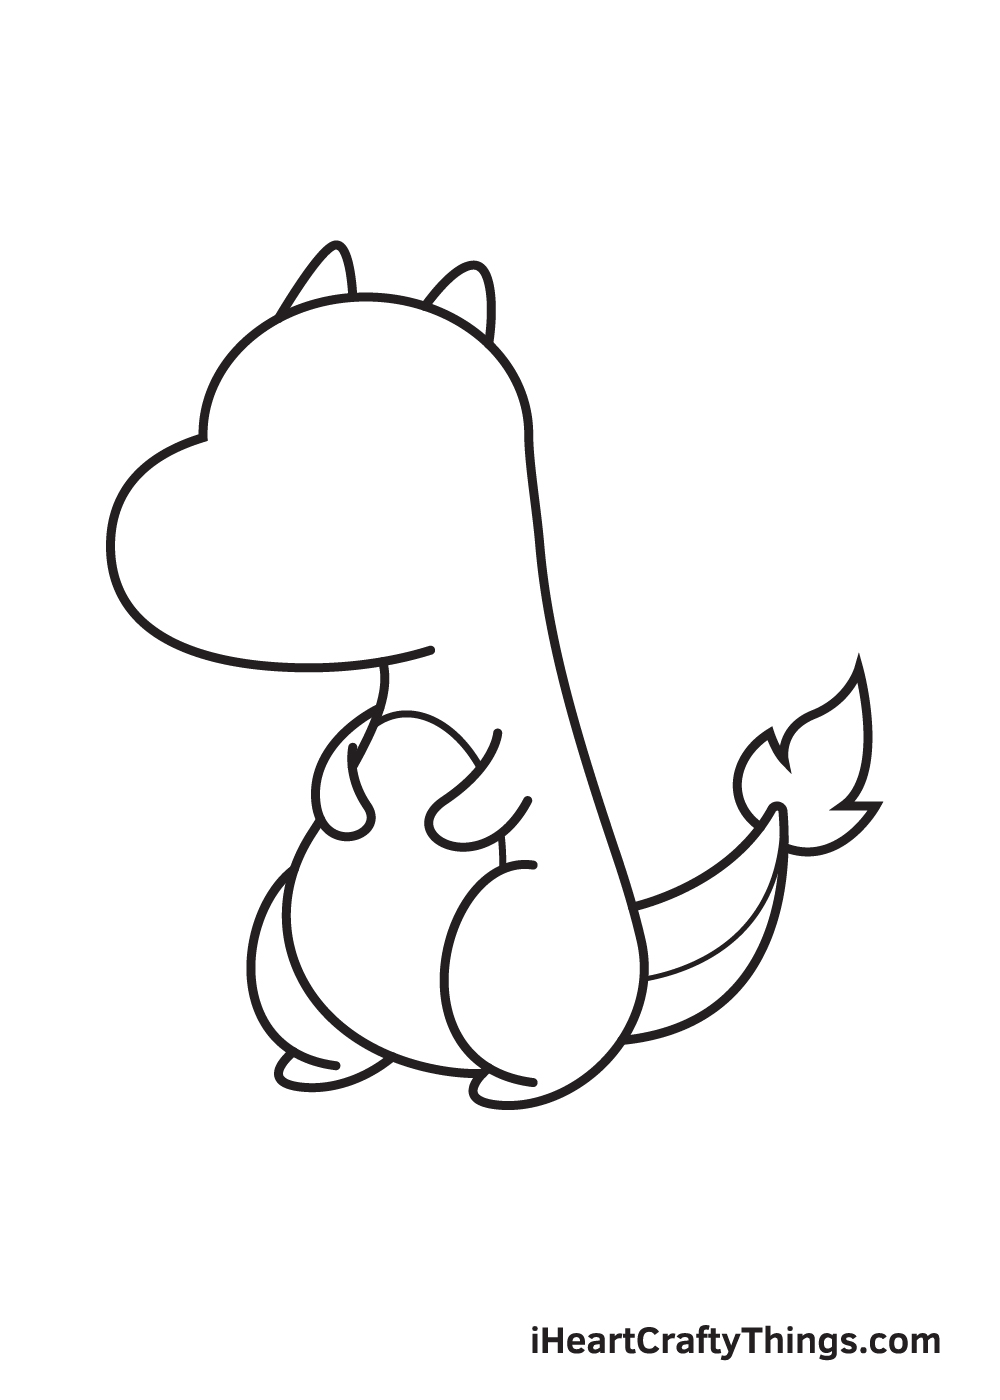
Step 4 – Afterwards, Draw Charizard’s Body
After completing the outline of the head, we will now be moving forward to its body.
Right underneath Charizard’s head, draw an elongated curved shape to create its neck as well as its entire torso. Don’t forget to put emphasis on the belly and make it appear round.
Step 5 – Then, Add Charizard’s Pair of Legs

Create Charizard’s limbs by drawing a curved line facing the right side on each side at the bottom of its torso.
This outlines Charizard’s legs. Then, draw another curved line directly connected to the ones we drew previously to create both feet.
After completing this step, Charizard’s pair of legs should now be complete.
Step 6 – Next, Draw Charizard’s Pair of Arms

Draw an elongated curved shape on each side of Charizard’s body near its chest. This creates both arms of Charizard.
Don’t forget to draw a curved line going downwards across the chest of Charizard too! This forms the underside of Charizard’s body.
Step 7 – Draw Charizard’s Tail With a Flame
Structure the tail by drawing an elongated triangular shape attached to the bottom back of Charizard.
Afterwards, draw a thin line within the tail to form the outline of its underside. The triangular shape should be curved upwards, as shown in the illustration.
Make sure to add a flame on the tip of the tail—it’s one of Charizard’s distinct features!
Step 8 – Afterwards, Draw Charizard’s Wings
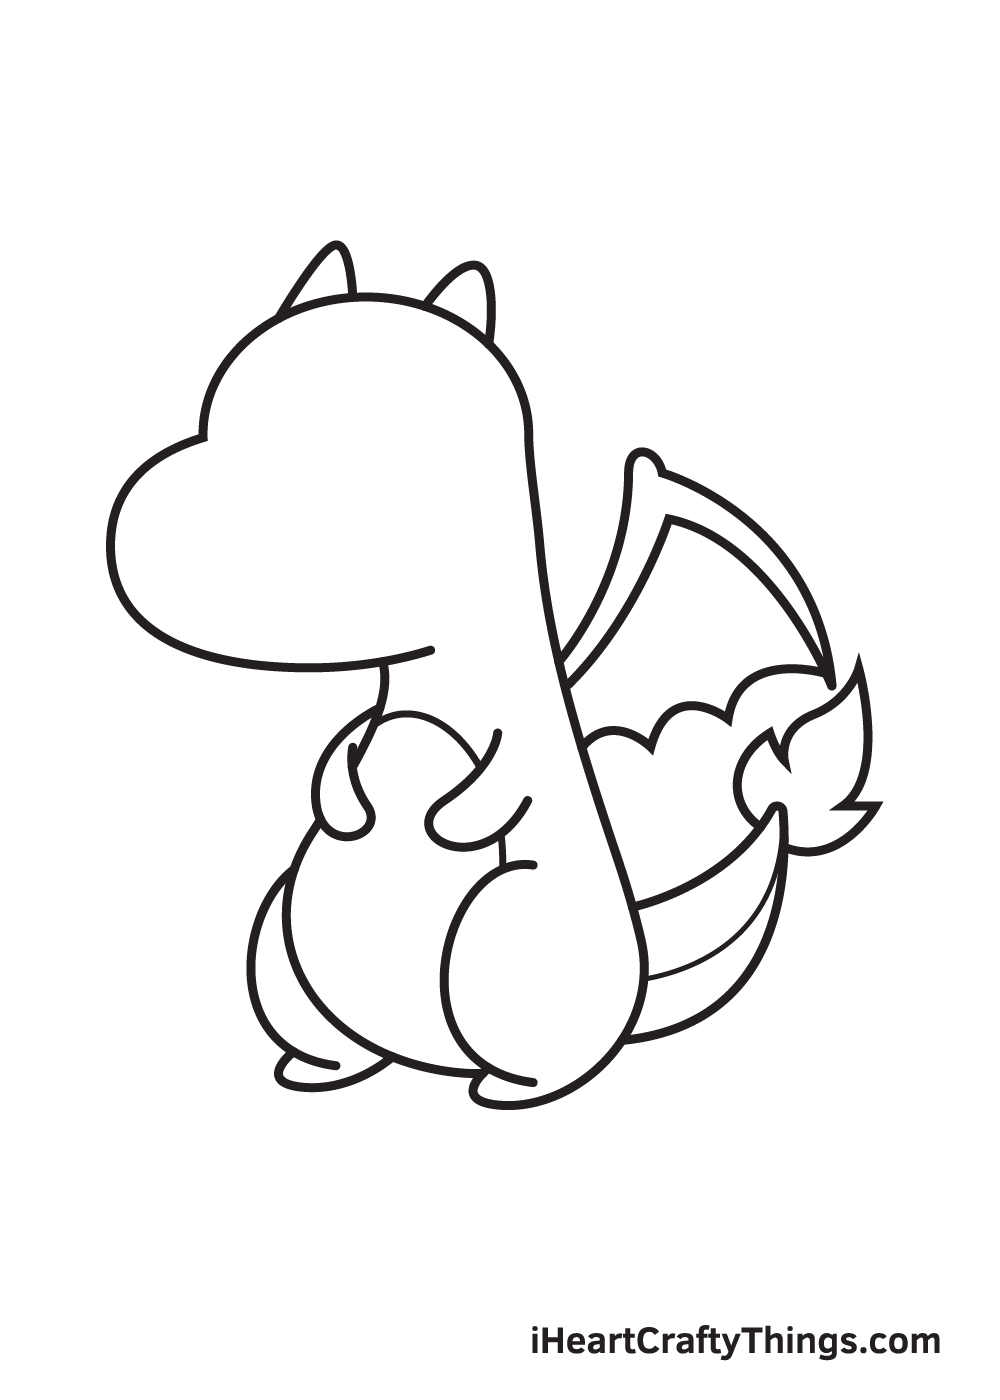
Create Charzard’s wings by drawing the bone structure in an upside down “V” form. Then, draw connected curved lines at the bottom, forming a triangular-shaped wing.
When drawn correctly, Charizard’s wings should have a quite similar shape to the wings of a bat.
Since Charizard is facing sideways, only its right wing is visible.
Step 9 – Now, Add Charizard’s Facial Features
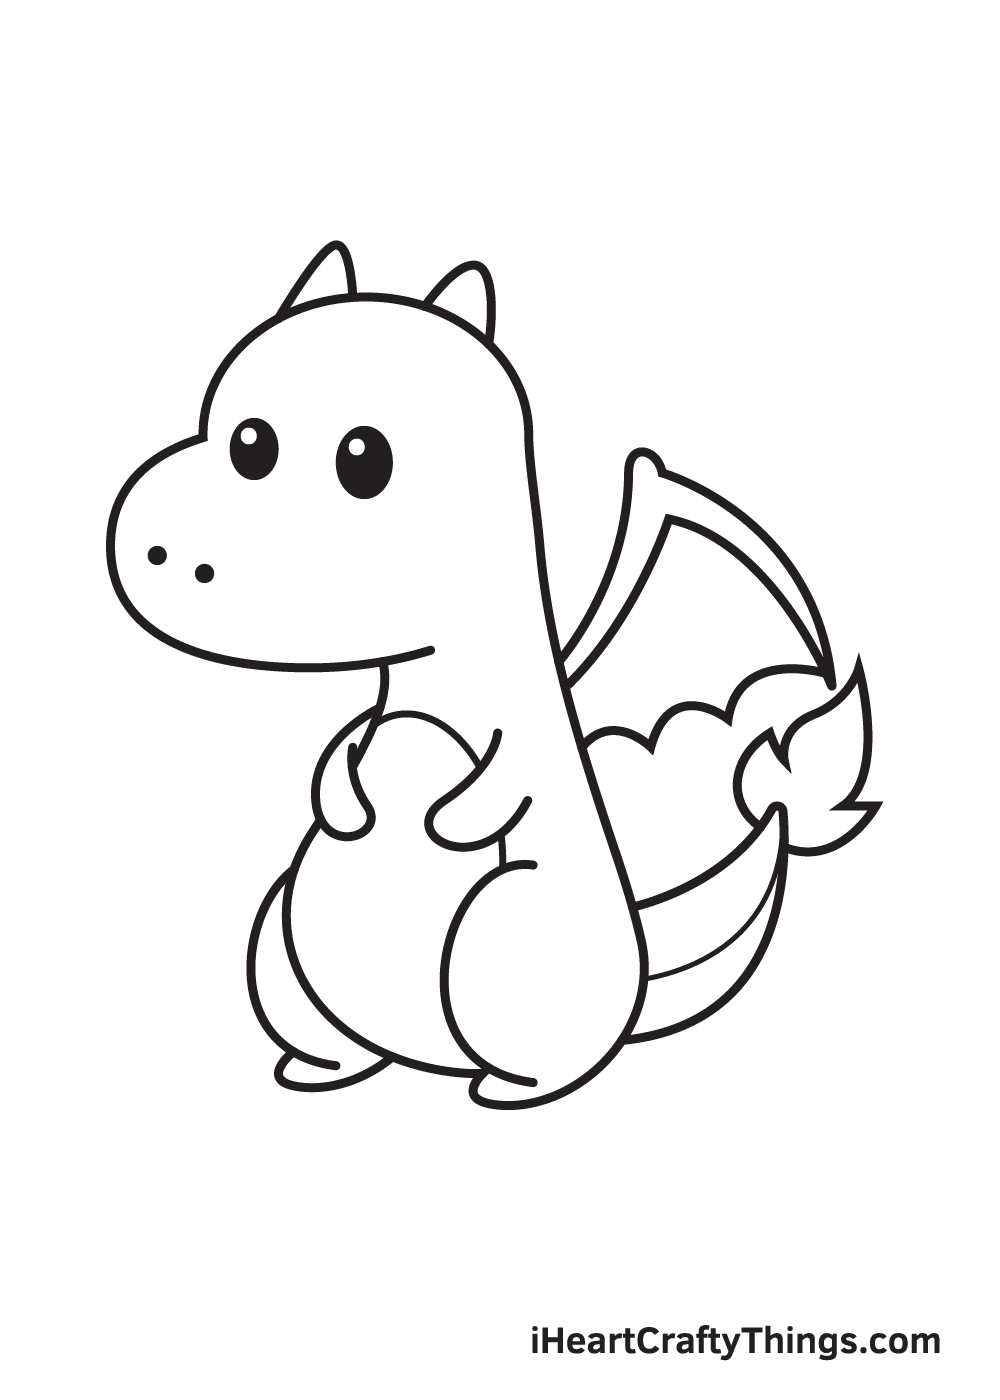
Make Charizard look happy by creating its facial features! Start by drawing two oval shapes to outline the eyes. Then, draw tiny circles inside each eye to create the iris.
Complete the eyes by shading the entire space within the eyes except for the small circles. This creates a dramatic “gleaming eyes” effect.
Now, to create the nose, simply draw two small shaded circles side by side.
As you can see, your Charizard drawing has come to life at last! Now all it’s missing is a splash of colors to make Charizard look vibrant and colorful!
Now that we have successfully drawn a Charizard, it’s time for the most enjoyable part—choosing the colors and coloring your drawing.
Charizard is originally orange in color with a cream-colored underside. Its pair of wings, on the other hand, are teal.
You can opt to color your drawing using the original colors of Charizard or handpick a unique set of colors.
If mixing and matching colors sound fun to you, then go ahead and customize the colors of your drawing. It’s all up to you! After all, it’s your work of art!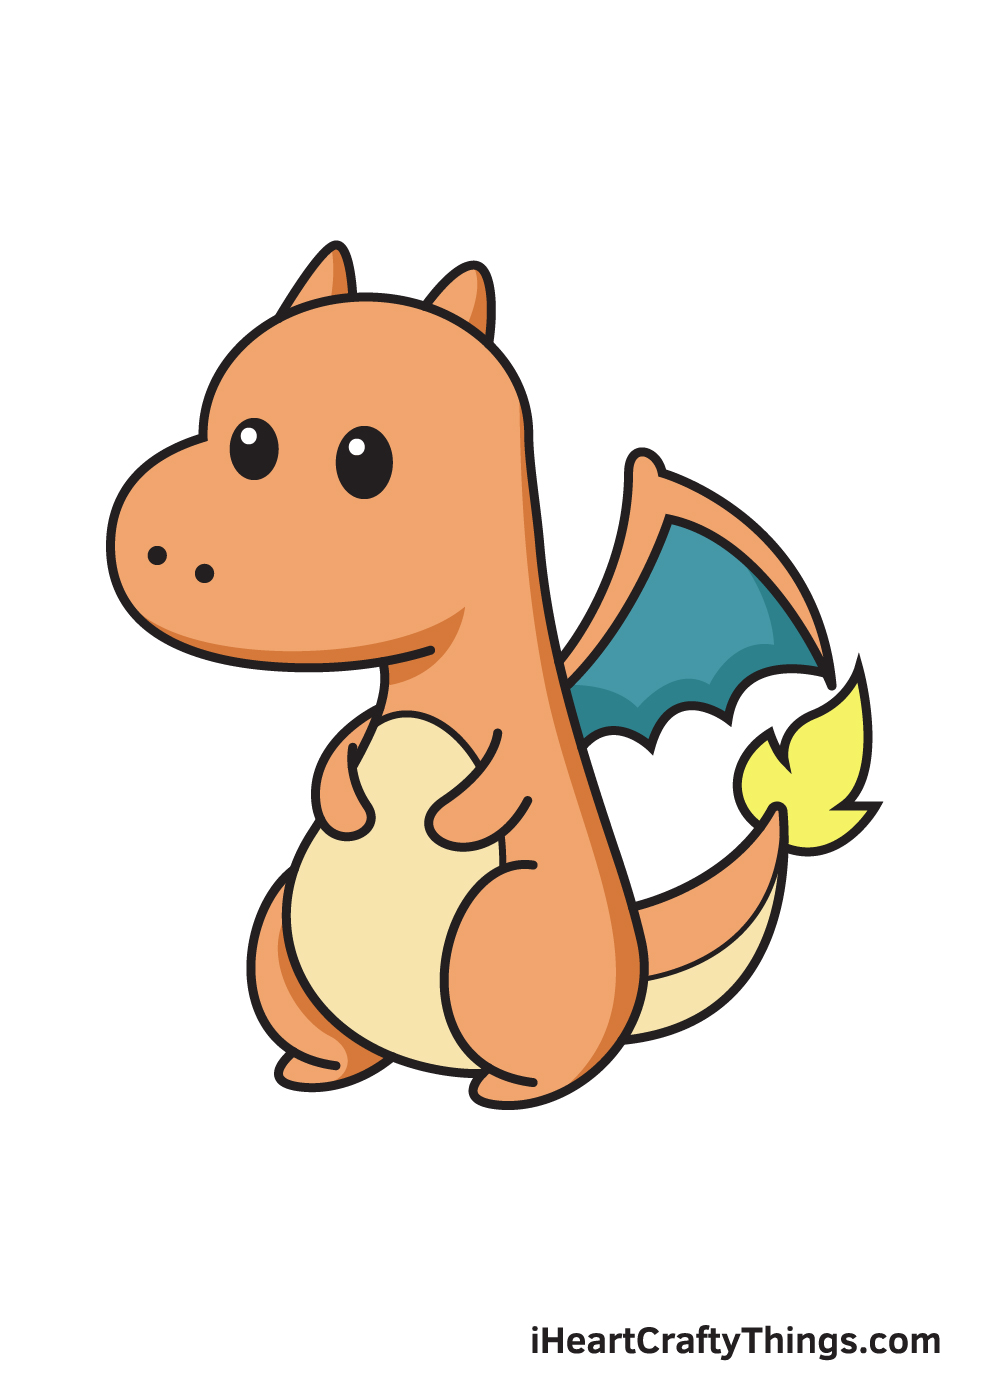
5 Tips To Make Your Charizard Drawing Even Better!
Find out how you can make your Charizard drawing even greater with these tips!
For this Charizard sketch, we went with a really cute and simplified interpretation of this famous Pokemon. One way to make this drawing even better would be by drawing some more Pokemon you love in this style.
You could draw the previous two stages of Charizard’s evolution or any other Pokemon that you’re a fan of! Who would you choose to add to this drawing?
Another way you could create an interesting dynamic for this drawing of Charizard would be by drawing his more regular look as well.
If you consult the TV show or pictures online, you could add a more ‘realistic’ version of Charizard beside this cartoony one. That would be a great way to create a contrast with this cute version!
You would make this cute Charizard even more complete by drawing a background. You could use some settings from the Pokemon games or shows as inspiration.
The background could be drawn in a similarly cartoony, simple style or you could make it more detailed and realistic. Which style would you choose for the background once you have decided on the setting?
We used the classic color scheme for this Charizard drawing, but you could customize it with your own colors. Sometimes Charizard will have a different color scheme for a different variation.
You could use one of these existing variations or create a unique one of your own! Any colors would look great, and it all depends on your own preference.
What colors and art mediums would you use for this Charizard?
Charizard is a fire Pokemon, and that means that he has fire powers. You could add some flaming fire effects to your Charizard sketch to finish off the effect!
These could be around him as if he were producing them, but they could also be used as a pattern around him.
If you color these with warm reds and yellows then that would also make the image more colorful.
Your Charizard Drawing is Complete!
Pokémon not only appeals to young children, but to people of all ages as well.
If you’re one of the many people who are fascinated with Charizard or Pokémons in general, then we’re sure you’ve had a lot of fun with this drawing activity.
We are constantly uploading new content to be added to our “How to Draw” catalog, so don’t forget to re-visit our website regularly to continuously enjoy brand-new drawing tutorials
. Now that you’ve drawn Charmander, which Pokemon would you like to learn how to draw next?
Once you’ve finished your Charmander drawing, you should be proud of yourself for finishing a masterpiece!
Take a picture of your drawing and share it on our Facebook page and on Pinterest. And while you’re at it, make sure to like our Facebook page too!
We’re excited to see your colorful Charizard drawing!