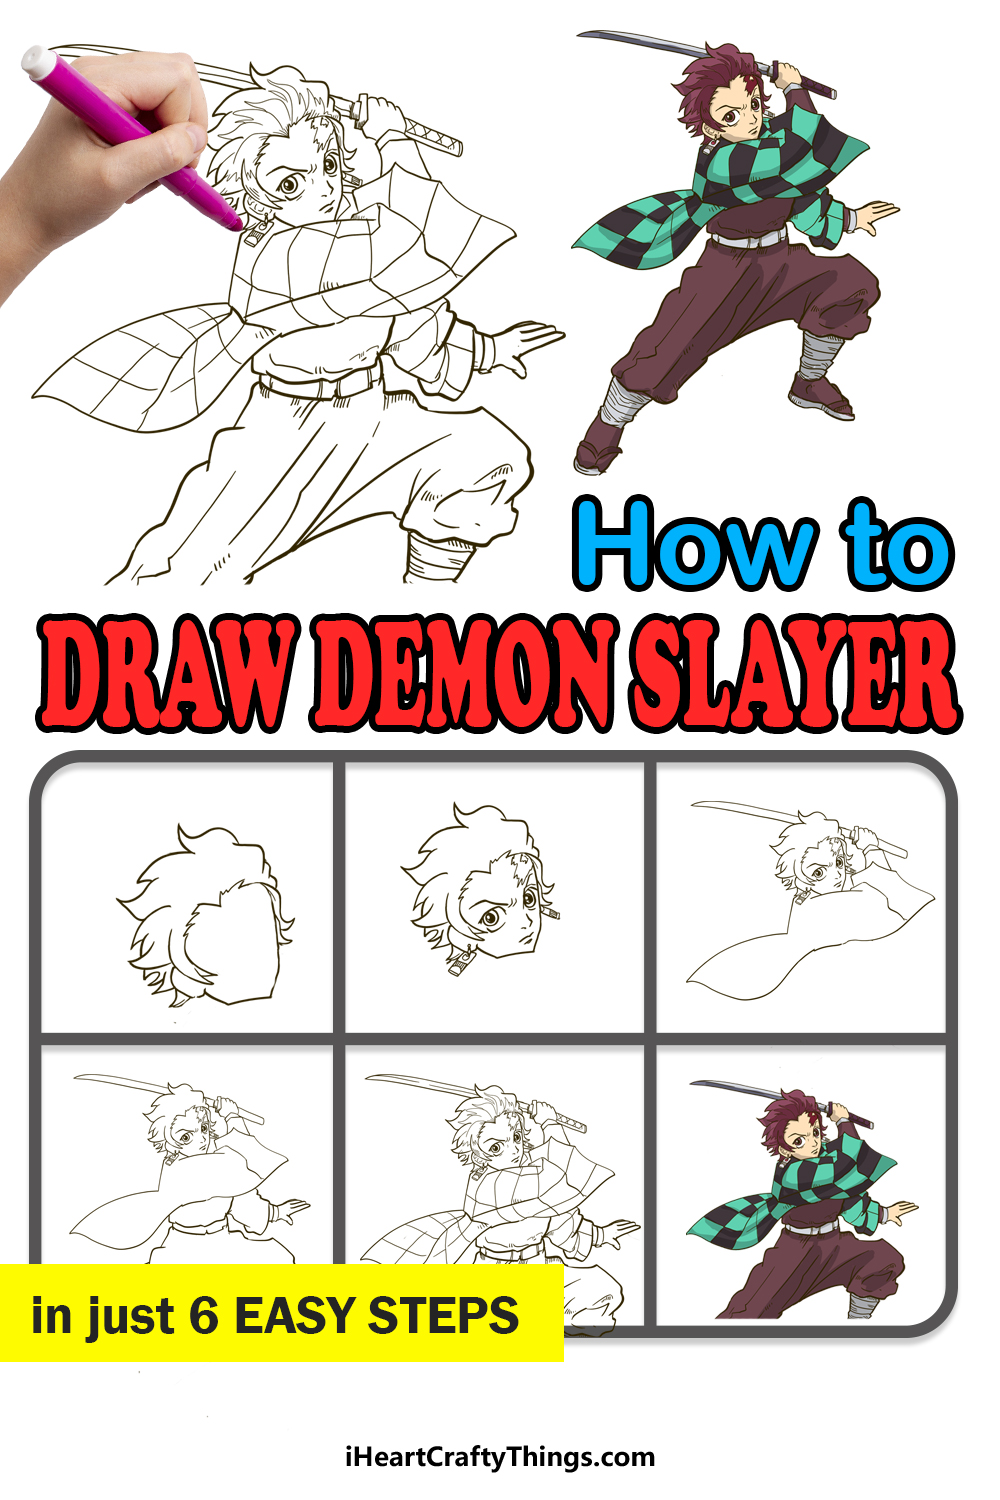
If you want to know how to draw Demon Slayer, then you’re in the right place! This guide for kids will make it much easier for you to recreate this iconic hero.
The world of anime is filled with many incredible stories and characters, and everyone has their favorites. Demon Slayer is a relatively recent addition to the world of anime and manga, but it’s incredibly popular nonetheless.
It follows the adventures of Tanjiro Kamado as he takes on various demons and monsters. Many fans of the show like to create fan art of this character but may not know how.
Anime characters are typically very detailed, and this makes it tricky to depict them. This guide will walk you through everything you need to know to make an incredible drawing of Tanjiro.
After that, you can even add your own ideas and elements to finish it off nicely.
Watch How To Make A Demon Slayer Drawing
How to Draw Demon Slayer – Let’s Get Started!
Step 1
When it comes to drawing people, even ones in a cartoon or an anime style, the more dynamic the pose the more difficult it gets to draw. You’ll notice that this drawing of Demon Slayer is in quite a dynamic pose, so it will be a bit tricky.
Artists will often break down a drawing into simple shapes using a light pencil to plan it out, and you can do that as well. The hardest part of drawing a person in any style is getting the proportions right.
You can help make this easier by looking at the final images of this guide and breaking it down into simple shapes, like an oval for the head and a rounded rectangle for the body and so on.
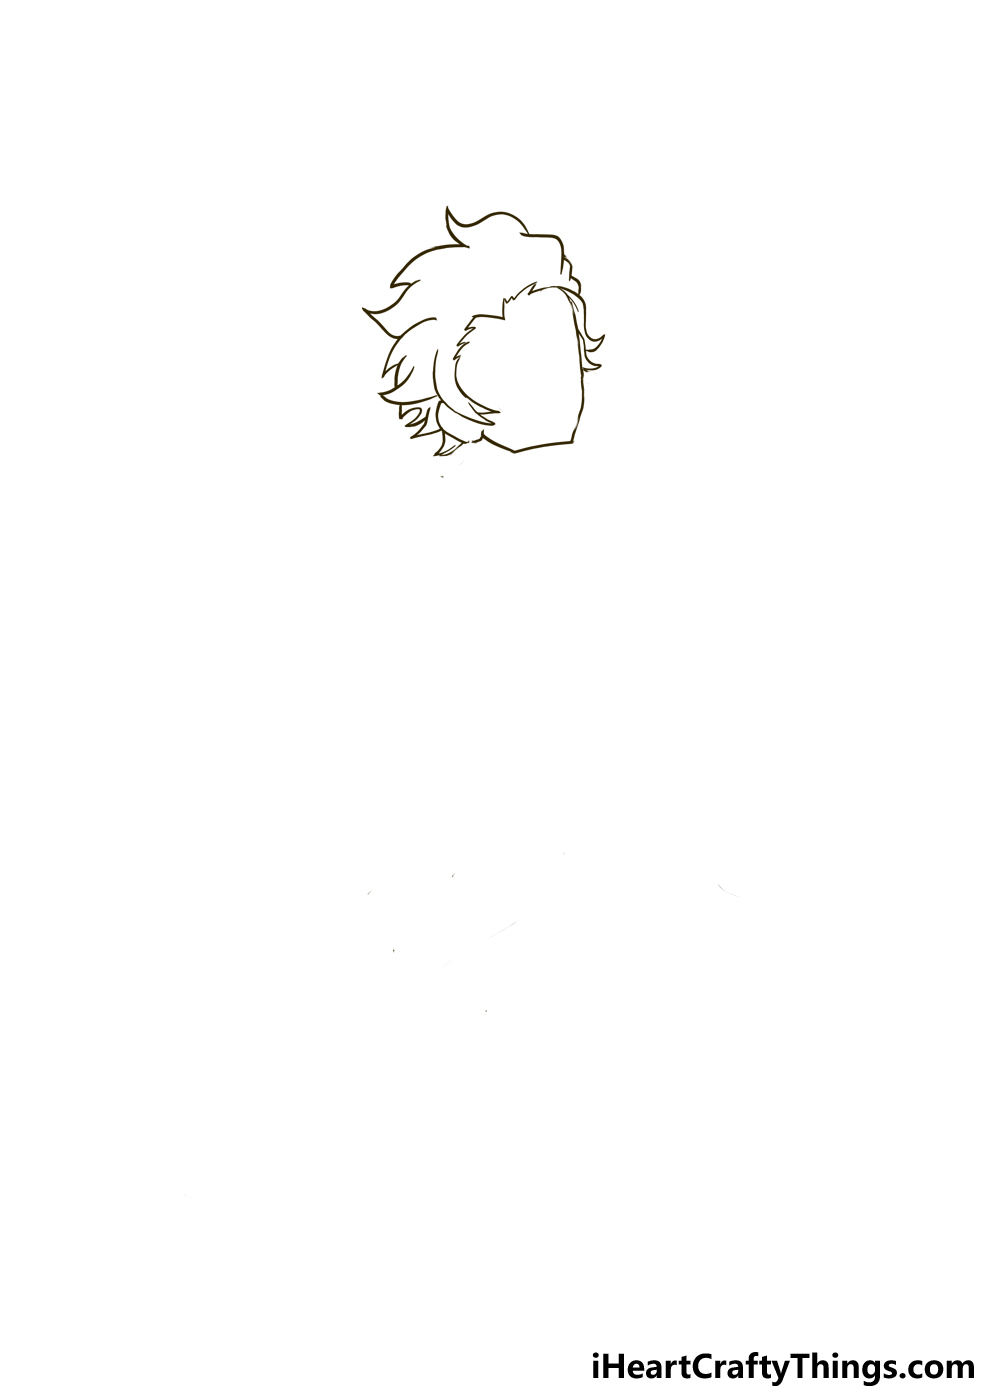
If you do this, then try to press as lightly as you can with the pencil to make it easy to erase later on. With all that said, we can draw the head for Demon Slayer now.
His face is quite angular with some pointy sections at his chin and jaw. You’ll notice his hair is quite prominent on his head, it’s quite curvy and wavy and flowing backward to show that he is moving forward.
If you use a shape to plan out his head, then a squat oval would be best, and you can separate it into two sections, the face and the hair.
Now that we have his head drawn, we can focus on adding his facial features in the next step.
Step 2: Draw some facial features for Demon Slayer
When it comes to manga and anime characters, they often have rather simple facial features. The features of this character’s face are a little more detailed than some, however.
Once again, you can prepare for these facial features by planning them out first. Another thing artists will sometimes do is draw a sort of cross across the shape of the face.
You can do this with two slightly curved lines crossing one another. The vertical line should be down the center of the face.
You can position it so that the nose will go on this line when we draw it. So in this case, you will see that the vertical line should be more to the right-hand side of the face.
The horizontal line will go where the eyes will be drawn. Once you have these lines, start building up the face with basic lines and shapes, just so you know where they will be positioned.
Remember to either use a very light pencil or just very gently press the pencil down on the page. Now we can draw the actual facial details.
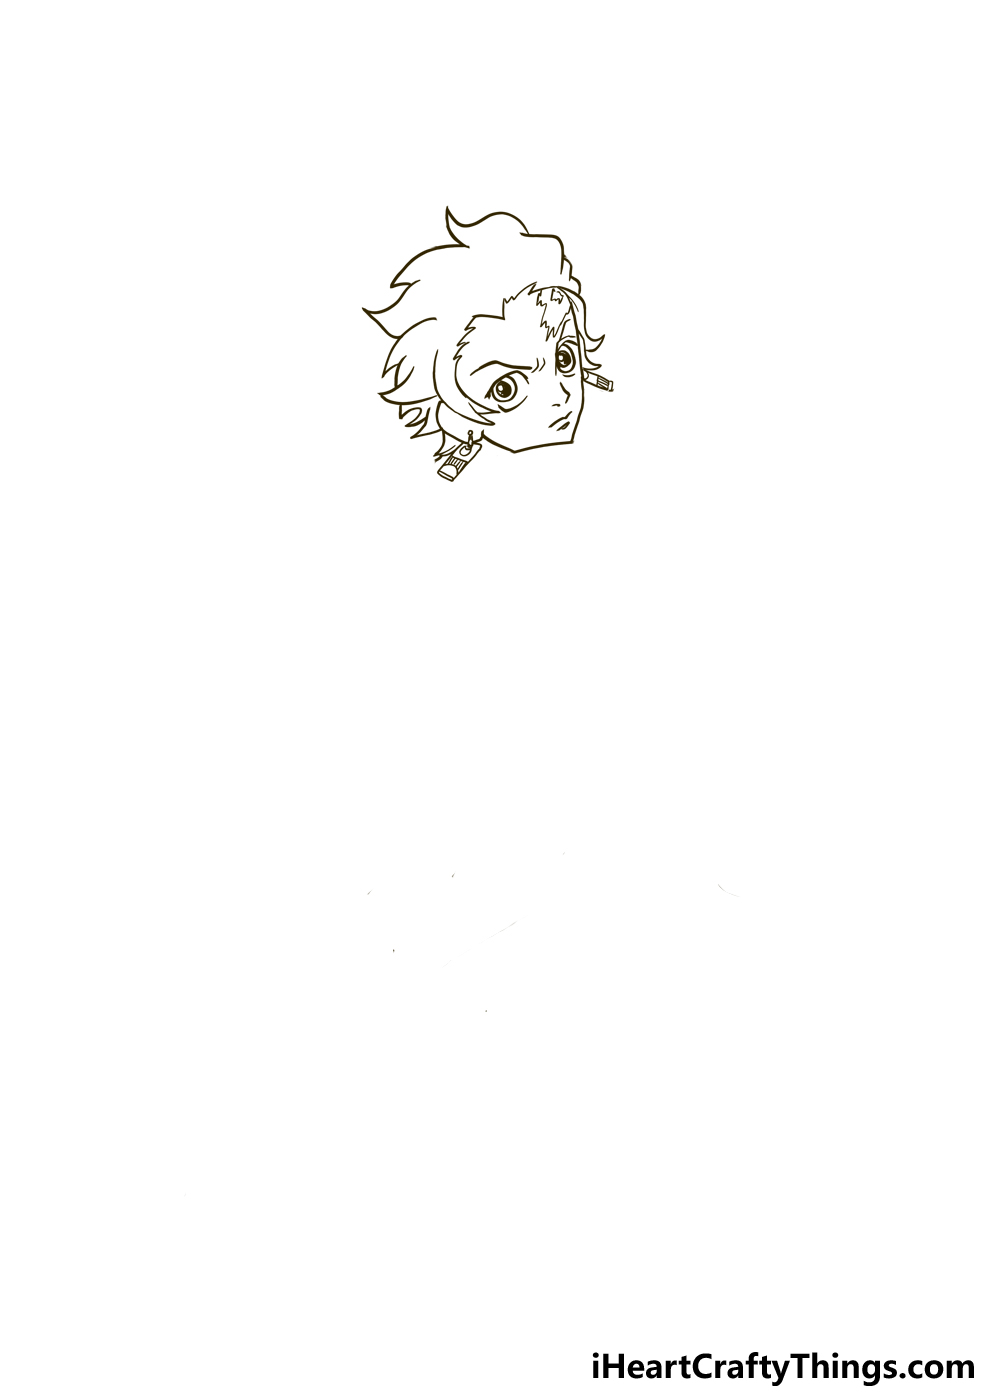
His eyes are quite large and rounded, more rounded than some other anime characters’ eyes. His nose and mouth are quite small on his face and drawn with some simple, small lines.
This character also has a characteristic marking on the top right of his face, so you can add that in this step as well, and it is drawn using some ragged lines.
Finally, he has some large rectangular earrings on his ears that have some nice detailing on them as well. Now his head is complete, we can start adding his body in the next step of the guide.
Step 3: Start adding his body in this third step
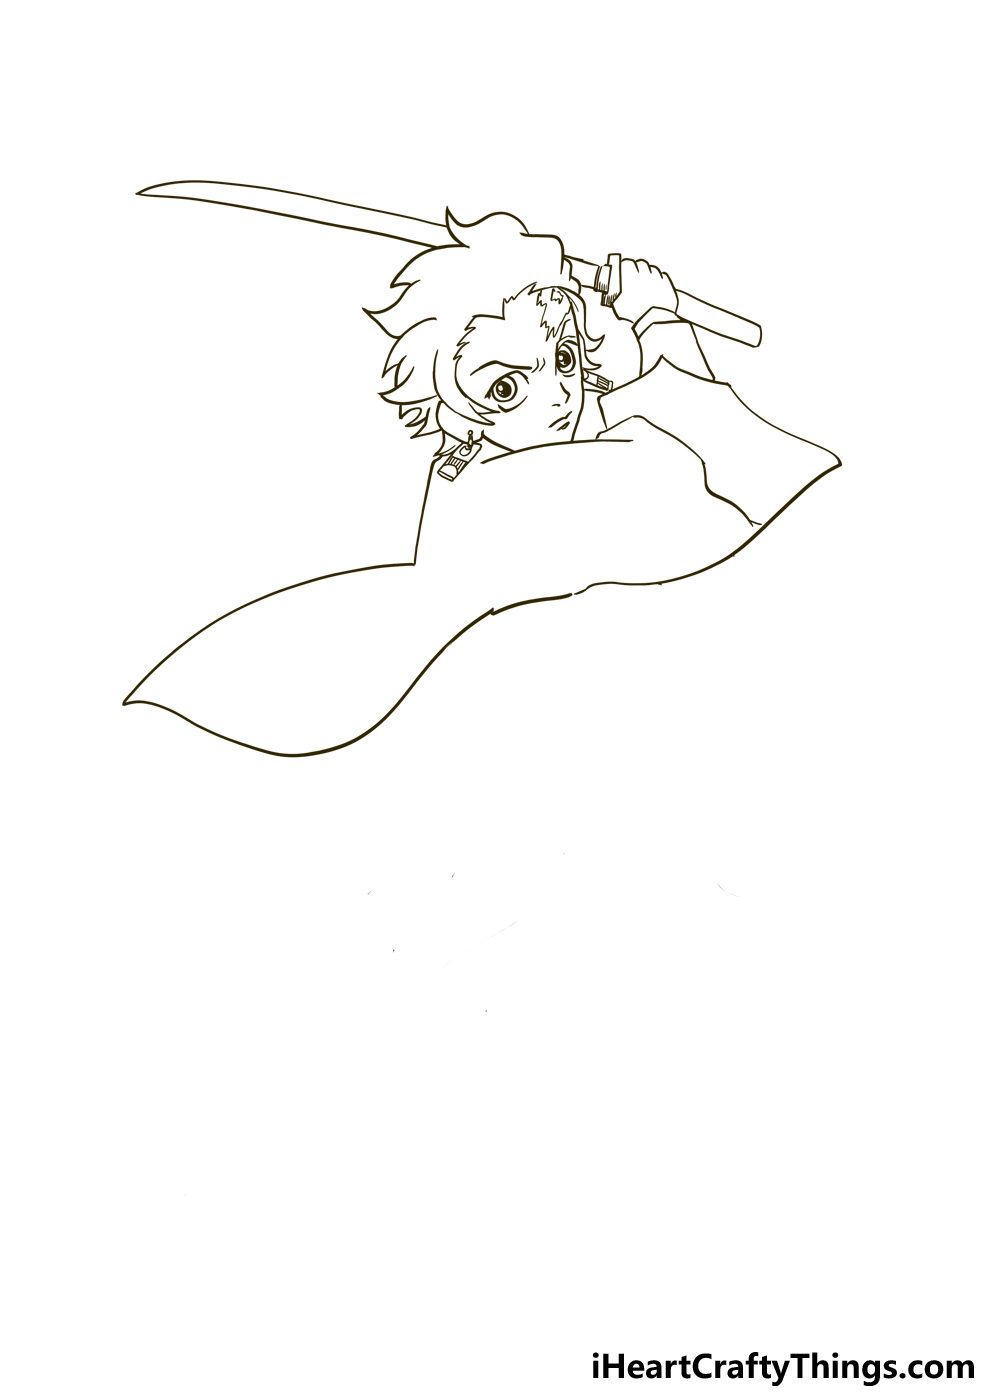
Tanjiro is wearing a flowy jacket coat in this picture, and we will draw it in this step. He is also swinging his sword in this pose, so we will portray this as well.
These kinds of poses are made so much easier when you plan them out first. Because his jacket is so flowy, it can be tough to imagine where his body actually is beneath the fabric.
Try to picture it as you draw, as it can be easy to get a bit lost with the posing. We will draw a big rectangular sleeve for his right arm.
This will have a fairly large ridge at the end of it. His shirt sleeve will poke out of the end of this larger jacket sleeve, and it will be really thin compared to the jacket.
His hand will be at the end of this thinner sleeve. The sword design is actually rather simple, composed of a thin rectangular handle that he is grasping and the blade itself.
The blade has a very slight curve to it, but it’s fairly straight edged. As you can see in the reference image, it will be behind his head with this pose, as he is in the middle of swinging it.
With the top of his body drawn, we can add the rest of the outline in the next step.
Step 4: Now draw the rest of the outline for his body
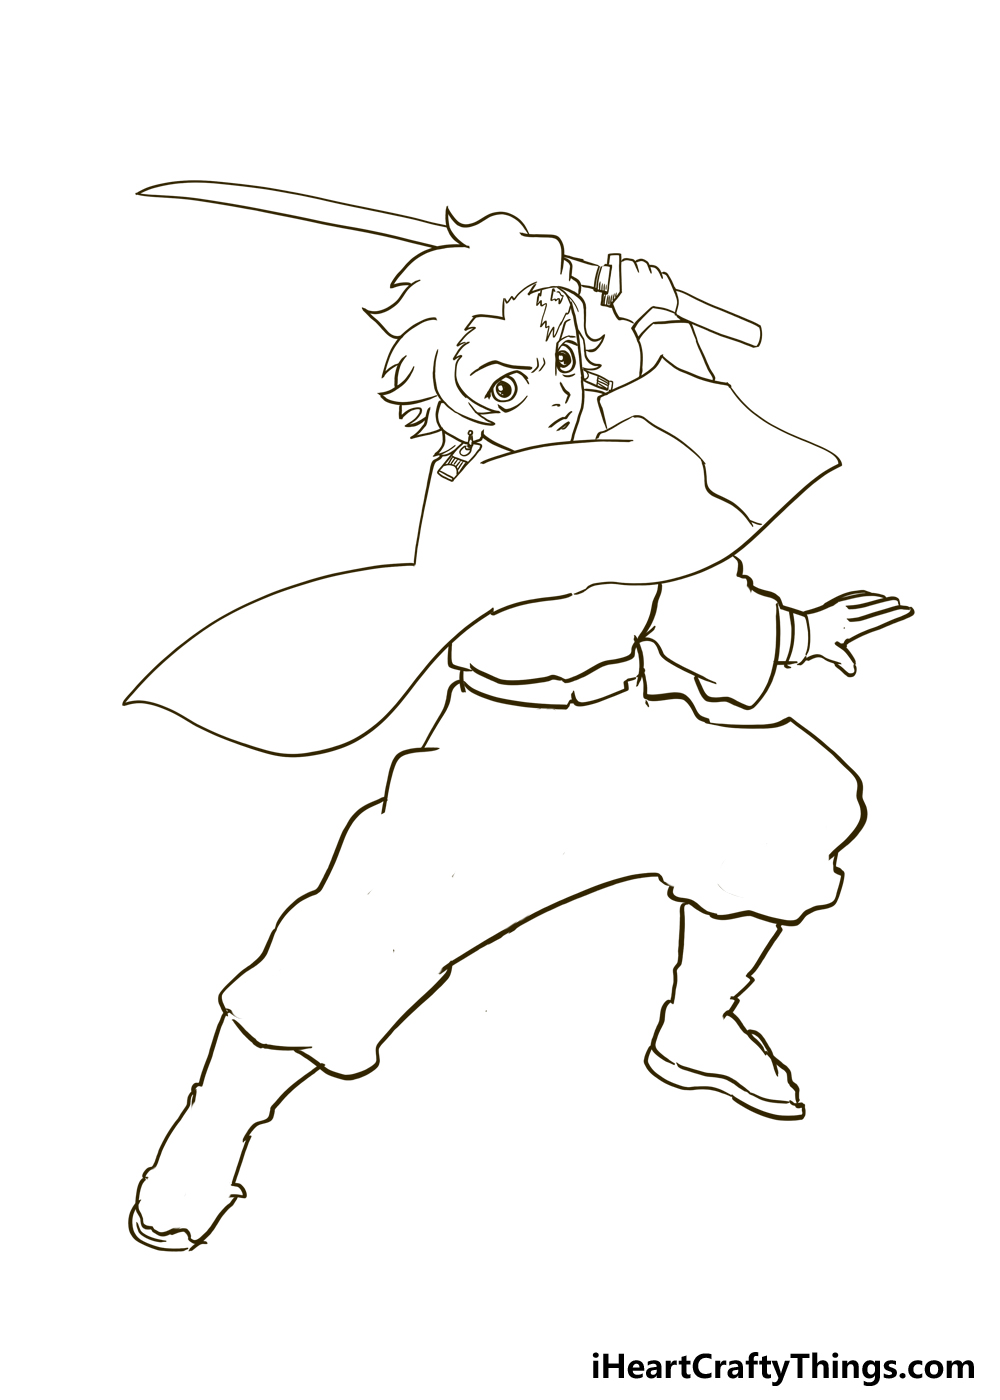
Now we can finish the outline for the body of this Demon Slayer drawing in this fourth step of the guide. First, we will draw the small section of his shirt that we can see under his jacket.
This can be drawn with some slightly wavy lines, and it will be a pretty small section. Then, we will see his other arm poking out.
This other arm will extend out from the chest section, and it will have a similarly flowy jacket sleeve and then a thinner shirt sleeve poking out from that.
His hand will be extended out in a simple pose at the end of his shirt sleeve. Then, we will draw his pants.
To create the effect of him in this mid-swing pose, we will position his legs accordingly. The leg on the left will be extended out straight, whereas the one on the right will be bent.
Much like the jacket, the outline for the pants will be quite large and flowy. The leg on the left will be drawn in a rounded rectangular shape whereas the one on the right will be a bit more rounded.
Then, we will add his boots to the legs. You may assume the boots would be drawn with some straight lines, but we will be making them bumpy and irregular.
Once these are drawn, you can erase any of the pencil lines you may have drawn to plan out the drawing, as we won’t be needing them anymore.
Step 5: Draw the final details
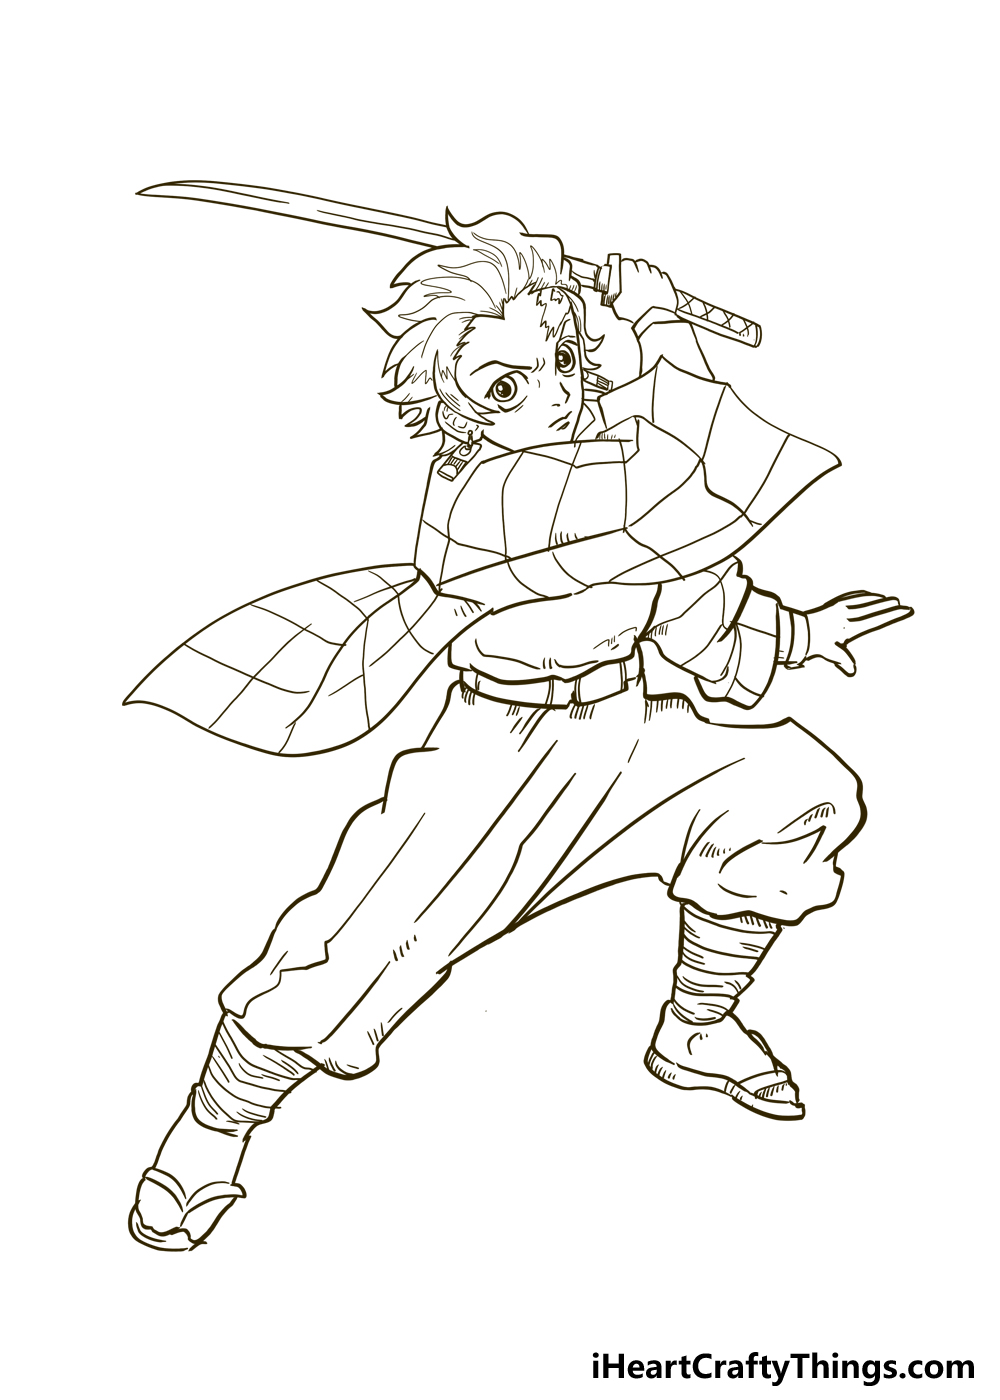
Smaller details can really help to bring a drawing to life, and we will be adding a lot in this fifth step. First, we will add some pointy shapes inside the hair outline.
You will see why we are adding these inner outlines soon enough when we add the colors later. Next, add a line down the center of the sword blade.
The handle of the sword has a diamond pattern on it that you can add now as well. His jacket has a grid pattern on it, and drawing it can actually be a bit tricky.
This is because we have to account for the way that the fabric is flowing. We would recommend following the reference image closely as you draw.
Don’t forget to add the grid to the arm poking out on the right. Then, add some details to the belt such as the buckle.
For his pants, we will be adding lots of curved, smooth lines to replicate the look of the creased fabric. Lines across the top portions of his boots will add some texture there as well.
Finally, add some thin shapes by his toes to make it look like the base of his shoes are sandals. Once you have added all of these details, you’re ready for the final step!
Before you go to the final step, be sure to add any extra details you would like for the drawing.
Adding a background to recreate your favorite Demon Slayer scene would be one good idea to add to the drawing.
If you have any other favorite characters from the series, it could be fun to add them as well!
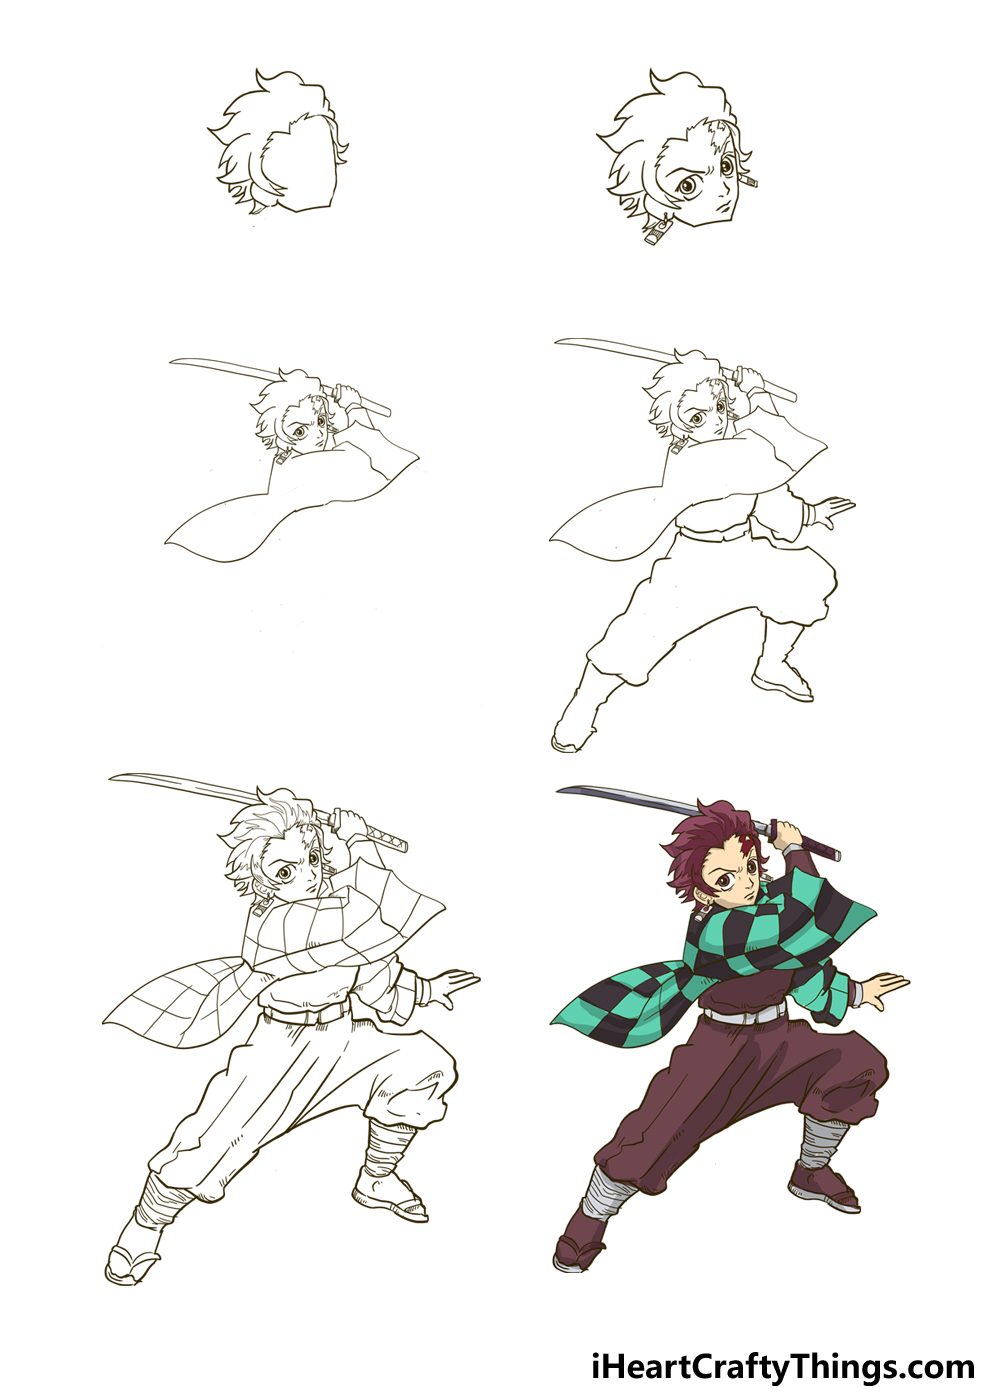
Step 6: Now, finish off with some color for Demon Slayer
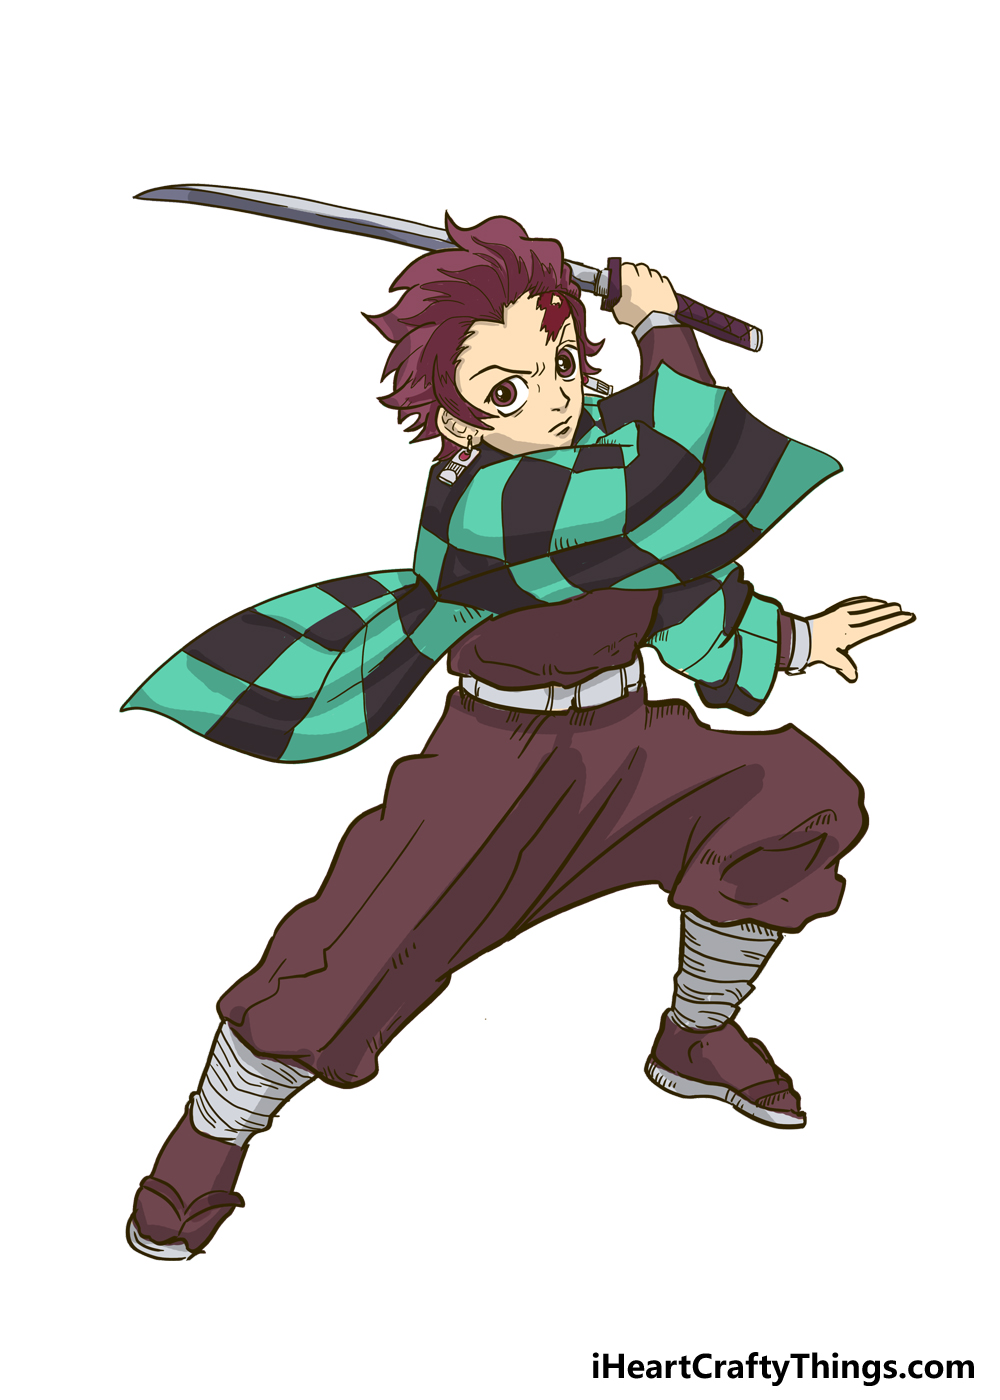
In this final step of our guide on how to draw Demon Slayer, we will focus on the colors to finish off the design. His design is somewhat muted, with maroon and green being the main colors.
There are some subtleties to the colors, however. You will notice this in his hair, and this is why we drew a separate section inside the main outline.
The outer section of his hair will be a lighter maroon, whereas the inner one will be a bit darker. This kind of subtlety helps to make the character look more dynamic.
We will then use a reddish brown for most of his clothing including his shirt and pants. Once again, you can use various shades to add some dynamic shading to his clothing.
Grey will be used for elements such as the blade of his sword and his belt. His jacket has a grid on it, and the squares of this grid will alternate between a bright green and a dark brown.
With these colors, you will have an accurate representation of the character! When bringing color to the drawing, try to use the most effective art medium for the job.
It can be good to use art mediums you’re comfortable with, but don’t be afraid to use ones that you’re less familiar with instead, as it can be fun to experiment.
Bonus: Make This Demon Slayer Drawing Easier With These Tips
For people who love anime and manga, it may seem like it would be easy to draw your favorite characters. However, when you sit down to do it, it can be harder than you expected.
You may have found that even with the steps in this guide. If you found that it was tricky to draw even with the steps, you’re in luck!
We have a few more tips that you can use to make your drawing a bit easier if you struggled. Firstly, one thing you can do to prepare for the drawing is drawing a stick figure version first.
Even if it’s super simple, you should still try to pose it as you wish to pose the final drawing. This will give you an idea of what the final drawing will look like.
Once you have this stick figure, it would then be good to add some simple shapes over the drawing that will vaguely form the shape of his outline.
It will be best to use a pencil for these, and as light a pencil as possible. This is because you will need to erase the pencil lines later on.
You can slowly add some more details in more layers until you start to see the picture taking shape. If you need to make a few attempts, then don’t be shy about it!
You could also get a friend or a family member to replicate the pose in the image, and that may make drawing it a bit easier for you as you will be able to see how the pose should look in a real context.
Hopefully, these tips will make this Demon Slayer drawing easier to take on and finish!
Your Demon Slayer Drawing is Complete!
The Demon Slayer series is so cool, and we hope you had a great time recreating its main character!
This Demon Slayer drawing was certainly challenging, but that’s why we wanted to break it down.
If you follow the steps and plan it out with a pencil then you can make it much easier. If you’re really struggling, you can change the pose to one you may find easier or simplify the details.
However you draw it, remember that there are more ways that you can have fun with the drawing.
Adding a background or additional characters from the series can be a great way to make it even more personalized.
You can also play around with the colors you use as well as the art mediums in order to make the colors even more interesting. When your drawing is complete, remember to share it on our Facebook and Pinterest pages for us to see!