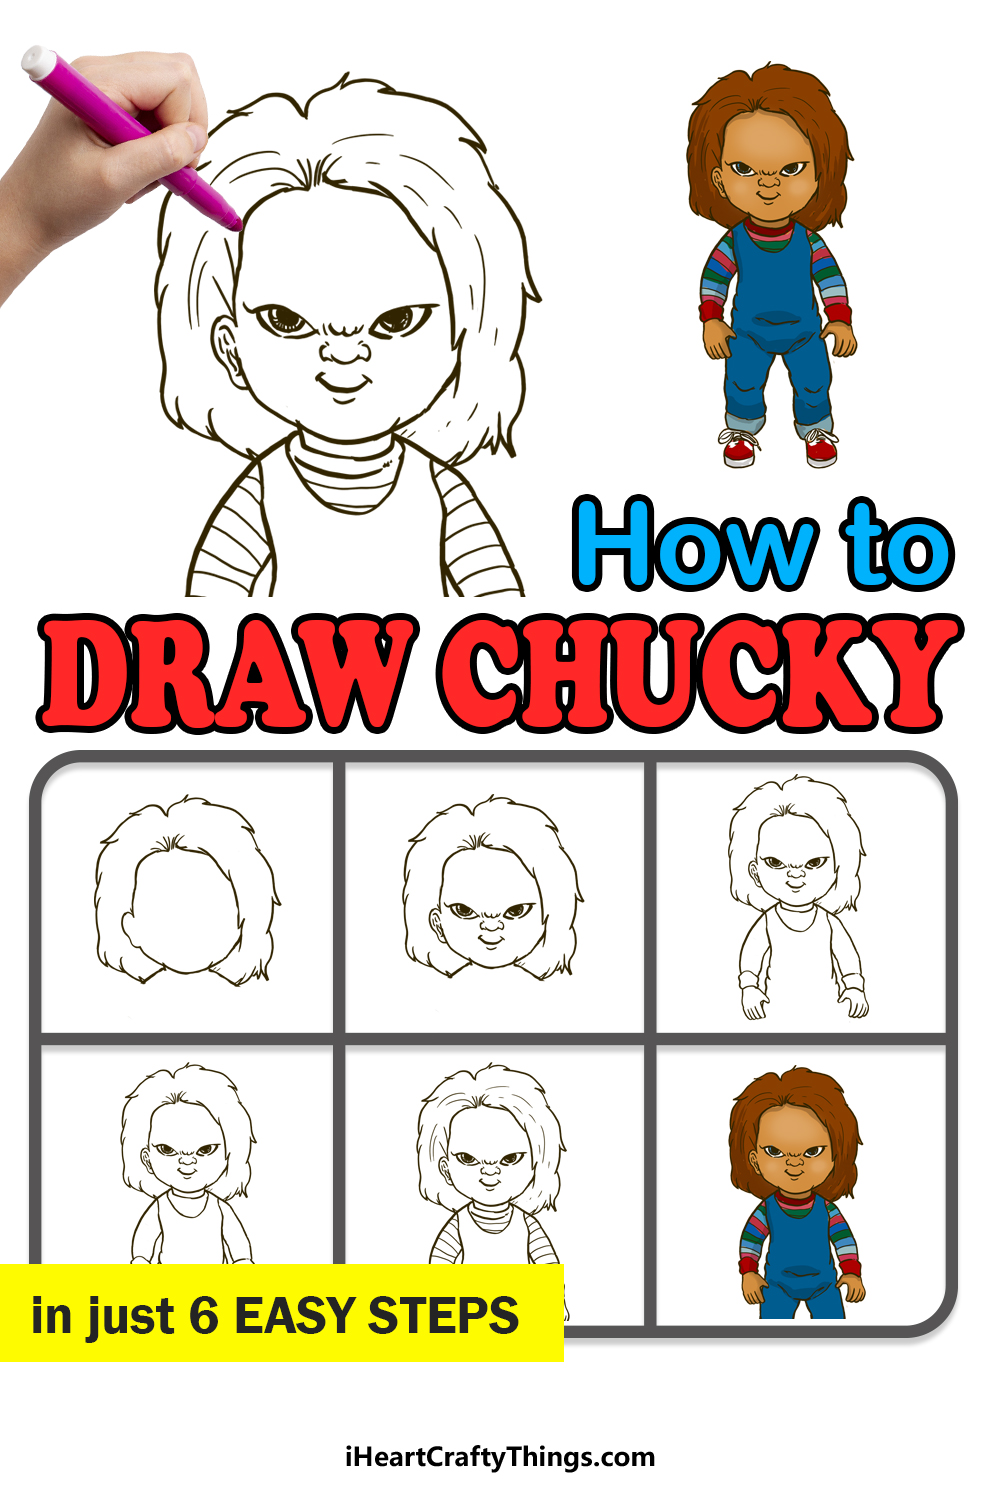
This horror villain may be scary, but learning how to draw Chucky doesn’t have to be! This guide for kids will teach anyone how to draw a detailed version of this icon of terror.
In 1988, the world was introduced to Chucky in the film Child’s Play. unlike horror villains like Michael Myers or Jason Voorhees, Chucky was much smaller in stature.
An infamous killer takes control of a child’s doll and goes on a rampage while controlling it. This first film led to many sequels and even a TV series.
I don’t mind admitting that Chucky always freaked me out, so I had to summon my courage to make this guide! These steps will break down the design and feature everything from his famous red hair to his overalls and striped shirt.
Once you have finished the guide, you could even add a background and other details to make your own horror scenes.
Watch These Steps To Help Make Your Chucky Drawing
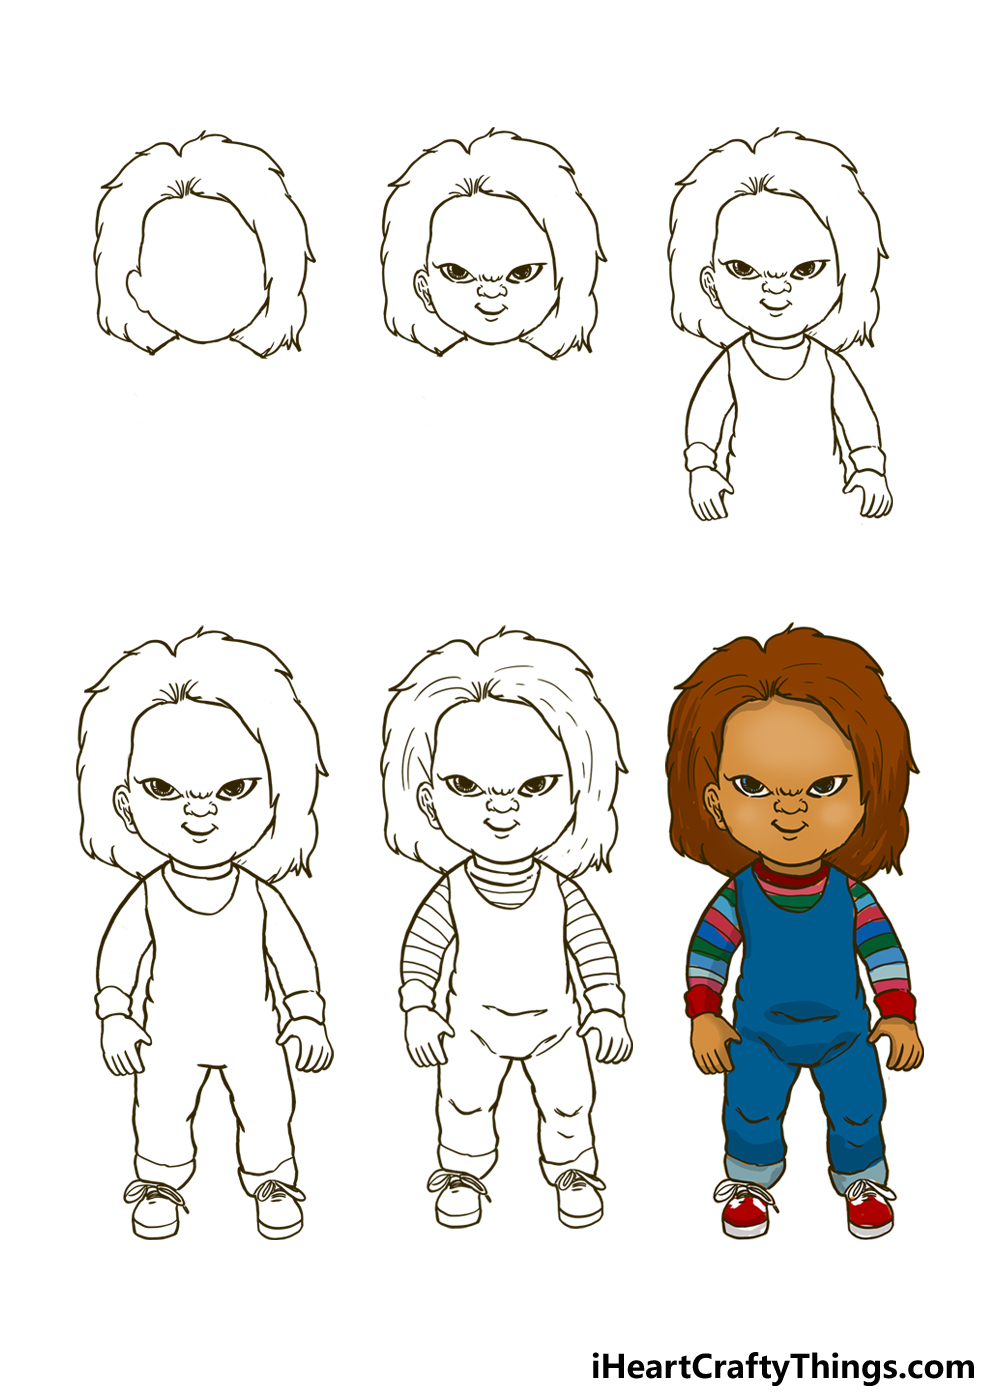
How to Draw Chucky – Let’s Get Started!
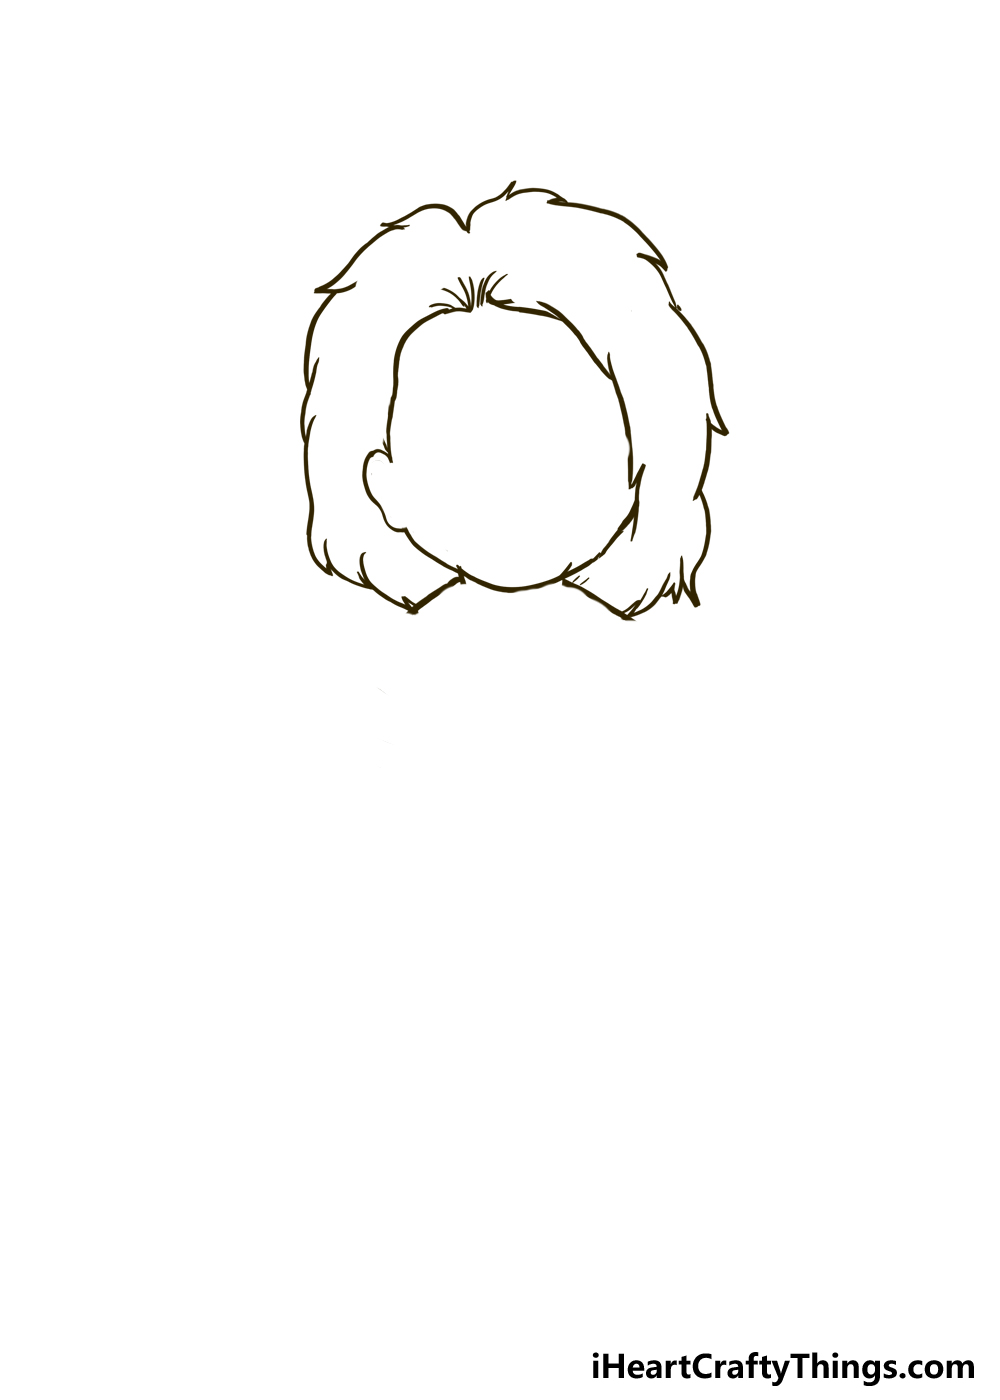
Step 1
Throughout his numerous film and television appearances, Chucky has gone through a few visual changes.
In some of the later films, he is covered with scarring and other evidence of the people that have bested him before.
This particular drawing will focus on Chucky in one of his earlier appearances, so he will look like he just came out of the box that his toy version would have come in.
While this is how we will be portraying Chucky, we will go over some details you could add later on if you want a more battle-damaged version of the character.
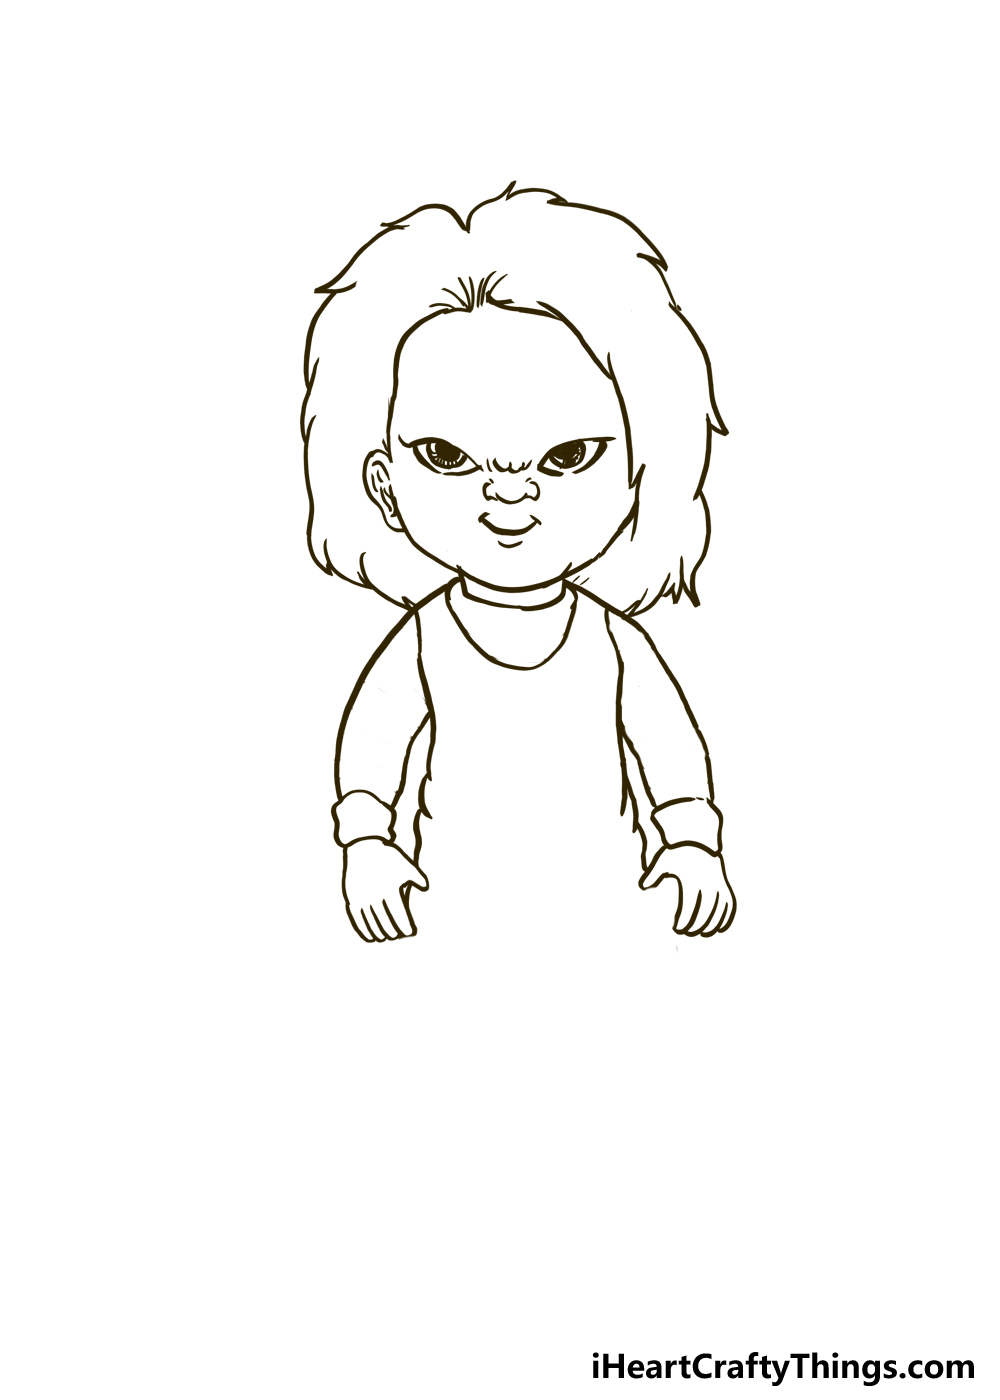
For now, we will begin with the outline for the face and hair of Chucky. One of Chucky’s most defining features is his wild red hair, so it’s vital that any drawing of Chucky contains this aspect.
Because his hair is so wild, it can be easy for his head to get lost in the design. For this reason, we would recommend drawing an oval shape with your pencil so that you can visualize the shape of the head.
Using this pencil guide along with the reference image, carefully draw the face outline. This will include the ear on the left, whereas the ear on the right will be obscured by hair.
Then, we will draw th hair franking the face, and this will be drawn using a combination of curved and pointy lines to make his hair look untidy as it does in the films.
When the face and hair outline matches our example, we can move on to the next part of the design.
Step 2: Draw the facial details for Chucky
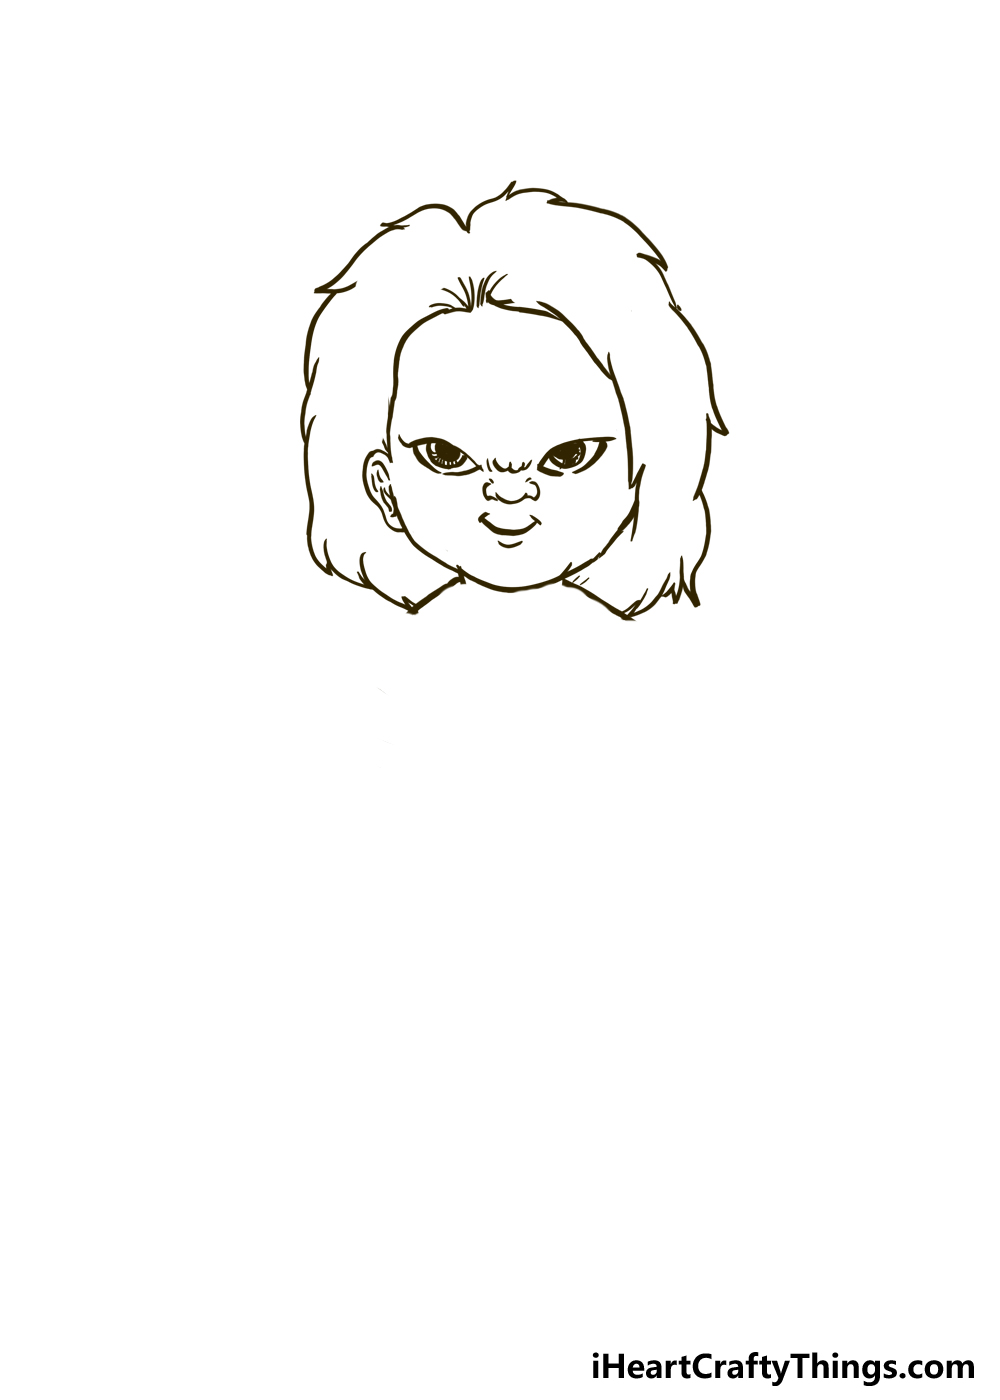
Chucky will often use the fact that he appears like an innocent children’s toy as a way to fool people, but there’s no fooling anyone when you see the facial design that we will be drawing!
As you can see in our example, Chucky has a very spooky and sinister look on his face in this pose. He certainly looks like he’s up to no good, which is the perfect expression for this character to have.
First, we will draw the eyes. In all of his appearances, Chucky’s face is fairly compact and low down on his head, and we will portray this in the drawing.
To do this, we will be placing his eyes a little bit lower than halfway down his face. They will be shaped as ovals with pointy corners, and the angle they’re at will give him a sinister expression.
Inside the eyes, we will give him big, round pupils. His nose is quite small on his face, which would probably look cute if the doll wasn’t on a rampage.
You can draw the nose with some small, curved lines connecting to one another, and then add some small line details above the nose. Finally, we will draw his mouth.
In this design, we have Chucky smiling, but it’s not a friendly smile. In fact, we would suggest running if you ever saw the real Chucky with such a look on his face!
Luckily, the prospect of drawing this smile is less intimidating than it looks. Simply draw a curved line with a smaller one beneath it to portray his scary grin.
Step 3: Draw the start of Chucky’s clothes and body
Earlier, we mentioned how iconic Chucky’s red hair is, but the clothing he wears is equally famous.
There are some variations in the films, but Chucky will typically wear a colorful striped shirt with blue overalls.
Again, this is a look that would look cute under any other circumstances, but Chucky manages to make it look scary! When drawing his body, remember that Chucky is a doll, not a human.
We mention this because it affects the proportions, and you may find yourself instinctively trying to give him more realistic proportions.
As you will see in the later images, his head should be disproportionately bigger than his body.
Once again, we would recommend doing a rough pencil sketch of his body attached to his head so that you can keep the proportions consistent. For now, we will focus on his arms and chest.
First, draw a short neck with some straight lines coming down from his head. Then, add a curved line at the base of his neck for the top of his overalls.
We will then use some slightly curved lines for his arms, and remember that they will be fairly short.
Finally, we will add his little hands. In this pose, they are sitting at his sides in a relaxed way.
Once these elements are done, it’s on to step 4 of this guide on how to draw Chucky!
Step 4: Now add the legs for Chucky
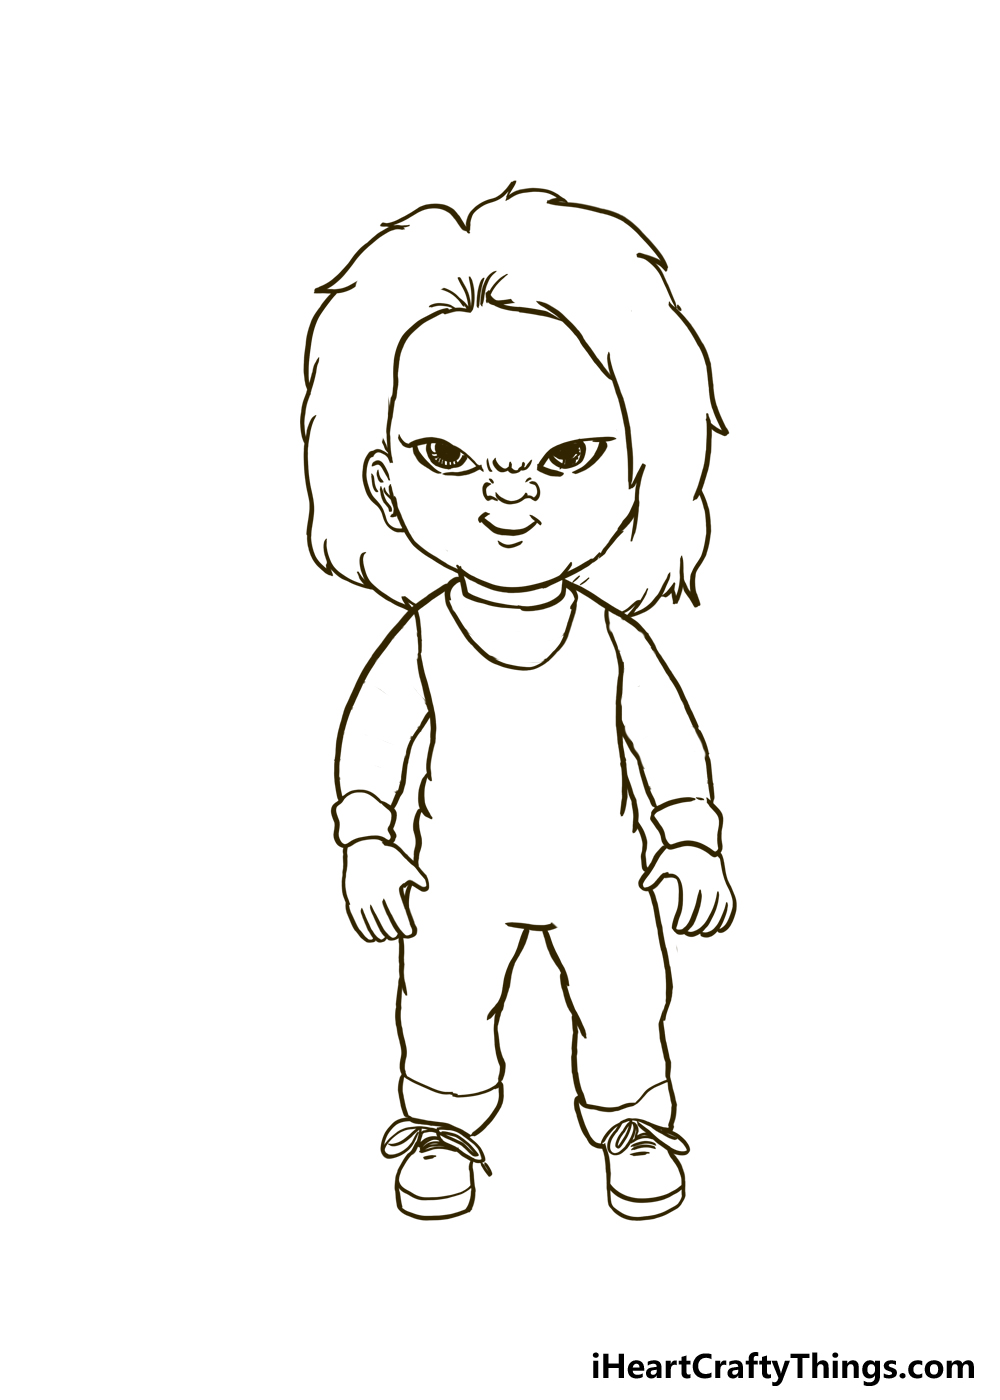
Now we’re ready to complete the outline for Chucky to get you ready for some final details in the next step of the guide. That means that we will be adding his legs in this particular step.
As you would imagine, these continue directly from the chest area that we drew in the previous step. We’re sure you are used to this by now, but remember that the proportion of the legs will be quite small.
He is a doll at heart, after all, so the legs will be quite short and stubbly. They won’t be drawn with smooth lines, but rather a series of smaller curved lines connecting to one another.
This will help to give them the appearance of having material trousers over them. Finally, we will draw the shoes he is wearing.
As you will see in the reference image, the laces of these shoes are comically large and drawn with some thin, curved shapes. Once those are drawn, we will add the shoes themselves.
They are fairly simple in design, as they can be drawn with some fairly simple rounded lines. Each show will have a separate, flat base at the bottom to finish them off.
With that, you’re ready for some final touches! Before you move on, make sure that everything is as you want it so far.
You can also erase any pencil lines you used to plan out your drawing at this stage, as they won’t be needed anymore.
Then, it’s time to have some fun with some final touches, ideas and details that we will add in the next step.
Step 5: Draw the final details for this portrayal of Chucky
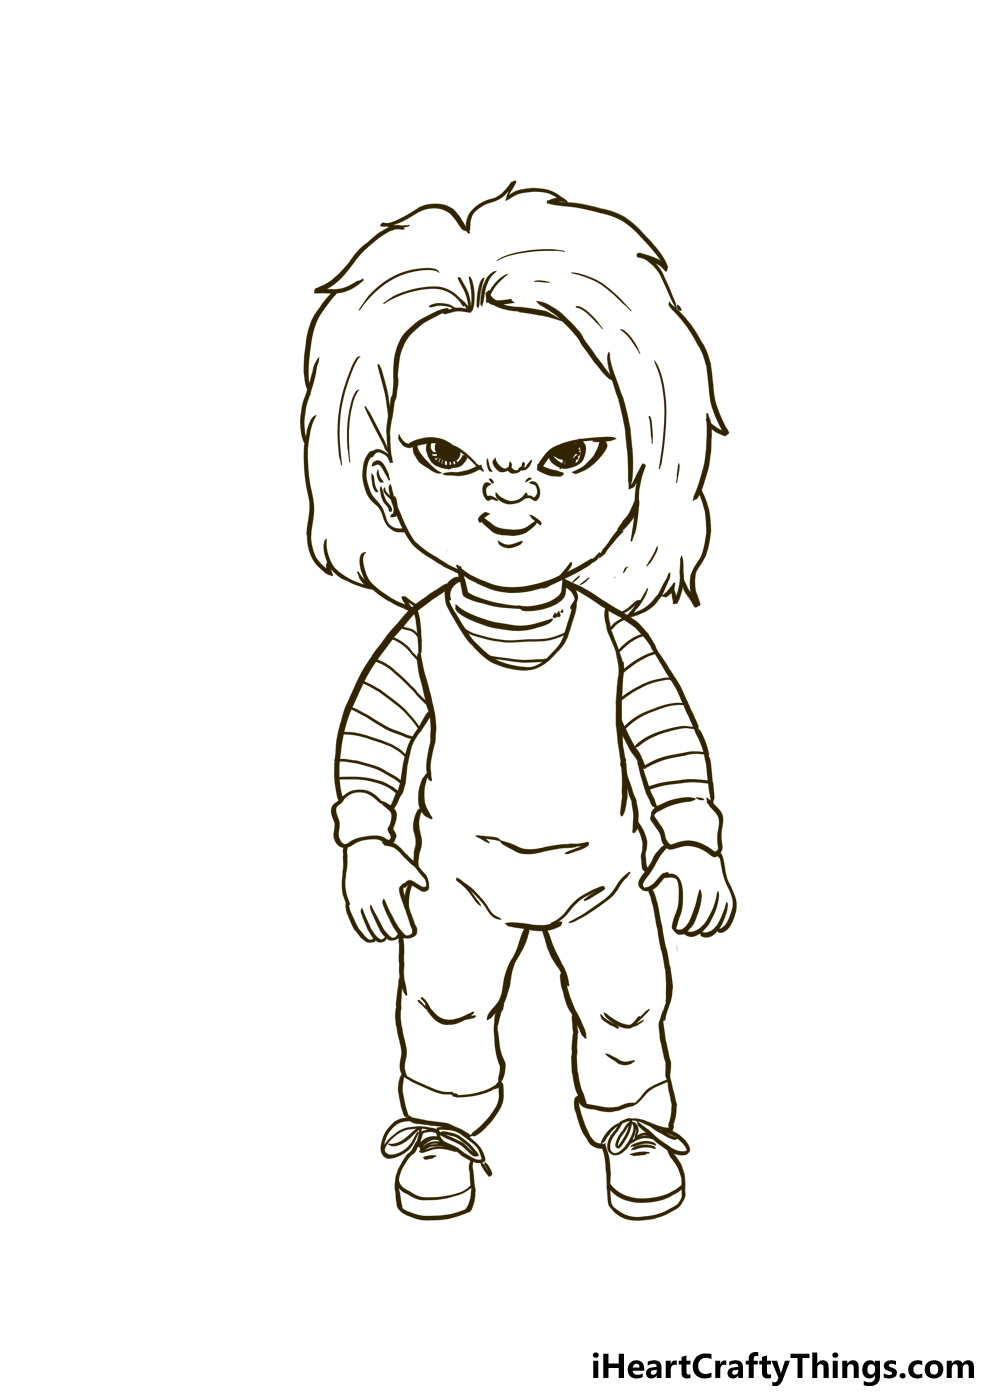
This Chucky drawing is already looking rather recognizable, and you can definitely tell who it is! It’s not quite done yet though, as Chucky needs a few more subtle details to really finish off his look.
First, we will make his hair look a little more textured and realistic. This can be done by adding a series of small, slightly curved lines inside the hair outline.
You don’t have to match these to our example, as you can place these details where you please. Earlier, we mentioned how his striped shirt is an iconic part of his design.
That’s why we had better add some stripes, which you can do with some simple horizontal lines.
These will go across each arm of his shirt along with his visible collar and chest beneath the overalls.
Speaking of the overalls, we will also draw some simple details throughout the overalls to add some creases and texture to the garment. With these details, you’re ready to color in Chucky!
You don’t have to move on just yet, however, as there are all sorts of cool details you could add. This is a great way to recreate your favorite scenes and looks from throughout the films.
He looks quite scarred and battle-damaged in many of his appearances, so you could add some of these details. If you’re feeling ambitious, you could even draw other characters from the films!
Chucky is joined by his female counterpart Tiffany in a few of the films, so she would make a great addition.
Adding background elements or props for Chucky to interact with would also be a great fit for this drawing!
Step 6: Now, finish off Chucky with some color
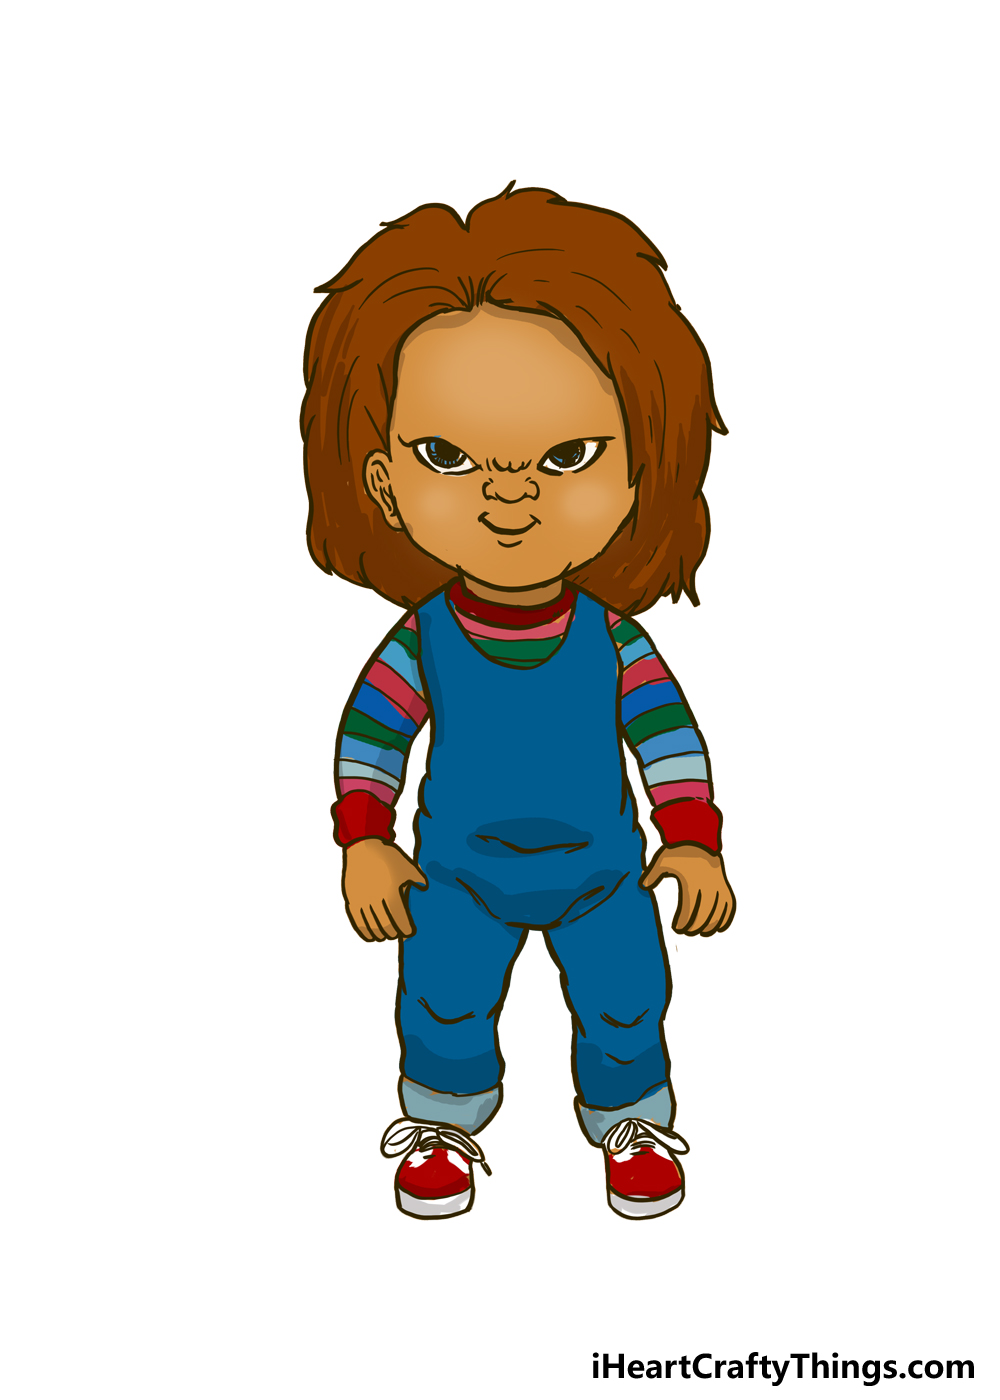
Now you’re ready to bring this drawing of Chucky to life with some color. Chucky isn’t the nicest character, so we don’t mean that literally!
Let’s start with his signature red hair. Just like in the films, we used a very dark red for his hair, but you could make it brighter if you wanted to.
We then used a few darker shades of blue for his overalls to recreate the look from the films. The shades are very dark in some areas to add some shading.
Then, we will color his striped shirt. Each stripe on his shirt is a different color, and we have colors like red, blue, green and pink here.
Chucky’s ‘skin’ is colored with a darker flesh tone, and there is a hint of blue in his eyes. Finally, you can use some red and white coloring for his shoes to finish off his look.
When coloring Chucky, we would recommend using mediums like colored pens, markers or more vibrant paint mediums to make the colors bright and eye-catching.
Do you think that you will use the classic colors Chucky usually sports or will you give him a unique look using some of your favorite colors and mediums?
Your Chucky Drawing is Complete!
We hope that you had a ton of fun bringing this horror icon to life in this guide on how to draw Chucky! The design for this character is deceptively simple.
He doesn’t look super complex at first glance, but there are a lot of details and elements to portray when drawing him.
That’s why we broke it down into smaller steps so that you can see how easy it can be.
Now you can take everything you learned here and make your own variations. It would be awesome to portray some of your favorite Chucky moments from the films!
When your Chucky artwork is complete, we would love to see how you portrayed this scary doll. You can share the finished drawing on our Facebook and Pinterest pages.
That way we can all be terrified and impressed by your awesome picture of this famous villain! We can’t wait to see how scary he looks.