Roses are probably the most well-known and recognizable flowers in the world, and they are often associated with events like Valentine’s Day and dates in general.
They’re often symbolic of love, but the image of a dead rose can be symbolic as well, often representing sorrow or the end of a relationship.
There’s a sad beauty to it, and learning how to draw a dead rose is a great way to create some artwork exploring these themes and feelings.
This is the perfect guide for you if you would like to know how it is done, so if this sounds like something you’d like to master then be sure to read all the way to the end!
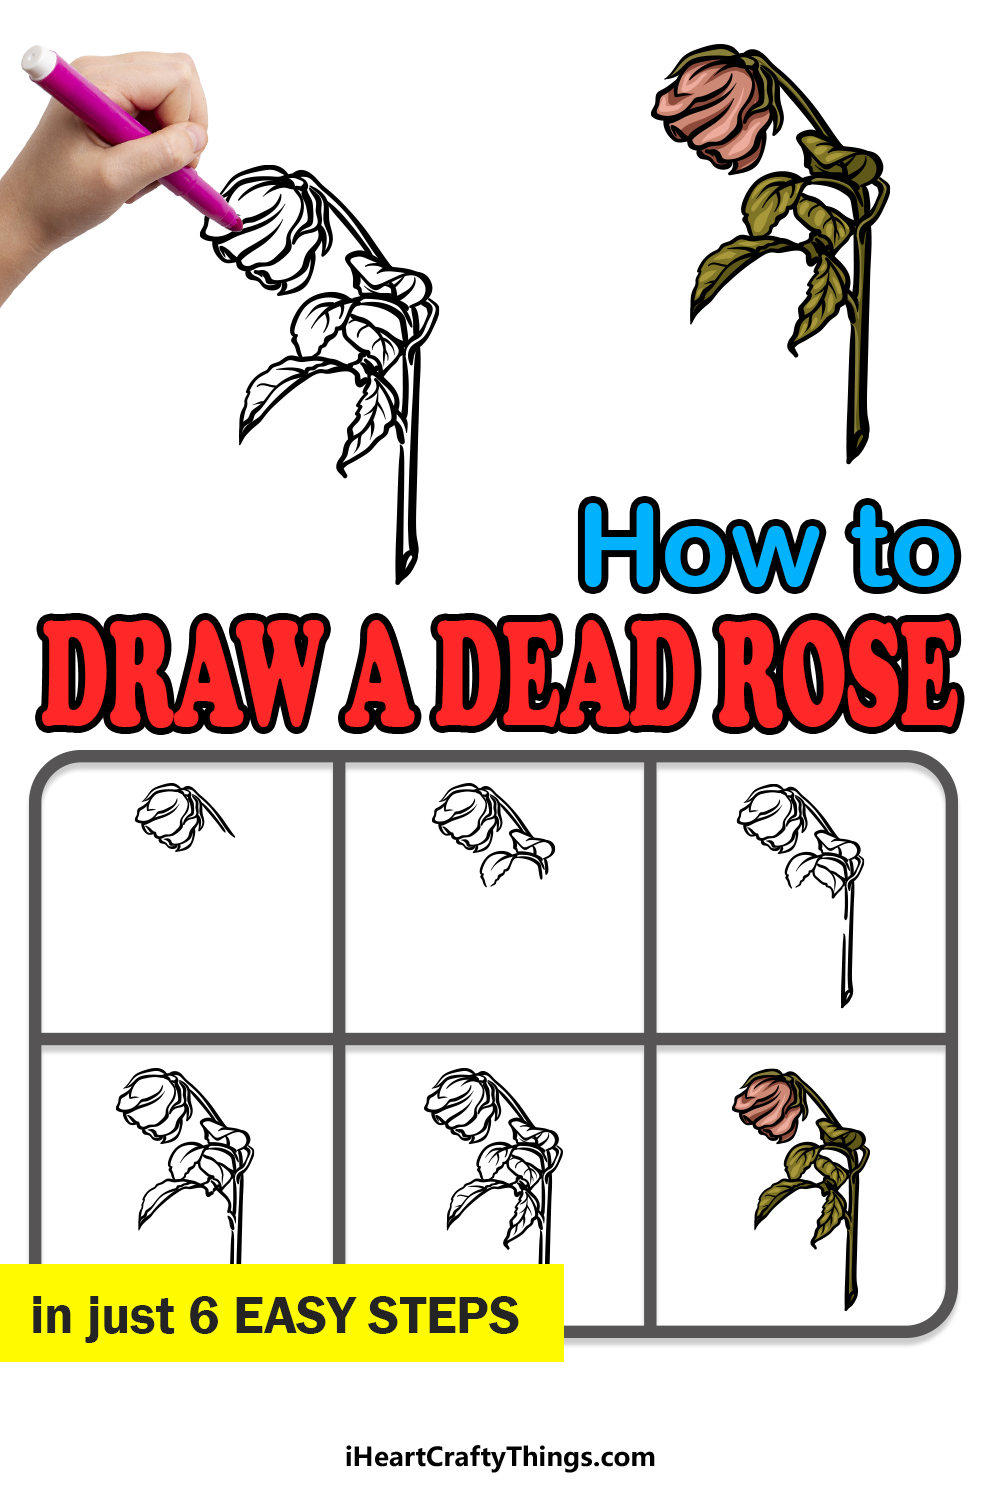
Our step-by-step guide on how to draw a dead rose will show you how you can recreate this sad yet beautiful image in just 6 easy steps.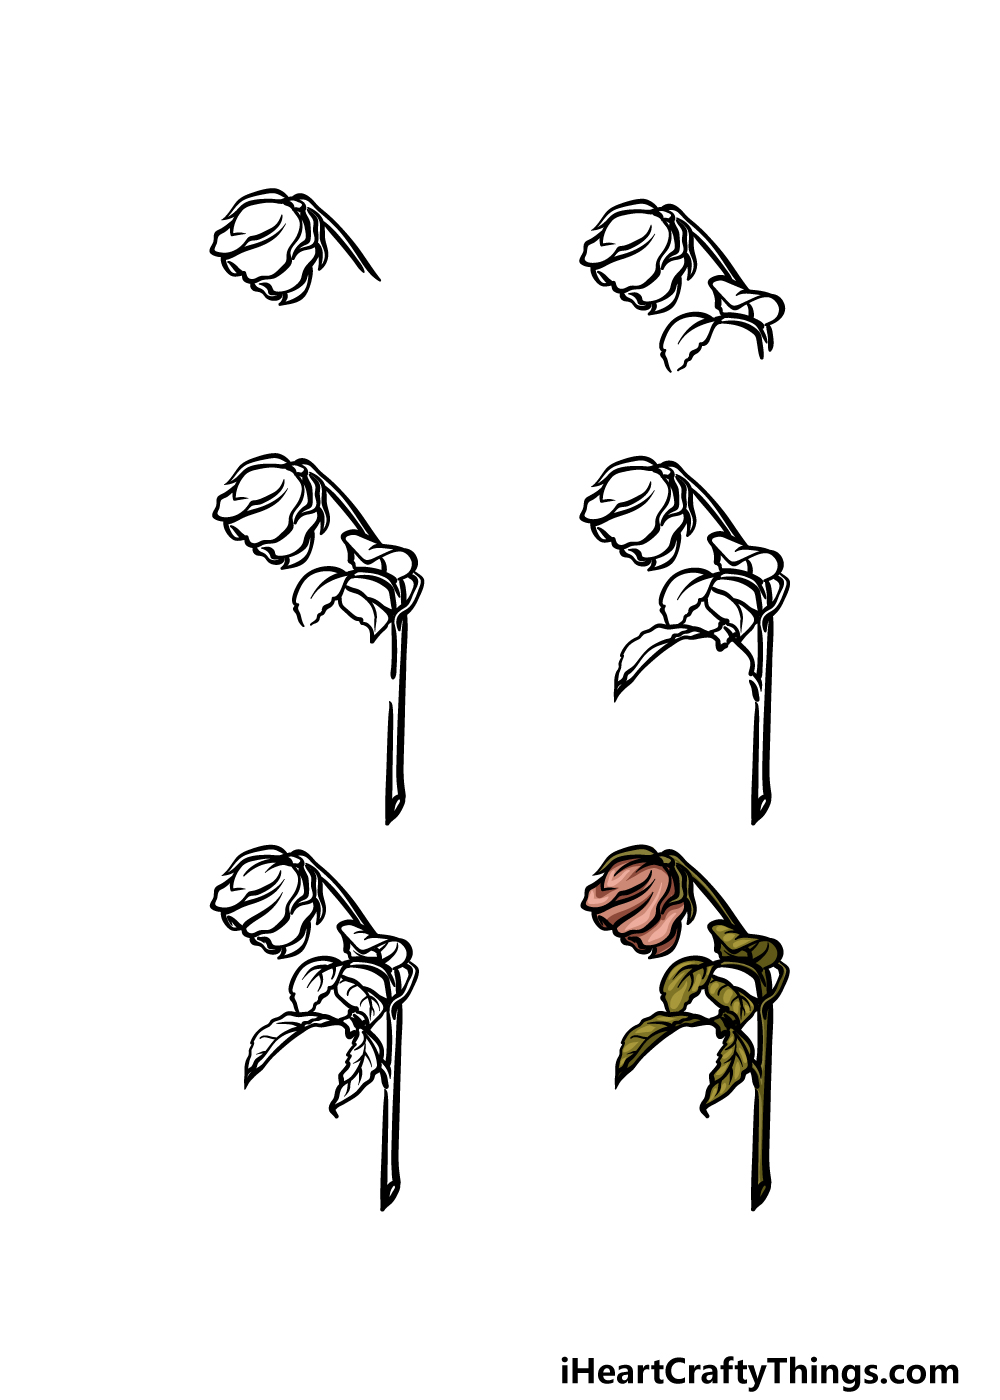
How to Draw A Dead Rose – Let’s Get Started!
Step 1

As we get started with this guide on how to draw a dead rose, we will be starting with the petals of the flower.
To draw this section, we will be using a lot of curved and rounded lines to give it an appearance of wilting. It will also be angled so that the head of the rose is drooped over and facing the floor.
As shown in our reference image, the head of the rose will also be quite rounded in shape and will be made up of a few shriveled petals.
Then, use some more curved lines with pointy edges for the leafy sepals at the base of the flower’s head. Finally, we shall start drawing the stem of the dead rose.
Simply use some straight yet very slightly curved lines for the start of the stem, and then you’ll be ready for the second step.
Step 2 – Now, draw the first leaves for the dead rose

Moving further down on the image, we will next start drawing some leaves for your dead rose drawing in this step.
The first leaf will be attached directly to the stem, and much like the head of the rose, it will be quite bent over to further show that this flower is dying.
The second leaf will be attached to a short stem, and this stem can be drawn with some simple curved lines attaching to the main stem of the flower.
This leaf will also be drawn with some curved lines, but you’ll want to leave a gap at the tip where another leaf will be overlapping with it in a later step.
Step 3 – Next, draw more of the stem
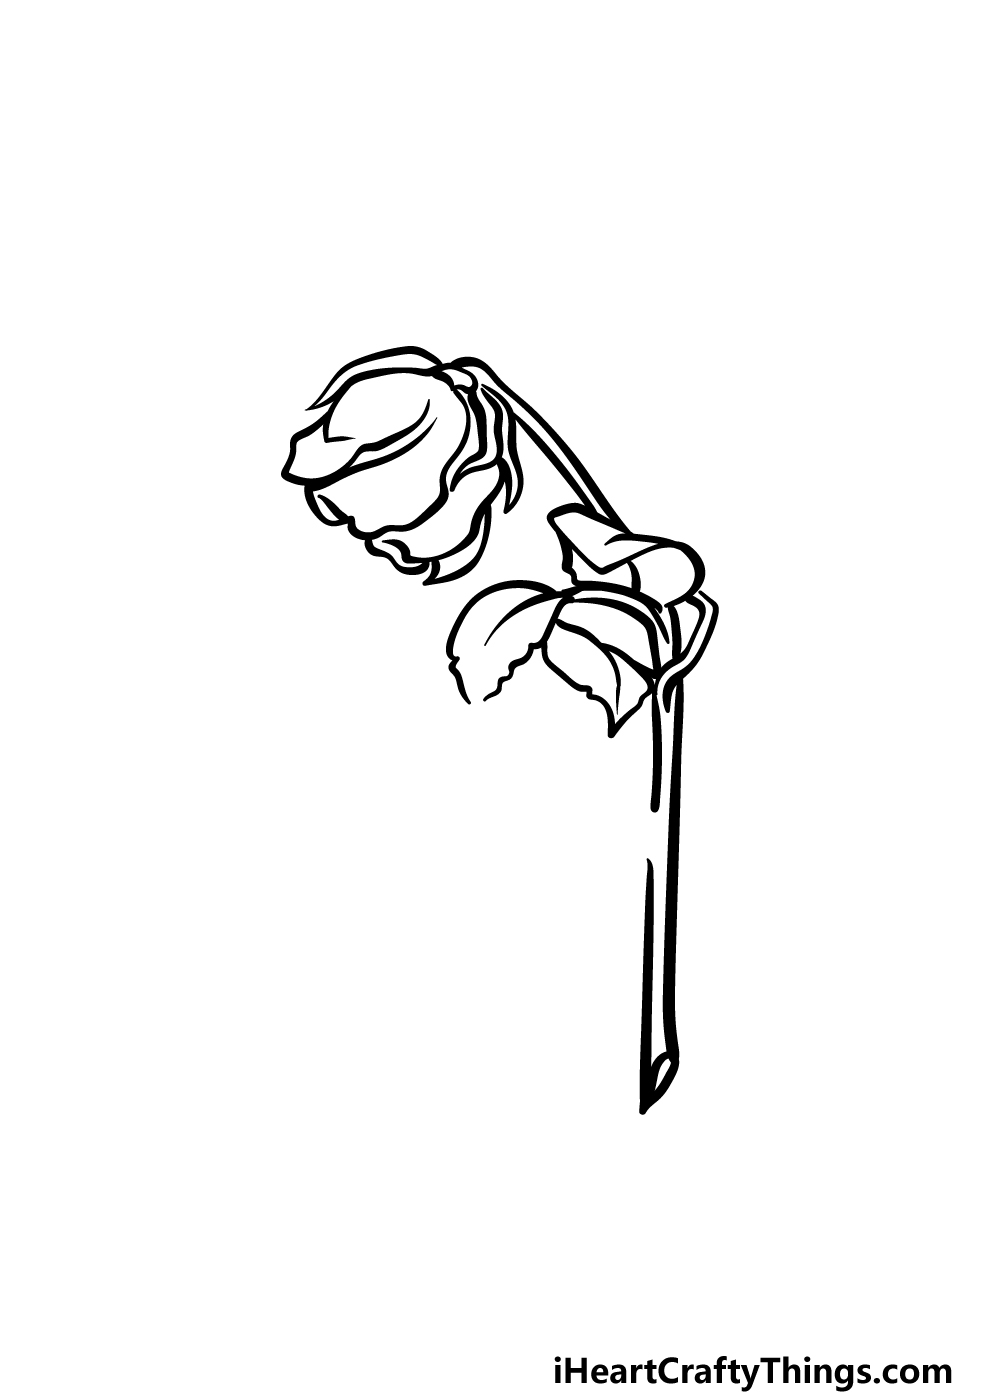
In this third step of our guide on how to draw a dead rose, we will be adding more of the outline for the stem.
Before you draw this outline, first draw another small, twisty stem leading up from the main one up to the base of the first leaf that you drew.
Then, you can finish off the final outline of the main stem by drawing some more fairly straight lines moving down.
The base of the stem will be at a bit of an angle to show where it was cut off, and there will also be a space on the left-hand side where we will be adding some elements later.
Step 4 – Start drawing the final leaves
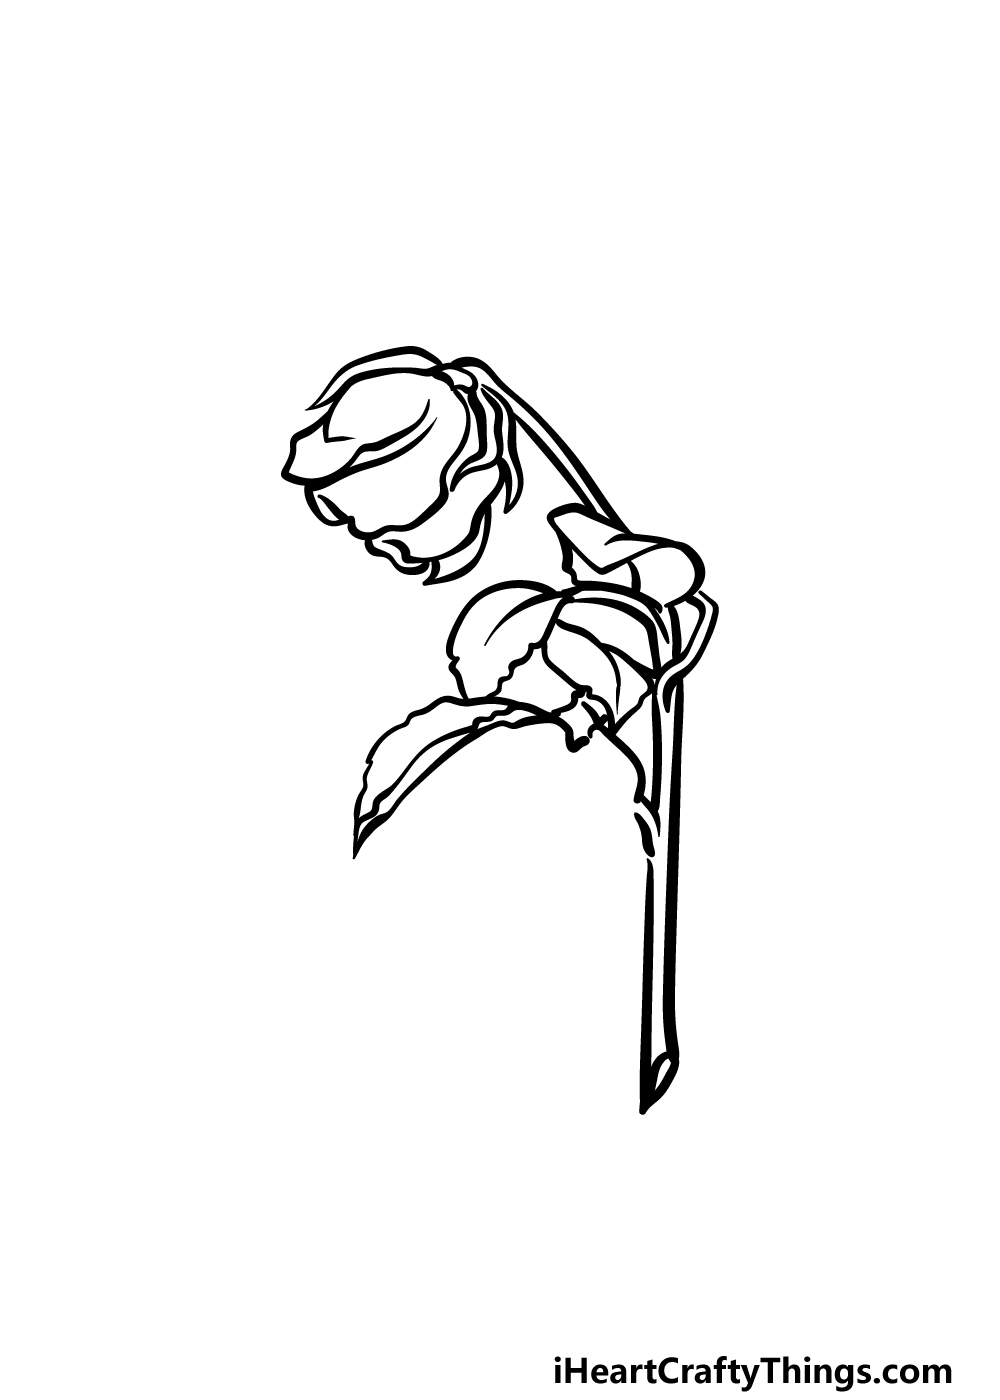
We will be filling in that space that you left in the stem of the flower in the last step of this dead rose drawing.
First, draw another thin leaf stem using some more curved lines. Then there will be another leaf near to this stem, and it will look quite thin due to the angle it is at.
Once again, there will be a space left underneath this leaf, but we will take care of that as we add the final elements in the next step.
Step 5 – Add the final touches for your dead rose drawing
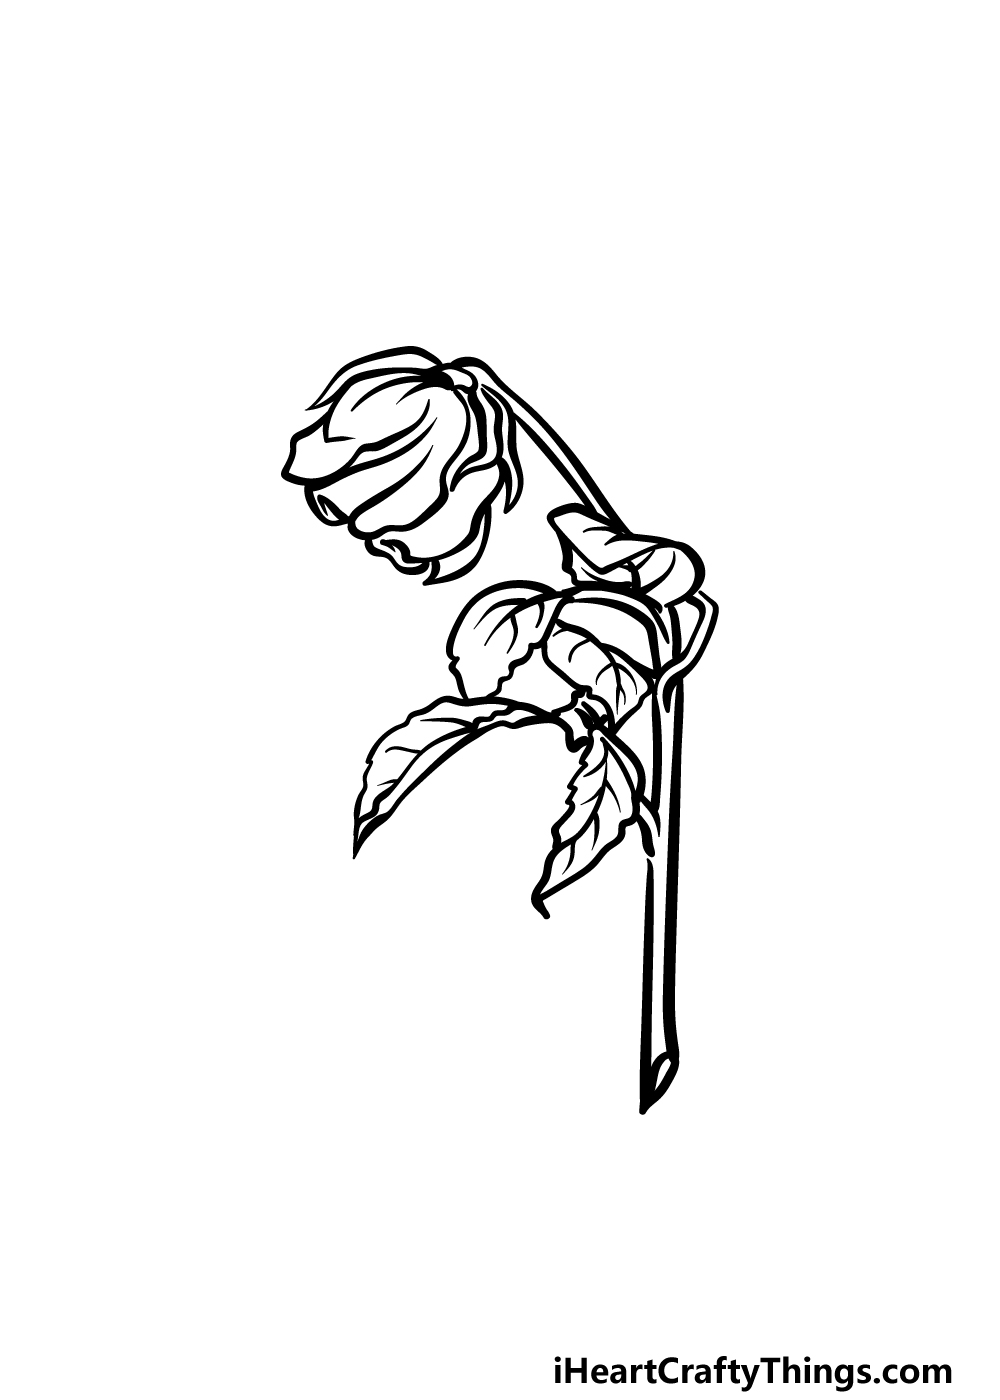
Now you are ready for the final details and elements before you move on to the final step of this guide on how to draw a dead rose.
First, you can fill the final space left over by adding another leaf, as shown in the reference image. Once that is drawn, we just have a few final details to add!
You can draw some veins onto each leaf to make them look a little more realistic. Then, add some more curved lines onto the head of the rose to finish off that aspect.
Once all of these details are drawn, you could also add some of your own! Can you think of any extra touches or background details to add?
Step 6 – Finish off your dead rose drawing with some color
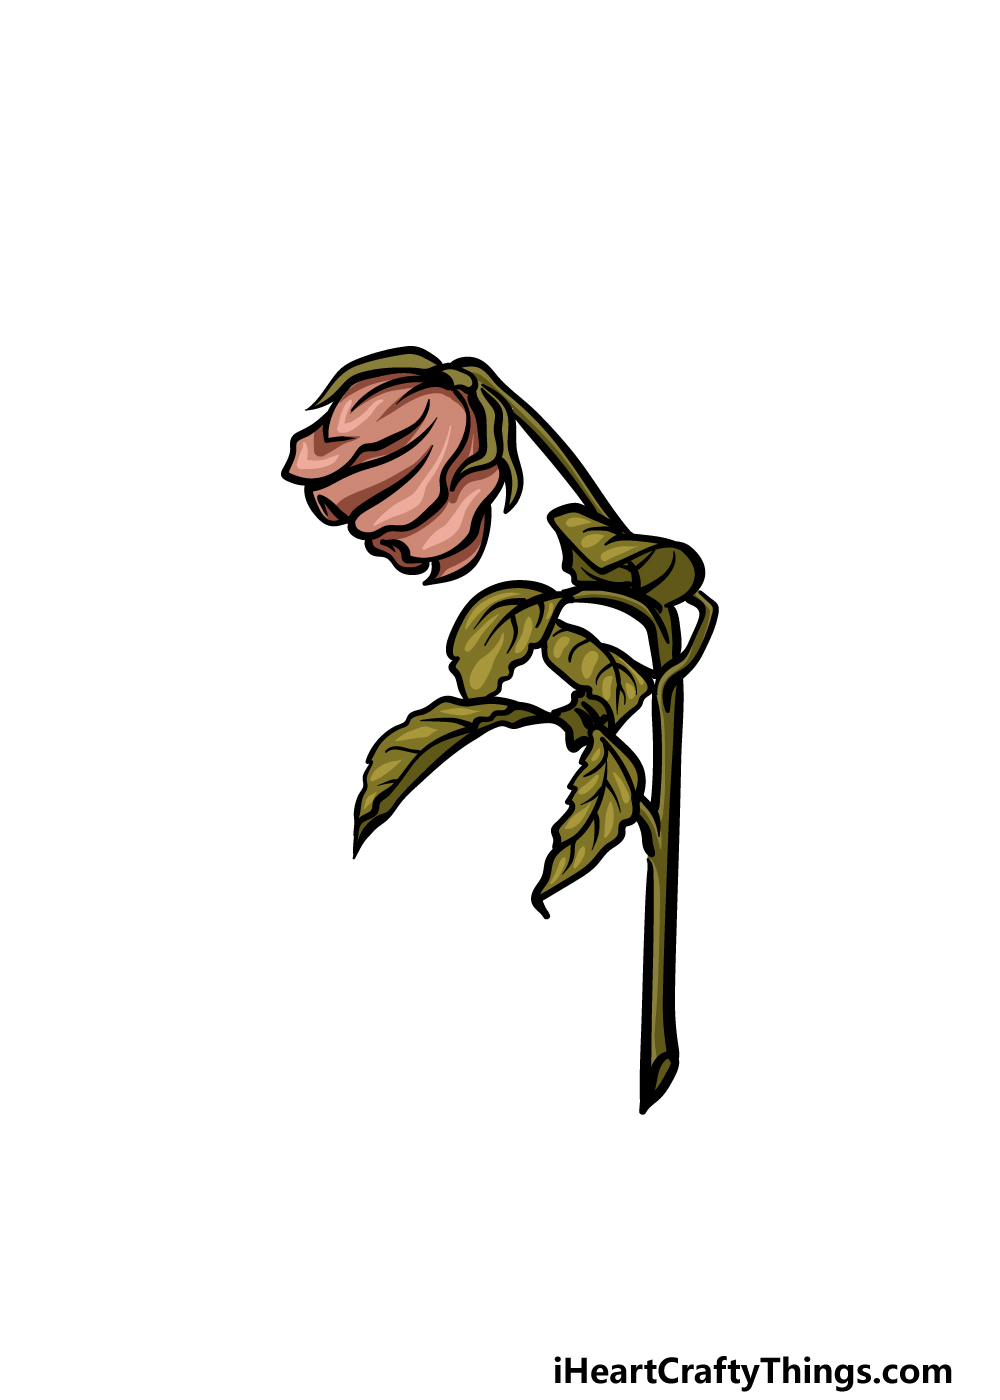
You are ready to finish off this dead rose drawing by adding some color to it in this final step.
As you can see in our reference picture, we used some pinks and greens for the flower and stem, but we used some rather dark, muted tones of these colors.
This is to further highlight that this flower is dead and wilting, and you can use similar colors for your own picture if you like this effect.
You could also change up the colors if you would like a different look for your own picture. Choosing your art mediums is also a great way to get some color variation.
We would suggest some watercolor paints for this particular picture, but anything you use will look great!
4 More Ways To Make Your Dead Rose Drawing Unique
Make this dead rose sketch even more beautiful with these 4 tips we have for you.
There is a certain dark beauty to a dead rose, and you could highlight this by adding a living rose to your drawing of a dead rose. This would be a great way to create an interesting contrast.
You could look up pictures of healthy roses or use a real one if you happen to have them in your yard.
Adding these would not only create that great contrast but would also allow you to add some bright and beautiful colors.
Another way that you could make your drawing more interesting would be by adding other kinds of dead flowers to the image.
There are a few that you could choose from, from daisies to tulips or any other flowers you like.
Once again, you may need to look up some images of what your chosen flower species look like when dead to help you as you draw. What are some flowers you could add to this picture?
If you have some real dead flowers in your yard, you could use them to add an interesting look to your dead rose drawing. First, pick off the dried petals from the real flowers.
Then, you could paint a thin layer of glue over the flower in your drawing. Then, sprinkle the petals over the glue and you will have some real texture on your image.
What other creative ways could you color this drawing?
You could also draw an interesting background for your dead rose sketch to finish it off. There are lots of locations you could draw this dead rose, and you could create a bit of a story with the background you choose.
For example, you could draw a spooky misty graveyard with this dead rose in a jar at the foot of a gravestone. That is just one of the many locations you could choose for this drawing, but there are many more!
What other locations could you use?
Your Dead Rose Drawing is Complete!
We hope that you had a great time recreating this sad and beautiful image as we worked through this guide on how to draw a dead rose.
This guide was created to make sure that you could overcome all of the smaller details and touches of the image with no frustration.
Hopefully this was the case for you and you could concentrate on the fun of drawing!
Your next drawing challenge awaits you on our website, as we have tons of amazing drawing guides there for you! We hope to see you there often, as more drawing guides are incoming soon.
We would love to see your interpretation of this dead rose drawing, so when it’s done please be sure to share it on our Facebook and Pinterest pages for us to admire!